This topic describes how to purchase an OpenSearch Vector Search Edition instance that has a single worker.
Procedure
Log on to the OpenSearch console. In the upper-left corner, switch to OpenSearch Vector Search Edition. On the Instances page, click Create Instance.
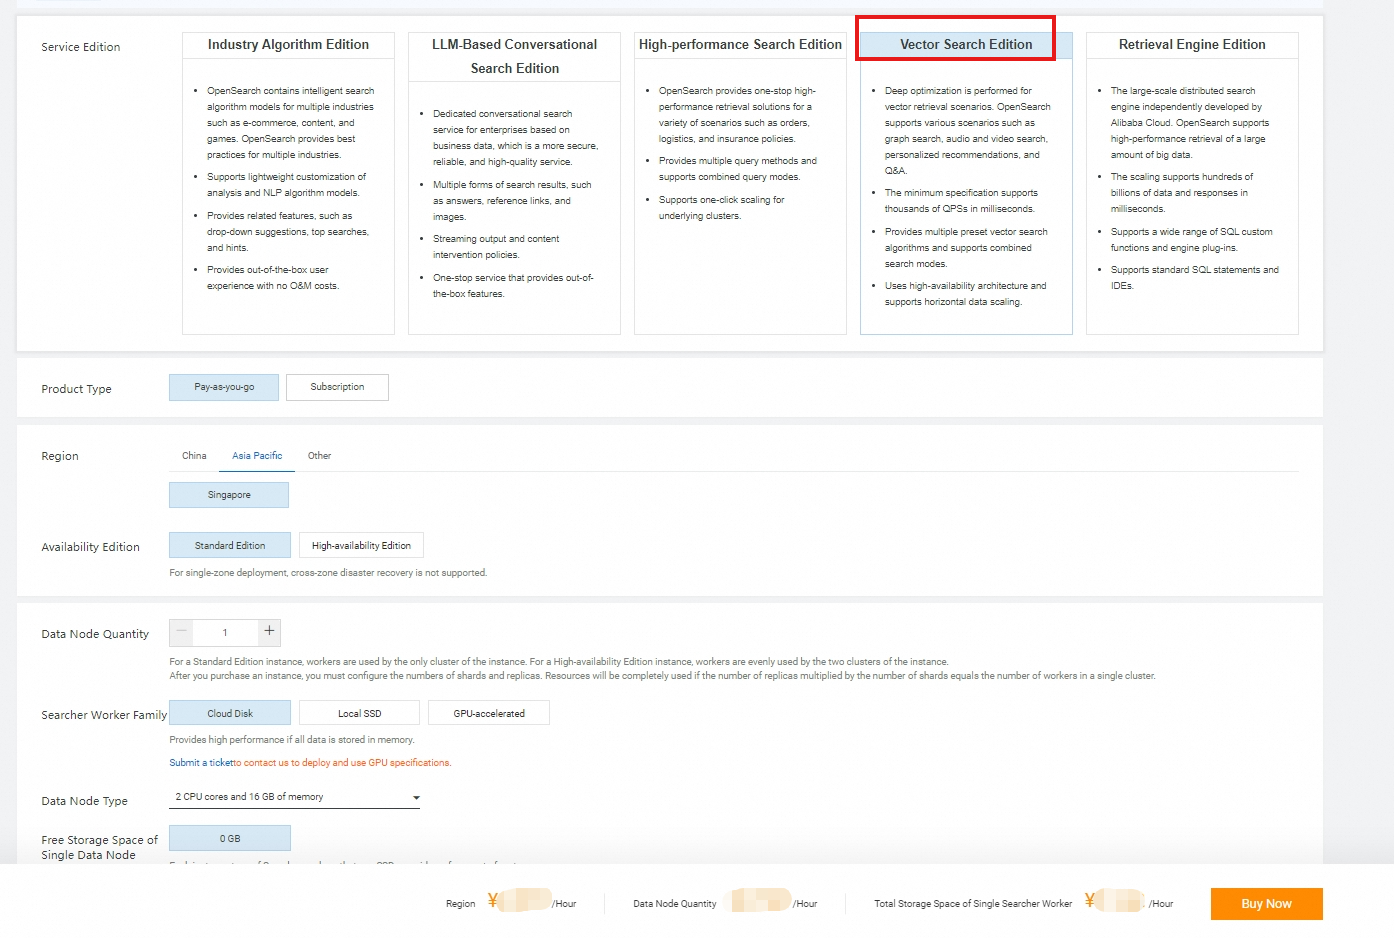
On the buy page, select Vector Search Edition for Service Edition and configure the following parameters for purchasing an OpenSearch Vector Search Edition instance: Region and Zone, Searcher Workers, Searcher Worker Specifications, Total Storage Space of Single Searcher Worker, VPC, and vSwitch. Then, specify a username and password and click Buy Now. The username and password are used for permission verification in queries. We recommend that you do not specify your Alibaba Cloud account and password as the username and password.
 Note
NoteYou need to determine the number and specifications of Search workers to purchase based on your business requirements. After you specify the number and specifications, the price is automatically calculated and displayed on the buy page.
If you purchase a single-worker instance, you do not need to purchase Query Result Searcher (QRS) workers. In this case, leave the QRS Workers parameter to 0, and the QRS Worker Family parameter is invalid.
You must specify the same virtual private cloud (VPC) and vSwitch as those of the Elastic Compute Service (ECS) instance that you use to access the OpenSearch Vector Search Edition instance. Otherwise, the {'errors':{'code':'403','message':'Forbidden'}} error message is reported when you access the OpenSearch Vector Search Edition instance.
A Searcher worker that uses local SSDs is provided with a free quota of 50 GB of storage space. You can purchase extra storage space for the Searcher worker in increments of 50 GB. For a Searcher worker that uses cloud disks, no free quota of storage space is provided and you can purchase storage space in increments of 50 GB.
On the Confirm Order page, confirm the configurations, read and agree to the terms of service, and then click Activate Now.
After you purchase the instance, click Console. On the Instances page, you can view the purchased instance.
Configure an instance
On the Instances page, the purchased instance is in the Pending Configuration state. The system automatically deploys an instance that contains no data. The number and specifications of Searcher workers in the automatically deployed instance are the same as those you specify when you purchase the instance. Before you can use the instance for searches, perform the following steps: configure the basic information of a table, add a data source, configure fields, configure an index schema, and then perform reindexing for the instance.
1. Configure the basic information of a table
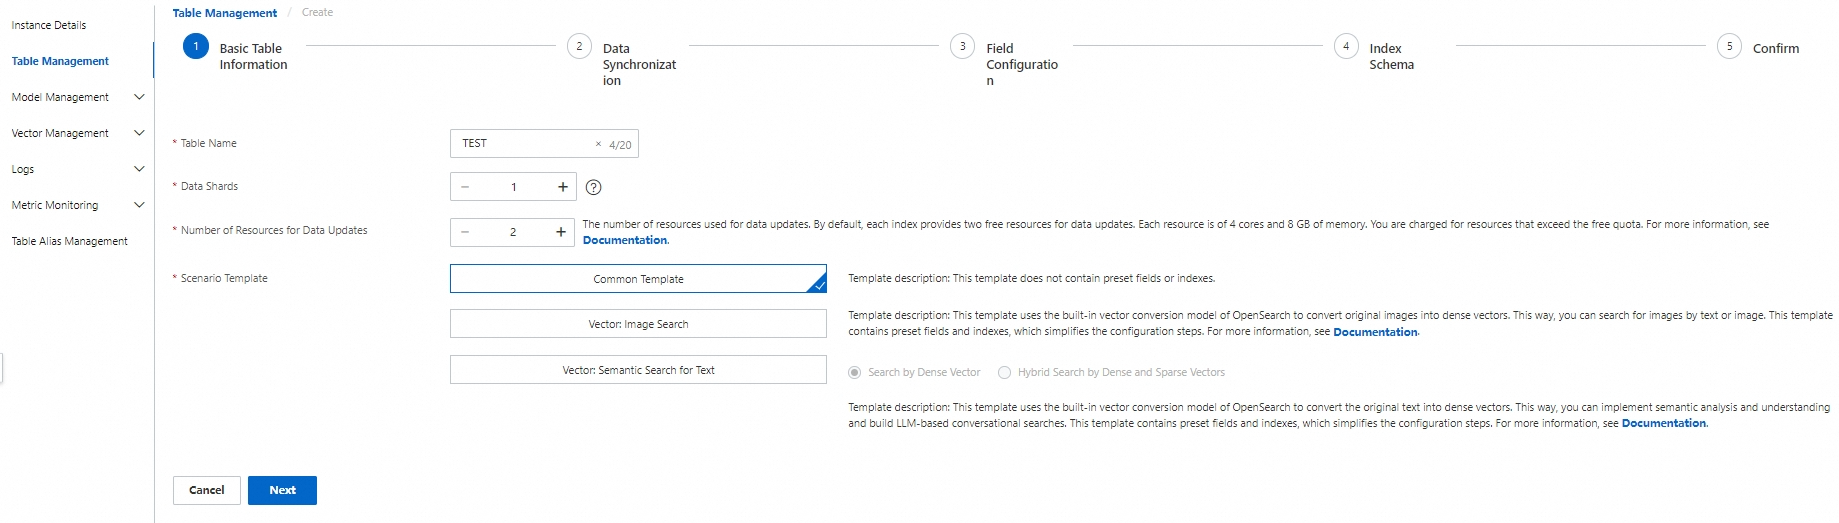
In the left-side navigation pane on the instance details page, click Table Management. On the Table Management page, click Add Table. In the Basic Table Information step of the Create wizard, configure the Table Name, Data Shards, Number of Resources for Data Updates, and Scenario Template parameters. Then, click Next.
Parameters:
Table Name: the name of the table. You can enter a custom table name.
Data Shards: the number of data shards. For a single-worker instance, the default value is 1 and you cannot modify the value. However, you can increase the number of workers for the instance. For more information, see Upgrade or downgrade the configurations of an instance.
Number of Resources for Data Updates: the number of resources that are used for data updates. By default, a free quota of two resources for data updates is provided for each index. Each resource consists of 4 CPU cores and 8 GB of memory. You are charged for resources that exceed the free quota. For more information, see Billing overview of OpenSearch Vector Search Edition.
Scenario Template: the template that is used to create the table. Valid values: Common Template, Vector: Image Search, and Vector: Semantic Search for Text.
2. Add a data source
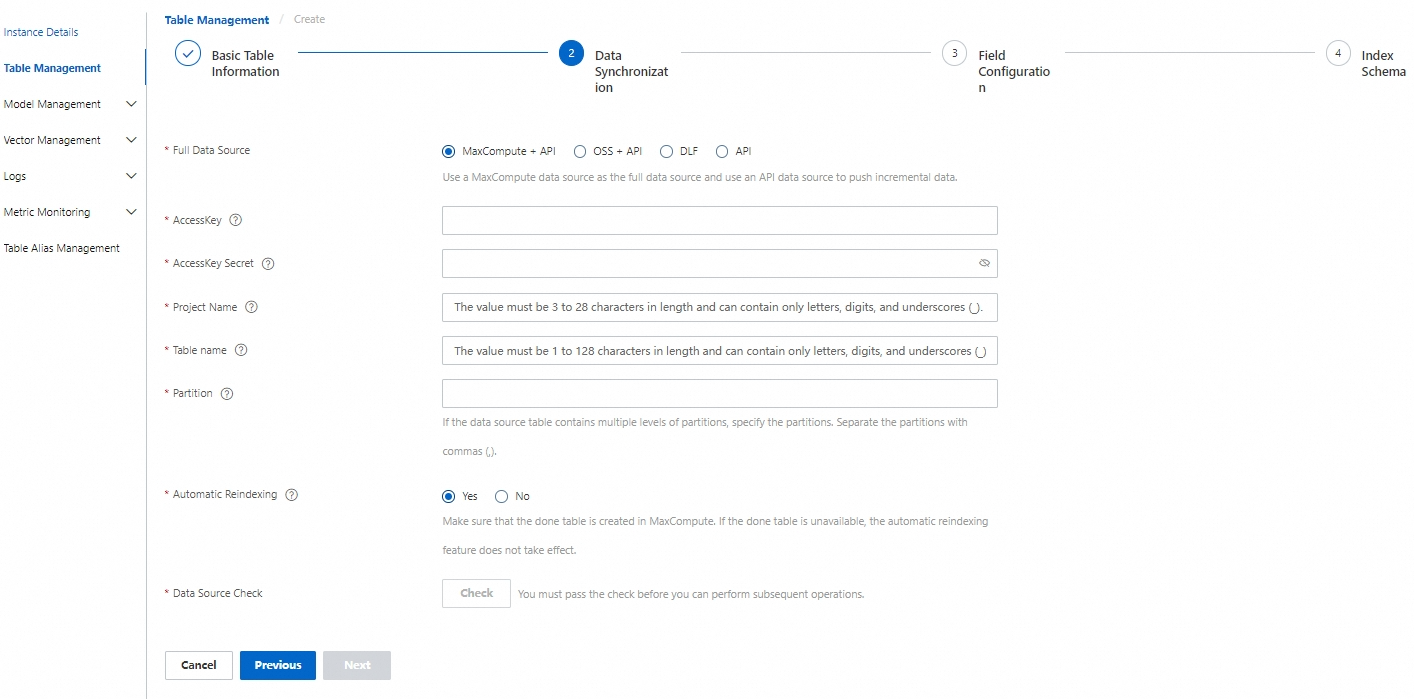
In the Data Synchronization step, add a data source. The following types of data sources are supported: MaxCompute + API, OSS + API, DLF, and API. In this example, MaxCompute + API is selected for Full Data Source. Then, click Check to check the data source information. If the data source information passes the check, click Next.
3. Configure fields
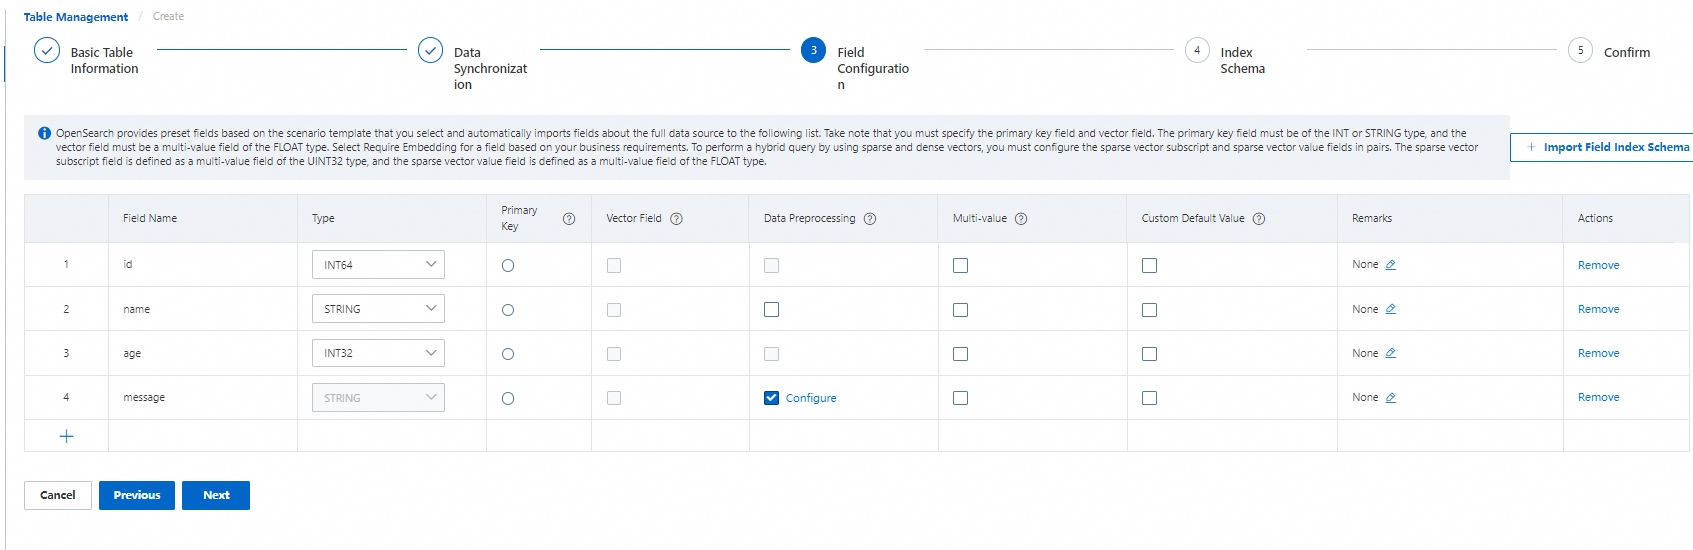
OpenSearch provides relevant preset fields based on the scenario template that you select and automatically imports all fields from the data source to the field list.
Take note of the following information:
The primary key field and vector field are required. For the primary key field, you must set the Type parameter to INT or STRING and select the Primary Key column. For the vector field, you must set the Type parameter to FLOAT and select the Vector Field column.
By default, the vector field is a multi-value field of the FLOAT type, and multiple values of the vector field are separated by commas (,). You can also enter a custom multi-value delimiter.
If a field does not exist or is empty in the source data, the system automatically sets the field to the default value. By default, a field of the numeric type is set to 0 and a field of the STRING type is set to an empty string. You can also specify custom default values.
4. Configure the index schema
4.1. Vector index
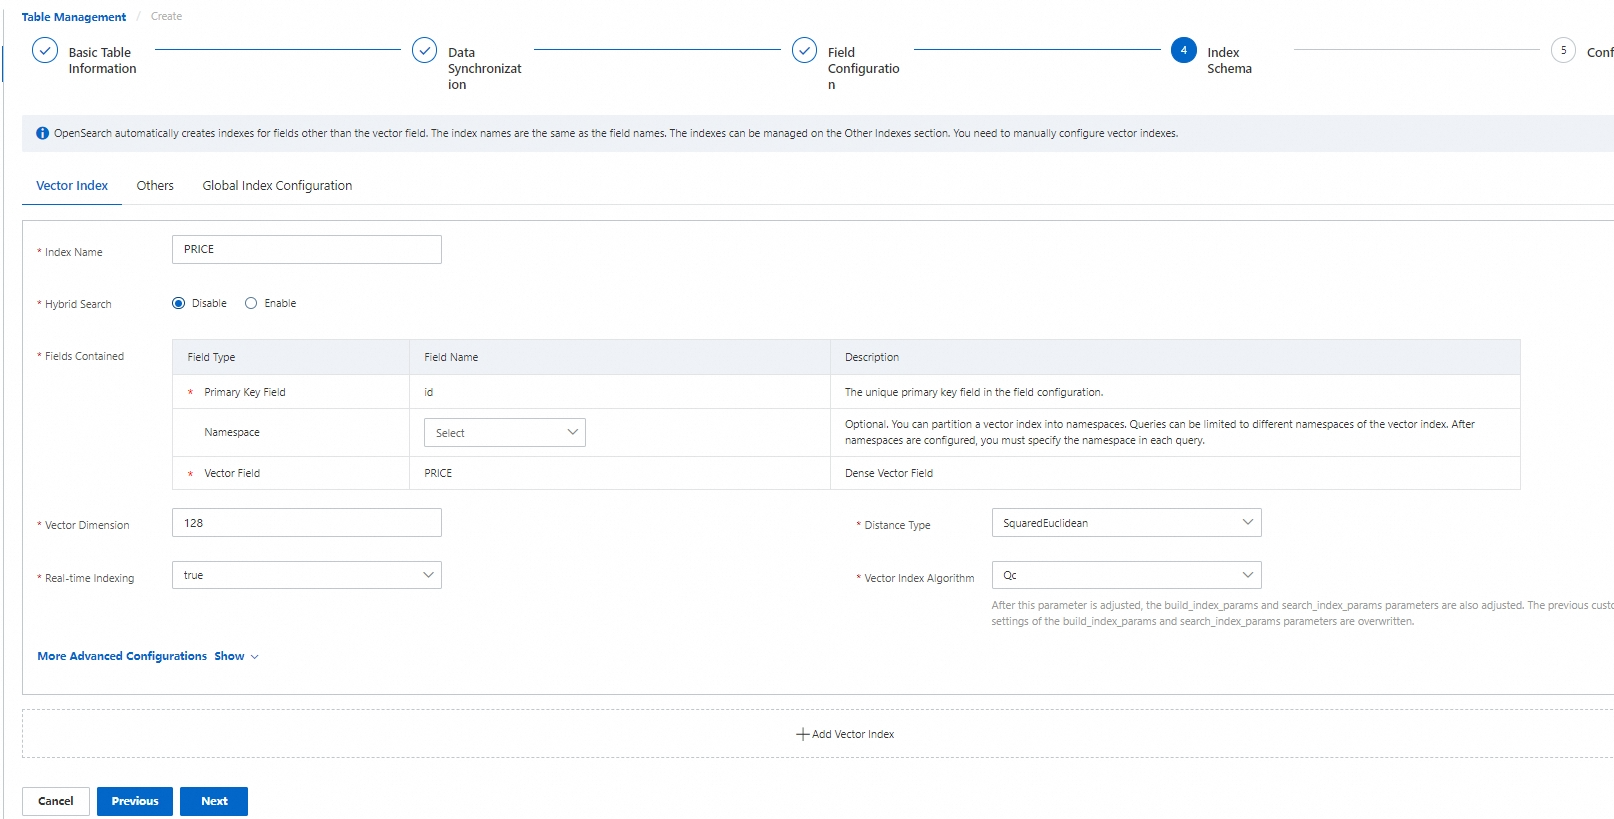
The primary key field and vector field are required. The namespace field is optional and can be left empty.
You can configure only the three fixed fields for the Fields Contained parameter and cannot add fields.
Vector Dimension: the dimension of vectors. Specify a vector dimension based on the vector model that you select.
Distance Type: You can select InnerProduct or SquareEuclidean. InnerProduct indicates the inner product distance. The larger the vector score, the higher the document relevance. SquareEuclidean indicates the squared Euclidean distance. The smaller the vector score, the higher the document relevance.
Vector Index Algorithm: The Linear, HNSW, QGraph, and QC algorithms are supported. GPU-accelerated instances also support the CAGRA algorithm. For more information about the supported algorithms, see Introduction to vectors.
Real-time Indexing: specifies whether to build real-time indexes for incremental data that is pushed by using API operations. Valid values: true and false. Default value: true.
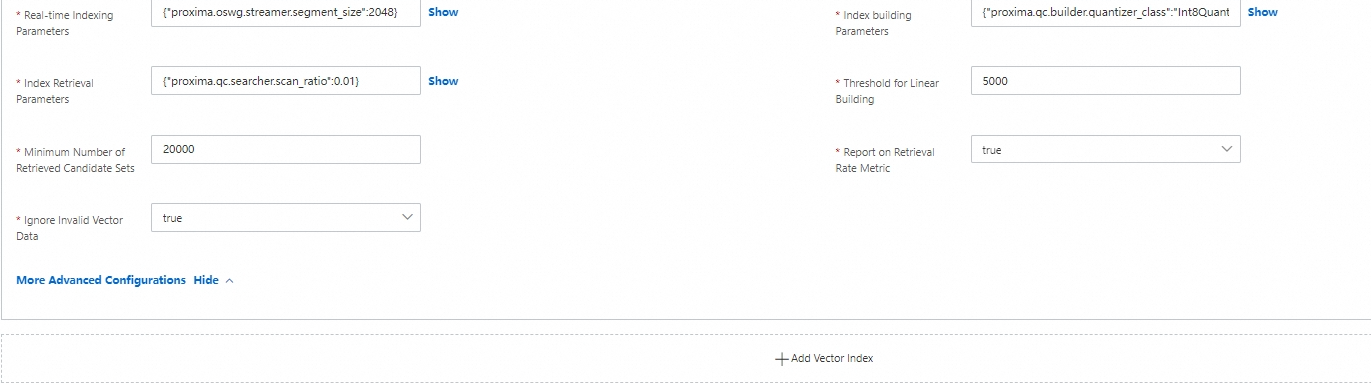
You can also configure parameters for the advanced configurations of the vector index. For more information, see Common configurations of vector indexes.
Namespace field: If the engine version of the instance is vector service 1.0.2 or earlier, the namespace field cannot be of the STRING type.
4.2. Other indexes
OpenSearch automatically creates indexes for fields other than the vector field. The index names are the same as the field names. The indexes can be managed on the Others tab. You need to manually configure vector indexes.

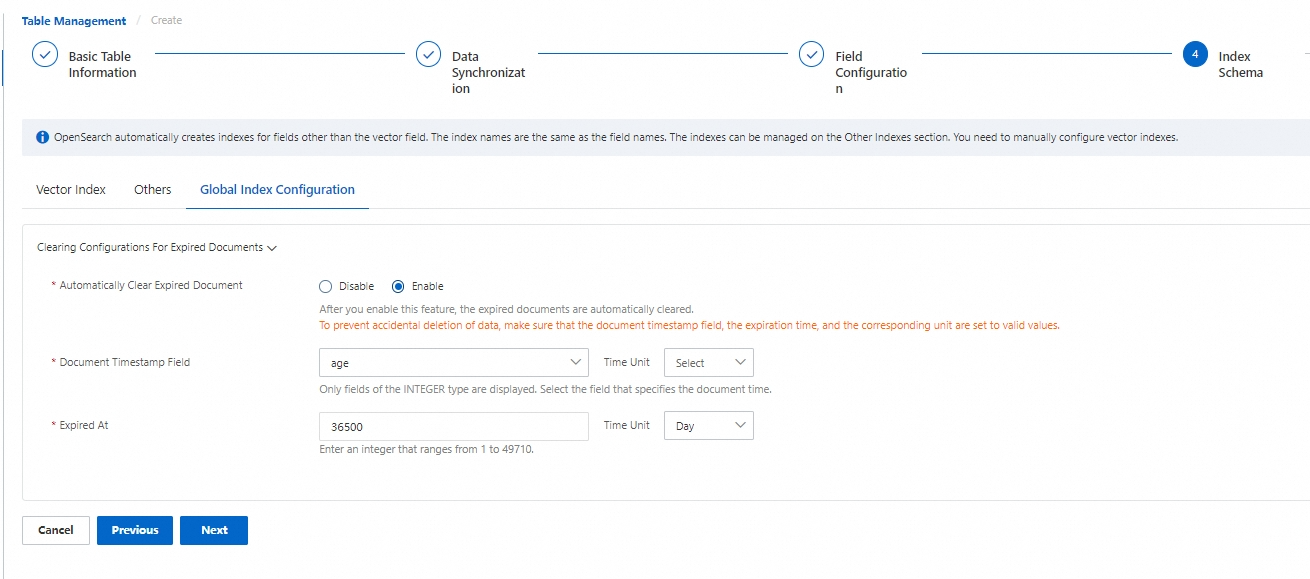
4.3. Configure the global index
This feature is disabled by default. After you enable this feature, you can configure expiration time for fields of an integer type. Expired documents are automatically cleared.
5. Confirm the creation
In the Confirm step, click Confirm. On the Table Management page, the table is in the Adding state.

6. View the change history
In the left-side navigation pane on the instance details page, click Change History. On the Change History page, you can view the change history of the instance within the previous 3 days, 7 days, and 30 days. For example, you can view the processes of creating tables, creating indexes, scaling out the instance, and performing reindexing for full data. After all processes on the Change History page are complete, the search service is built and you can run query tests.
7. Perform query tests
In the left-side navigation pane of the instance details page, choose Vector Management > Query Test. You can perform a query test in form or developer mode.
7.1 Form mode
In the upper-right corner, select Form Mode. Then, configure the Table Name and Query Type parameters. You can set Query Type to Vector or Text. In this example, Text is selected. Then, enter the query text in the Text field and click Search. You can view the query results in the Search Results section.
7.2 Developer mode
In the upper-right corner, select Developer Mode. Configure the Table Name parameter, specify parameters in the left-side section, and then click Search. You can view the query results in the right-side section.
vector: the vector to be queried.
topK: the top K documents to be retrieved.
includeVector: specifies whether to return the vector information in documents.
For more information about the query syntax, see the "Syntax" section of this topic.
Syntax
Syntax for vector-based queries: Vector-based query
Syntax for primary key-based queries: Primary key-based query
Syntax for filter expressions: Filter expression
Use an SDK to perform vector-based queries
Use an SDK to perform vector-based queries or primary key-based queries. For more information, see Query data.
Use an SDK to add or delete documents. For more information, see Update data.
Scale out the instance
To increase the number of workers of a single-worker instance, perform the following steps:
When a single-worker instance is being scaled out, the instance is unavailable. You can view the scale-out progress on the Change History page.
On the Instances page, find the instance that you want to scale out and click Upgrade/Downgrade in the Actions column.
On the Upgrade/Downgrade page, specify the number and specifications of QRS workers that you want to purchase, read and agree to the terms of service, and then click Buy Now.