MaxCompute allows you to grant MaxCompute permissions to RAM users and RAM roles in the MaxCompute console by using roles. This topic describes how to grant different types of permissions and provides policy examples.
Grant project-level management permissions
MaxCompute project-level management permissions include the permissions related to project security configurations, project-level user and role permission management, package management, label-based access control, and clearance of expired permissions. For more information, see Permissions on project management.
Procedure
Log on to the MaxCompute console. In the top navigation bar, select a region.
In the left-side navigation pane, choose Workspace > Projects.
On the Projects page, find the desired project and click Manage in the Actions column.
On the Project Settings page, click the Role Permissions tab. On the Role Permissions tab, create an administrator role or modify the permissions of an existing administrator role based on your business requirements.
NoteBy default, only an Alibaba Cloud account has permissions to manage roles in a project. If you want to use a RAM user or RAM role to manage roles in a project, you must grant the RAM user or RAM role the permissions to manage the project.
Create an administrator role
On the Project Settings page, click the Role Permissions tab.
On the Role Permissions tab, click Create Project-level Role.
In the Create Role dialog box, configure Role Name, select Admin from the Role Type drop-down list, select Policy for Authorization Method, and then enter a policy document in the Policy-based Access Control field.
Click OK.
Modify the permissions of an existing administrator role
On the Project Settings page, click the Role Permissions tab.
On the Role Permissions tab of the Project Settings page, find the desired role and click Edit Role in the Actions column. In the Edit Role dialog box, modify the policy document for the role.
Click OK.
For more information about the items that you can specify in the Action and Resource elements, see Permissions on project management. This topic provides examples of policy-based access control based on management modules.
Find the desired role and click Manage Members in the Actions column. In the Manage Members dialog box, you can view the users to which this role is assigned, assign the role to a user, or revoke the role permissions from a user.
Policy examples
In most cases, the management permissions of a module involve various operations and permissions on resources. In the following sample code, an asterisk (
*) is used as a wildcard to grant permissions to a group of objects at a time.For more information about the items that you can specify in the Action and Resource elements, see Permissions on project management.
You must replace
project_namein the following sample code with the name of the MaxCompute project on which you want to grant permissions.
Example 1: Policy that allows you to manage roles in a project
{
  "Statement": [
    {
      "Action": [
        "odps:*"
      ],
      "Effect": "Allow",
      "Resource": [
        "acs:odps:*:projects/project_name/authorization/roles",
        "acs:odps:*:projects/project_name/authorization/roles/*/*"
      ]
    }
  ],
  "Version": "1"
}
Example 2: Policy that allows you to manage packages in a project
{ "Statement": [ { "Action": [ "odps:*" ], "Effect": "Allow", "Resource": [ "acs:odps:*:projects/project_name/authorization/packages", "acs:odps:*:projects/project_name/authorization/packages/*", "acs:odps:*:projects/project_name/authorization/packages/*/*/*" ] } ], "Version": "1" }NoteThe
Listpermission on a project is required for package management in the MaxCompute console. Therefore, if a user wants to manage the packages in a project, the user must be granted theListpermission on the project. For more information about how to grant permissions in the MaxCompute console, see Grant project-level operation permissions on objects. For more information about how to grant permissions by using commands, see Manage user permissions by using commands.Example 3: Policy that allows you to modify the security configurations of a project
{
  "Statement":[
    {
      "Action":[
        "odps:*"
      ],
      "Effect":"Allow",
      "Resource":[
        "acs:odps:*:projects/project_name/authorization/configurations/*"
      ]
    }
  ],
  "Version":"1"
}
Example 4: Policy that allows you to manage users in a project
{
  "Statement":[
    {
      "Action":[
        "odps:*"
      ],
      "Effect":"Allow",
      "Resource":[
        "acs:odps:*:projects/project_name/authorization/users"
      ]
    }
  ],
  "Version":"1"
}
Example 5: Policy that allows you to perform all management operations on a project
{
  "Statement":[
    {
      "Action":[
        "odps:*"
      ],
      "Effect":"Allow",
      "Resource":[
        "acs:odps:*:projects/project_name/authorization/*"
      ]
    }
  ],
  "Version":"1"
}
Grant project-level operation permissions on objects
Project-level operation permissions on objects include the operation permissions, such as CreateTable, CreateInstance, and SelectTable, on projects, tables, functions, and resources and the objects in projects. For more information, see Permissions on projects and objects in projects.
Procedure
Log on to the MaxCompute console. In the top navigation bar, select a region.
In the left-side navigation pane, choose Workspace > Projects.
On the Projects page, find the desired project and click Manage in the Actions column.
On the Role Permissions tab of the Project Settings page, create a resource role or modify the permissions of an existing resource role based on your business requirements.
NoteBy default, only an Alibaba Cloud account has permissions to manage roles in a project. If you want to use a RAM user or RAM role to manage roles in a project, you must grant the RAM user or RAM role the permissions to manage the project.
Create a resource role
On the Project Settings page, click the Role Permissions tab.
On the Role Permissions tab, click Create Project-level Role.
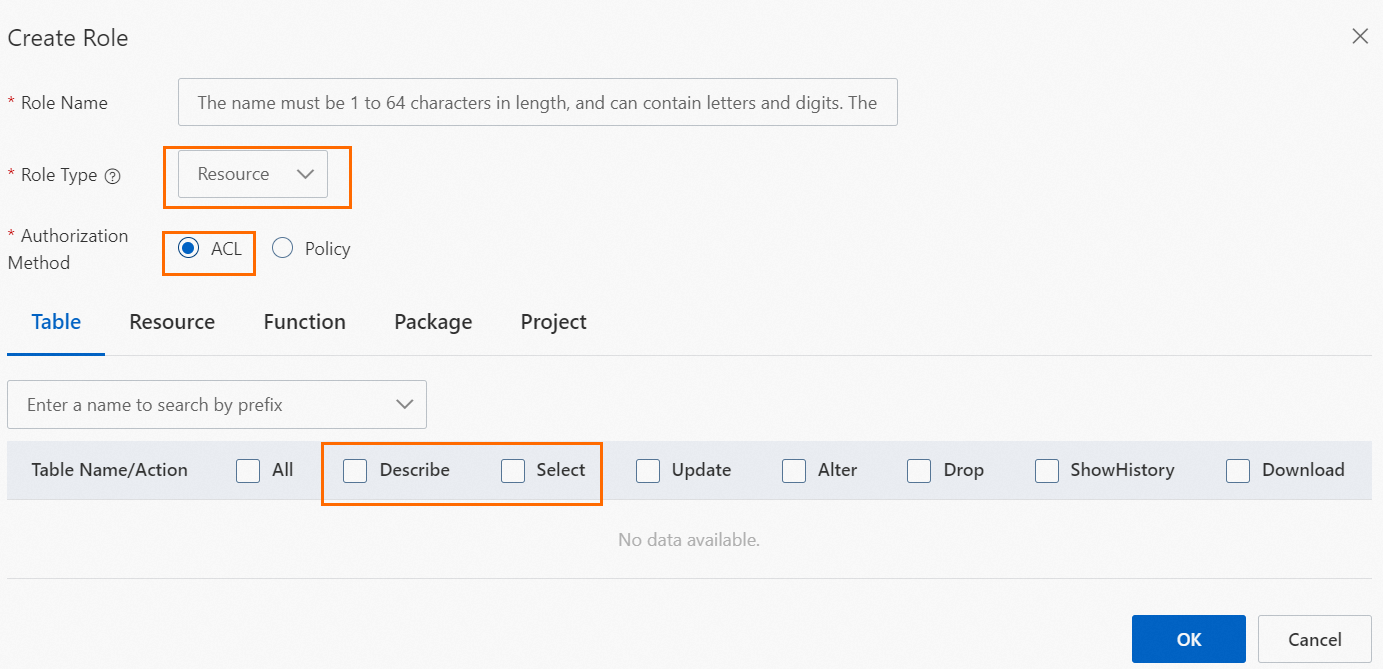
In the Create Role dialog box, configure Role Name, select Resource from the Role Type drop-down list, and then select ACL or Policy for Authorization Method. If you select Policy for Authorization Method, enter a policy document in the Policy-based Access Control field.
Click OK.
Modify the permissions of an existing resource role
On the Project Settings page, click the Role Permissions tab.
On the Role Permissions tab of the Project Settings page, find the desired role and click Edit Role in the Actions column. In the Edit Role dialog box, modify the settings for ACL-based access control or policy-based access control.
Click OK.
For more information about the permissions, see Permissions on projects and objects in projects. This topic provides examples on how to configure ACL-based access control and policy-based access control in the MaxCompute console. For more information, see Grant project-level management permissions.
Find the desired role and click Manage Members in the Actions column. In the Manage Members dialog box, you can view the users to which this role is assigned, assign the role to a user, or revoke the role permissions from a user.
Examples
For more information about the actions and objects of project-level operation permissions, see Permissions on projects and objects in projects.
You must replace
project_namein the following sample code with the name of the MaxCompute project on which you want to grant permissions.
Example 1: Use the ACL-based access control method to grant a resource role the CreateTable, CreateInstance, and List permissions on a project and the Describe and Select permissions on all tables in the project.
Grant the role the CreateTable, CreateInstance, and List permissions on the project. The List permission is used to view all objects in the project.
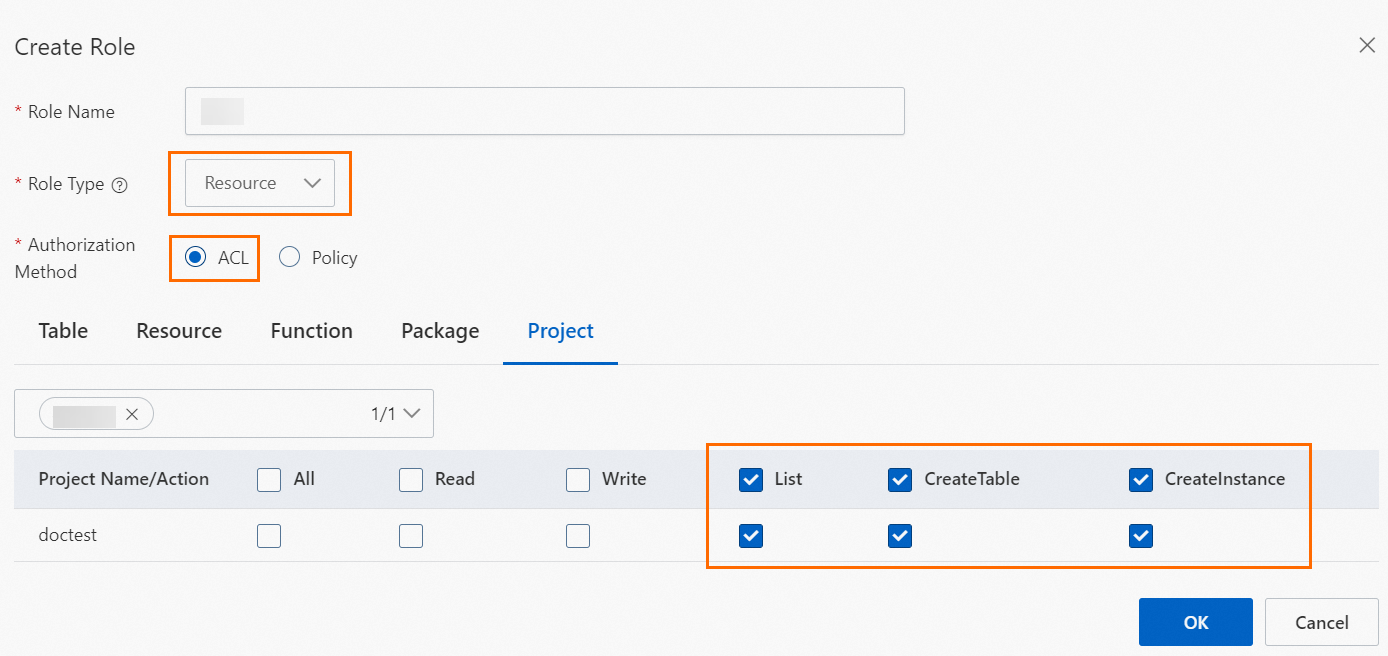
Grant the role the Describe and Select permissions on all tables in the project. The Describe permission is used to read the metadata of tables, and the Select permission is used to read the data in tables.
NoteDo not close the progress bar or the Edit Role dialog box after you click OK. Otherwise, the authorization may be terminated.
Example 2: Use policy-based access control to grant a resource role the CreateTable, CreateInstance, and List permissions on a project and the Describe and Select permissions on all tables in the project.
{
    "Statement": [{
            "Action": ["odps:CreateTable","odps:CreateInstance","odps:List"],
            "Effect": "Allow",
            "Resource": ["acs:odps:*:projects/project_name"]},
        {
            "Action": ["odps:Describe","odps:Select"],
            "Effect": "Allow",
            "Resource": ["acs:odps:*:projects/project_name/tables/*"]}],
    "Version": "1"}
Example 3: Use policy-based access control to grant a resource role the Describe and Select permissions on all tables whose names start with tmp in a project, the permissions to read and update all resources and functions, and the permissions to prohibit the deletion of all tables.
{
    "Statement": [{
            "Action": ["odps:Describe","odps:Select"],
            "Effect": "Allow",
            "Resource": ["acs:odps:*:projects/project_name/tables/tmp_*"]},
        {
            "Action": ["odps:Read","odps:Write"],
            "Effect": "Allow",
            "Resource": ["acs:odps:*:projects/project_name/resources/*"]},
            {
            "Action": ["odps:Read","odps:Write"],
            "Effect": "Allow",
            "Resource": ["acs:odps:*:projects/project_name/functions/*"]},
            {
            "Action": ["odps:Drop"],
            "Effect": "Deny",
            "Resource": ["acs:odps:*:projects/project_name/tables/*"]}],
    "Version": "1"}
If data storage by schema is enabled for a project, you must modify the policy based on the following sample code. For more information about data storage by schema, see Schema-related operations.
{
    "Statement": [{
            "Action": ["odps:Describe","odps:Select"],
            "Effect": "Allow",
            "Resource": ["acs:odps:*:projects/project_name/schemas/*/tables/tmp_*"]},
        {
            "Action": ["odps:Read","odps:Write"],
            "Effect": "Allow",
            "Resource": ["acs:odps:*:projects/project_name/schemas/*/resources/*"]},
            {
            "Action": ["odps:Read","odps:Write"],
            "Effect": "Allow",
            "Resource": ["acs:odps:*:projects/project_name/schemas/*/functions/*"]},
            {
            "Action": ["odps:Drop"],
            "Effect": "Deny",
            "Resource": ["acs:odps:*:projects/project_name/schemas/*/tables/*"]}],
    "Version": "1"}
Grant tenant-level management permissions
Tenant-level management permissions refer to the management of tenant-level user and role permissions. Tenant-level management permissions include the permissions to add or remove tenants, add or remove tenant-level roles, view tenant-level users and roles and their permissions, assign tenant-level roles to users, revoke tenant-level roles from users, add tenant-level roles to projects, and remove tenant-level roles from projects.
Only Alibaba Cloud accounts or RAM users that are assigned the tenant-level Super_Administrator or Admin role can be used to perform access control based on tenant-level roles.
If you want to grant management permissions to a RAM user or RAM role, you must use an Alibaba Cloud account to assign the Super_Administrator or Admin role to the RAM user or RAM role. The tenant-level Super_Administrator and Admin roles have multiple management permissions. Proceed with caution. For more information about the permissions, see Role planning. For more information about tenant-level roles, see Perform access control based on tenant-level roles.
Log on to the MaxCompute console. In the top navigation bar, select a region.
In the left-side navigation pane, choose Tenants > Users.
On the Users page, find the desired user and click Modify Role in the Actions column. Then, in the Edit Role dialog box, select a required role from the Available Roles section to assign the role to the user.
Grant tenant-level operation permissions on objects
Tenant-level operation permissions on objects include the operation permissions on the tenant-level objects, such as quotas and network connections. For example, you can grant the Usage permission to use quotas or the CreateNetworkLink permission to create a network connection. Tenant-level operation permissions on objects allow you to manage multiple projects by using one account. This facilitates permission management. For more information about tenant-level roles, see Perform access control based on tenant-level roles.
Procedure
Log on to the MaxCompute console. In the top navigation bar, select a region.
In the left-side navigation pane, choose Tenants > Roles.
On the Roles page, create a tenant-level role or manage the permissions of an existing custom role.
NoteOnly Alibaba Cloud accounts or RAM users that are assigned the tenant-level Super_Administrator or Admin role can be used to perform access control based on tenant-level roles.
Add a tenant-level role
On the Roles page, click Add Role.
In the Add Role dialog box, configure the parameters. The following table describes the parameters.
Parameter
Description
Role Name
The name of the role that you want to add. The name must be unique within your Alibaba Cloud account. The name must start with a letter and can contain only letters, underscores (_), and digits. The name must be 6 to 64 characters in length.
Policy Content
The policy that you want to attach to the role. You can write code for the policy based on the policy template that is provided.
Click OK.
Modify the permissions of an existing tenant-level role
On the Roles page, find the desired role and click Manage Permissions in the Actions column. In the Edit Role dialog box, modify the policy document.
Click OK.
On the Users page, find the desired user and click Modify Role in the Actions column. Then, in the Edit Role dialog box, select a required role from the Available Roles section to assign the role to the user.
Policy examples
In the following sample code, an asterisk (
*) is used as a wildcard to grant permissions to a group of objects at a time.For more information about the items that you can specify in the Action and Resource elements, see Permissions on objects in a tenant.
Example 1: Grant a tenant-level role the Usage permission on all quotas in all regions and the
CreateNetworkLink,List, andExecutepermissions on all network connections.{ "Statement":[ { "Action":[ "odps:Usage" ], "Effect":"Allow", "Resource":[ "acs:odps:*:regions/*/quotas/*" ] }, { "Action":[ "odps:CreateNetworkLink", "odps:List", "odps:Execute" ], "Effect":"Allow", "Resource":[ "acs:odps:*:networklinks/*" ] } ], "Version":"1" }Example 2: Grant a tenant-level role all operation permissions on MaxCompute projects
project_1andproject_2.{ "Statement":[ { "Action":[ "odps:*" ], "Effect":"Allow", "Resource":[ "acs:odps:*:projects/project_1", "acs:odps:*:projects/project_1/*", "acs:odps:*:projects/project_2", "acs:odps:*:projects/project_2/*" ] } ], "Version":"1" }NoteAfter you use a tenant-level role to grant permissions to specific objects in a project, you must add the tenant-level role to the project for the permissions to take effect. Only the project owner or a user that is assigned the Super_Administrator or Admin role of the project can add tenant-level roles to the project. To make a tenant-level role take effect, you must perform the following operations: On the Role Permissions tab of the Project Settings page, select Tenant from the Role Level drop-down list, find the desired role, and then click Enable in the Actions column.