WordPress is a free, open-source content management system (CMS) that allows you to easily create and manage websites, including blogs, news websites, e-commerce websites, and social media platforms. WordPress has a rich library of themes and plug-ins that allows you to customize the appearance and functionality of your websites. This topic describes how to build a WordPress website on an Elastic Compute Service (ECS) instance that runs a Windows operating system.
Preparations
Before you build a WordPress website on an existing ECS instance, make sure that the instance meets the following requirements:
A public IP address is automatically assigned to the ECS instance. Alternatively, an elastic IP address (EIP) is associated with the ECS instance. For instructions on how to enable public bandwidth, see Enable public bandwidth.
Inbound rules are added to a security group of the ECS instance to open ports 80 and 3389. For information about how to add a security group rule, see Add a security group rule.
ImportantTo ensure security, configure rules in a security group of the ECS instance to open ports based on your business requirements. For example, if you want to connect to a MySQL database on the ECS instance, configure an inbound rule in a security group of the instance to open port 3306, which is the default port for MySQL.
Procedure
This section describes how to build a WordPress website on an ECS instance that runs Windows Server 2022. The graphical interface may vary based on the Windows operating system version.
Step 1: Build a WIMP environment
WIMP stands for Windows, Internet Information Services (IIS), MySQL and PHP.
Each WordPress version requires specific PHP and MySQL versions. If the PHP or MySQL version is incompatible with the WordPress version that you want to install, WordPress may fail to be installed. For information about the PHP and MySQL versions that are compatible with each WordPress version, see WordPress Compatibility. In this example, WordPress 6.4.4, IIS 10.0, MySQL 8.0, and PHP 8.0 are used.
For information about how to deploy IIS, see How to install IIS and FTP services on Windows instances.
For information about how to deploy MySQL, see Deploy a MySQL database on an ECS Windows instance.
For information about how to deploy PHP, see How do I use IIS to build a PHP environment on a Windows instance?
Step 2: Build a WordPress website
Connect to the Windows instance on which you want to build a WordPress website and download the WordPress installation package.
Connect to the ECS instance.
For more information, see Use Workbench to connect to a Windows instance over RDP.
Download the WordPress 6.4.4 installation package from the official WordPress website.
NoteIn this tutorial, WordPress 6.4.4 is used. Visit the official WordPress website for other WordPress versions. If you download the WordPress installation package on an instance that is located in a region inside the Chinese mainland and the
429 Too Many Requestserror is reported, we recommend that you try again or download the WordPress installation package from a third-party website.Decompress the WordPress installation package.
In this tutorial, the WordPress installation package is decompressed to the
C:\wordpress-6.4.4\wordpressdirectory.
Create a MySQL database for the WordPress website that you want to build.
Go to the
binfolder in the MySQL installation directory, right-click a blank area while you press and hold theShiftkey, and then select Open command window here.In this example, the
binfolder in the MySQL installation directory isC:\BtSoft\mysql\MySQL8.0.Log on to MySQL.
.\mysql -u root -pEnter the password of the root user of MySQL as prompted.
Create a database named
wordpress.create database wordpress;
Configure WordPress.
In the
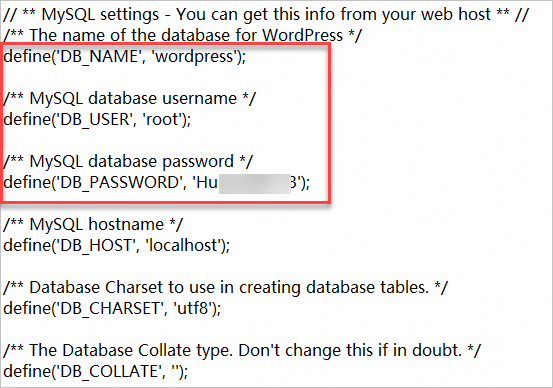
C:\wordpress-6.4.4\wordpressdirectory, find thewp-config-sample.phpfile, copy the file, and then change the name of the file copy towp-config.php.Use the text editor to open the
wp-config.phpfile, modify information about thewordpressdatabase, and then save the file.The following figure shows an example on how to modify the information.

Add the WordPress website to Server Manager.
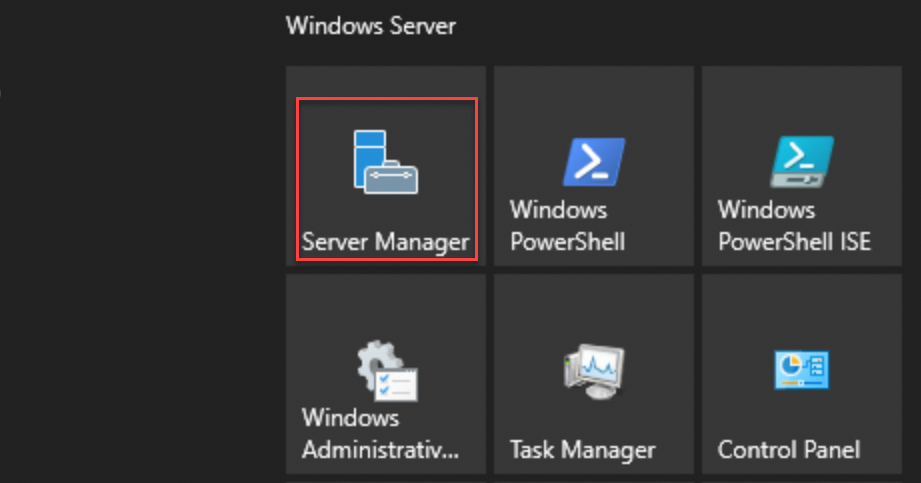
Open the Start menu on the Windows desktop. In the Windows Server section, click Server Manager.

In the top navigation bar of the Server Manager window, choose .

In the Connections pane, choose .
Delete the website that is bound to port 80 or change the port number from 80 to an unused port number, such as 8088.
In this example, the website named
127.0.0.1, which is bound to port 80, is deleted.
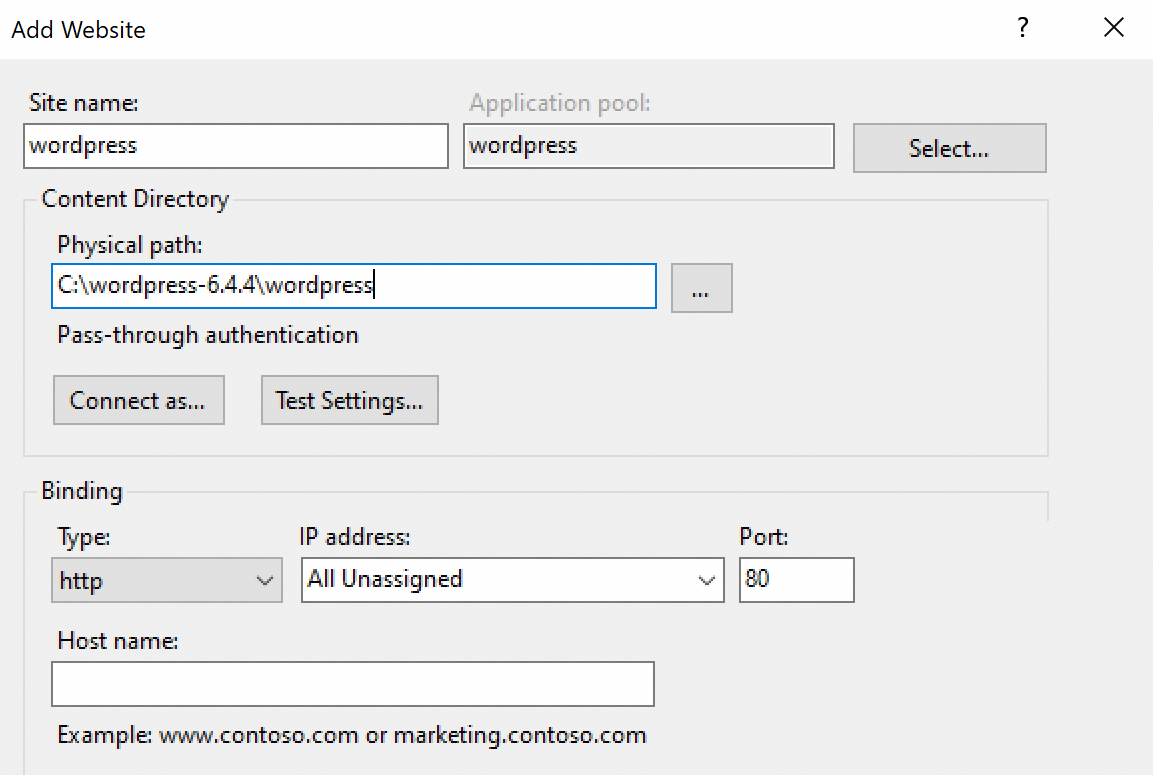
In the right-side Actions pane, click Add Website to add the WordPress website.
The following figure shows an example on how to configure parameters in the Add Website dialog box.

Take note of the following parameters:
Site name: Specify a name for the WordPress website. In this example, enter
wordpress.Physical path: Select the directory in which you decompressed the WordPress installation package. In this example, select
C:\wordpress-6.4.4\wordpress.Port: Enter 80.
Install WordPress and log on to the WordPress website.
On the Windows instance, use a web browser to access
http://localhost/to go to the WordPress installation page.Configure basic information about the WordPress website and click Run the installation.
Configure the following parameters:
Site Title: the name of the WordPress website. Example: demowp.
Username: the username that you want to use to log on to WordPress. Make sure that the username is secure. Example: testwp.
Password: the password that you want to use to log on to WordPress. We recommend that you specify a strong password.
Your Email: the email address that you want to use to receive notifications. Example: example.com.
Click Install Wordpress.
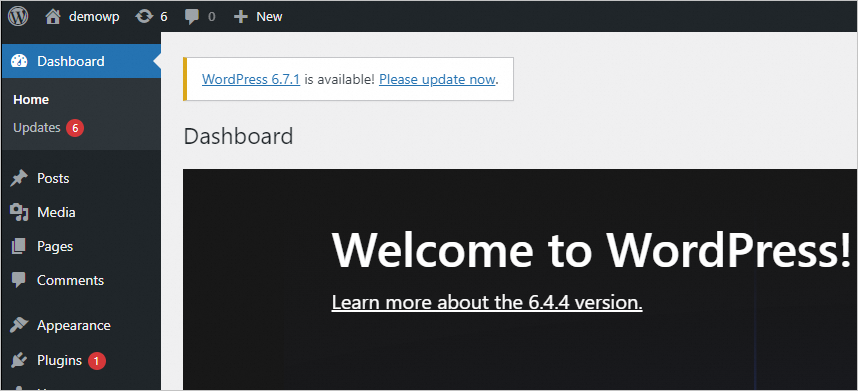
Enter the username and password that you specified when you installed WordPress and click LOGIN.
You are logged on to the WordPress website. For more information about how to use WordPress, see the WordPress documentation.

Related operations
Configure a domain name for the WordPress website
FAQ
Why am I unable to access the WordPress website by using the public IP address of the ECS instance on which the WordPress website is hosted?
References
You can use Docker to deploy WordPress. For more information, see Use Docker Compose to deploy applications.
If you want to upload a theme or plug-in to WordPress by using FTP, you must first build an FTP server. For information about how to build an FTP server, see the following topics:
You can build multiple websites on an ECS instance. For more information, see the following topics:
If a domain name is connected to the WordPress website, you can configure encrypted communication over HTTPS for the domain name. For more information, see Installation overview.
