If you need to manage and monitor the service level of an application, you can configure service level objectives (SLOs) and alert rules in the Service Mesh (ASM) console to ensure that the application runs as expected. When the service level of the application becomes equal to or lower than the preset threshold, ASM issues different levels of reminders based on the severity of the fault. This helps you manage the service level of the application more efficiently and handle issues more quickly.
Prerequisites
A Container Service for Kubernetes (ACK) cluster is added to an ASM instance of v1.15.3 or later. For more information, see The cluster is added to the ASM instance.
Automatic sidecar proxy injection is enabled. For more information, see Enable automatic sidecar proxy injection.
Step 1: Deploy the HTTPBin application
Create an httpbin.yaml file that contains the following content:
Use kubectl to connect to the ACK cluster and run the following command to deploy the HTTPBin application.
For more information about how to use kubectl to connect to the ACK cluster, see Obtain the kubeconfig file of a cluster and use kubectl to connect to the cluster.
kubectl apply -f httpbin.yaml
Step 2: Create a virtual service and an Istio gateway
Create an httpbin-gateway.yaml file that contains the following content:
Use kubectl to connect to the ASM instance and run the following command to deploy the virtual service and Istio gateway.
For more information about how to use kubectl to connect to the ASM instance, see Use kubectl on the control plane to access Istio resources.
kubectl apply -f httpbin-gateway.yamlIn the address bar of your browser, enter
http://{IP address of the ingress gateway}.For more information about how to obtain the IP address of the ingress gateway, see Use Istio resources to route traffic to different versions of a service. If you can view the page of the HTTPBin application, the HTTPBin application is successfully deployed.
Step 3: Configure an SLO
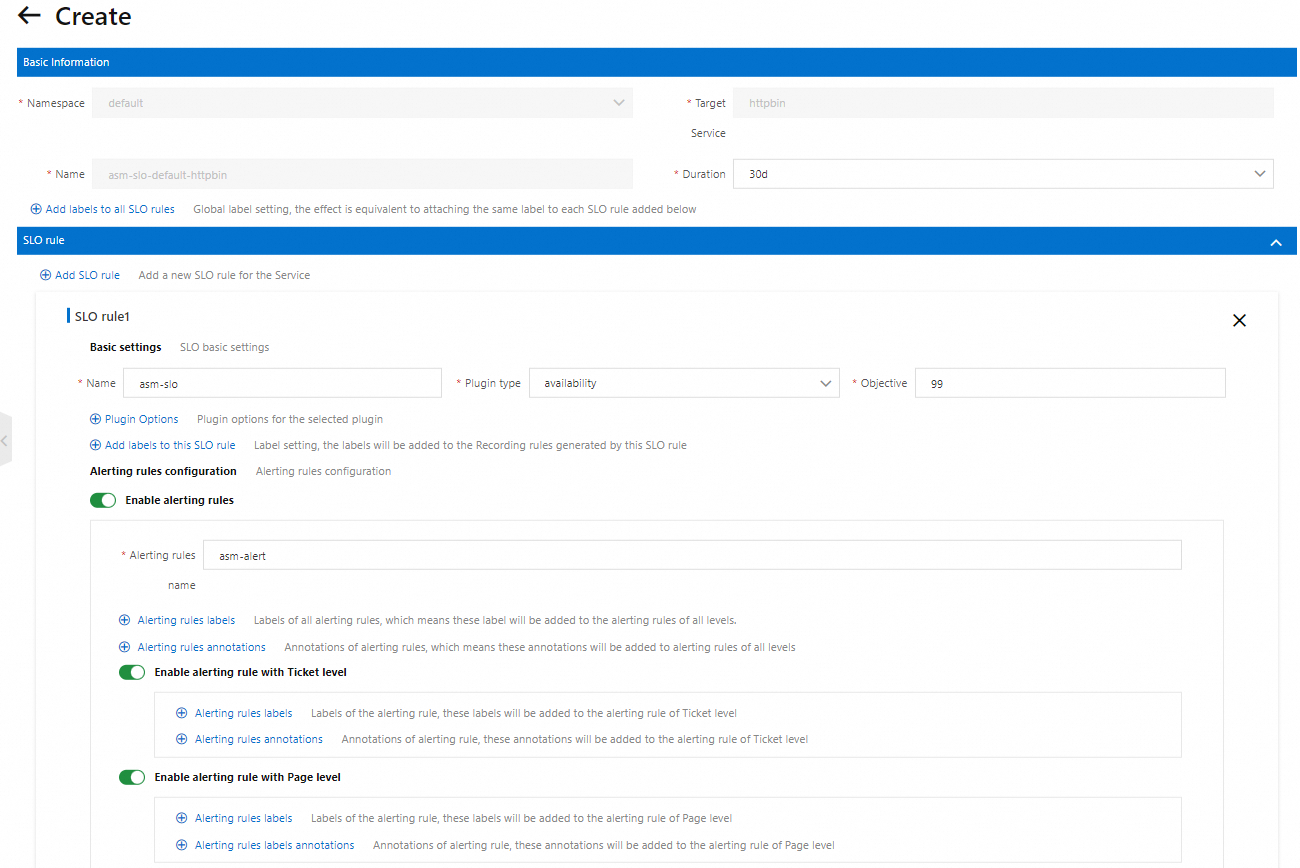
In this example, an SLO is configured for the HTTPBin application in the default namespace to specify the service availability. The objective is 99% and the period of time during which the SLO takes effect is 30 days. Two severity levels of alerts are configured: Page and Ticket. For more information about the concepts related to SLO, see SLO overview.
Log on to the ASM console. In the left-side navigation pane, choose .
On the Mesh Management page, click the name of the ASM instance. In the left-side navigation pane, choose .
In the upper part of the SLO Configuration page, select the default namespace from the Namespace drop-down list and click Create in the Actions column of the httpbin service.
In the Basic Information section of the Create page, set Duration to 30d.
Click the SLO rule tab. Set Name to asm-slo, Plugin type to availability, and Objective to 99. Turn on Enable alerting rules and set Alerting rules name to asm-alert. Turn on Enable alerting rule with Ticket level and Enable alerting rule with Page level.

(Optional) In the lower part of the page, click Preview to view the configurations. Confirm that the configurations are correct and click Submit.
For more information about the fields in the configuration file, see Description of SLO CRD fields.
In the lower part of the page, click Create.
Step 4: View the automatically generated Prometheus rule
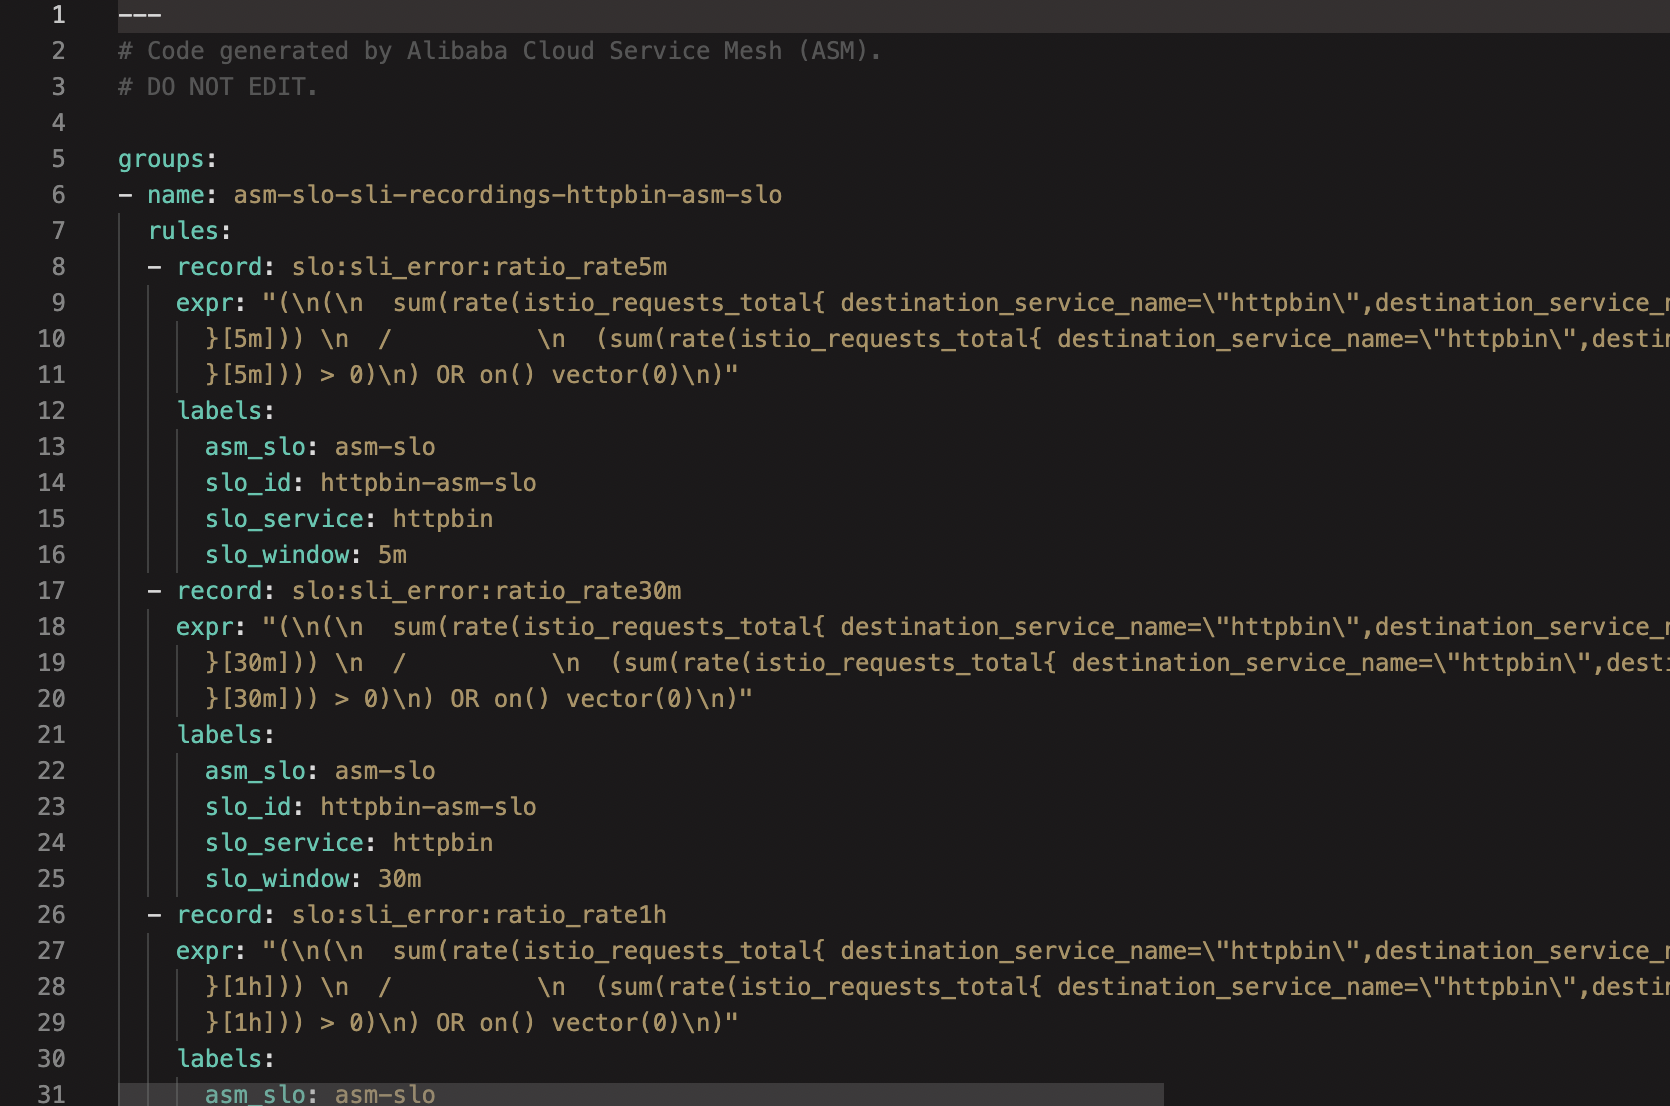
After the SLO is configured, you can perform the following operations to view the automatically generated Prometheus rule: find the httpbin service on the SLO Configuration page and click View Prometheus rules in the Actions column.

What to do next
You can import the generated Prometheus rule to the Prometheus system for the SLO to take effect and use Grafana to view SLO-related metrics. For more information, see Import the generated Prometheus rule to the Prometheus system for the SLOs to take effect and Use Grafana to view SLOs.