Common questions about Application Monitoring billing, cost optimization, and spending controls.
Application Monitoring Basic Edition and Browser Monitoring Basic Edition have stopped activation and will no longer receive technical support from March 31, 2024. For more information, see [Billing changes] Discontinuation of Application Monitoring Basic Edition and Browser Monitoring Basic Edition activation.
How does Application Monitoring billing work?
The billing model depends on your edition:
| Edition | Billing metric | What counts |
|---|---|---|
| Pro Edition | Number of hours agents run | Each running agent is billed per hour. For example, 5 agents running for 24 hours = 120 agent-hours. |
| Basic Edition (deprecated) | Amount of data collected | Billed by the volume of trace and metric data ingested |
Basic Edition free tier: Basic Edition collects data on specific traces and data on all metrics. Trace data is stored free of charge for one day. Metric data is stored free of charge for three days. As long as you do not extend the data retention period or modify the sampling rate, no charges are incurred.
What are the differences between editions?
| Aspect | Pro Edition | Basic Edition (deprecated) |
|---|---|---|
| Billing metric | Agent-hours | Data volume |
| Features | Advanced monitoring, diagnostics, large-scale data processing and storage | Free quotas and basic APM: trace query and data collection |
| Best for | Business-critical, high-traffic applications that require high stability and availability | Staging environments or small-scale services that need only basic APM |
How do I reduce Application Monitoring Pro Edition costs?
Use these strategies to lower your spending:
| Strategy | Savings | Details |
|---|---|---|
| Purchase resource plans | Discounted rates | Prepaid resource plans offer lower per-unit pricing than pay-as-you-go |
| Deploy on ACK | 50% discount | Applications deployed in Container Service for Kubernetes (ACK) are billed at half the standard rate |
| Adjust the trace sampling rate | Reduces stored spans | Lower the sampling rate for non-critical APIs to reduce data volume. See How do I modify the trace sampling rate? |
| Set a consumption limit | Caps daily spending | Prevent unexpected charges by setting a daily maximum. See How do I set a consumption limit? |
How do I modify the trace sampling rate?
Log on to the ARMS console. In the left-side navigation pane, choose .
On the Applications page, click the name of the application.
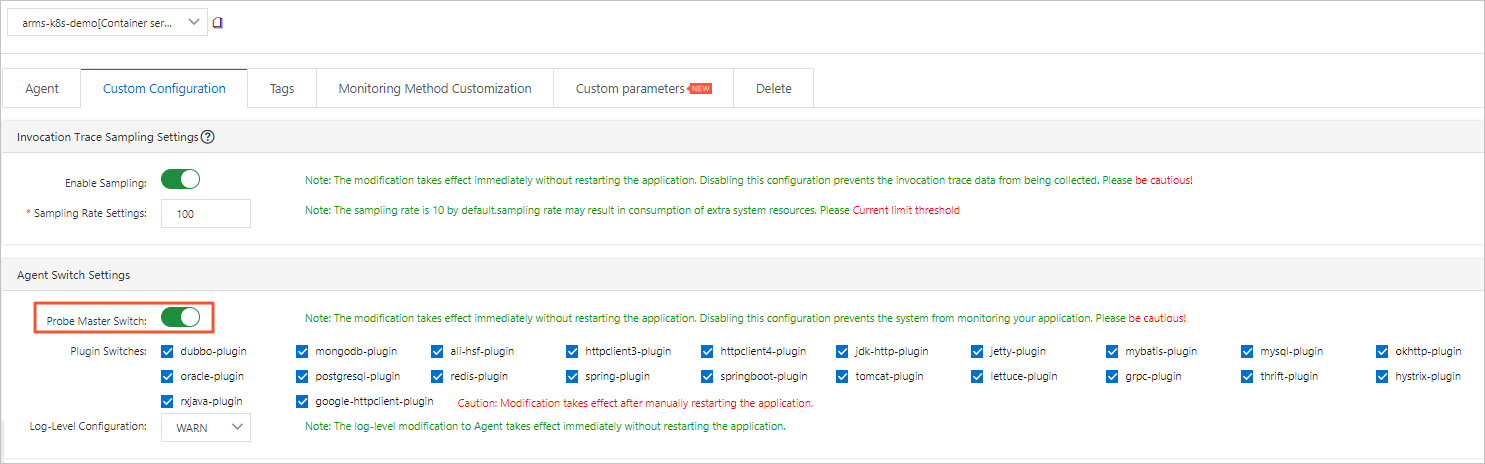
In the left-side navigation pane, click Application Settings. On the page that appears, click the Custom Configuration tab.
In the Invocation Trace Sampling Settings section, modify the sampling rate.
Pro Edition: Set a trace sampling rate for all APIs. The default value is 10%.
Basic Edition (deprecated): Set a trace sampling rate for all APIs or a specific API, or specify the number of traces sampled within a specific time range.
For more information, see Sampling rate settings.
How do I view usage details after receiving a bill?
Log on to the ARMS console and choose in the left-side navigation pane.
The Usage Statistics page shows the following metrics for the last hour or last day:
| Metric | Description |
|---|---|
| Connected agents | Agents currently reporting data |
| Agent hours | Total hours agents have run |
| Reported spans | Spans sent to ARMS |
| Stored spans | Spans retained in storage |
By default, data within the last hour is displayed. Switch to the last-day view to analyze trends and identify which agents or services are driving costs.
How do I set a consumption limit?
A daily consumption limit prevents unexpected charges. After the limit is reached, ARMS stops monitoring and billing stops. Monitoring and billing resume at 00:00 the next day.
In the left-side navigation pane of the ARMS console, choose .
In the upper-right corner of the Applications page, choose .
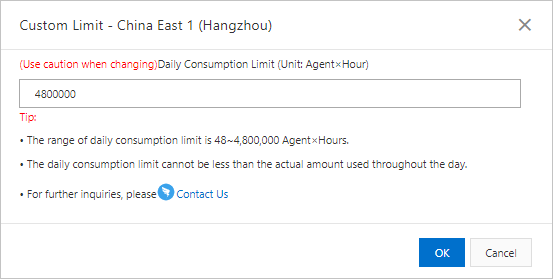
In the Custom Limit dialog box, set your daily consumption limit and click OK.
How do I stop billing for Application Monitoring?
Either stop your application or uninstall the ARMS agent.
Stop all applications
In the left-side navigation pane of the ARMS console, choose .
In the upper-right corner of the Applications page, choose .
In the Start/Stop All Applications dialog box, select an option and click OK.
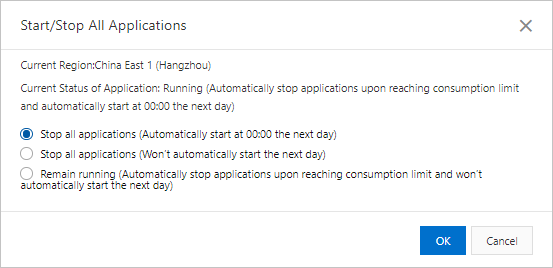
| Option | Behavior |
|---|---|
| Stop All Applications (Automatically start the application at 00:00 the next day) | Stops monitoring immediately. Resumes at 00:00 the next day. |
| Stop All Applications (Do not automatically start the application the next day) | Stops monitoring immediately. Does not resume the next day. |
| Keep Running (Automatically stop the application after reaching the limit and do not automatically start the application the next day) | Continues monitoring until the consumption limit is reached, then stops. Does not resume the next day. For details, see How do I set a consumption limit?. |
Stop a single application
In the left-side navigation pane of the ARMS console, choose .
In the top navigation bar, select the region where the application resides.
On the Applications page, click the name of the application.
In the left-side navigation pane, click Application Settings.
On the Application Settings page, click the Custom Configuration tab. In the Agent Switch Settings section, turn off the Probe Master Switch to disable the ARMS agent.
Uninstall the ARMS agent
Uninstalling the ARMS agent stops billing immediately. You are still charged for any usage incurred before the uninstall.
How do I configure alerts for resource plans?
Set up resource usage alerts
Receive email or text message notifications when your resource plan balance drops below a threshold.
Log on to the Expenses and Costs. In the left-side navigation pane, click Manage Reserved Instances.
On the Manage Reserved Instances page, set Resource Type to Resource Packages and click Set remaining Quota Alert.
In the dialog box, turn on Enable Alert, specify the threshold percentage, and click OK.
For example, setting the Proportion to 20% triggers a notification when only 20% of your monthly quota remains.
Set up expiration notifications
Receive notifications before your resource plan expires.
Log on to the Alibaba Cloud Management Console.
In the top navigation bar, click the
 icon.
icon.In the left-side navigation pane, choose .
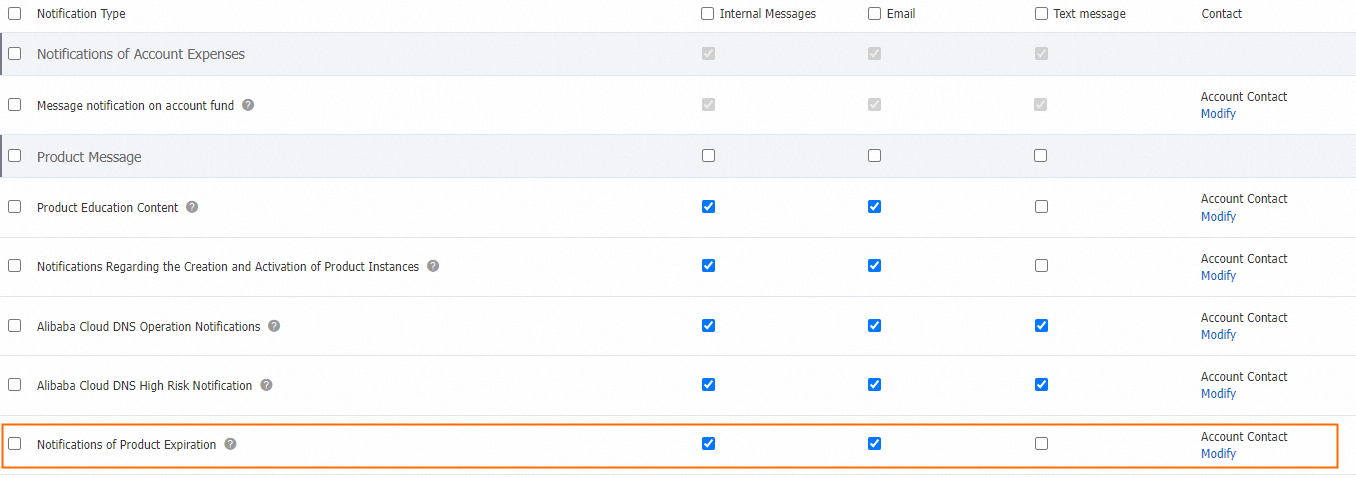
On the Common Settings page, select Notifications of Product Expiration.
Alibaba Cloud sends expiration notifications to the contacts of the current Alibaba Cloud account. Click Modify to add contacts.