This article introduces how to use Object Storage Service (OSS) foreign tables to import CSV files to PolarDB for MySQL. The following are the main steps:
• For PolarDB for MySQL 8.0.1, the minor engine version must be 8.0.1.1.25.4 or later.
• For PolarDB for MySQL 8.0.2, the minor engine version must be 8.0.2.2.1 or later.
If there are a large number of offline CSV files (100 GB or larger), you may use ossutil to upload large files, download files, or delete files with fixed prefixes.
ossutil supports the following OSs: Windows, Linux, and macOS. For more information, see https://www.alibabacloud.com/help/oss/developer-reference/install-ossutil
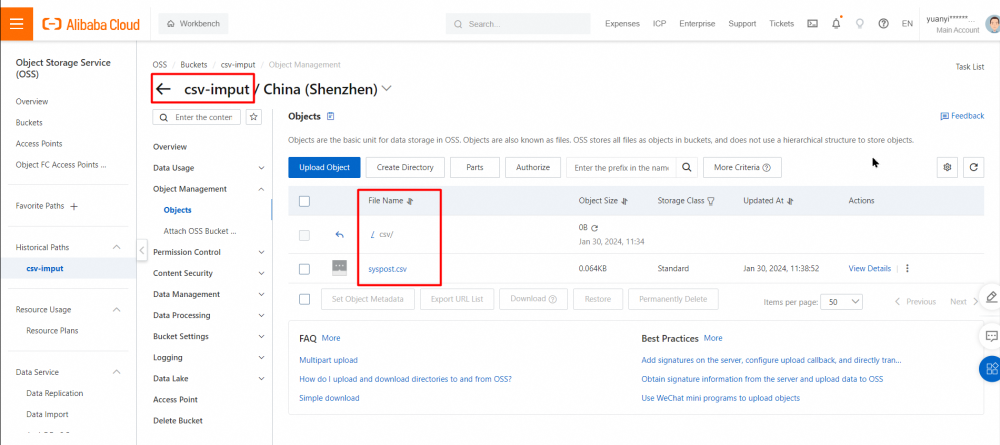
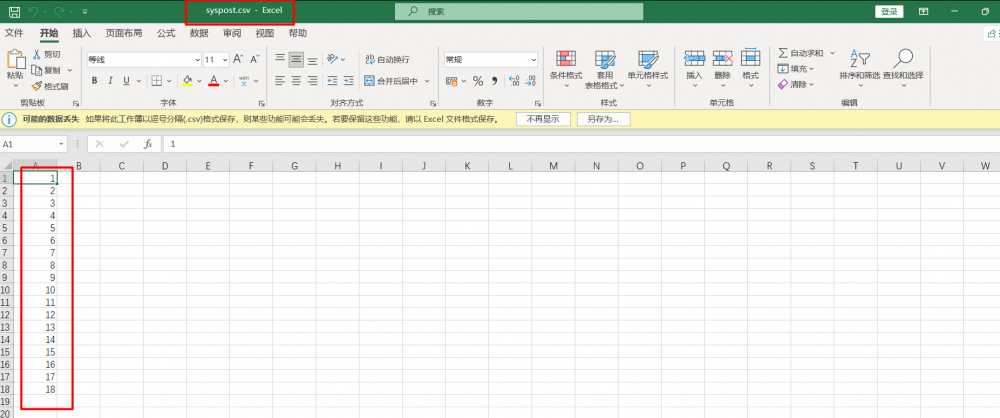
This experiment shows how to import a CSV file to the PolarDB database. The following are the data details of the CSV file (syspost.CSV) used in this experiment, which has 18 records in total.
Notes:
You can use one of the following methods to create an OSS foreign table in PolarDB:
• Method 1: Use an OSS server to connect to OSS to read data from the OSS foreign table. This method is recommended if the data to be read is scattered and large.
• Method 2: Use the CONNECTION parameter to directly specify the access to OSS to read data from the OSS foreign table. This method is recommended if there is less data and only a single import is required.
The following describes these two methods in detail.
1) Create the OSS Server Connection Information
Creation statement:
CREATE SERVER <server_name>
FOREIGN DATA WRAPPER oss OPTIONS
(
EXTRA_SERVER_INFO
  '{"oss_endpoint": "<my_oss_endpoint>",
  "oss_bucket": "<my_oss_bucket>",
  "oss_access_key_id": "<my_oss_access_key_id>",
  "oss_access_key_secret": "<my_oss_access_key_secret>",
  }'
);

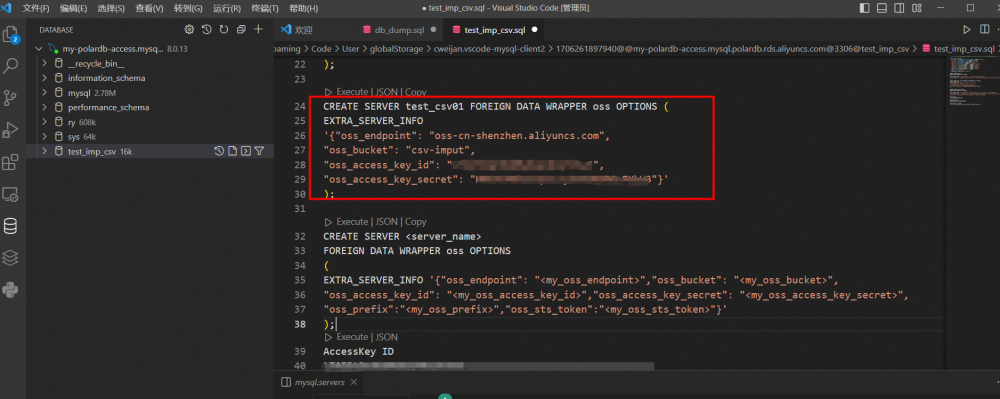
Sample code:
CREATE SERVER test_csv01 FOREIGN DATA WRAPPER oss OPTIONS (
EXTRA_SERVER_INFO
'{"oss_endpoint": "oss-cn-shenzhen.aliyuncs.com",
"oss_bucket": "csv-imput",
"oss_access_key_id": "**************",
"oss_access_key_secret": "***************"}'
);
2) Query the Added OSS Server Information
SELECT Server_name, Extra_server_info FROM mysql.servers;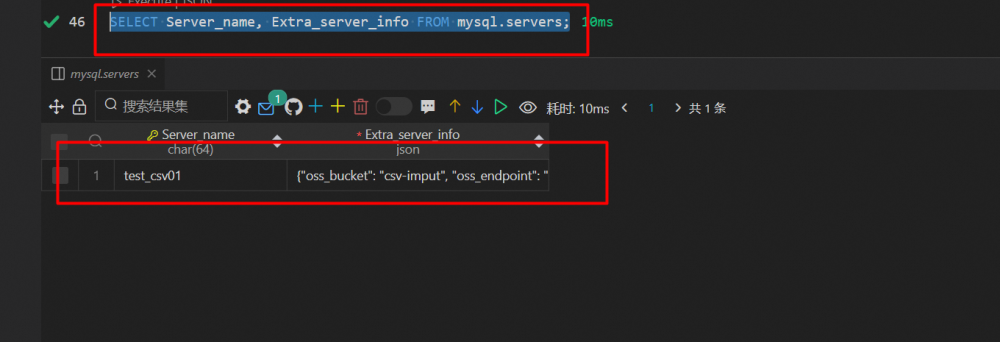
3) Create an OSS Foreign Table
After you define the OSS server, you need to create an OSS foreign table in PolarDB to connect to OSS. Sample code:
create table t1 (id int) engine=csv connection="connection_string";Replace connection_string with the name of the OSS server.
For more information, see https://www.alibabacloud.com/help/en/polardb/polardb-for-mysql/user-guide/use-oss-foreign-tables-to-access-oss-data
If only one foreign table is required to be imported, you can use CONNECTION to specify the OSS connection address to create a foreign table, realizing quick access to OSS data.
create table `syspost02` (
  `post_id` VARCHAR(20)
) ENGINE=CSV    CONNECTION="oss://********:*************@oss-cn-shenzhen.aliyuncs.com/csv-imput/csv/syspost";
Notes:
ENGINE must be specified as a CSV.
Syntax:CONNECTION="oss://access_key_id:access_key_secret@endpoint/bucket/database/table";
access_key_id and access_key_secret refer to the OSS account ID and account key respectively.
endpoint refers to the domain name of the OSS service. The domain name must be written in full.
bucket refers to the name of the OSS bucket.
database refers to the directory name of the CSV file in OSS.
table refers to the CSV file name. You do not need to write a suffix (.CSV) here.

Use the SELECT statement to query the number of records in the foreign table. This value indicates the number of rows in the CSV file that has been uploaded to OSS. Remember to record this value. (If you are performing a test, this value is equivalent to test data and will be compared with the result later.)
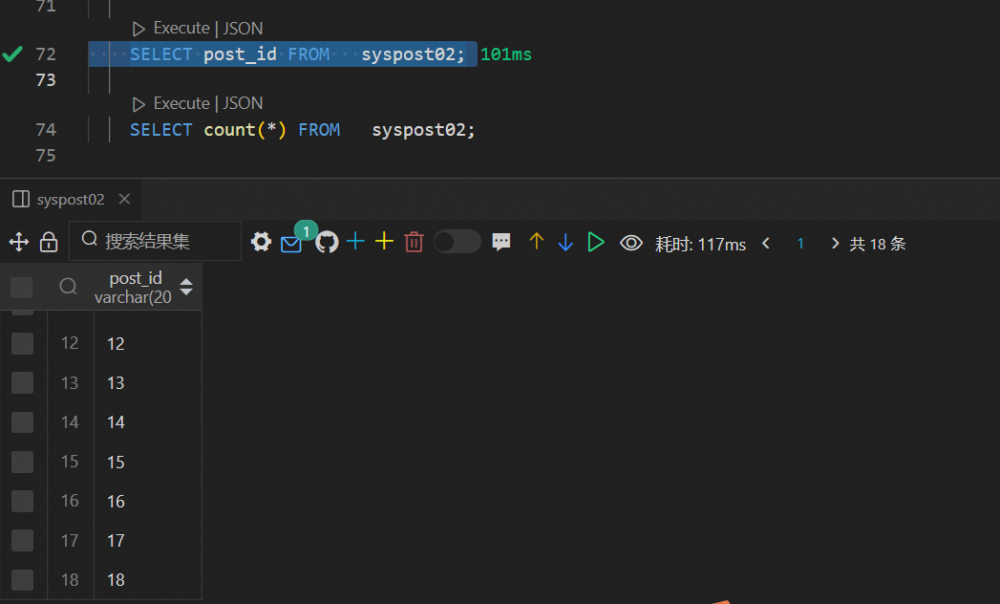
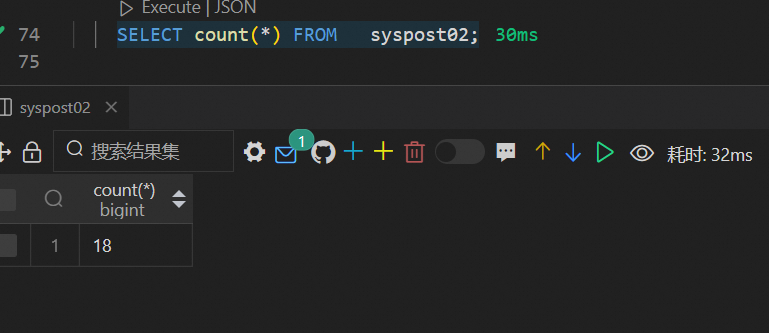
Use the CREATE TABLE statement to create a new table, and nest the SELECT statement in the INSERT statement to insert the data read from the OSS foreign table into the new table.
CREATE TABLE new_post(
   post_id   VARCHAR(20)

) COMMENT 'Import data records by using INSERT INTO ';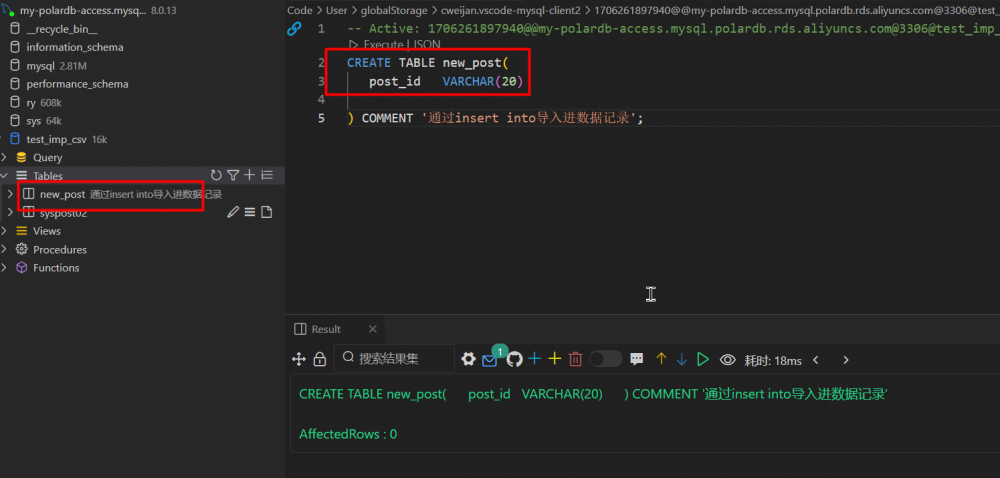
INSERT into new_post SELECT * FROM syspost02;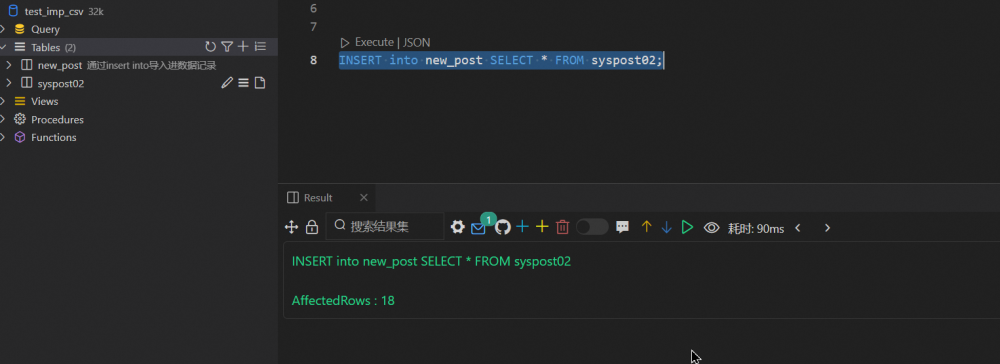
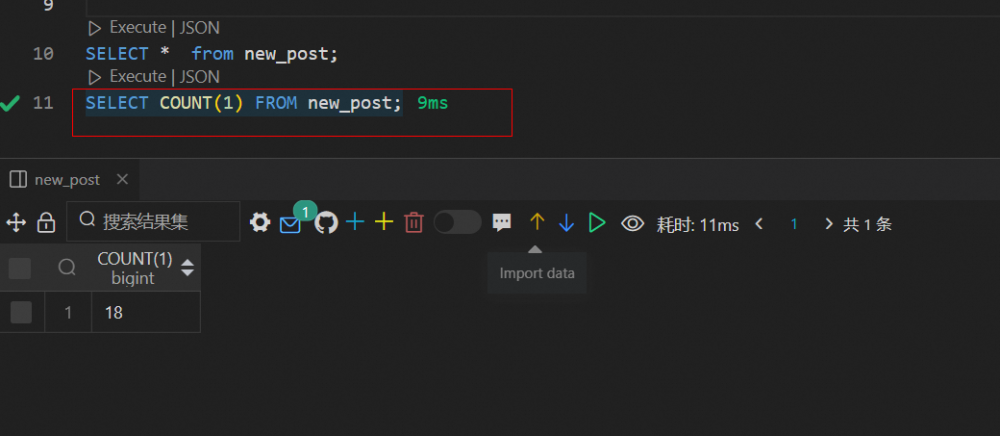
After the INSERT statement is executed, use the SELECT statement to query the number of records in the new table. Compare the number of records in the new table and that in the OSS foreign table queried in Step 3. If the two values are the same, the import is successful. If different, a further examination of the log is required to find the cause of missing data or excess data.
[Infographic] Highlights | Database New Feature in January 2024
Alibaba Cloud Community - March 22, 2024
ApsaraDB - March 26, 2024
ApsaraDB - December 10, 2024
ApsaraDB - July 20, 2021
ApsaraDB - October 22, 2024
ApsaraDB - January 15, 2024
 OSS(Object Storage Service)
An encrypted and secure cloud storage service which stores, processes and accesses massive amounts of data from anywhere in the world
Learn More PolarDB for Xscale
Alibaba Cloud PolarDB for Xscale (PolarDB-X) is a cloud-native high-performance distributed database service independently developed by Alibaba Cloud.
Learn More Hybrid Cloud Distributed Storage
Provides scalable, distributed, and high-performance block storage and object storage services in a software-defined manner.
Learn More PolarDB for PostgreSQL
Alibaba Cloud PolarDB for PostgreSQL is an in-house relational database service 100% compatible with PostgreSQL and highly compatible with the Oracle syntax.
Learn MoreMore Posts by ApsaraDB