By Moumou from F(x) Team
Pipcook 1.0 enables web developers to utilize the power of machine learning with a relatively low threshold. It has opened and accelerated the era of frontend intelligence. However, we also found some problems in practice. Among them, we got the most feedback from the one Pipcook installation difficulties, and the success rate is relatively low. The installation often fails due to network problems. Even if the network is smooth, the installation takes at least three minutes. In addition, Pipcook will install plug-ins when it starts training for the first time, which is also time-consuming for users.

We have done a lot of refactoring and optimization work in version 2.0 to solve the problems in version 1.0. Let's take a look at the installation speed of Pipcook 2.0 now:

It drops from a few minutes in version 1.0 to less than 20 seconds in version 2.0! Users no longer need to install the daemon through the pipcook init command. Due to the decoupling of the heavy machine learning framework, the size of the package is effectively controlled, and the installation success rate is close to 100%.
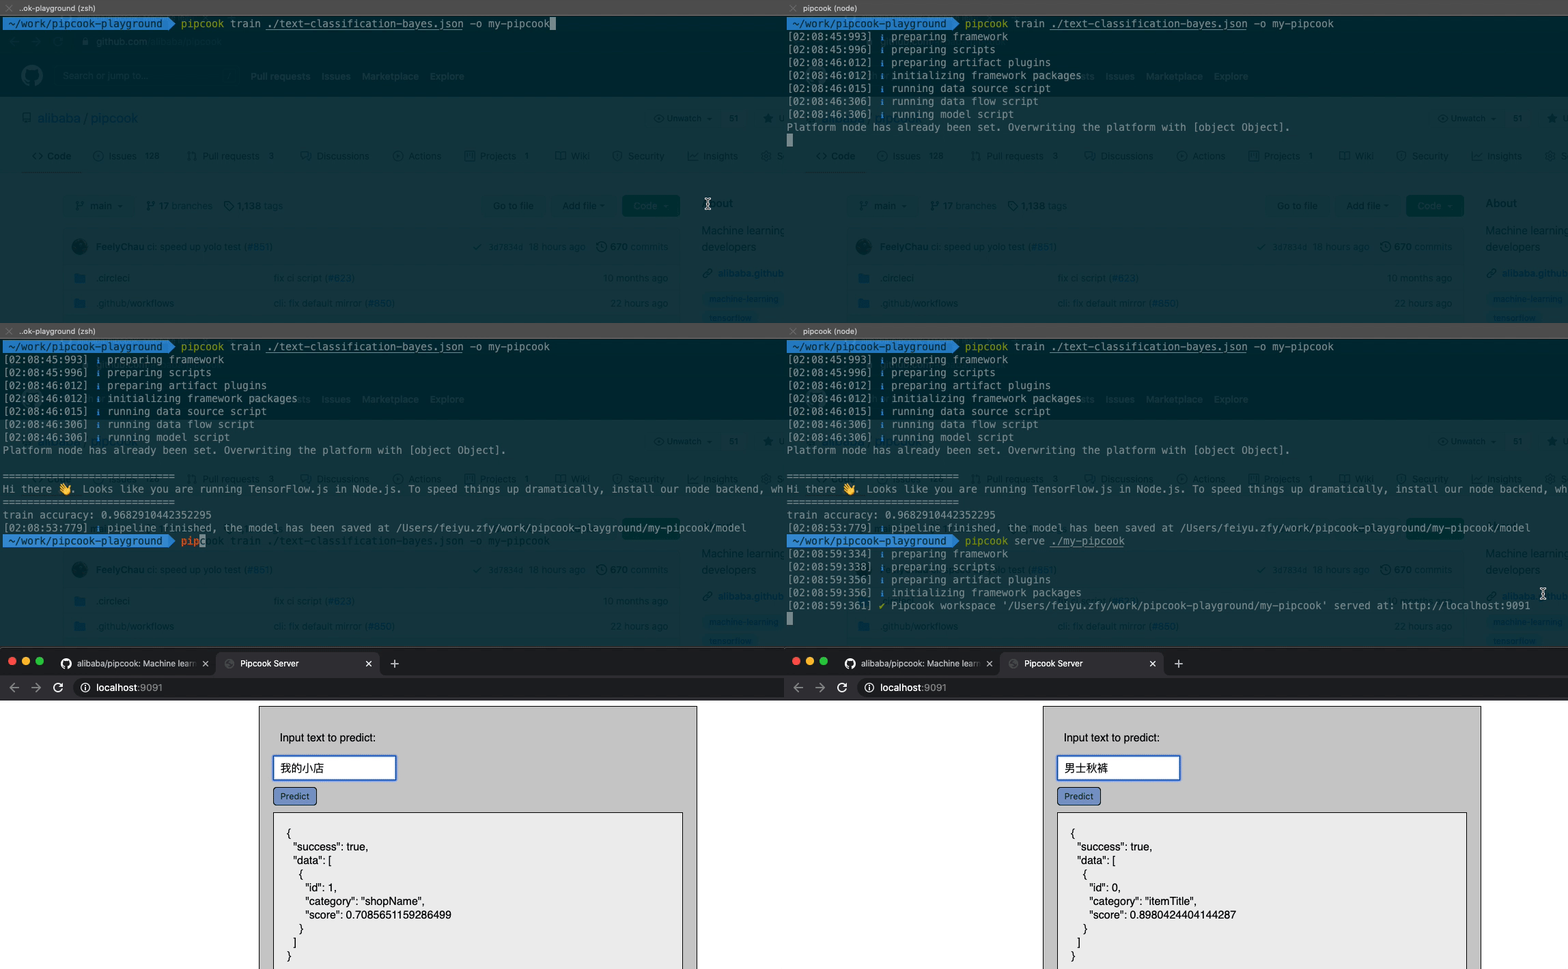
Let's look at the time used for the text classification task from model training to service published:

Yes, it only takes 20 seconds from the start of the model training to launch the text classification service!
Next, let's look at how to use Pipcook 2.0 to train, deploy, and publish a model quickly.
Before we start, we need to know something about Pipeline. In Pipcook, we use Pipeline to represent the workflow of a model. Currently, the following four Pipelines are implemented:
| Pipeline Names | Task Types | CDN Links of Pipeline File |
| image classification MobileNet | Image classification | image-classification-mobilenet.json |
| image classification ResNet | Image classification | image-classification-resnet.json |
| text classification Bayes | Text classification | text-classification-bayes.json |
| object detection YOLO | Object detection | object-detection-yolo.json |
The text classification Bayes model is demonstrated at the beginning of the article.
How does Pipeline work? Pipeline uses JSON to describe different phases, such as sample collection, data flow, model training/prediction, and the parameters related to each phase.
{
  "specVersion": "2.0",
  "type": "ImageClassification",
  "datasource": "https://cdn.jsdelivr.net/gh/imgcook/pipcook-script@5ec4cdf/scripts/image-classification/build/datasource.js?url=http://ai-sample.oss-cn-hangzhou.aliyuncs.com/image_classification/datasets/imageclass-test.zip",
  "dataflow": [
    "https://cdn.jsdelivr.net/gh/imgcook/pipcook-script@5ec4cdf/scripts/image-classification/build/dataflow.js?size=224&size=224"
  ],
  "model": "https://cdn.jsdelivr.net/gh/imgcook/pipcook-script@5ec4cdf/scripts/image-classification/build/model.js",
  "artifacts": [],
  "options": {
    "framework": "tfjs@3.8",
    "train": {
      "epochs": 10
    }
  }
}
As shown in the JSON above, Pipeline consists of version, Pipeline type, three types of scripts (dataSource, dataflow, and model), build plug-in artifacts, and Pipeline options. The supported Pipeline types include ImageClassification, TextClassification, and ObjectDetection. Additional support for other task types will be added in subsequent iterations of Pipcook. Each script delivers parameters through the URI query. The parameters of the model script can also be defined through options.train. Artifacts define a set of build plug-ins. Each build plug-in is called in sequence after training, which allows the conversion, packaging, and deployment of the output model. Options contain the definitions of framework and training parameters.
In this Pipeline example, the task type is ImageClassification. We have also defined the data source scripts, data processing scripts, and model scripts required for image classification. The data sources we have prepared are stored on OSS. The samples contain two categories, avatar and blurBackground. You can also replace them with custom datasets to train your classification model. We have defined the framework to run the Pipeline as tfjs 3.8 and the training parameters as 10 epochs.
Next, we can run it through Pipcook.
You need to meet several conditions to install and run Pipcook:
Then, execute the following command:
$ npm install @pipcook/cli –gWait until the installation is complete.
Save the Pipeline file as image-classification.json and then execute this command:
$ pipcook train ./image-classification.json -o my-pipcook
ℹ preparing framework
████████████████████████████████████████ 100% 133 MB/133 MB
ℹ preparing scripts
████████████████████████████████████████ 100% 1.12 MB/231 kB
████████████████████████████████████████ 100% 11.9 kB/3.29 kB
████████████████████████████████████████ 100% 123 kB/23.2 kB
ℹ preparing artifact plugins
ℹ initializing framework packages
ℹ running data source script
downloading dataset ...
unzip and collecting data...
ℹ running data flow script
ℹ running model script
Platform node has already been set. Overwriting the platform with [object Object].
2021-08-29 23:32:08.647853: I tensorflow/core/platform/cpu_feature_guard.cc:142] This TensorFlow binary is optimized with oneAPI Deep Neural Network Library (oneDNN) to use the following CPU instructions in performance-critical operations:  AVX2 FMA
To enable them in other operations, rebuild TensorFlow with the appropriate compiler flags.
loading model ...
Epoch 0/10 start
Iteration 0/20 result --- loss: 0.8201805353164673 accuracy: 0.5
Iteration 2/20 result --- loss: 0.03593956679105759 accuracy: 1
.....
Epoch 9/10 start
Iteration 0/20 result --- loss: 1.1920930376163597e-7 accuracy: 1
Iteration 2/20 result --- loss: 2.0116573296036222e-7 accuracy: 1
Iteration 4/20 result --- loss: 2.5331991082566674e-7 accuracy: 1
Iteration 6/20 result --- loss: 2.123416322774574e-7 accuracy: 1
Iteration 8/20 result --- loss: 1.937151523634384e-7 accuracy: 1
Iteration 10/20 result --- loss: 0.000002644990900080302 accuracy: 1
Iteration 12/20 result --- loss: 0.000003799833848461276 accuracy: 1
Iteration 14/20 result --- loss: 2.8312223321336205e-7 accuracy: 1
Iteration 16/20 result --- loss: 1.49011640360186e-7 accuracy: 1
Iteration 18/20 result --- loss: 5.438936341306544e-7 accuracy: 1
ℹ pipeline finished, the model has been saved at /Users/pipcook-playground/my-pipcook/model
We saved this example in the code repository, and you can also run it directly through the URL:
$ pipcook train https://cdn.jsdelivr.net/gh/alibaba/pipcook@main/example/pipelines/image-classification-mobilenet.json -o my-pipcookThe parameter -o indicates that our training workspace is defined in ./my-pipcook.
We can see from the log that Pipcook downloads some necessary dependent items during the preparation phase:
us-west for you to download if you are abroad. The file for each framework URL will only be downloaded once and will be obtained from the cache when it is used again.After preparation, datasource, dataflow, and model will run in sequence. Then, the training data will be pulled, the samples processed, and the model fed for training.
We define the Pipeline's training parameters with 10 epochs. Therefore, the model training stops after 10 epochs.
After the training stops, our training product is saved in the model folder in the workspace ./my-pipcook.
my-pipcook
    ├── cache
    ├── data
    ├── framework -> /Users/pipcook-playground/.pipcook/framework/c4903fcee957e1dbead6cc61e52bb599
    ├── image-classification.json
    ├── model
└── scripts
As you can see, the workspace contains all we need for this training. Among them, the framework is soft-chained to the framework directory of the workspace after the downloading is completed.
Here, we prepare a profile picture:

Execute the pipcook predict command to enter the model for category prediction. The two parameters are the workspace and the address of the image to be predicted:
$ pipcook predict ./my-pipcook -s ./avatar.jpg
ℹ preparing framework
ℹ preparing scripts
ℹ preparing artifact plugins
ℹ initializing framework packages
ℹ prepare data source
ℹ running data flow script
ℹ running model script
Platform node has already been set. Overwriting the platform with [object Object].
2021-08-30 00:08:28.070916: I tensorflow/core/platform/cpu_feature_guard.cc:142] This TensorFlow binary is optimized with oneAPI Deep Neural Network Library (oneDNN) to use the following CPU instructions in performance-critical operations:  AVX2 FMA
To enable them in other operations, rebuild TensorFlow with the appropriate compiler flags.
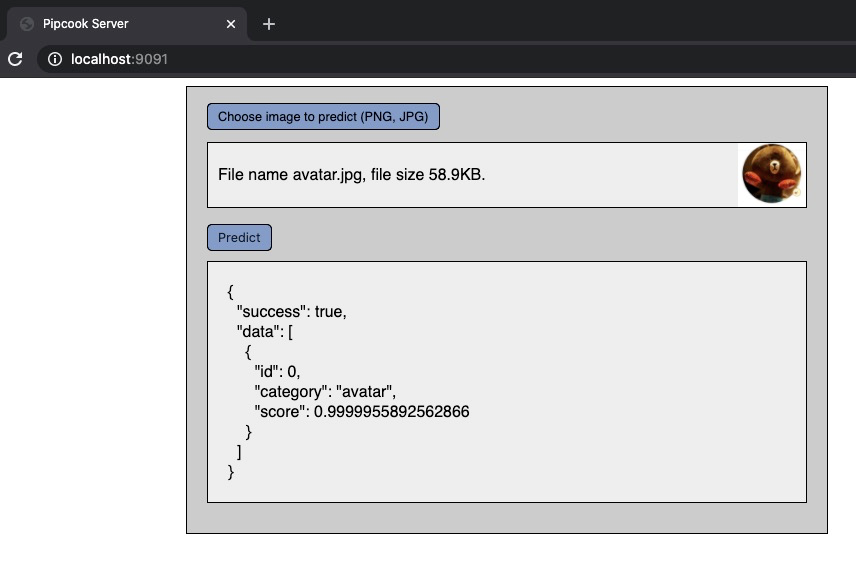
predict result: [{"id":0,"category":"avatar","score":0.9999955892562866}]
✔ Origin result:[{"id":0,"category":"avatar","score":0.9999955892562866}]
In prediction, we also prepare necessary dependencies, such as Framework, Scripts, and Artifact, since they are during the training process. They are ignored when dependencies already exist. This way, it can run directly even if we move the model to another device. Pipcook will prepare the running environment automatically. According to the output log, the model predicts that this type of image is avatar, and the reliability is 0.999.
The command to deploy the machine learning model through Pipcook is pipcook serve <workspace-path>.
$ pipcook serve ./my-pipcook
ℹ preparing framework
ℹ preparing scripts
ℹ preparing artifact plugins
ℹ initializing framework packages
Pipcook has served at: http://localhost:9091
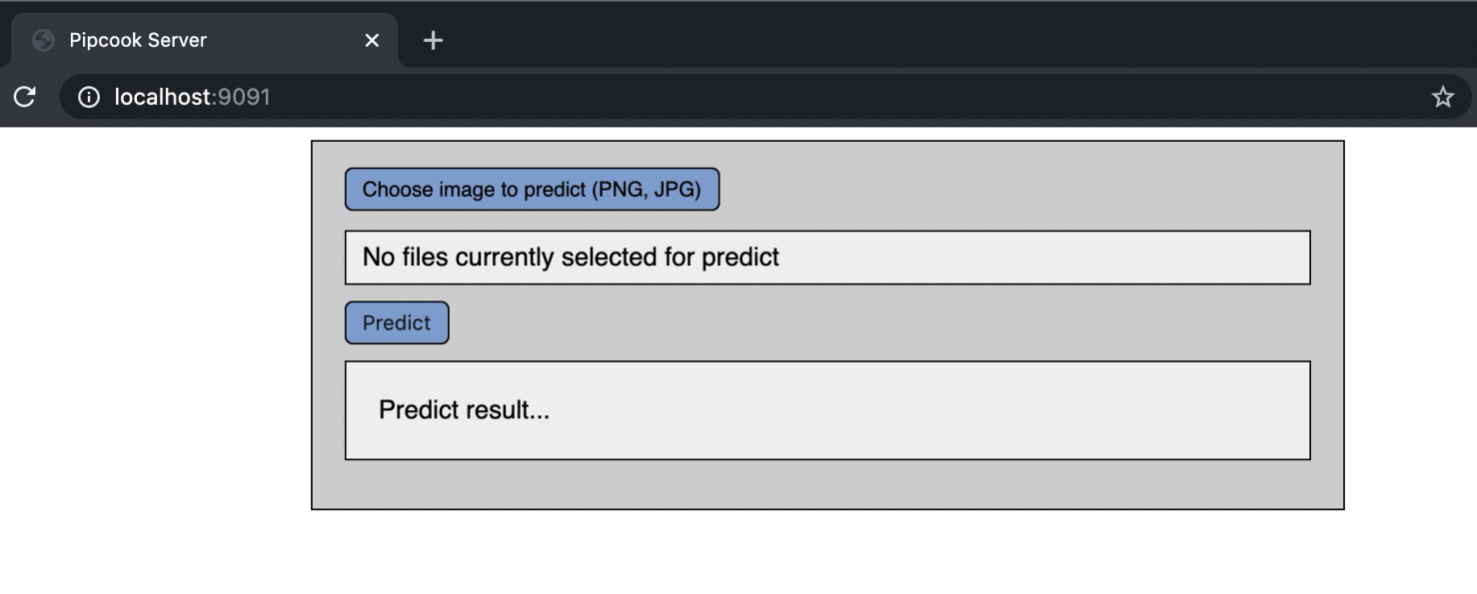
The default port is 9091, which can also be specified by the -p parameter. Then, we can access the interactive interface of the picture classification task by opening http://localhost:9091 through the browser for testing:

Select the picture and click the Predict button:

We can also directly access the prediction interface:
$ curl http://localhost:9091/predict -F "image=@/Users/pipcook-playground/avatar.jpg" -v
*   Trying ::1...
* TCP_NODELAY set
* Connected to localhost (::1) port 9091 (#0)
> POST /predict HTTP/1.1
> Host: localhost:9091
> User-Agent: curl/7.64.1
> Accept: */*
> Content-Length: 60452
> Content-Type: multipart/form-data; boundary=------------------------6917c53e808d414f
> Expect: 100-continue
>
< HTTP/1.1 100 Continue
* We are completely uploaded and fine
< HTTP/1.1 200 OK
< X-Powered-By: Express
< Content-Type: application/json; charset=utf-8
< Content-Length: 64
< ETag: W/"40-kCOJxkKqWqcndfPNbdrICzIiW+A"
< Date: Mon, 30 Aug 2021 03:59:49 GMT
< Connection: keep-alive
< Keep-Alive: timeout=5
<
* Connection #0 to host localhost left intact
{"success":true,"data":[{"id":0,"category":"avatar","score":1}]}* Closing connection 0
Pipcook provides different interactive interfaces based on the Pipeline types.
This was an introduction to Pipcook 2.0. If you are interested, you can click the Star, Issues, and Pull requests buttons on the website for more information.

66 posts | 3 followers
FollowAlibaba F(x) Team - June 20, 2022
Alibaba F(x) Team - June 22, 2021
Alibaba F(x) Team - December 10, 2020
Alibaba F(x) Team - December 31, 2020
Alibaba F(x) Team - December 14, 2020
Alibaba F(x) Team - December 16, 2021

66 posts | 3 followers
Follow Platform For AI
A platform that provides enterprise-level data modeling services based on machine learning algorithms to quickly meet your needs for data-driven operations.
Learn More Epidemic Prediction Solution
This technology can be used to predict the spread of COVID-19 and help decision makers evaluate the impact of various prevention and control measures on the development of the epidemic.
Learn More AI Acceleration Solution
Accelerate AI-driven business and AI model training and inference with Alibaba Cloud GPU technology
Learn More Web Hosting Solution
Explore Web Hosting solutions that can power your personal website or empower your online business.
Learn MoreMore Posts by Alibaba F(x) Team