By Zhenzi
The experiments in our frontend intelligent framework facilitate the implementation of handwritten digit recognition and image classification tasks. This article approaches the implementation from four aspects: environment setup, quick experiment, best practices, and principle analysis. After reading this article, I hope that you can start your own frontend intelligent project and use machine learning to address programming problems. Please be patient while reading this "lengthy" article.
First, laptops are recommended for beginners, because computations will not be heavy in the initial stage of the experiment. Laptops also offer better portability, allowing you to learn and practice anywhere at your own convenience. Second, current lightweight laptops are equipped with powerful GPUs, which can meet the requirements of general machine learning experiments. MacBook Pro users can consider laptops with AMD graphics cards, because, with the support of PlaidML (a machine learning backend provided by Intel), most Keras ops support GPU hardware acceleration. Note that PlaidML does not support many neural networks well, such as RNN. For more information about this, see the Issues section. On my own 16-inch Mac Book Pro, PlaidML delivers no hardware acceleration effect on RNN: The GPU monitor is not loaded, and the model compilation process seems never-ending.
Finally, desktops are always recommended, because you will have to process more and more complex models in learning and experiments, and half of these models take several days of training. Desktops feature better heat dissipation to ensure stable operations.
In a fully assembled desktop, the frequency of the CPU does not need to be very high. General medium- and low-end CPUs of AMD will be competent, as long as the number of cores reaches 6 and that of threads reaches 12. The memory is preferably 32 GB. 16 GB is enough most of the time, but may be easily stretched to its limits when massive amounts of data, especially images, are processed.
In terms of GPU, thanks to the improving ROCm, you can select an AMD GPU if you enjoy updates. Otherwise, you can always choose an Nvidia GPU. But note that, the higher the memory capacity and bandwidth the better, as long as your budget allows, especially the memory capacity. This is because large models with massive parameters simply cannot be trained without a large memory capacity.
In terms of hard drives, 512 GB high-speed SSD is the basic configuration to serve as the system drive. You can mount a hybrid hard drive for storing data and model parameters. In terms of the power supply, keep it large to cope with peaks. We may deploy multiple GPUs to speed up the training process and handle large amounts of parameters. Case is "home" to hardware, and is advised to have good electromagnetic shielding performance, thick and heavy plates, and a spacious chamber to facilitate heat dissipation. The watercooled build is another story.
The choice is easy to make: Choose DIY as you prefer, or buy a branded desktop or laptop with after-sales services as described above, depending on whether you wish to take more time to save some money, or to spend more money to save some time.
For Windows laptops, Anaconda can basically tackle all the problems in the R&D environment, and its NPM management tool is very convenient to use. If you have a bulging wallet and love DIYs, Ubuntu Linux is a better choice because Linux offers more native support to the technological ecosystem related to machine learning and hardly has compatibility problems.
The Ubuntu Linux system is recommended for desktops. Otherwise, with such a good graphics card, you might find it hard to resist the desire to play Windows games. An Ubuntu setup disk is easy to make, with a USB flash drive and just pressing the Enter key all the way through the process to get it done. After the operating system is ready, create a Workspace folder in your root directory (~) for storing code files, and then make a soft link to reference the hybrid hard drive as a data drive. Later, you can also save dataset folders of frameworks such as Keras and NLTK as soft links to the data drive.
Ubuntu is automatically updated, which is important, because many bugs in the framework and library are fixed in the update process. If problems such as prolonged unresponsiveness or network exceptions occur during this process, you can use an Alibaba Cloud origin to accelerate the process and then manually perform the update in the command line interface (CLI).
Here are several useful links to get you set up Python on your device.
Python programming tutorial: https://docs.python.org/3.8/tutorial/index.html
MacOS: https://www.python.org/ftp/python/3.7.7/python-3.7.7-macosx10.9.pkg
Windows: https://www.python.org/ftp/python/3.7.7/python-3.7.7-embed-amd64.zip
https://docs.python.org/3.8/installing/index.html
Node tutorial: https://nodejs.org/
MacOS: https://nodejs.org/dist/v12.16.2/node-v12.16.2.pkg
Windows:
Linux: 64-bit
Download page: https://nodejs.org/download/
Module website: https://www.npmjs.com/
Installation method:
$ npm install -g @pipcook/pipcook-cliEnsure that your Python version is 3.6 or later, and your Node.js version is the latest stable version of 12.x or later. Run the preceding installation command to set up a complete development environment for Pipcook on your computer.
Command line:
$ mkdir pipcook-example && cd pipcook-example
$ pipcook init
$ pipcook board
Output:
> @pipcook/pipcook-board-server@1.0.0 dev /Users/zhenyankun.zyk/work/node/pipcook/example/.server
> egg-bin dev
[egg-ts-helper] create typings/app/controller/index.d.ts (2ms)
[egg-ts-helper] create typings/config/index.d.ts (9ms)
[egg-ts-helper] create typings/config/plugin.d.ts (2ms)
[egg-ts-helper] create typings/app/service/index.d.ts (1ms)
[egg-ts-helper] create typings/app/index.d.ts (1ms)
2020-04-16 11:52:22,053 INFO 26016 [master] node version v12.16.2
2020-04-16 11:52:22,054 INFO 26016 [master] egg version 2.26.0
2020-04-16 11:52:22,839 INFO 26016 [master] agent_worker#1:26018 started (782ms)
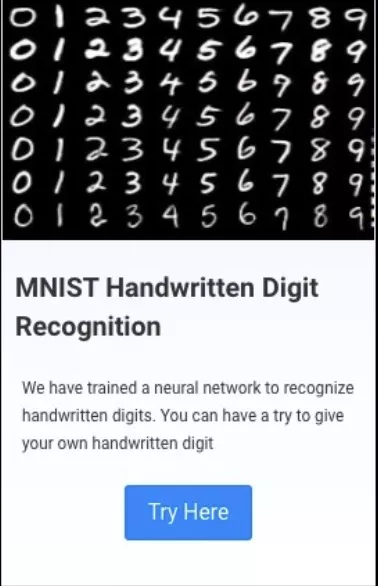
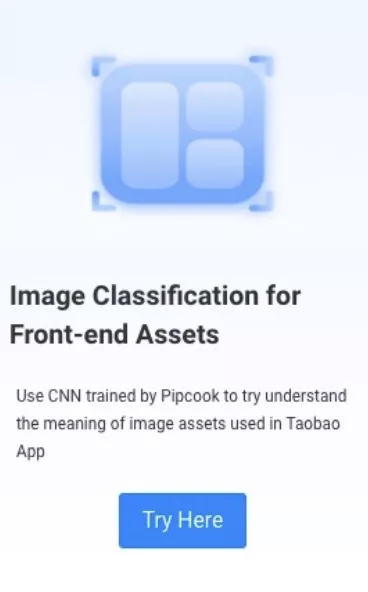
2020-04-16 11:52:24,262 INFO 26016 [master] egg started on http://127.0.0.1:7001 (2208ms)To perform a handwritten digit recognition experiment, choose MNIST Handwritten Digit Recognition > Try Here. To perform an image classification experiment, choose Image Classification for Front-end Assets > Try Here.
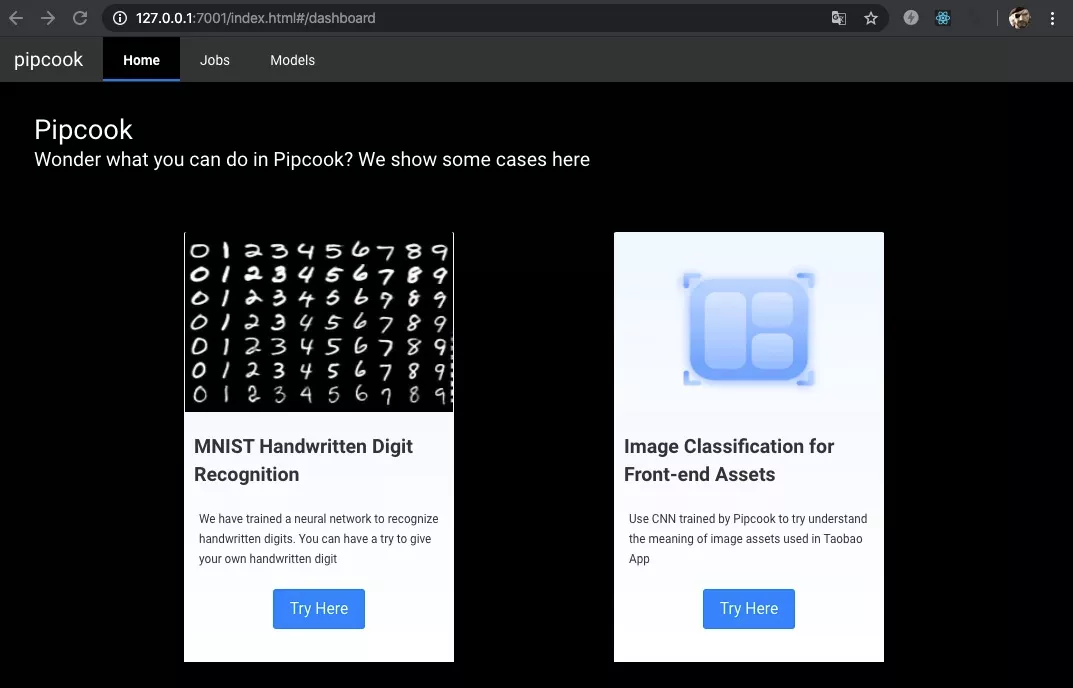
Enter the handwritten digit recognition experiment from a browser.

Perform the following steps:
Enter the image classification experiment from a browser.
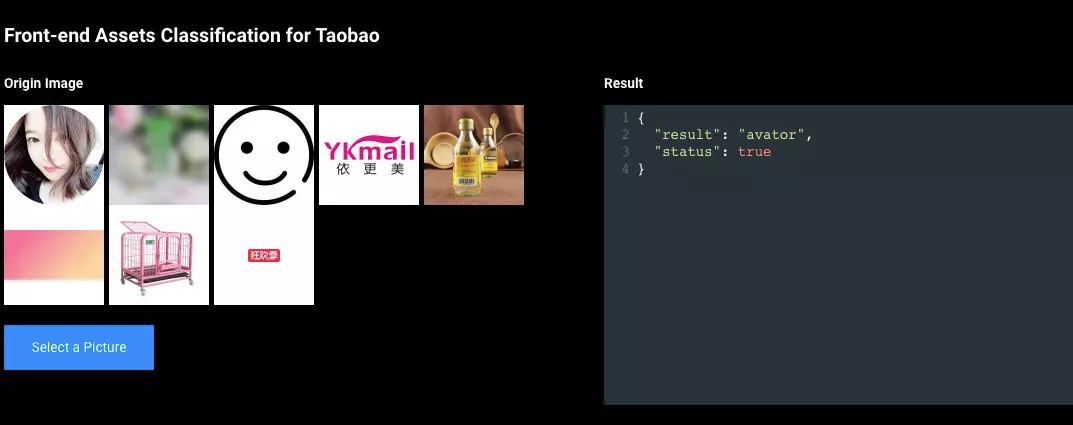
Select an image, and the following interface will appear.

The interface prompts that the prediction is in process. The model will be loaded during the process, and image classification will be predicted. When you select the "YKmail" logo and wait for a while, the predicted JSON data structure will be displayed in the "Result" area.
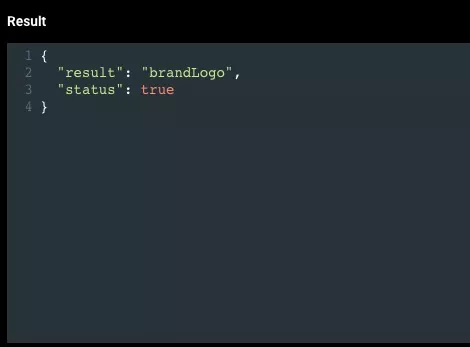
The model can recognize that this image is a "brandLogo".
The following describes how to transform existing projects; it's like learning painting or calligraphy. Beginning from copying can smooth out the learning curve. Therefore, you can start with transforming an existing Pipcook MNIST pipeline and use this process to implement a control recognition model of your own. After completing the subsequent tutorial, you will have a model that can recognize "buttons" from images.
If you have read my previous article, you may already have an understanding of the basic principles of imgcook.com: Use machine vision to refactor the frontend code of a design draft. The problem defined here is to refactor the code of a design draft by using machine vision. However, this problem is too broad and can be reduced to recognizing controls using machine vision, as a beginner-level practice.
To recognize controls, first you need to define them. In computer programming, a control (or component, widget) is a graphical user interface element whose information arrangement can be changed by users, such as windows or text boxes. Control definition aims to provide a single point of interaction for the direct manipulation of given data. A control is a basic visual building block that is contained in an app and controls all the data processed by the program and the interactive manipulations on the data (quoted from Wikipedia).
According to the problem definition, controls belong to graphical user interfaces, are at the element layer, and provide separate interaction points. Therefore, an element that provides a separate interaction point in a graphical interface is a control. For machine vision models, "to find elements in a graphical interface" is similar to "to find elements in images", and the task of finding elements in images can be fulfilled by a target detection model.
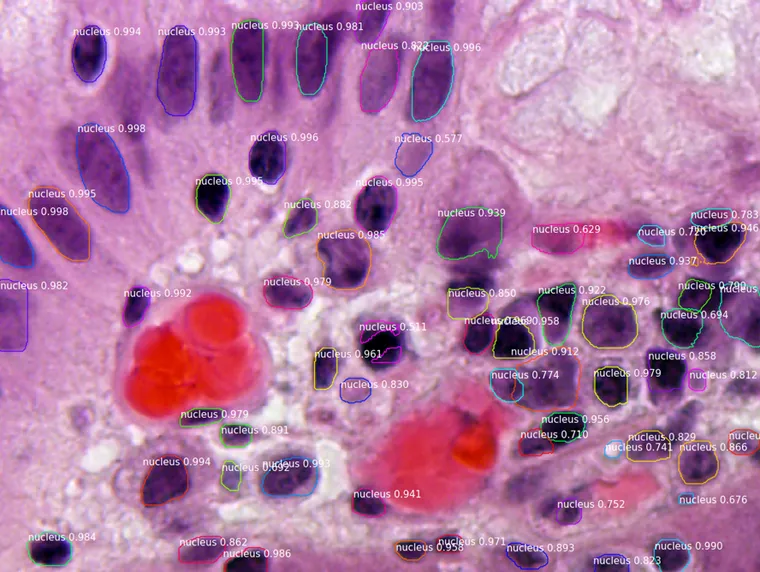
Segmenting Nuclei in Microscopy Images
Mask R-CNN is recommended for such tasks. You can download Mask R-CNN from https://github.com/matterport/Mask_RCNN. Mask R-CNN performs semantic cell segmentation and then classifies the segmented images to fulfill the target detection task. To sum up, the target detection process of Mask R-CNN is as follows: Mask R-CNN generates candidate regions (semantic segmentation) by using the PRN network, and then classifies the candidate regions (mask prediction through a multi-task loss). Semanticization is actually to determine the relationship between data based on semantics. For example, in image matting by using machine learning, the arms, legs and hair threads of figures in an image must be retained. Here, semantic segmentation comes into play to determine which parts belong to the figures.

Nevertheless, unlike image classification of handwritten digit recognition which is relatively simple, fulfilling a machine vision task of semantic segmentation is not easy. Mask R-CNN segments images into blocks by using bounding boxes, and then classifies each block. Good classification of images is equivalent to the entire task half done. Let's get started.
Data organization is to prepare annotated samples for a model based on the problem definition and training tasks. As previously discussed in "Frontend Intelligence: Path of Thinking Transformation", a so-called intelligent development method tells a machine annotated data including the correct answers (positive samples) and the wrong answers (negative samples). Through analysis and understanding of the data, the machine learns how to work out the correct answers. This is why we say data organization is critical, and only high-quality data can help machines learn the correct way of solving problems.
By analyzing the data organization pattern of MNIST datasets, you can quickly reuse MNIST samples.
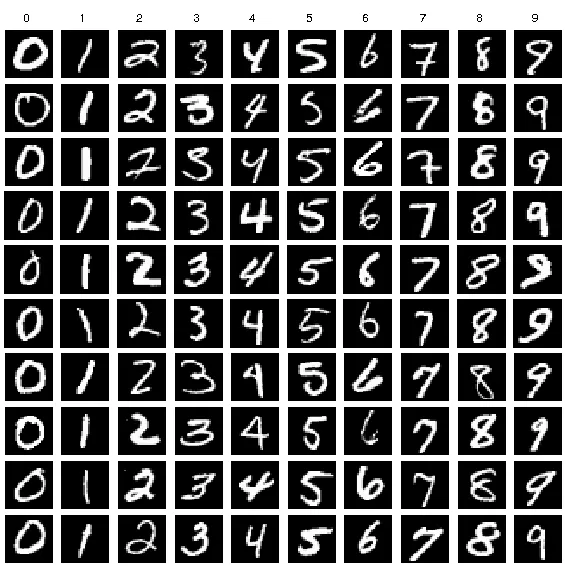
The training samples of MNIST handwritten digit recognition are generated by writing digits by hand and then attaching labels to these digits, such as the "0" labels attached to the "0" digits, and the "1" labels attached to the "1" digits. In this way, the model gets to know what the image corresponding to the "0" label looks like after proper training.
Second, what are Pipcook's requirements on data organization during model training? You can find the answer at https://github.com/alibaba/pipcook/blob/master/example/pipelines/mnist-image-classification.json
{
  "plugins": {
    "dataCollect": {
      "package": "@pipcook/plugins-mnist-data-collect",
      "params": {
        "trainCount": 8000,
        "testCount": 2000
      }
},
Based on @pipcook/plugins-mnist-data-collect, you can find the following at https://github.com/alibaba/pipcook/blob/master/packages/plugins/data-collect/mnist-data-collect/src/index.ts
const mnist = require('mnist');Then you will find the following at https://github.com/alibaba/pipcook/blob/master/packages/plugins/data-collect/mnist-data-collect/package.json
"dependencies": {
    "@pipcook/pipcook-core": "^0.5.9",
    "@tensorflow/tfjs-node-gpu": "1.7.0",
    "@types/cli-progress": "^3.4.2",
    "cli-progress": "^3.6.0",
    "jimp": "^0.10.0",
    "mnist": "^1.1.0"
  },
You can find related information at https://www.npmjs.com/package/mnist
As indicated by the information in the npm package, you will find the source code at https://github.com/cazala/mnist. In the Readme file, you can find the following:
The goal of this library is to provide an easy-to-use way for training and testing MNIST digits for neural networks (either in the browser or node.js). It includes 10000 different samples of mnist digits. I built this in order to work out of the box with Synaptic. You are free to create any number (from 1 to 60 000) of different examples c via MNIST Digits data loader
The preceding information indicates that you can use MNIST Digits data loader to create different samples. Click the following link to find detailed steps: https://github.com/ApelSYN/mnist_dl
For node.js: npm install mnist_dl
Download from LeCun's website and unpack two files:
train-images-idx3-ubyte.gz:  training set images (9912422 bytes)
train-labels-idx1-ubyte.gz:  training set labels (28881 bytes)
You need to place these files in the ./data directory.
First, clone the project.
git clone https://github.com/ApelSYN/mnist_dl.git
Cloning to 'mnist_dl'...
remote: Enumerating objects: 36, done.
remote: Total 36 (delta 0), reused 0 (delta 0), pack-reused 36
Expanding objects: 100% (36/36), completed.
Run the npm install command for the project and then create a data source and the destination directory of datasets.
# Data source directory, used to download data of LeCun
$ mkdir data
# Data set directory, used to store JSON data processed by mnist_dl
$ mkdir digits
Then download data from the website of Yann LeCun, one of the top machine learning experts, and save the data to the ./data directory.
http://yann.lecun.com/exdb/mnist/
Image data of MNIST training samples: train-images-idx3-ubyte.gz
Label data of MNIST training samples: train-labels-idx1-ubyte.gz
Perform a test by using mnist_dl.
node mnist_dl.js --count 10000
DB digits Version: 2051
Total digits: 60000
x x y: 28 x 28
60000
47040000
Pass 0 items...
Pass 1000 items...
Pass 2000 items...
Pass 3000 items...
Pass 4000 items...
Pass 5000 items...
Pass 6000 items...
Pass 7000 items...
Pass 8000 items...
Pass 9000 items...
Finish processing 10000 items...
Start make "0.json with 1001 images"
Start make "1.json with 1127 images"
Start make "2.json with 991 images"
Start make "3.json with 1032 images"
Start make "4.json with 980 images"
Start make "5.json with 863 images"
Start make "6.json with 1014 images"
Start make "7.json with 1070 images"
Start make "8.json with 944 images"
Start make "9.json with 978 images"
Clone the MNIST project and perform tests after replacing the datasets.
$ git clone https://github.com/cazala/mnist.git
Cloning to 'mnist'...
remote: Enumerating objects: 143, done.
remote: Total 143 (delta 0), reused 0 (delta 0), pack-reused 143
Receiving objects: 100% (143/143), 18.71 MiB | 902.00 KiB/s, completed.
Processing delta: 100% (73/73), completed.

$ npm install
$ cd src
$ cd digits
$ ls
0.json 1.json 2.json 3.json 4.json 5.json 6.json 7.json 8.json 9.json
Next, try the raw dataset. Open the mnist/visualizer.html file in the browser, and the following interface will be displayed.
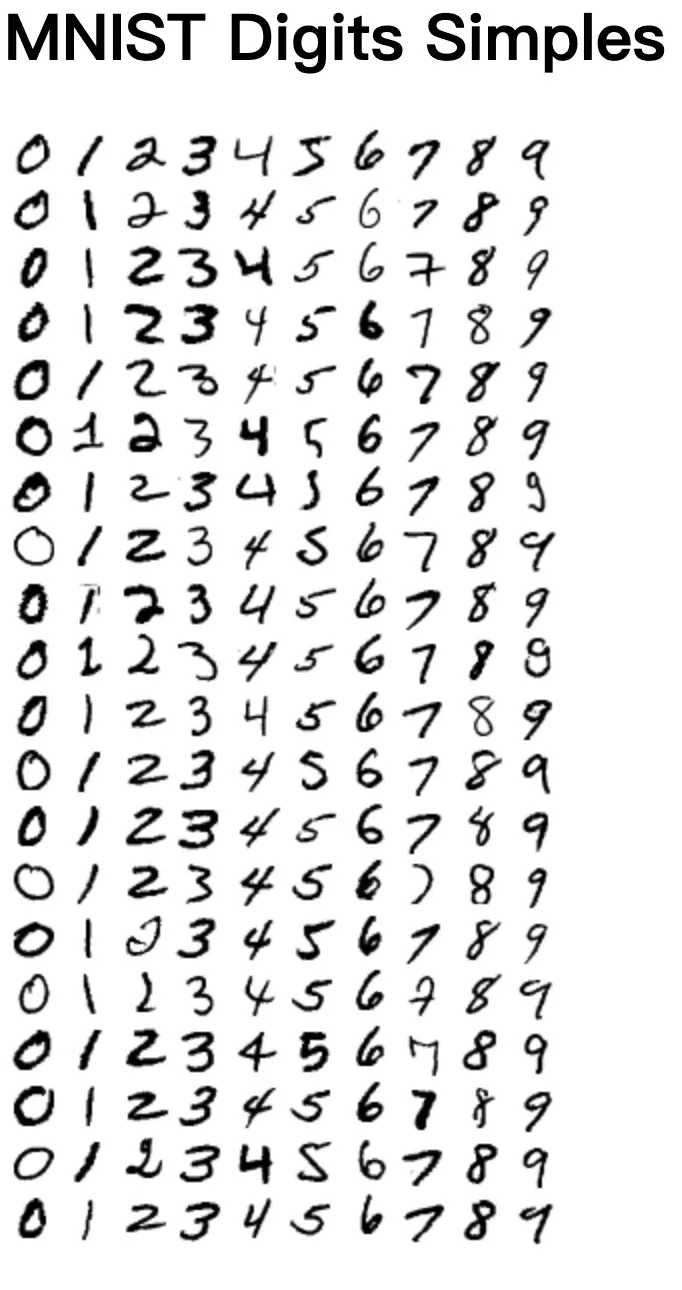

Then replace the data file with the file that you just processed.
# Enter the working directory
$ cd src
# Back up data
$ mv digits digits-bk
# Copy the previously processed JSON data
$ cp -R ../mnist_dl/digits ./
$ ls
digits    digits-bk mnist.js
Forcibly refresh the mnist/visualizer.html file in the browser, and you can see that the generated file is fully available. Therefore, a solution is gradually taking shape: You can implement your own image classification and detection model by replacing the content in the original MNIST file and in the MNIST labels.
To replace files, use the following data:
Image data of MNIST training samples: train-images-idx3-ubyte.gz
Label data of MNIST training samples: train-labels-idx1-ubyte.gz
To make them custom datasets, first you need to know their formats. The "xx-xx-idx3-ubyte" text in the file name indicates that the file is organized in the IDX format and in the UByte encoding.

In the train-images.idx3-ubyte file, the 32-bit integer at offset 0 is a magic number, the integer at offset 4 is the total number of images (the number of image samples), the integers at offsets 8 and 12 are the image dimensions (height and width of an image in pixels), and the other integers at and after offset 16 are the pixel information (the pixel values of the images stored, within a range of 0 to 255). After analysis, you only need to obtain the magic number and the number of images in order, obtain the height and width of an image, and then read the images pixel by pixel. Therefore, the content of the digitsLoader.js file in the lib folder of the MNIST_DL project is as follows:
stream.on('readable', function () {
        let buf = stream.read();
        if (buf) {
            if (ver ! = 2051) {
                ver = buf.readInt32BE(0);
                console.log(`DB digits Version: ${ver}`);
                digitCount = buf.readInt32BE(4);
                console.log(`Total digits: ${digitCount}`);
                x = buf.readInt32BE(8);
                y = buf.readInt32BE(12);
                console.log(`x x y: ${x} x ${y}`);
                start = 16;
            }
            for (let i = start; i< buf.length; i++) {
                digits.push(buf.readUInt8(i));
            }
            start = 0;
        }
});
Things then become easy to understand. You only need to perform the "inverse operations" of the process on the images, to organize the prepared image samples into such a format in the reversed order. Now you know how the data is organized. Then, how are samples produced?
As explained in the problem analysis part, "image classification" lays the foundation of control recognition. Like labeling the handwritten number "0" with the number "0", you also need to label control samples. Sample labeling is tedious work. The rise of machine learning has created a new job role: sample labeling engineers, who attach labels to images manually.
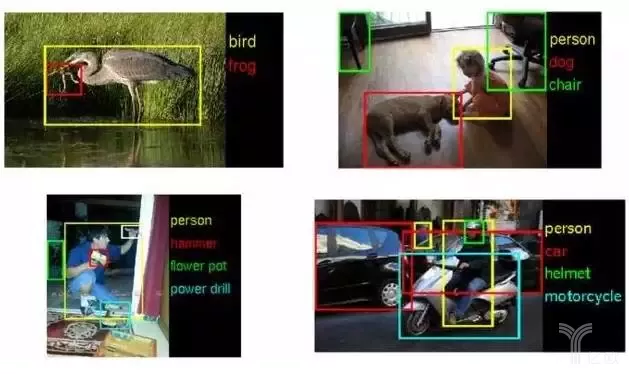
Labeled samples can be organized into datasets and populated into models for training. In this sense, good labeling quality (to accurately pass information to the model) and multi-angle (to describe data from different perspectives and under different conditions) datasets lay the foundation for high-quality models. In subsequent sections, we will introduce the sample generator in Pipcook, which will become open-source soon. Now, let's take a look at the sample generation process first.
Web controls are written in the form of HTML tags, and then HTML pages are rendered into images by browsers. This process and the popular Puppeteer frontend tool can be used to automatically generate samples. Here we use Bootstrap to write a simple demo for the convenience of this explanation.
<link rel="stylesheet" href="t1.min.css">
<meta name="viewport" content="width=device-width, initial-scale=1, maximum-scale=1, user-scalable=no">
<div align="middle">
<p>
    <button class="btn btn-primary">Primary</button>
</p>
<p>
    <button class="btn btn-info">Info</button>
</p>
<p>
    <button class="btn btn-success">Success</button>
</p>
<p>
    <button class="btn btn-warning">Warning</button>
</p>
<p>
    <button class="btn btn-danger">Danger</button>
</p>
<p>
    <button class="btn btn-lg btn-primary" type="button">Large button</button>
</p>
<p>
    <button class="btn btn-primary" type="button">Default button</button>
</p>
<p>
    <button class="btn btn-sm btn-primary" type="button">Mini button</button>
</p>
<p>
    <a href="#" class="btn btn-xs btn-primary disabled">Primary link disabled state</a>
</p>
<p>
    <button class="btn btn-lg btn-block btn-primary" type="button">Block level button</button>
</p>
<p>
    <button type="button" class="btn btn-primary">Primary</button>
</p>
<p>
    <button type="button" class="btn btn-secondary">Secondary</button>
</p>
<p>
    <button type="button" class="btn btn-success">Success</button>
</p>
<p>
    <button type="button" class="btn btn-danger">Danger</button>
</p>
<p>
    <button type="button" class="btn btn-warning">Warning</button>
</p>
<p>
    <button type="button" class="btn btn-info">Info</button>
</p>
<p>
    <button type="button" class="btn btn-light">Light</button>
</p>
<p>
    <button type="button" class="btn btn-dark">Dark</button>
</p>
</div>
Open the HTML file in a browser and use a debugging tool to simulate the display on an iPhoneX mobile phone.
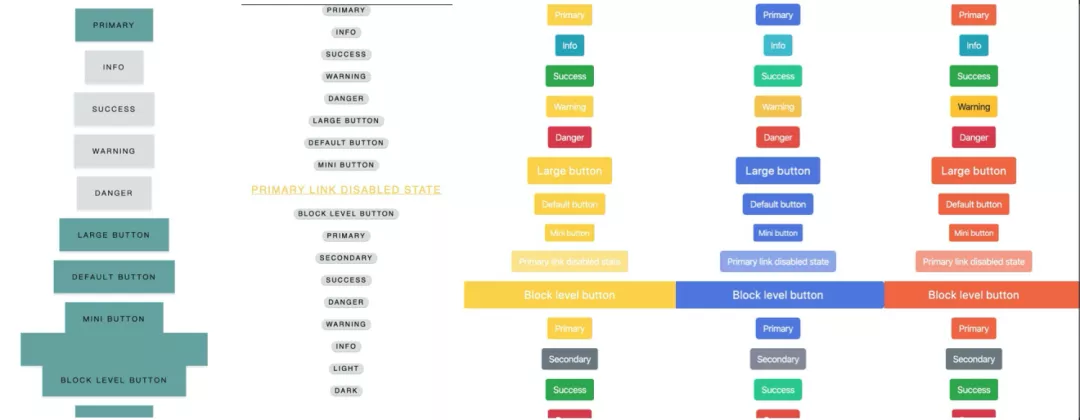
You can find many different themes at https://startbootstrap.com/themes/. Use these themes to diversify your samples, so that the model can identify the features of the "buttons" from images.
However, such manual screenshotting is less efficient and less accurate, so it is show time for Puppeteer. First, initialize a node.js project and install it.
$ mkdir pupp && cd pupp
$ npm init --yes
$ npm i puppeteer --save
# or "yarn add puppeteer"
For the purpose of image processing, you need to install GM, which is available at https://www.npmjs.com/package/gm. You can find the GM installation method at http://www.graphicsmagick.org/
$ brew install graphicsmagick
$ npm i gm ®Csave
After the installation is complete, open the IDE to add a shortcut.js file (all source code is attached to the end of this article, as usual).
const puppeteer = require("puppeteer");
const fs = require("fs");
const Q = require("Q");
function delay(ms) {
  var deferred = Q.defer();
  setTimeout(deferred.resolve, ms);
  return deferred.promise;
}
const urls = [
  "file:///Users/zhenyankun.zyk/work/node/pipcook/pupp/htmlData/page1.html",
  "file:///Users/zhenyankun.zyk/work/node/pipcook/pupp/htmlData/page2.html",
  "file:///Users/zhenyankun.zyk/work/node/pipcook/pupp/htmlData/page3.html",
  "file:///Users/zhenyankun.zyk/work/node/pipcook/pupp/htmlData/page4.html",
  "file:///Users/zhenyankun.zyk/work/node/pipcook/pupp/htmlData/page5.html",
];
(async () => {
  // Launch a headful browser so that we can see the page navigating.
  const browser = await puppeteer.launch({
    headless: true,
    args: ["--no-sandbox", "--disable-gpu"],
  });
  const page = await browser.newPage();
  await page.setViewport({
    width: 375,
    height: 812,
    isMobile: true,
  }); //Custom Width
  //start shortcut every page
  let counter = 0;
  for (url of urls) {
    await page.goto(url, {
      timeout: 0,
      waitUntil: "networkidle0",
    });
    await delay(100);
    let btnElements = await page.$$("button");
    for (btn of btnElements) {
      const btnData = await btn.screenshot({
        encoding: "binary",
        type: "jpeg",
        quality: 90,
      });
      let fn = "data/btn" + counter + ".jpg";
      Q.nfcall(fs.writeFileSync, fn, btnData);
      counter++;
    }
  }
  await page.close();
  await browser.close();
})();
The preceding scripts cyclically render the buttons of all the five themes and take screenshots of each button with the help of Puppeteer.
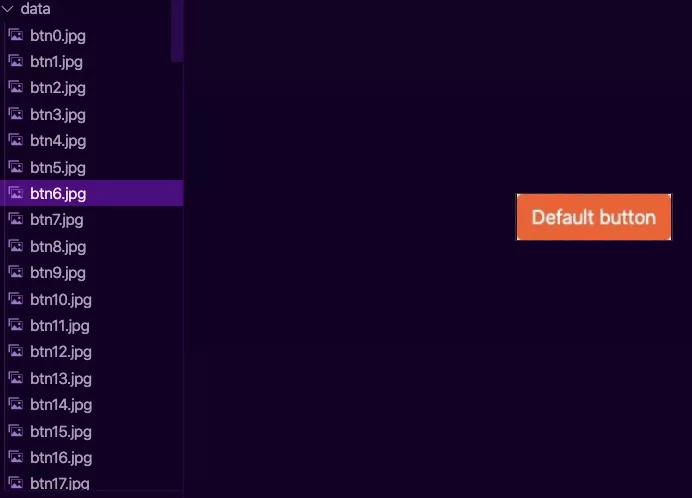
In this example, only more than 80 images are generated. This is when the GM installed earlier comes into play: https://www.npmjs.com/package/gm
Process the images by using the GM library, so that the images are consistent with MNIST's handwritten digit images. Then, add some random text to the images and let the model ignore the features of the text. The principle employed here is to "break the rules". The model remembers button features in a similar way to how people recognize things. People remember repeated elements to identify things. For example, if I want to remember a person, I need to remember his invariant features, such as eye size, pupil color, eyebrow distance, face width, and cheekbone shape, instead of what clothes or shoes the person wears. If clothes and shoes change, it is difficult for you to recognize the person again.
Next, let's take a look at the specific image processing code. Please note that no enhancement is implemented here. But when you apply this method in a real-life scenario, always try to draw inferences and generate more images from one. This is the "data enhancement" method.
const gm = require("gm");
const fs = require("fs");
const path = require("path");
const basePath = "./data/";
const chars = [
  "0",
  "1",
  "2",
  "3",
  "4",
  "5",
  "6",
  "7",
  "8",
  "9",
  "A",
  "B",
  "C",
  "D",
  "E",
  "F",
  "G",
  "H",
  "I",
  "J",
  "K",
  "L",
  "M",
  "N",
  "O",
  "P",
  "Q",
  "R",
  "S",
  "T",
  "U",
  "V",
  "W",
  "X",
  "Y",
  "Z",
];
let randomRange = (min, max) => {
  return Math.random() * (max - min) + min;
};
let randomChars = (rangeNum) => {
  let tmpChars = "";
  for (let i = 0; i < rangeNum; i++) {
    tmpChars += chars[Math.ceil(Math.random() * 35)];
  }
  return tmpChars;
};
// Obtain all files (arrays) in this folder.
const files = fs.readdirSync(basePath);
for (let file of files) {
  let filePath = path.join(basePath, file);
  gm(filePath)
    .quality(100)
    .gravity("Center")
    .drawText(randomRange(-5, 5), 0, randomChars(5))
    .channel("Gray")
    // .monochrome()
    .resize(28)
    .extent(28, 28)
    .write(filePath, function (err) {
      if (!err) console.log("At " + filePath + " done! ");
      else console.log(err);
    });
}
You can achieve data enhancement by slightly modifying the following code.
for (let file of files) {
  for (let i = 0; i < 3; i++) {
    let rawfilePath = path.join(basePath, file);
    let newfilePath = path.join(basePath, i + file);
    gm(rawfilePath)
      .quality(100)
      .gravity("Center")
      .drawText(randomRange(-5, 5), 0, randomChars(5))
      .channel("Gray")
      // .monochrome()
      .resize(28)
      .extent(28, 28)
      .write(newfilePath, function (err) {
        if (! err) console.log("At " + newfilePath + " done! ");
        else console.log(err);
      });
  }
}
The number of images is now tripled.
After you have completed data enhancement, you can organize the images into an idx-ubyte file to so that mnist-ld can process the file properly. To do this, you need to perform special processing on the images, which includes extracting the pixel information and processing the information into data vectors similar to MNIST datasets. It is very complicated to carry out such processing in JavaScript, but Python is good at this aspect. Solving problems in the Python technical ecosystem cannot be done without Boa.
Boa is the underlying core function developed for Pipcook. It is responsible for bridging the Python technical ecosystem with JavaScript, and features almost zero performance loss throughout the process.
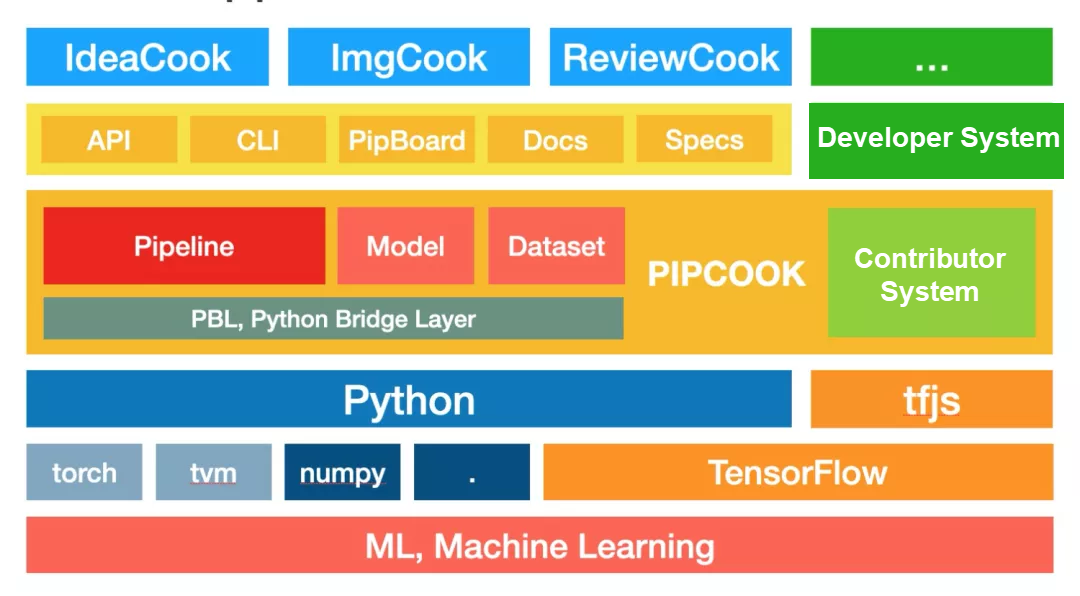
First, install Boa.
$ npm install @pipcook/boa ®CsaveSecond, install opencv-python.
$ ./node_modules/@pipcook/boa/.miniconda/bin/pip install opencv-python pillowFinally, let's see how to use Boa to bridge Python with JavaScript.
const boa = require("@pipcook/boa");
// Introduce some built-in data structures in Python.
const { int, tuple, list } = boa.builtins();
// Introduce OpenCV.
const cv2 = boa.import("cv2");
const np = boa.import("numpy");
const Image = boa.import("PIL.Image");
const ImageFont = boa.import("PIL.ImageFont");
const ImageDraw = boa.import("PIL.ImageDraw");
let img = np.zeros(tuple([28, 28, 3]), np.uint8);
img = Image.fromarray(img);
let draw = ImageDraw.Draw(img);
draw.text(list([0, 0]), "Shadow");
img.save("./test.tiff");
Check out the Python code.
import numpy as np
import cv2
from PIL import ImageFont, ImageDraw, Image
img = np.zeros((150,150,3),np.uint8)
img = Image.fromarray(img)
draw = ImageDraw.Draw(img)
draw.text((0,0),"Shadow")
img.save()
Main differences between Python code and JavaScript code are as follows:
1. Method to import packages:
Python: import cv2
JavaScript: const cv2 = boa.import("cv2");
Python:
from PIL import ImageFont, ImageDraw, ImageJavaScript:
const Image = boa.import("PIL.Image");
const ImageFont = boa.import("PIL.ImageFont");
const ImageDraw = boa.import("PIL.ImageDraw");
2. Use of data structures such as Tuple:
Python: (150, 150, 3)
JavaScript: tuple([28, 28, 3])
Using the preceding two methods, you can easily transplant an open-source machine learning project in github.com to Pipcook and Boa.
Exercises:
#/usr/bin/env python2.7
#coding:utf-8
import os
import cv2
import numpy
import sys
import struct
DEFAULT_WIDTH = 28
DEFAULT_HEIGHT = 28
DEFAULT_IMAGE_MAGIC = 2051
DEFAULT_LBAEL_MAGIC = 2049
IMAGE_BASE_OFFSET = 16
LABEL_BASE_OFFSET = 8
def usage_generate():
    print "python mnist_helper generate path_to_image_dir"
    print "\t path_to_image_dir/subdir, subdir is the label"
    print ""
    pass
def create_image_file(image_file):
    fd = open(image_file, 'w+b')
    buf = struct.pack(">IIII", DEFAULT_IMAGE_MAGIC, 0, DEFAULT_WIDTH, DEFAULT_HEIGHT)
    fd.write(buf)
    fd.close()
    pass
def create_label_file(label_file):
    fd = open(label_file, 'w+b')
    buf = struct.pack(">II", DEFAULT_LBAEL_MAGIC, 0)
    fd.write(buf)
    fd.close()
    pass
def update_file(image_file, label_file, image_list, label_list):
    ifd = open(image_file, 'r+')
    ifd.seek(0)
    image_magic, image_count, rows, cols = struct.unpack(">IIII", ifd.read(IMAGE_BASE_OFFSET))
    image_len = rows * cols
    image_offset = image_count * rows * cols + IMAGE_BASE_OFFSET
    ifd.seek(image_offset)
    for image in image_list:
        ifd.write(image.astype('uint8').reshape(image_len).tostring())
    image_count += len(image_list)
    ifd.seek(0, 0)
    buf = struct.pack(">II", image_magic, image_count)
    ifd.write(buf)
    ifd.close()
    lfd = open(label_file, 'r+')
    lfd.seek(0)
    label_magic, label_count = struct.unpack(">II", lfd.read(LABEL_BASE_OFFSET))
    buf = ''.join(label_list)
    label_offset = label_count + LABEL_BASE_OFFSET
    lfd.seek(label_offset)
    lfd.write(buf)
    lfd.seek(0)
    label_count += len(label_list)
    buf = struct.pack(">II", label_magic, label_count)
    lfd.write(buf)
    lfd.close()
def mnist_generate(image_dir):
    if not os.path.isdir(image_dir):
        raise Exception("{0} is not exists!".format(image_dir))
    image_file = os.path.join(image_dir, "user-images-ubyte")
    label_file = os.path.join(image_dir, "user-labels-ubyte")
    create_image_file(image_file)
    create_label_file(label_file)
    for i in range(10):
        path = os.path.join(image_dir, "{0}".format(i))
        if not os.path.isdir(path):
            continue
        image_list = []
        label_list = []
        for f in os.listdir(path):
            fn = os.path.join(path, f)
            image = cv2.imread(fn, 0)
            w, h = image.shape
            if w and h and (w <> 28) or (h <> 28):
                simg = cv2.resize(image, (28, 28))
                image_list.append(simg)
                label_list.append(chr(i))
        update_file(image_file, label_file, image_list, label_list)
    print "user data generate successfully"
    print "output files: \n\t {0}\n\t {1}".format(image_file, label_file)
pass
The above is a tool written in Python, which organizes MNIST datasets in the IDX format. After the datasets are processed in the mnist-ld described in the preceding section, they can be replaced with the generated datasets.
The sample platform is more convenient for sample enhancement.
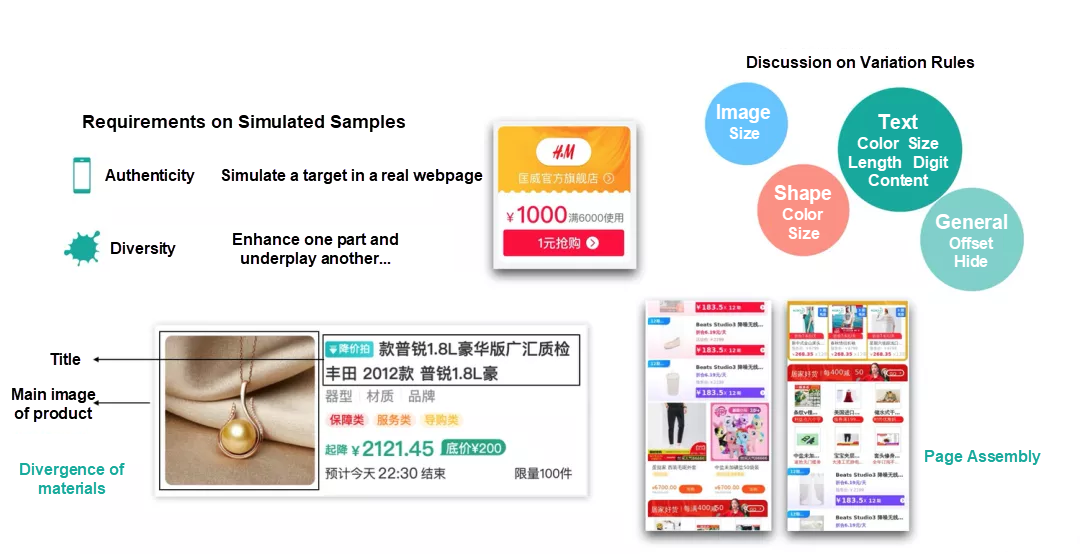
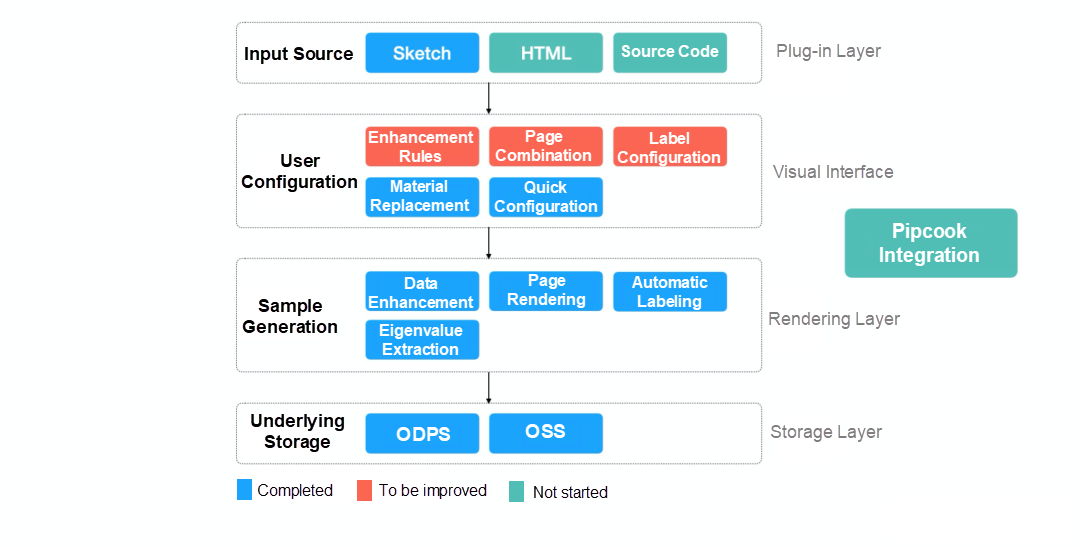
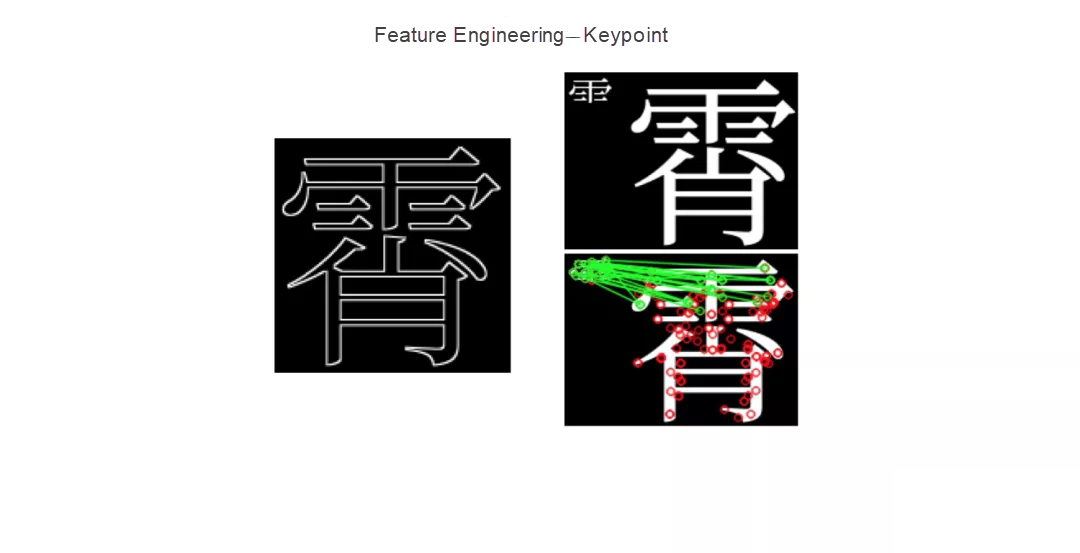
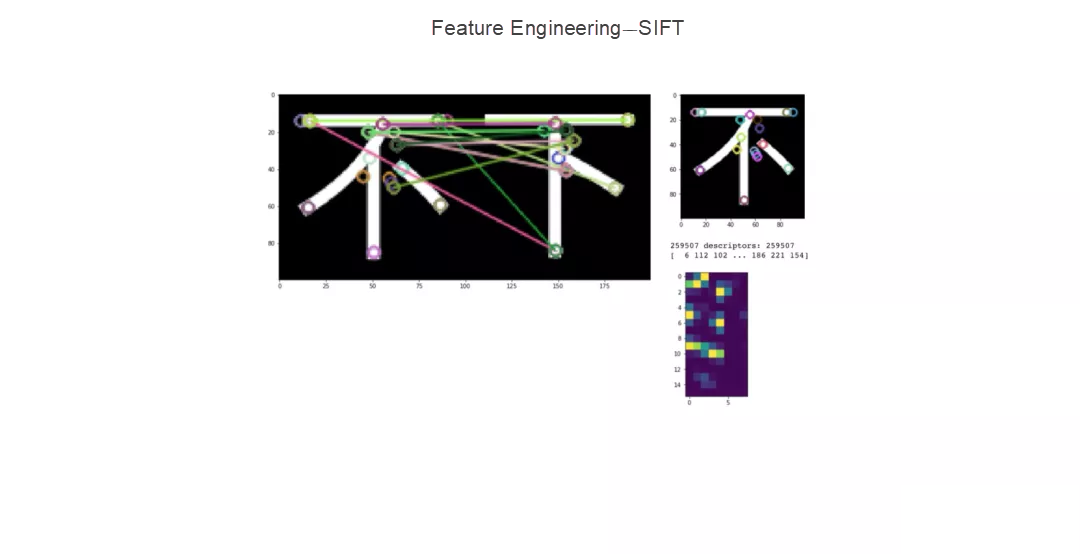
Feature analysis and processing help better optimize datasets. To work out image features, you can use Keypoint, scale-invariant feature transform (SIFT), and other algorithms to represent images. Such high-order feature algorithms have their advantages. For example, SIFT can handle rotation and Keypoint can handle deformation.
Pipeline configuration:
{
  "plugins": {
    "dataCollect": {
      "package": "@pipcook/plugins-mnist-data-collect",
      "params": {
        "trainCount": 8000,
        "testCount": 2000
      }
    },
    "dataAccess": {
      "package": "@pipcook/plugins-pascalvoc-data-access"
    },
    "dataProcess": {
      "package": "@pipcook/plugins-image-data-process",
      "params": {
        "resize": [28,28]
      }
    },
    "modelDefine": {
      "package": "@pipcook/plugins-tfjs-simplecnn-model-define"
    },
    "modelTrain": {
      "package": "@pipcook/plugins-image-classification-tfjs-model-train",
      "params": {
        "epochs": 15
      }
    },
    "modelEvaluate": {
      "package": "@pipcook/plugins-image-classification-tfjs-model-evaluate"
    }
  }
}
Model training:
$ pipcook run examples/pipelines/mnist-image-classification.jsonModel prediction:
$ pipcook boardThe entire engineering transformation process includes understanding pipeline tasks and pipeline operating principles, identifying the dataset format, preparing training data, retraining the model, and performing prediction using the model. The following describes these key steps.
The examples in Pipcook can be classified into three categories: machine vision, natural language processing, and reinforcement learning. Machine vision and natural language processing represent "seeing" objects and "understanding" tasks, while reinforcement learning represents decision-making and generation. The three categories can be compared to a programmer's work process from seeing objects, understanding tasks, to writing code. The combination of different capabilities in different programming tasks is the mission of pipeline.
For simple tasks such as MNIST handwritten digit recognition, machine vision capabilities are enough to fulfill the tasks. However, more complex capabilities will be required to handle complicated application scenarios such as imgcook.com. For the purpose of fulfilling different tasks, a diversity of machine learning capabilities can be combined by using a pipeline to manage the use of machine learning capabilities.
Finally, it is necessary to grasp the differences between "machine learning application engineering" and "machine learning algorithm engineering." In machine learning algorithm engineering, algorithm engineers design, fine-tune, and train models. In machine learning application engineering, they select and train models. The former aims to create and transform models, while the latter aims to apply models and algorithm capabilities. When you read machine learning documents and textbooks, you can focus on model ideas and applications in light of the preceding principles. Don't let the formulas in the book scare you - they are just the mathematical methods to describe the model ideas.
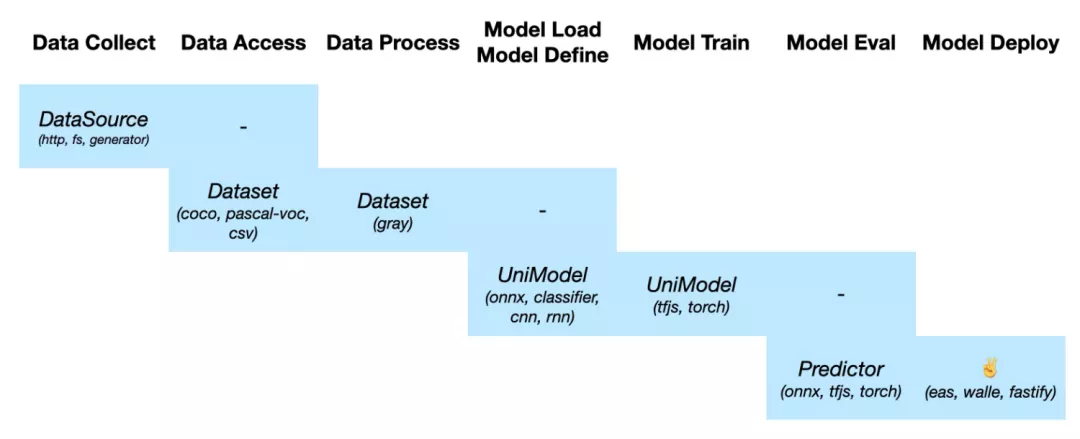
This is how a pipeline works. The seven types of plug-ins shown in the figure form the entire algorithm engineering chain. With the open mode of plug-ins introduced, you can develop plug-ins to access your own frontend projects for the purpose of troubleshooting. For more information, see the plug-in development document at https://alibaba.github.io/pipcook/#/tutorials/how-to-develop-a-plugin
You need to identify the dataset format to run the pipeline, or more specifically, to enable the model to recognize and use data. Different tasks correspond to different types of models, and different models correspond to different types of datasets. This mapping relationship ensures that models are properly trained. The dataset formats defined in Pipcook are also targeted to different tasks and models. The dataset format for machine vision is VOC, while that for NLP Pipcook is CSV. For more information about the specific dataset formats, see https://alibaba.github.io/pipcook/#/spec/dataset. Alternatively, you can use the methods described in this article to identify the dataset formats based on relevant processors and code.
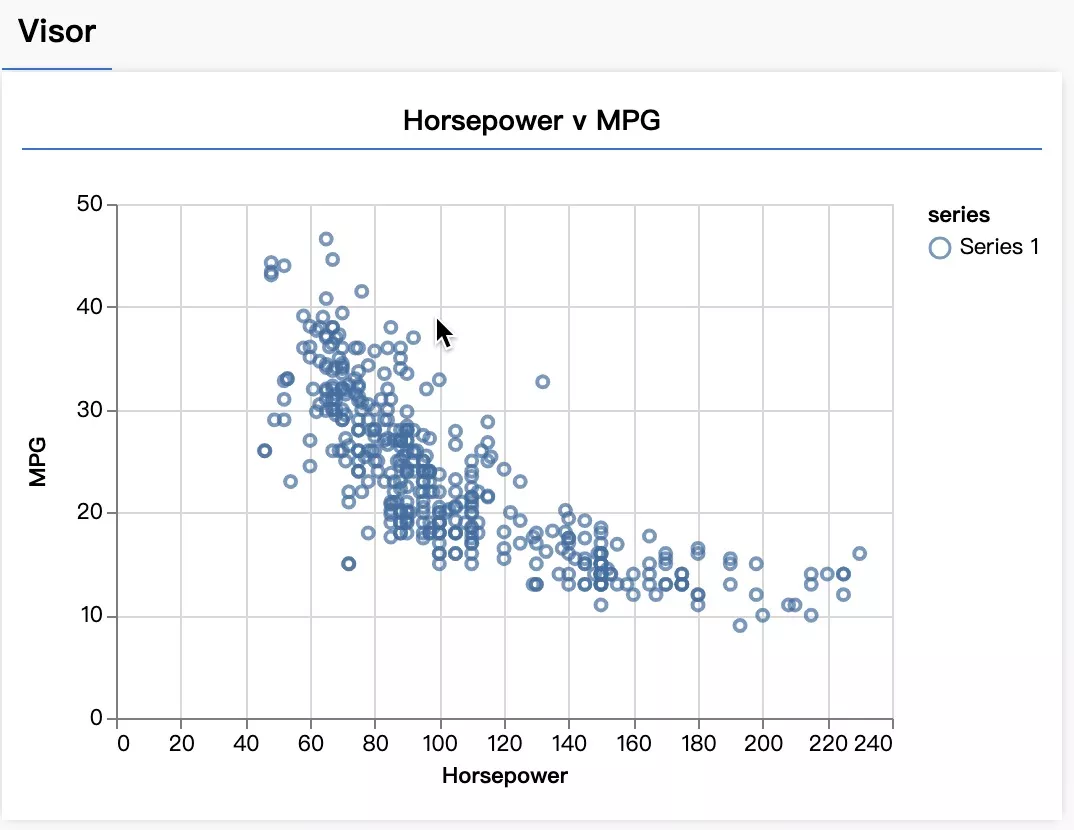
Why is data the most important part? This is because the data accuracy, the rationality of data distribution, and the sufficiency of feature description in the data directly determine the final effect of a model. You also need to master tools and crawlers such as Puppeteer to prepare high-quality data. Alternatively, you can use methods such as PCA algorithms to evaluate data quality based on traditional machine learning theories and tools. Data visualization tools are also helpful for you to gain an intuitive picture of data distribution.
I don't think it's necessary to devote much space to model training, because the hyper-parameters of today's models are not as sensitive as they were before, and data tuning may deliver better results than parameter tuning. Then what is the point of parameters in training? They accommodate the GPU and memory size. In addition to the model complexity, tuning down hyper-parameters to an appropriate extent may compromise the training speed, or even the model accuracy, but at least it guarantees the feasibility of model training. Therefore, once you find the graphics card to be OOM in a Pipcook model configuration, you can adjust hyper-parameters to solve the problem.
The only thing to heed during prediction is that the input data format of the model training must be consistent with that of the model prediction.
It is advised that you pay attention to the selection of containers during deployment. If you are developing a simple model, the CPU containers will be sufficient, because such predictions do not consume as many computing resources as machine training does. If the deployed model is very complicated and the prediction time is too long to be acceptable, you can consider GPU or heterogeneous computing containers. NVIDIA CUDA containers are common GPU containers. For more information, see https://github.com/NVIDIA/nvidia-docker. If you prefer heterogeneous computing containers, such as the Xilinx container provided by Alibaba Cloud, see related Alibaba Cloud documentation.
I wrote this article in fits and starts over a long time, and will strive to present more articles to share more of my methods and thinking in practice. My next article will systematically introduce the NLP methods, following an organization of quick experiment, best practices, and principle analysis as well. I look forward to seeing you there.
Information Input Considerations for Intelligently Generating Frontend Code
Ideas for Using Recursive Autoencoders for Intelligent Layout Generation

66 posts | 3 followers
FollowAlibaba F(x) Team - December 16, 2021
Alibaba F(x) Team - June 20, 2022
Alibaba F(x) Team - December 8, 2020
Alibaba F(x) Team - February 26, 2021
Alibaba F(x) Team - June 22, 2021
Alibaba Clouder - December 31, 2020

66 posts | 3 followers
Follow Platform For AI
A platform that provides enterprise-level data modeling services based on machine learning algorithms to quickly meet your needs for data-driven operations.
Learn More Epidemic Prediction Solution
This technology can be used to predict the spread of COVID-19 and help decision makers evaluate the impact of various prevention and control measures on the development of the epidemic.
Learn More Super App Solution for Telcos
Alibaba Cloud (in partnership with Whale Cloud) helps telcos build an all-in-one telecommunication and digital lifestyle platform based on DingTalk.
Learn More Machine Translation
Relying on Alibaba's leading natural language processing and deep learning technology.
Learn MoreMore Posts by Alibaba F(x) Team