By Hitesh Jethva, Alibaba Cloud Community Blog author.
Rancher is a free and open-source management platform for Docker containers that help you to run the containers in production. With Rancher, you don't need to build containers from scratch, rather you can launch compute nodes directly from the Rancher web interface. Rancher Docker Container Manager supports Kubernetes that allows you to deploy and manage full stacks. Rancher enables you to manage and deploy Docker containers and entire Docker application stacks across multiple host systems. Rancher makes it easy for developers to test, deploy and manage their applications. You don't need to develop the technical skills required to integrate and maintain a complex set of open source technologies.
In this tutorial, you will learn how to install Rancher on an Alibaba Cloud Elastic Compute Service (ECS) and how to use Rancher to manage Docker applications.
For this tutorial, you will need the following items:
For reference, see create a new ECS instance and connect to your instance. Next, once you are logged into your Ubuntu 16.04 instance, you should run the apt-get update -y command to update your base system with the latest available packages.
Before starting with this tutorial, you will need to make sure that you have install the latest stable version of Docker on both instances. By default, the latest stable version of Docker is not available on the Ubuntu 16.04 default repository. So, you will need to add the Docker repository to your instance.
First, allow apt to use a repository over HTTPS with the following command:
apt-get install apt-transport-https ca-certificates curl software-properties-commonNext, download and add the official GPG key with the following command:
curl -fsSL https://download.docker.com/linux/ubuntu/gpg | apt-key add -Next, verify the key's fingerprint with the following command:
apt-key fingerprint 0EBFCD88The output will look like this:
pub   4096R/0EBFCD88 2017-02-22
      Key fingerprint = 9DC8 5822 9FC7 DD38 854A  E2D8 8D81 803C 0EBF CD88
uid                  Docker Release (CE deb) <docker@docker.com>
sub   4096R/F273FCD8 2017-02-22
Next, add the Docker repository using the following command:
add-apt-repository "deb [arch=amd64] https://download.docker.com/linux/ubuntu $(lsb_release -cs) stable"Next, update the repository and install Docker with the following command:
apt-get update -y
apt-get install docker-ce=17.09.1~ce-0~ubuntu -y
Once the Docker is installed, check the status of Docker with the following command:
systemctl status dockerThe output will look like this:
● docker.service - Docker Application Container Engine
   Loaded: loaded (/lib/systemd/system/docker.service; enabled; vendor preset: enabled)
   Active: active (running) since Tue 2018-12-04 20:36:26 IST; 1min 0s ago
     Docs: https://docs.docker.com
 Main PID: 14498 (dockerd)
   CGroup: /system.slice/docker.service
           └─14498 /usr/bin/dockerd -H unix://

Dec 04 20:36:24 rancher dockerd[14498]: time="2018-12-04T20:36:24.456058066+05:30" level=warning msg="Your kernel does not support swap memory
Dec 04 20:36:24 rancher dockerd[14498]: time="2018-12-04T20:36:24.456185632+05:30" level=warning msg="Your kernel does not support cgroup rt pe
Dec 04 20:36:24 rancher dockerd[14498]: time="2018-12-04T20:36:24.456222954+05:30" level=warning msg="Your kernel does not support cgroup rt ru
Dec 04 20:36:24 rancher dockerd[14498]: time="2018-12-04T20:36:24.458818614+05:30" level=info msg="Loading containers: start."
Dec 04 20:36:25 rancher dockerd[14498]: time="2018-12-04T20:36:25.632077835+05:30" level=info msg="Default bridge (docker0) is assigned with an
Dec 04 20:36:25 rancher dockerd[14498]: time="2018-12-04T20:36:25.894066060+05:30" level=info msg="Loading containers: done."
Dec 04 20:36:26 rancher dockerd[14498]: time="2018-12-04T20:36:26.580044220+05:30" level=info msg="Docker daemon" commit=4d60db4 graphdriver(s)
Dec 04 20:36:26 rancher dockerd[14498]: time="2018-12-04T20:36:26.581073448+05:30" level=info msg="Daemon has completed initialization"
Dec 04 20:36:26 rancher systemd[1]: Started Docker Application Container Engine.
Dec 04 20:36:26 rancher dockerd[14498]: time="2018-12-04T20:36:26.784977406+05:30" level=info msg="API listen on /var/run/docker.sock"Next, you will need to install Rancher server on the Rancher server instance. You can download the rancher/server Docker image and start a Rancher server in a container by running the following command:
docker run -d --restart=unless-stopped -p 8080:8080 rancher/server:stableOnce the Rancher servcer is installed successfully, it will be accessible through a web browser using port 8080.
Now, open your web browser and type the URL http://192.168.0.100:8080. You will be redirected to the following page:
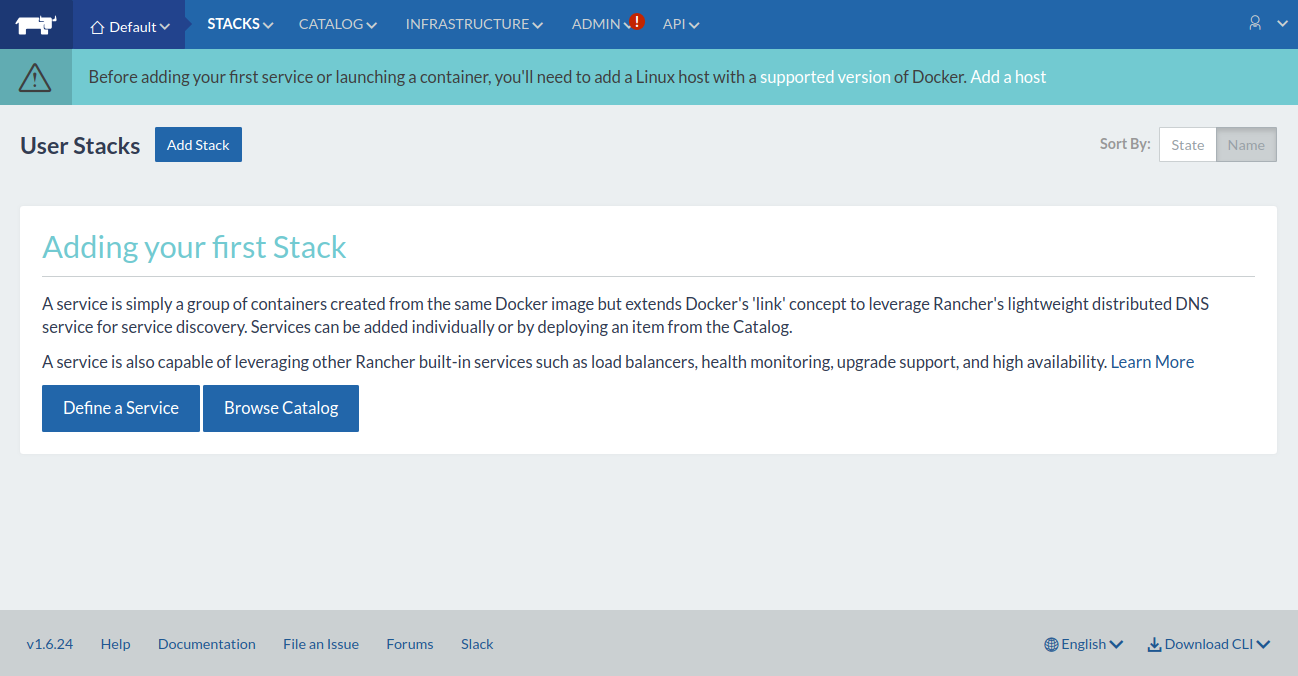
First, you will need to configure the Rancher Access Control that allows you to manage users. Rancher supports many access control including, Active Directory, Azure AD, Github, OpenLDAP, SAML, and Local Authentication.
Here, we will configure the local authentication for Rancher.
To do so, click on the ADMIN menu and click on the Access Control. You should see the following page:
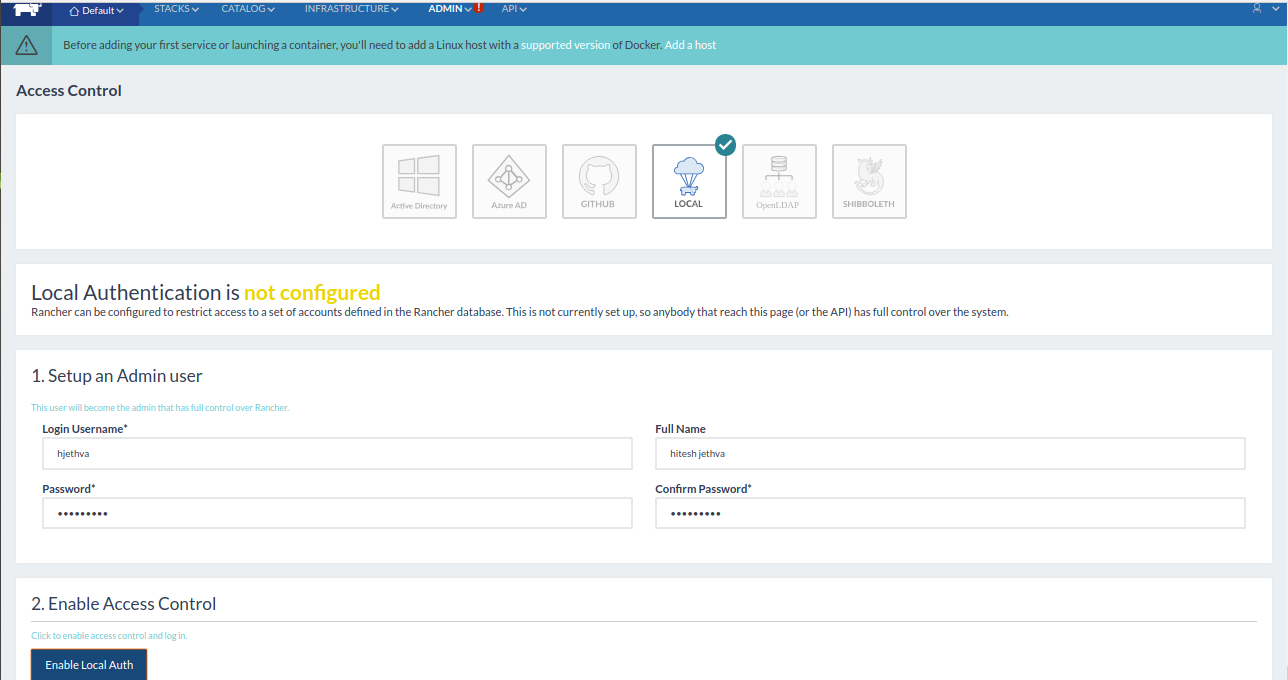
Now, click on the LOCAL Access Control, provide username, password and click on the Enable Local Auth button. You should see the Rancher Dashboard with Local Authentication enabled in the following page:
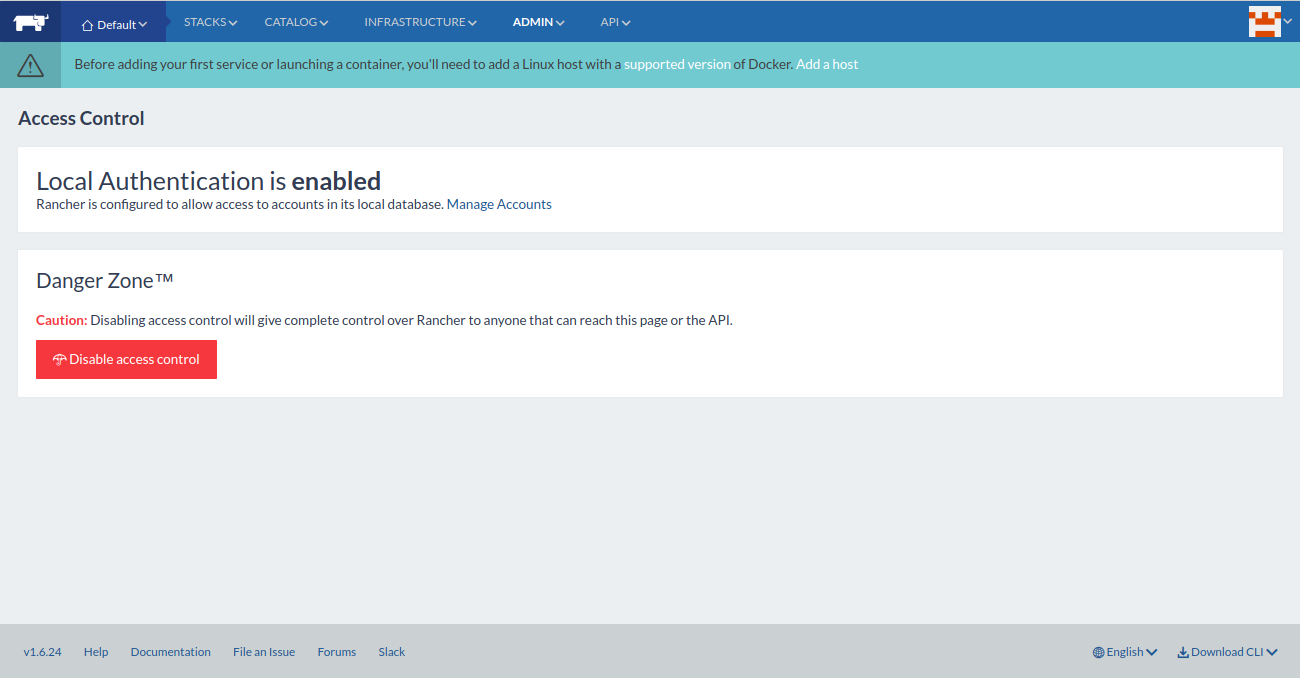
Next, you will need to add the Rancher Client to the Rancher Server instance.
To do so, go to the Rancher dashboard, click on the INFRASTRUCTURE menu and click on the Hosts button. You should see the following page:

Now, click on the Add Host button. You should see the Host Registration URL in the following page:
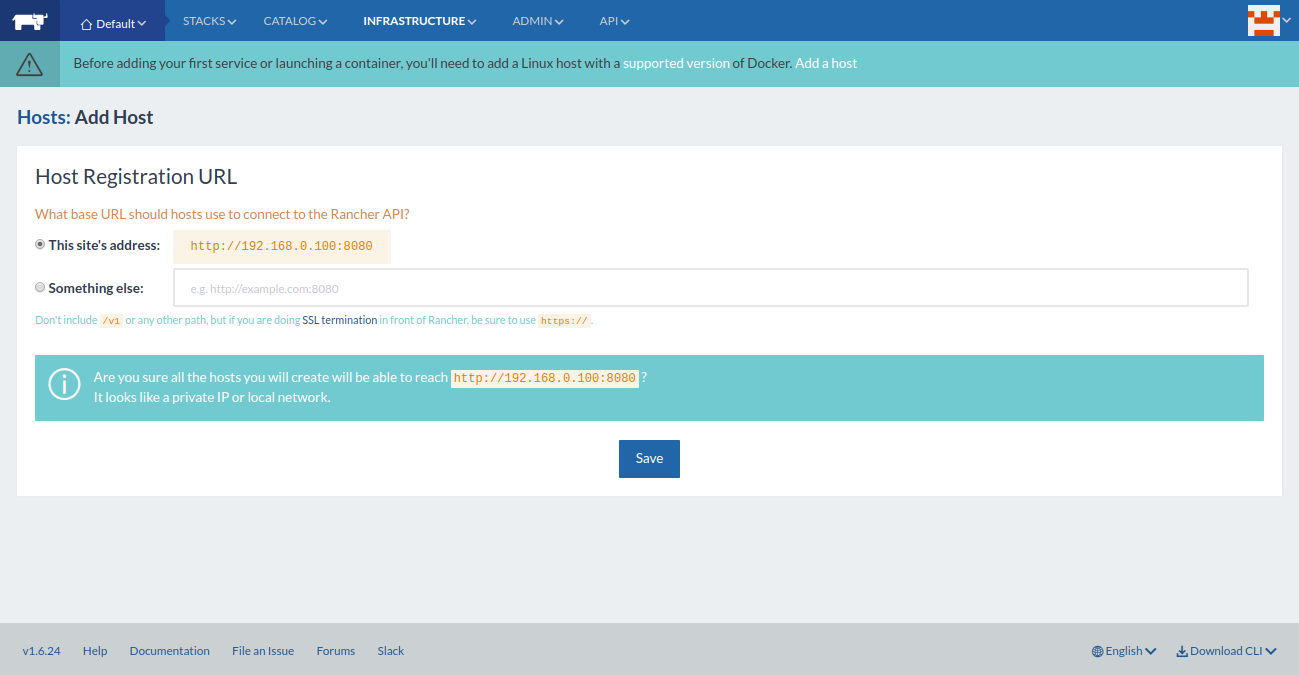
Now, click on the Save button. You should see the following page:
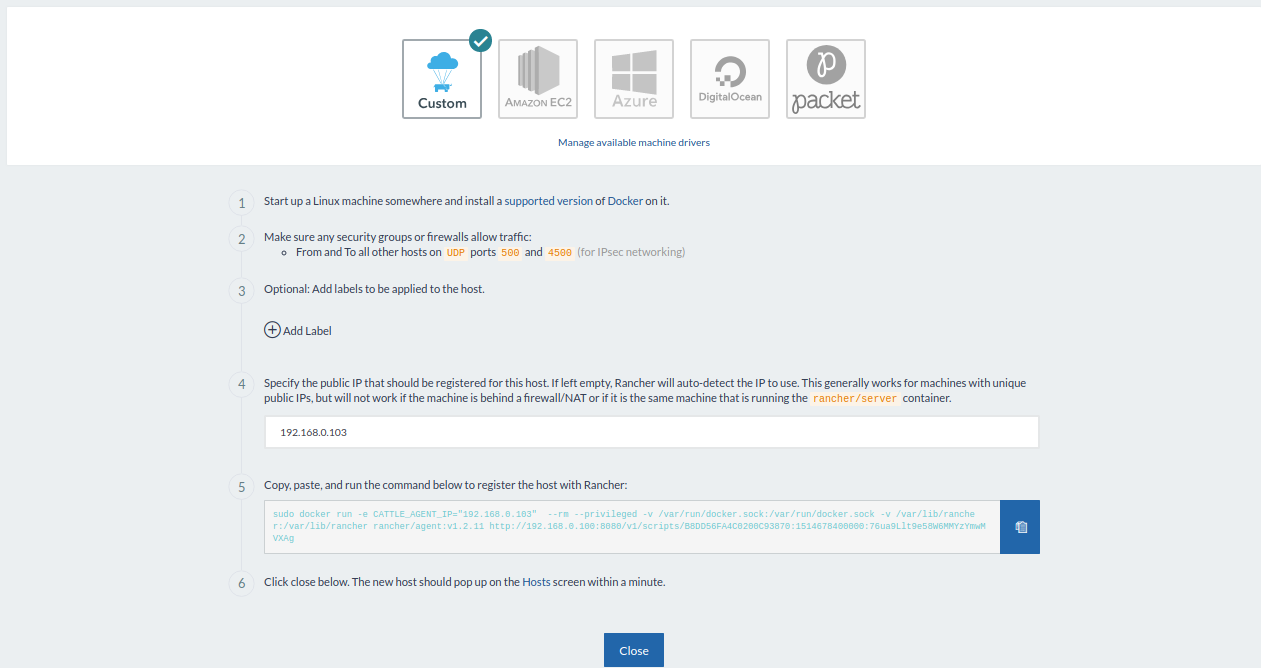
Now, select Custom host type, provide Rancher Client IP address. Then, copy the Docker command from the box.
Next, log in to Rancher Client instance, open the terminal and paste the command as shown below:
docker run -e CATTLE_AGENT_IP="192.168.0.103" --rm --privileged -v /var/run/docker.sock:/var/run/docker.sock -v /var/lib/rancher:/var/lib/rancher rancher/agent:v1.2.11 http://192.168.0.100:8080/v1/scripts/B8DD56FA4C0200C93870:1514678400000:76ua9Llt9e58W6MMYzYmwMVXAgThis command will download and create new Rancher container on the Rancher Agent host. Once the process completed successfully, you should see the following output:
Status: Downloaded newer image for rancher/agent:v1.2.11

INFO: Running Agent Registration Process, CATTLE_URL=http://192.168.0.100:8080/v1
INFO: Attempting to connect to: http://192.168.0.100:8080/v1
INFO: http://192.168.0.100:8080/v1 is accessible
INFO: Configured Host Registration URL info: CATTLE_URL=http://192.168.0.100:8080/v1 ENV_URL=http://192.168.0.100:8080/v1
INFO: Inspecting host capabilities
INFO: Boot2Docker: false
INFO: Host writable: true
INFO: Token: xxxxxxxx
INFO: Running registration
INFO: Printing Environment
INFO: ENV: CATTLE_ACCESS_KEY=8DEEDD0366EBBA2368EE
INFO: ENV: CATTLE_AGENT_IP=192.168.0.103
INFO: ENV: CATTLE_HOME=/var/lib/cattle
INFO: ENV: CATTLE_REGISTRATION_ACCESS_KEY=registrationToken
INFO: ENV: CATTLE_REGISTRATION_SECRET_KEY=xxxxxxx
INFO: ENV: CATTLE_SECRET_KEY=xxxxxxx
INFO: ENV: CATTLE_URL=http://192.168.0.100:8080/v1
INFO: ENV: DETECTED_CATTLE_AGENT_IP=192.168.0.103
INFO: ENV: RANCHER_AGENT_IMAGE=rancher/agent:v1.2.11
INFO: Launched Rancher Agent: f2242a231e5c774a80004c7a930145b9711406fd6e22d1af6a2aaf508d1ee863
Now, go back to the Rancher dashboard and click on the Close button. You should see the newly added Rancher Client in the following page:
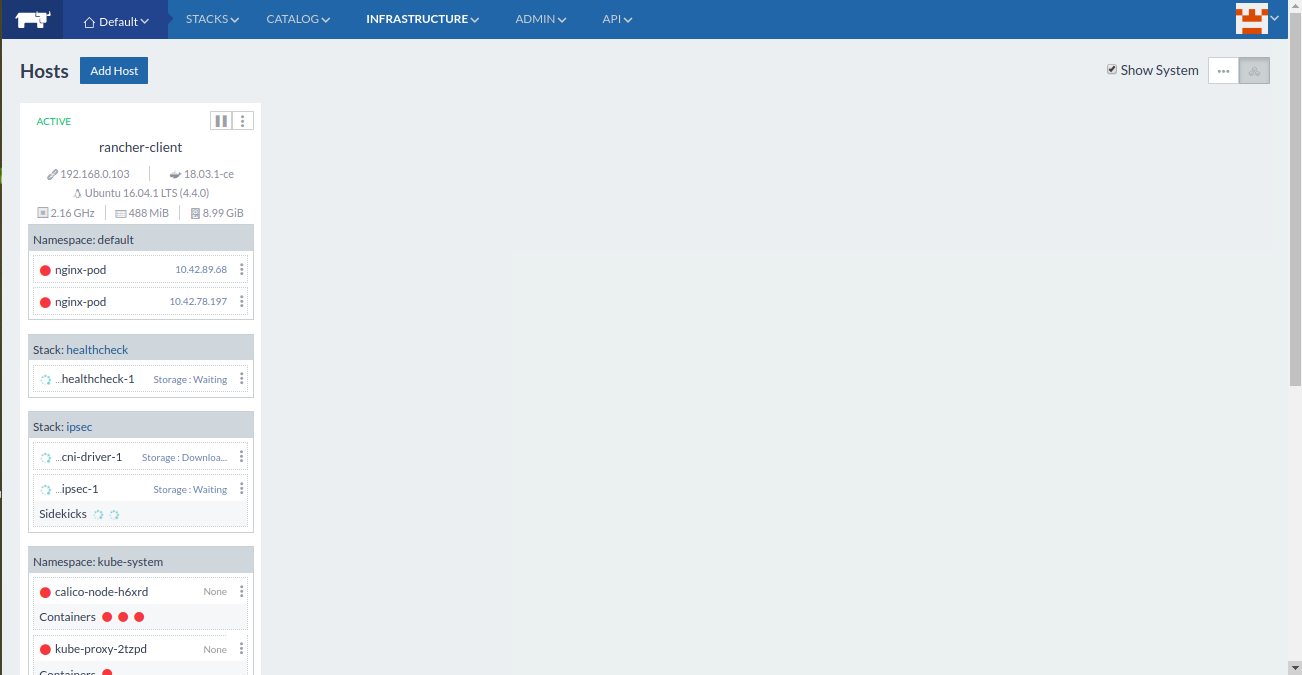
Rancher server and a client is now installed and configured, it's time to create new container through Rancher.
On the Rancher Dashboard, go to the INFRASTRUCTURE menu and click on the Containers. You should see the following page:

Now, click on the Add Container button. You should see the following page:
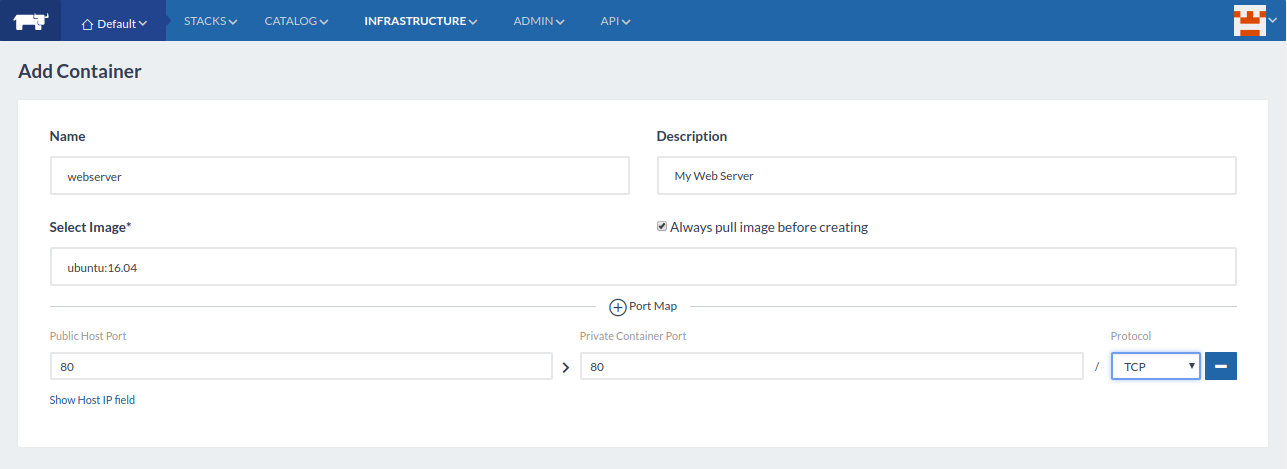
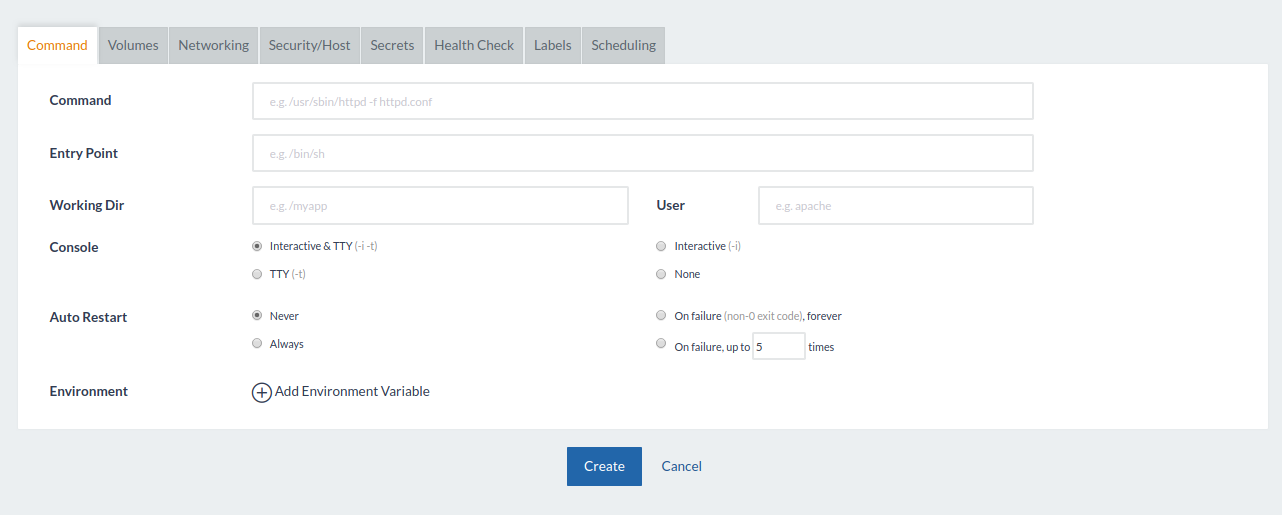
Now, provide container name, select image, provide port number and click on the Create button. Once the container created successfully, you should see the newly created web server container in the following page:
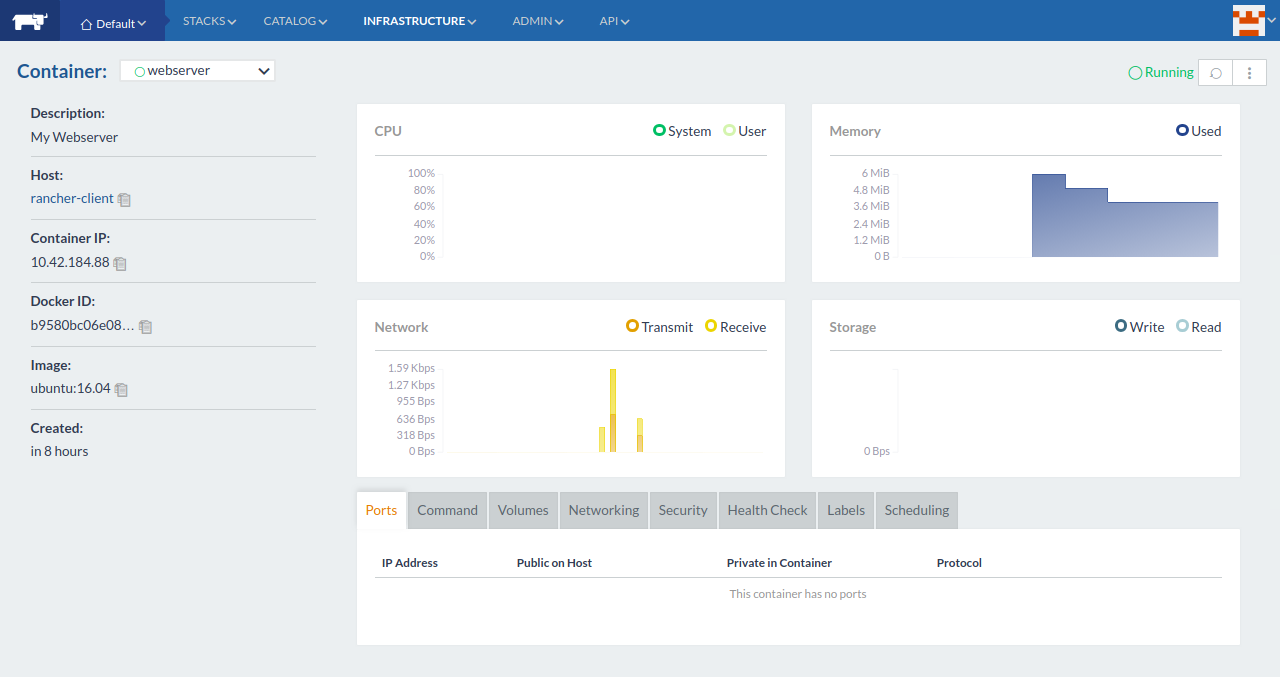
You have successfully installed and configured Rancher with Docker on Ubuntu 16.04 server. You can now easily manage Docker containers like, create, start, stop and delete the container with Rancher web interface.

2,599 posts | 769 followers
FollowAlibaba Clouder - August 5, 2019
Hironobu Ohara - February 3, 2023
Alibaba Clouder - August 16, 2019
Alibaba Developer - March 8, 2021
Alibaba Developer - December 9, 2020
Alibaba Container Service - November 13, 2019

2,599 posts | 769 followers
Follow ECS(Elastic Compute Service)
Elastic and secure virtual cloud servers to cater all your cloud hosting needs.
Learn MoreLearn More
 OSS(Object Storage Service)
An encrypted and secure cloud storage service which stores, processes and accesses massive amounts of data from anywhere in the world
Learn MoreMore Posts by Alibaba Clouder
Start building with 50+ products and up to 12 months usage for Elastic Compute Service
Get Started for Free Get Started for Free