By Victor Mak, Alibaba Cloud Solution Architect
This article describes how to use the SAG app to secure access your cross-border cloud resources, step-by-step.
As the coronavirus outbreak forces unprecedented changes in work culture across the world. Most people are working from home during the pandemic. Some of them stayed in China and want to access oversea cloud resources. Alibaba Cloud Smart Access Gateway (SAG) and Cloud Enterprise Network (CEN) provide a one-stop solution to secure, accelerate, and connect your mobile phone/PC to cross border cloud resources.
Before you begin, make sure:

Here's an overview of the entire process. We'll be describing each step in detail, please follow these steps in the corresponding order to avoid any complications.
1. Log on to the CEN console
2. On the Instances page, click Create CEN Instance

3. Fill in the required information, select the Hong Kong VPC you created, then click OK:
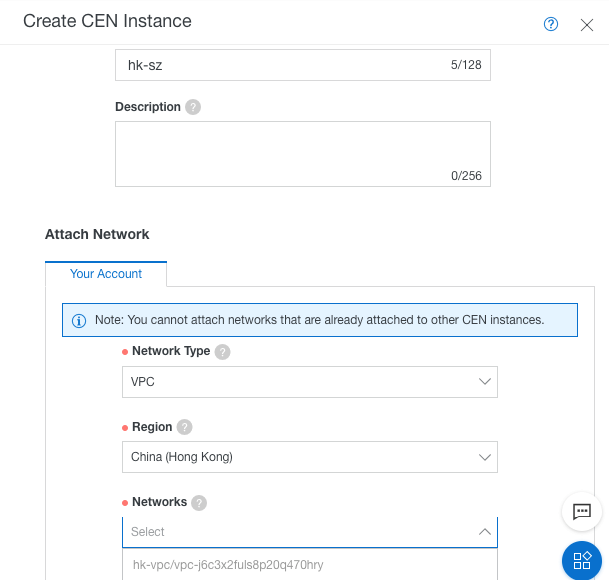
4. Your results should be the same as the picture below:
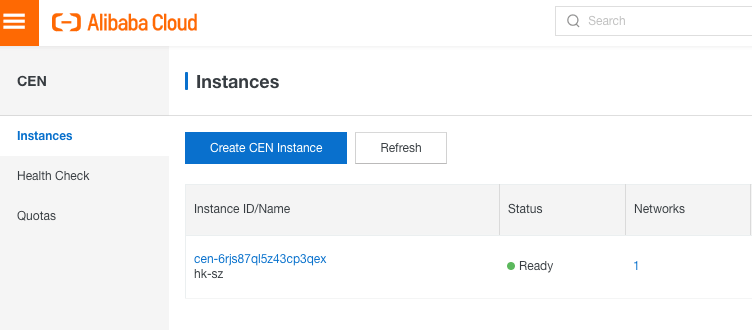
5. You need to purchase cross-region connection bandwidth in to establish a connection between different regions. Click Buy Bandwidth Package (Subscription) in the Bandwidth Packages tab:

6. Select the CEN instance that you want to purchase, a bandwidth package, and the areas to be interconnected. In this example, select Asia Pacific and Mainland China with 2 Mbps bandwidth, then click Buy Now:
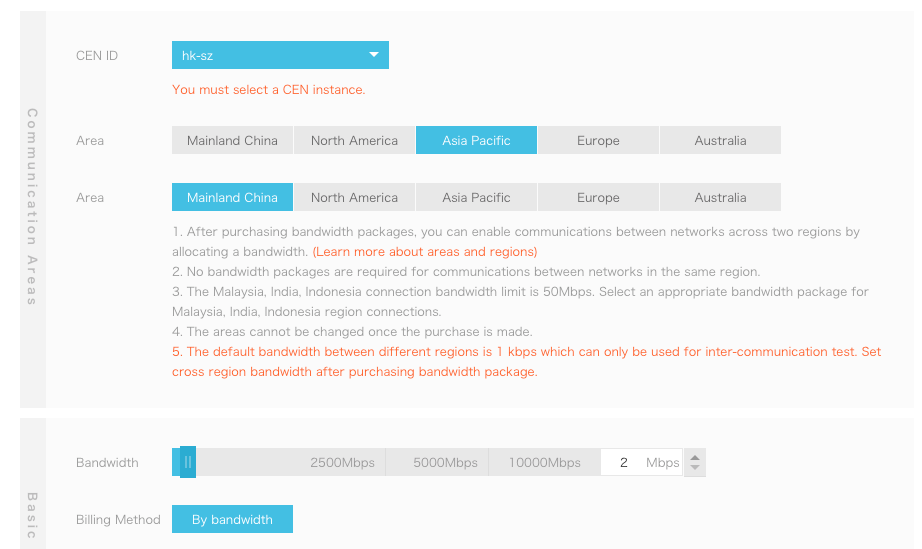
7. Bind the Bandwidth Package to the CEN instance, then click OK:
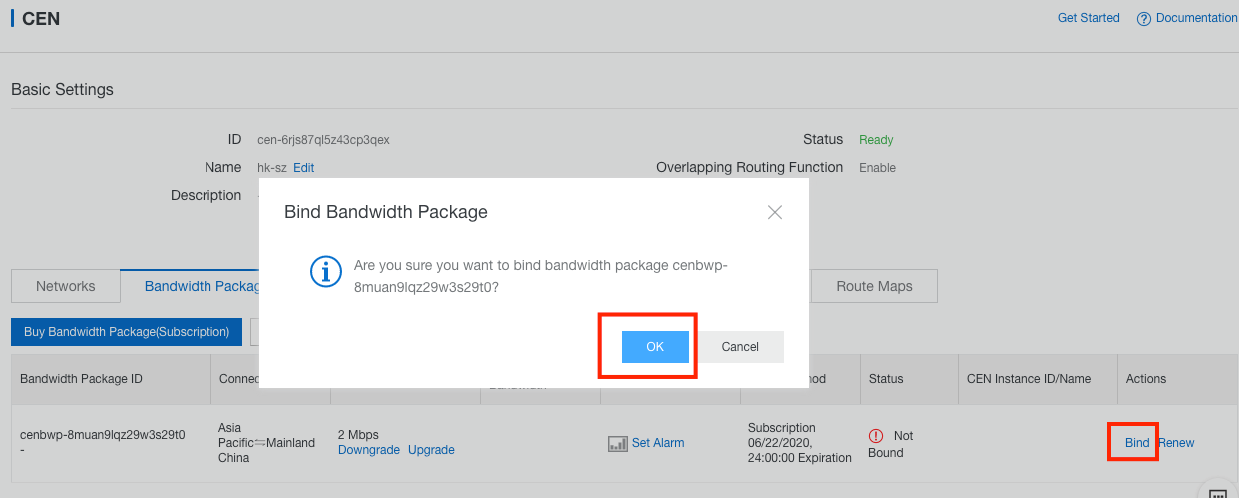
8. You will see the same results as the picture below. The bandwidth is already associated with the CEN instance:

1. Log on to the Smart Access Gateway console
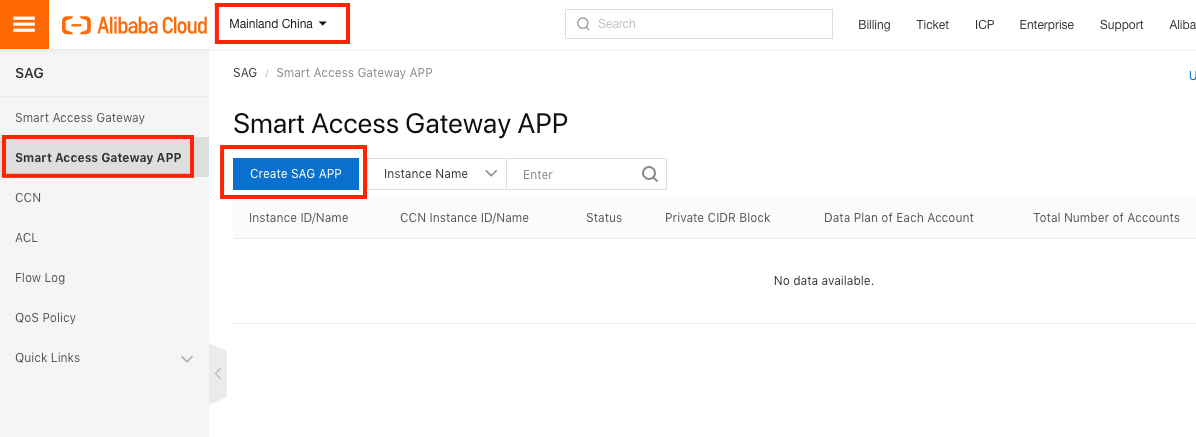
2. Select the Mainland China region and go to the Smart Access Gateway app, and click Create SAG app:
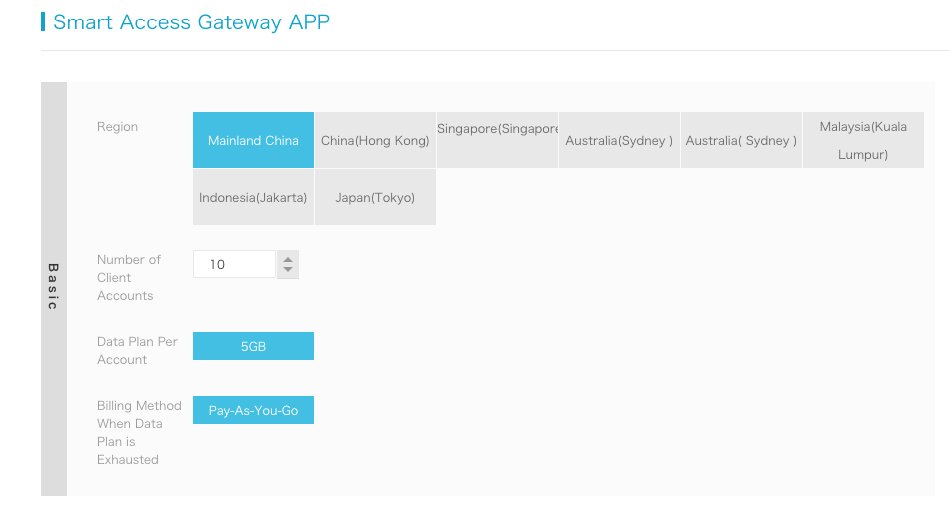
3. Select the Mainland China Region and the Number of Client Accounts you want to create. In this example, the default value was 10:
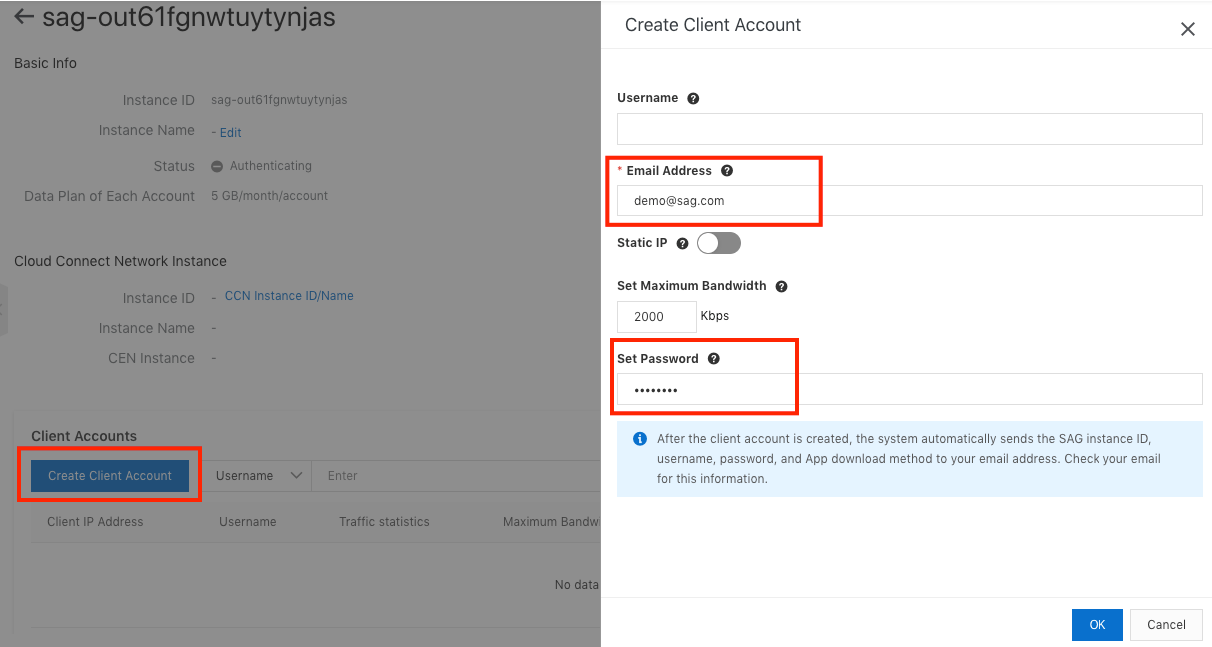
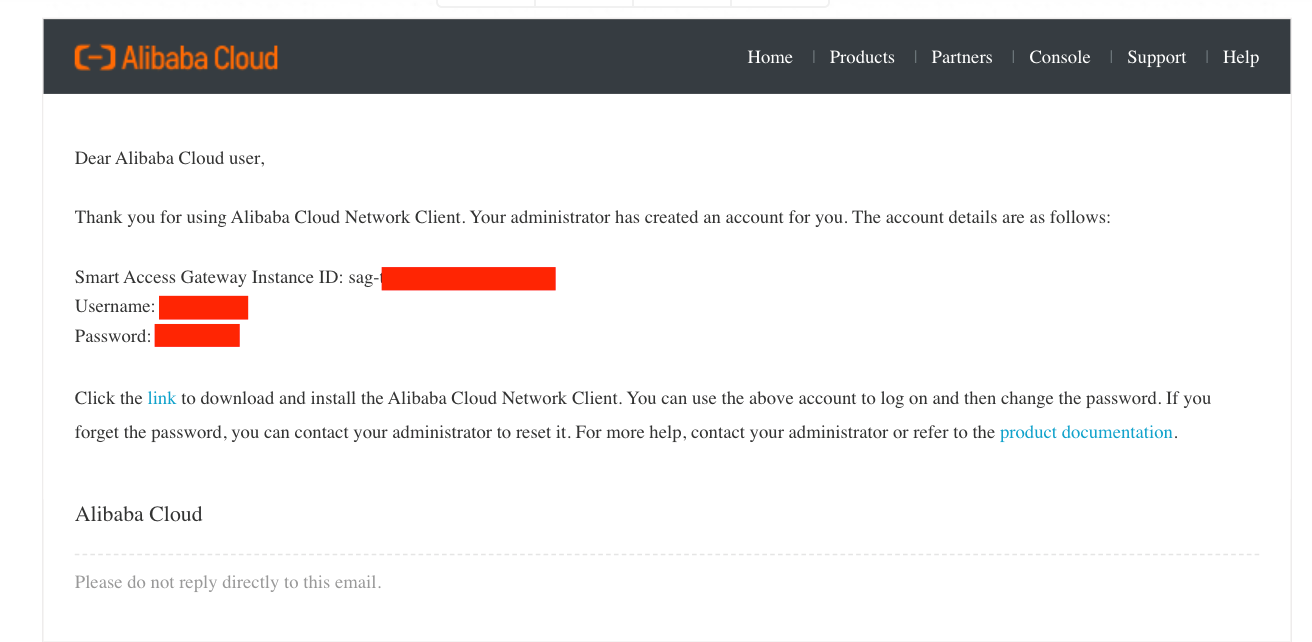
4. Before the client can use the Smart Access Gateway App, you need to create a client account. Alibaba Cloud will send the login information to the email address you fill in:
1. Before the Smart Access Gateway app can bind to the CEN instance, you need to create a CCN instance under the Smart Access Gateway console, input the CCN instance name, and click OK:
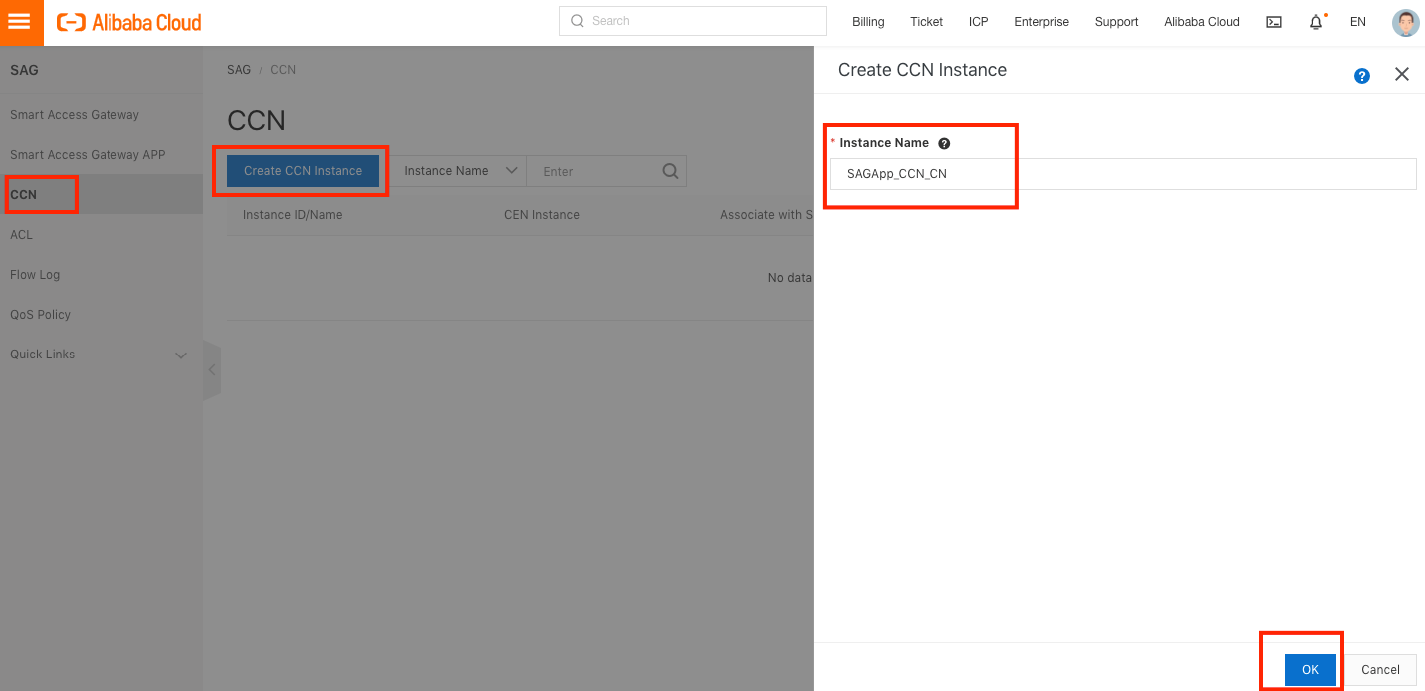
2. Once you have created the CCN instance, you need to connect the CCN instance with the Smart Access Gateway app. Click Network Configuration.

3. Select the CCN instance and configure the private CIDR Block. In this example, we used 10.10.100.0/24:
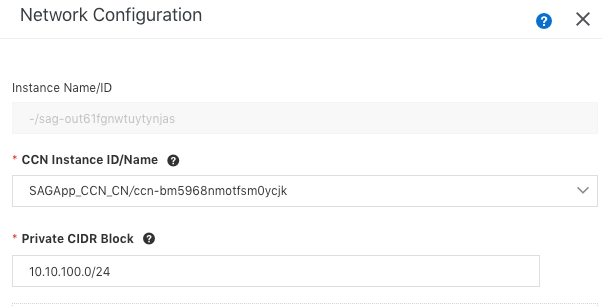
4. Once you have created the CCN instance, you can bind that CCN instance to the CEN instance:

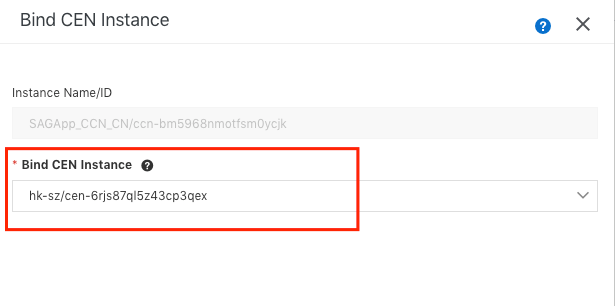
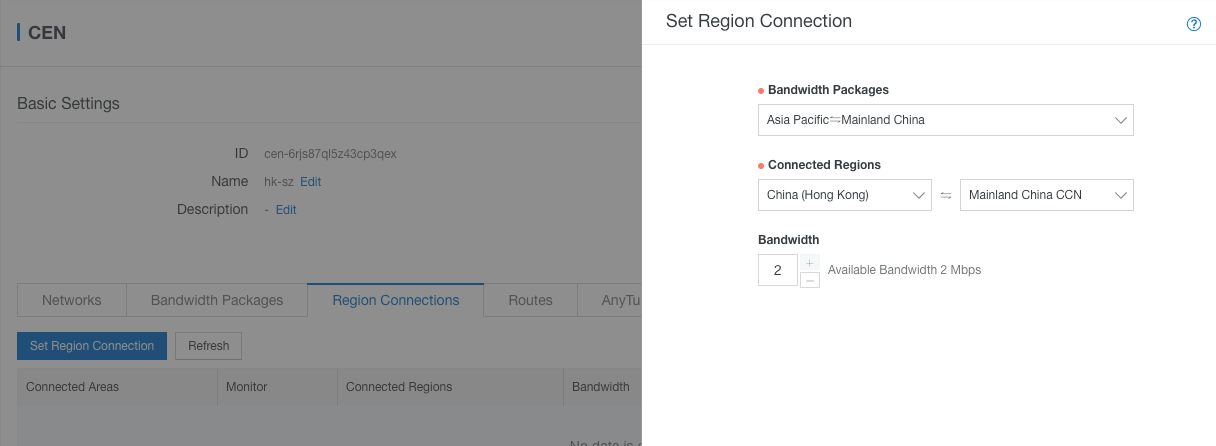
5. Go to the CEN console, find Region Connections, then click Set Region Connection:
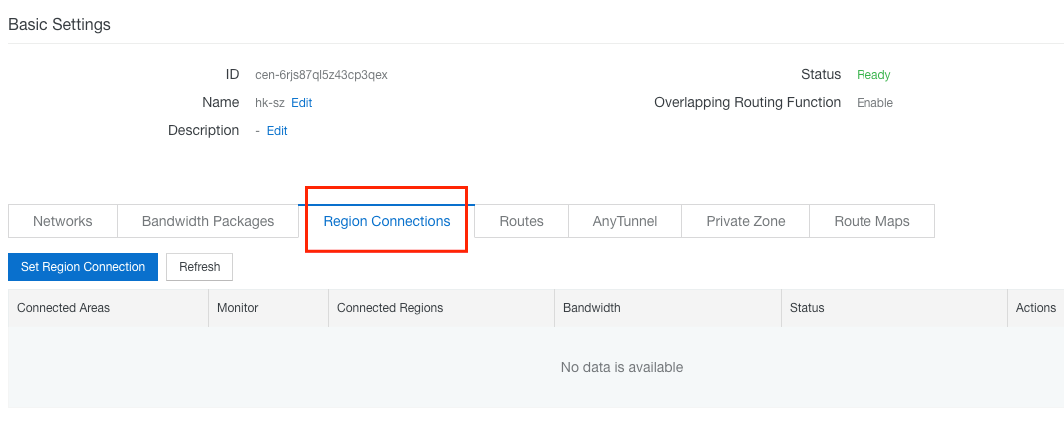
6. Configure the Connected Regions and bandwidth. In this example, we used China (Hong Kong) and Mainland China CCN with 2 Mbps bandwidth. After it's selected, click OK:
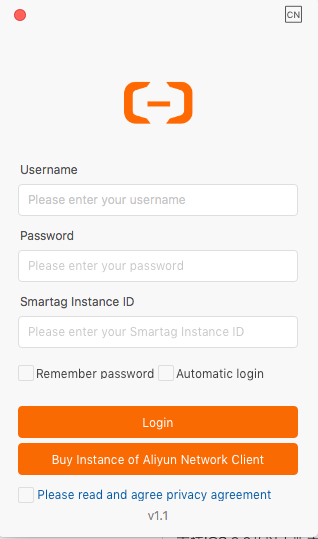
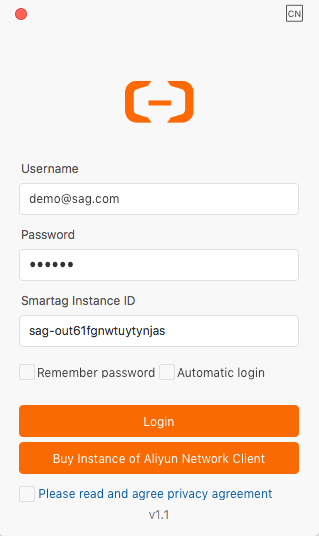
1. Fill in your login details in the SAG app client. The information can be found in the email Alibaba sent to you before.
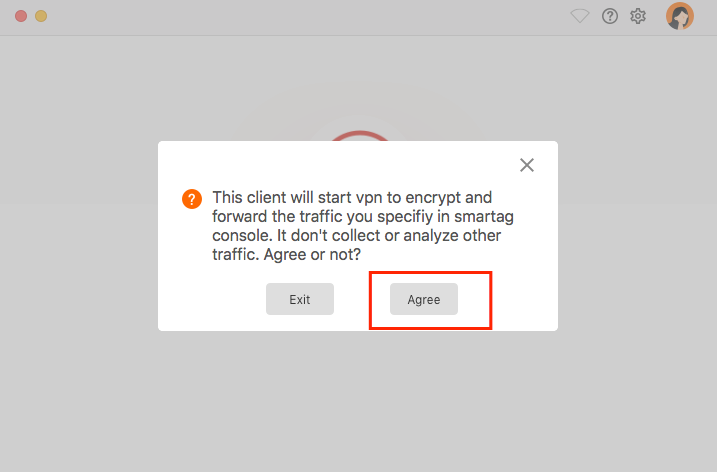
2. Once you successfully log in the first time, you will need to click Agree to accept the terms and conditions.
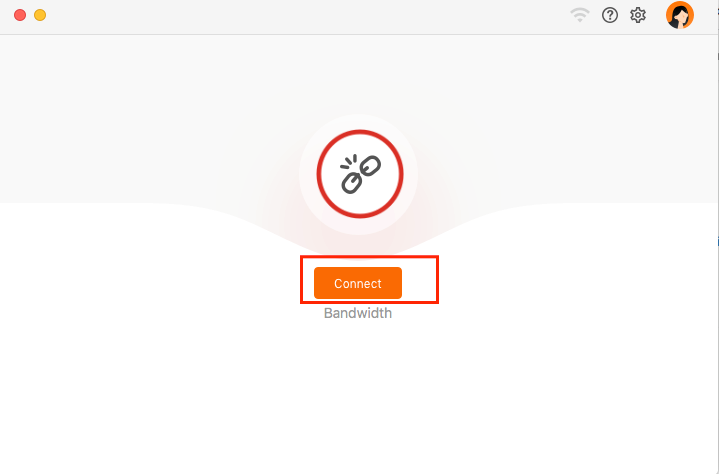
3. You can click Connect and start the VPN connection.
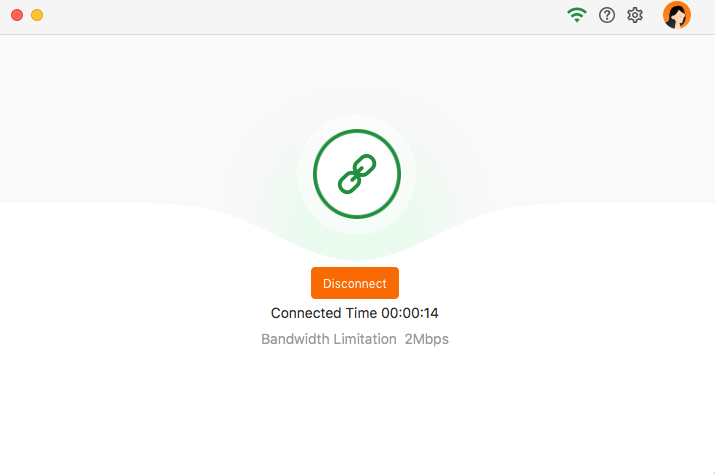
4. You are now able to connect SSH to the ECS server using the internal IP address 192.168.0.249.

The views expressed herein are for reference only and don't necessarily represent the official views of Alibaba Cloud.
Alibaba Cloud Makes Efficient Genetic Detection of Pathogens Possible
A Deep Understanding of Cloud Native Technology and Application

2,593 posts | 792 followers
FollowRupal_Click2Cloud - August 30, 2021
Alibaba Clouder - March 9, 2021
Alibaba Clouder - May 24, 2019
Alibaba Clouder - July 6, 2021
Alibaba Clouder - February 18, 2021
Alibaba Cloud Indonesia - August 22, 2022

2,593 posts | 792 followers
Follow Networking Overview
Connect your business globally with our stable network anytime anywhere.
Learn More CEN
CEN
A global network for rapidly building a distributed business system and hybrid cloud to help users create a network with enterprise level-scalability and the communication capabilities of a cloud network
Learn More Edge Network Acceleration
Establish high-speed dedicated networks for enterprises quickly
Learn More Accelerated Global Networking Solution for Distance Learning
Alibaba Cloud offers an accelerated global networking solution that makes distance learning just the same as in-class teaching.
Learn MoreMore Posts by Alibaba Clouder