by Muhammad Risma, Channel Marketing Intern
This topic describes how to synchronize data from an ApsaraDB RDS for MySQL instance to a Message Queue for Apache Kafka instance by using Data Transmission Service (DTS).
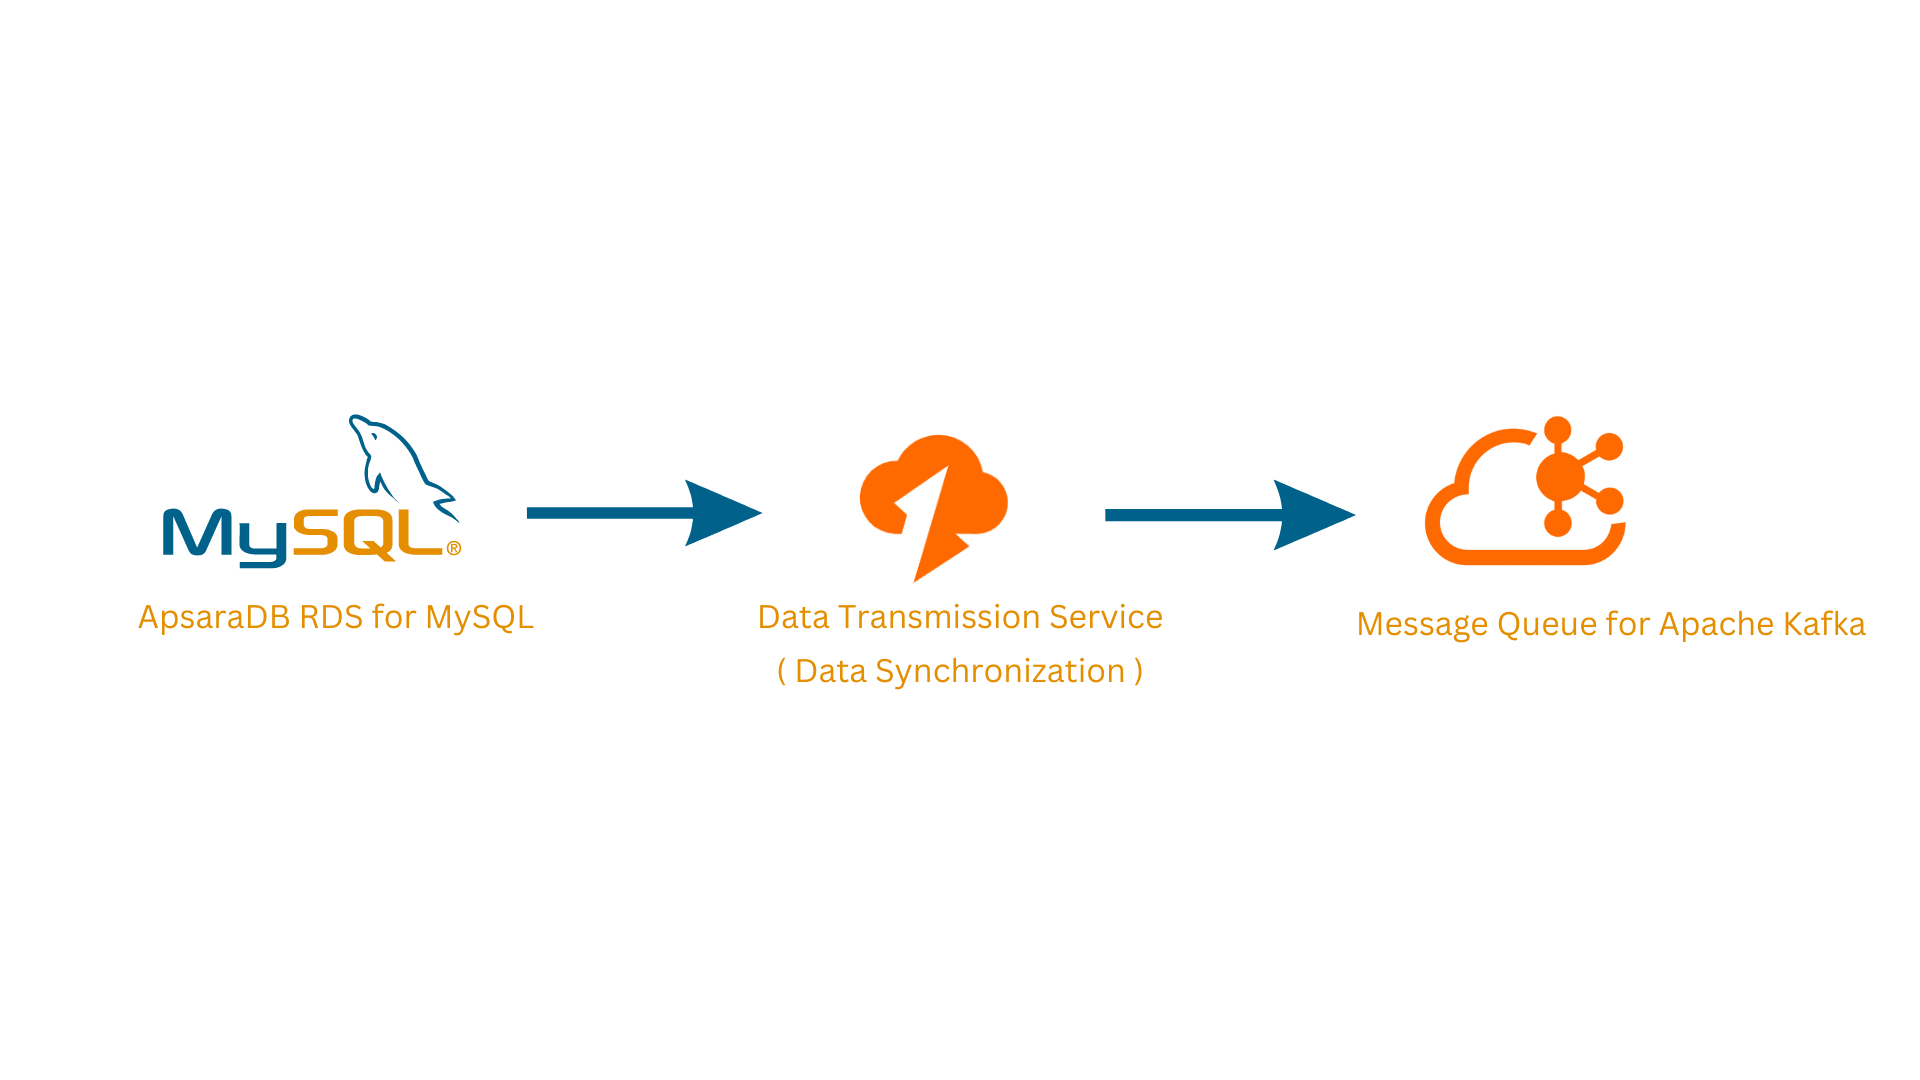
Message Queue for Apache Kafka is a distributed message queue service provided by Alibaba Cloud. This service features high throughput and scalability. Message Queue for Apache Kafka is widely used in big data fields such as log collection, monitoring data aggregation, streaming data processing, and online and offline analytics. It has become an indispensable part of the big data ecosystem.
In the Apache Kafka Queuing system, messages are stored in queue mode. This allows messages in the queue to be ingested by one or more consumers, but one consumer can only consume each message at a time. As soon as the consumer reads the message, it is removed from the Apache Kafka Queue.
Message Queue for Apache Kafka Features:
-100% Compatible with Apache Kafka
-Fully Managed
-High Availability
-Data Security
Log Analysis: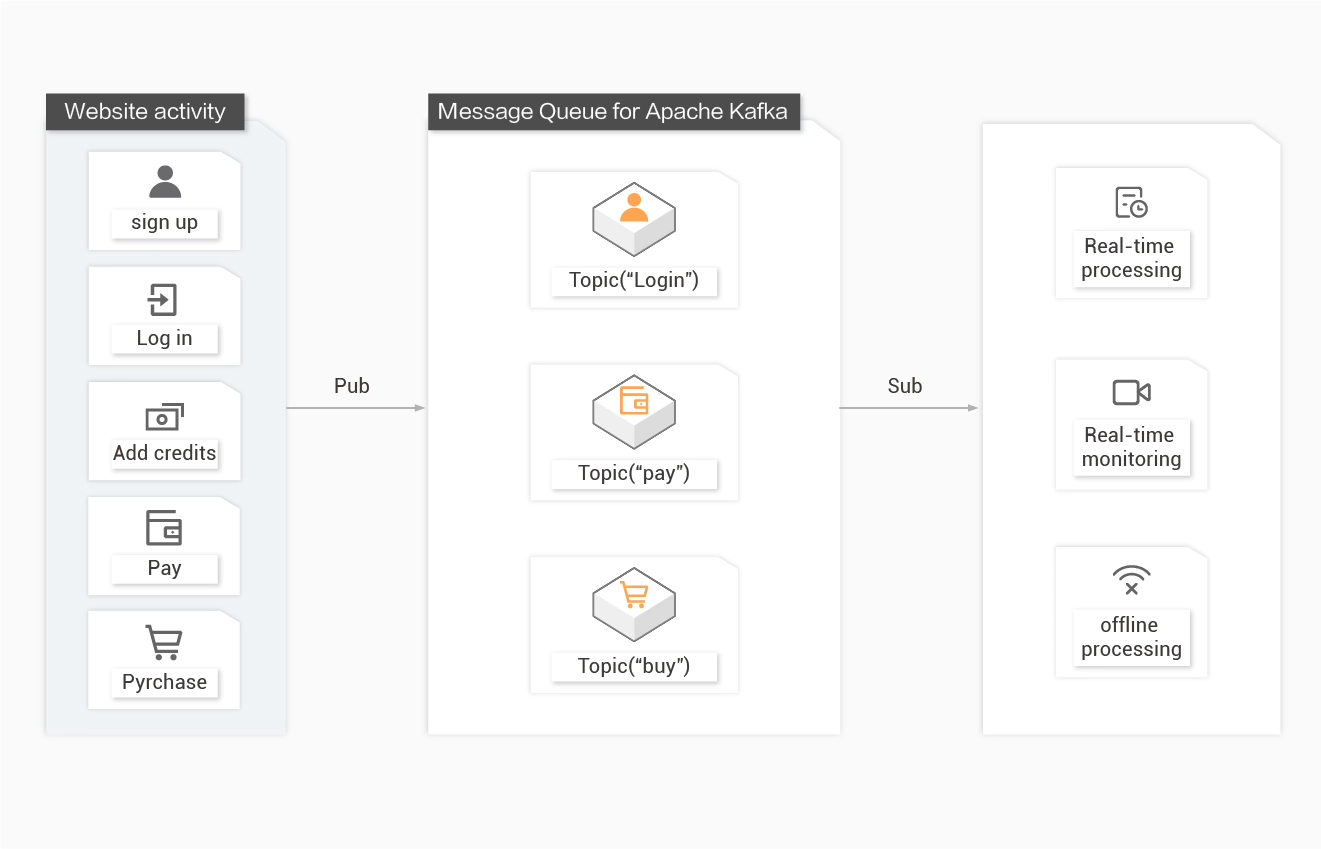
Log Collection
AlibabaMQ for Apache Kafka capable performance makes it suitable for log collection because:
Website Tracking: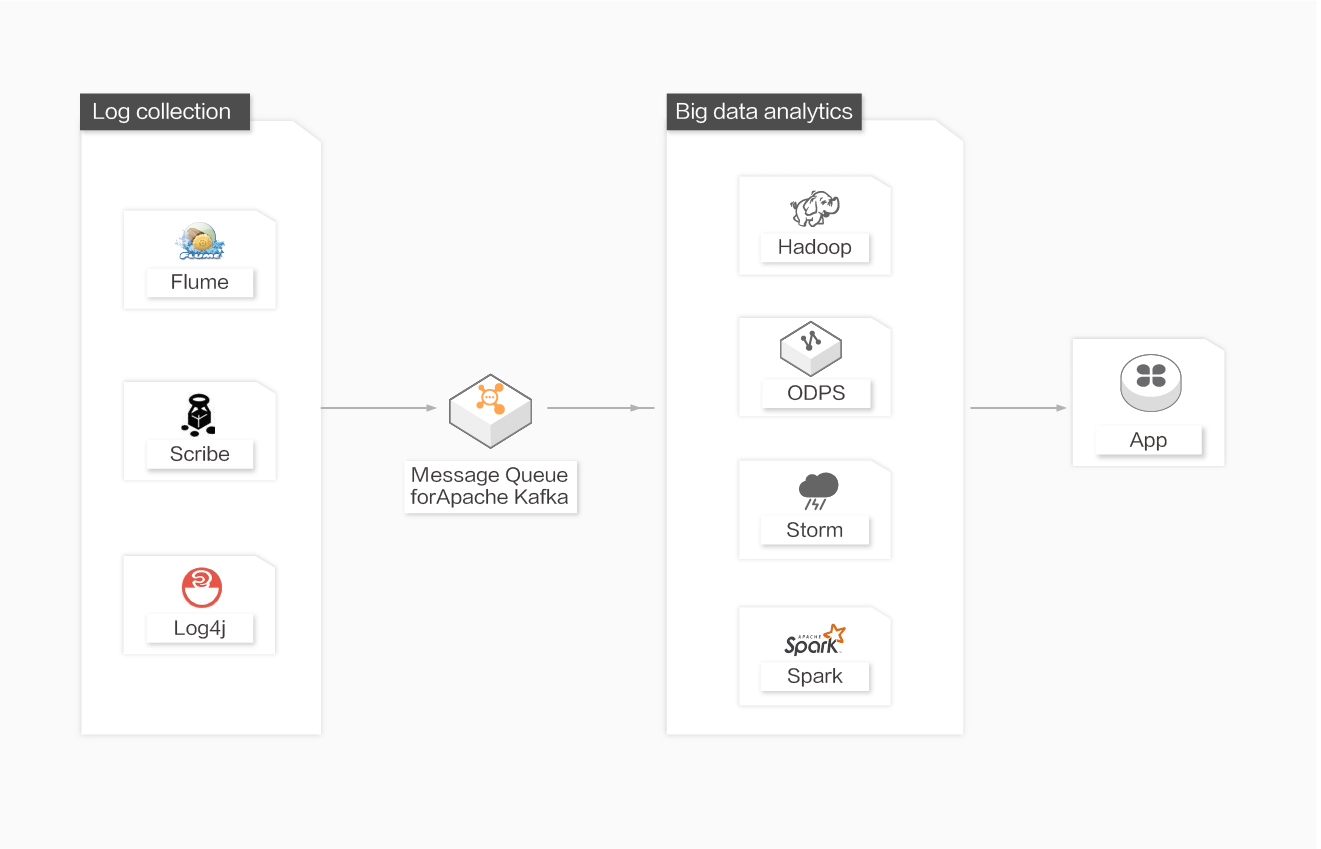
High Throughput and Data Integration
AlibabaMQ for Apache Kafka allows users to collect real-time website activity statistics (including browsing, searching, and other behaviors).
Publish/subscribe mode routes messages to different topics by data type.
Message streaming can be used in real-time monitoring or service analysis if subscribed to real-time message delivery or offline processing if loaded to offline data warehouses such as Hadoop and ODPS.
Data Hub: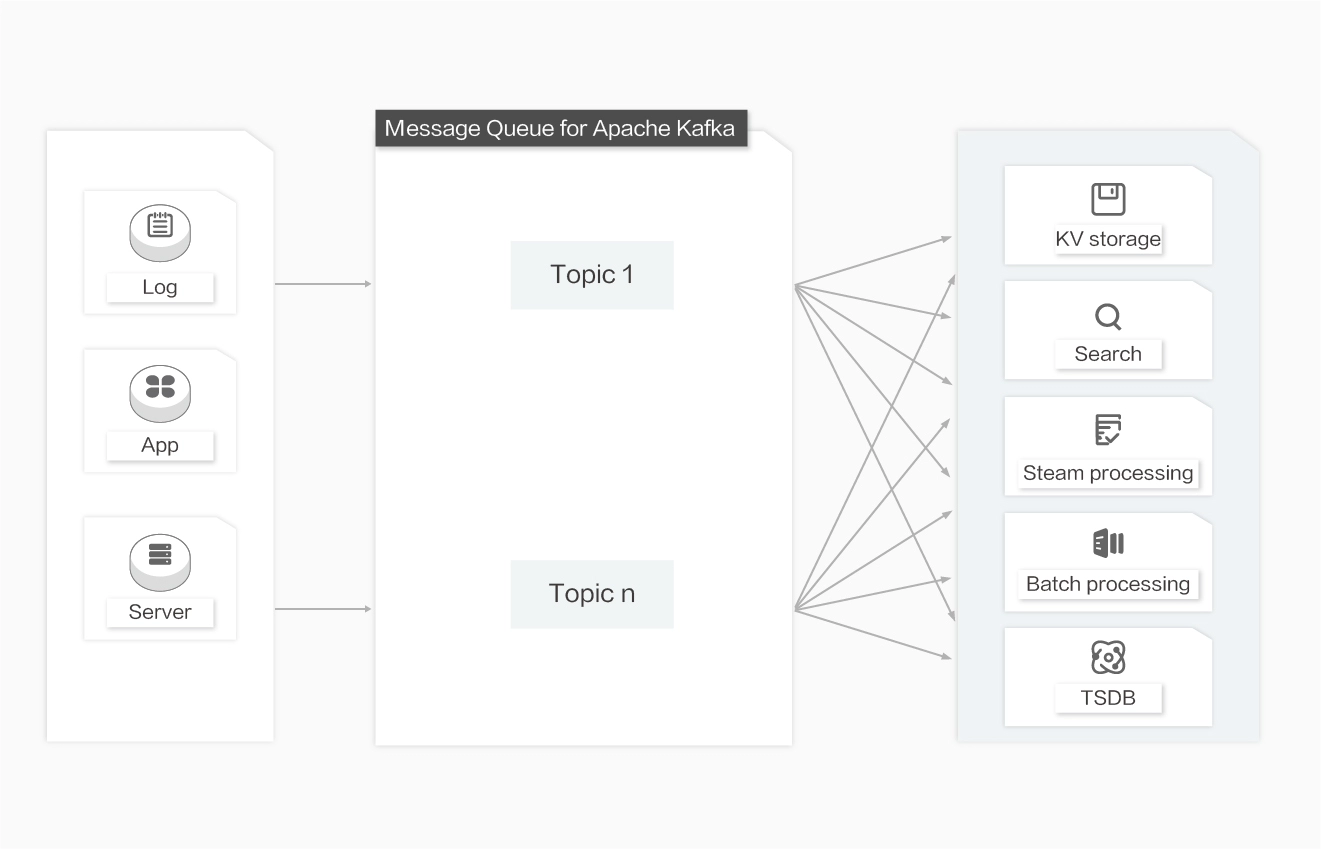
Multipath Routing
Supports both real-time and batch processing: local data persistence and PageCache can be delivered to multiple computing engines at the same time without performance loss.
Precautions:
● The available storage space of the destination Message Queue for Apache Kafka instance is larger than the total size of data in the source ApsaraDB RDS for MySQL instance.
A) Create Resource Group for your ApsaraDB RDS MySQL and Alibaba Message Queue for Apache Kafka
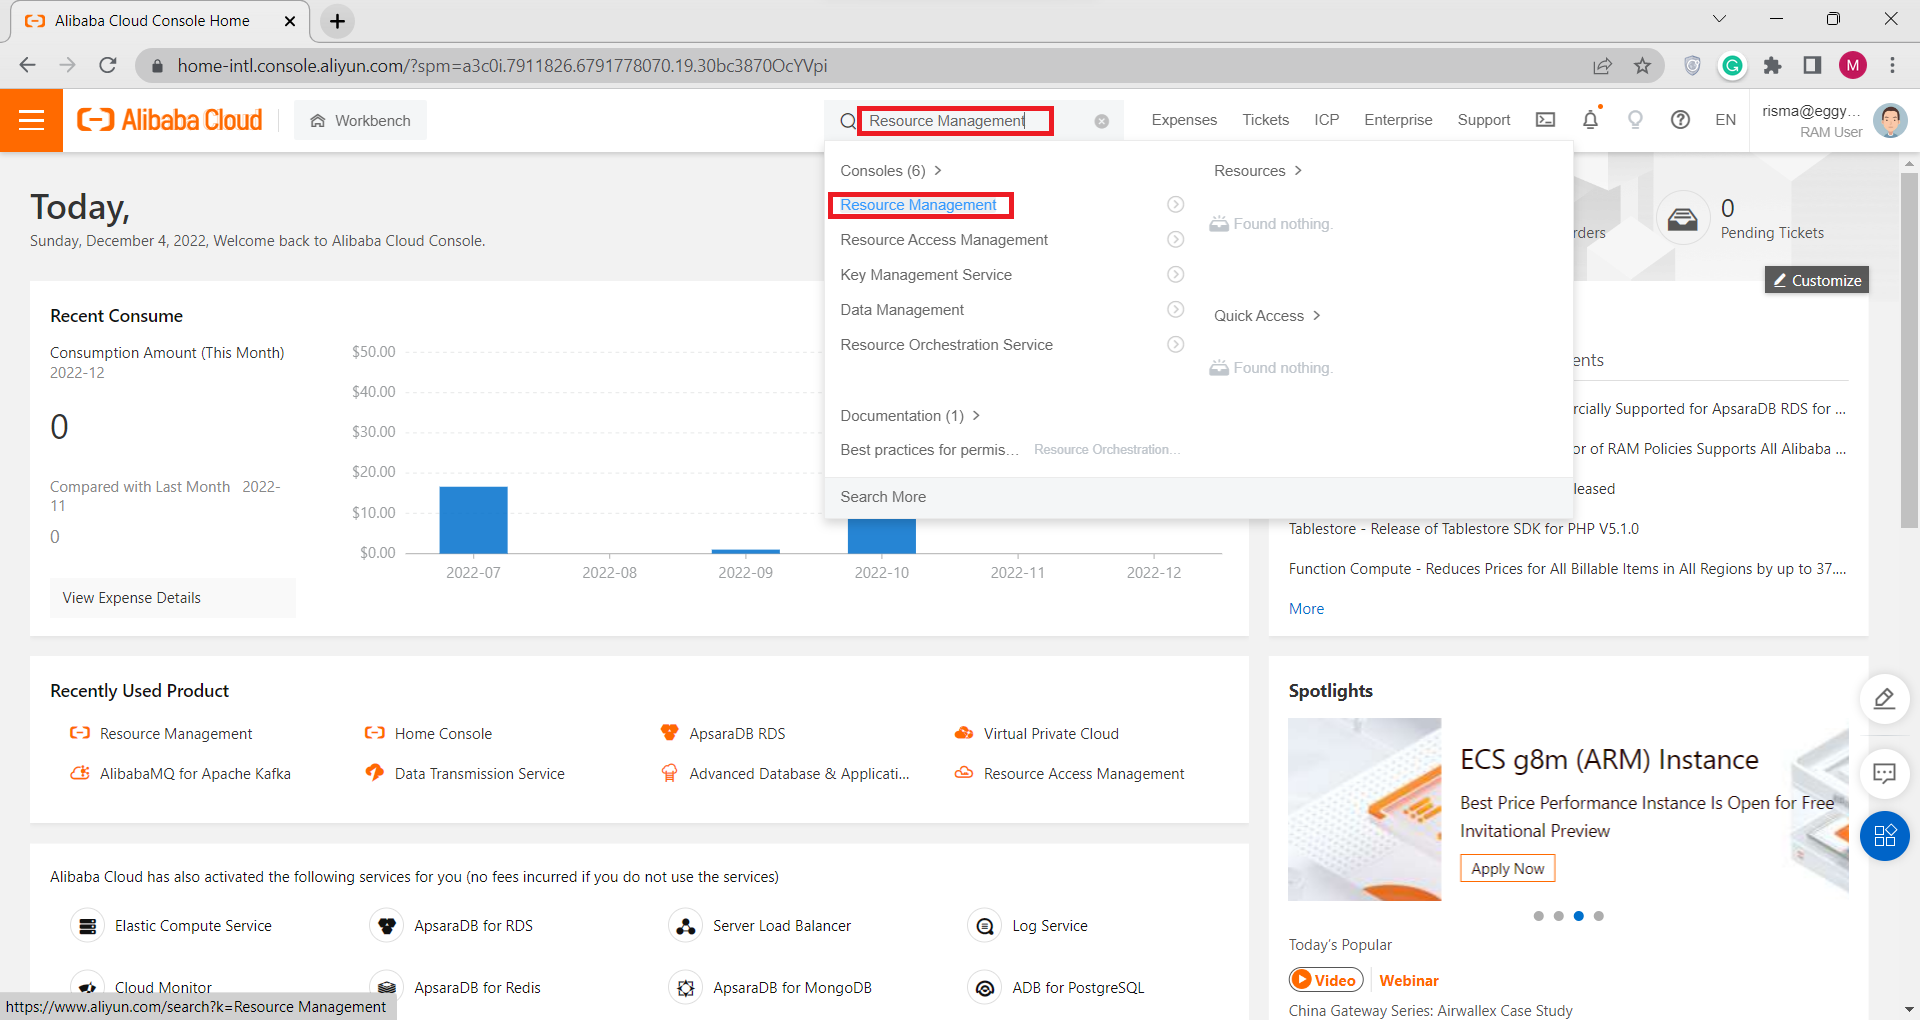
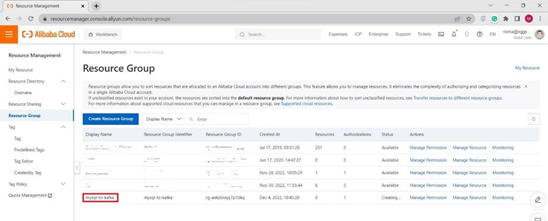
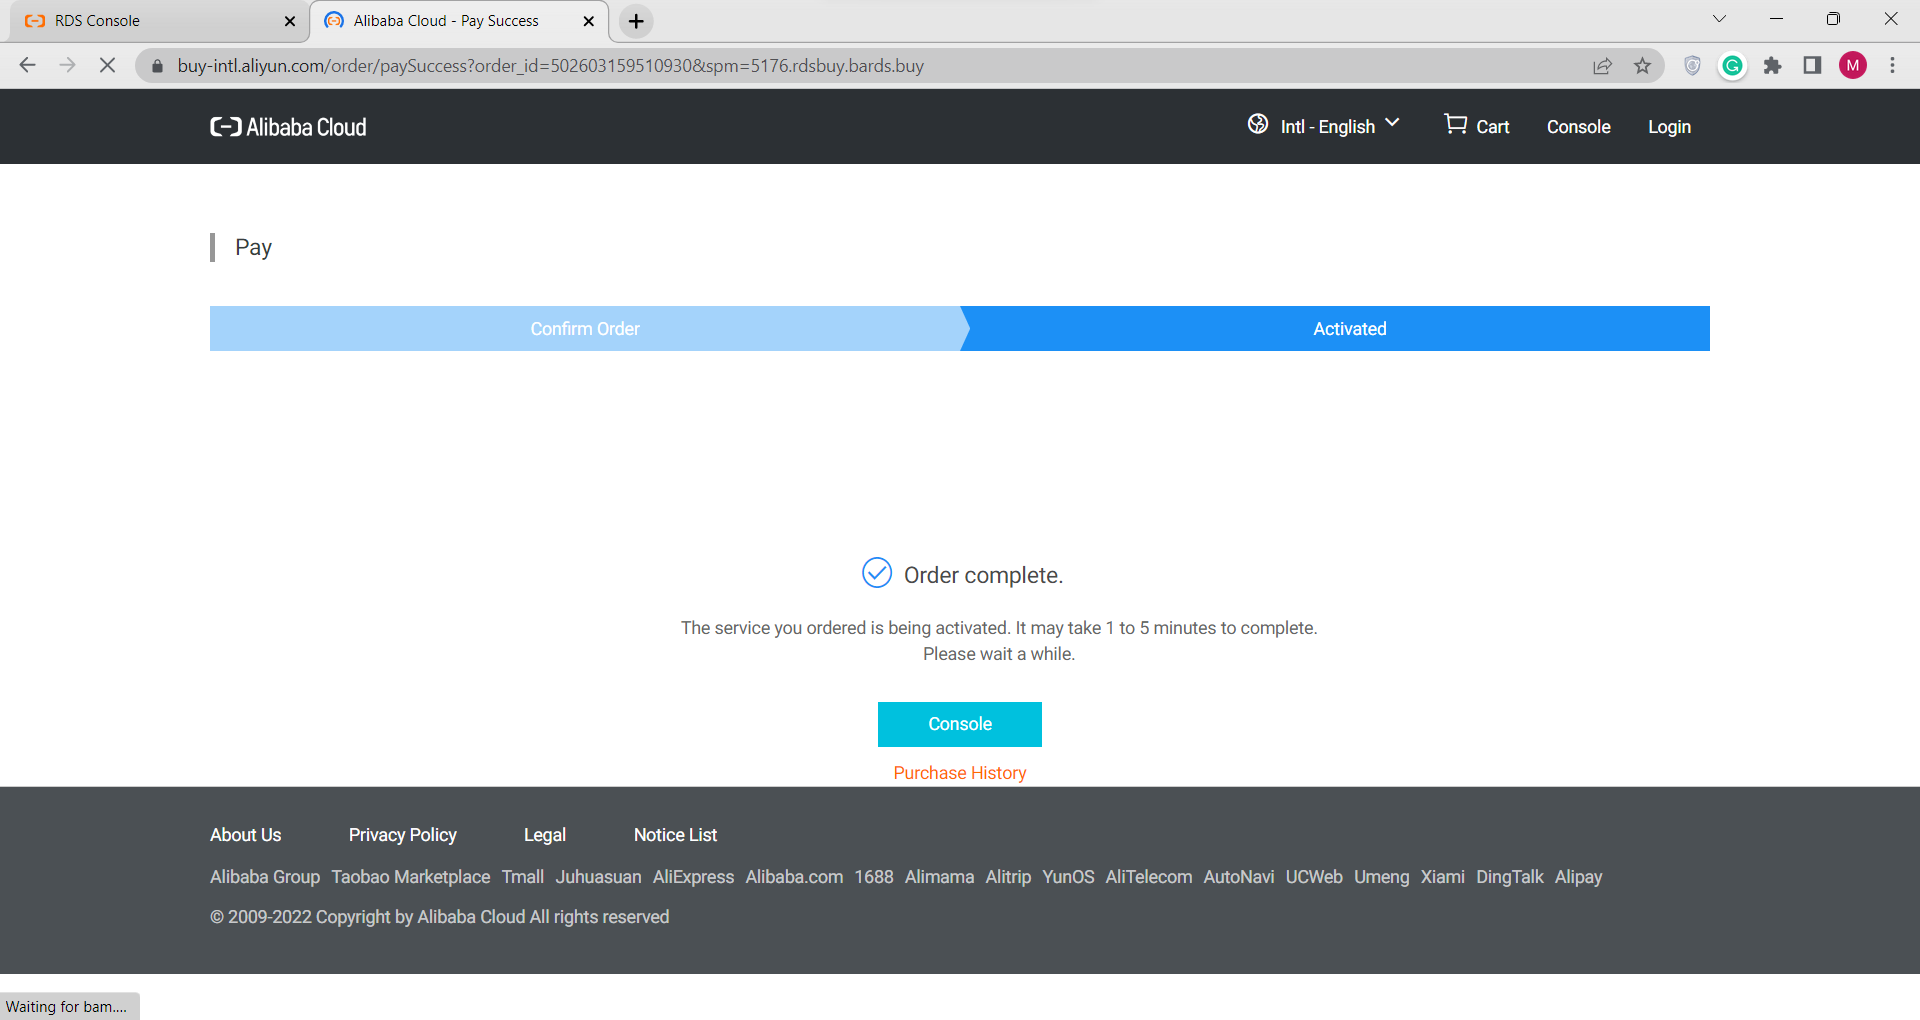
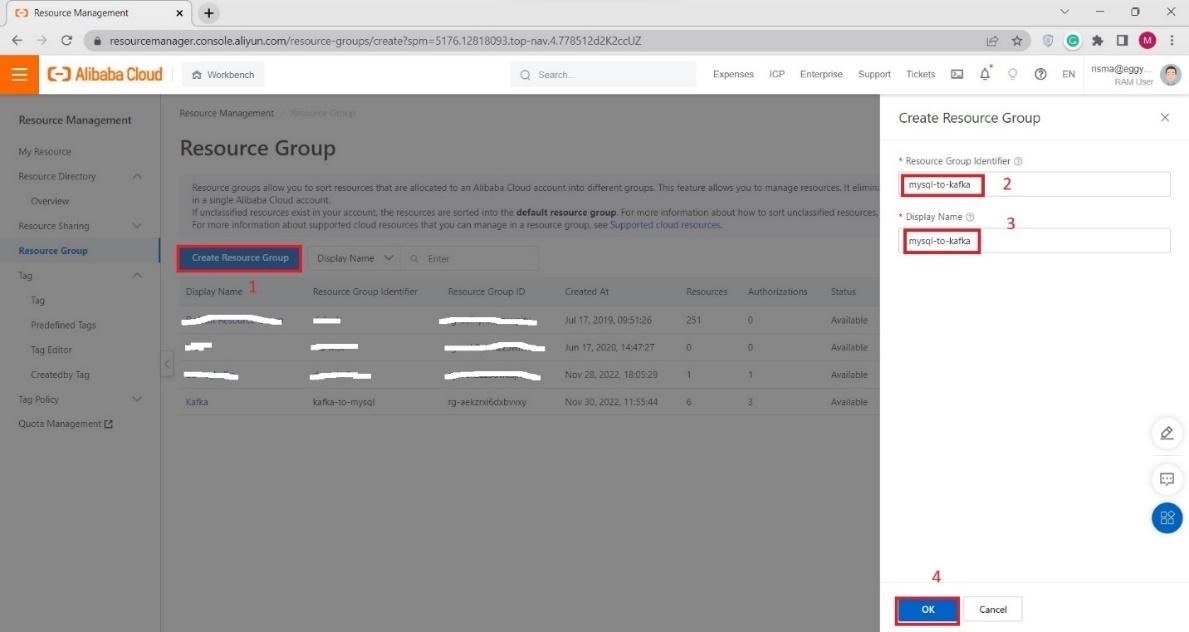 Please wait until the resource group is created, this will take around 2 – 3 minutes.
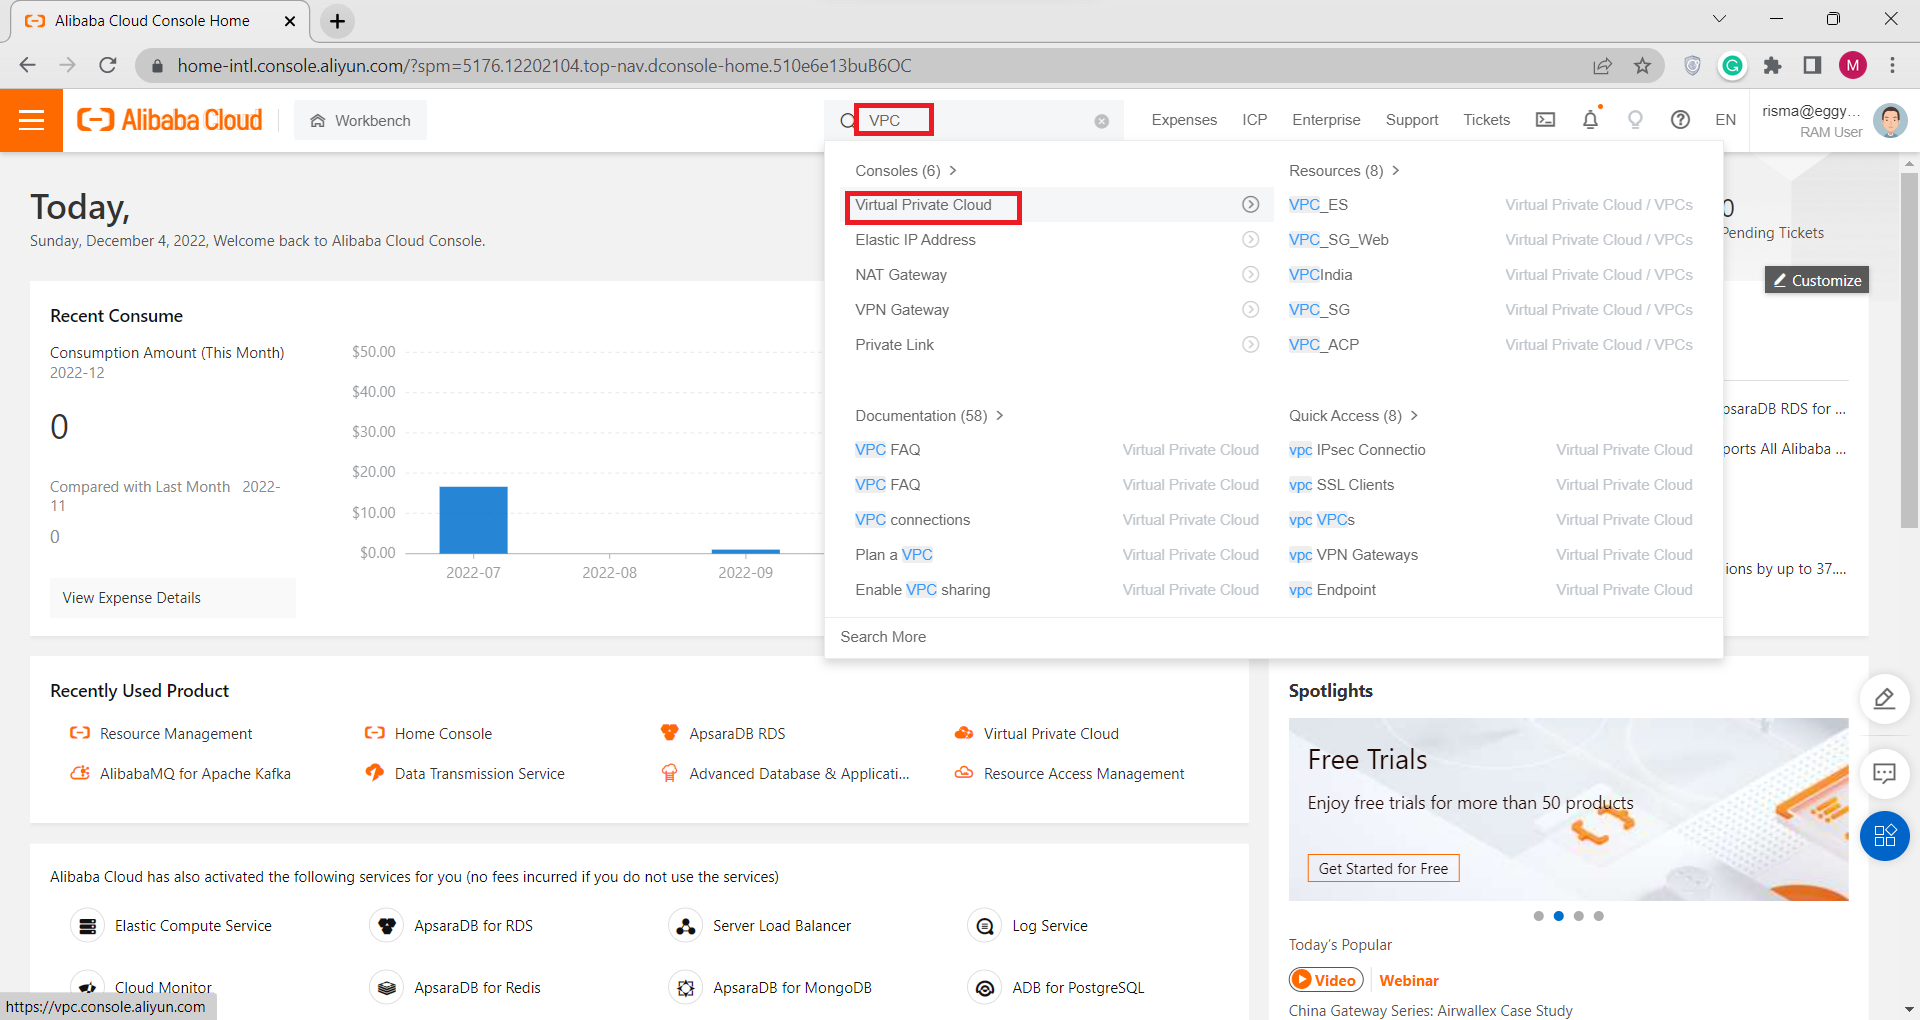
B) Create VPC for your ApsaraDB RDS MySQL and AlibabaMQ for Apache Kafka
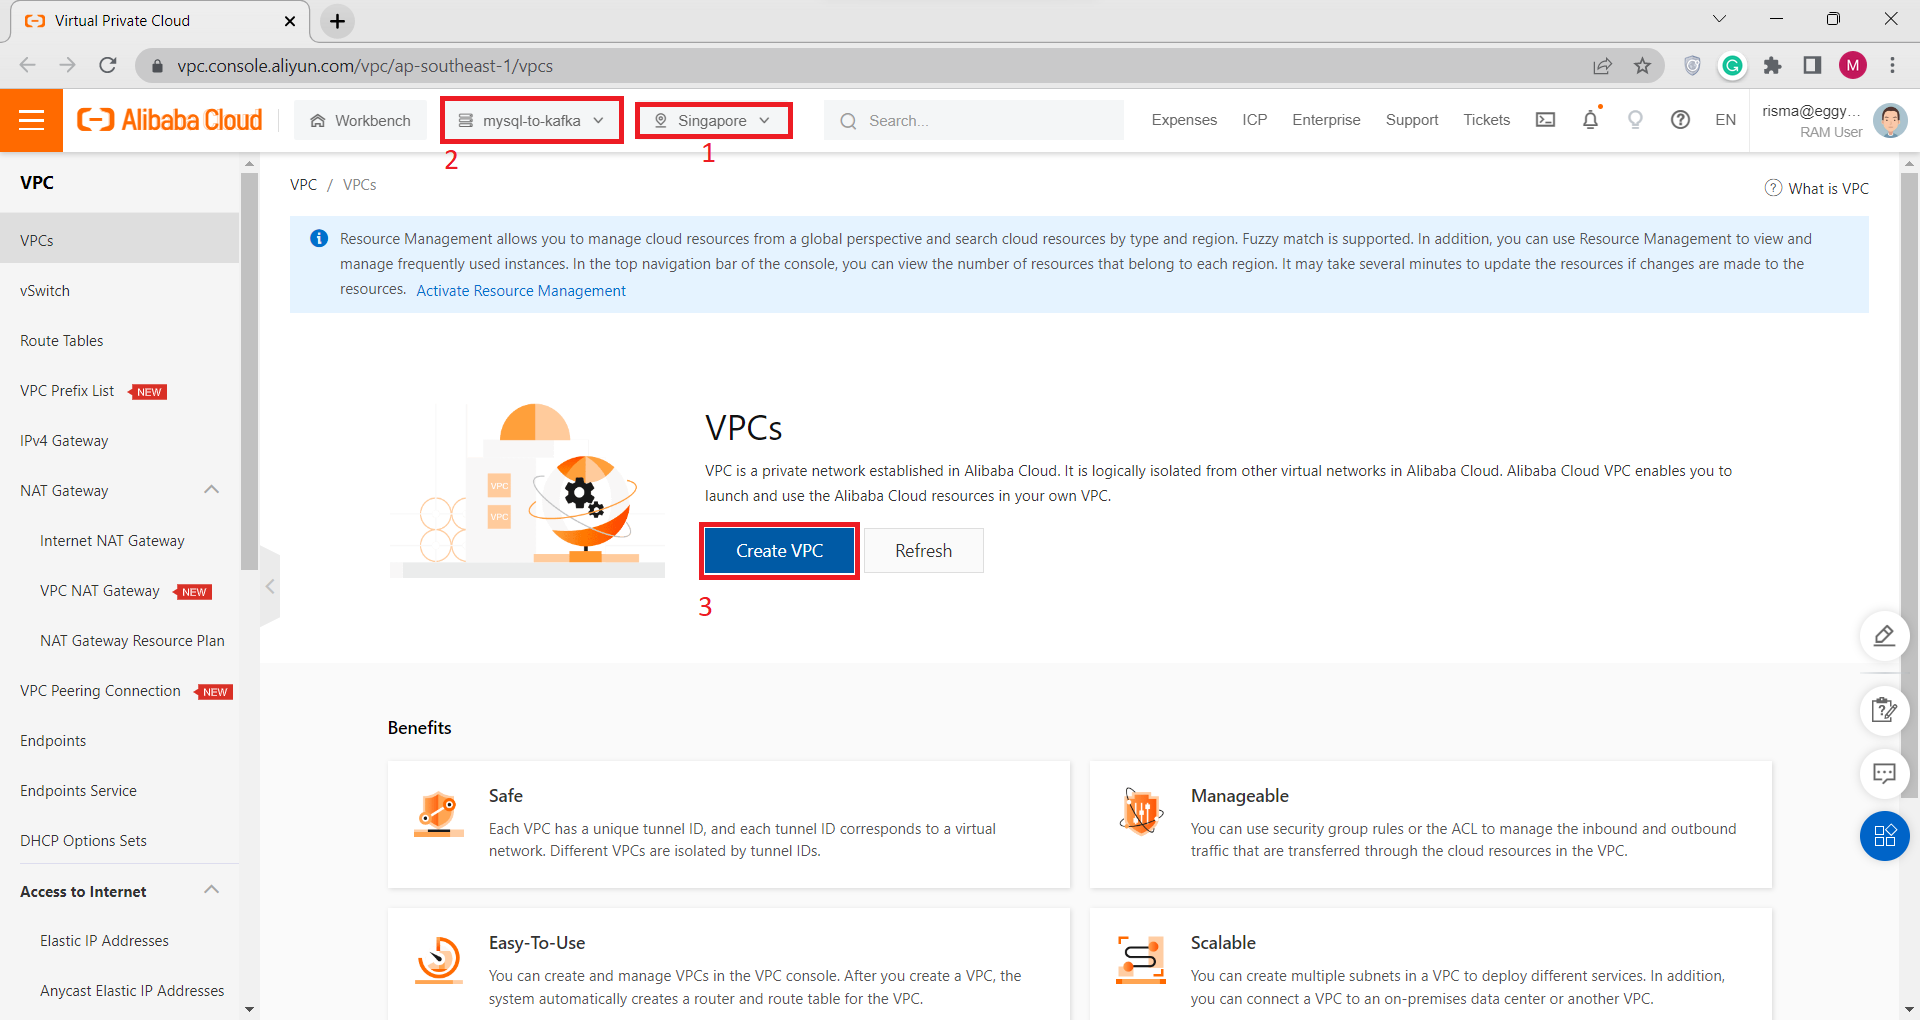
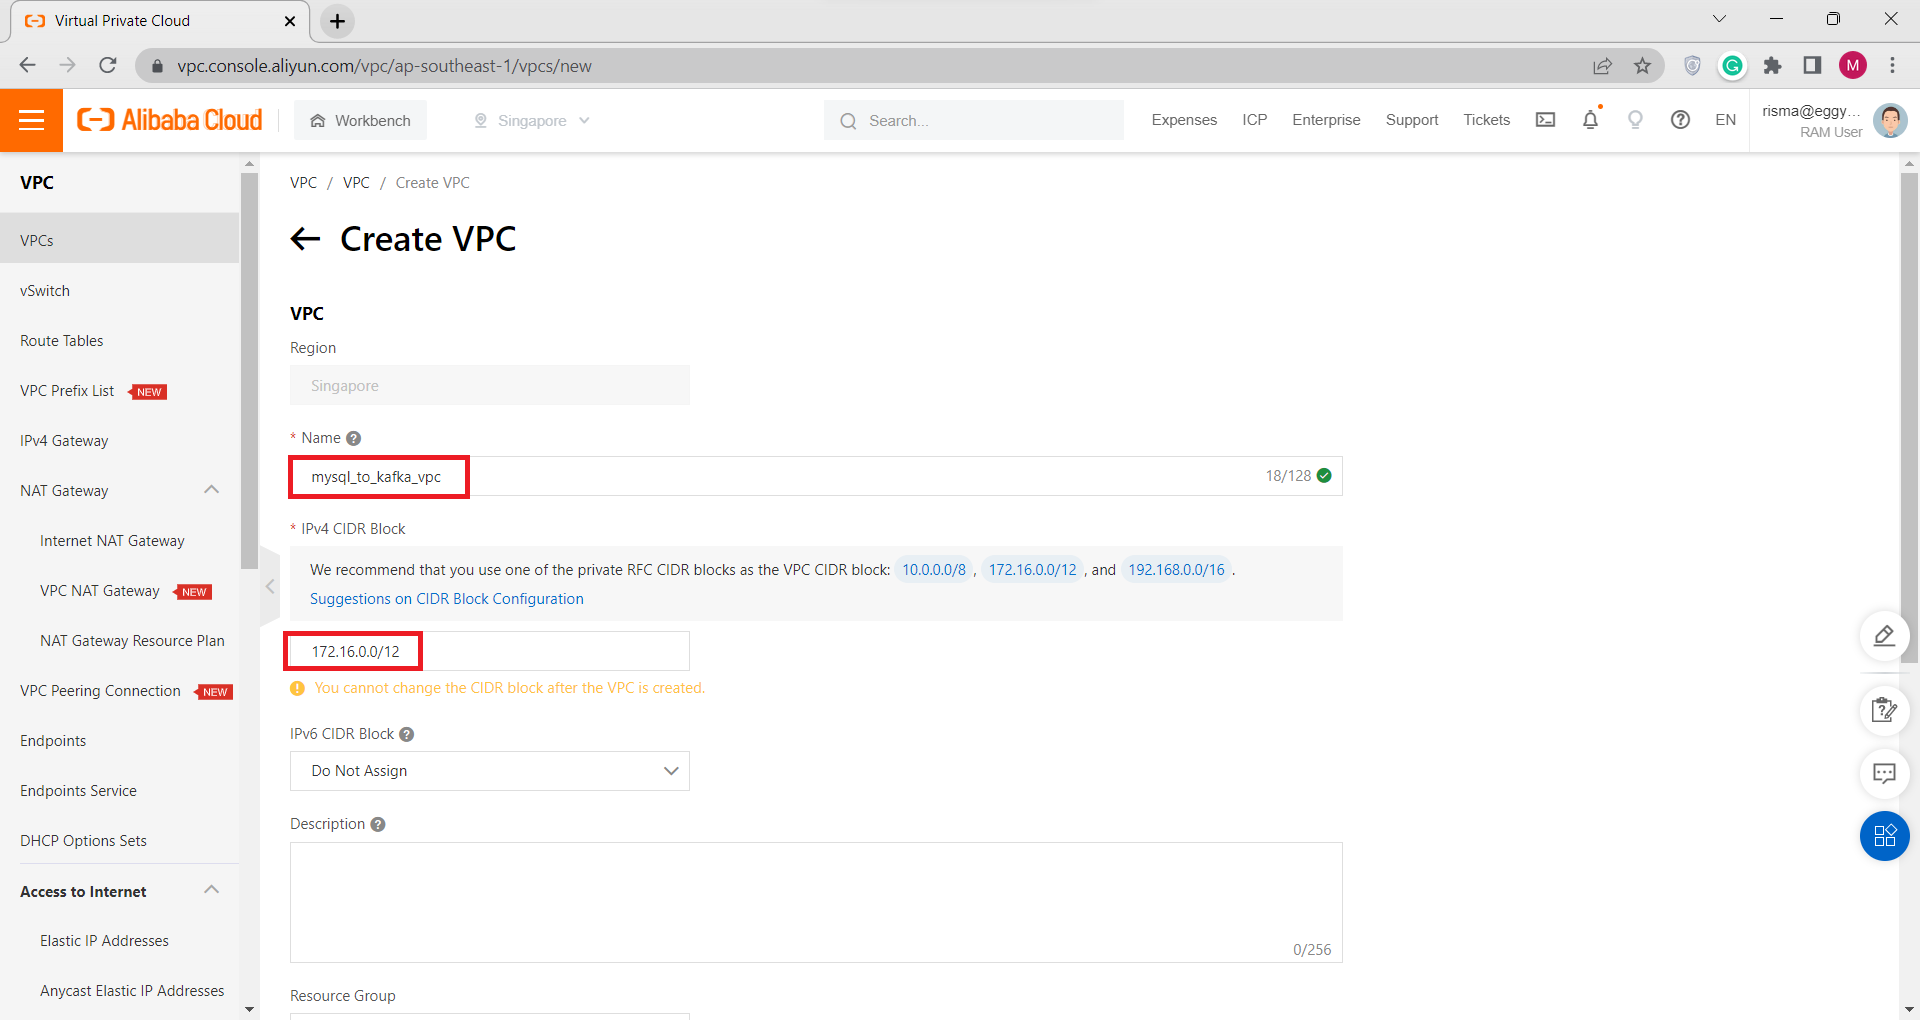
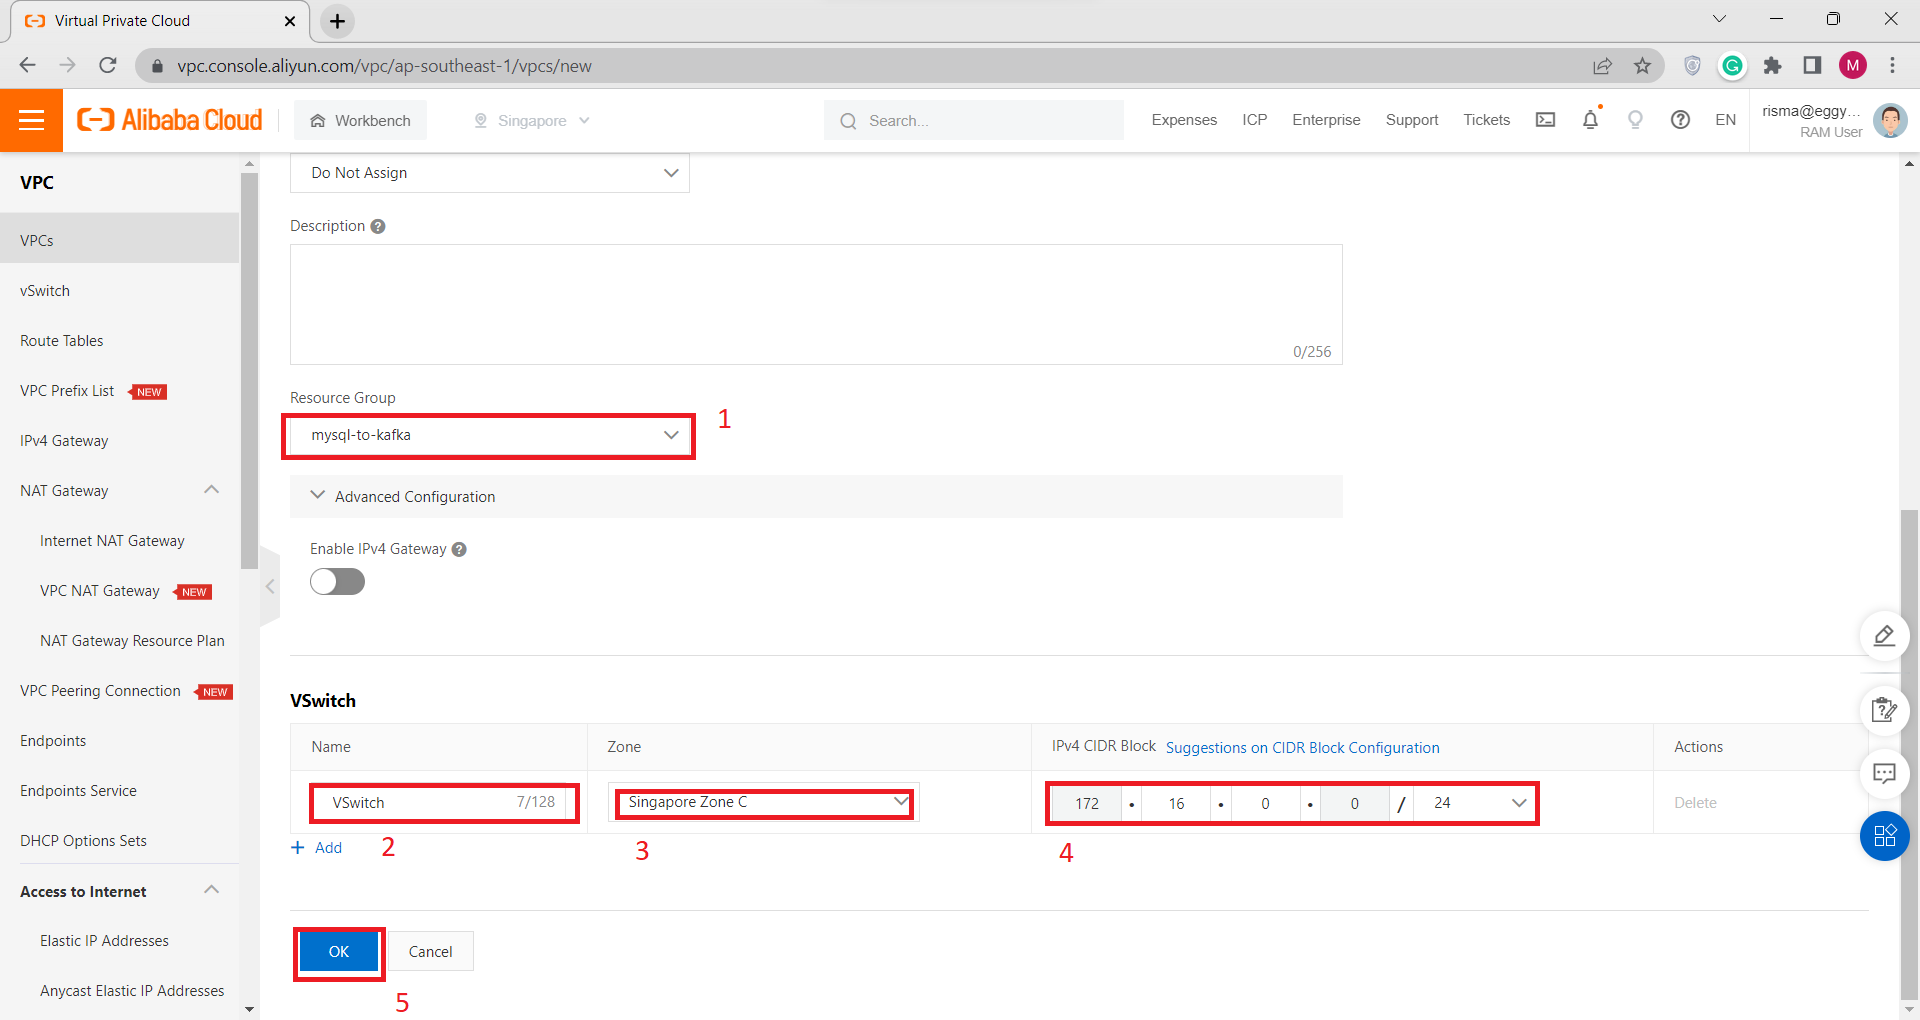
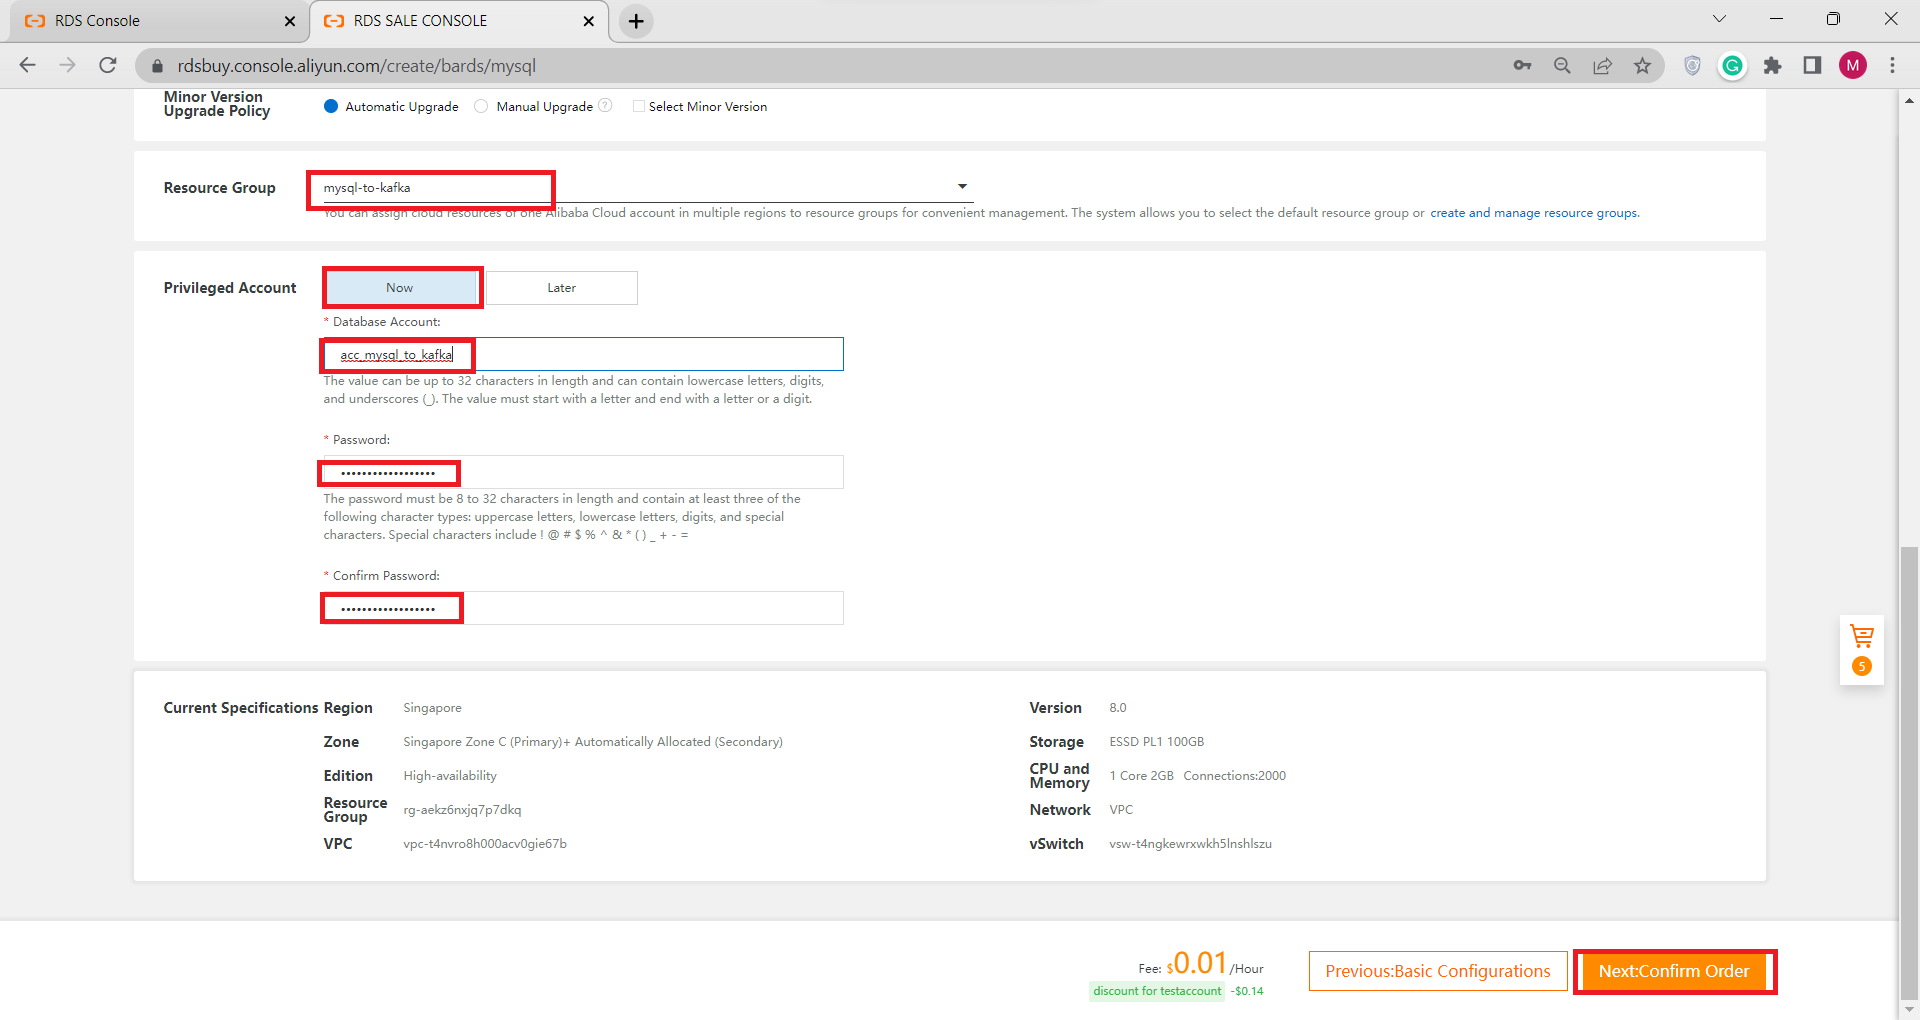
C) Create ApsaraDB RDS Instance for MySQL
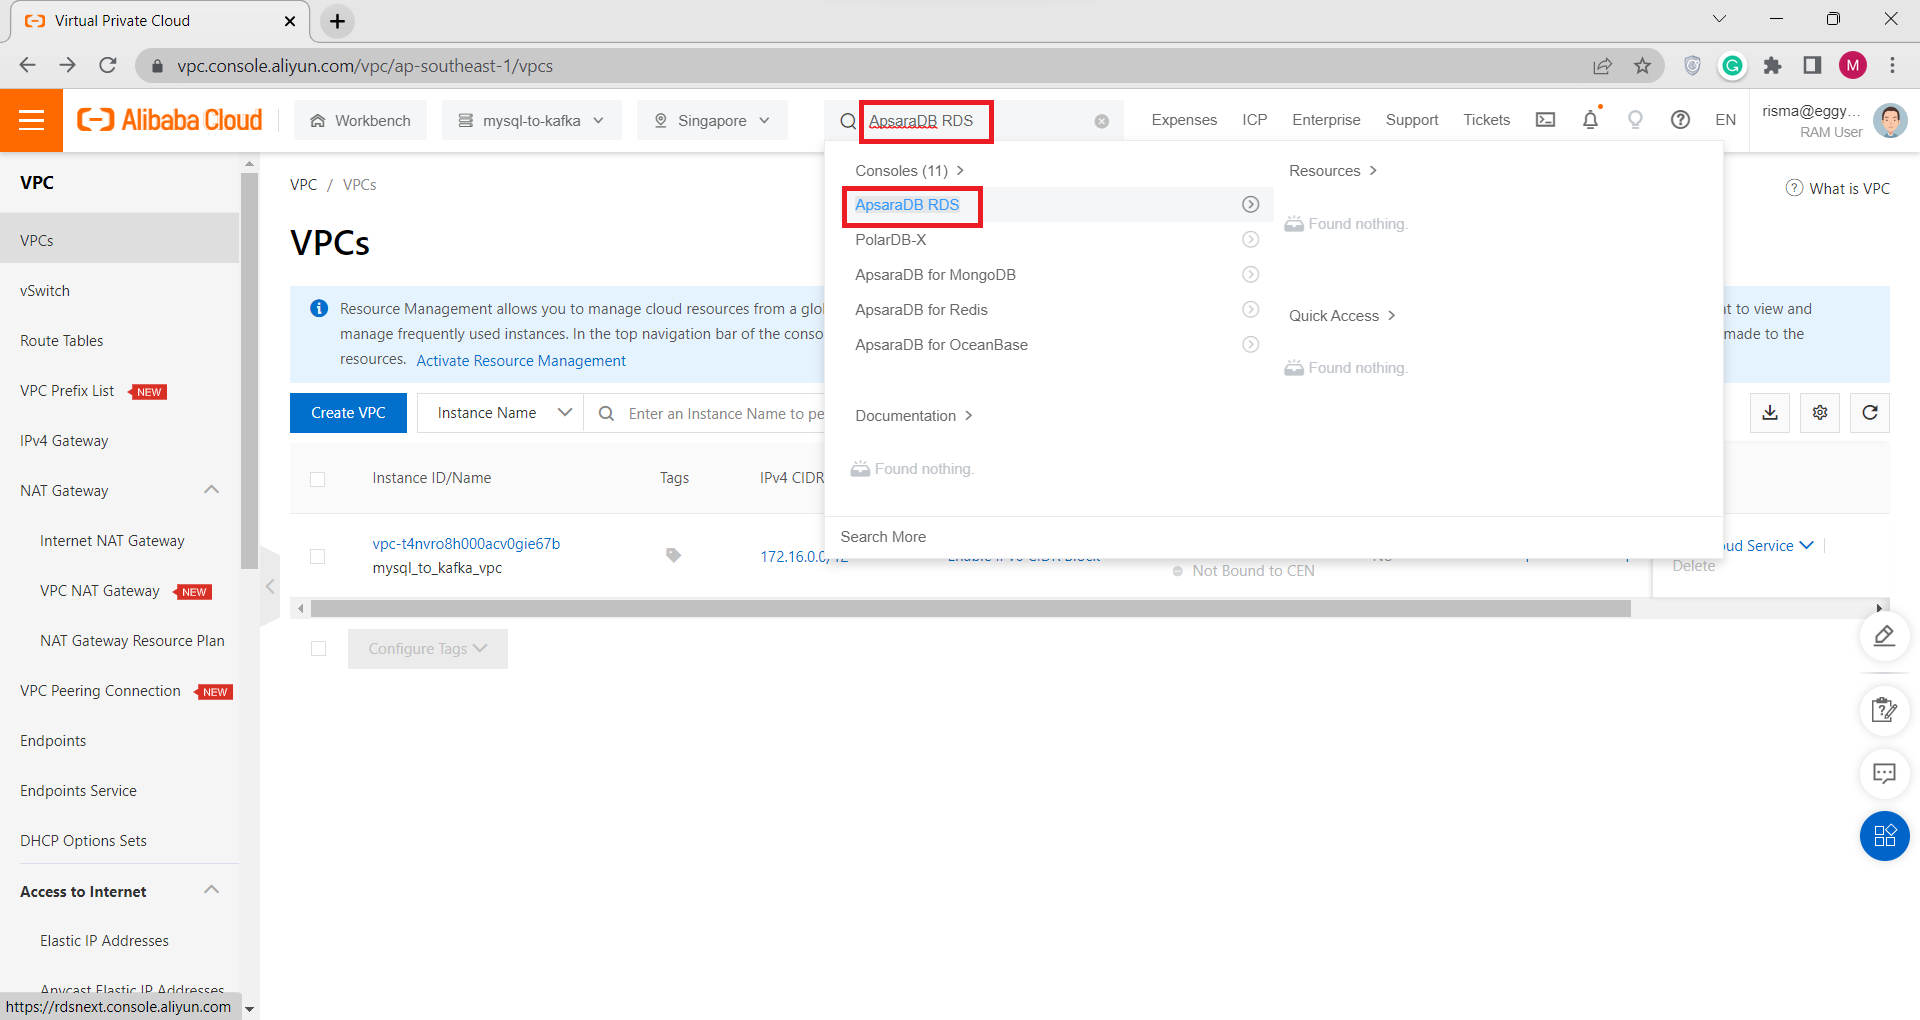
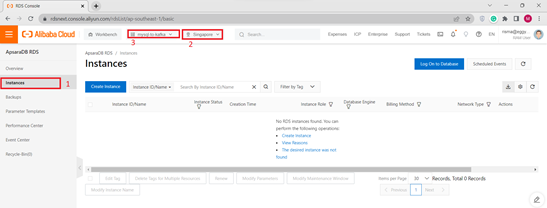
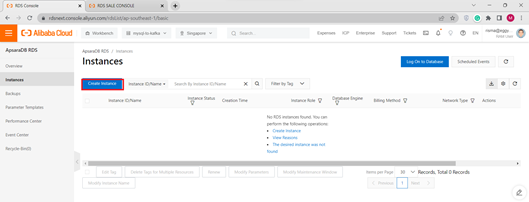
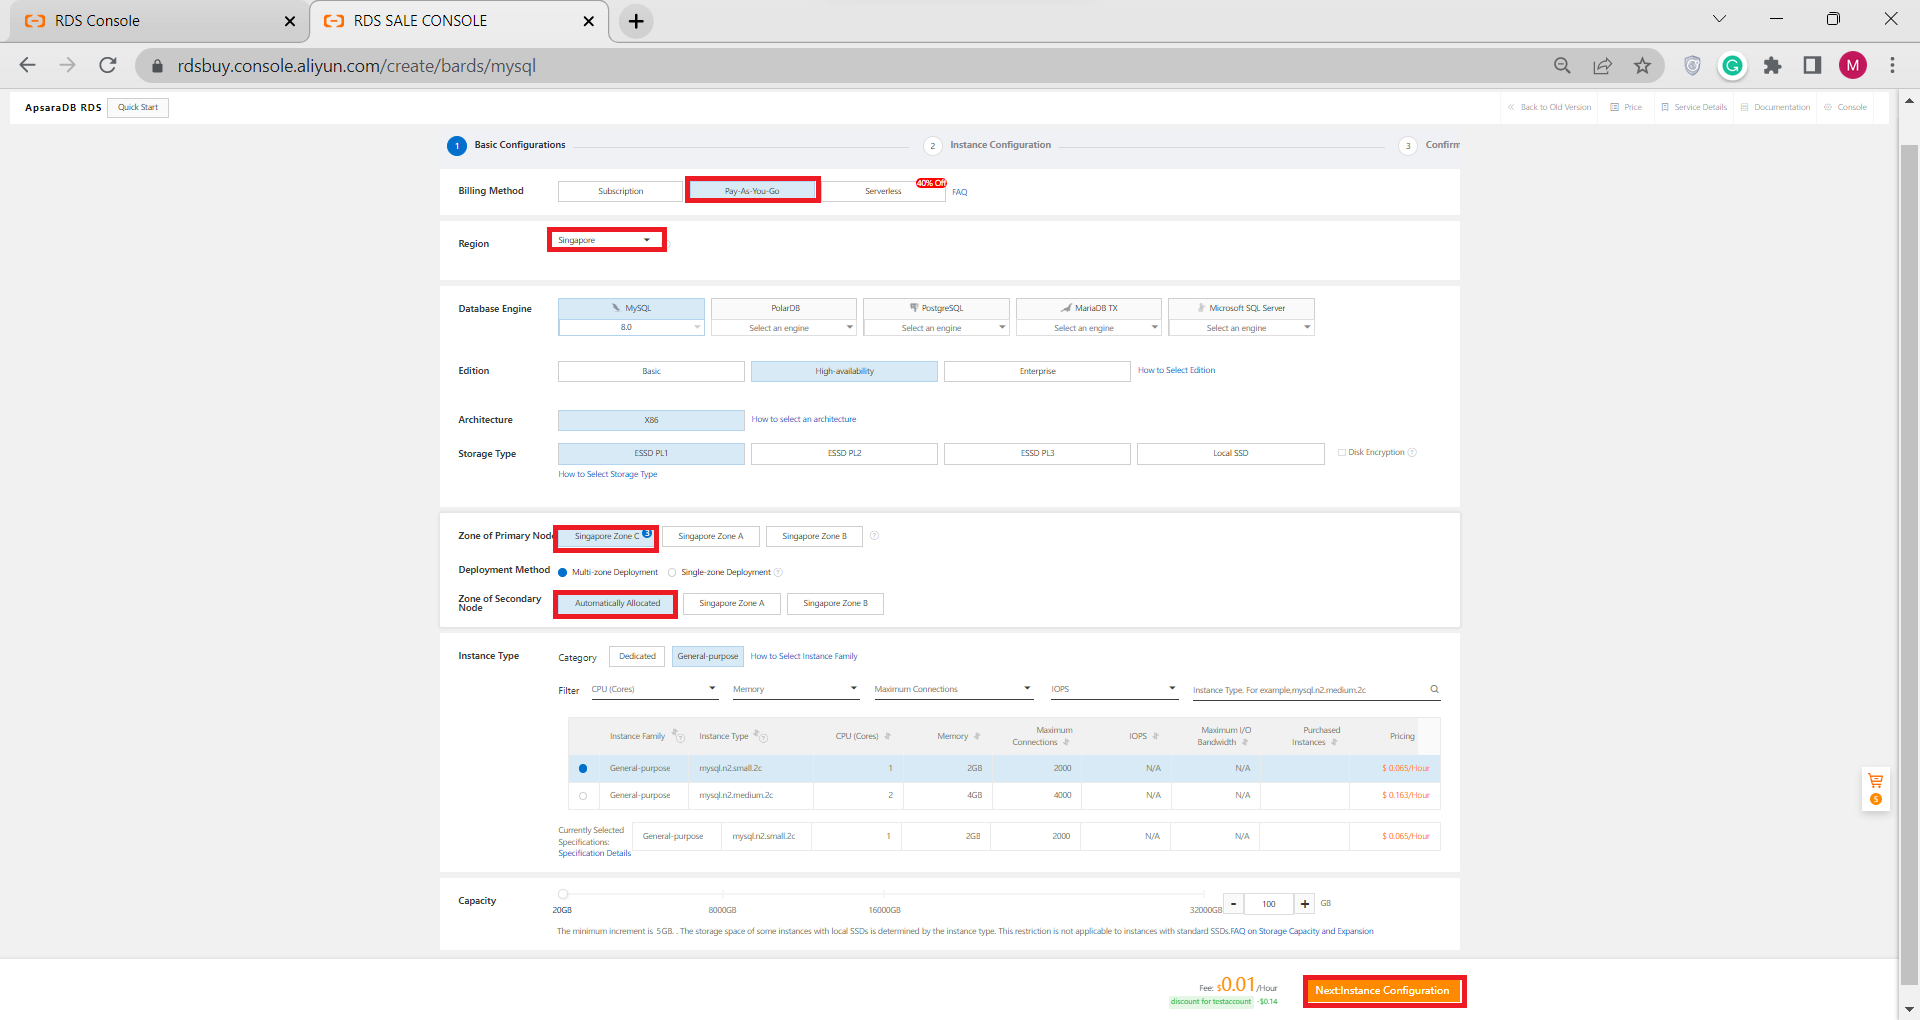
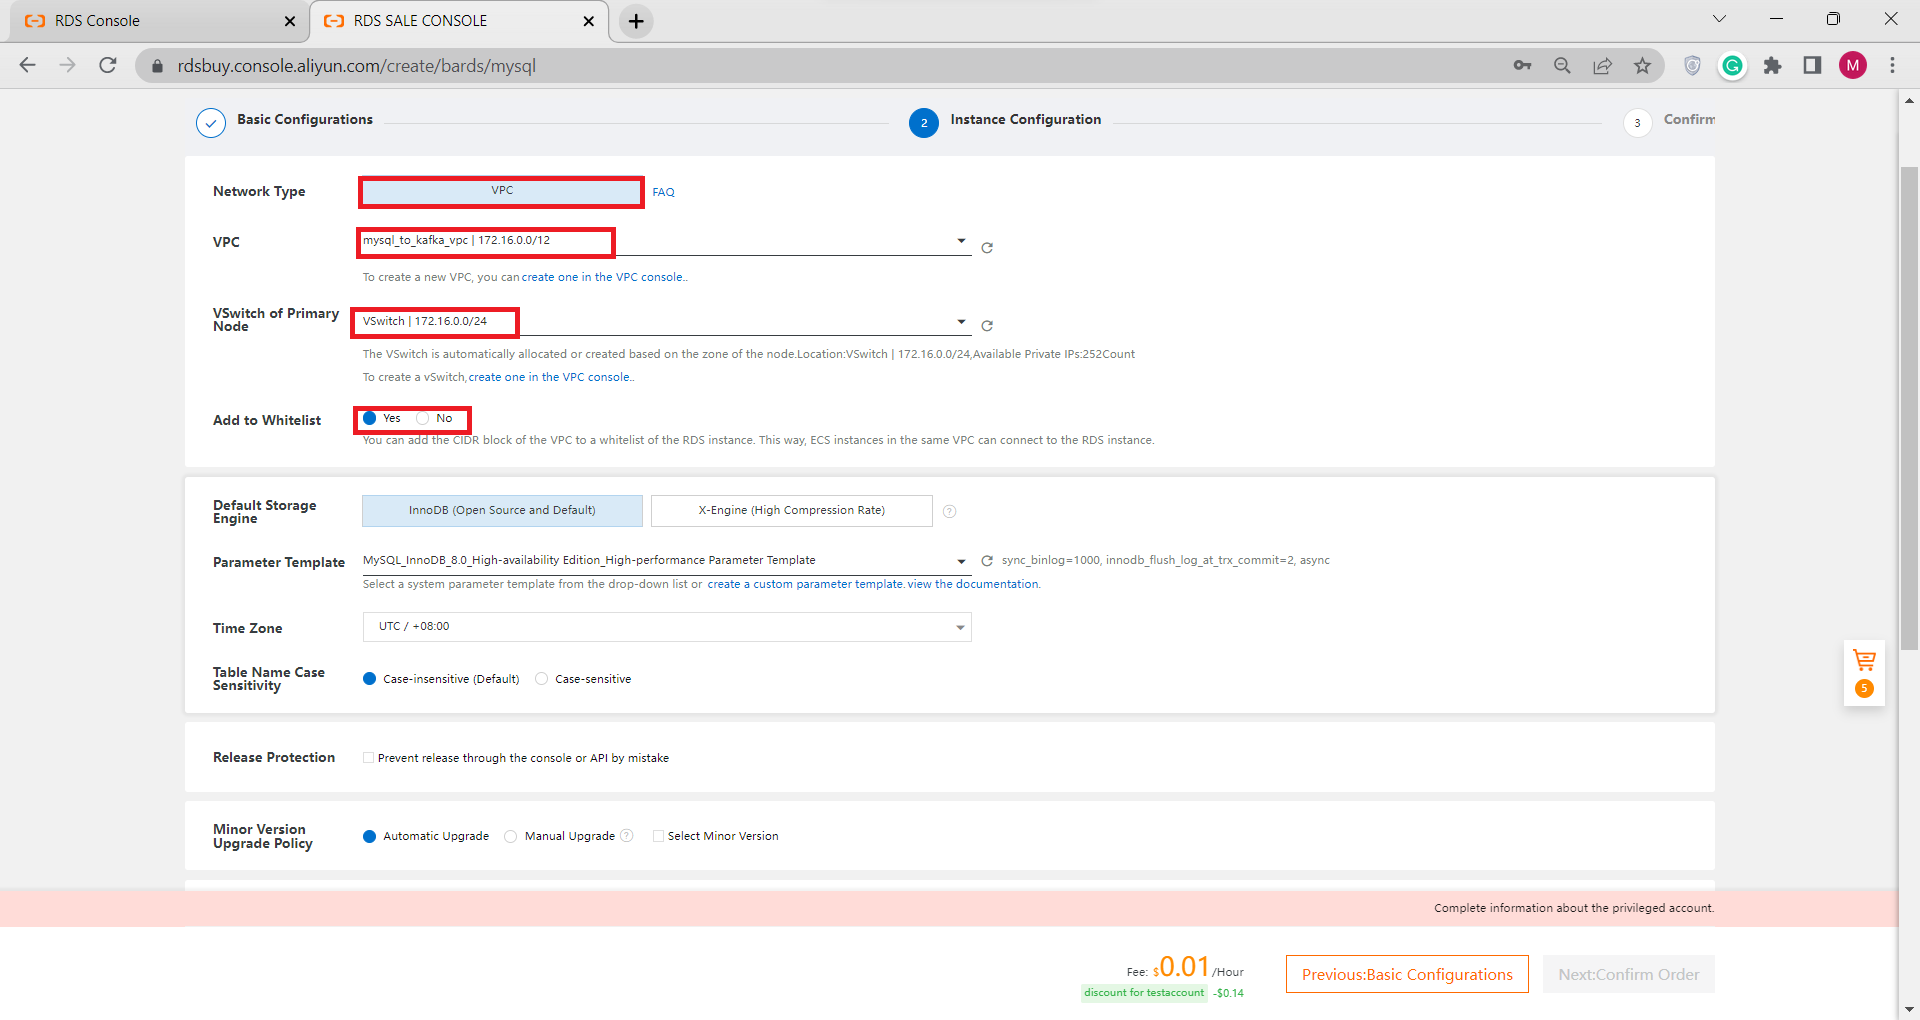
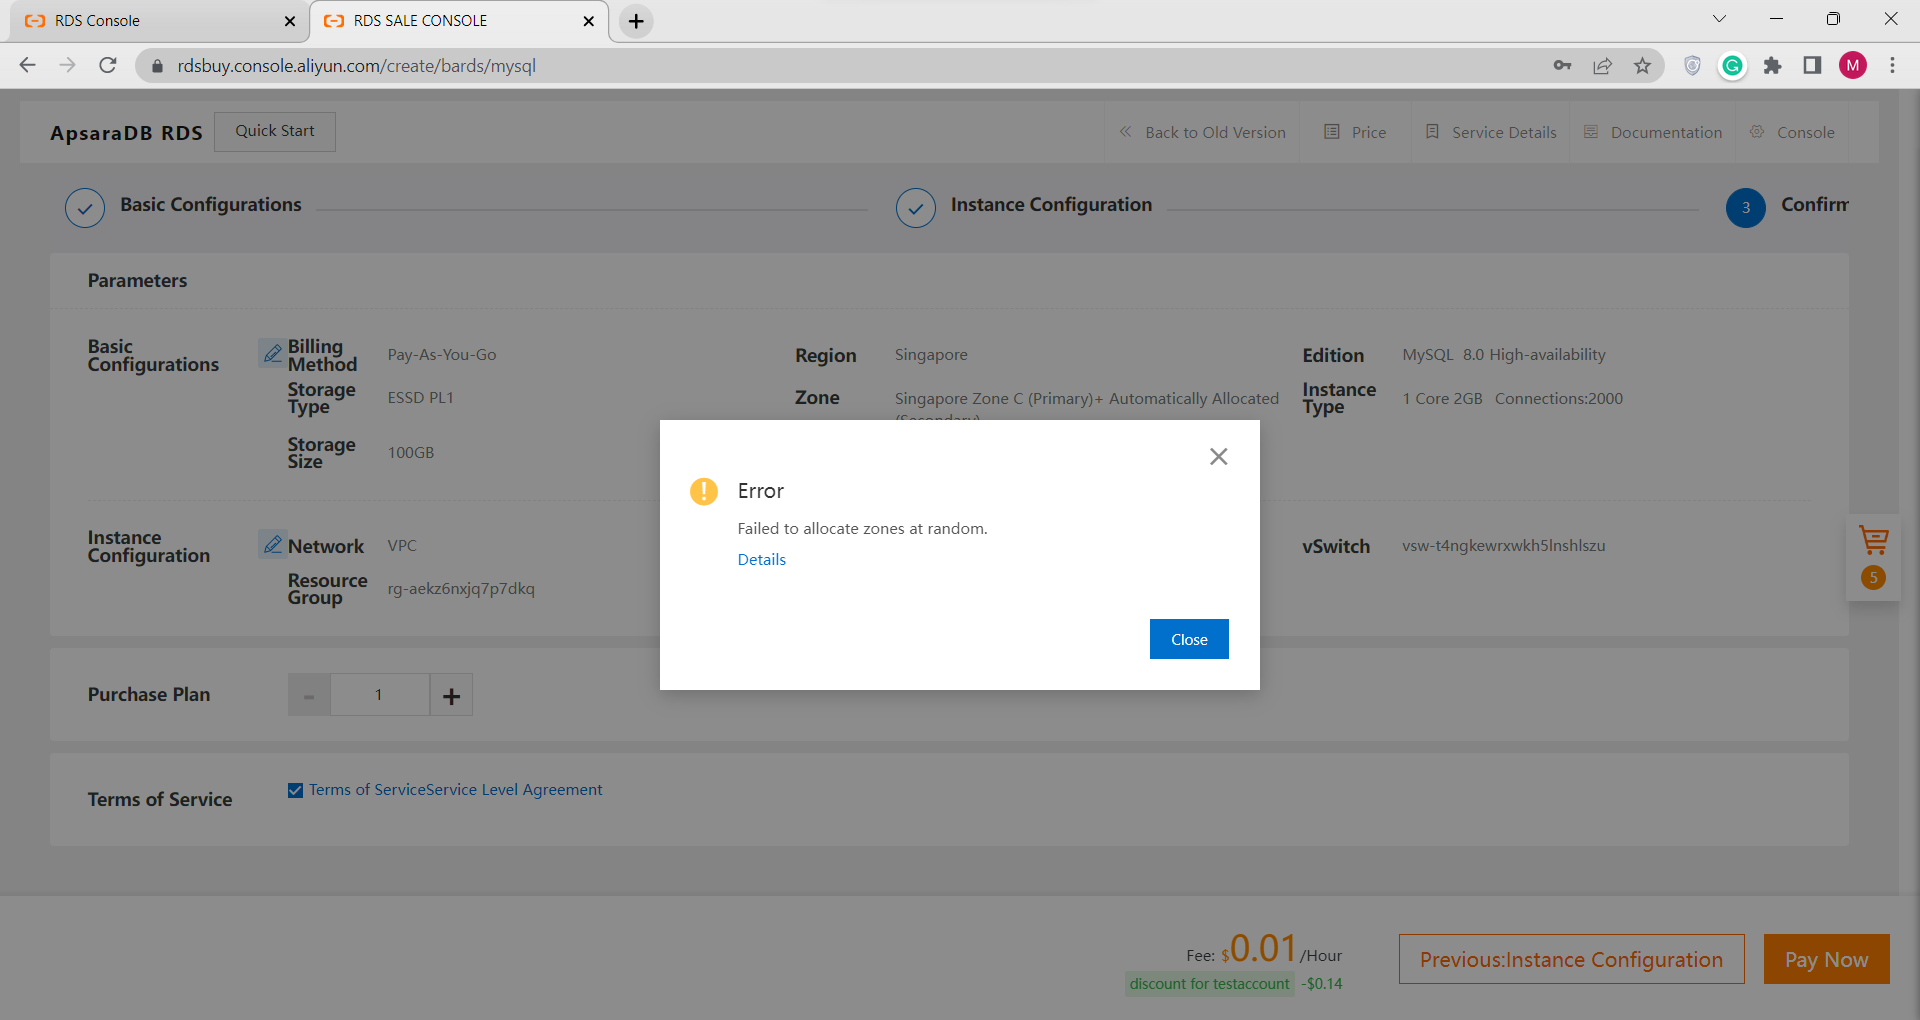
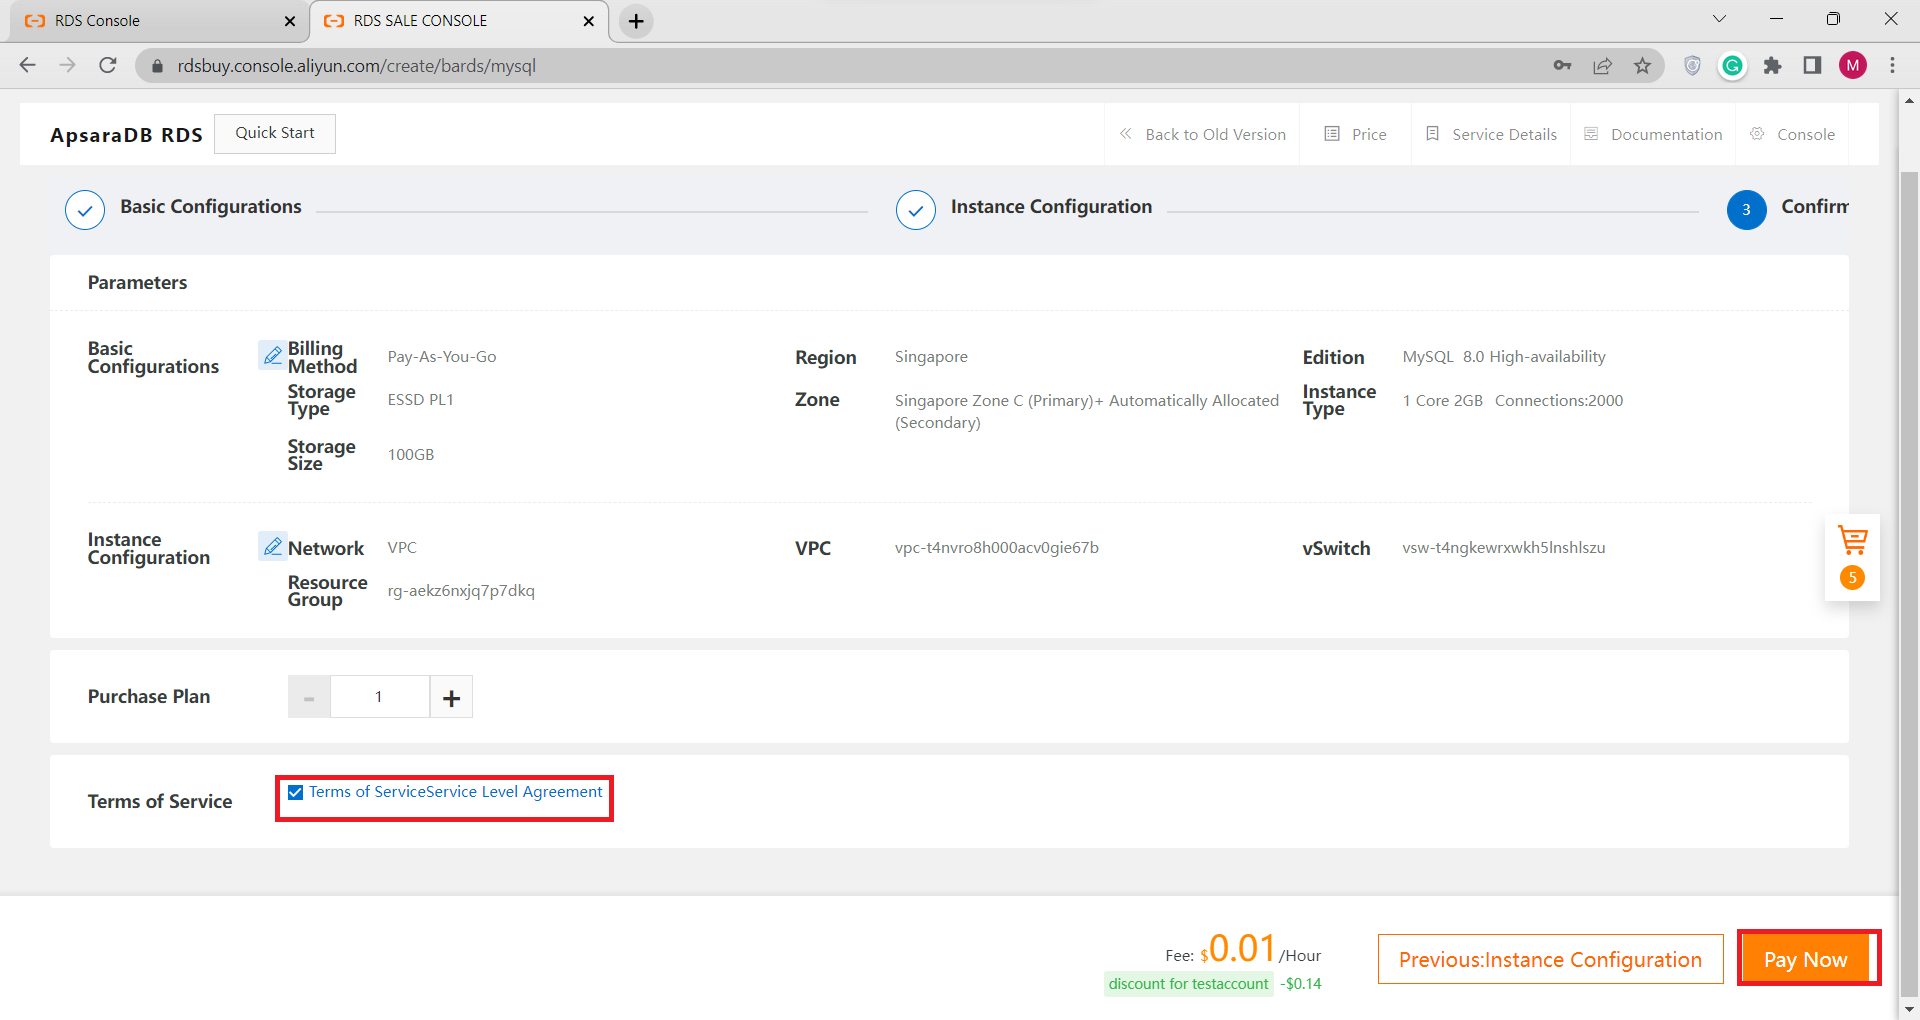 If you get an error like the image below, please make sure that your internet connection is stable
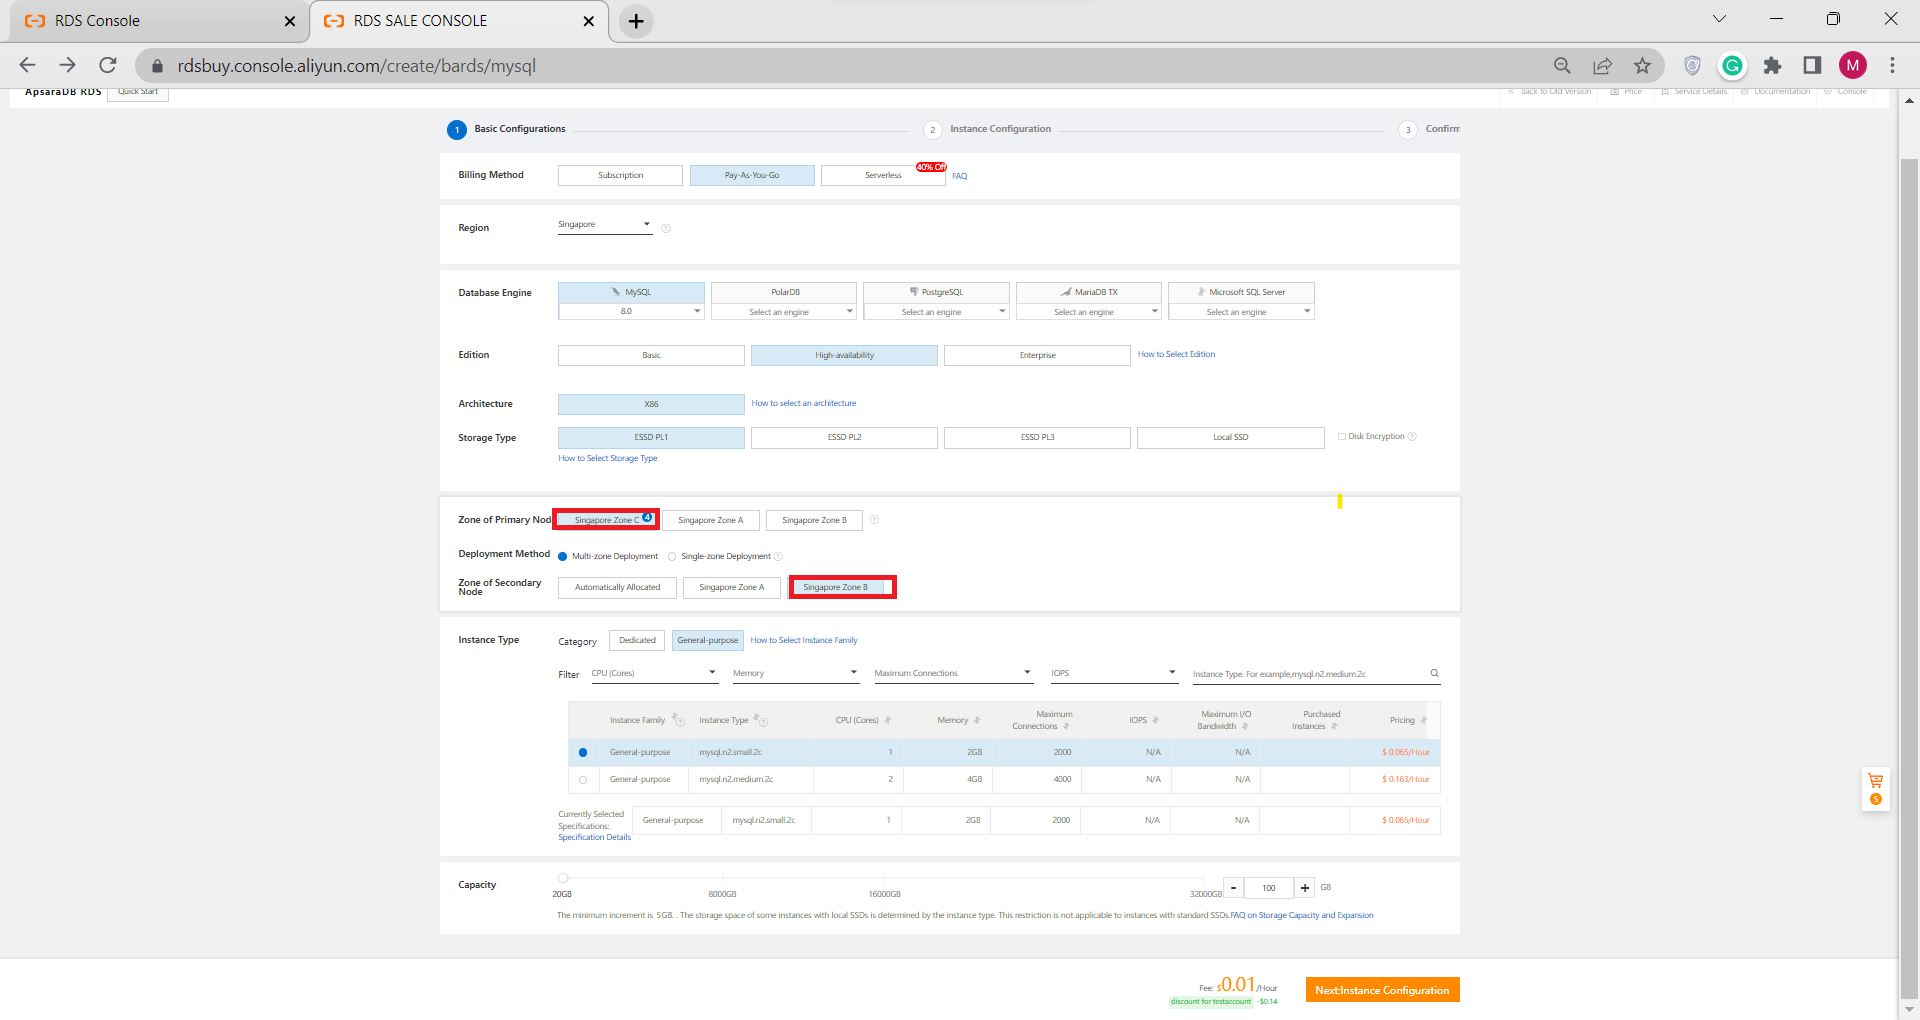
 Or you can go back again to Basic Configuration and choose Manual Zone of Secondary Node

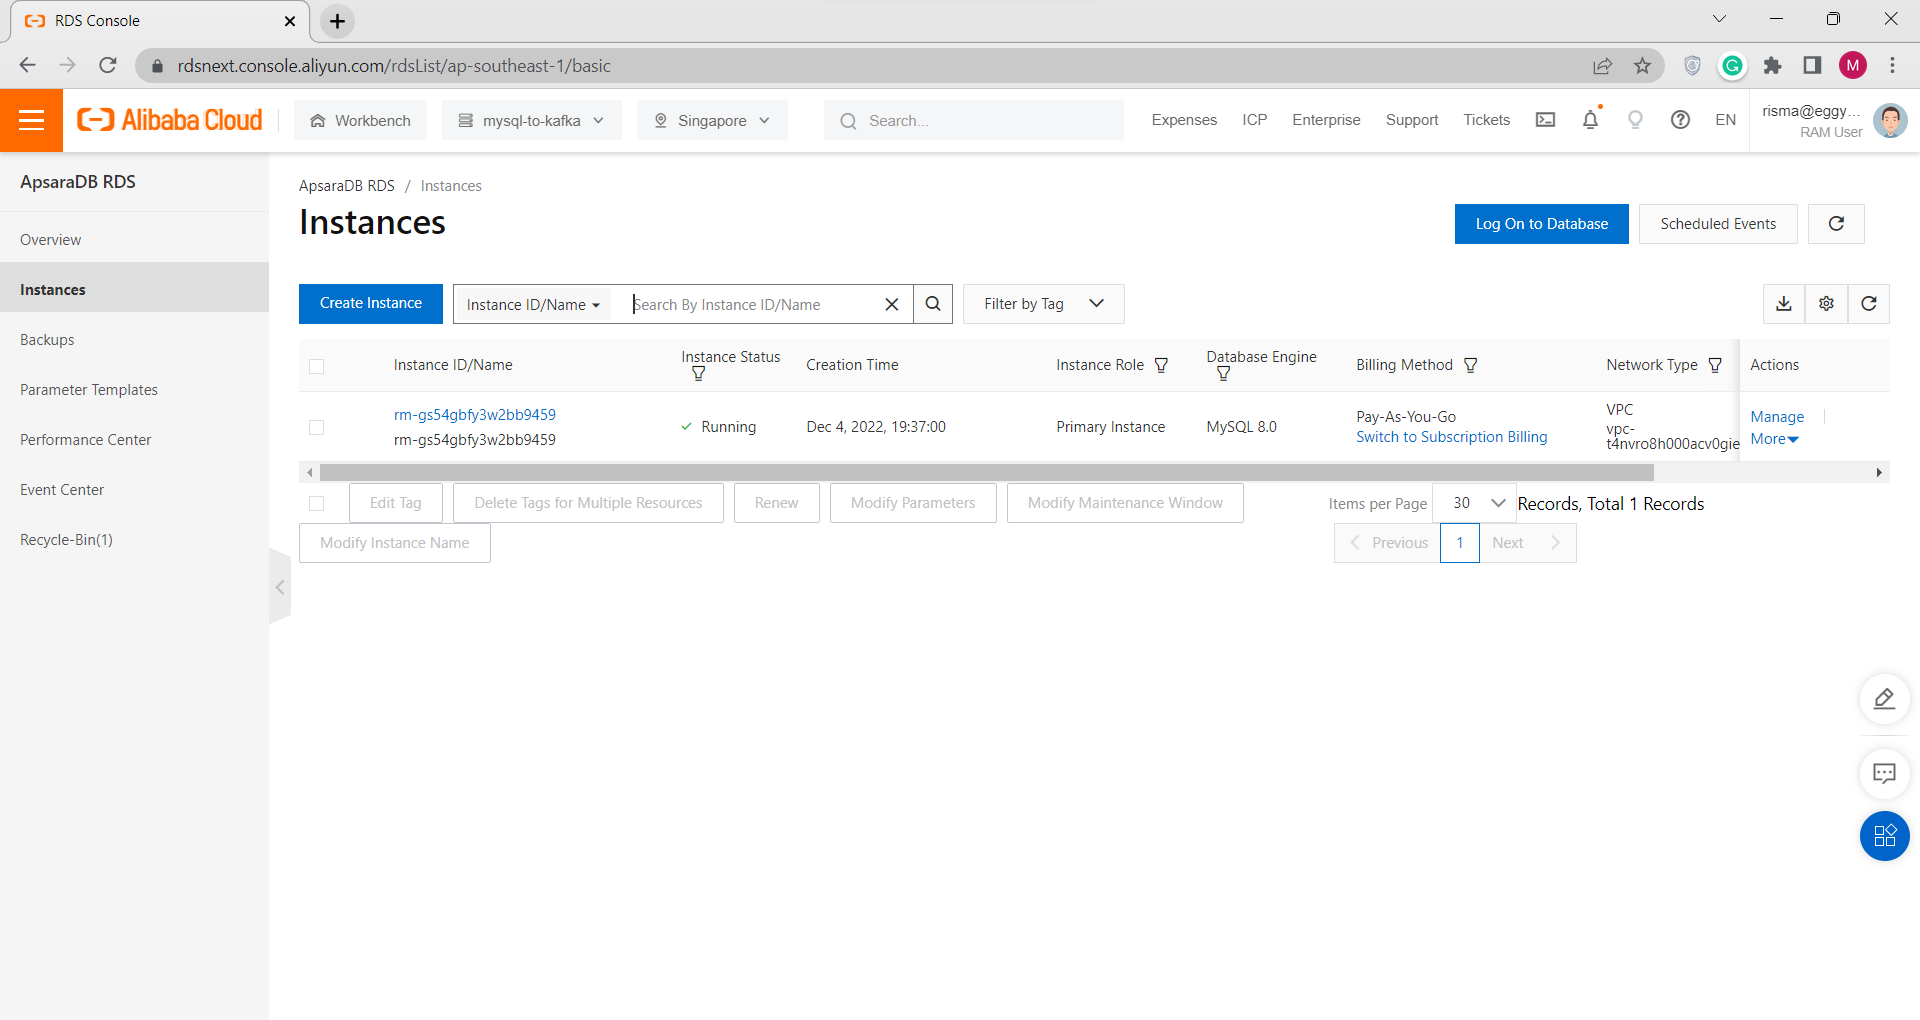
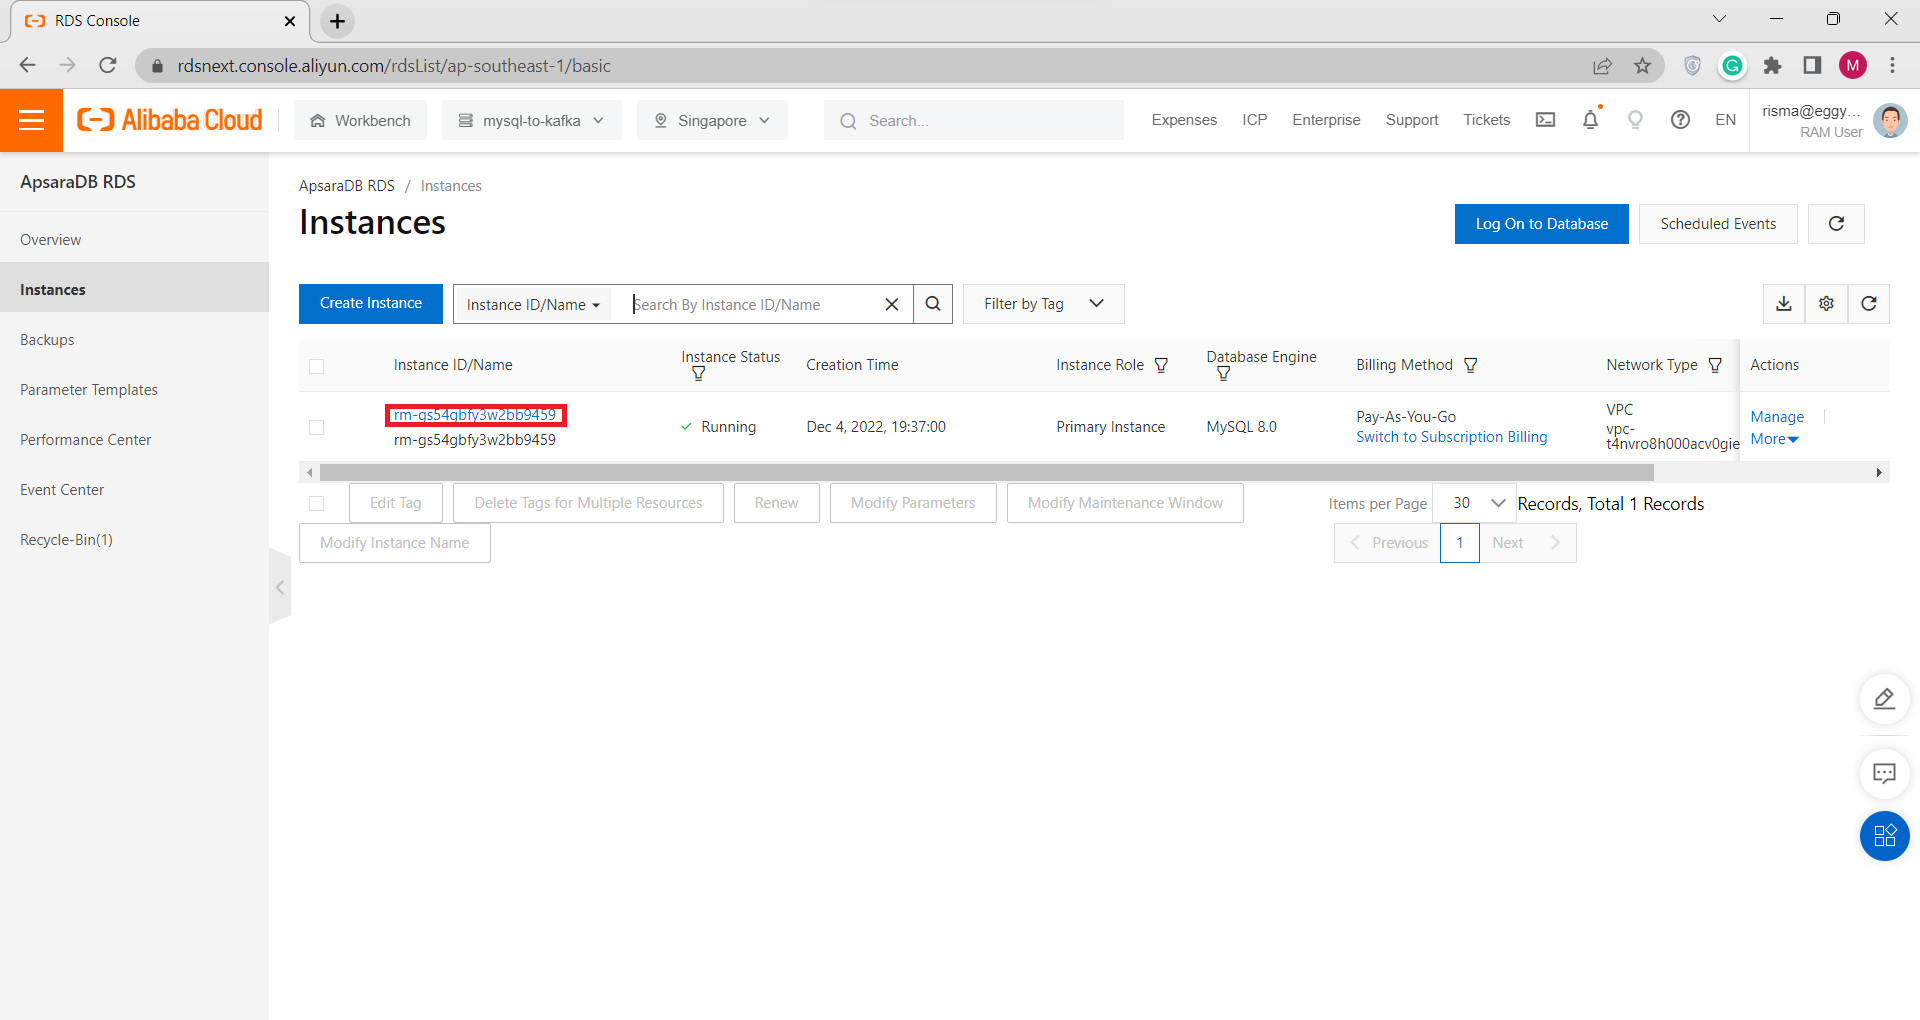
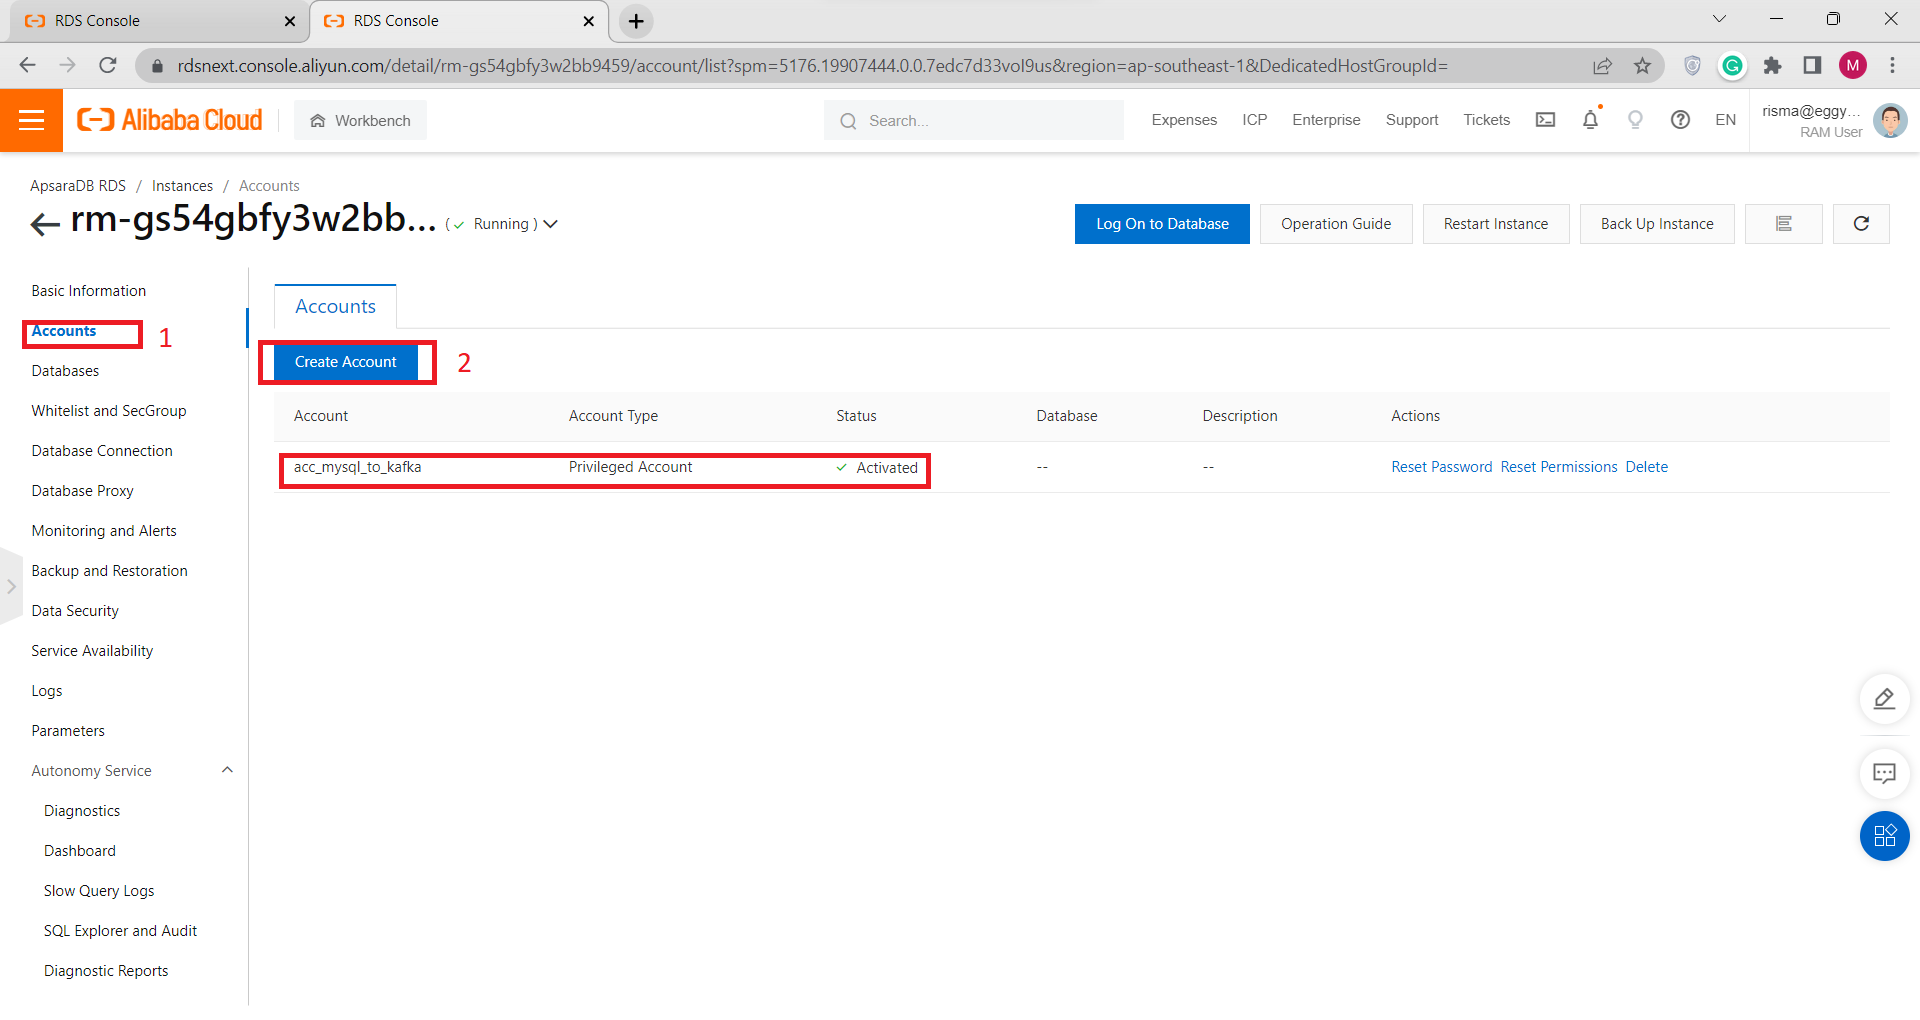
D) Create ApsaraDB RDS Account and Database for MySQL
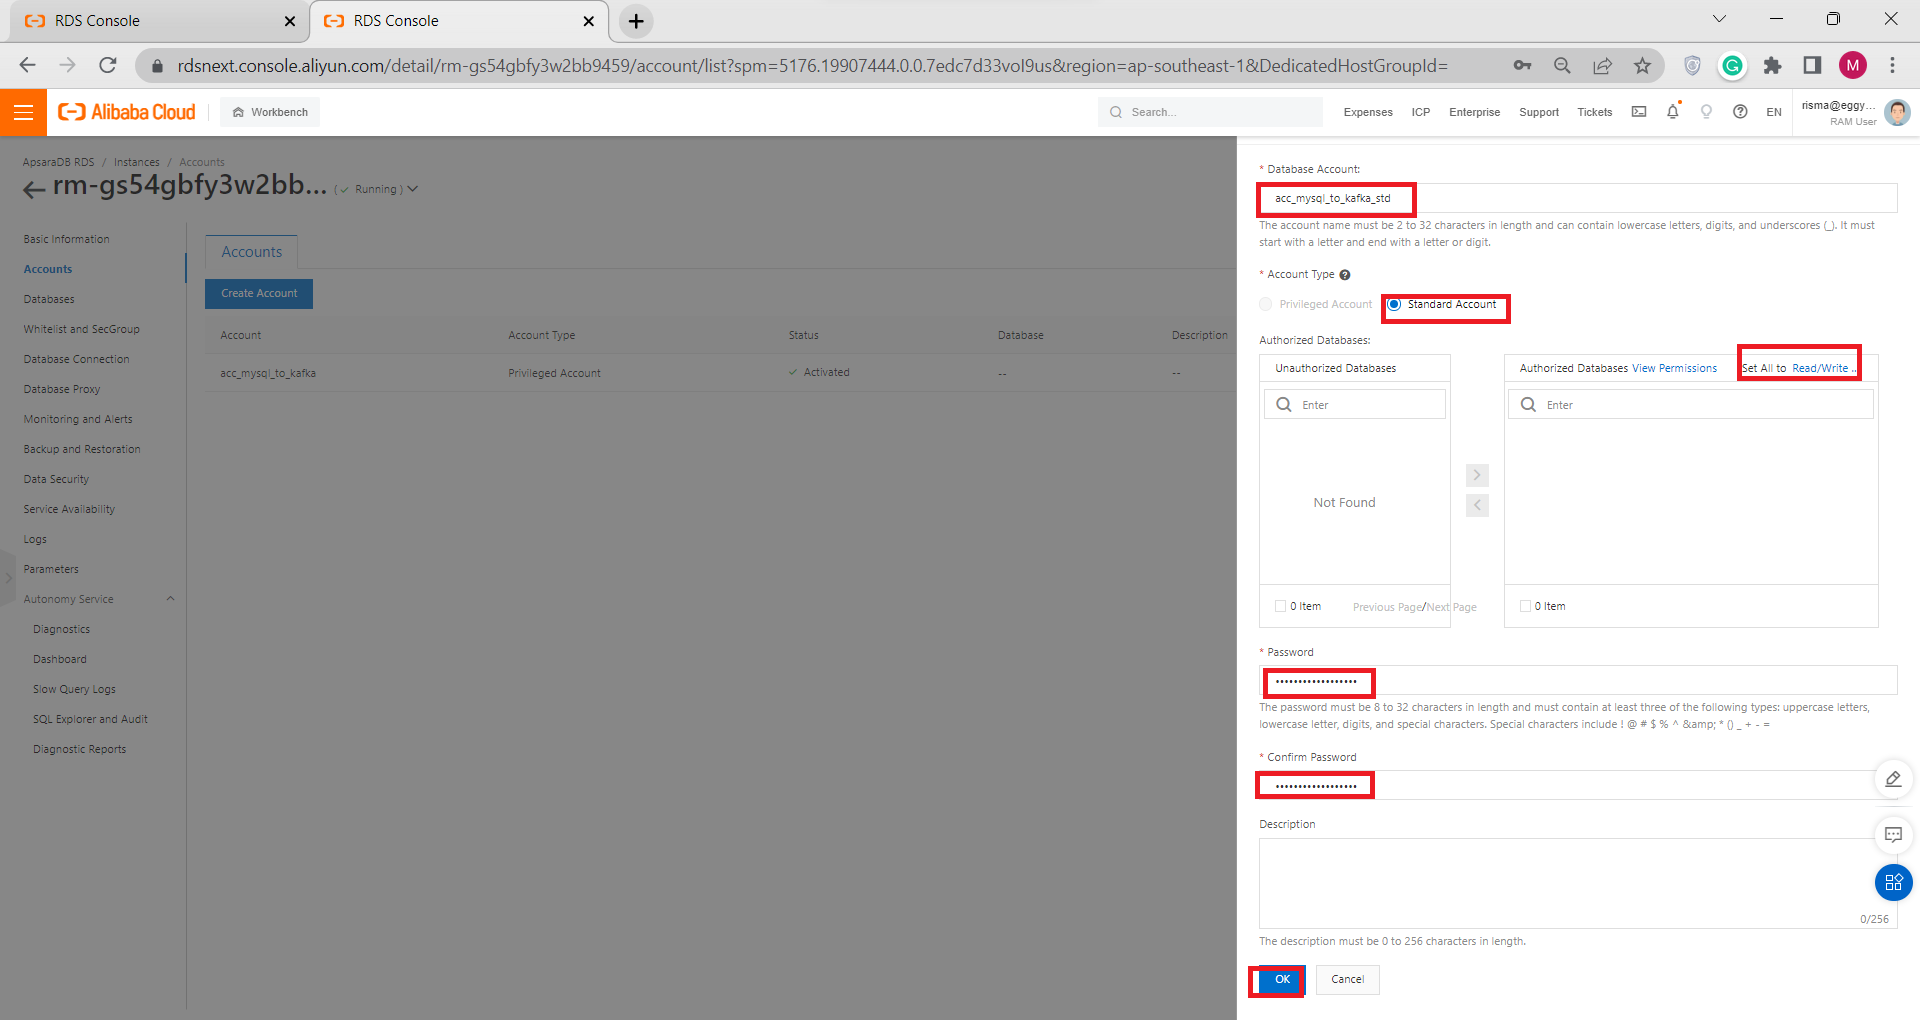
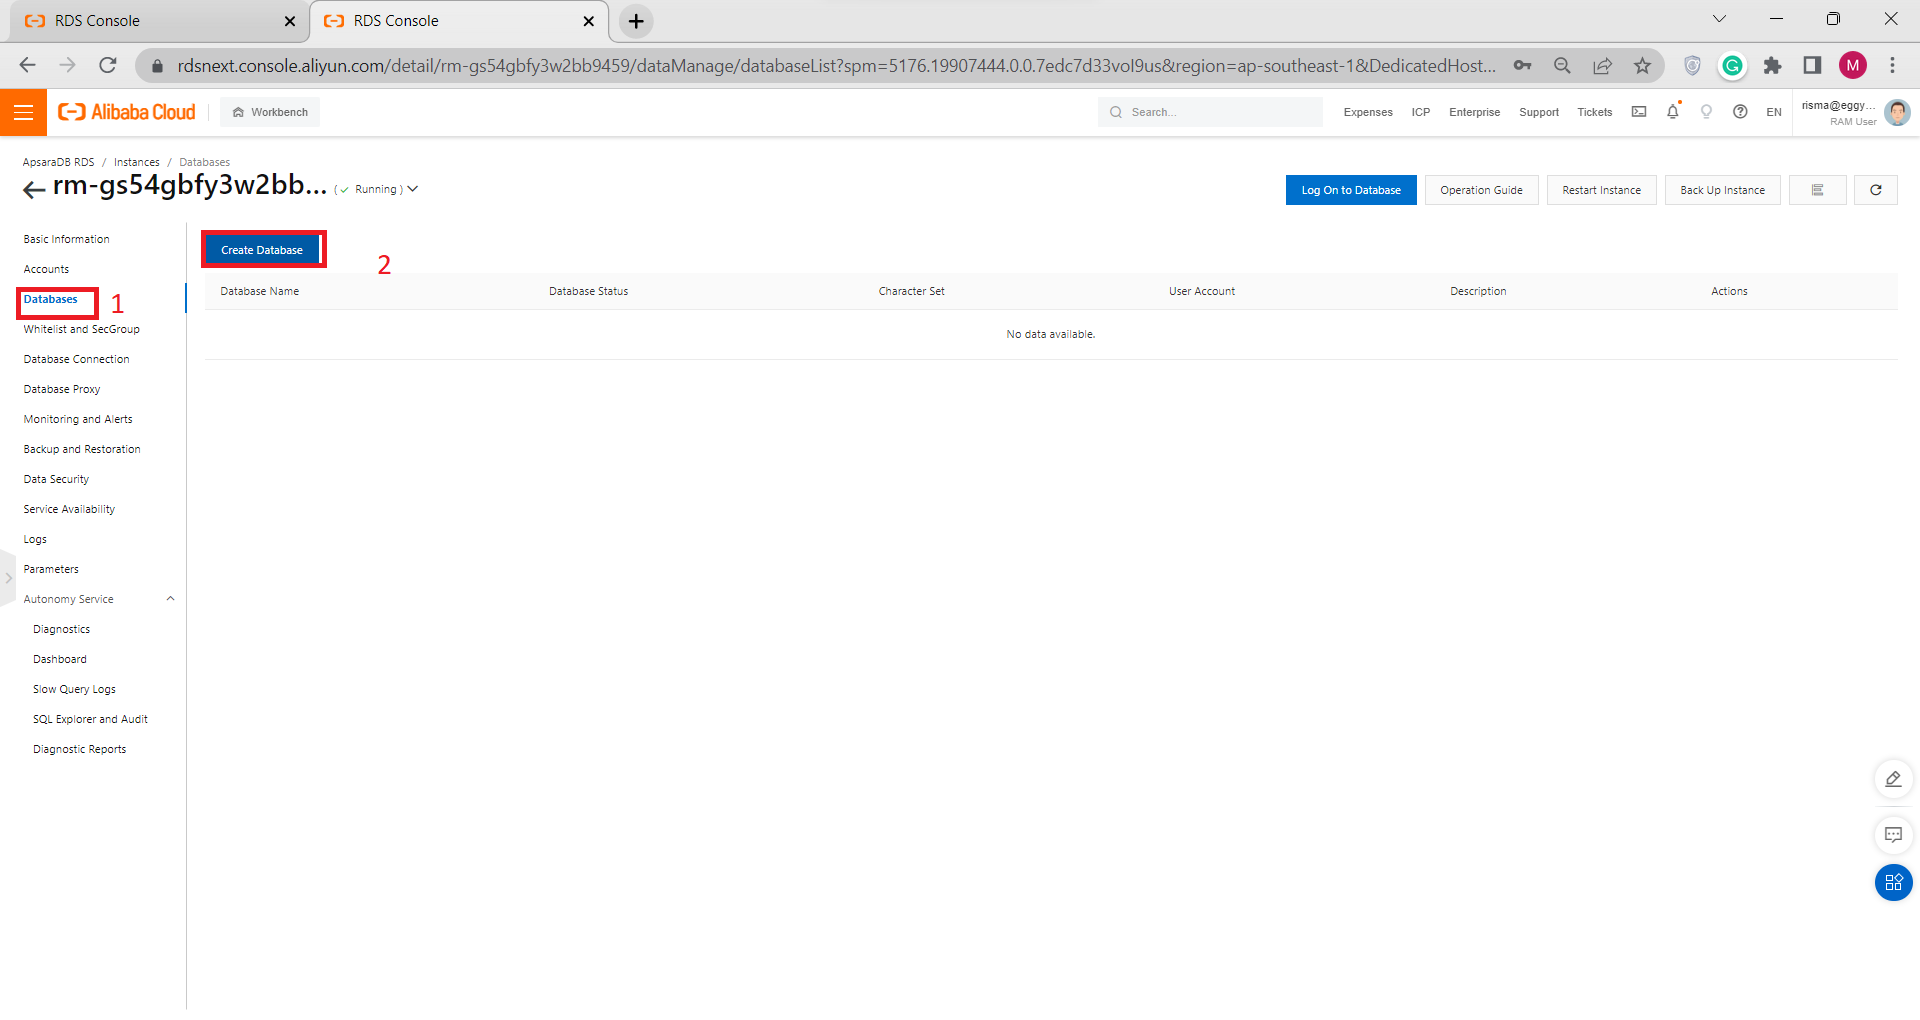
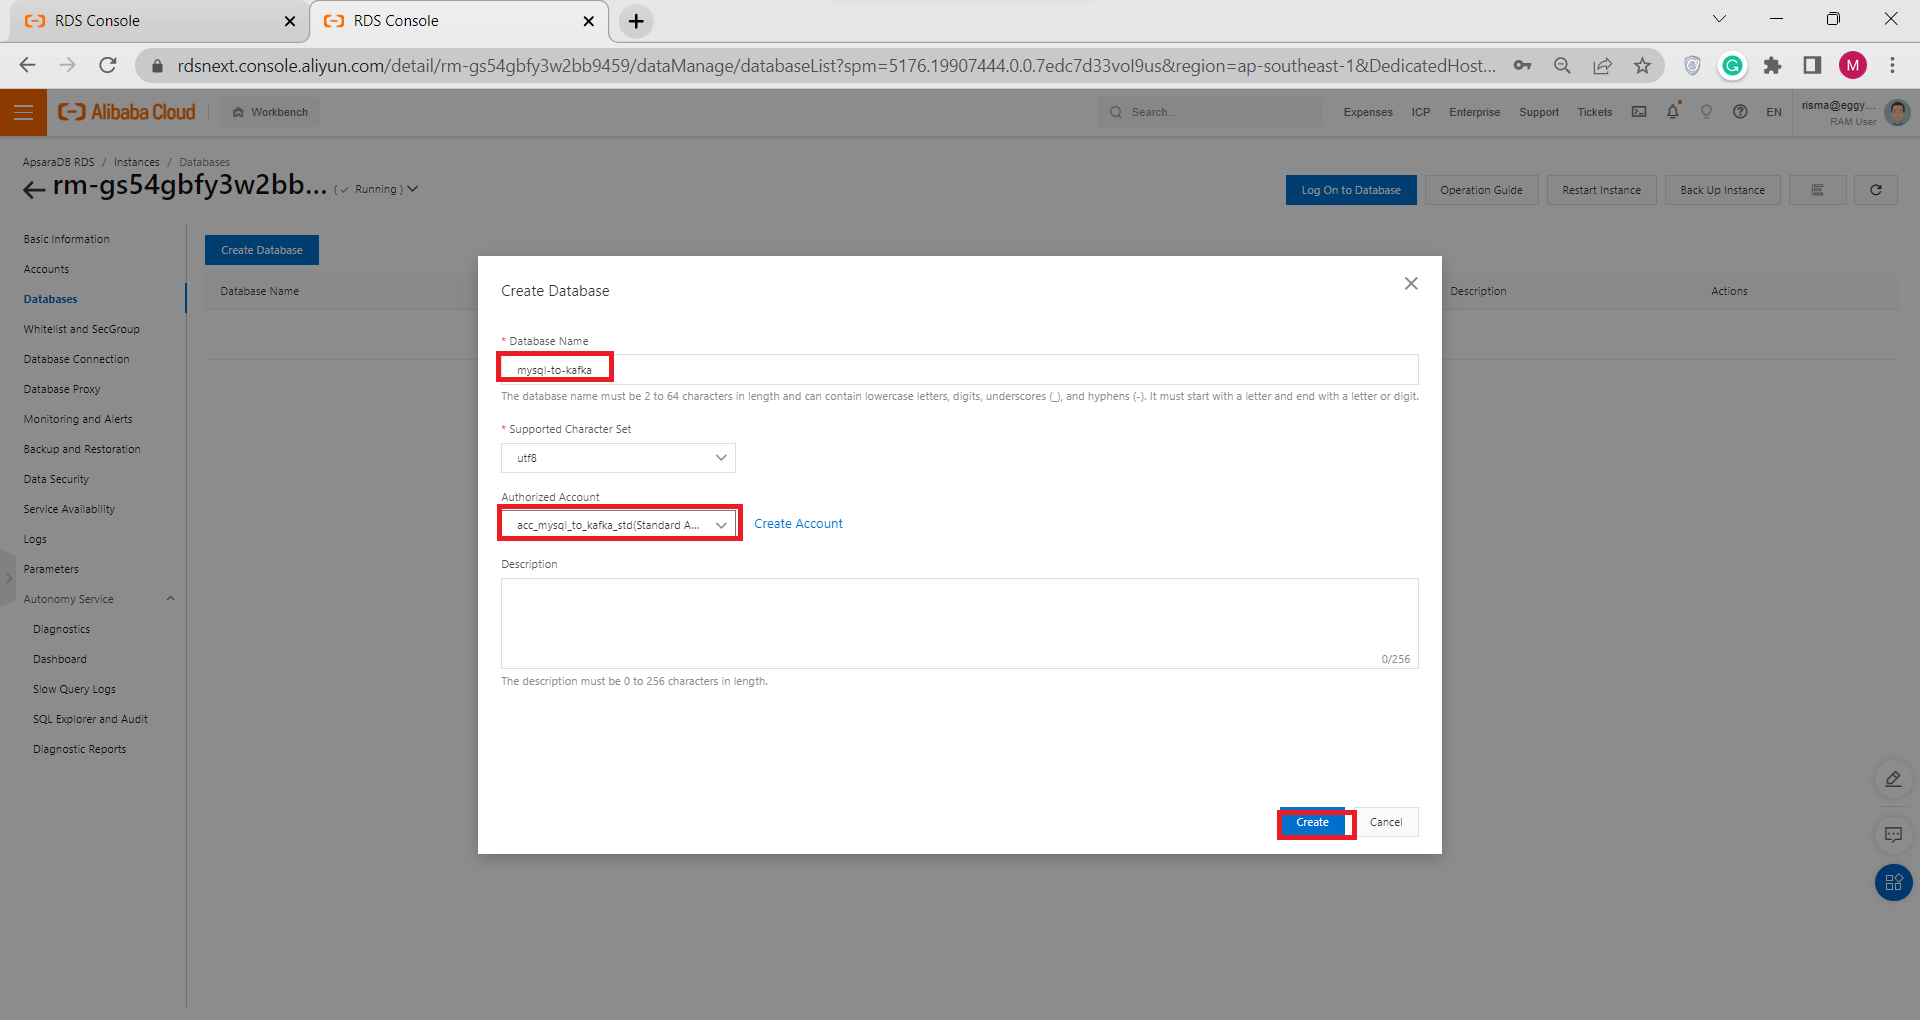
E) Create ApsaraDB RDS Table for MySQL
There are two ways to create an RDS table: by using DMS or using MySQL Workbench.
I. Creating Table Using DMS:
1) Click Log on Databases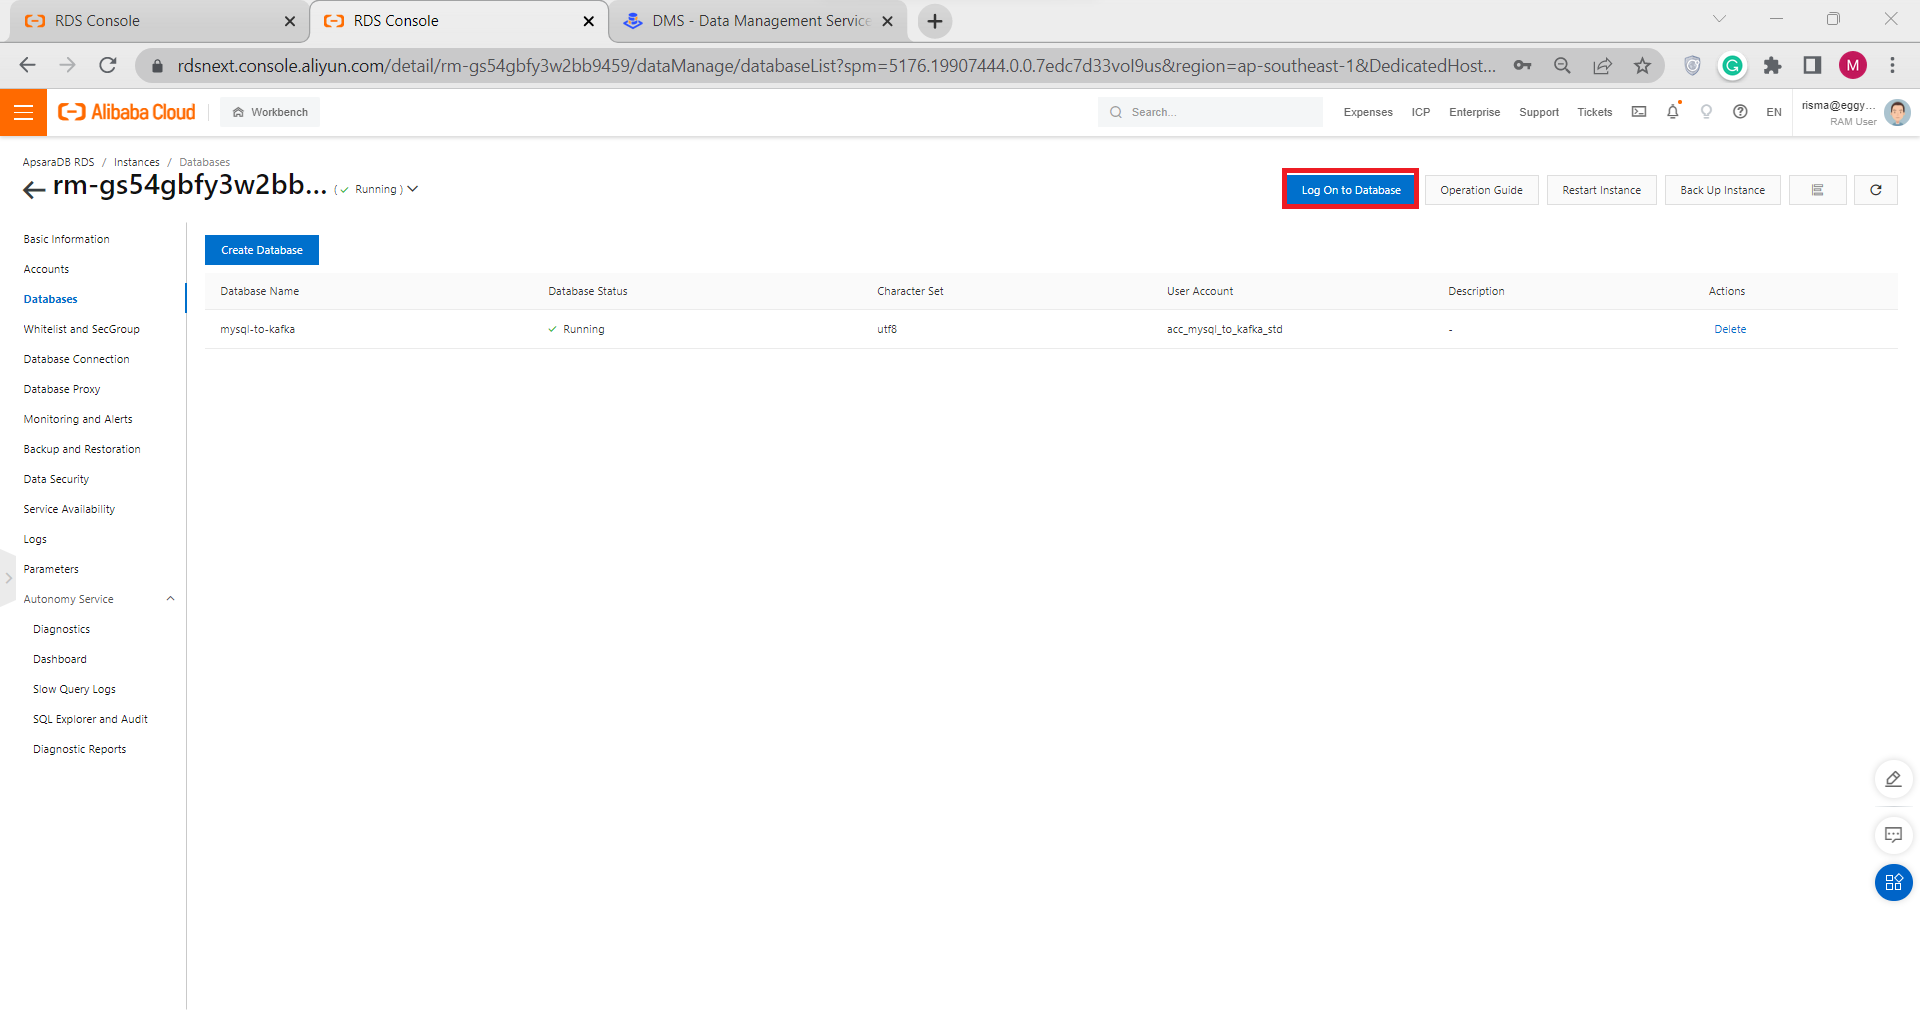
2) Log On to your Database Instance Using your Instance ID, Database Account, and Database Account that you made before, and then click Login.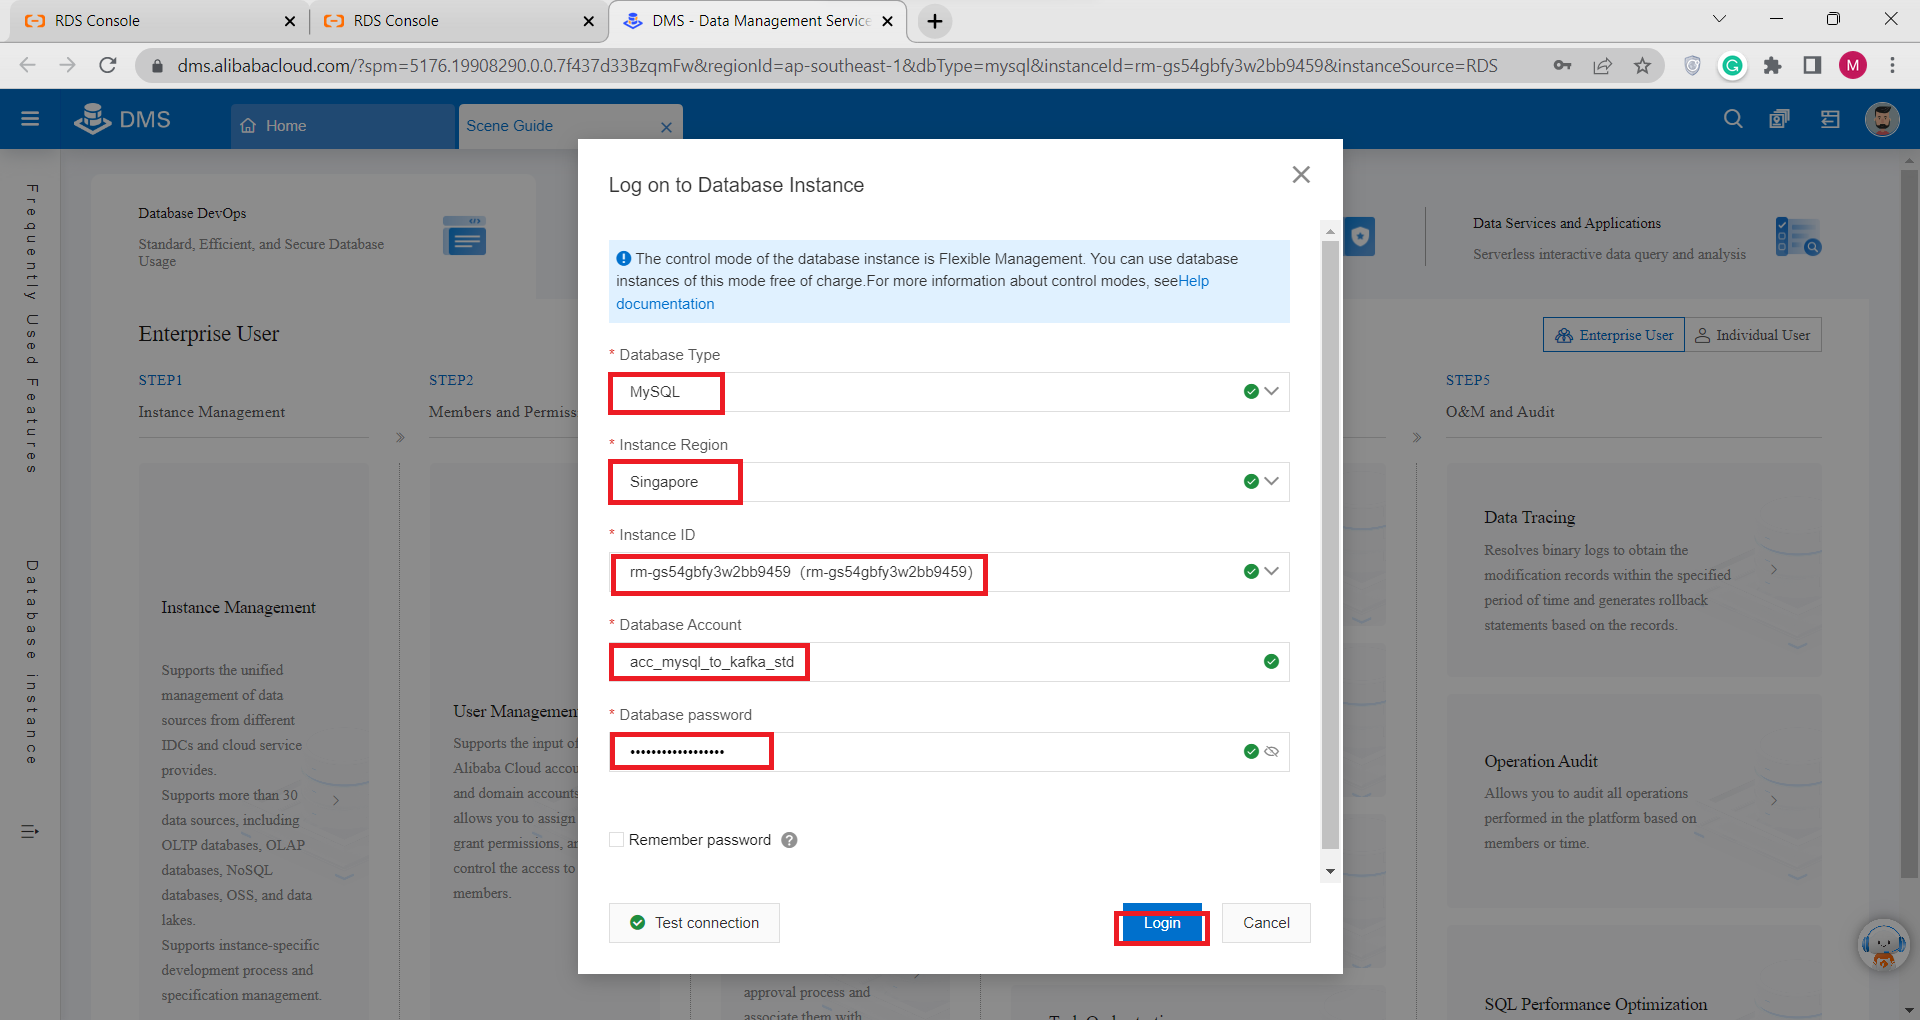
3) In the top section please choose the id for the ApsaraDB for MySQL that we created before in step C.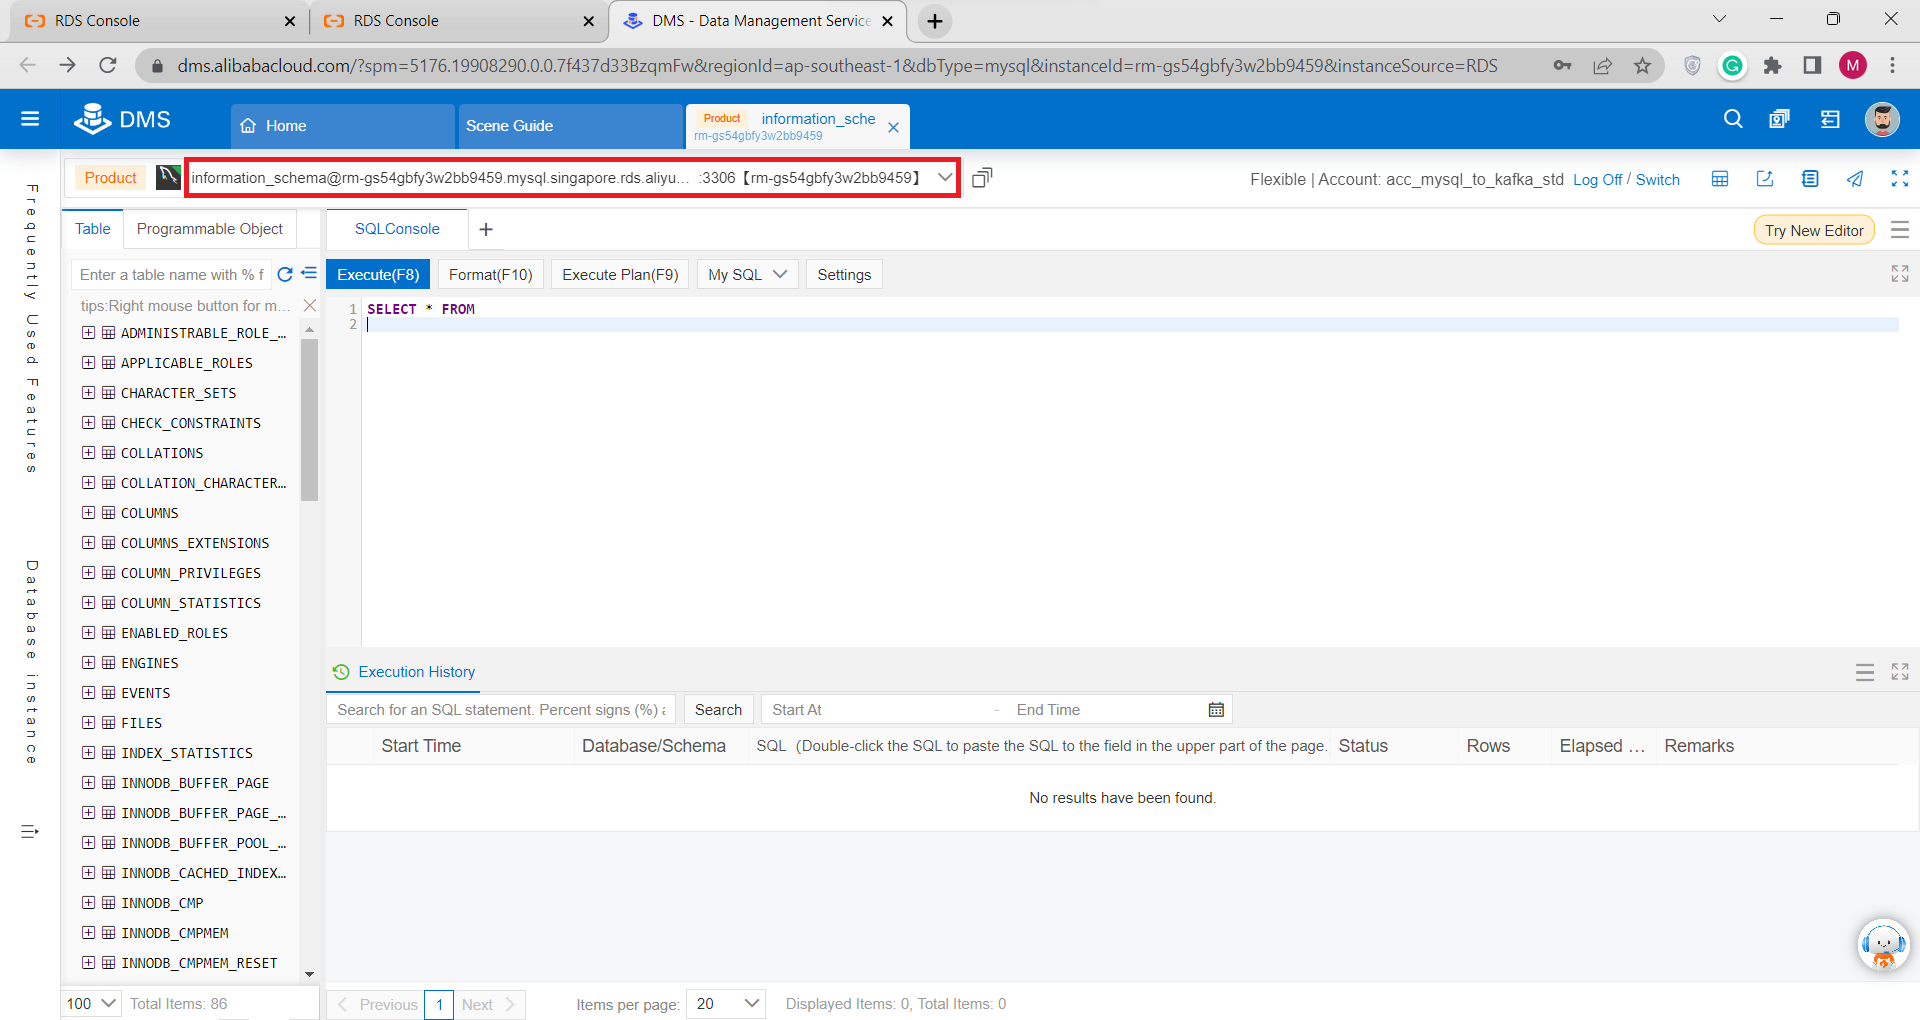
4) Create Table and Column by executing queries using this format:
CREATE TABLE name_of_table(
    name_of_column  type_of_cloumn,
    .
    .
    PRIMARY KEY (name_of_column)
)
Below is the example of the query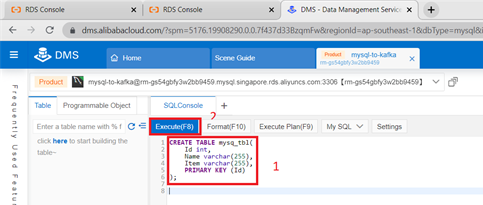
5) Next, add data to your table by executing queries using this format:
INSERT INTO name_of_table(
    name_of_column, …
)
VALUES( values_column1, values_column2, …)
Execute the query.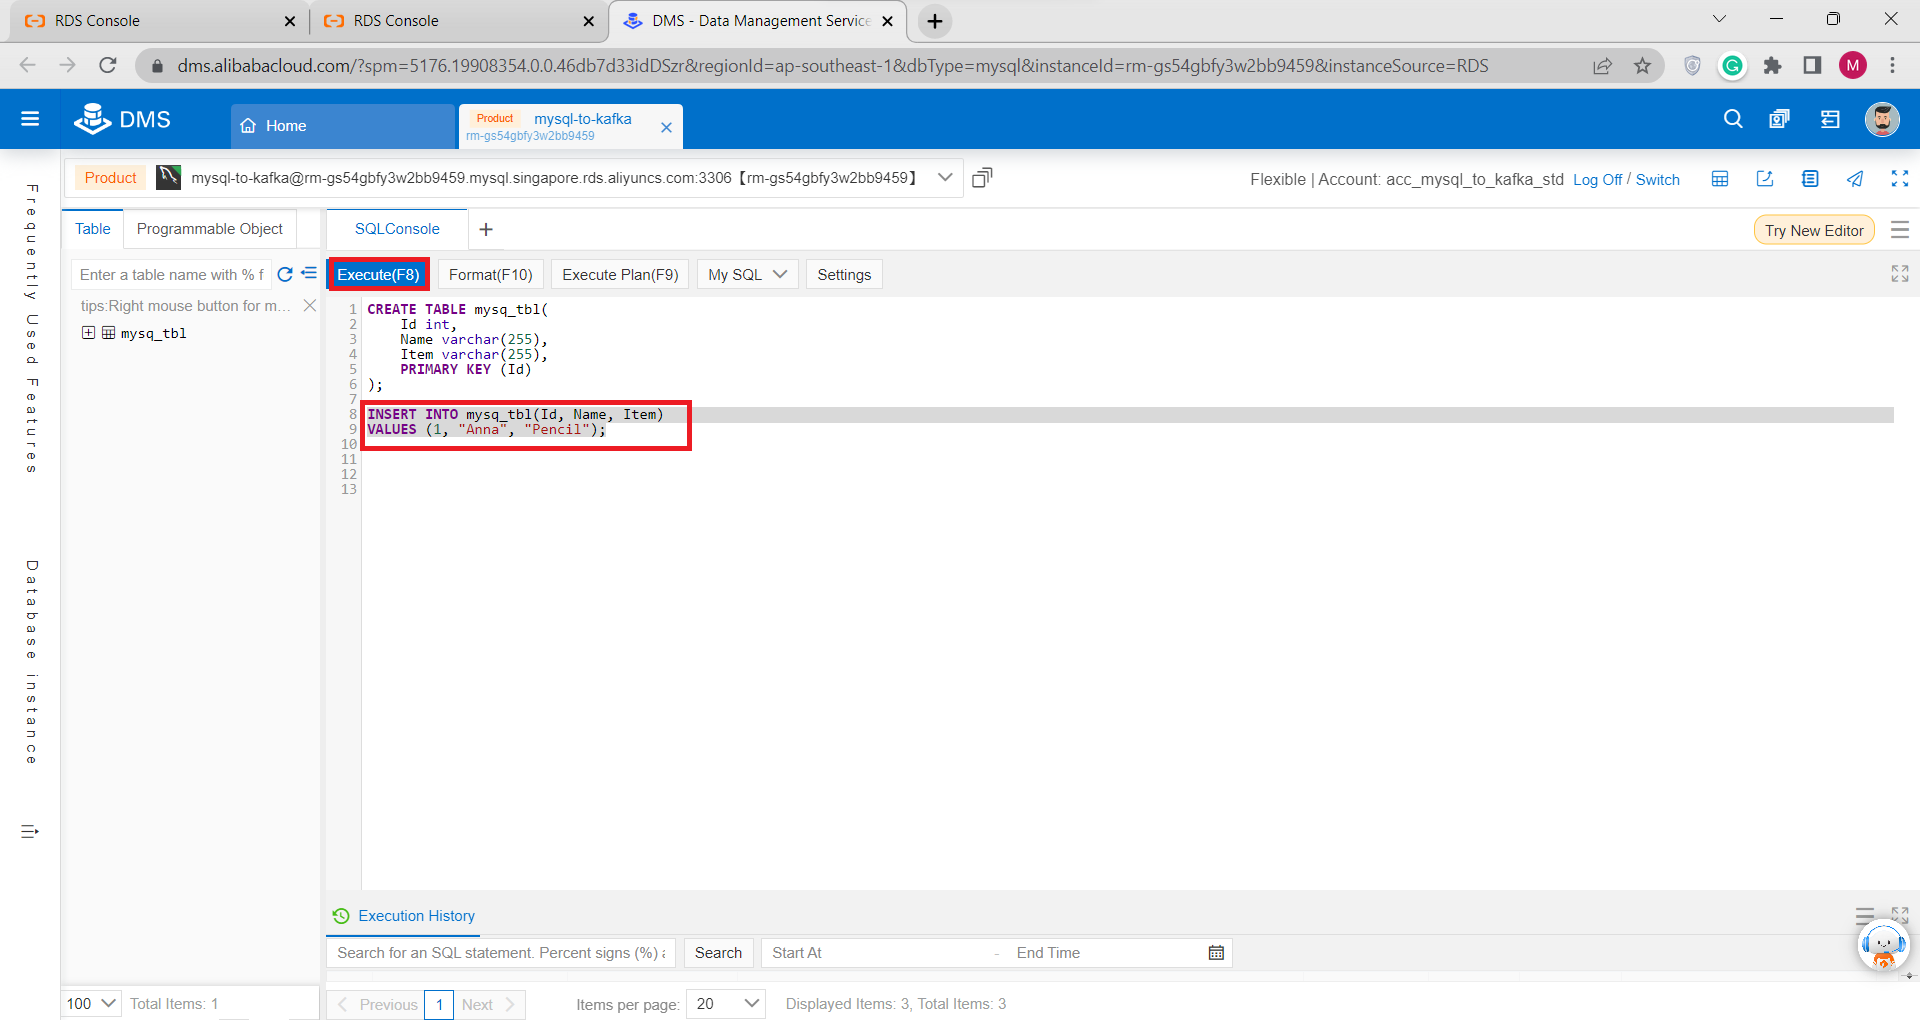
6) You are all done. The table have been added to the database
II. Using MySQL Workbench:
1) Create Connection from your MySQL Workbench to your ApsaraDB RDS for MySQL
2) Go to ApsaraDB RDS Instance that we made before, In the left-side navigation pane Click Database Connection, then click Apply for Public Endpoint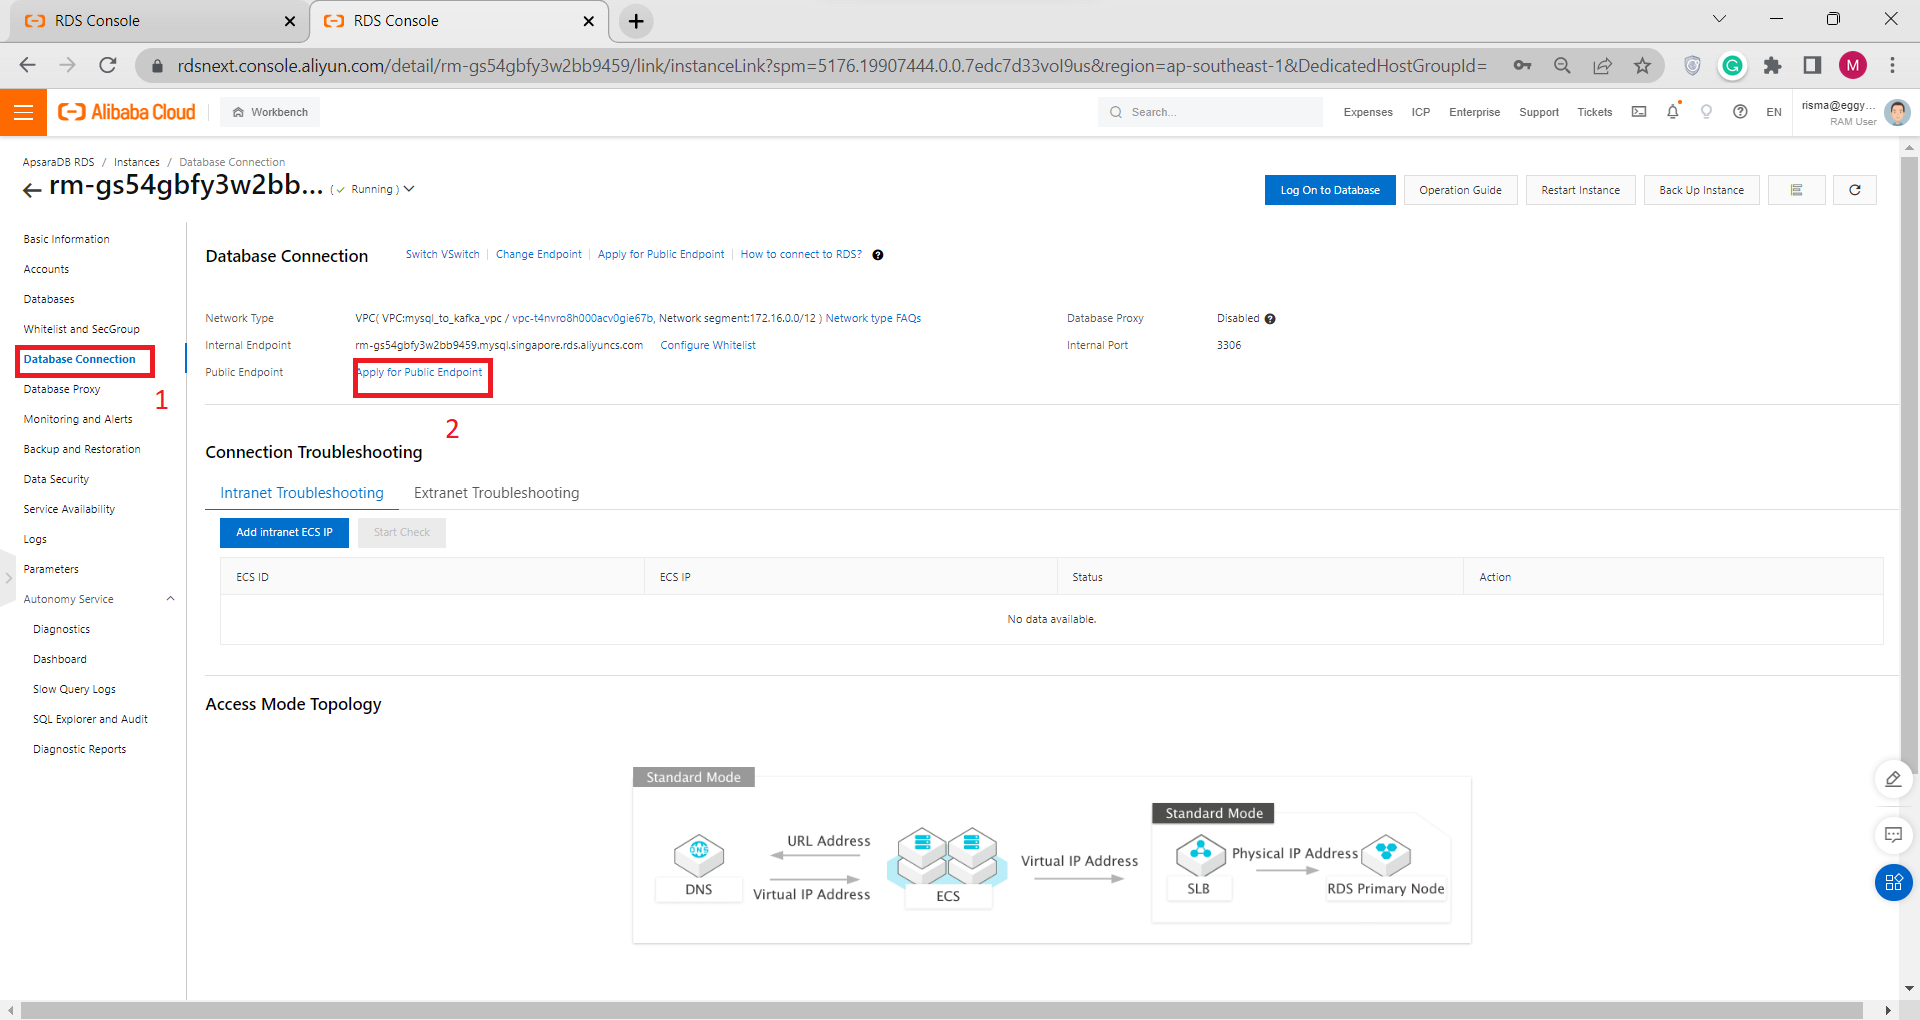
3)There will be a popup message like below. Click OK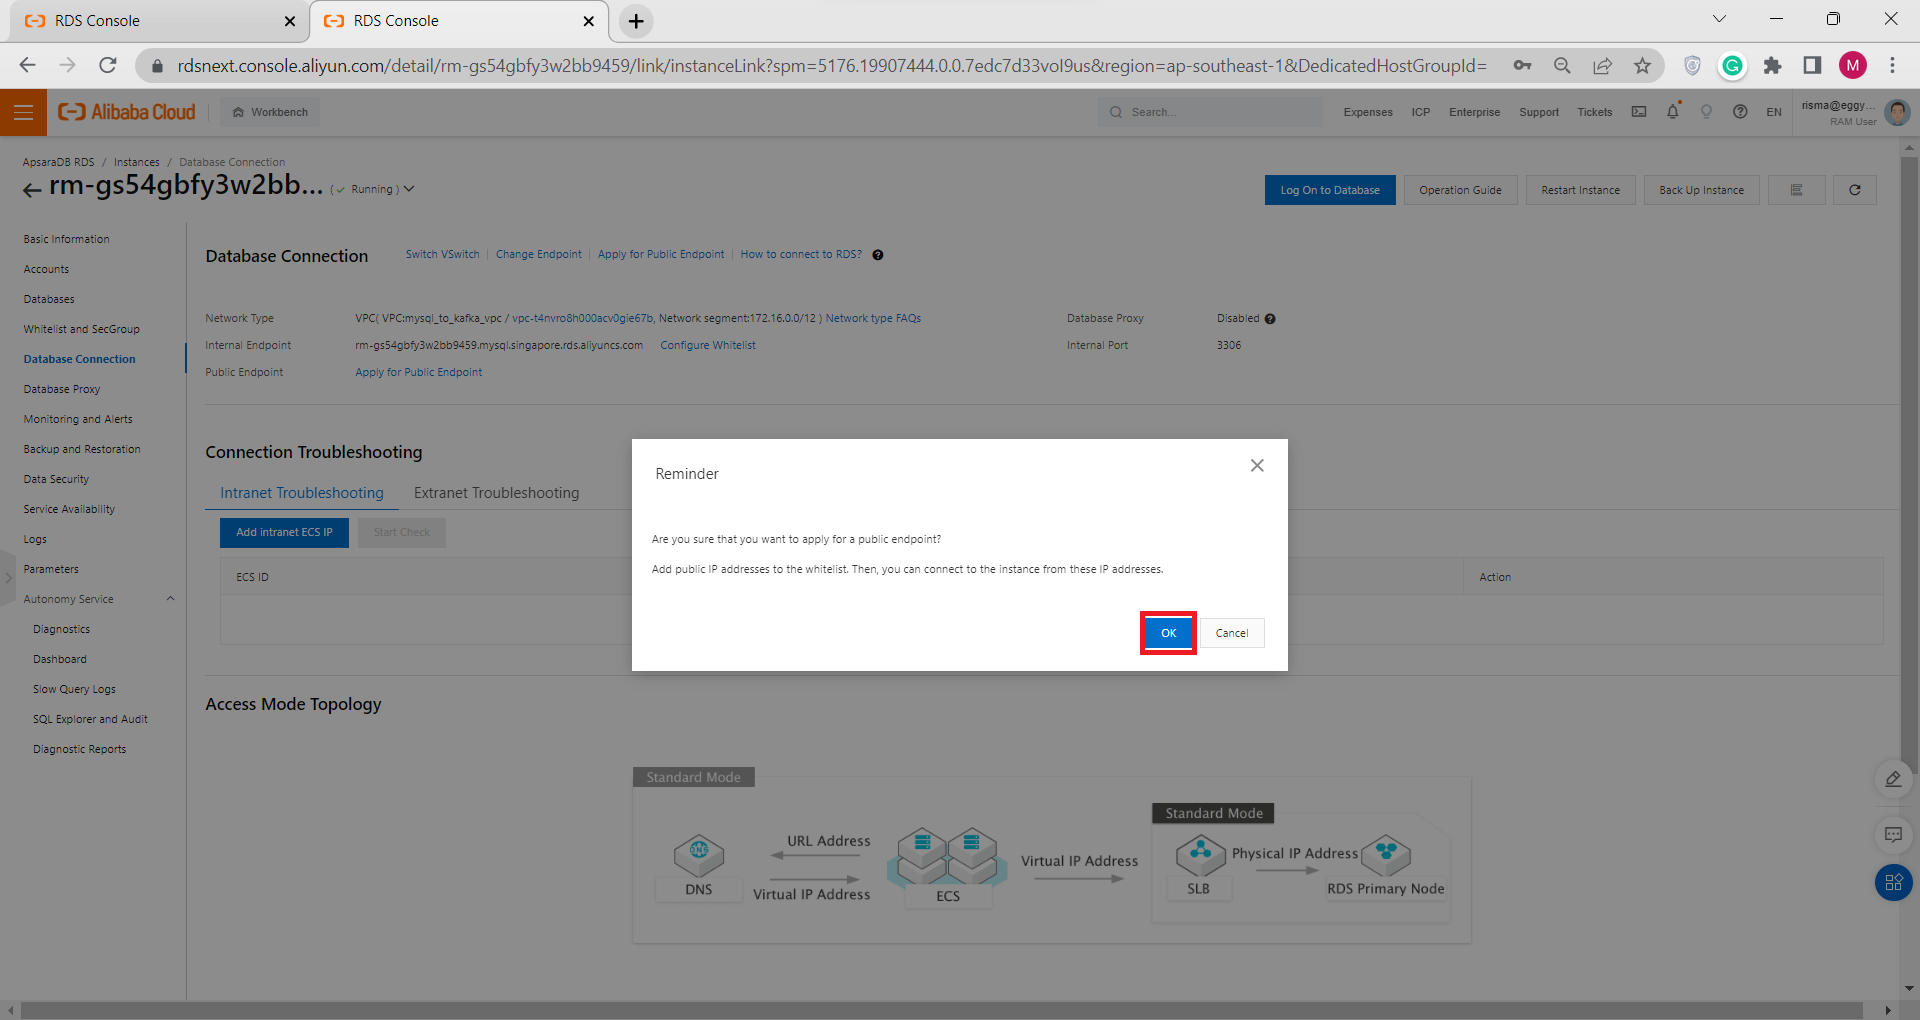
4) Check the public endpoint by going to the Database Connection tab. Next to the Public Endpoint section is your Public IP address. Copy and save it to your Note 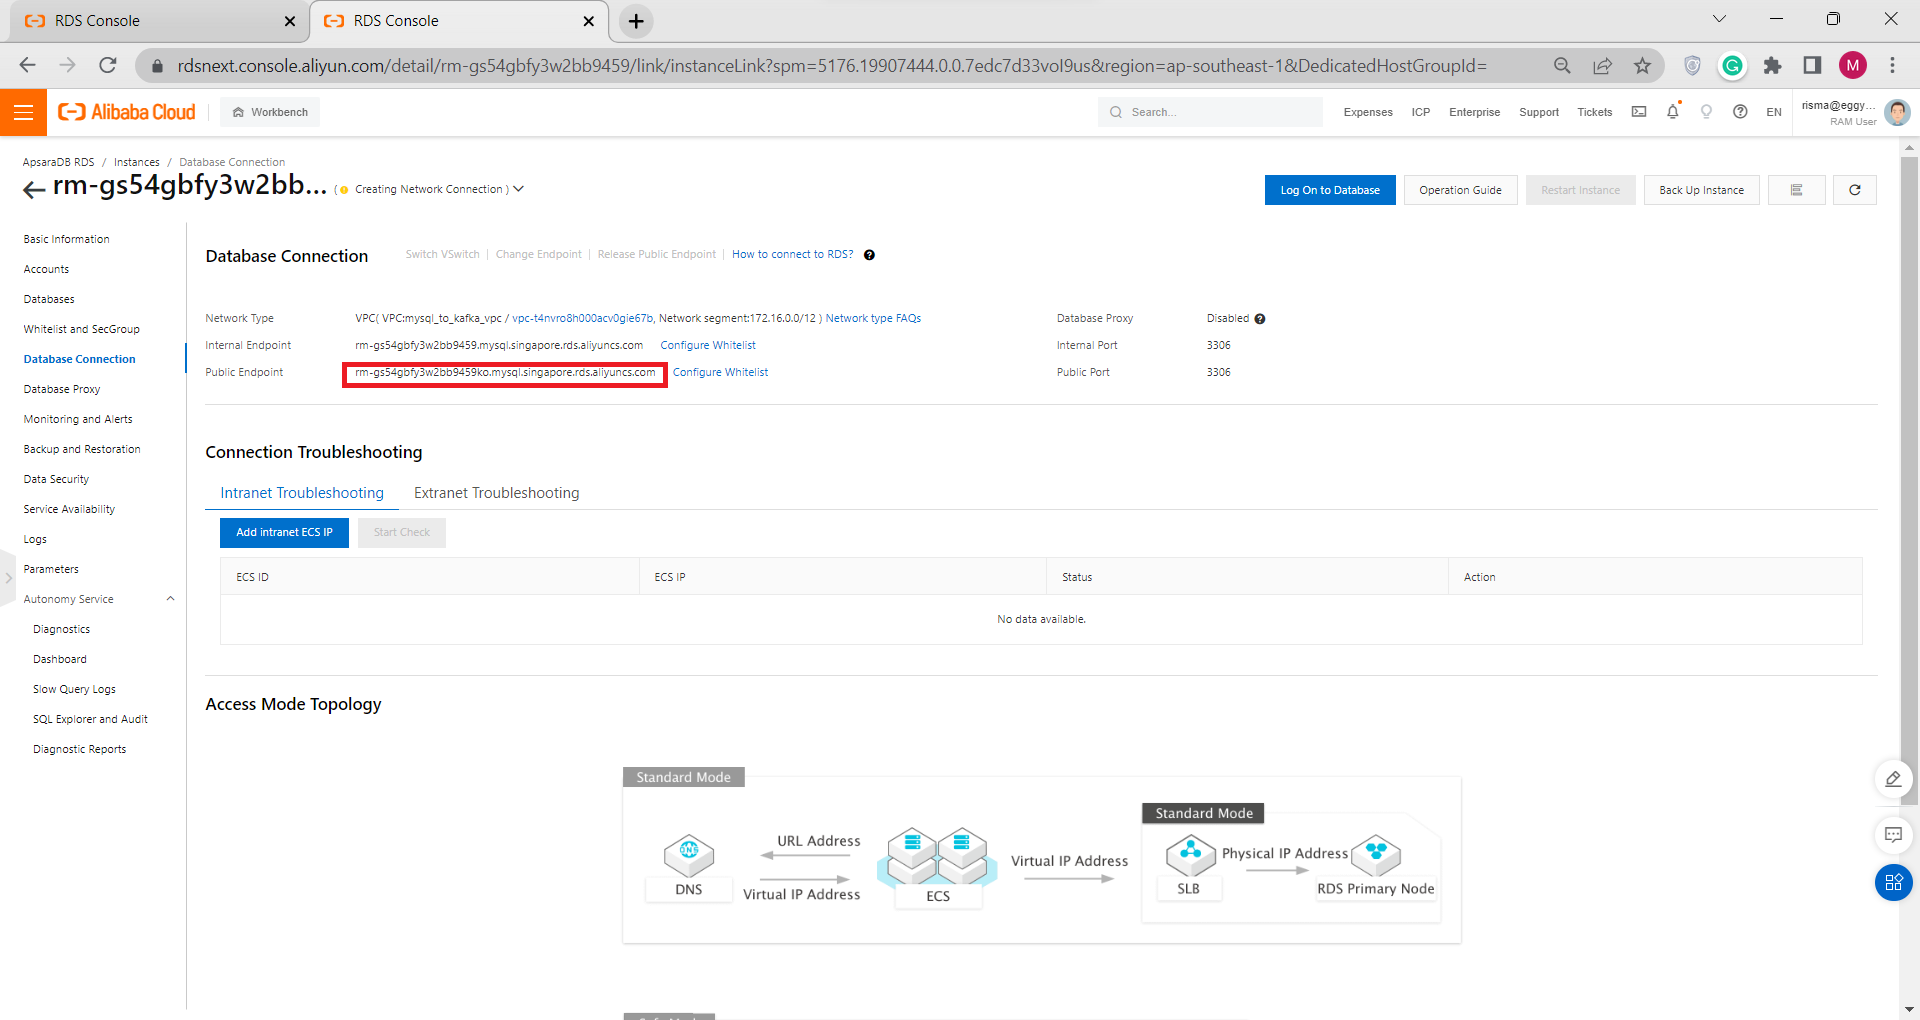
5) In the left-side navigation pane Click Whitelist and SecGroup, and click Modify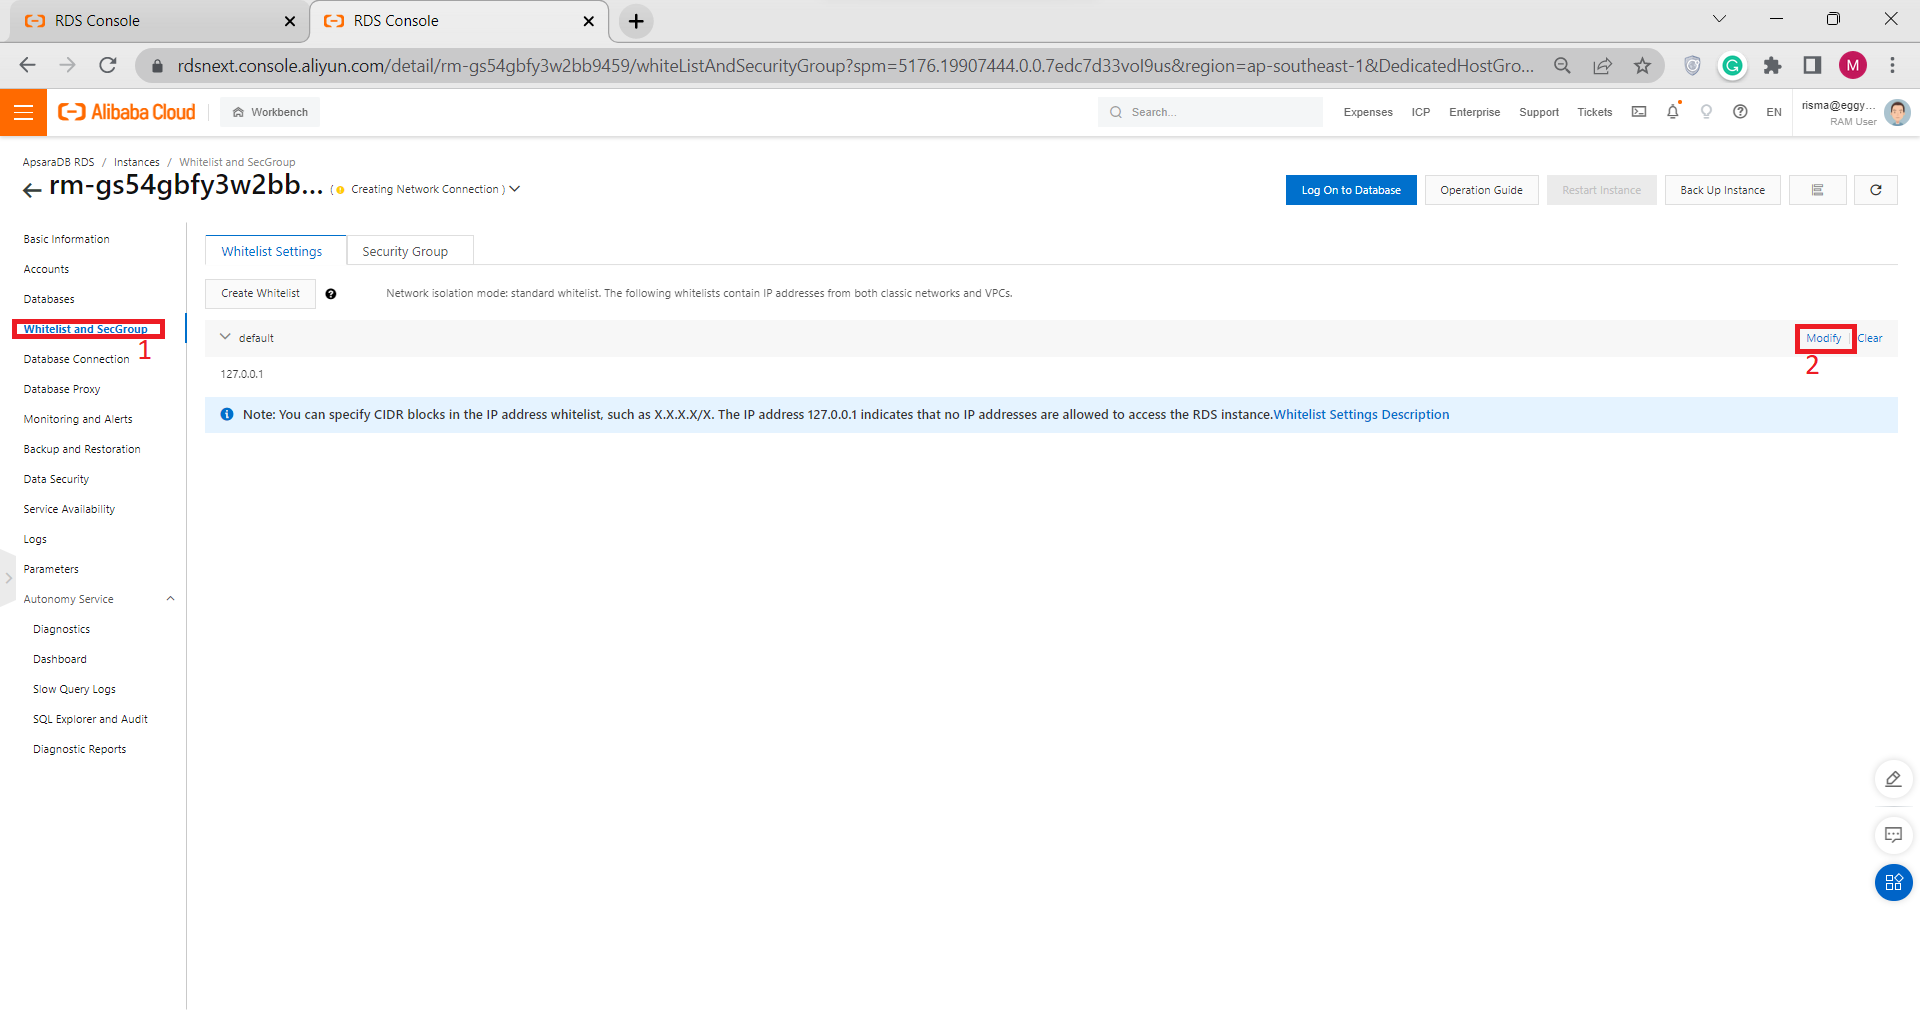
6) Change your IP Addresses to 0.0.0.0/0 so your MySQL Workbench can connect to your ApsaraDB RDS Instance, then click OK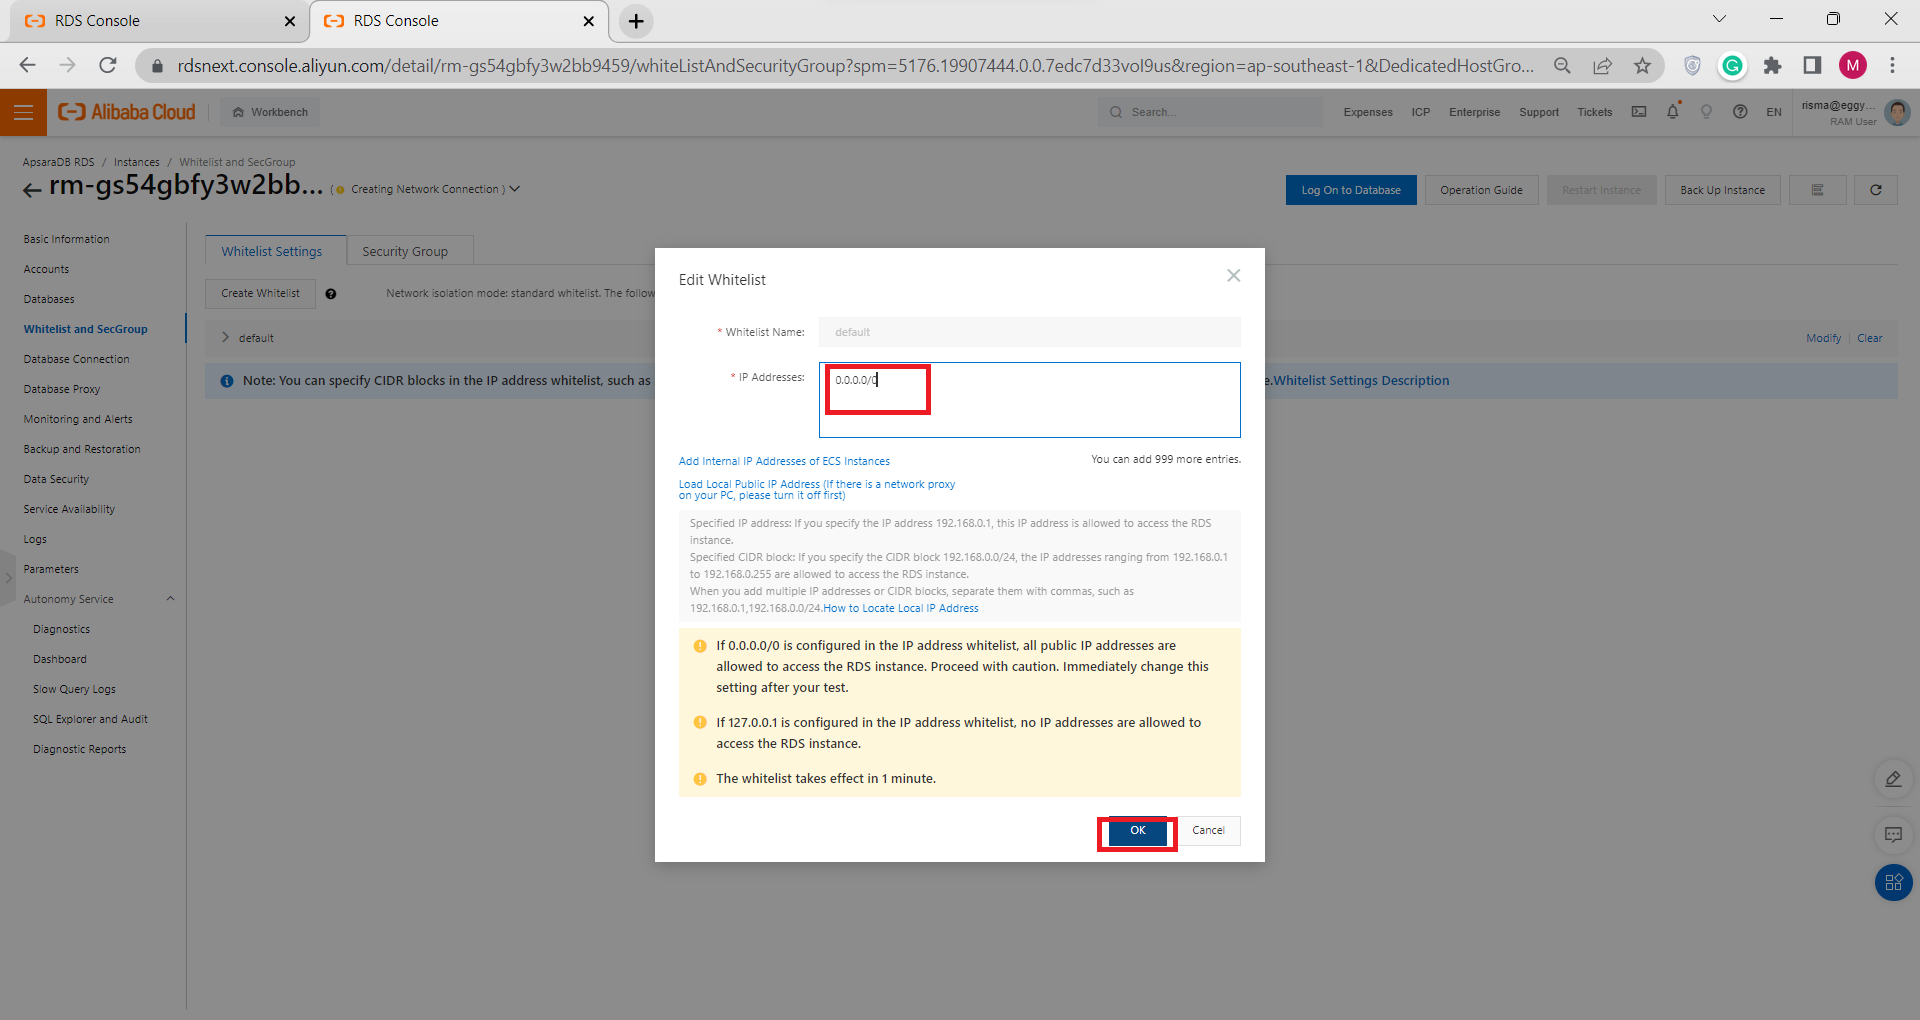
7) Go to your mysQL Workbench, add MySQL Connection, set Connection Name, Paste your ApsaraDB RDS for MySQL Public Endpoint to Hostname, Input your Standard Account name as Username and Password, and Click OK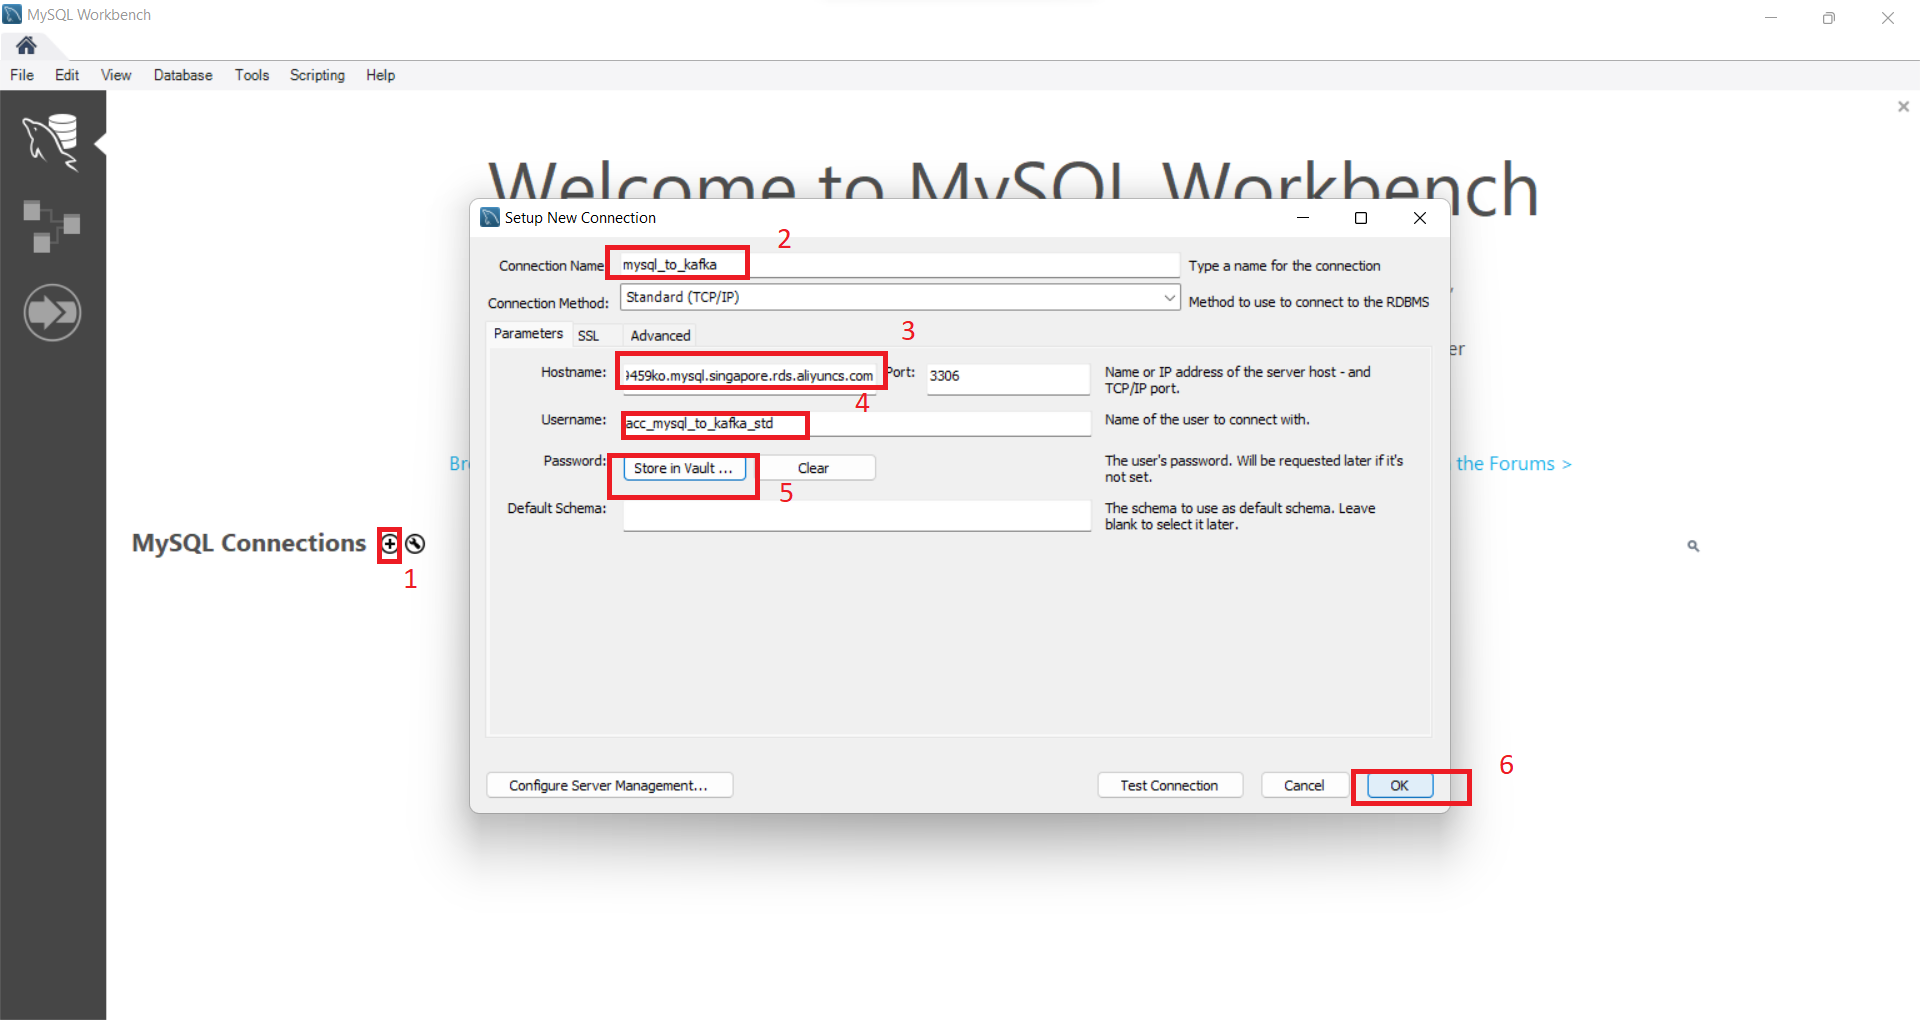
Now you can create and insert data to your Table
F) Create AlibabaMQ for Apache Kafka
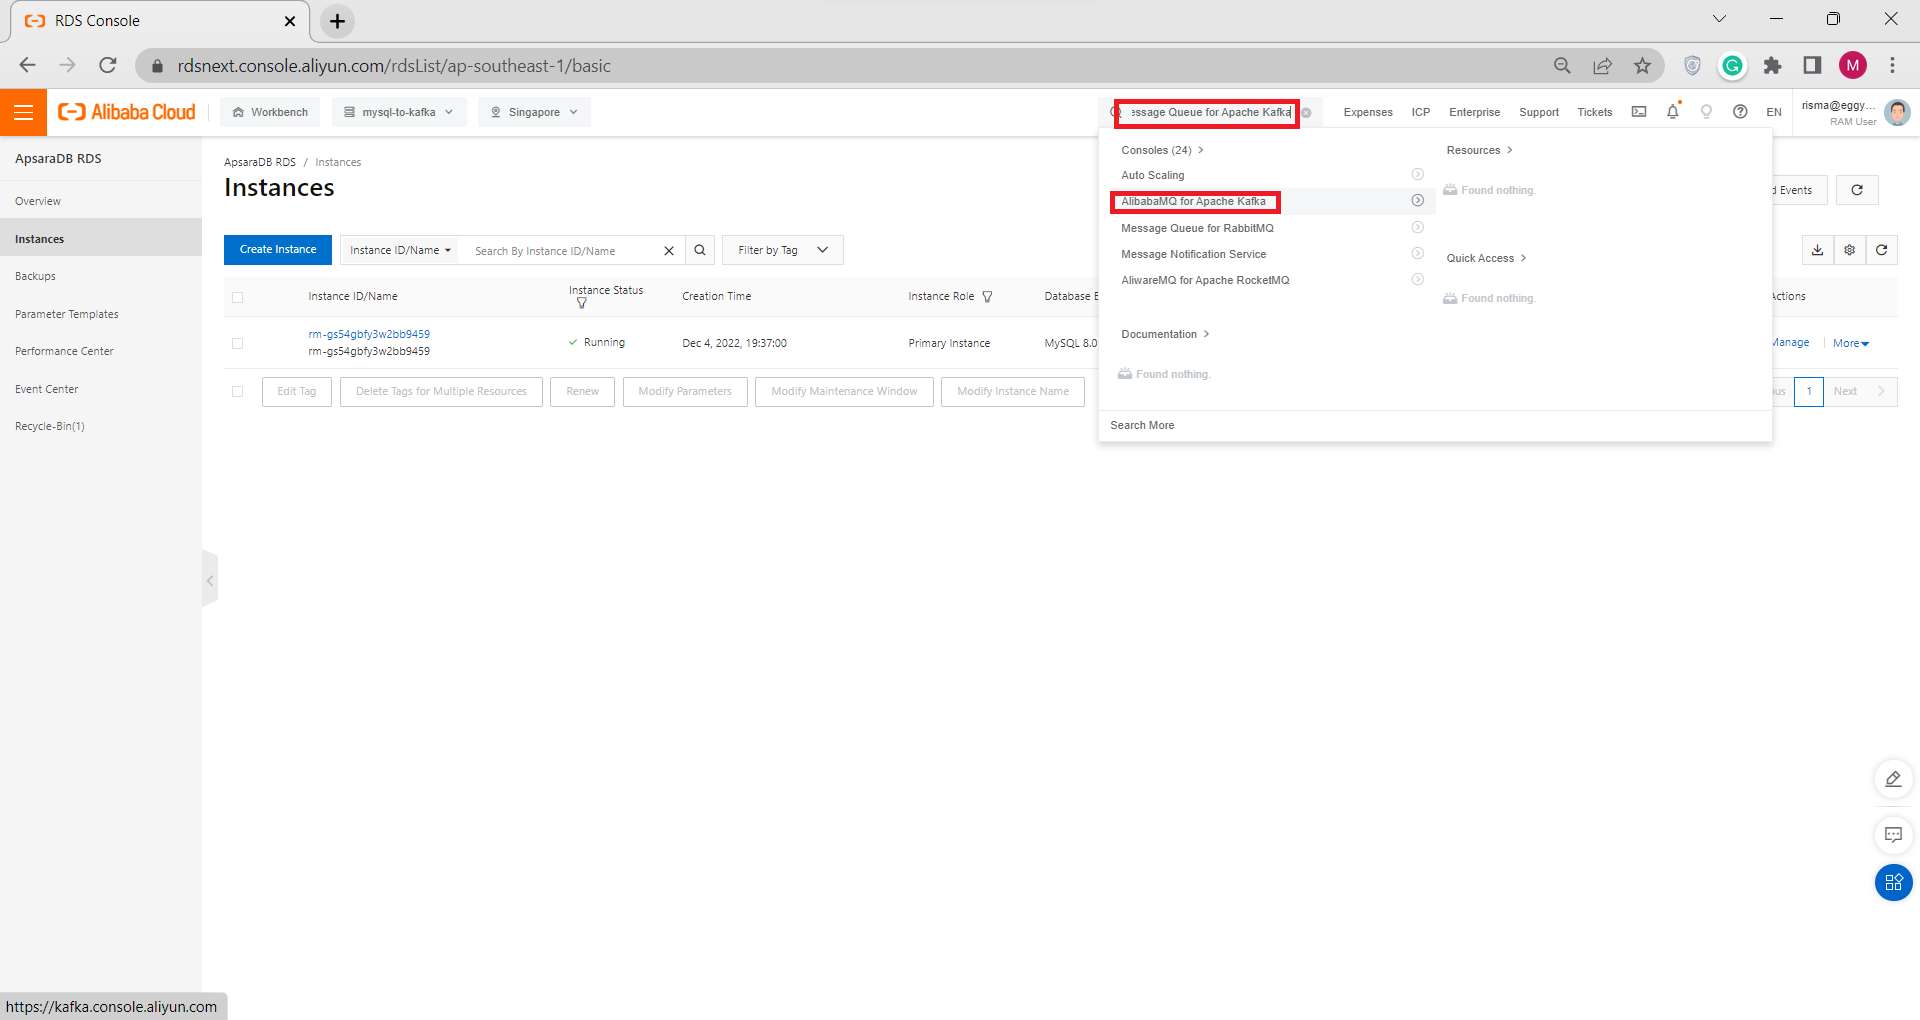
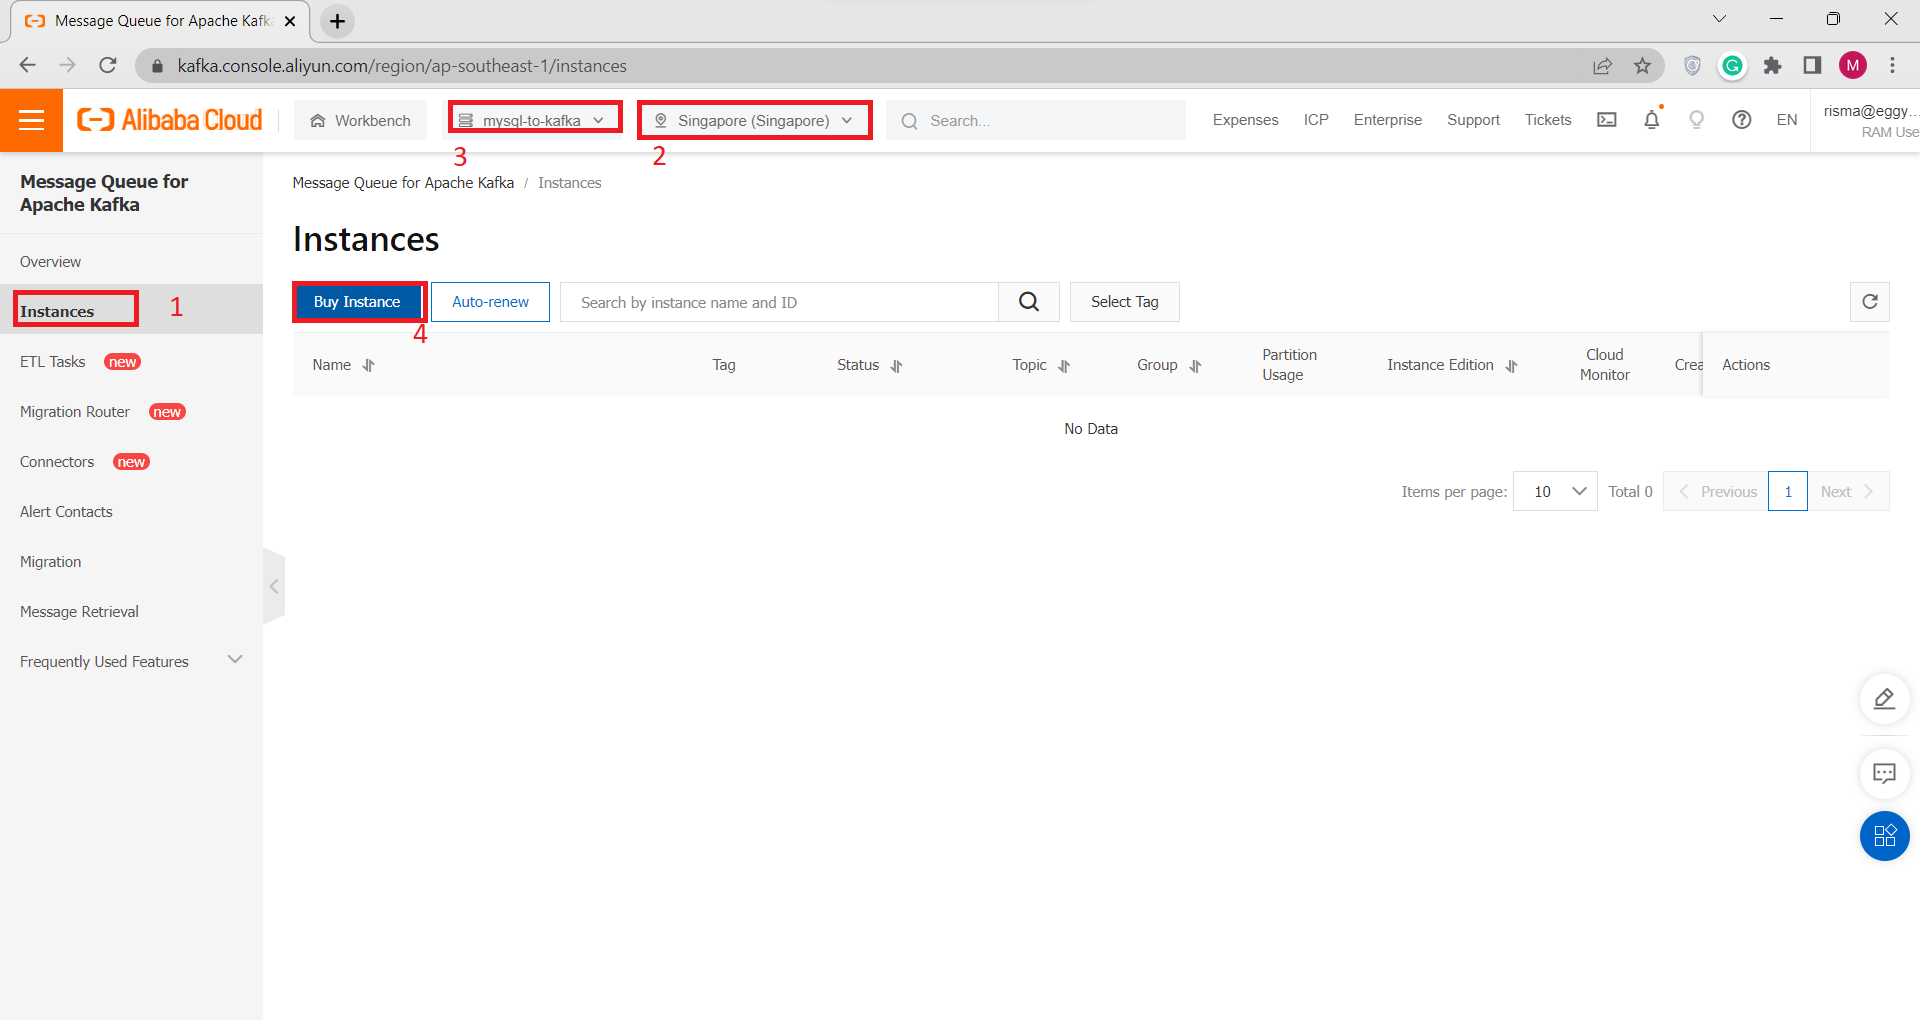
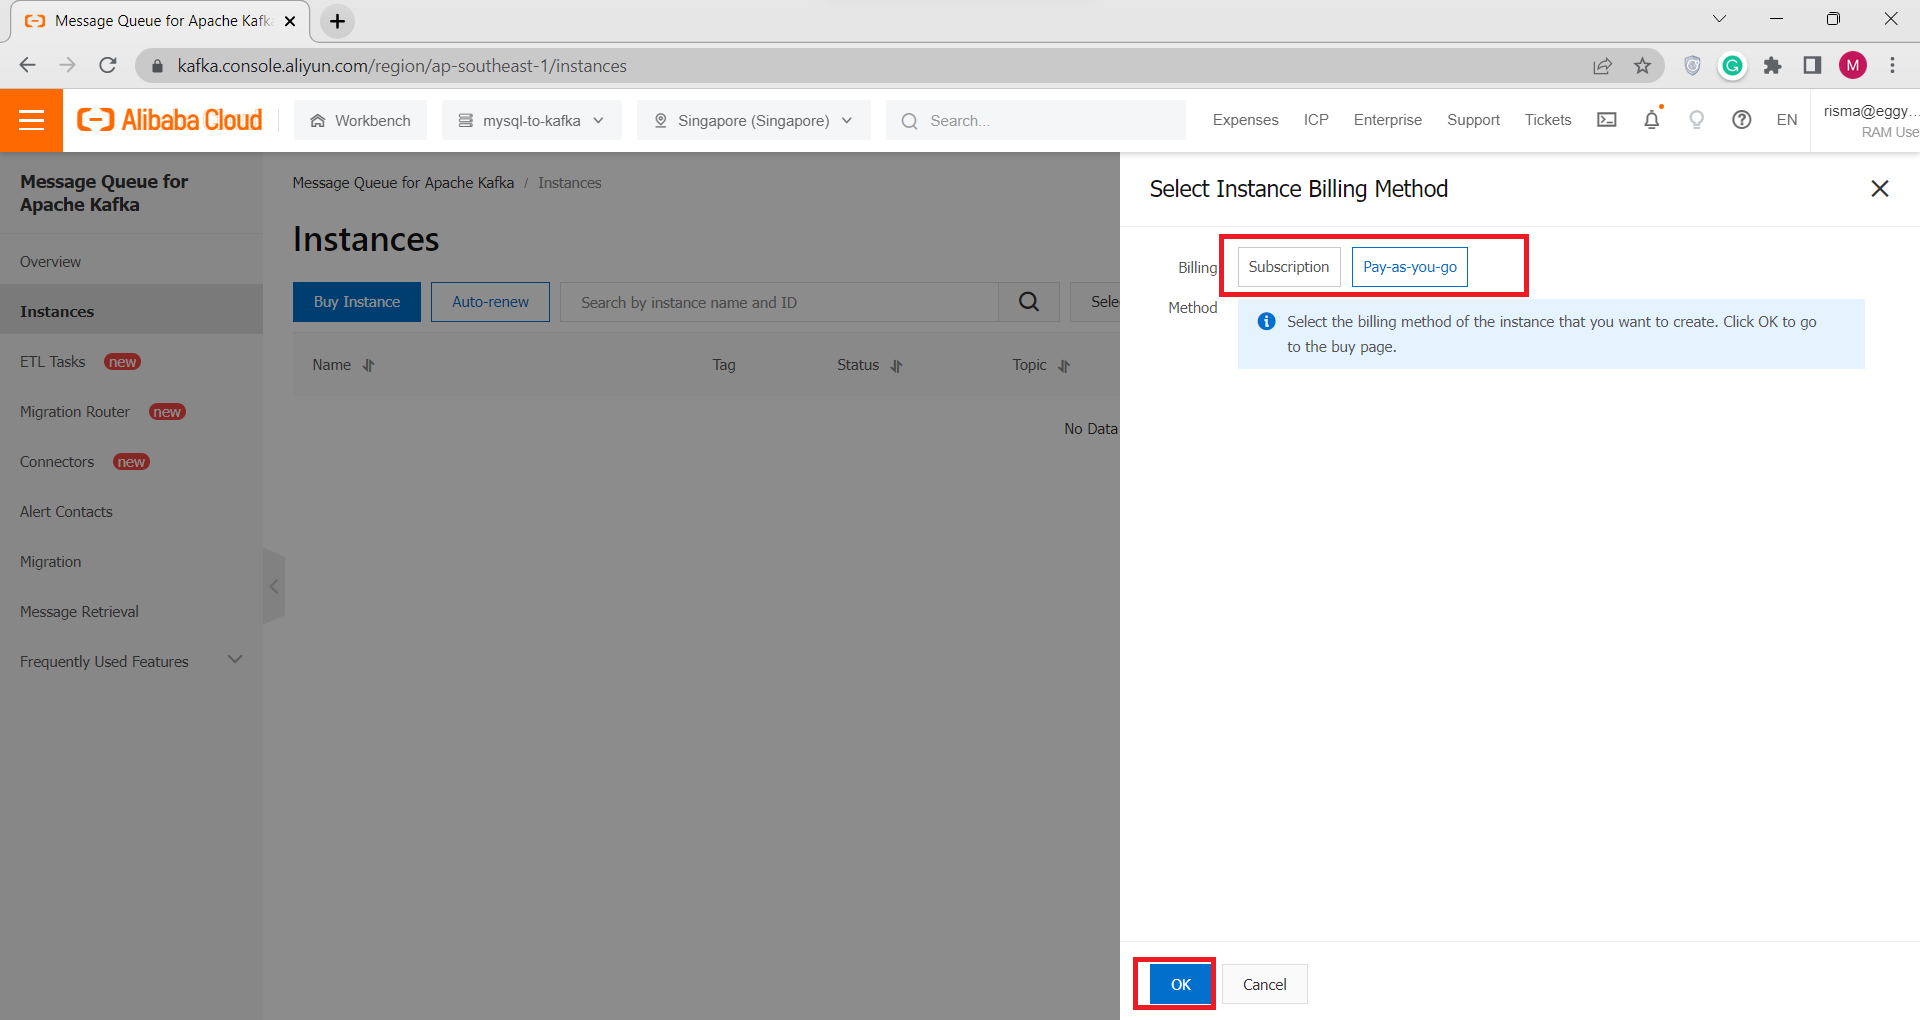
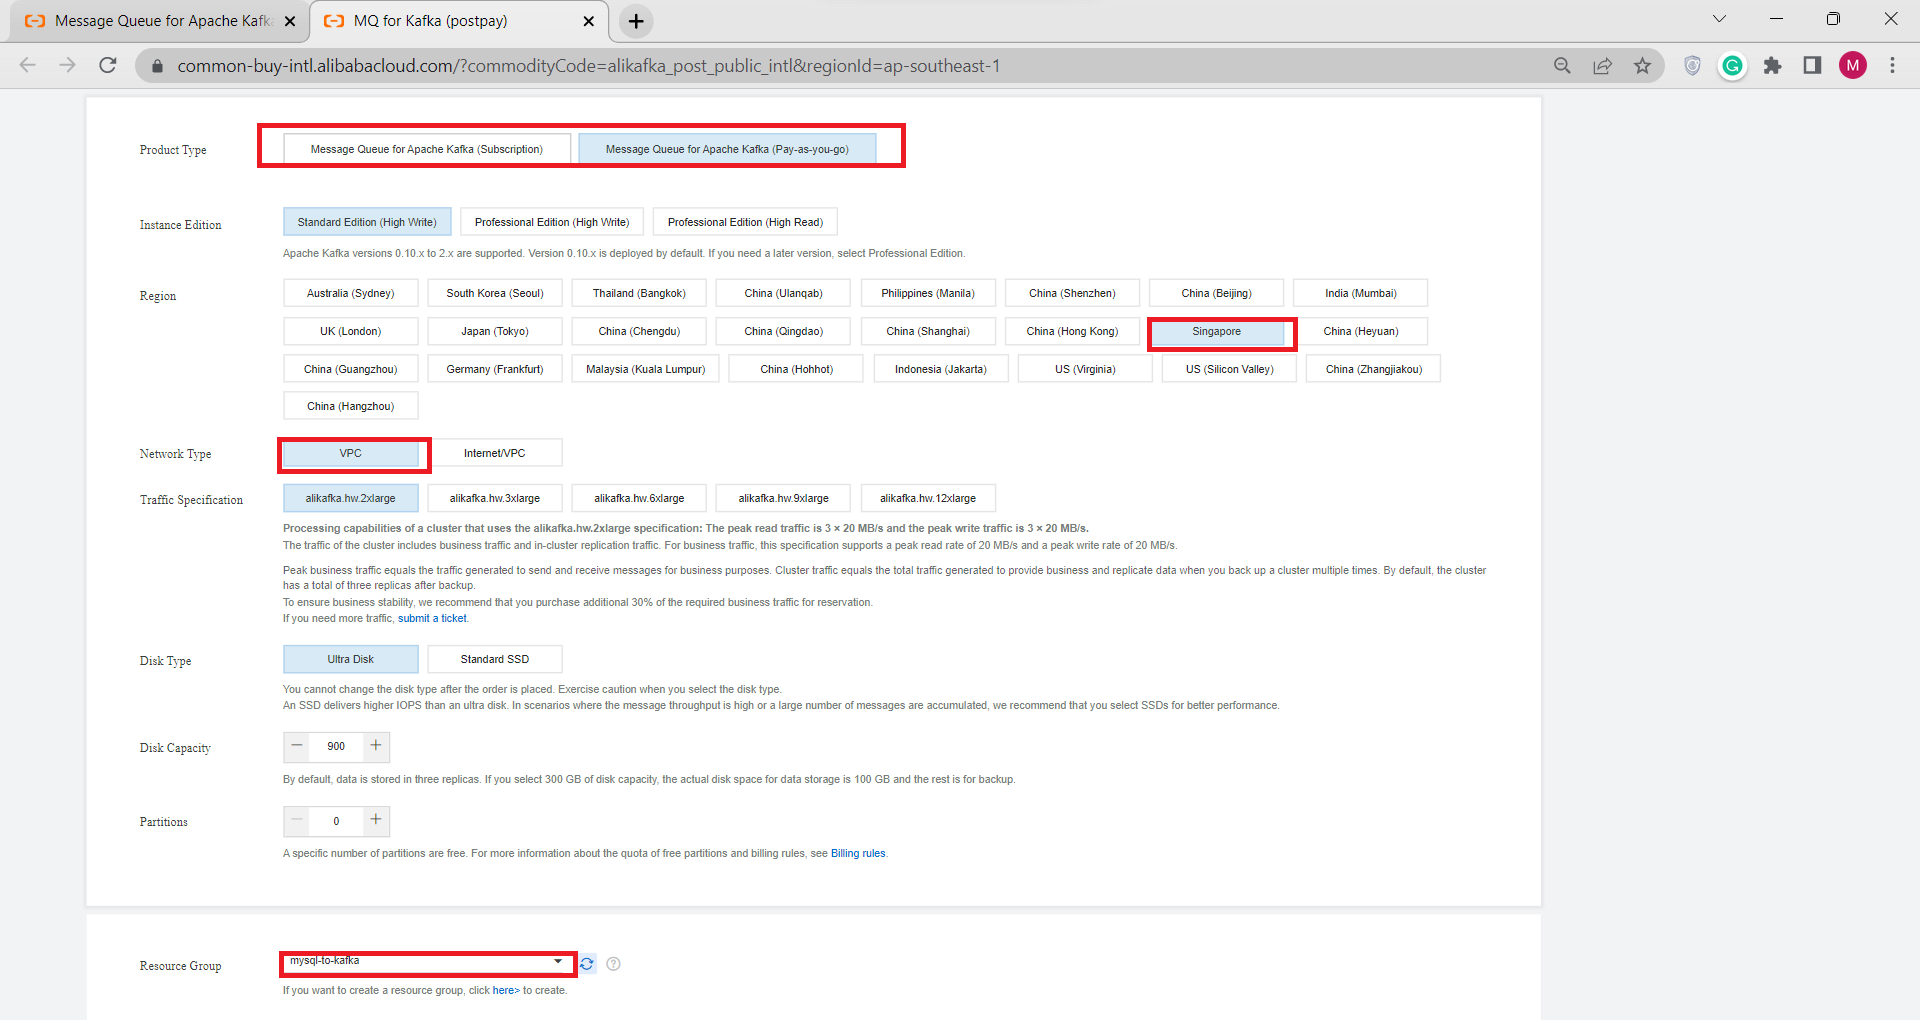
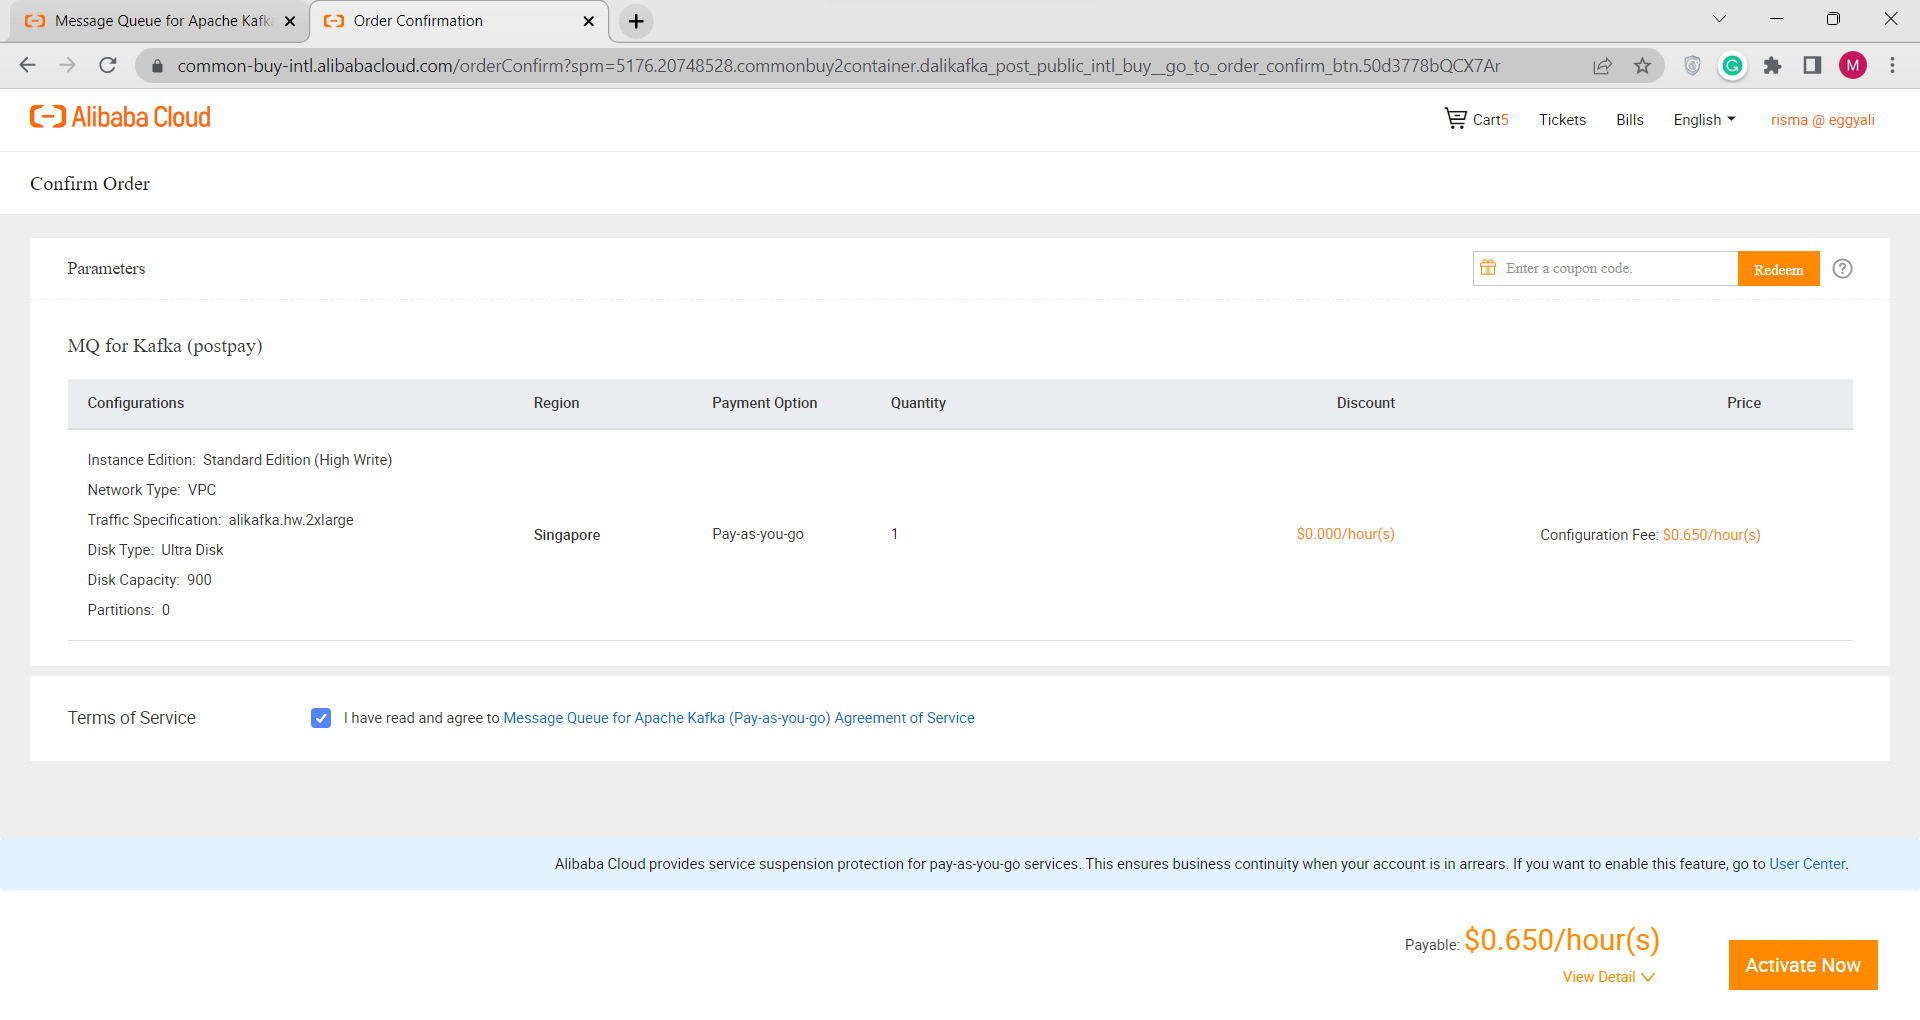
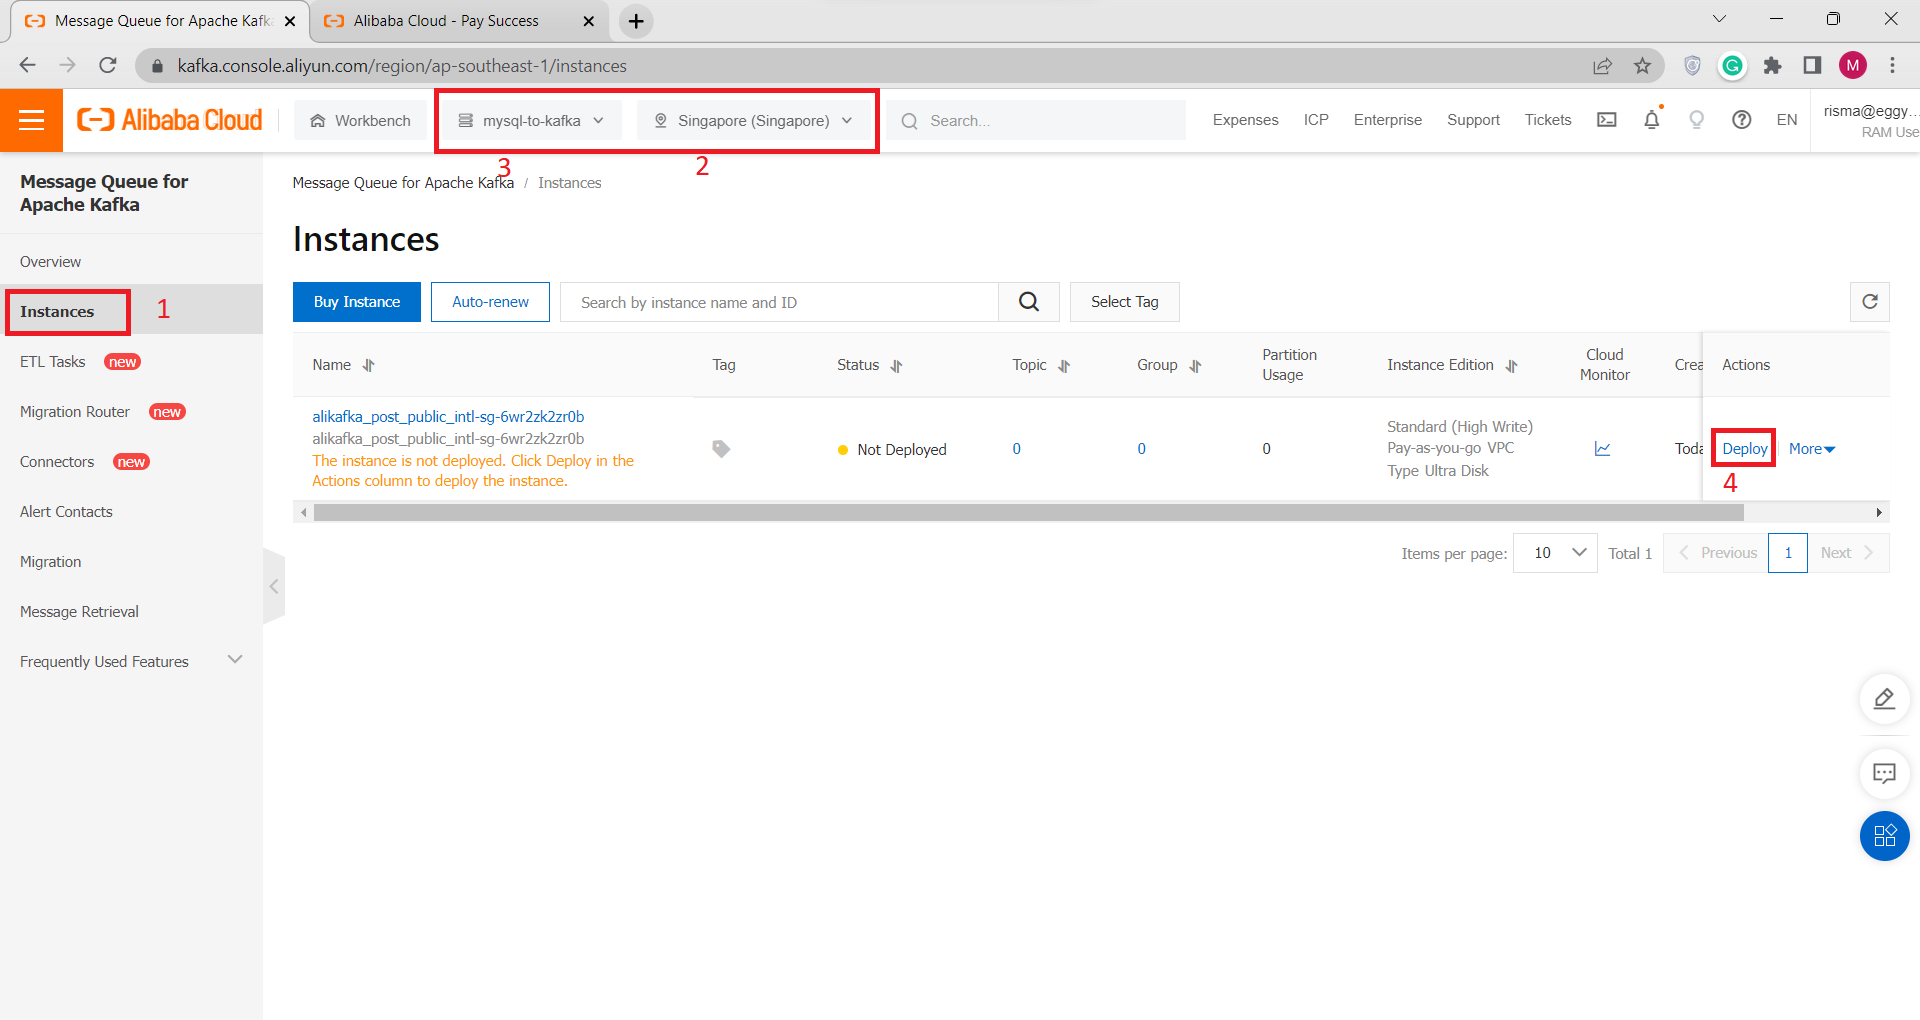
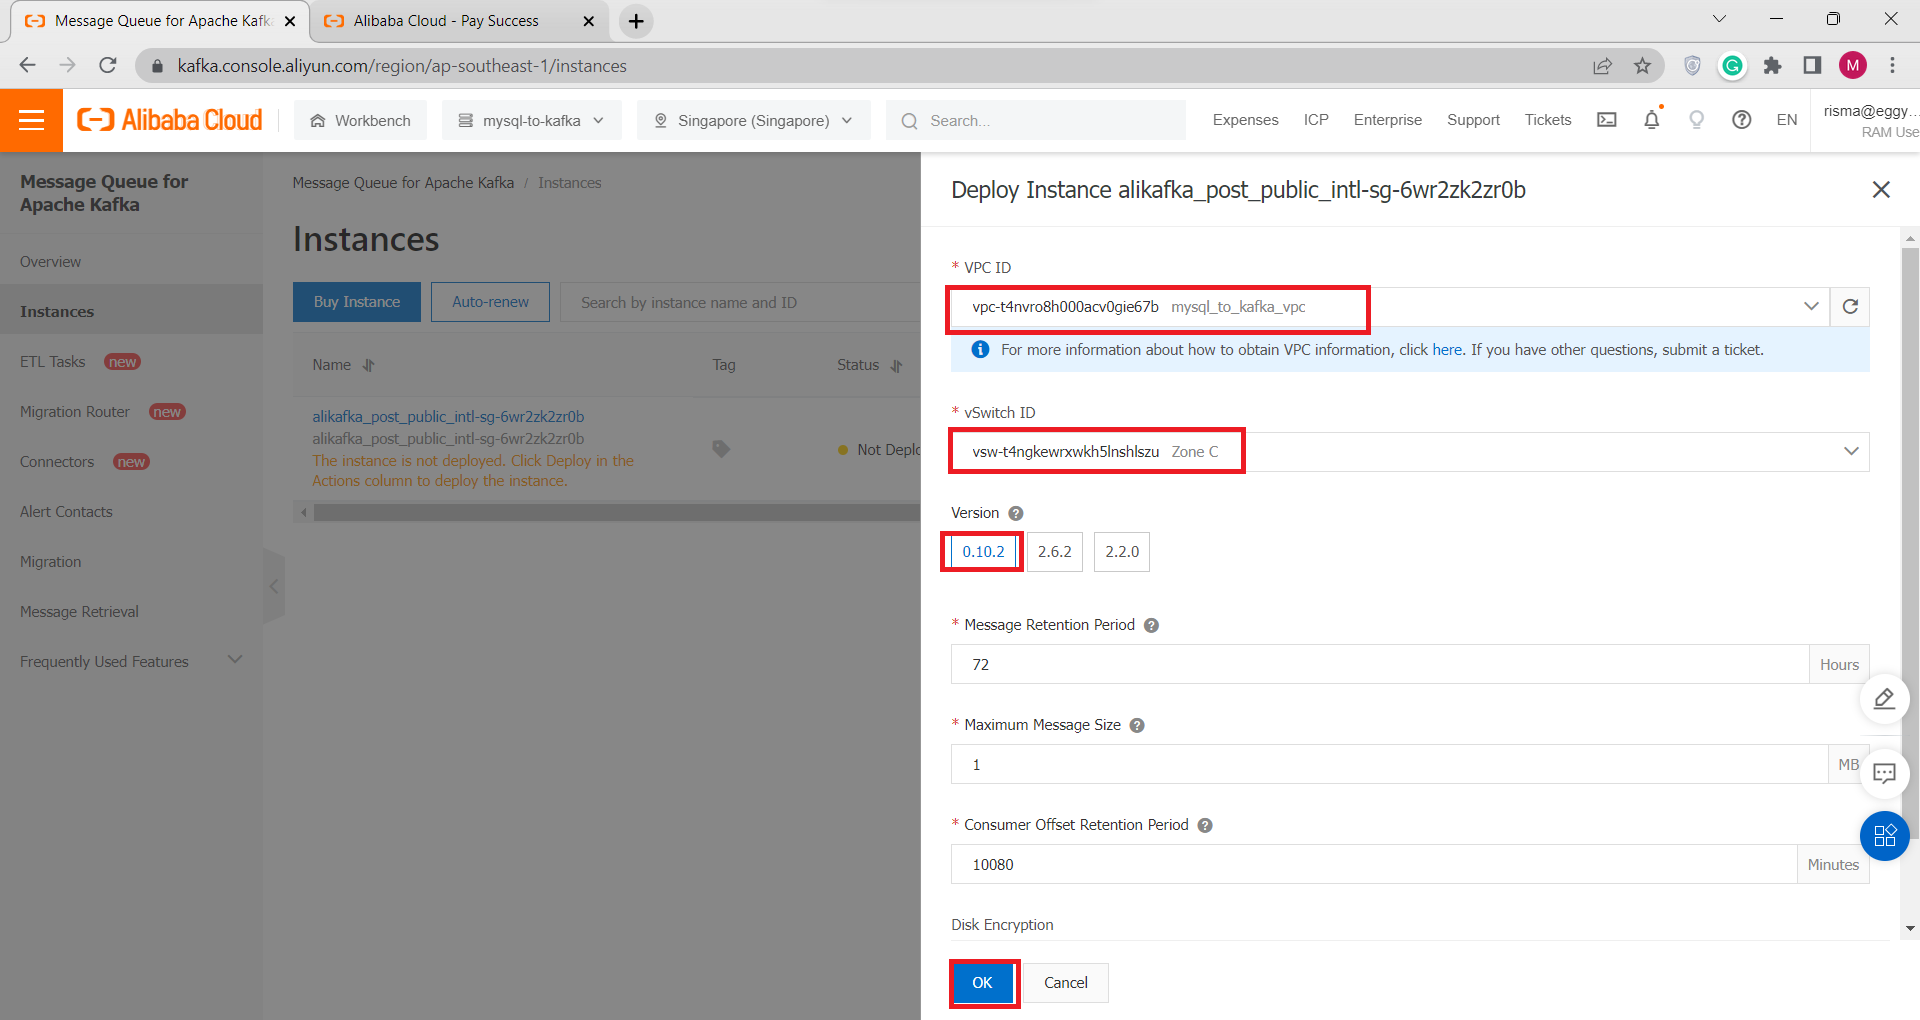
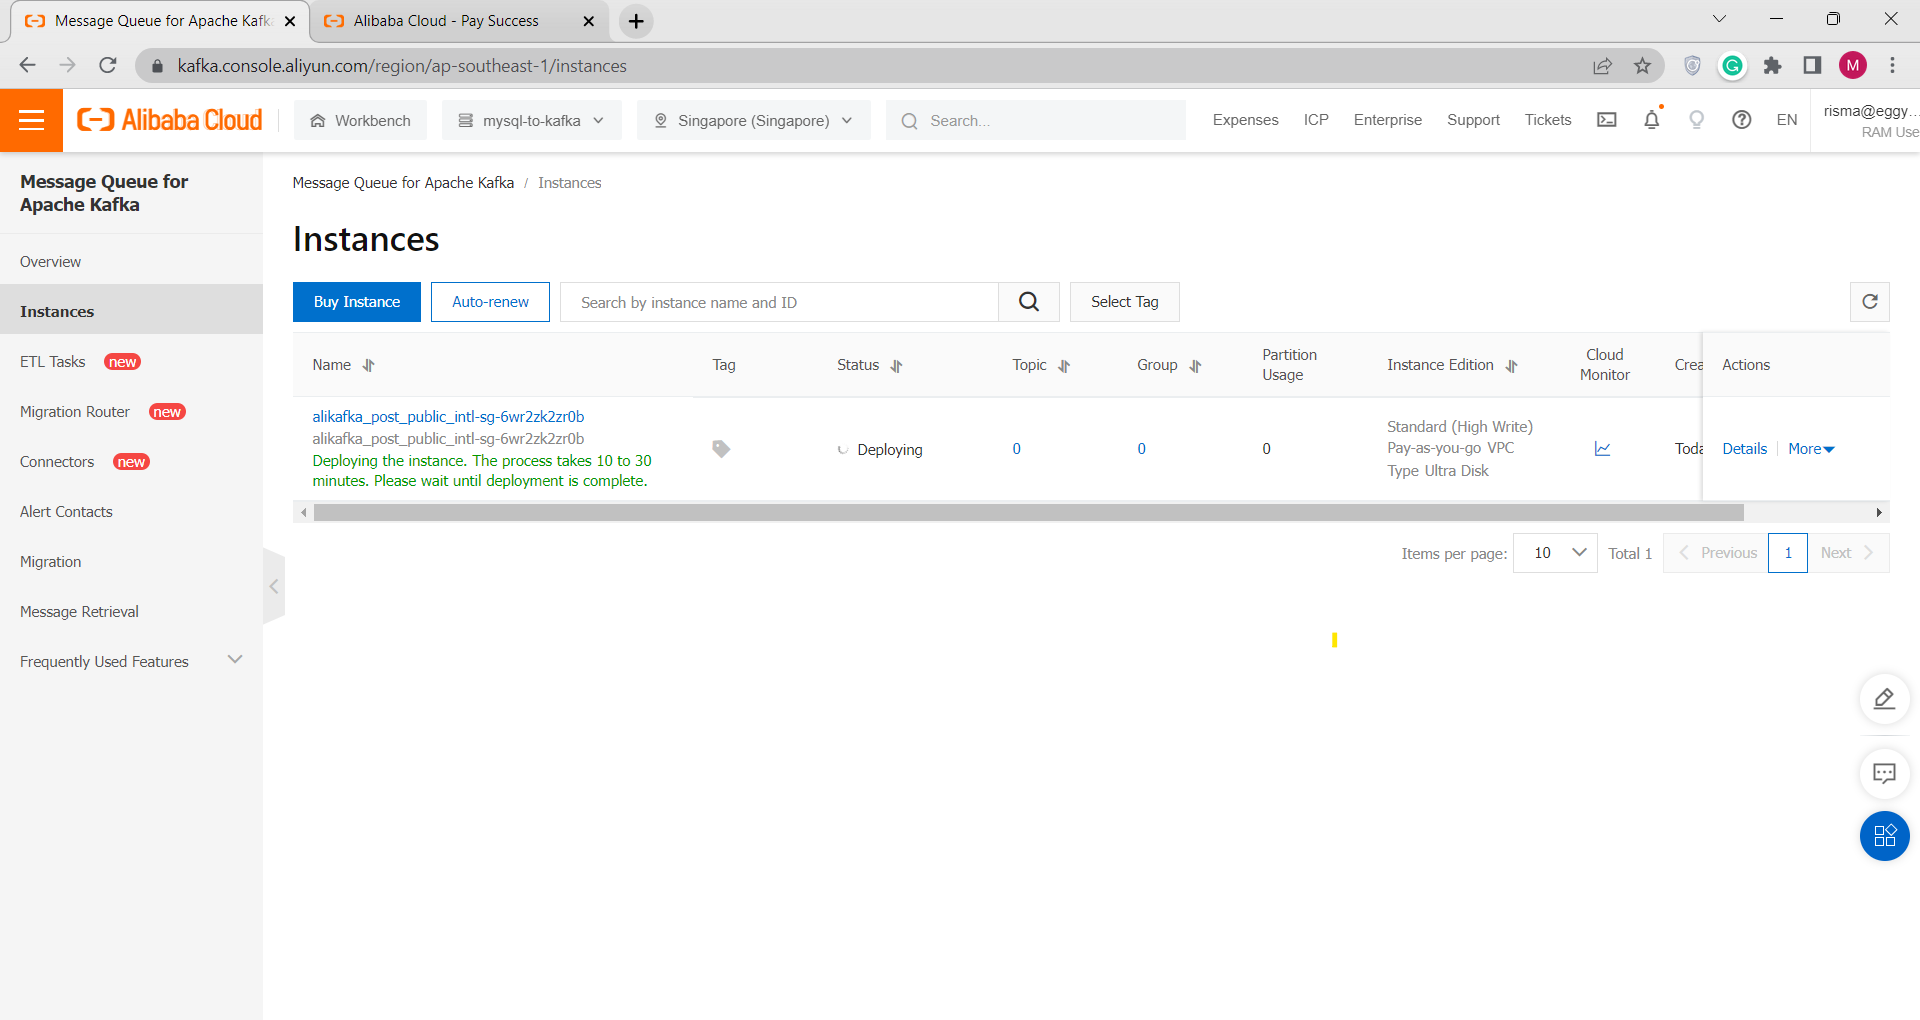
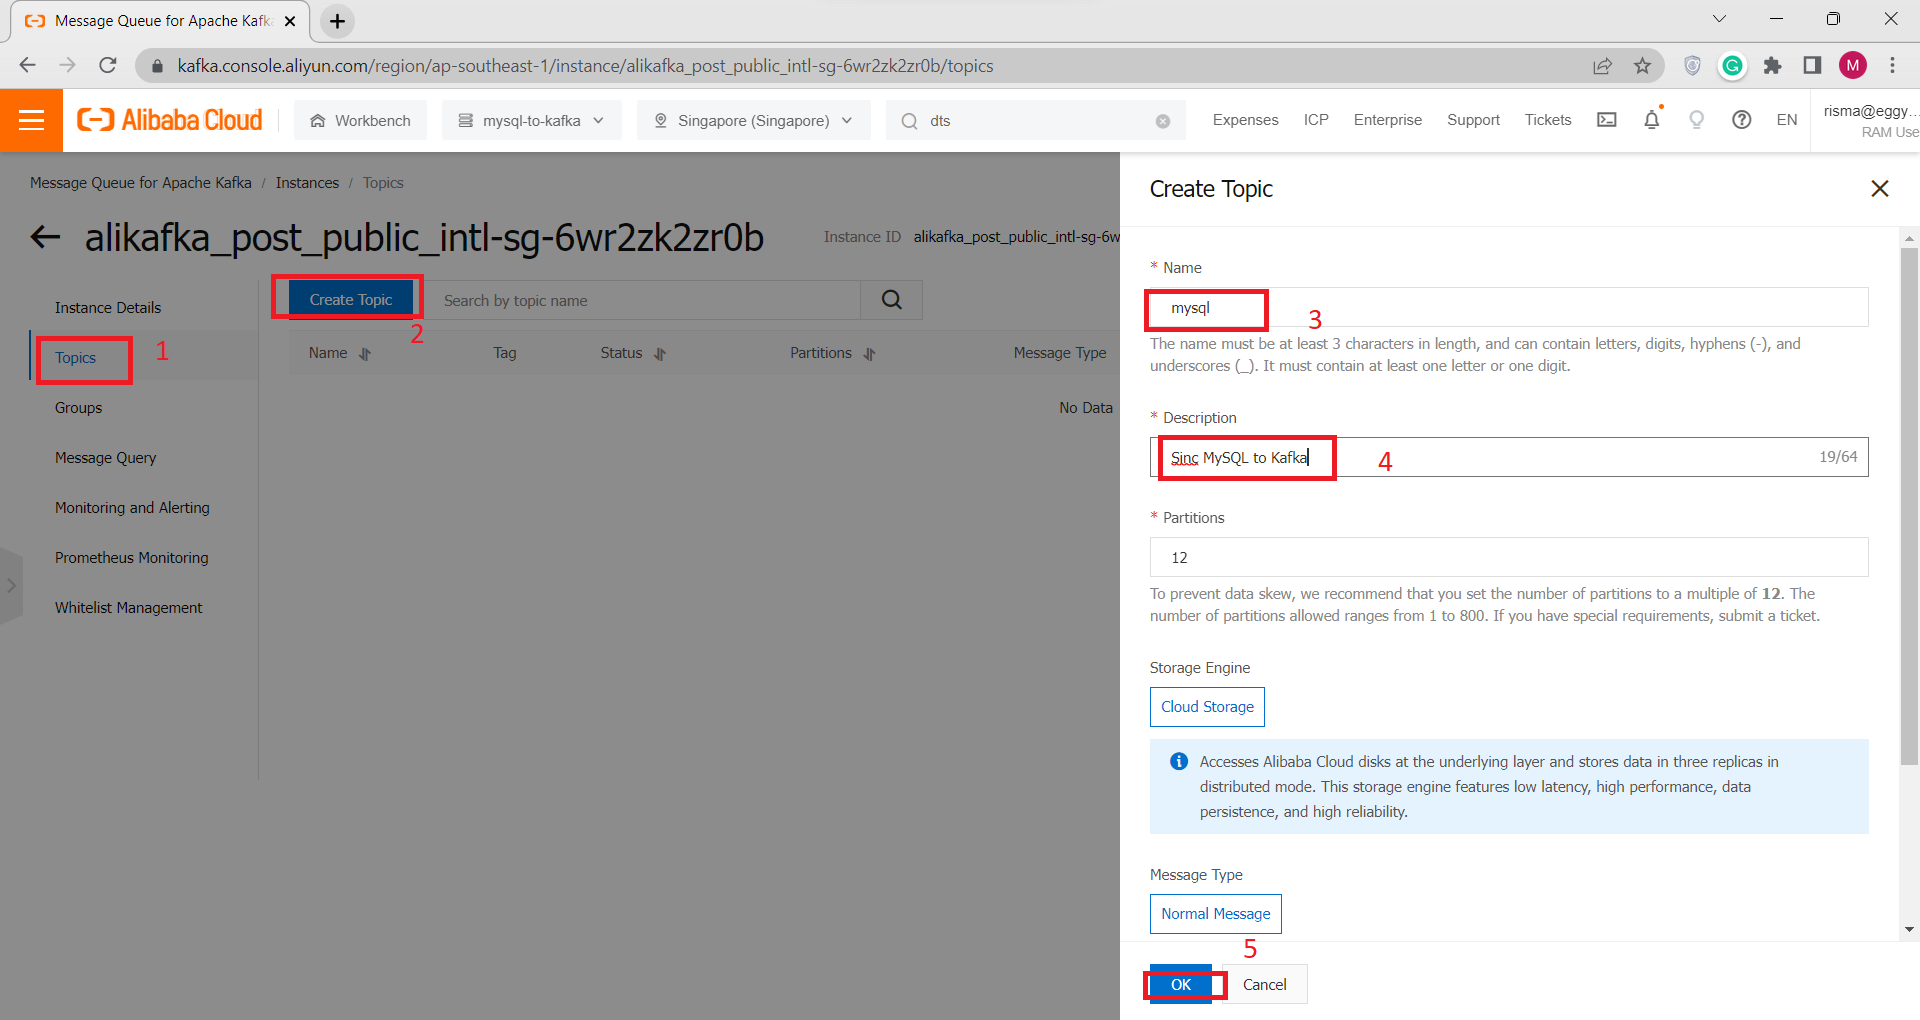 In the left-side navigation pane click Instance Details, in Basic Information
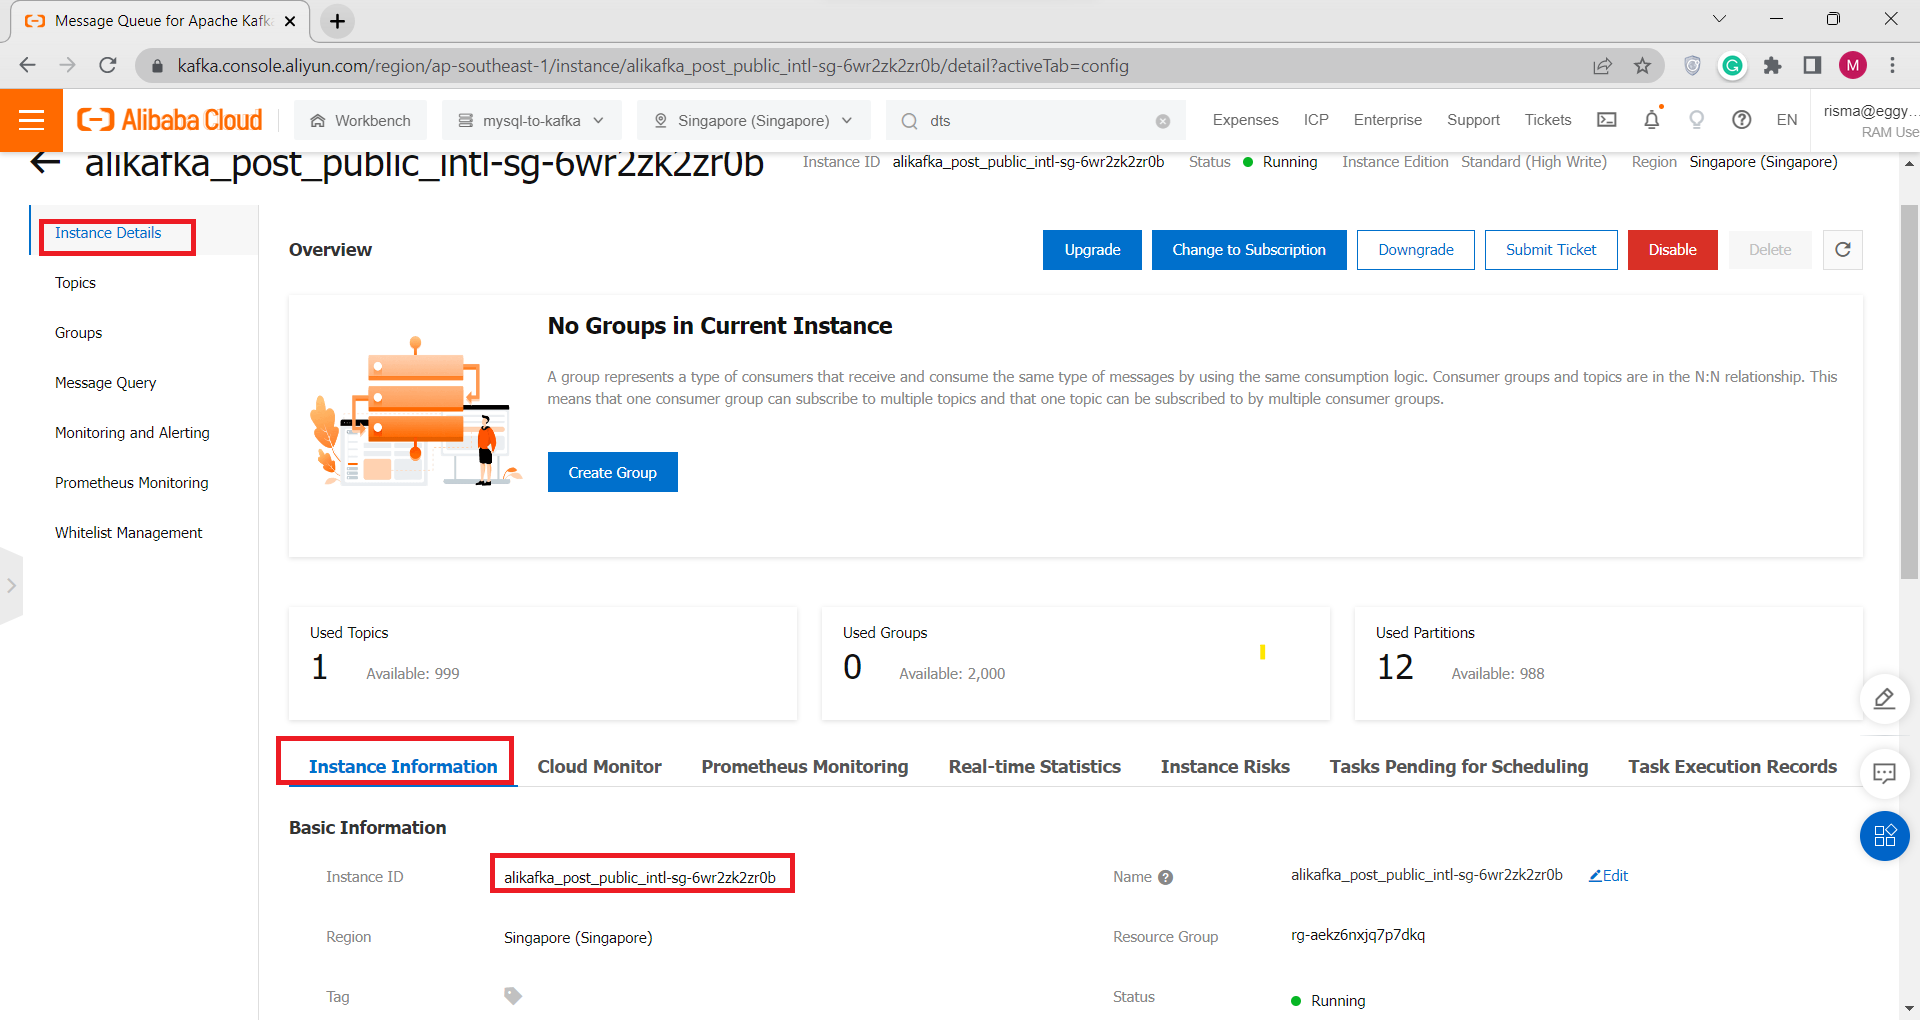 Scroll Down go to Endpoint Information, Click Domain Name, and Copy selected IP Address to your Note
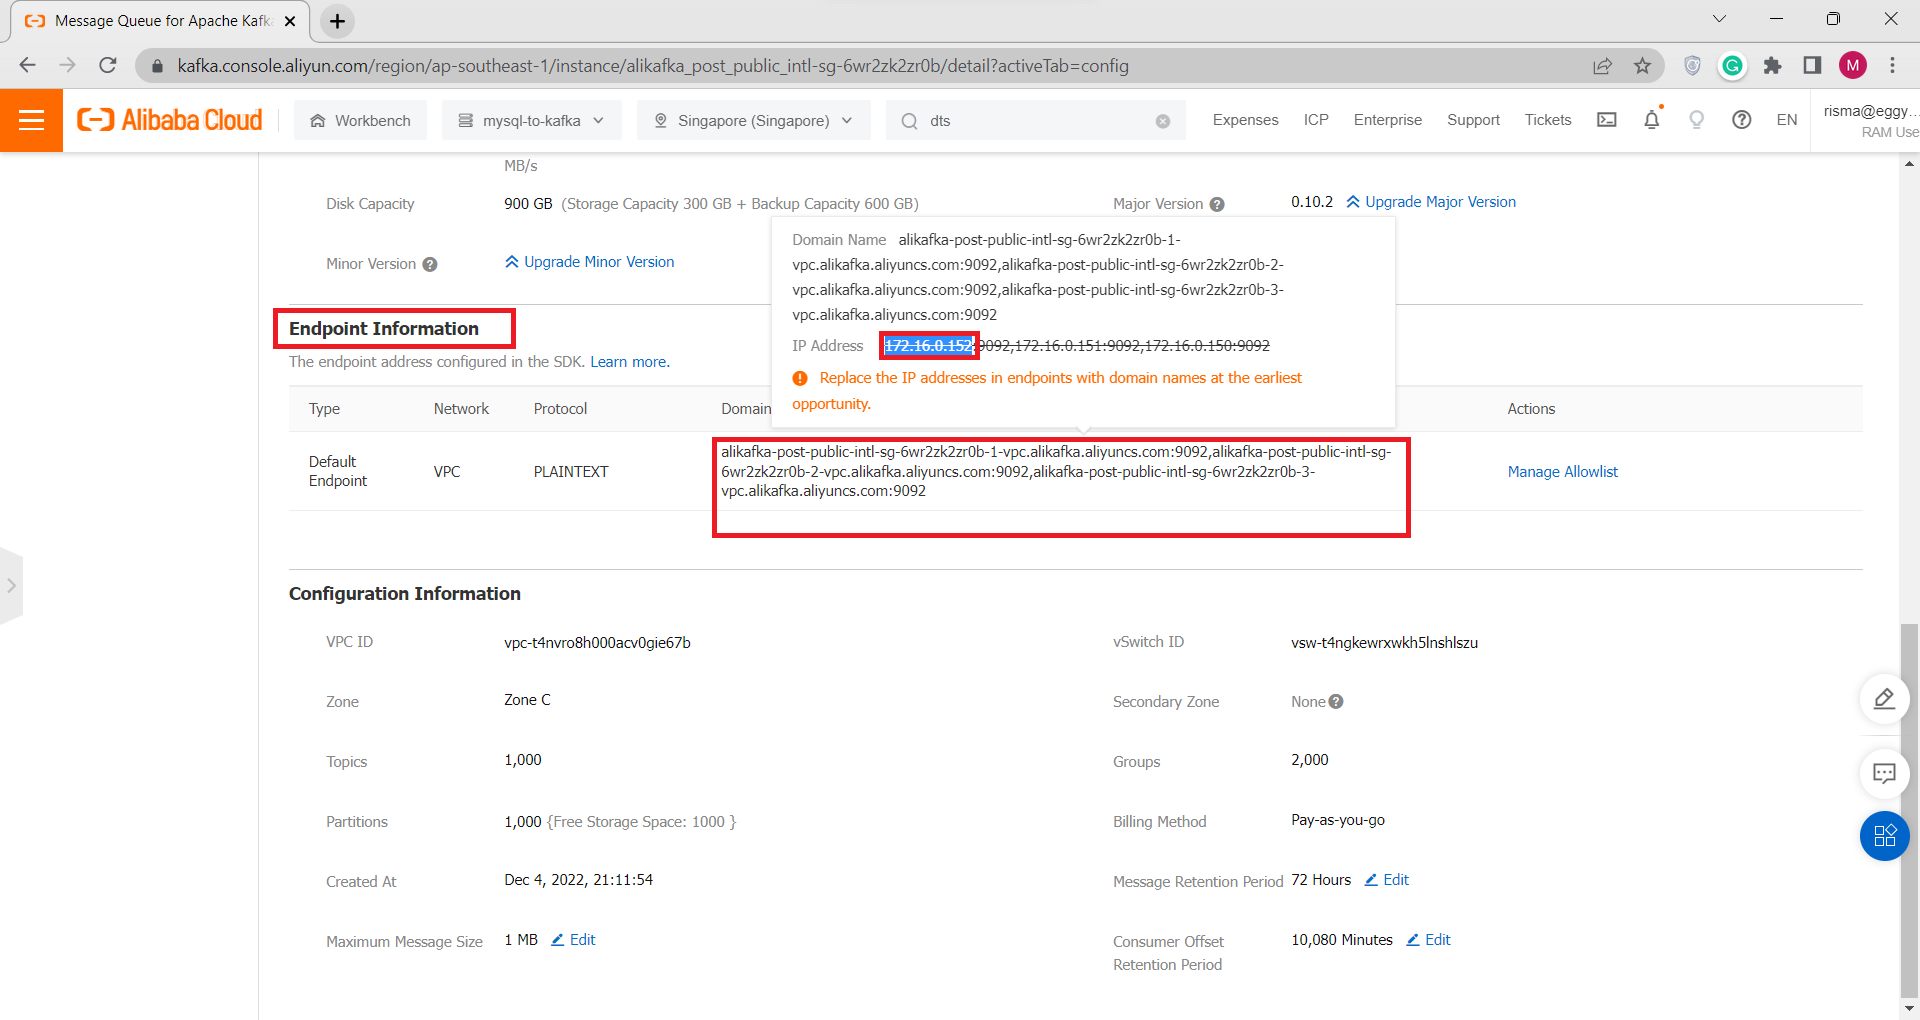
G) Synchronize data from an ApsaraDB RDS for MySQL instance to Message Queue for Apache Kafka using DTS
1) Go to Data Transmission Service Console
2) Make sure your Region and Resource Group are Correct, In the left-side navigation pane click Data Synchronization, then Click Create Task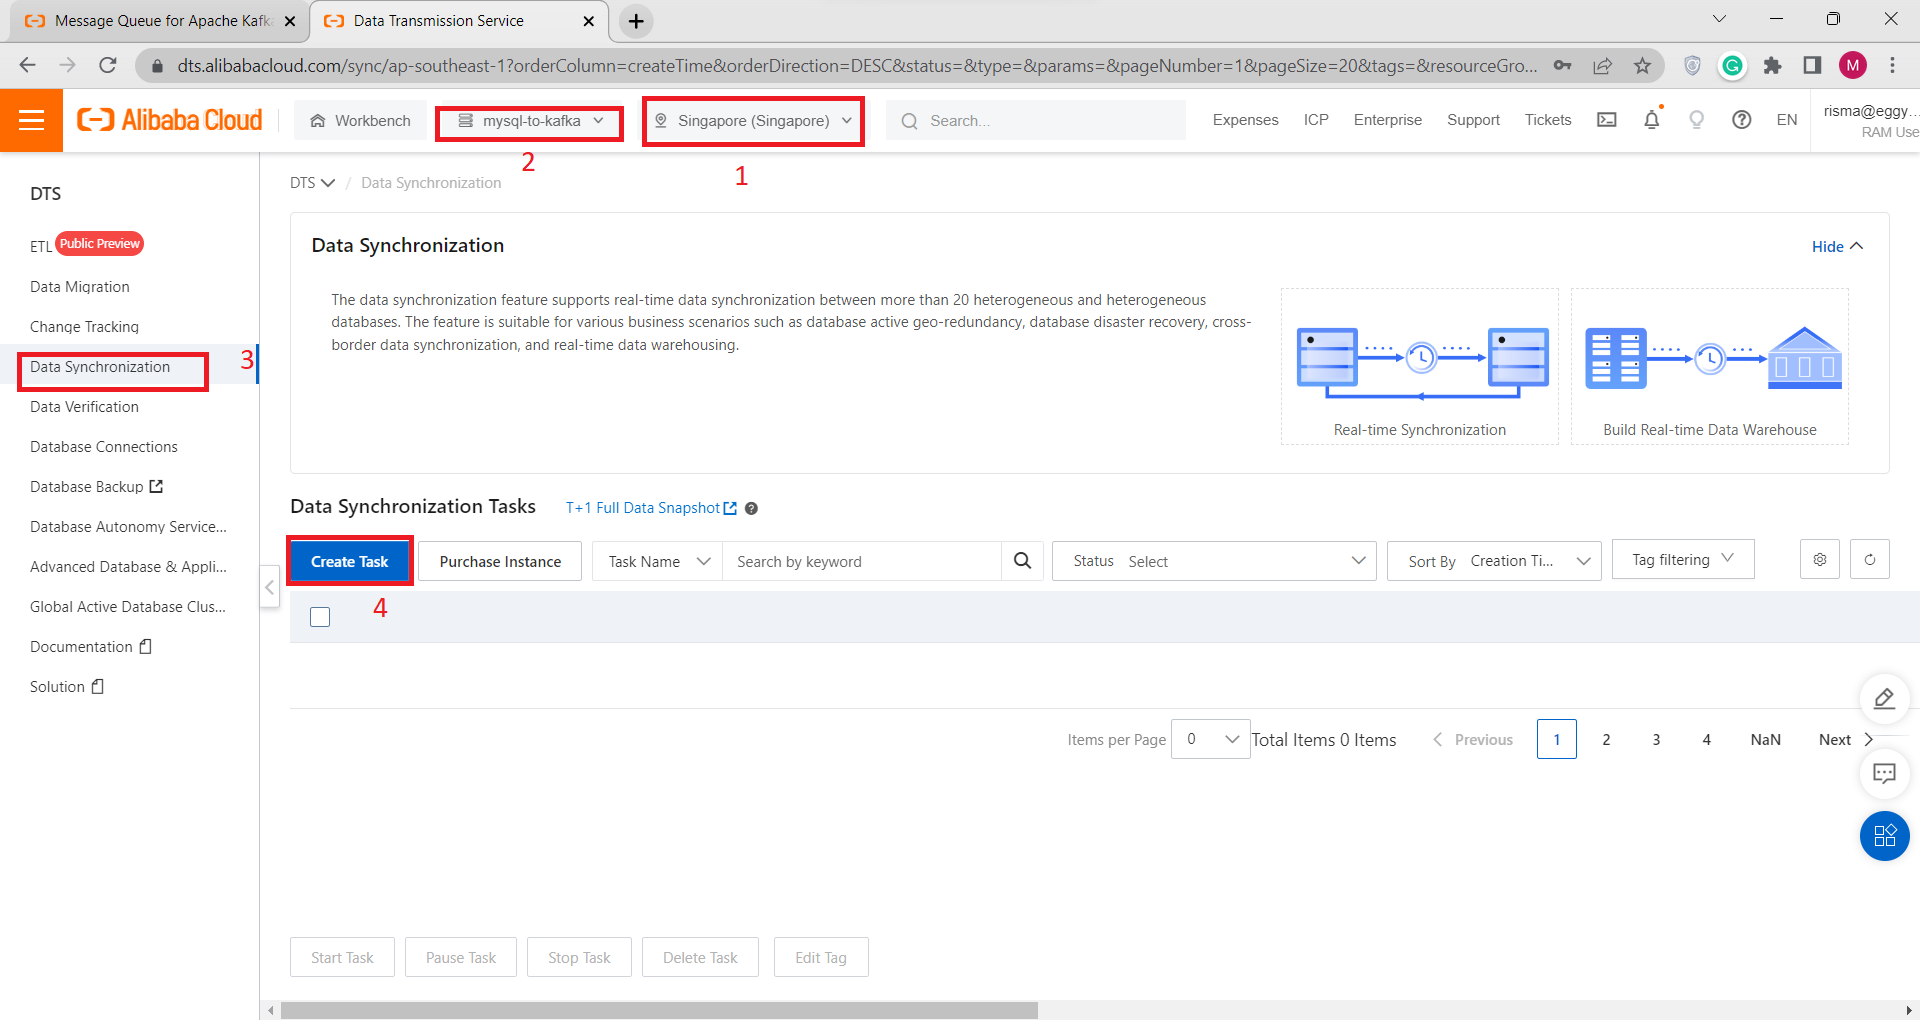
3) Input Your ApsaraDB for MySQL data to Source Database, make sure your Database Type, RDS Instance ID, Instance Region, Database Account And Password are correct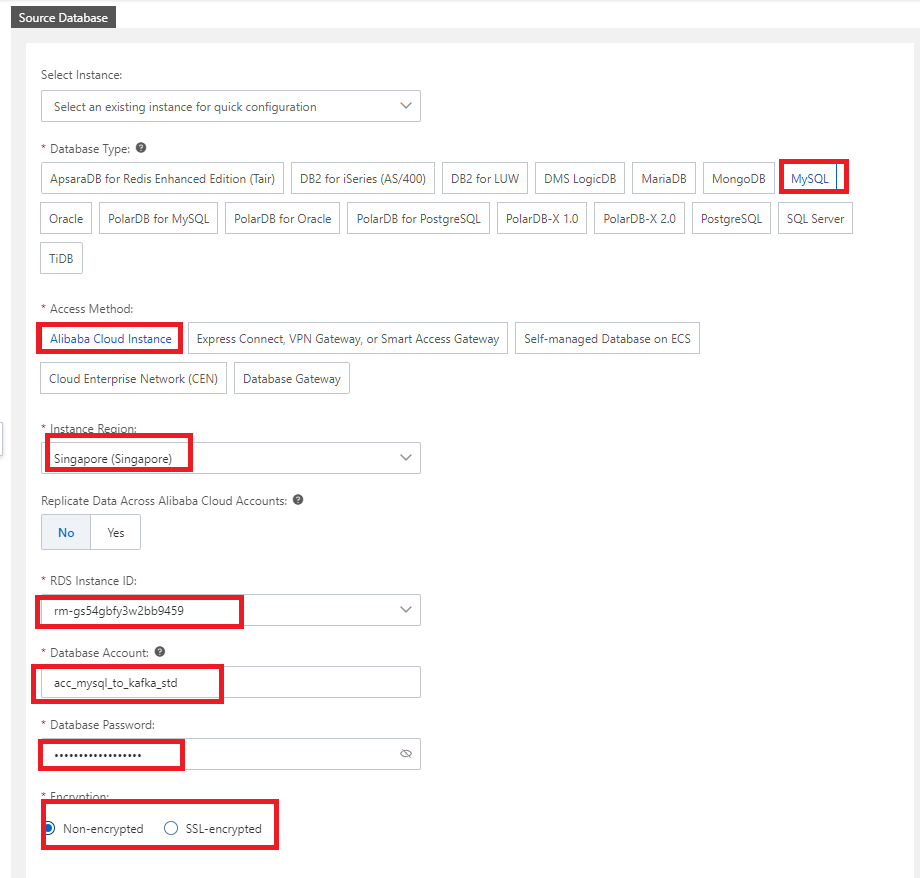
4) For Destination Databases,
Database Type : Kafka
Access Method : Express Connect, VPN Gateway, or Smart Access Gateway
Region : The same region as VPC
IP Address : Paste Message Queue for Apache Kafka IP Address that we copy in step F
Port Number : 9092
Kafka Version : 0.10
Topic : Select Topic that have been created before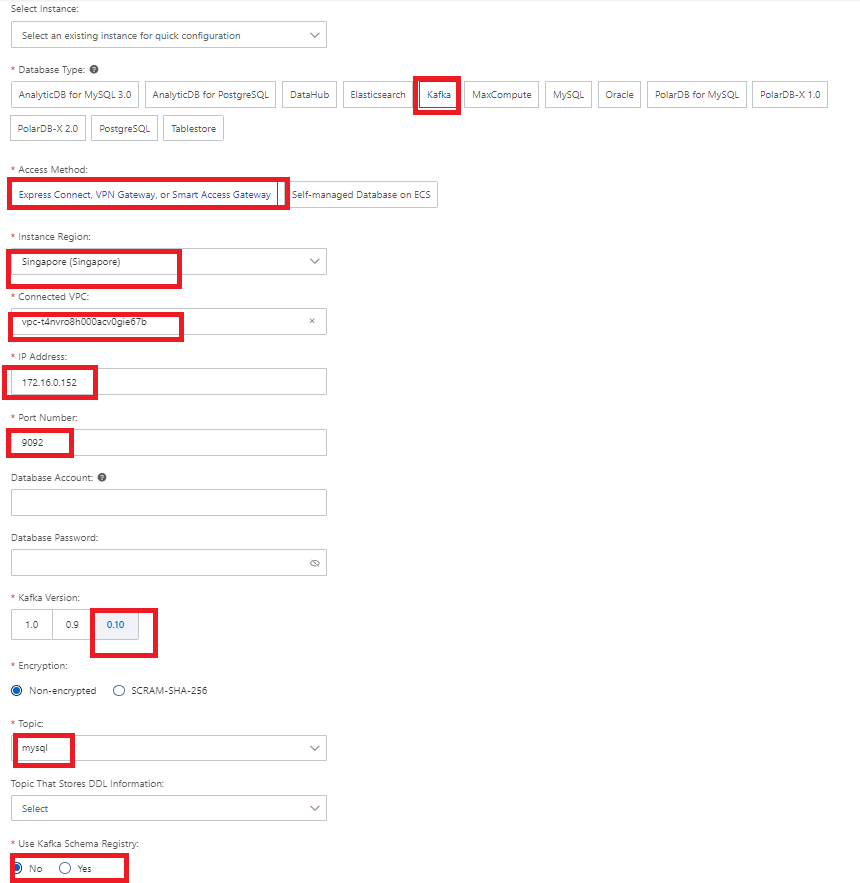
5) Click Test Connectivity and Proceed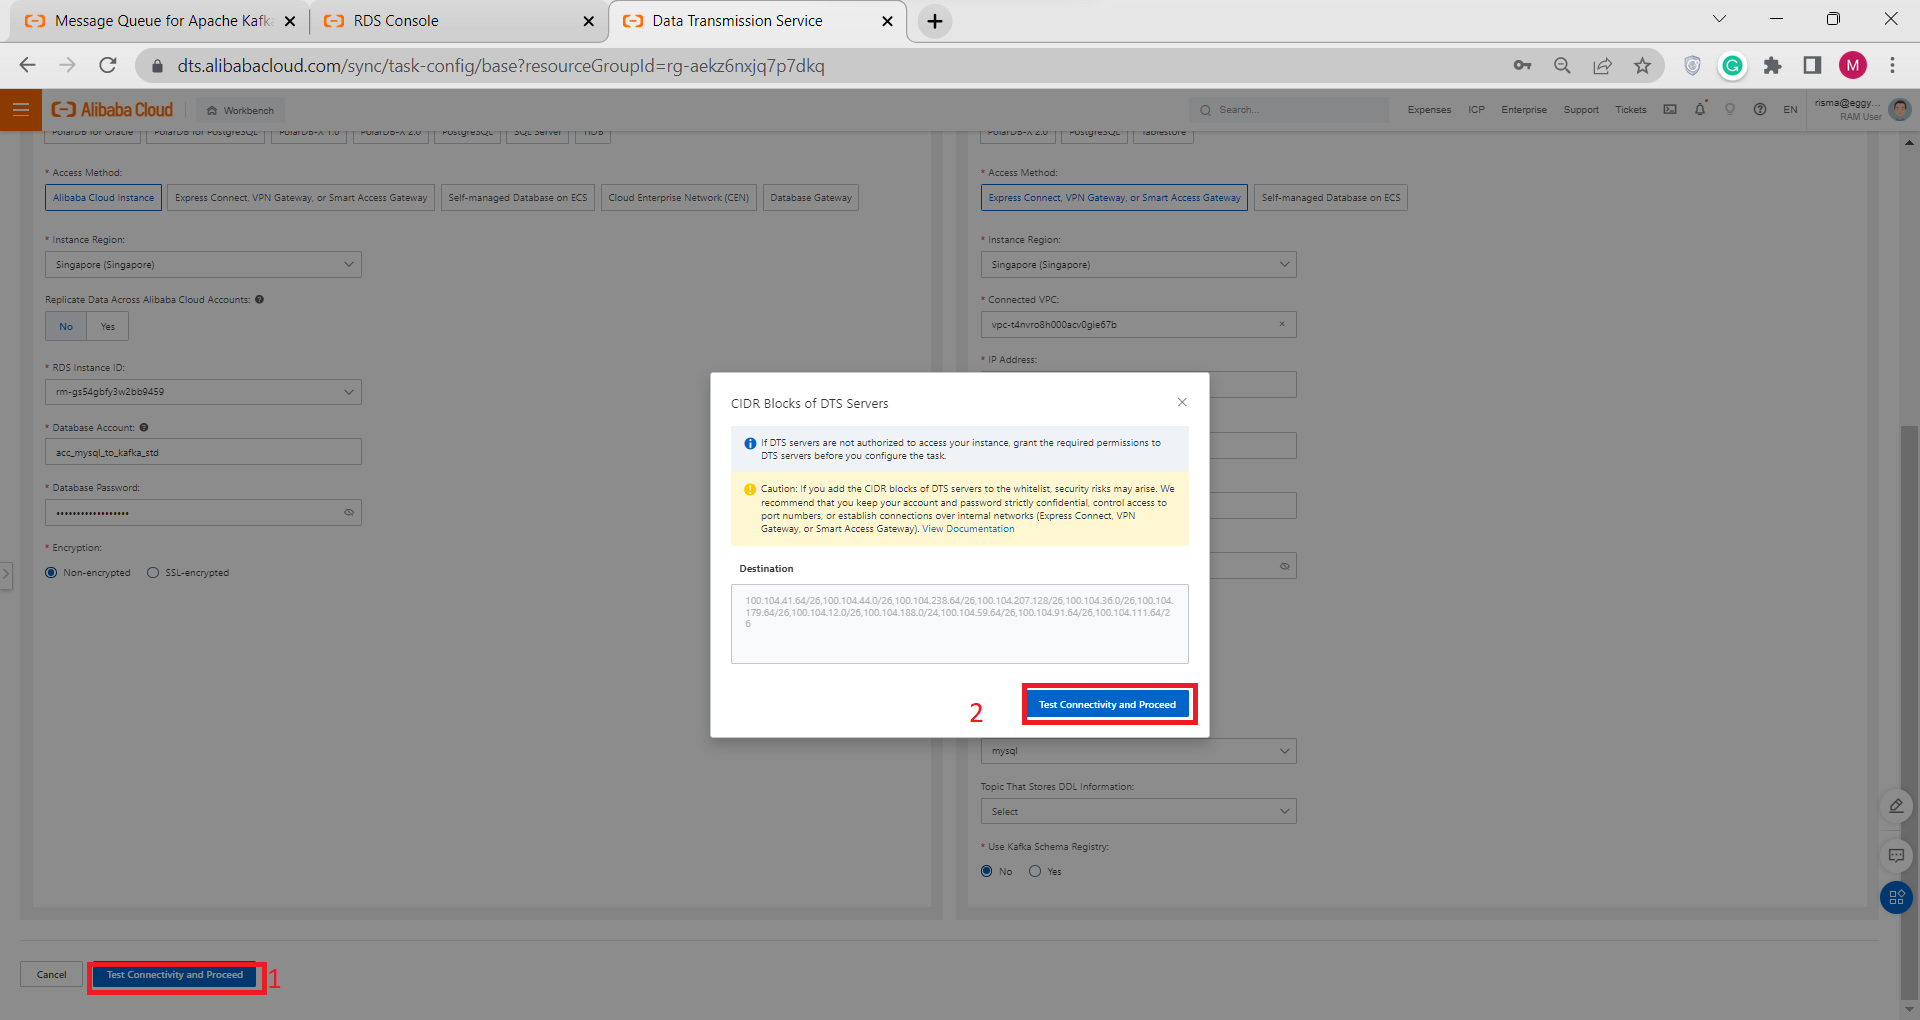
6) Configure Objects and Advanced Setting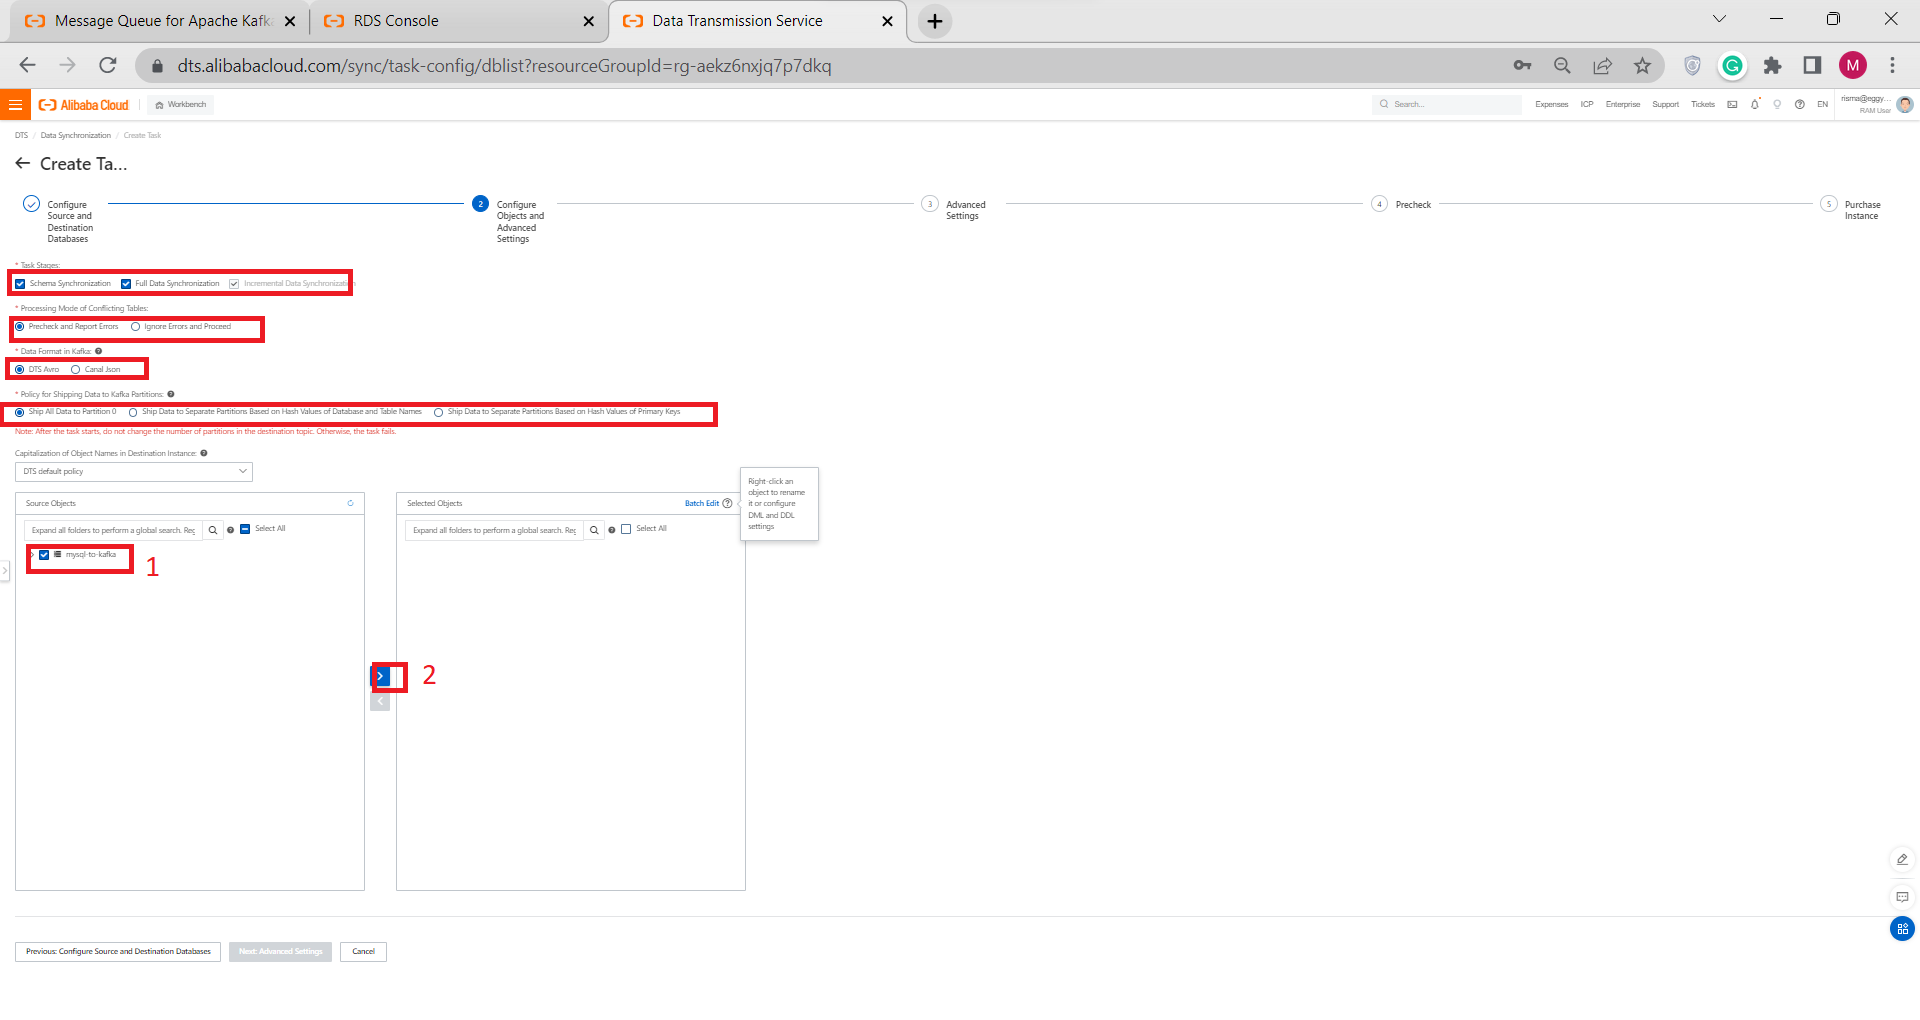
7) Click Advanced Settings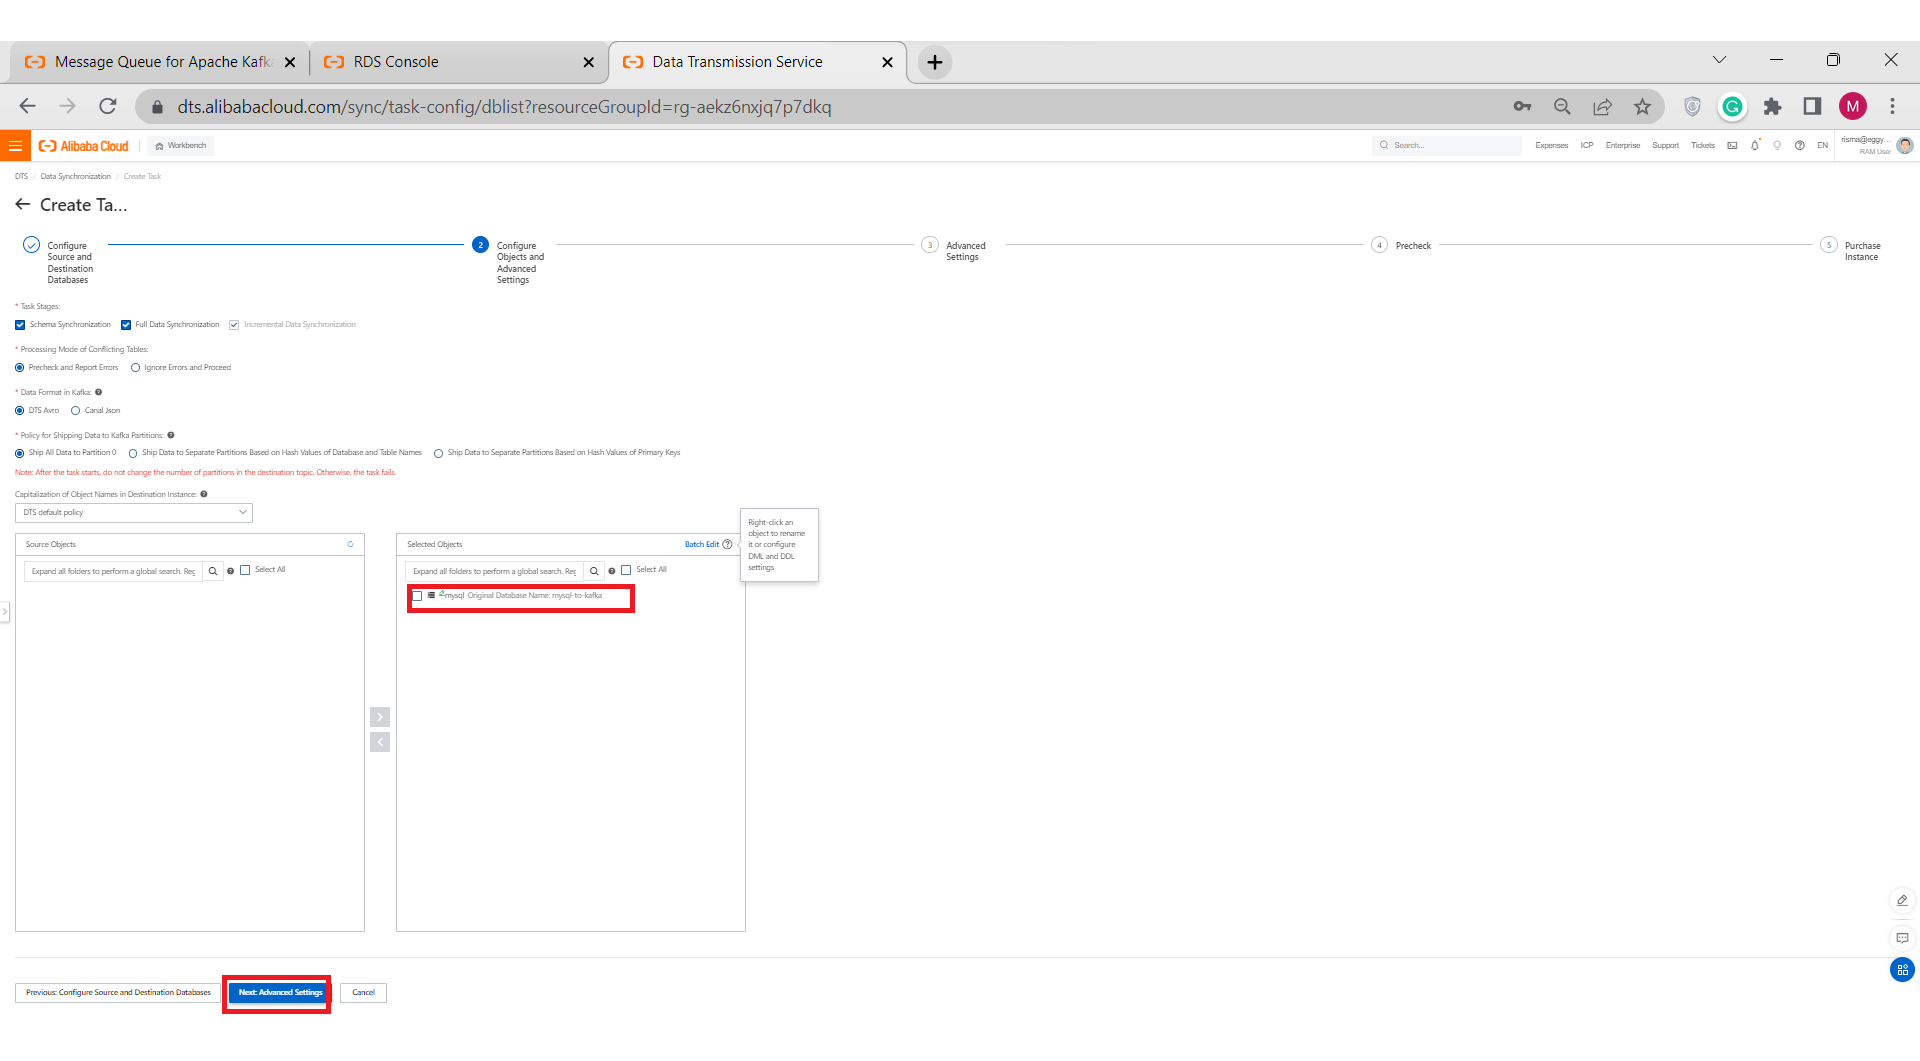
8) Set your Advanced Settings, then click Next: Save Task Settings and Precheck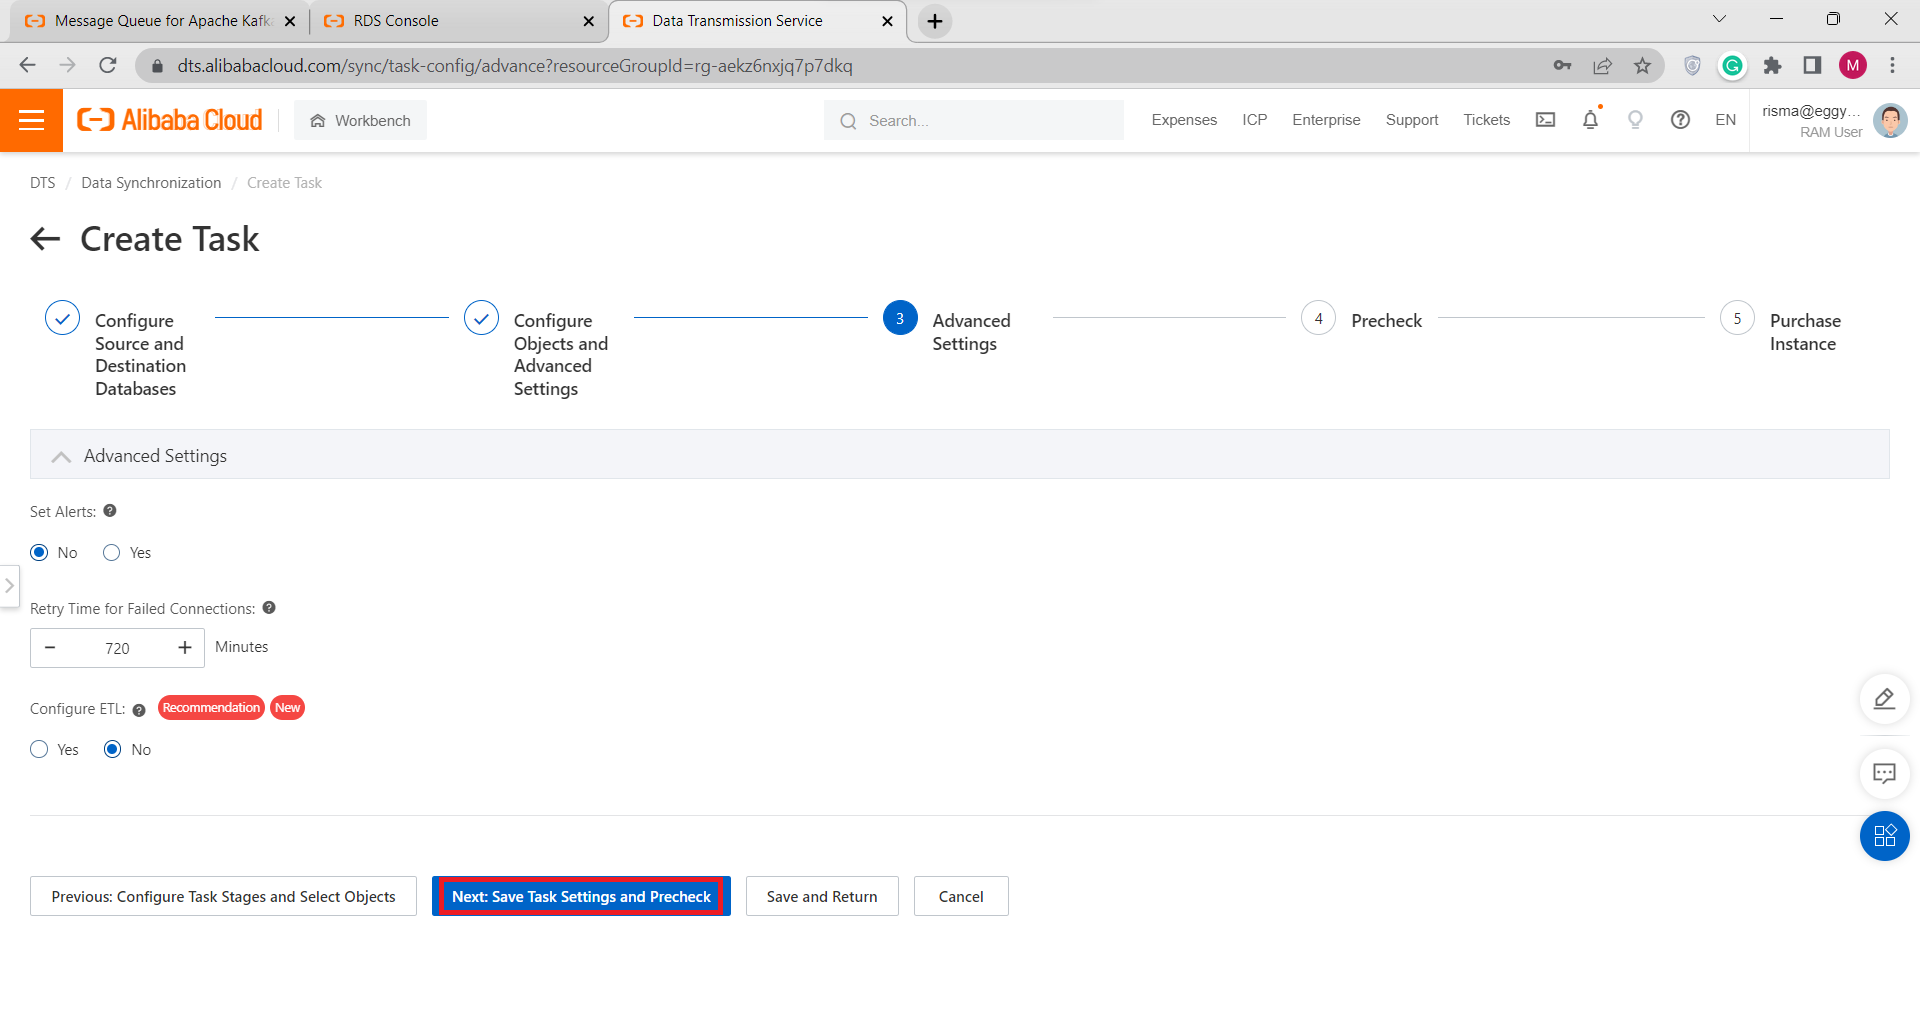
9) Wait for Precheck Completed, then Click Next: Purchased Instance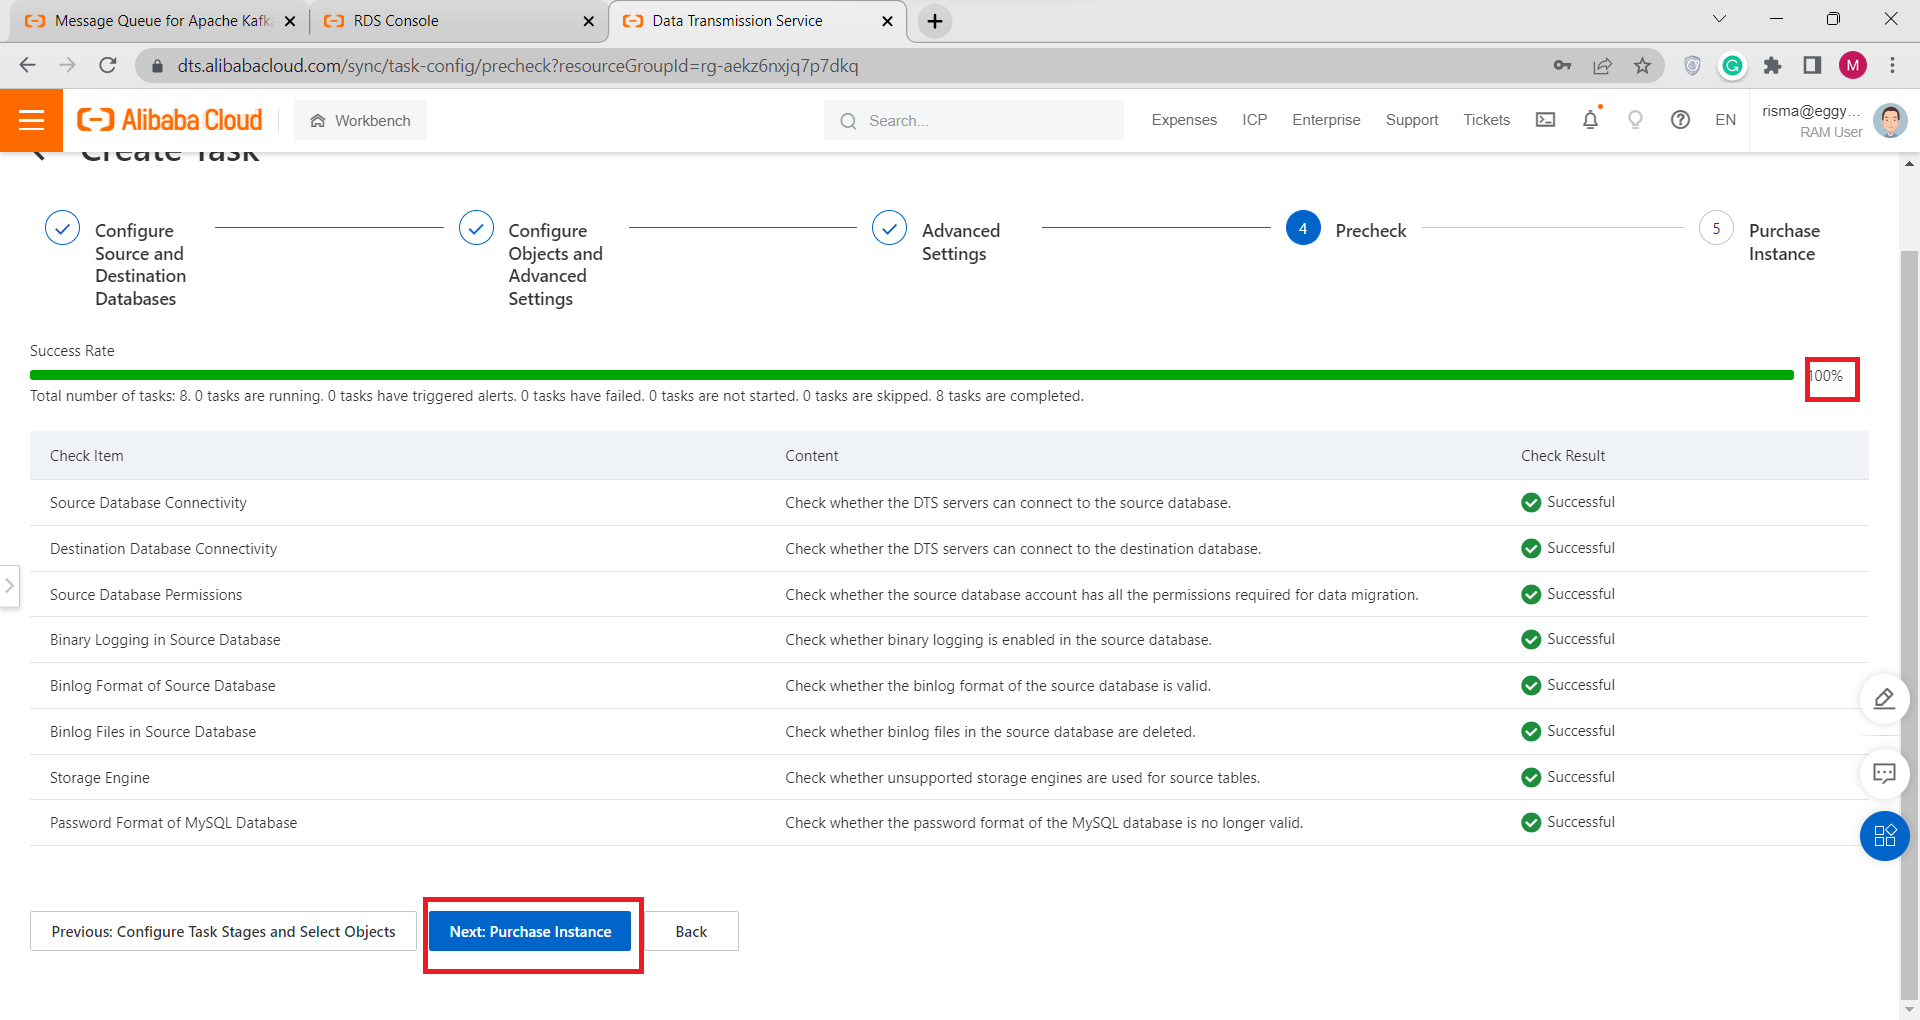
10) Purchase your Instance, then click Data Transmission Service (Pay-as-you-go) Service Terms click Buy and Start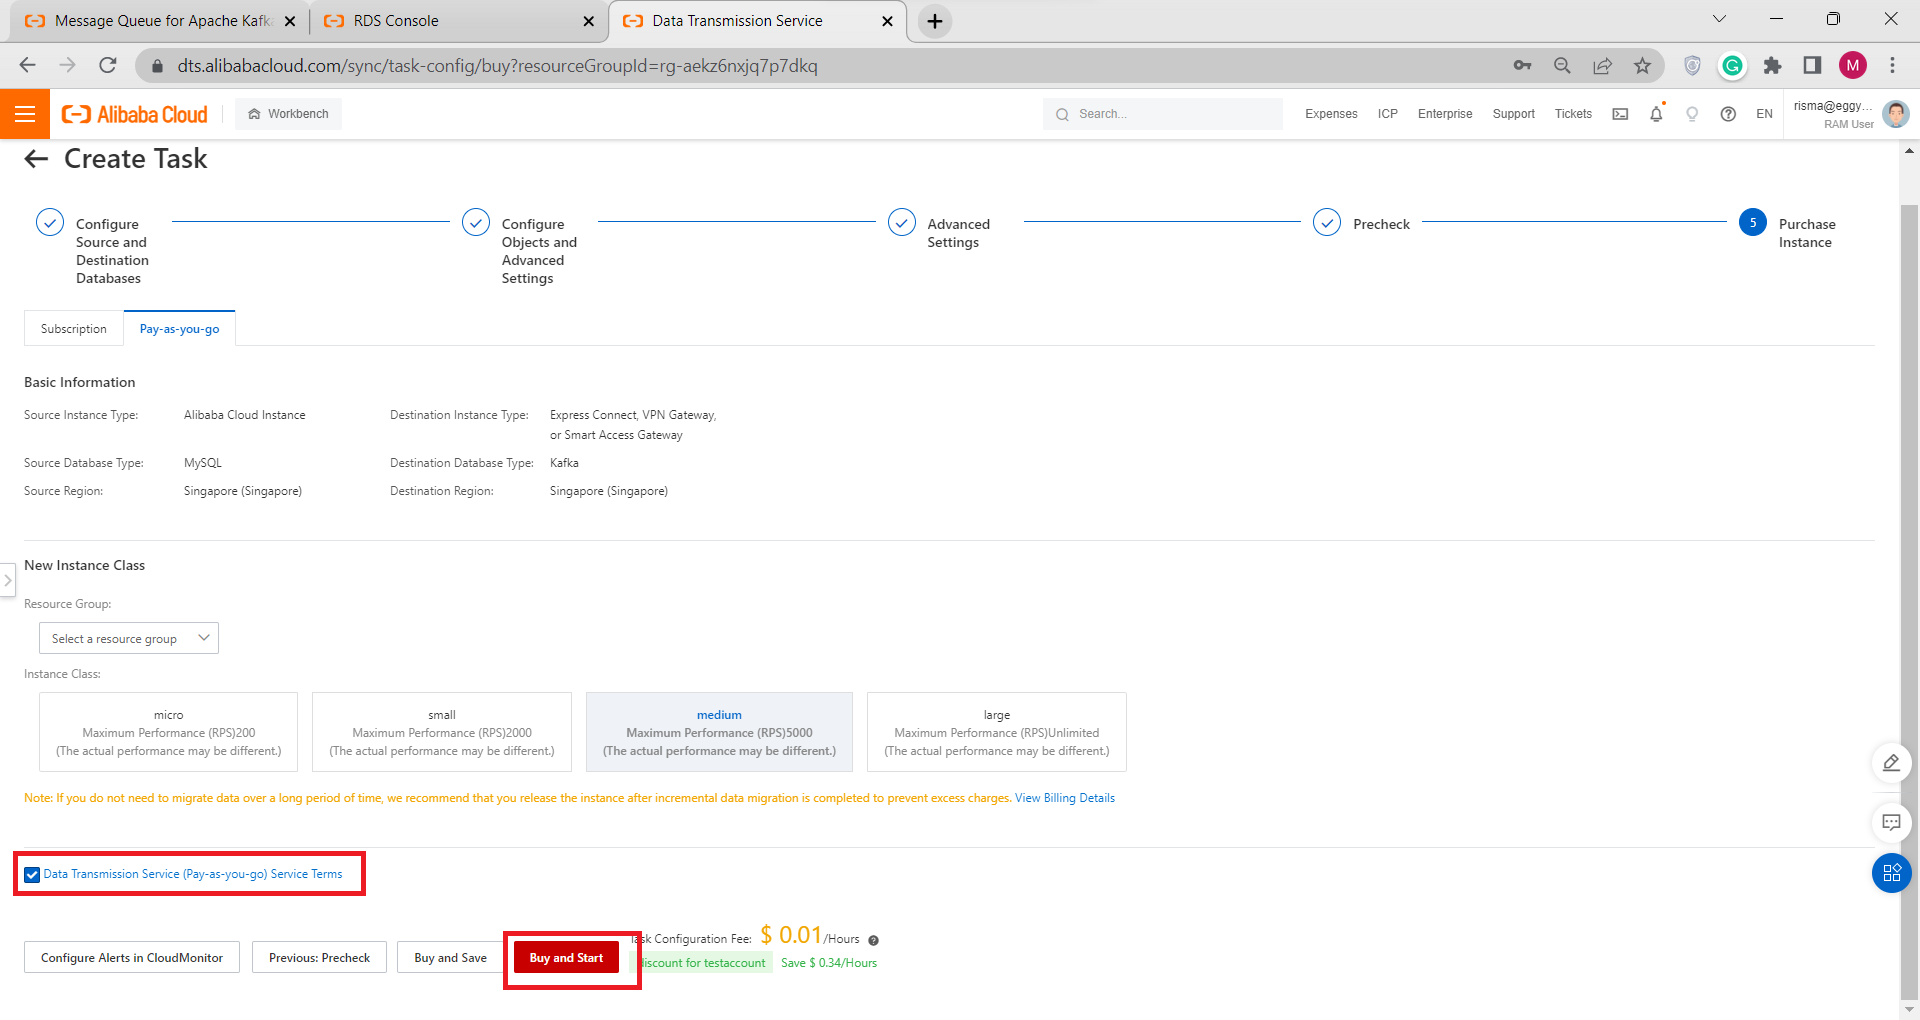
11) Click OK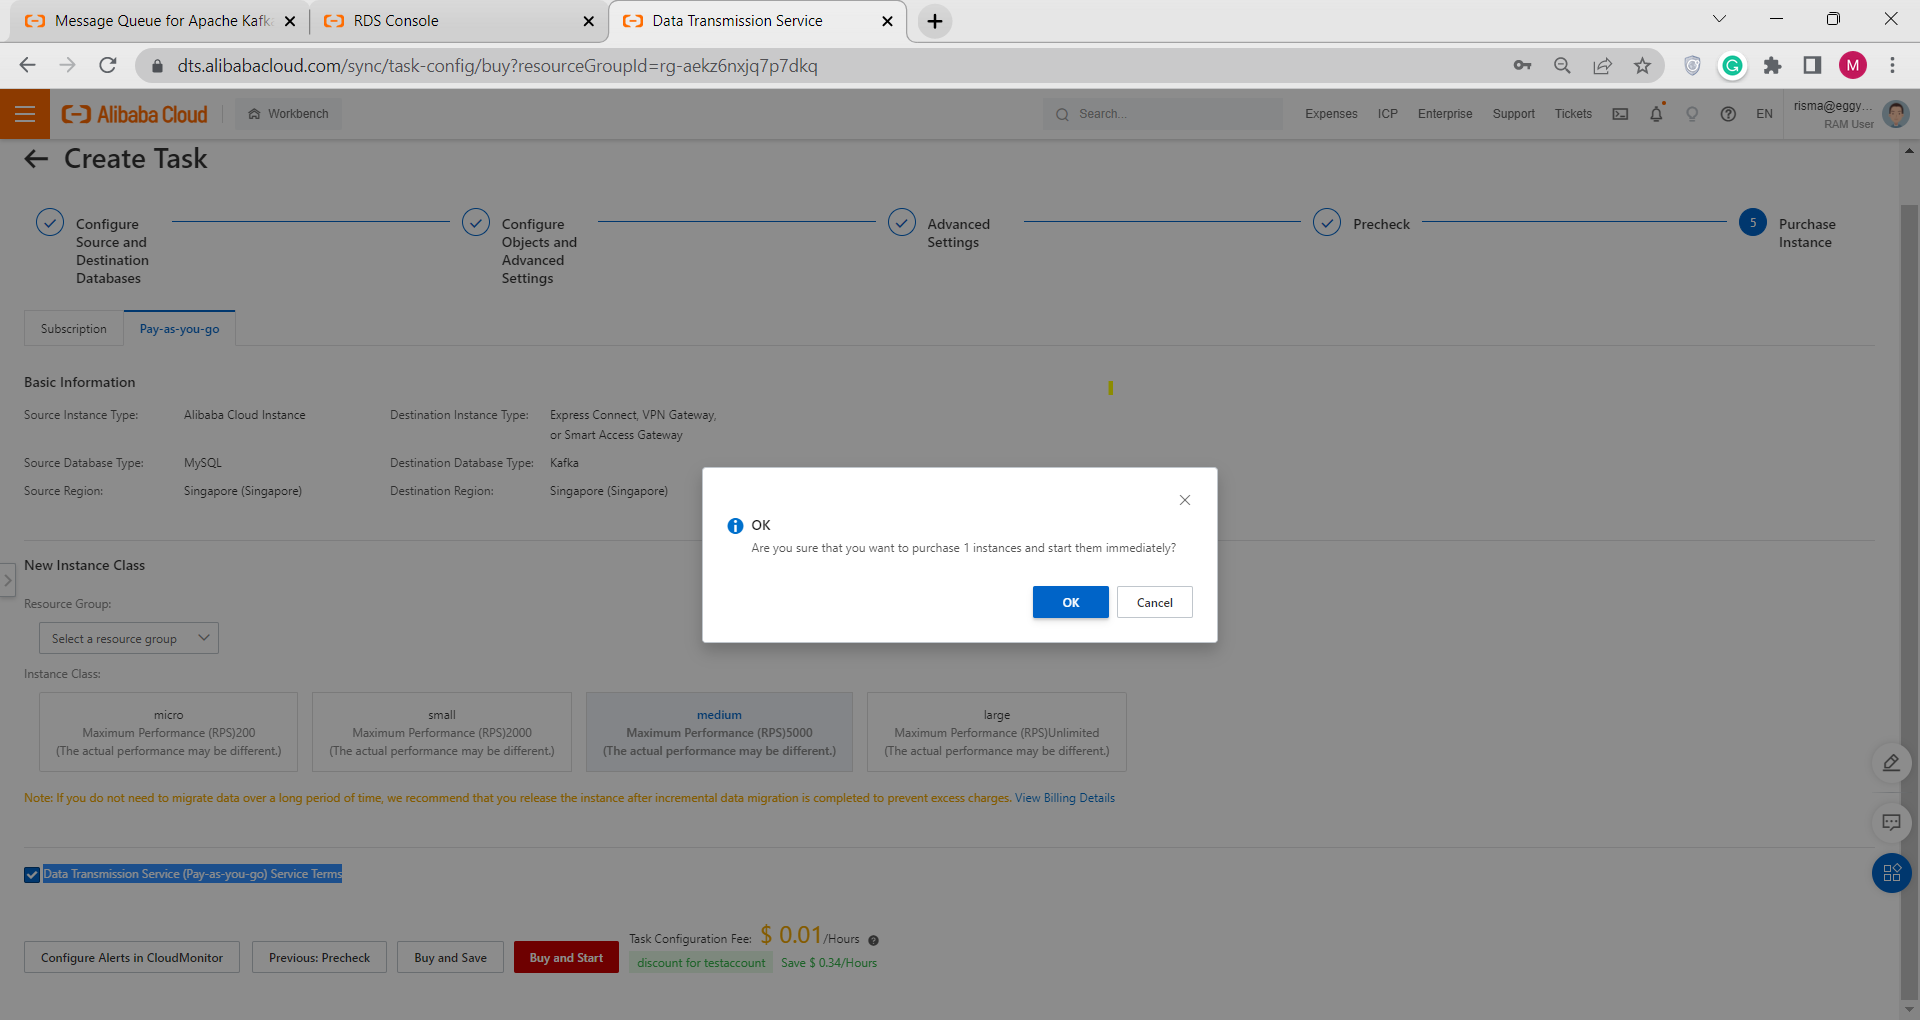
12) Now Go to Data Synchronization, and Click Purchased Instance to see your Running Task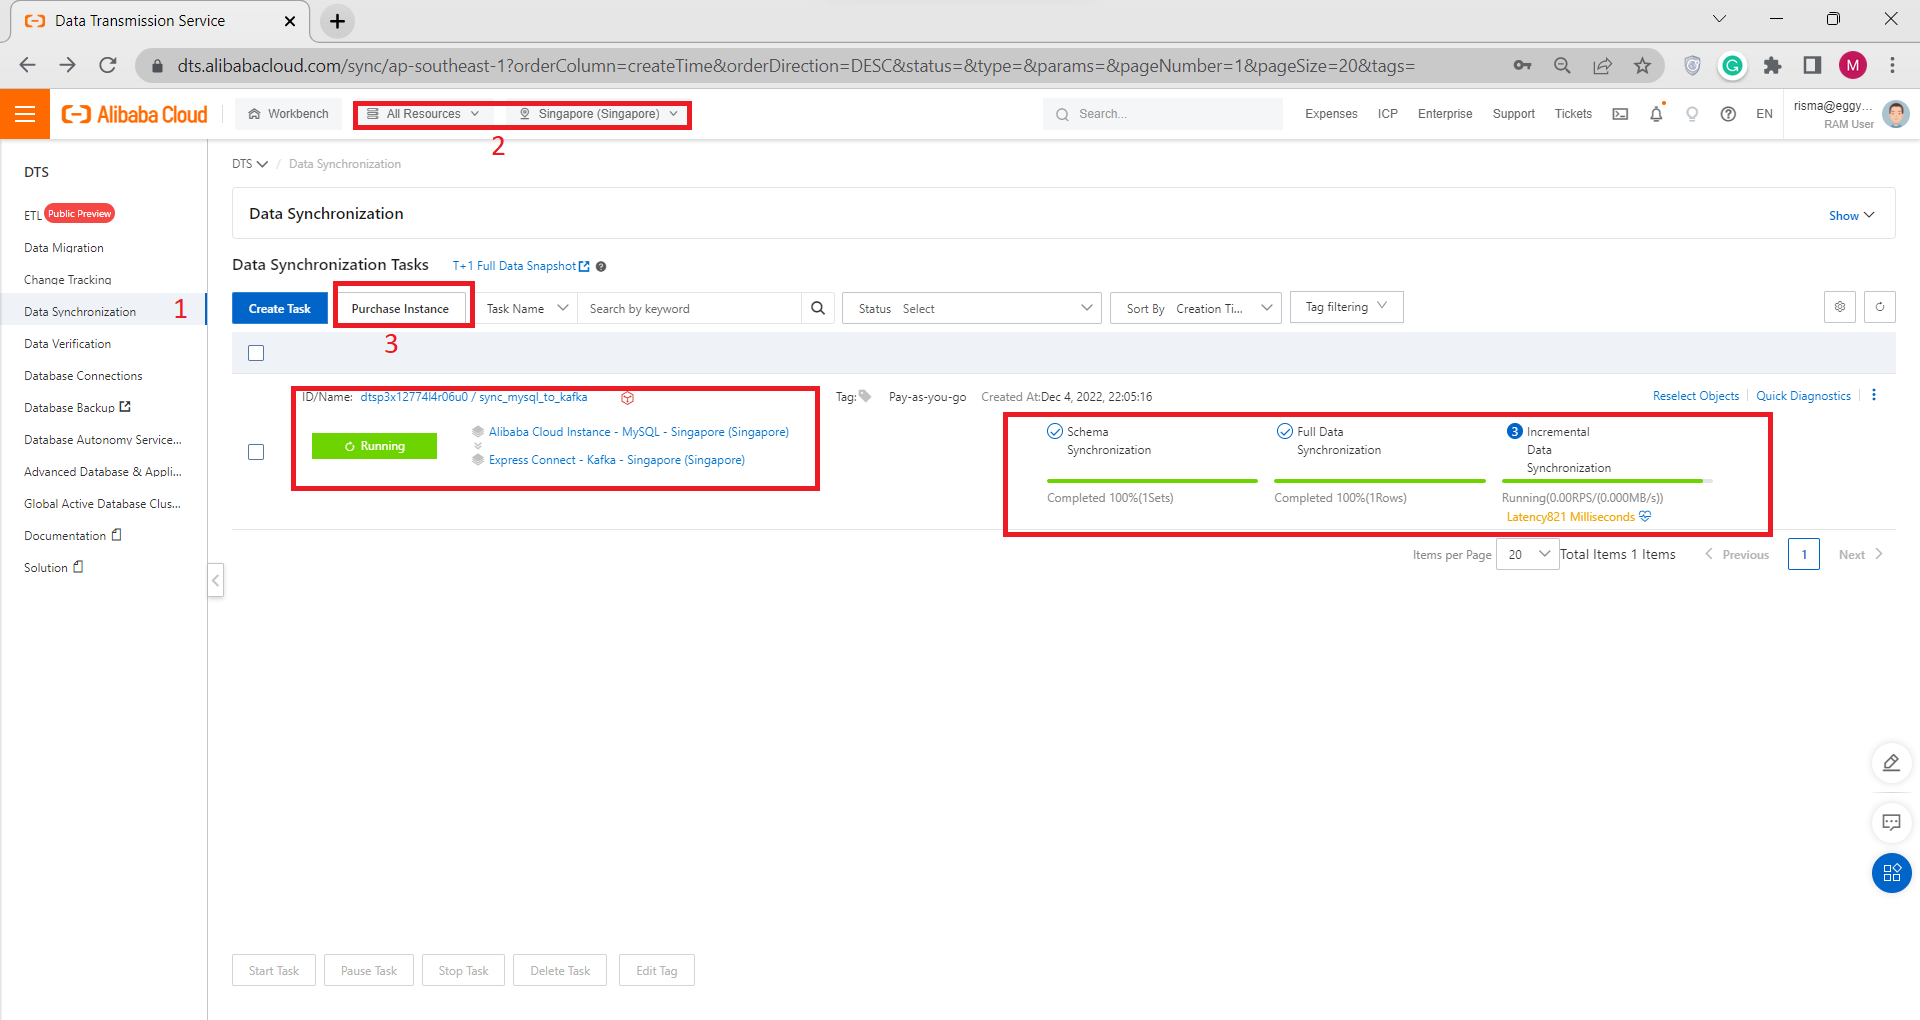
AIRec Deployment on Alibaba Cloud: Step-by-Step Instructions and Troubleshooting
104 posts | 18 followers
FollowAlibaba Cloud MaxCompute - February 17, 2021
ApsaraDB - September 9, 2021
Alibaba Clouder - February 7, 2018
AliCloud-TechLab - August 25, 2021
Alibaba Cloud Indonesia - March 23, 2023
Alibaba Cloud MaxCompute - April 26, 2020
104 posts | 18 followers
Follow ApsaraMQ for RocketMQ
ApsaraMQ for RocketMQ is a distributed message queue service that supports reliable message-based asynchronous communication among microservices, distributed systems, and serverless applications.
Learn More Data Transmission Service
Supports data migration and data synchronization between data engines, such as relational database, NoSQL and OLAP
Learn More AliwareMQ for IoT
A message service designed for IoT and mobile Internet (MI).
Learn More Message Queue for RabbitMQ
A distributed, fully managed, and professional messaging service that features high throughput, low latency, and high scalability.
Learn MoreMore Posts by Alibaba Cloud Indonesia
Start building with 50+ products and up to 12 months usage for Elastic Compute Service
Get Started for Free Get Started for Free
Kidd Ip January 21, 2023 at 2:39 am
Thank you very much for sharing on Kafka, very useful on message queue case handling