By Thomas Poon, Solutions Architect
Many customers have raised the requirement to have a bastion host to manage the login of Elastic Compute Service (ECS), with the auditing/reply features of the login users. This article will teach you how to do this; in particular, we'll show you how to install and configure Jumpserver on an Alibaba Cloud ECS server. Jumpserver is a sophisticated bastion host software from FIT2CLOUD, it is open sourced, and customer can purchase the enterprise support from them directly.
Before you proceed with this tutorial, you should have basic understanding of Alibaba Cloud's products and services. This includes familiarity with ECS, Security Groups, terminal commands, SSH, and to name a few.
Purchase an ECS instance. For this article, I have chosen a Centos OS server with public internet bandwidth.

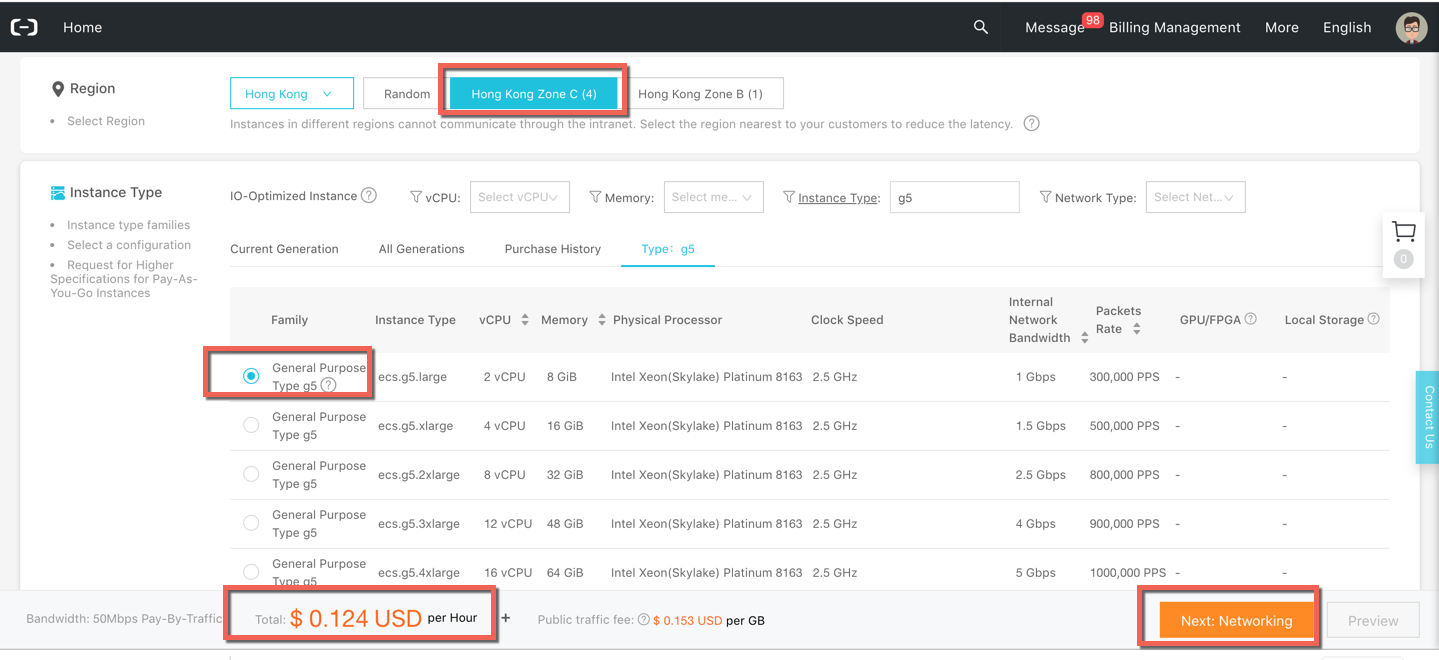
For this blog, I used PAYG instance, g5 instance type with 2VCPU 8Gb RAM, click "Next: Networking"
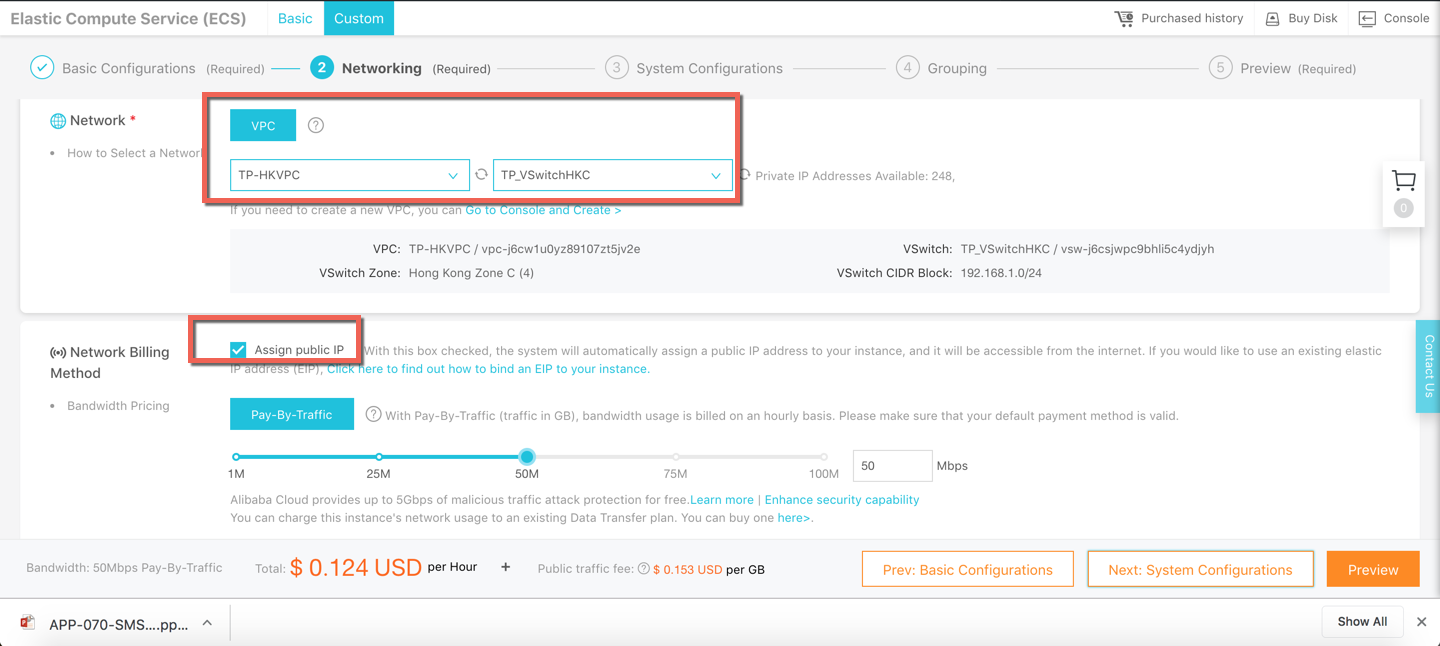
After choosing the VPC and VSwitch, select the "Assign public IP" and assign 50Mb to the instance
At this moment, you can select the default Security Group first. We will need to create a new Jumpserver security group later for this ECS as it is a bastion host.

Accept the Term of Service and "Create instance"

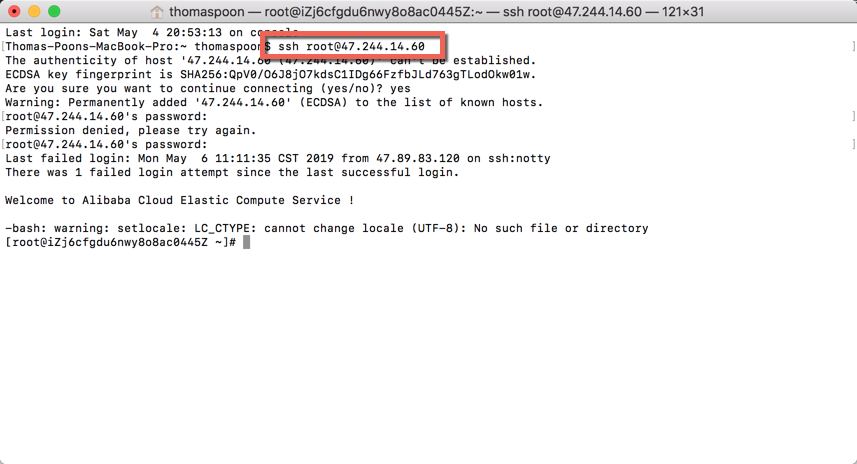
After few minutes, the instance will be up and running, copy the public IP and SSH to the machine.

Login with root and the password you defined
Copy and paste the following command and execute it, which will setup the firewall and selinux
echo -e "\033[31m 1. Firewall and Selinux setup \033[0m" \
  && if [ "$(systemctl status firewalld | grep running)" != "" ]; then firewall-cmd --zone=public --add-port=80/tcp --permanent; firewall-cmd --zone=public --add-port=2222/tcp --permanent; firewall-cmd --permanent --add-rich-rule="rule family="ipv4" source address="172.17.0.0/16" port protocol="tcp" port="8080" accept"; firewall-cmd --reload; fi \
  && if [ "$(getenforce)" != "Disabled" ]; then setsebool -P httpd_can_network_connect 1; fi
You should see this screen after executing the command.

And then copy and paste the following command and execute it for setting up environment
echo -e "\033[31m 2. Setup environment \033[0m" \
  && yum update -y \
  && yum -y install wget gcc epel-release git \
  && curl -o /etc/yum.repos.d/epel.repo http://mirrors.aliyun.com/repo/epel-7.repo \
  && yum clean all \
  && yum makecache \
  && yum install -y yum-utils device-mapper-persistent-data lvm2 \
  && yum-config-manager --add-repo http://mirrors.aliyun.com/docker-ce/linux/centos/docker-ce.repo \
  && yum makecache fast \
  && rpm --import https://mirrors.aliyun.com/docker-ce/linux/centos/gpg \
  && echo -e "[nginx-stable]\nname=nginx stable repo\nbaseurl=http://nginx.org/packages/centos/\$releasever/\$basearch/\ngpgcheck=1\nenabled=1\ngpgkey=https://nginx.org/keys/nginx_signing.key" > /etc/yum.repos.d/nginx.repo \
  && rpm --import https://nginx.org/keys/nginx_signing.key \
  && yum -y install redis mariadb mariadb-devel mariadb-server nginx docker-ce \
  && systemctl enable redis mariadb nginx docker \
  && systemctl start redis mariadb \
  && yum -y install python36 python36-devel \
  && python3.6 -m venv /opt/py3
You should see this screen after executing the command.

Continue to download the components required by Jumpserver. You can do this by copying and pasting the following commands and running it
echo -e "\033[31m 3. Download components \033[0m" \
  && cd /opt \
  && if [ ! -d "/opt/jumpserver" ]; then git clone --depth=1 https://github.com/jumpserver/jumpserver.git; fi \
  && if [ ! -f "/opt/luna.tar.gz" ]; then wget https://demo.jumpserver.org/download/luna/1.4.10/luna.tar.gz; tar xf luna.tar.gz; chown -R root:root luna; fi \
  && yum -y install $(cat /opt/jumpserver/requirements/rpm_requirements.txt) \
  && source /opt/py3/bin/activate \
  && pip install --upgrade pip setuptools -i https://mirrors.aliyun.com/pypi/simple/ \
  && pip install -r /opt/jumpserver/requirements/requirements.txt -i https://mirrors.aliyun.com/pypi/simple/ \
  && curl -sSL https://get.daocloud.io/daotools/set_mirror.sh | sh -s http://f1361db2.m.daocloud.io \
  && systemctl restart docker \
  && docker pull jumpserver/jms_coco:1.4.10 \
  && docker pull jumpserver/jms_guacamole:1.4.10 \
  && rm -rf /etc/nginx/conf.d/default.conf \
  && curl -o /etc/nginx/conf.d/jumpserver.conf https://demo.jumpserver.org/download/nginx/conf.d/jumpserver.conf
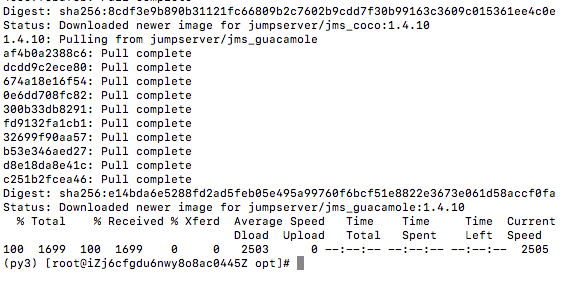
You should see this screen after executing the command.
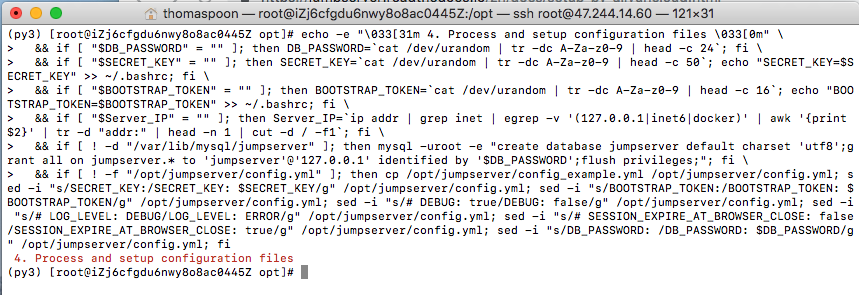
Run the following commands to process and setup configuration files
echo -e "\033[31m 4. Process and setup configuration files \033[0m" \
  && if [ "$DB_PASSWORD" = "" ]; then DB_PASSWORD=`cat /dev/urandom | tr -dc A-Za-z0-9 | head -c 24`; fi \
  && if [ "$SECRET_KEY" = "" ]; then SECRET_KEY=`cat /dev/urandom | tr -dc A-Za-z0-9 | head -c 50`; echo "SECRET_KEY=$SECRET_KEY" >> ~/.bashrc; fi \
  && if [ "$BOOTSTRAP_TOKEN" = "" ]; then BOOTSTRAP_TOKEN=`cat /dev/urandom | tr -dc A-Za-z0-9 | head -c 16`; echo "BOOTSTRAP_TOKEN=$BOOTSTRAP_TOKEN" >> ~/.bashrc; fi \
  && if [ "$Server_IP" = "" ]; then Server_IP=`ip addr | grep inet | egrep -v '(127.0.0.1|inet6|docker)' | awk '{print $2}' | tr -d "addr:" | head -n 1 | cut -d / -f1`; fi \
  && if [ ! -d "/var/lib/mysql/jumpserver" ]; then mysql -uroot -e "create database jumpserver default charset 'utf8';grant all on jumpserver.* to 'jumpserver'@'127.0.0.1' identified by '$DB_PASSWORD';flush privileges;"; fi \
  && if [ ! -f "/opt/jumpserver/config.yml" ]; then cp /opt/jumpserver/config_example.yml /opt/jumpserver/config.yml; sed -i "s/SECRET_KEY:/SECRET_KEY: $SECRET_KEY/g" /opt/jumpserver/config.yml; sed -i "s/BOOTSTRAP_TOKEN:/BOOTSTRAP_TOKEN: $BOOTSTRAP_TOKEN/g" /opt/jumpserver/config.yml; sed -i "s/# DEBUG: true/DEBUG: false/g" /opt/jumpserver/config.yml; sed -i "s/# LOG_LEVEL: DEBUG/LOG_LEVEL: ERROR/g" /opt/jumpserver/config.yml; sed -i "s/# SESSION_EXPIRE_AT_BROWSER_CLOSE: false/SESSION_EXPIRE_AT_BROWSER_CLOSE: true/g" /opt/jumpserver/config.yml; sed -i "s/DB_PASSWORD: /DB_PASSWORD: $DB_PASSWORD/g" /opt/jumpserver/config.yml; fi
You should see this screen after executing the command.
It's time to start Jumpserver! Use the following script to start the jump server.
echo -e "\033[31m 5. Start the Jumpserver \033[0m" \
  && systemctl start nginx \
  && cd /opt/jumpserver \
  && ./jms start all -d \
  && docker run --name jms_coco -d -p 2222:2222 -p 5000:5000 -e CORE_HOST=http://$Server_IP:8080 -e BOOTSTRAP_TOKEN=$BOOTSTRAP_TOKEN jumpserver/jms_coco:1.4.10 \
  && docker run --name jms_guacamole -d -p 8081:8081 -e JUMPSERVER_SERVER=http://$Server_IP:8080 -e BOOTSTRAP_TOKEN=$BOOTSTRAP_TOKEN jumpserver/jms_guacamole:1.4.10 \
  && echo -e "\033[31m your database password is $DB_PASSWORD \033[0m" \
  && echo -e "\033[31m your SECRET_KEY is $SECRET_KEY \033[0m" \
  && echo -e "\033[31m your BOOTSTRAP_TOKEN is $BOOTSTRAP_TOKEN \033[0m" \
  && echo -e "\033[31m your ECS IP is $Server_IP \033[0m" \
  && echo -e "\033[31m Please set the following port in security group 80 and 2222 port \033[0m" \
  && echo -e "\033[31m Please use your browser to access internet IP with port 80 : UserID:admin Password:admin \033[0m"
You can copy the information displayed.

Now use the browser to access the page with the ECS public IP
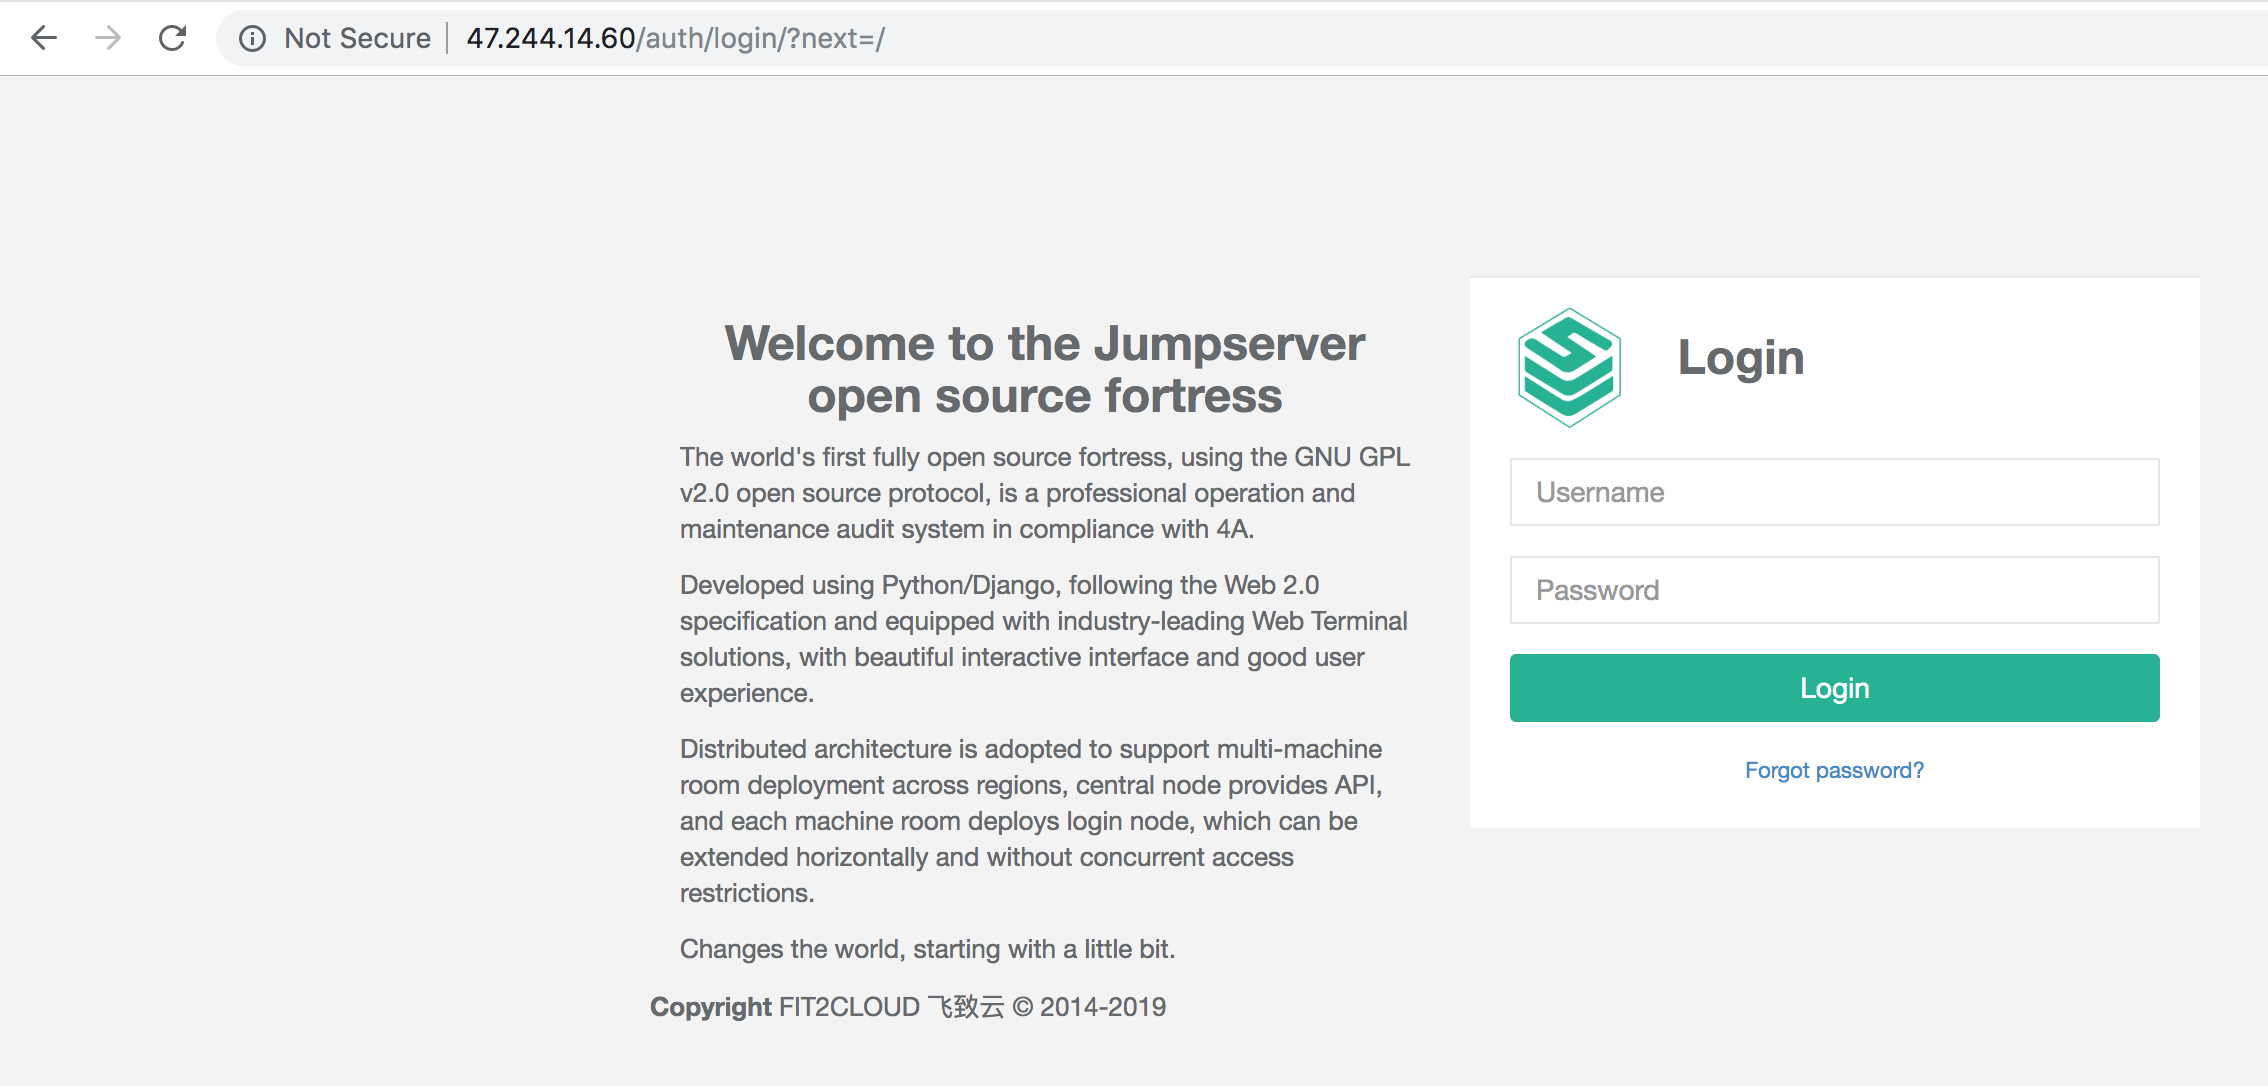
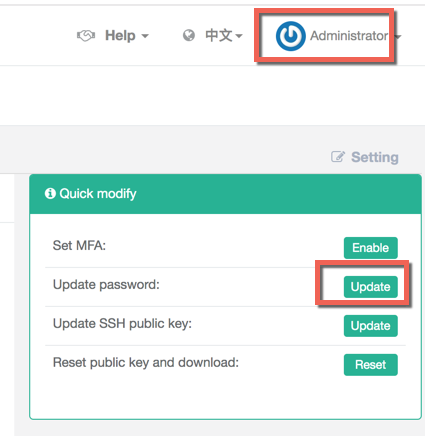
Login with the default user admin and password admin, now change your admin password.
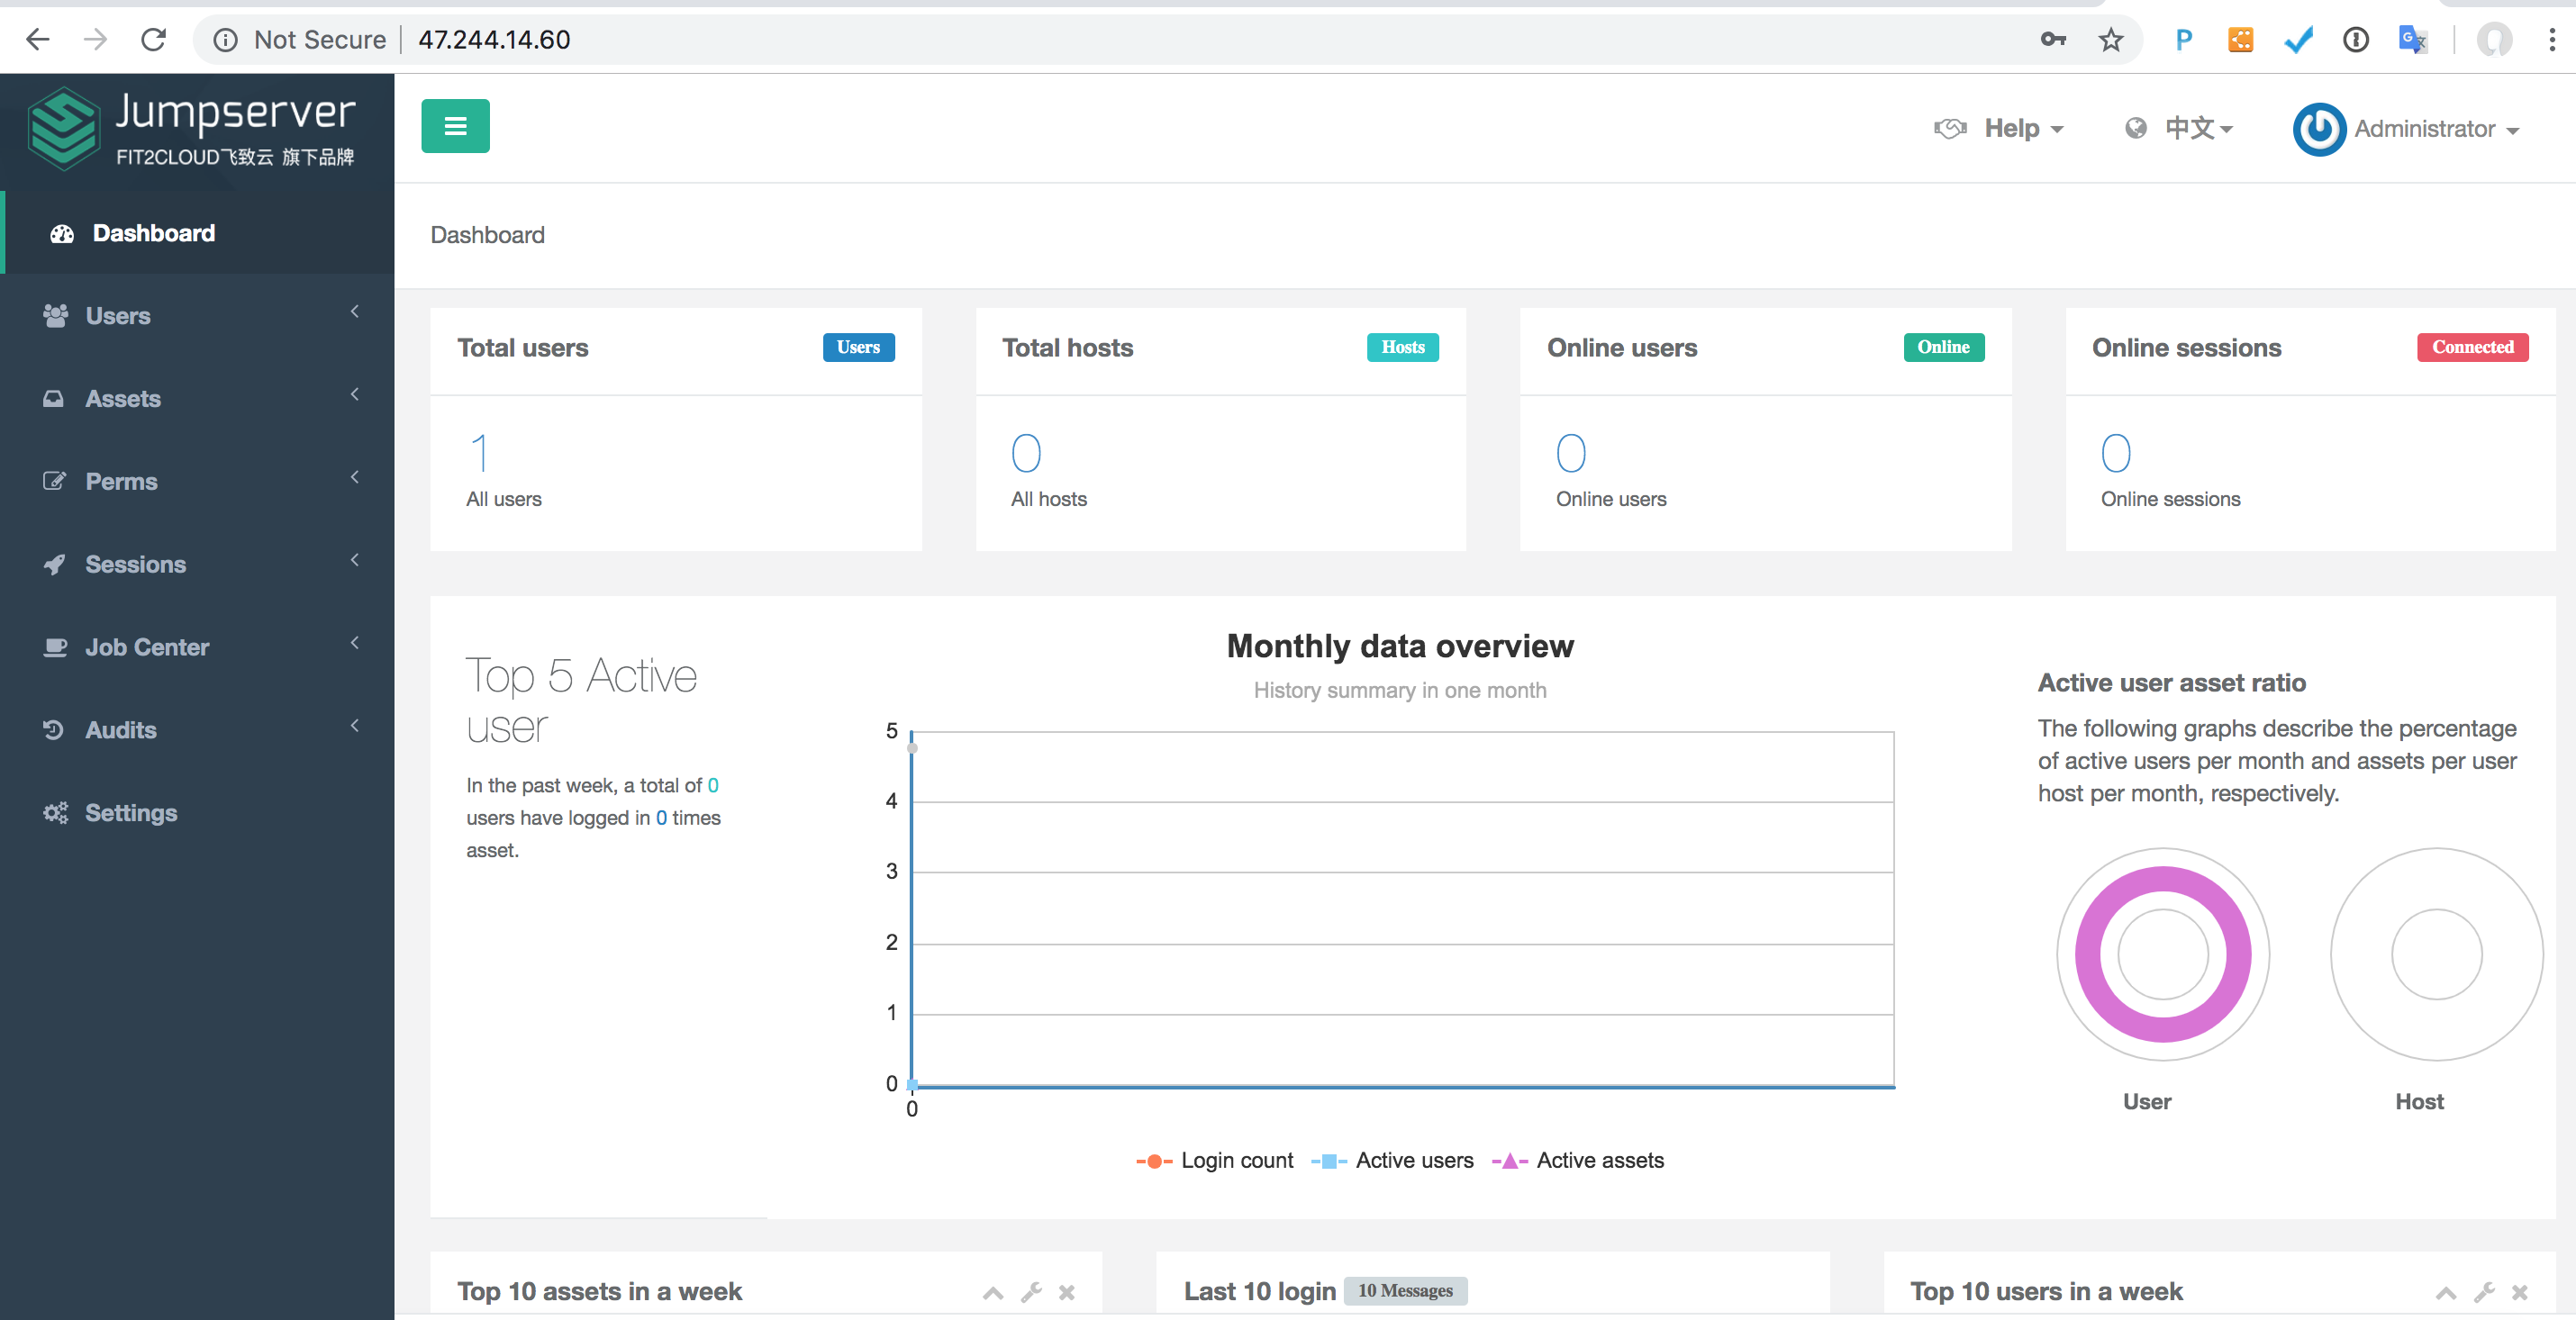
We will start to configure the Login for ECS, click Assets > Admin user, "Create admin user"

Input the username or password of the target ECS root account, and click "Submit"
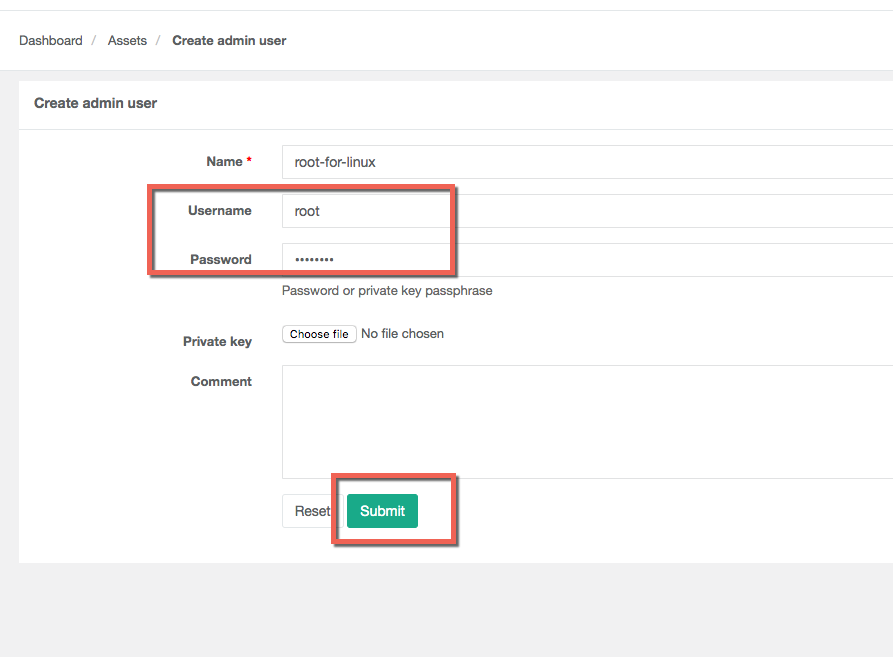
You will see the root-for-linux name here.

We will also need to create System user, which the jumpserver will switch to this user after logging in the target ECS.

We input root as the Username, leave others as default, and click "Submit"
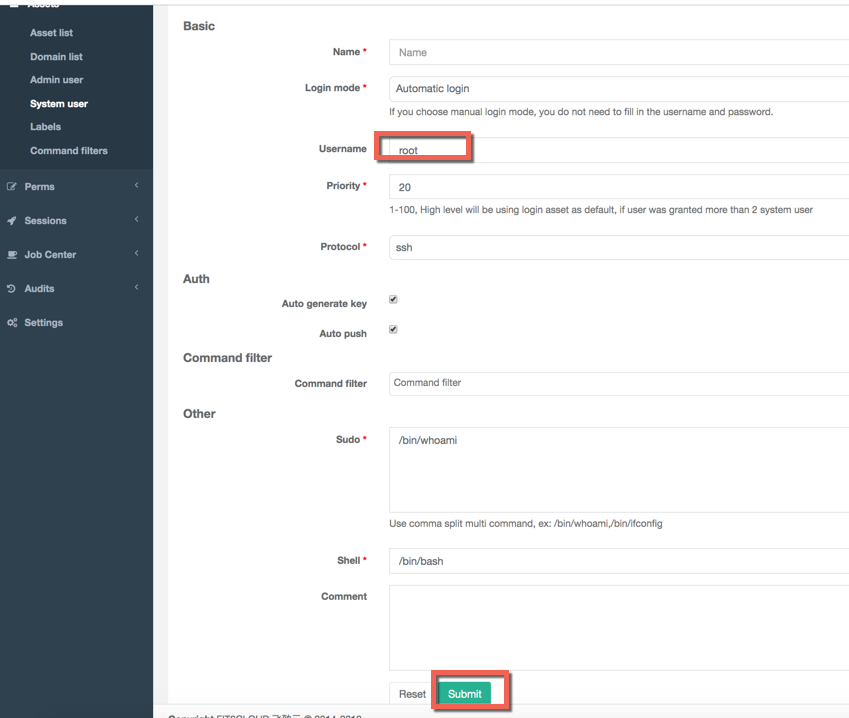
You will see the system user "root" created

Now, we want to setup jumpserver to login the "TP-OwnCloud" ECS, we copy the private IP (192.168.1.119) of the OwnCloud ECS.

Then we go to the Asset list > "Create asset" to create the asset of TP-OwnCloud ECS

Copy and paste the internal IP of TP-OwnCloud to IP, choose the Admin user as "root-for-linux", and "Submit"
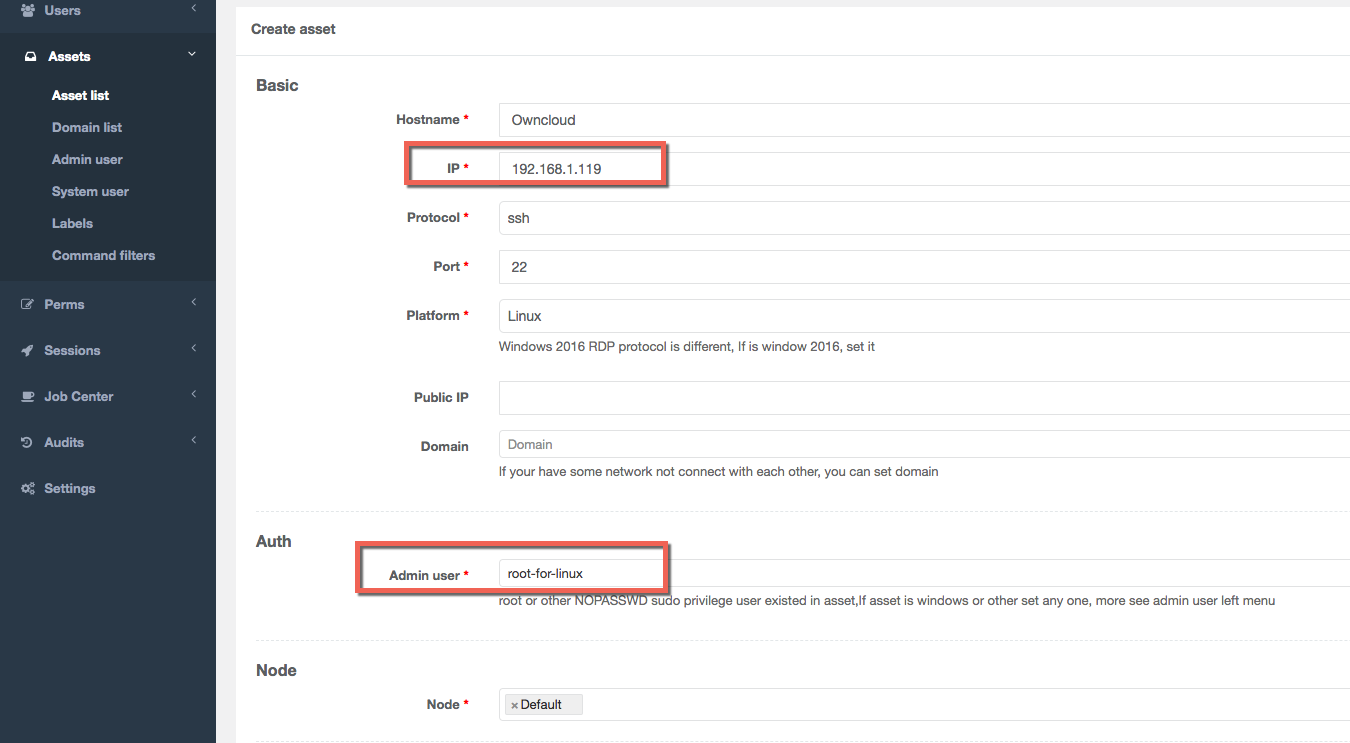

Then you should see the asset is ready

We will also need to make sure the Security Group of TP-OwnCloud allow the inbound 22 port from jumpserver

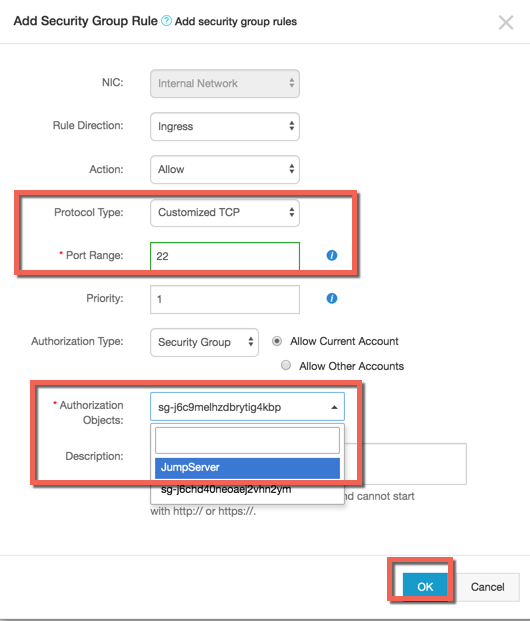
Now everything is ready, time to create the jumpserver user and use the service, go to User list > "Create user"
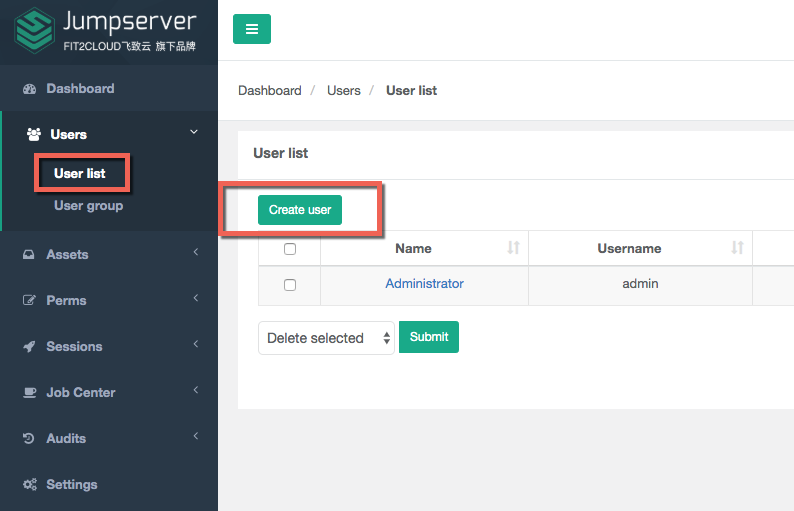
Create the user with Username: kwpoon, input the email address and click "Submit"
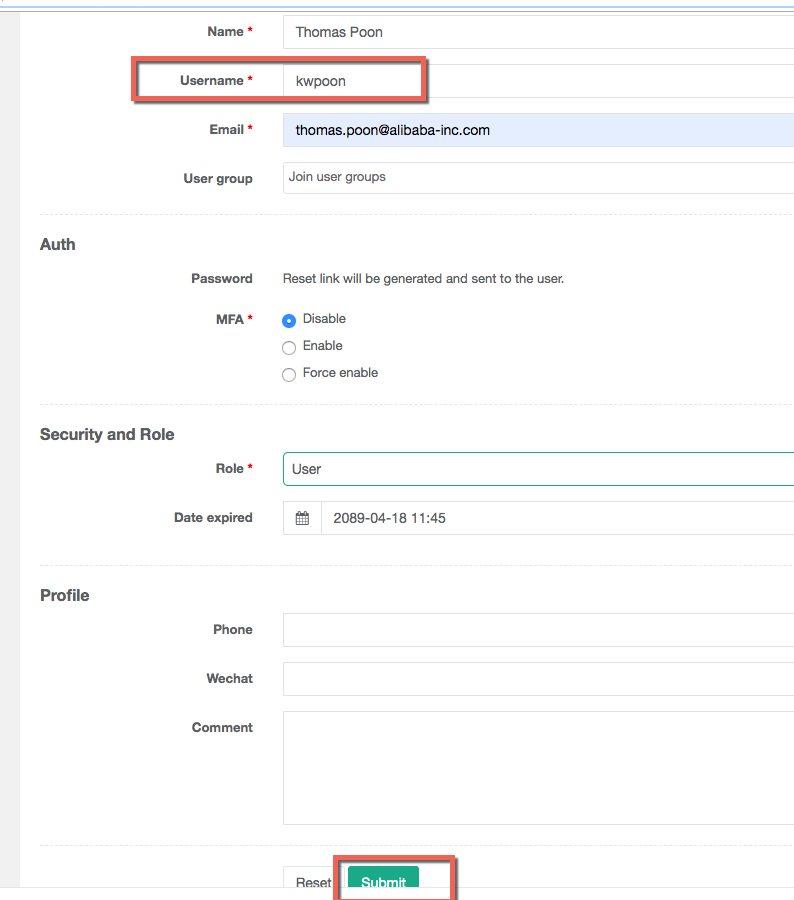
Since the smtp server has not configured yet, so the jumpserver is not able to send emails. Instead, we can use the following command to change the password of the user.

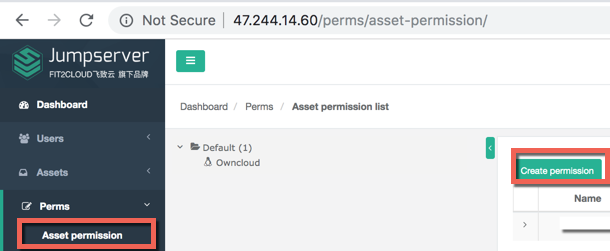
Now we will need to associate the asset with user kwpoon. Click "Create permission" under Asset permission
Input the name, and then select User kwpoon, Asset "Owncloud", System user as root, and then click "Submit"
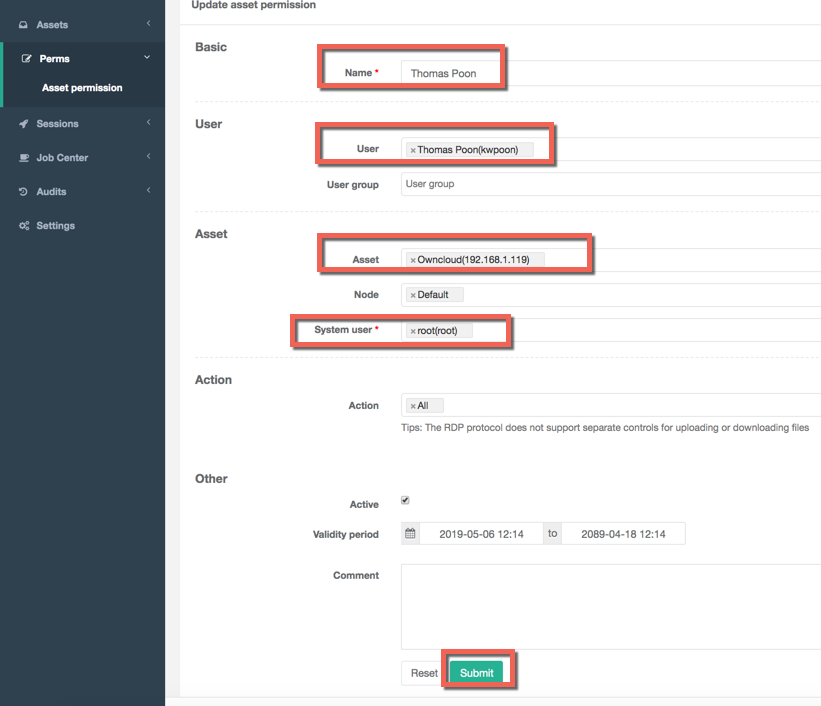
Then the permission should be ready

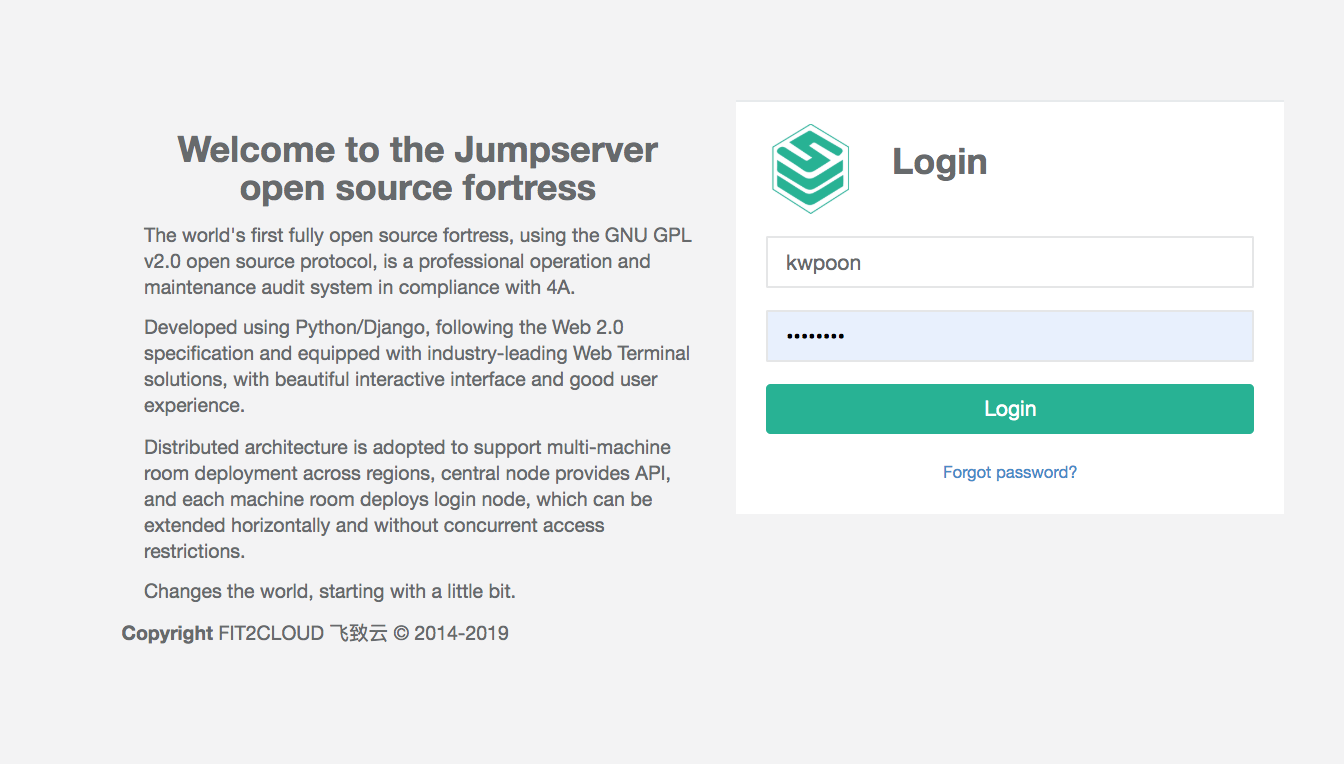
Now we login to the Jumpserver bastion host again using user kwpoon
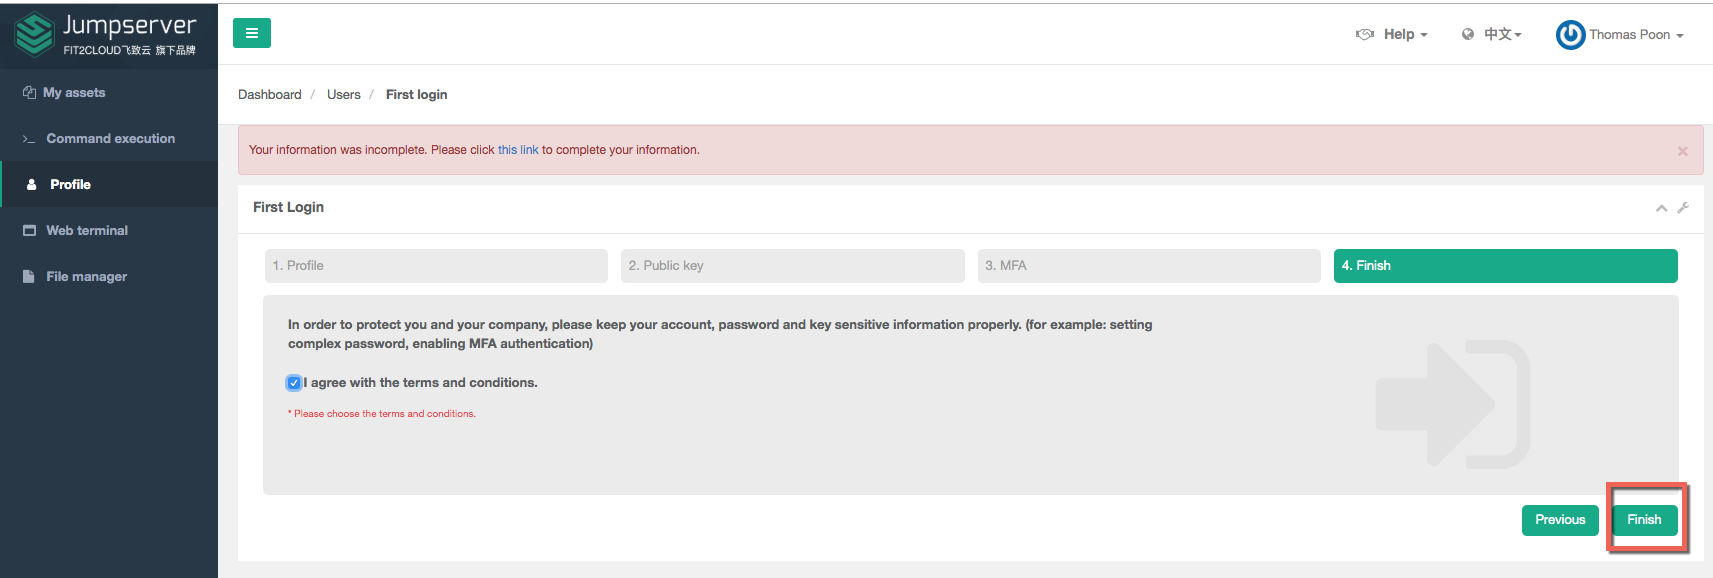
Accept the terms and conditions for the first login
You should see the Owncloud asset there, click "Connect"

You should be seeing this screen, already logged in to Owncloud ECS without prompting username/password, then I typed 3 commands here:

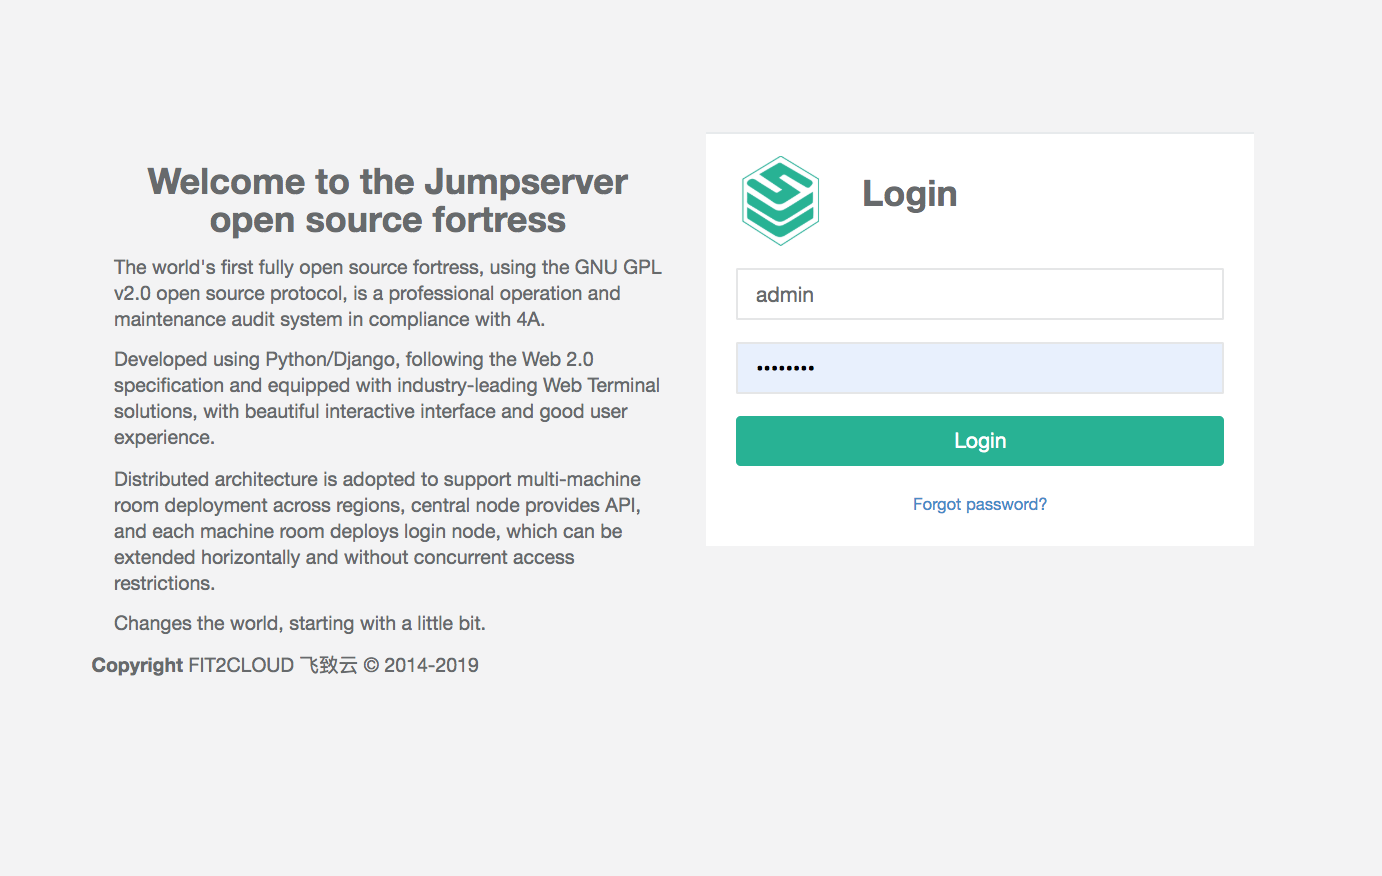
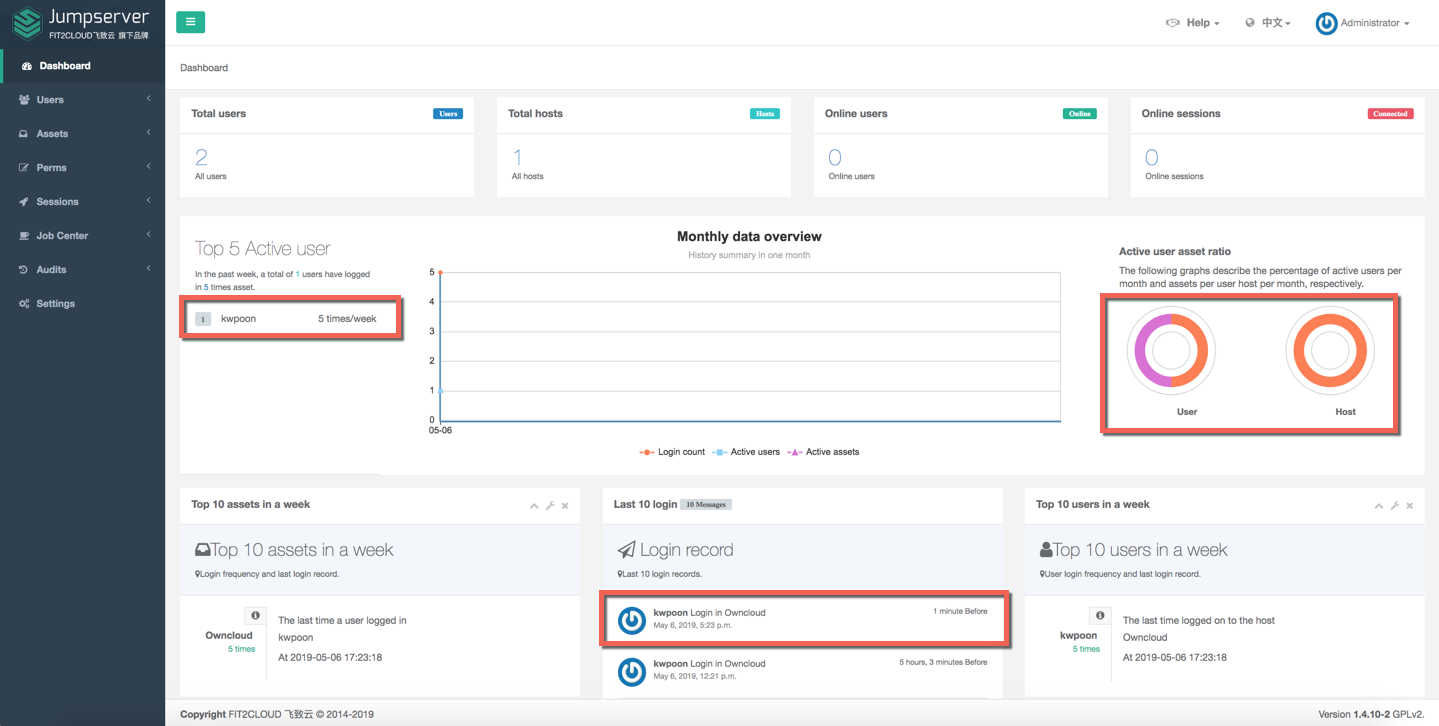
Audit/playback checking, now I logging again using user: admin
A very cool dashboard showing the information of the user and login hosts
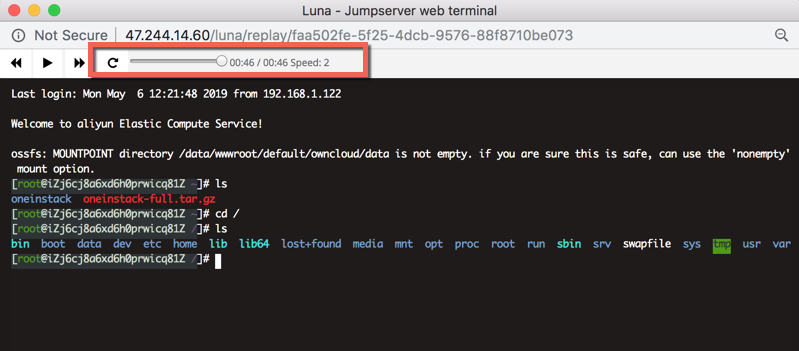
I can even replay the session that what kwpoon did previously

This is what exactly kwpoon did.
You can check the login audit log as well

Hope you find this tutorial useful!
How to Install WordPress on Ubuntu 16.04 with Nginx and HHVM

2,593 posts | 792 followers
FollowAlibaba Cloud Product Launch - December 11, 2018
Kalpesh Parmar - November 22, 2025
Alibaba Clouder - April 26, 2019
Alibaba Cloud Indonesia - January 22, 2021
ApsaraDB - March 4, 2021
JDP - February 10, 2022

2,593 posts | 792 followers
Follow Security Center
A unified security management system that identifies, analyzes, and notifies you of security threats in real time
Learn More Security Solution
Alibaba Cloud is committed to safeguarding the cloud security for every business.
Learn More Security Overview
Simple, secure, and intelligent services.
Learn More Database Security Solutions
Protect, backup, and restore your data assets on the cloud with Alibaba Cloud database services.
Learn MoreMore Posts by Alibaba Clouder