By Hitesh Jethva, Alibaba Cloud Tech Share Author. Tech Share is Alibaba Cloud's incentive program to encourage the sharing of technical knowledge and best practices within the cloud community.
Snipe-IT is a free and open source web application for IT assets management that provides a web-based interface for tracking licenses, accessories, consumables, and components. Snipe-IT comes with beautiful built-in email notifications for users and administrators. It is cross-platform and feature-rich web-based software built using a PHP framework called Laravel. You can keep track of what you own, how something has been deployed, who is working with what desktop, and the details of every server in your data center using Snipe-IT.
Features:
In this article, I will explain how to install Snipe-IT asset management system on Alibaba Cloud Elastic Compute Service (ECS) with Ubuntu 16.04.
First, log in to your Alibaba Cloud ECS Console. Create a new ECS instance, choosing Ubuntu 16.04 as the operating system with at least 2GB RAM. Connect to your ECS instance and log in as the root user.
Once you are logged into your Ubuntu 16.04 instance, run the following command to update your base system with the latest available packages.
apt-get update -ySnipe-IT requires Apache, MariaDB and PHP installed to your system. First, install Apache and MariaDB with the following command:
apt-get install apache2 mariadb-server -yNext, you will need to add the PHP repository to your system. You can add it with the following command:
apt-get install software-properties-common -y
add-apt-repository ppa:ondrej/php
Once the repository is installed, update the repository and install PHP with all the required libraries with the following command:
apt-get install apache2 libapache2-mod-php7.2 php7.2 php7.2-pdo php7.2-mbstring php7.2-tokenizer php7.2-curl php7.2-mysql php7.2-ldap php7.2-zip php7.2-fileinfo php7.2-gd php7.2-dom php7.2-mcrypt php7.2-bcmath -yOnce all the packages are installed, you will also modify the php.ini file:
nano /etc/php/7.2/apache2/php.iniMake the following changes:
memory_limit = 256M
upload_max_filesize = 200M
max_execution_time = 360
date.timezone = Asia/Kolkata
Save and close the file. Then start Apache and MariaDB service and enable them to start on boot time with the following command:
systemctl start apache2
systemctl start mysql
systemctl enable apache2
systemctl enable mysqlBy default, MariaDB is not hardened. So you will need to secure it first. You can do this using the mysql_secure_installation script:
mysql_secure_installationOutput:
Set root password? [Y/n] n
Remove anonymous users? [Y/n] y
Disallow root login remotely? [Y/n] y
Remove test database and access to it? [Y/n] y
Reload privilege tables now? [Y/n] y
Next, log in to MariaDB shell:
mysql -u root -pEnter your root password, then create a database and user for Snipe-IT:
MariaDB [(none)]> CREATE DATABASE snipeit_db character set utf8;
MariaDB [(none)]> GRANT ALL PRIVILEGES ON snipeit_db.* TO 'snipeit_user'@'localhost' IDENTIFIED BY 'password';
Next, flush the privileges and exit from the MariaDB shell with the following command:
MariaDB [(none)]> FLUSH PRIVILEGES;
MariaDB [(none)]> quitFirst, you will need to download the latest version of the Snipe-IT to your system. You can download it from the GIT repository with the following command:
cd /var/www/html/
git clone https://github.com/snipe/snipe-it snipe-it
Next, change the directory to the snipe-it and copy sample .env file:
cd /var/www/html/snipe-it
cp .env.example .env
Next, open .env file and update the database details:
nano .envMake the following changes:
# --------------------------------------------
# REQUIRED: DATABASE SETTINGS
# --------------------------------------------
DB_CONNECTION=mysql
DB_HOST=localhost
DB_DATABASE=snipeit_db
DB_USERNAME=snipeit_user
DB_PASSWORD=password
DB_PREFIX=null
DB_DUMP_PATH='/usr/bin'
Save and close the file.
Next, you will need to install the Composer to your system. The Composer is a dependency manager for PHP. It is used to install dependencies required by PHP. You can install it by just running the following command:
curl -sS https://getcomposer.org/installer | php
mv composer.phar /usr/local/bin/composer
Next, install all the dependencies required by PHP by running the following command:
composer install --no-dev --prefer-sourceOnce all the dependencies are installed, generate the "APP_Key" with the following command:
php artisan key:generateOutput:
**************************************
*     Application In Production!     *
**************************************

 Do you really wish to run this command? (yes/no) [no]:
 > yes

Application key [base64:Ui3UGJG6QXyb+ary9K34qdohTC63vD8cKx5uetPfjVU=] set successfully.
Next, populate MySQL with Snipe-IT's default database schema with the following command:
php artisan migrateOutput:
**************************************
*     Application In Production!     *
**************************************

 Do you really wish to run this command? (yes/no) [no]:
 > yes

Migration table created successfully.
Next, give proper permissions to the snipe-it directory:
chown -R www-data:www-data /var/www/html/snipe-it
chmod -R 755 /var/www/html/snipe-itNext, you will need to create an Apache virtual host file for Snipe-IT. You can create it with the following command:
nano /etc/apache2/sites-available/snipeit.confAdd the following lines:
<VirtualHost *:80>
ServerAdmin webmaster@your-domain.com
<Directory /var/www/html/snipe-it/public>
        Require all granted
        AllowOverride All
   </Directory>
    DocumentRoot /var/www/html/snipe-it/public
    ServerName your-domain.com
        ErrorLog /var/log/apache2/snipeIT.error.log
        CustomLog /var/log/apache2/snipeIT.access.log combined
</VirtualHost>
Save and close the file, then enable Apache virtual host file with the following command:
a2ensite snipeit.confNext, enable mcrypt, mbstring and rewrite module using the following command:
phpenmod mcrypt
phpenmod mbstring
a2enmod rewrite
Finally, restart Apache service to apply all the changes:
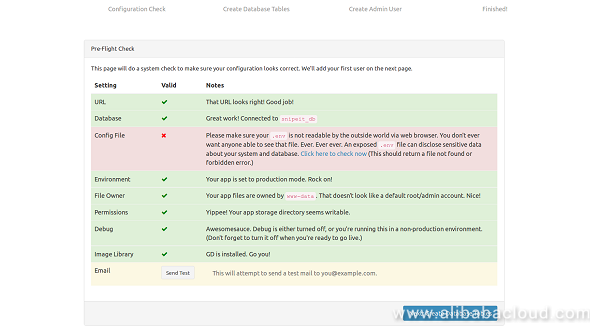
systemctl restart apache2Open your web browser and type the URL http://your-domain.com. You should see the following page:

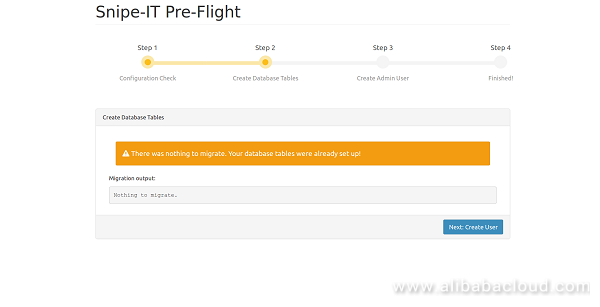
Make sure all the system requirements are correct. Then, click on the Create Database Table button. You should see the following page:

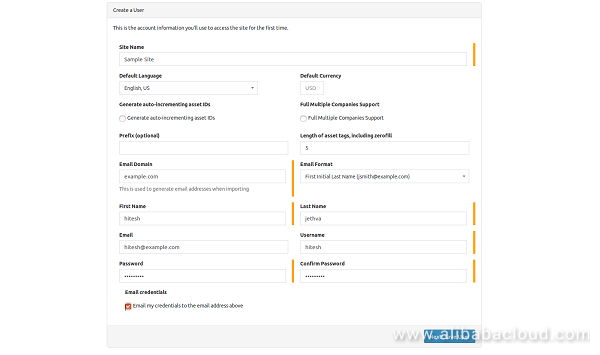
Next, click on the Create User page. You should see the following page:

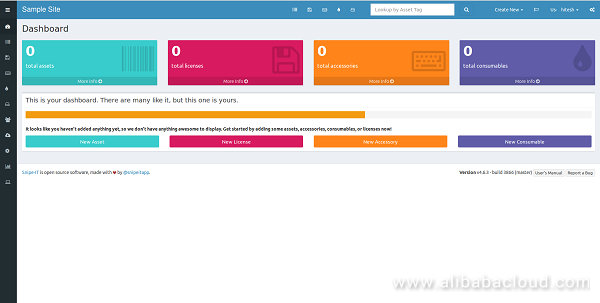
Here, provide your Site name, Admin username and password. Then click on the Next button. You should see the following page:

Alibaba Cloud ApsaraDB for MongoDB is a secure, reliable, and elastically scalable cloud database service. It currently supports the ReplicaSet and Sharding architectures and can be quickly deployed in just a few steps.
ApsaraDB for MongoDB's highly available service includes automatic monitoring, backup, and disaster tolerance capabilities. This frees you from time-consuming database management tasks and lets you can focus on your applications and core business.
Website Threat Inspector utilizes data, white hat penetration testing, and machine learning to provide an all-in-one security solution for domains and other online assets. WTI detects web vulnerabilities, illicit content, webpage defacement and backdoors to prevent possible financial loss caused by damage to your brand reputation. Website Threat Inspector comprehensively detects any risks to your website and online assets, such as web vulnerabilities, weak passwords, webpage defacement, and Trojan attacks. The system scans all source code, text, and images for vulnerabilities.
How to Setup MariaDB Master and Slave Replication on Ubuntu 16.04
Alibaba Cloud Expands European Presence with UK Data Centres

2,593 posts | 792 followers
FollowAlibaba Clouder - August 5, 2019
Alibaba Clouder - May 7, 2019
Alibaba Clouder - August 2, 2018
Alibaba Clouder - September 5, 2018
Alibaba Clouder - June 4, 2019
Alibaba Clouder - June 13, 2019

2,593 posts | 792 followers
Follow ECS(Elastic Compute Service)
Elastic and secure virtual cloud servers to cater all your cloud hosting needs.
Learn More OSS(Object Storage Service)
An encrypted and secure cloud storage service which stores, processes and accesses massive amounts of data from anywhere in the world
Learn MoreLearn More
More Posts by Alibaba Clouder