By Hitesh Jethva, Alibaba Cloud Tech Share Author. Tech Share is Alibaba Cloud's incentive program to encourage the sharing of technical knowledge and best practices within the cloud community.
OpenLDAP also known as Lightweight Directory Access Protocol is a free open source Light Weight Directory Access protocol developed by the OpenLDAP project. It is a platform independent protocol, so it runs on all Linux/Unix like systems, Windows, AIX, Solaris and Android. OpenLDAP is specially designed to manage and access hierarchical directory information over a network, and also used as a centralized authentication system, shared directory, address book, etc. Any LDAP client can access organizational information stored on OpenLDAP server using the Lightweight Directory Access Protocol (LDAP). OpenLDAP is efficient on both reading and modifying data in the directory. OpenLDAP servers are most commonly used to provide centralized management of user accounts.
OpenLDAP has three main components:
slapd : stand-alone LDAP daemon.
libraries : implementing the LDAP protocol, and utilities, tools, and sample clients.
client software : ldapsearch, ldapadd, ldapdelete, and others.
Features
In this tutorial. I am going to explain how to install and configure OpenLDAP and phpLDAPadmin on an Alibaba Cloud Elastic Compute Service (ECS) Ubuntu 16.04 server.
First, log in to your Alibaba Cloud ECS Console. Create a new ECS instance, choosing Ubuntu 16.04 as the operating system with at least 2GB RAM. Connect to your ECS instance and log in as the root user.
Once you are logged into your Ubuntu 16.04 instance, run the following command to update your base system with the latest available packages.
apt-get update -yBy default, OpenLDAP packages are available in the Ubuntu 16.04 default repository. You can install it by just running the following command:
apt-get install slapd ldap-utils -yDuring the installation process, you will be asked to create a password for the LDAP admin user as shown below:
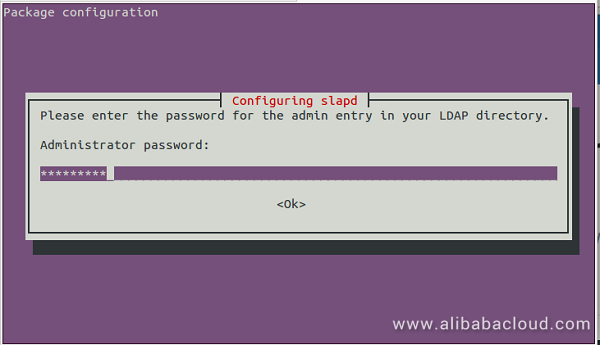
Provide a password for admin user and press OK to start the installation. Once the installation has been completed, you can check the status of the server with the following command:
systemctl status slapdOutput:
  slapd.service - LSB: OpenLDAP standalone server (Lightweight Directory Access Protocol)
   Loaded: loaded (/etc/init.d/slapd; bad; vendor preset: enabled)
   Active: active (running) since Fri 2018-08-31 20:26:05 IST; 2min 5s ago
     Docs: man:systemd-sysv-generator(8)
   CGroup: /system.slice/slapd.service
           └─16622 /usr/sbin/slapd -h ldap:/// ldapi:/// -g openldap -u openldap -F /etc/ldap/slapd.d

Aug 31 20:26:05 Node1 systemd[1]: Starting LSB: OpenLDAP standalone server (Lightweight Directory Access Protocol)...
Aug 31 20:26:05 Node1 slapd[16613]:  * Starting OpenLDAP slapd
Aug 31 20:26:05 Node1 slapd[16621]: @(#) $OpenLDAP: slapd  (Ubuntu) (May 22 2018 13:54:12) $
                                            buildd@lcy01-amd64-019:/build/openldap-t_Ta0O/openldap-2.4.42+dfsg/debian/build/servers/slapd
Aug 31 20:26:05 Node1 slapd[16622]: slapd starting
Aug 31 20:26:05 Node1 slapd[16613]:    ...done.
Aug 31 20:26:05 Node1 systemd[1]: Started LSB: OpenLDAP standalone server (Lightweight Directory Access Protocol).OpenLDAP server is now installed, it's time to configure it. You can configure it by running the following command:
dpkg-reconfigure slapdDurring the configuration process. You will need to answer a few questions as shown below:
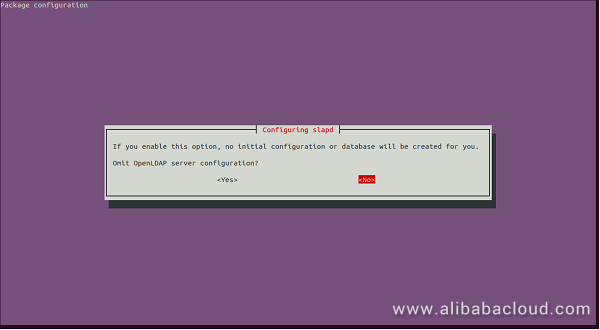
Click on the No button, you should see the following page:
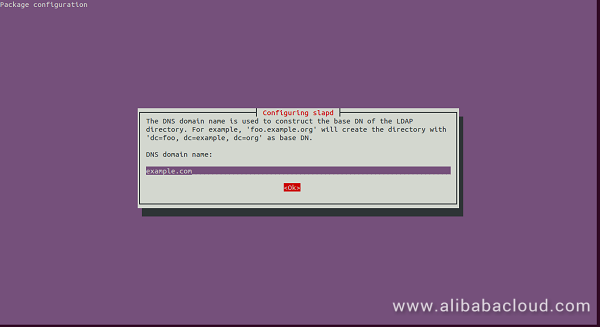
Here, provide the DNS domain name to construct the base DN of LDAP and click on the OK. You should see the following page:
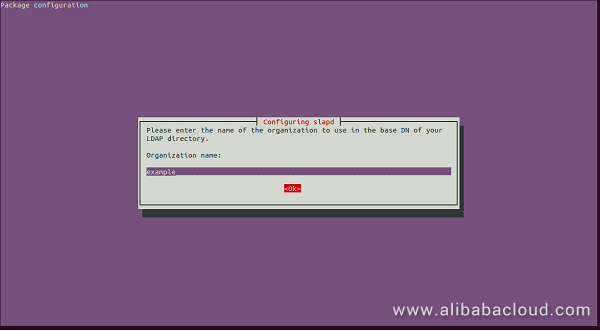
Here, provide the name of the organization and click on the OK. You should see the following page:

Here, provide the password for the Administrator account and click on the OK. You should see the following page:
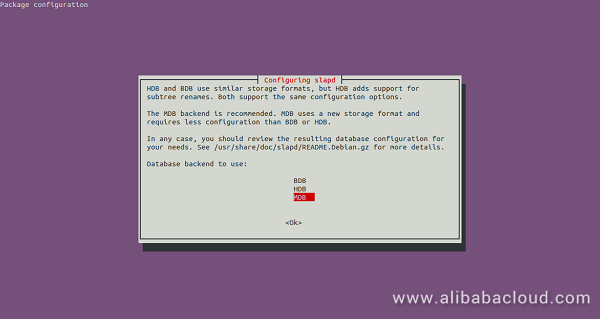
Here, select database backend MDB and click on the OK. You should see the following page:
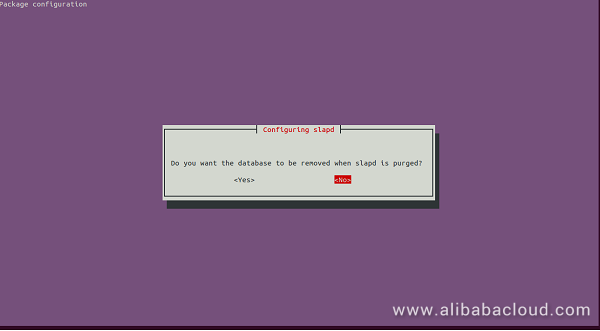
Here, click on No button. You should see the following page:
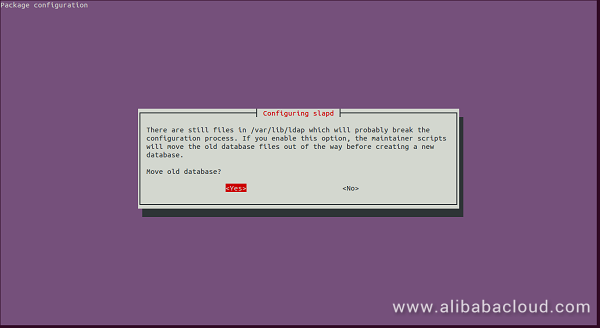
Next, click on the Yes button. You should see the following page:
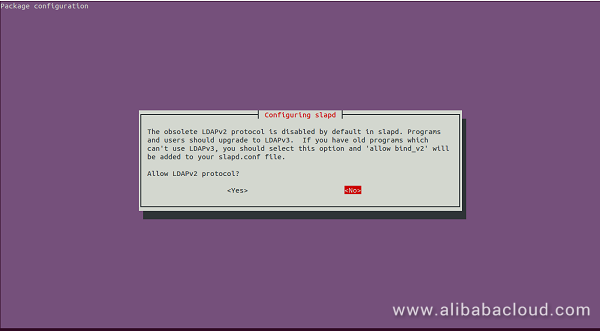
Here, click on the No button. The installation process is now started. Once the installation has been completed. You should see the following output:
  Moving old database directory to /var/backups:
  - directory unknown... done.
  Creating initial configuration... done.
  Creating LDAP directory... done.
OpenLDAP server is now installed and configured. You can check it whether it is working or not by running the following command:
ldapsearch -xIf everything went fine. You should see the following output:
# extended LDIF
#
# LDAPv3
# base <dc=example,dc=com> (default) with scope subtree
# filter: (objectclass=*)
# requesting: ALL
#

# example.com
dn: dc=example,dc=com
objectClass: top
objectClass: dcObject
objectClass: organization
o: example
dc: example

# admin, example.com
dn: cn=admin,dc=example,dc=com
objectClass: simpleSecurityObject
objectClass: organizationalRole
cn: admin
description: LDAP administrator

# search result
search: 2
result: 0 Success

# numResponses: 3
# numEntries: 2phpLDAPadmin is a graphical administration tool for LDAP server administration. It is written in PHP language and provides an easy way to manage LDAP servers over a web interface. By default, phpLDAPadmin is available in the Ubuntu 16.04 default repository. You can install it by just running the following command:
apt-get install phpldapadmin -yThe above command will install the application with Apache and enable the necessary Apache configurations. Next, you will need to configure phpLDAPadmin to use your domain. You can do this by editing its default configuration file:
nano /etc/phpldapadmin/config.phpMake the following changes:
$servers->setValue('server','name','OpenLDAP Server');
$servers->setValue('server','base', array('dc=example,dc=com'));
#Disallow public access by comment out the following line:
#$servers->setValue('login','bind_id','cn=admin,dc=example,dc=com');
$config->custom->appearance['hide_template_warning'] = true;
Save and close the file, then restart slapd to apply the changes:
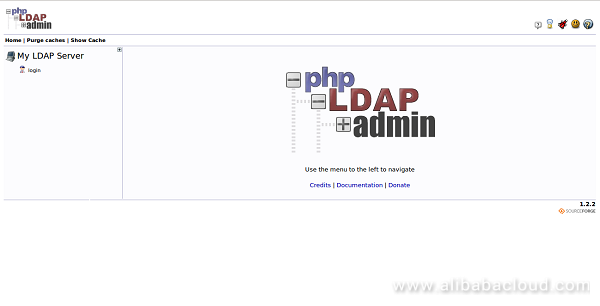
systemctl restart slapdNow, open your web browser and type the URL http://example.com/phpldapadmin. You will be redirected to the following page:
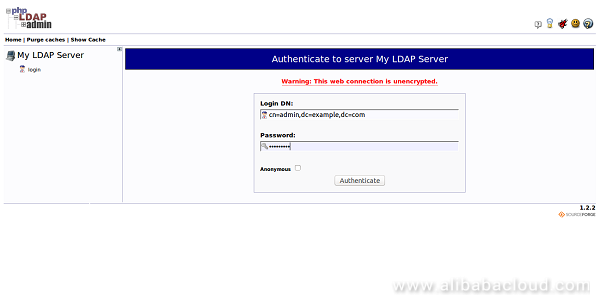
Now, log in using the username "cn=admin,dc=example,dc=com" and the admin password you created during configuration. Then click on the Authenticate button. You should see the phpLDAPadmin default dashboard in the following page:
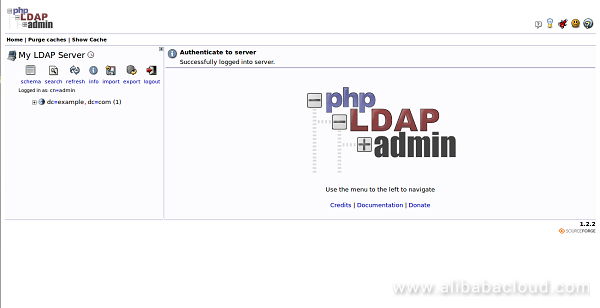
Next, create some basic structure for your information like Organizational Units, Groups and Users. To do so, click on the "plus" next to the domain components (dc=example,dc=com). You should see the following page:
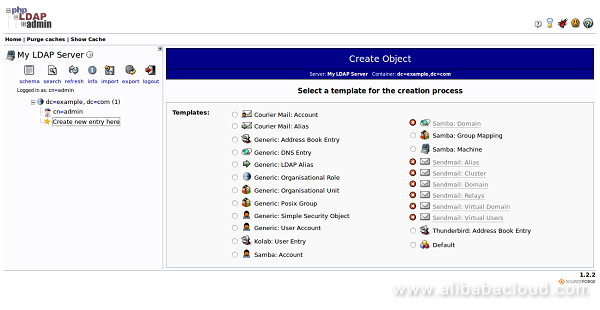
Now, click on the "Create new entry here" link on the left-hand side. You should see the different kinds of entries in the following page:
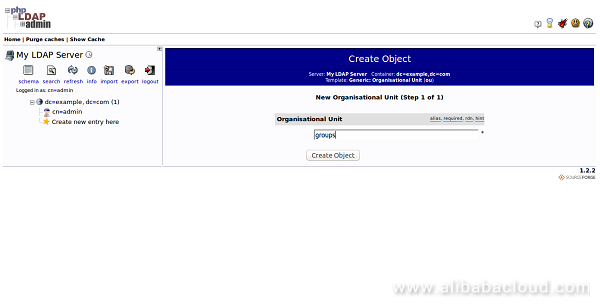
Now, click on the "Generic: Organizational Unit". You will be asked to provide the name of your organizational unit. Type groups and click on the Create Object button. You should see the following page:
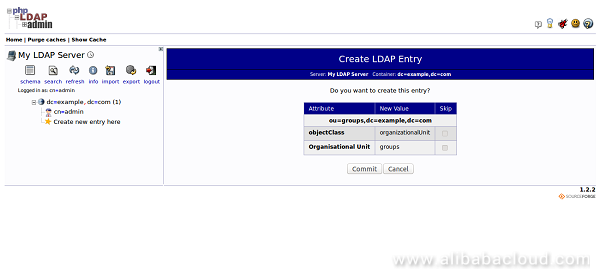
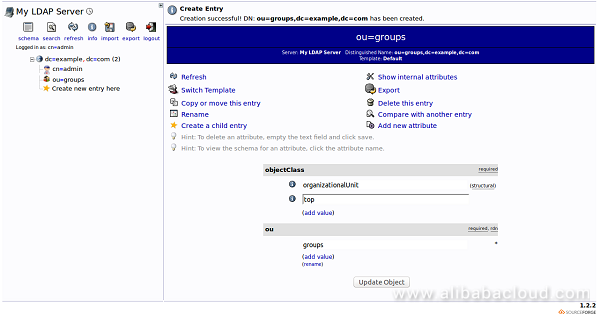
Now, click on the Commit button. You can see a new entry on the left-hand side:
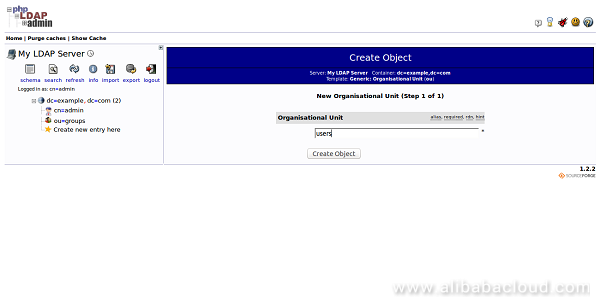
Next, create another Organizational Unit "Users" with the same procedure. You should see the following page:
Next, you will need to create the groups within the "groups" organizational unit. To do so, click on the "groups" category you created. In the main pane, click on the "Create a child entry". You should see the following page:
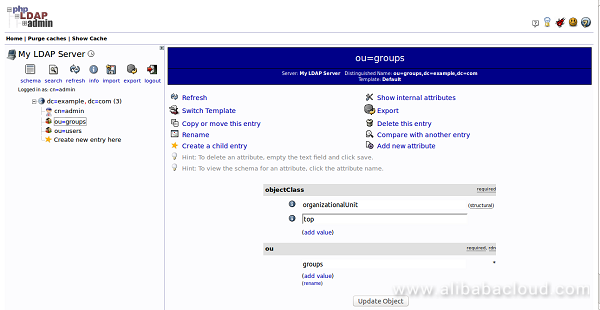
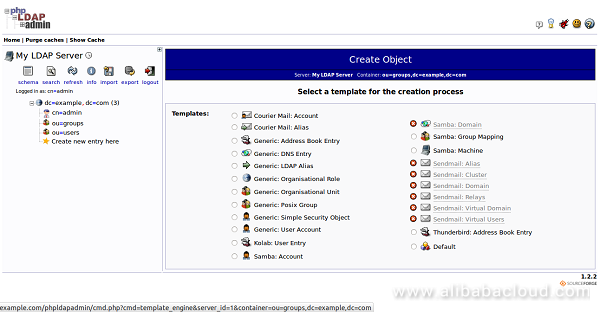
Here, choose the "Generic: Posix Group" category. You should see the following page:
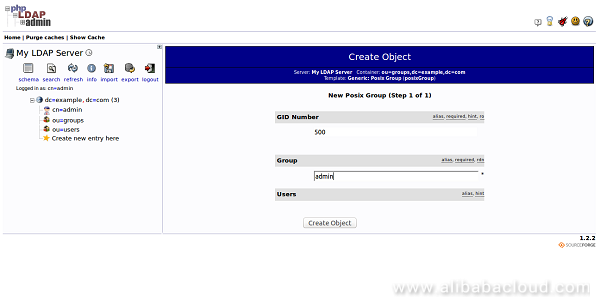
Now, provide group name as admin and click on the Create Object button. You should see the following page:
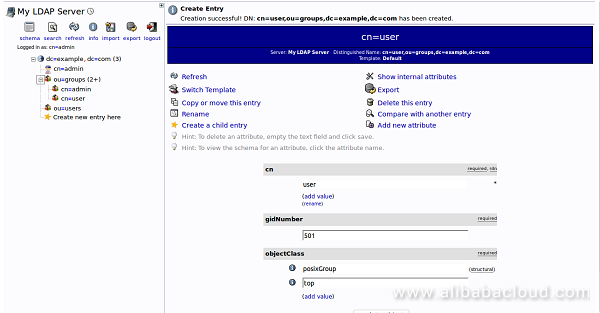
You can see an overview of the entries in the "ou=groups" category by clicking on that entry, and then clicking on "View 3 children". You should see the following page:
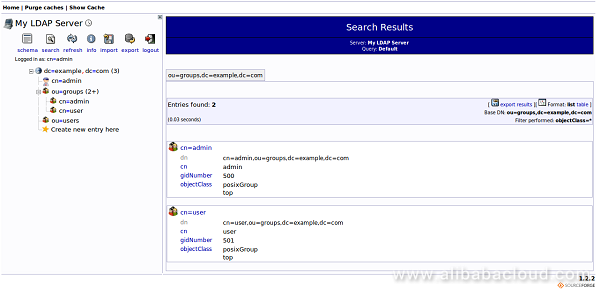
Congratulations! You have successfully installed and configure OpenLDAP and phpLDAPadmin on your Elastic Compute Service (ECS) Ubuntu 16.04 server. You should now have a basic LDAP server set up with a few users and groups. You can now easily expand this information and add all of the different organizational structures to replicate the structure of your business.
How to Set Up Django with Postgres, Nginx, and Gunicorn on Ubuntu 16.04

2,593 posts | 791 followers
FollowAlibaba Clouder - May 7, 2019
Alibaba Clouder - May 10, 2019
Alibaba Clouder - August 16, 2019
Alibaba Clouder - August 11, 2020
Alex - June 21, 2019
Alibaba Clouder - February 13, 2018

2,593 posts | 791 followers
Follow ECS(Elastic Compute Service)
Elastic and secure virtual cloud servers to cater all your cloud hosting needs.
Learn More RAM(Resource Access Management)
Secure your cloud resources with Resource Access Management to define fine-grained access permissions for users and groups
Learn More Key Management Service
Create, delete and manage encryption keys with Alibaba Cloud Key Management Service
Learn MoreMore Posts by Alibaba Clouder