By Hitesh Jethva, Alibaba Cloud Community Blog author.
Foreman is a free and open source systems management tool for provisioning, configuring and monitoring of physical and virtual servers. Foreman can be used to discover, provision and upgrade your entire bare-metal infrastructure, create and manage instances across private and public clouds. Foreman can integrate with other configuration management software like, Puppet, Chef and Salt that allows you to automate repetitive tasks, deploy applications, and manage change to deployed servers. Foreman provides user friendly web interface that allows you to install and apply puppet modules to the registered servers to automate day to day operations tasks. It is specially designed for infrastructures of all sizes, and works with most distributions of Linux. Foreman supports on all the major operating systems like, RHEL /CentOS/Fedora, Ubuntu/Debian, CoreOS, FreeBSD, Junos, Solaris, OpenSUSE and much more.
In this tutorial, we will learn how to install and configure Foreman on Ubuntu 16.04 server with an Alibaba Cloud Elastic Compute Service (ECS) instance.
Create a new ECS instance, choosing Ubuntu 16.04 as the operating system with at least 2GB RAM, and connect to your instance as the root user.
Once you are logged into your Ubuntu 16.04 instance, run the following command to update your base system with the latest available packages.
apt-get update -yFirst, you will need to configure hostname and hostname resolution on both instances. So, each instance can communicate with each other by hostname.
On the server instance, setup hostname with the following command:
hostnamectl set-hostname node1.example.comNext, configure hostname resolution by editing /etc/hosts file:
nano /etc/hostsAdd the following line:
192.168.43.192 node1.example.com
192.168.43.11 client1.example.com
Save and close the file, when you are finished.
On the client instance, setup hostname with the following command:
hostnamectl set-hostname client1.example.comNext, configure hostname resolution by editing /etc/hosts file:
nano /etc/hostsAdd the following line:
192.168.43.192 node1.example.com
192.168.43.11 client1.example.com
Save and close the file, when you are finished.
The Foreman installer is a collection of Puppet modules that install everything required for a full working Foreman setup. It comes with all the necessary components like, Foreman, Puppet master and agent, Apache Web Server with SSL and Passenger module.
By default, Foreman is not available in the Ubuntu 16.04 default repository. So, you will need to add the Puppet and Foreman repository to your server.
First, install Puppet repository with the following command:
apt-get install ca-certificates wget -y
wget https://apt.puppetlabs.com/puppet5-release-xenial.deb
dpkg -i puppet5-release-xenial.deb
Next, add the Foreman repository with the following command:
nano /etc/apt/sources.list.d/foreman.listAdd the following lines:
deb http://deb.theforeman.org/ xenial 1.20
deb http://deb.theforeman.org/ plugins 1.20
Save and close the file. Then, add the GPG key with the following command:
wget -q https://deb.theforeman.org/pubkey.gpg -O- | apt-key add -Next, update the repository and install Foreman installer with the following command:
apt-get update -y
apt-get install foreman-installer -y
Next, run the Foreman installer with the following command:
foreman-installerOnce the installation has been completed successfully, you should see the following output:
Installing             Done                                               [100%]
  Success!
  * Foreman is running at https://node1.example.com
      Initial credentials are admin / zb7tBspqEqh933gw
  * Foreman Proxy is running at https://node1.example.com:8443
  * Puppetmaster is running at port 8140
  The full log is at /var/log/foreman-installer/foreman.log
Note : Please remember the admin username and password from the above output. You will need this to access Foreman web interface.
Open your web browser and type the URL https://node1.example.com. You will be redirected to the Foreman login page:

Now, provide your admin username and password. Then, click on the Log In button. You should see the following page:
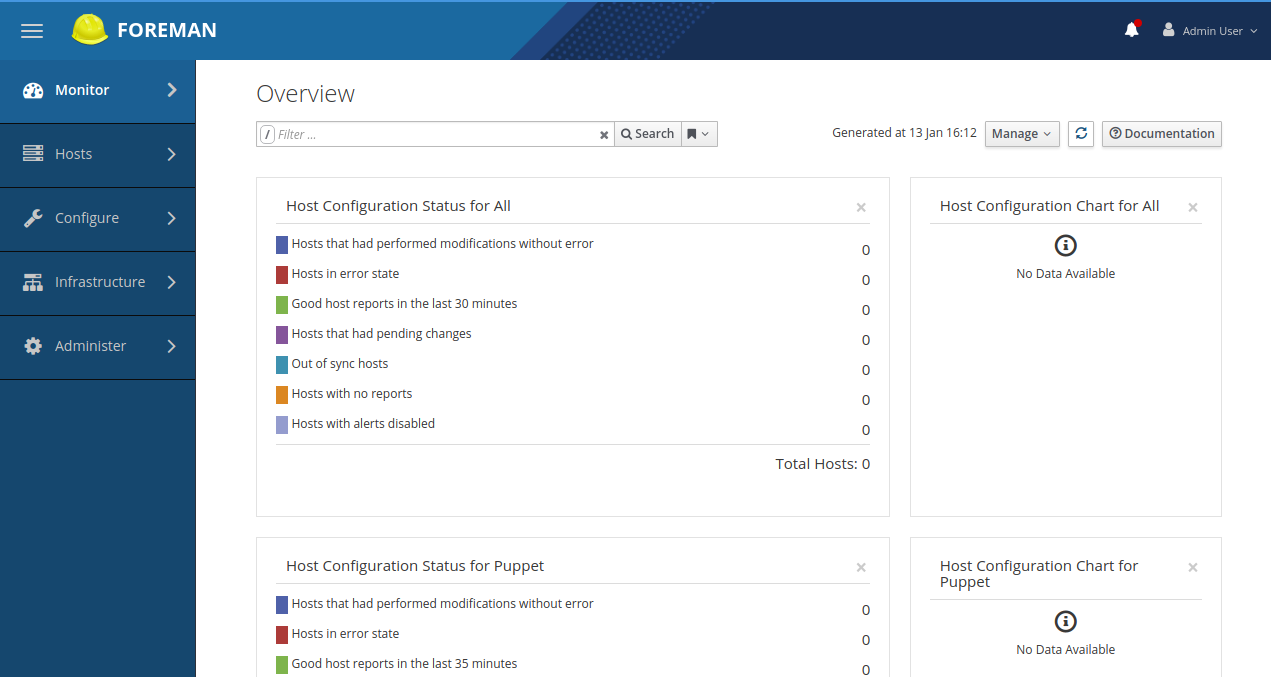
Next, it is recommended to change the current password of Foreman admin user. To do so, click on the username >> My Account. You should see the following page:
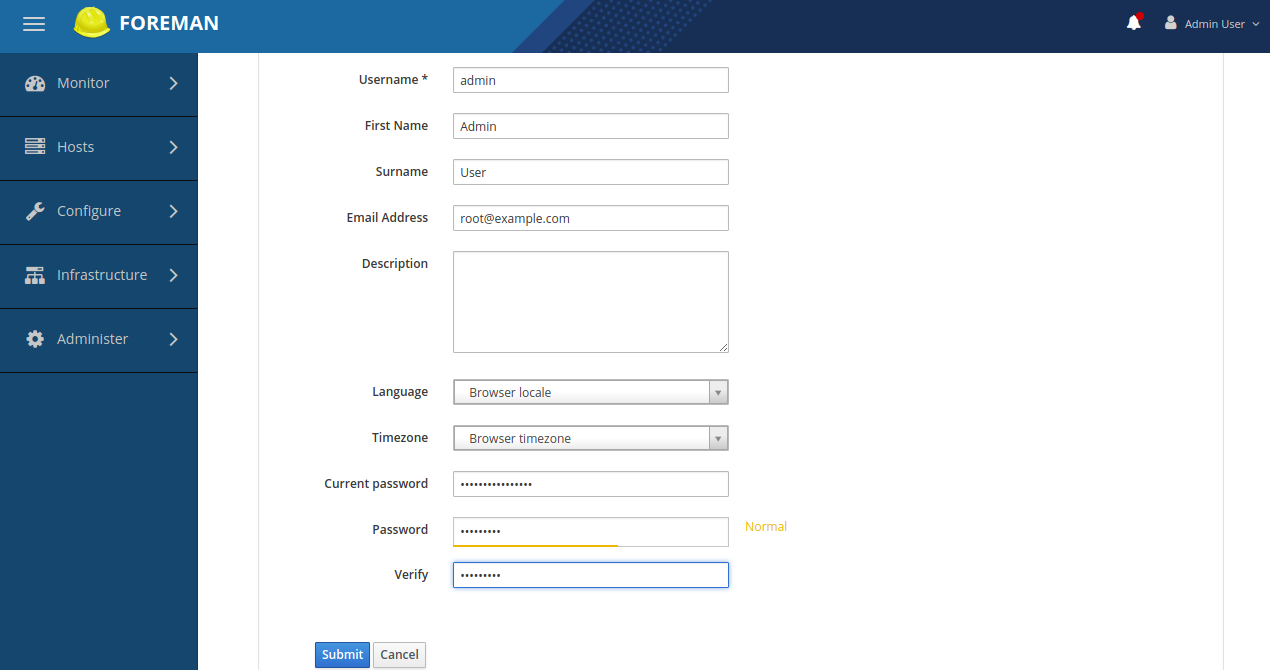
Now, change your password and click on the Submit button.
Next, click on the Hosts >> All Hosts button to see the available hosts:
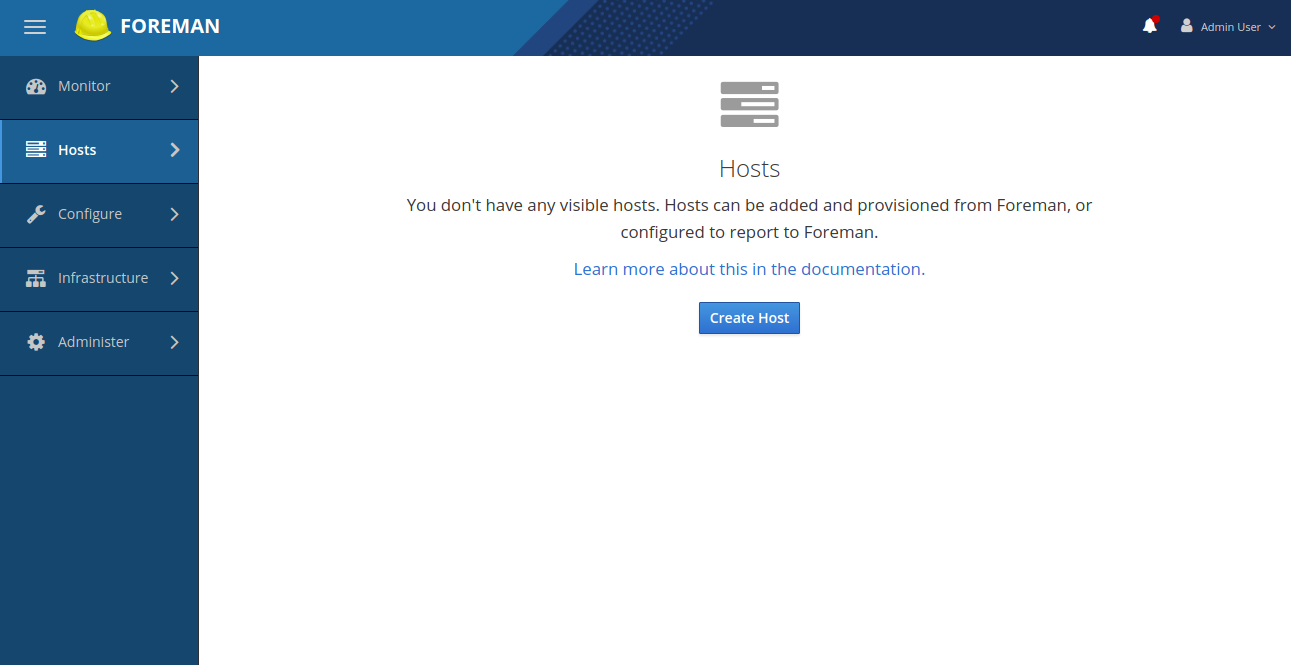
Foreman host is not visible in the above image. So, you will need to run the following command:
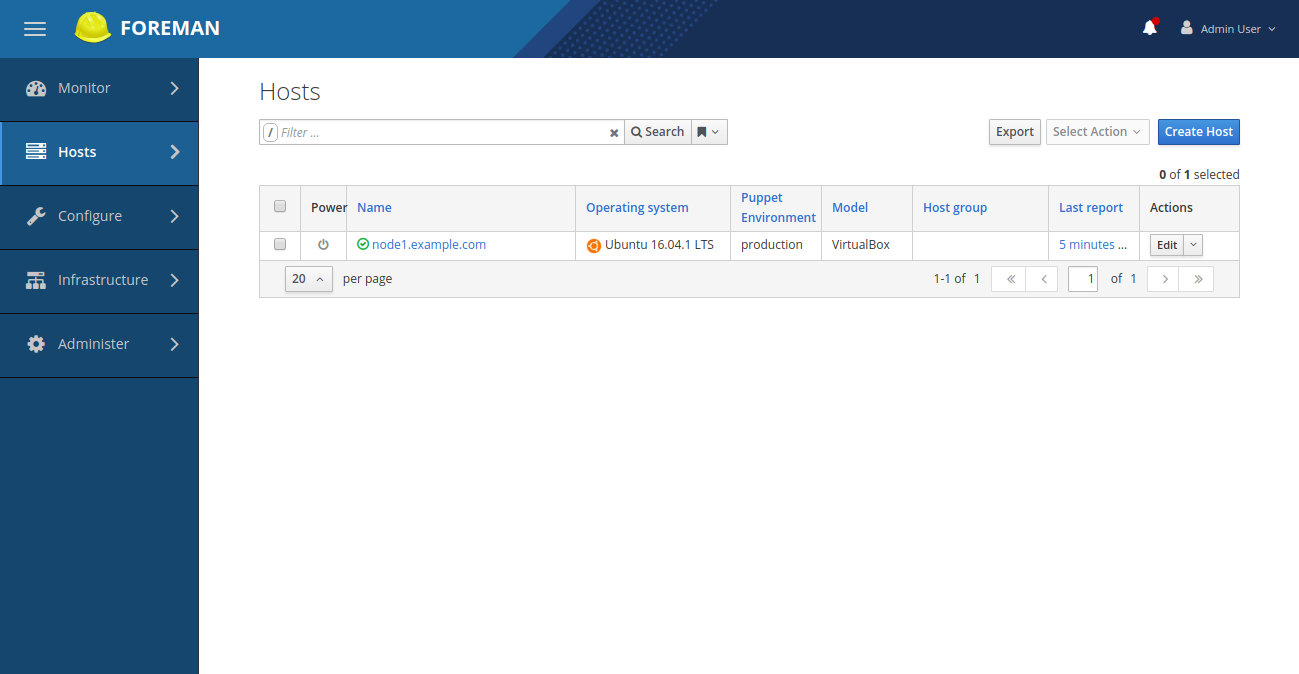
/opt/puppetlabs/bin/puppet agent --testThis command will send the first Puppet agent report to Foreman and automatically create the host in Foreman's database.
Warning: Unable to fetch my node definition, but the agent run will continue:
Warning: Error 500 on SERVER: Server Error: Failed to find node1.example.com via exec: Execution of '/etc/puppetlabs/puppet/node.rb node1.example.com' returned 1:
Info: Retrieving pluginfacts
Info: Retrieving plugin
Info: Retrieving locales
Info: Caching catalog for node1.example.com
Info: Applying configuration version '1547376667'
Notice: Applied catalog in 1.80 seconds
Now, click on the Hosts >> All Hosts button again to see the Foreman host in the following page:
Puppet requires accurate time-keeping. So you will need to install NTP module to manage the NTP service on the Foreman host.
You can install NTP module by running the following command:
/opt/puppetlabs/bin/puppet module install puppetlabs/ntpOutput:
Notice: Preparing to install into /etc/puppetlabs/code/environments/production/modules ...
Notice: Downloading from https://forgeapi.puppet.com ...
Notice: Installing -- do not interrupt ...
/etc/puppetlabs/code/environments/production/modules
©ž©€©Ð puppetlabs-ntp (v7.3.0)
  ©ž©€©€ puppetlabs-stdlib (v5.1.0)
On the Foreman dashboard, go to Configure >> Puppet >> Classes. You should see the following page:
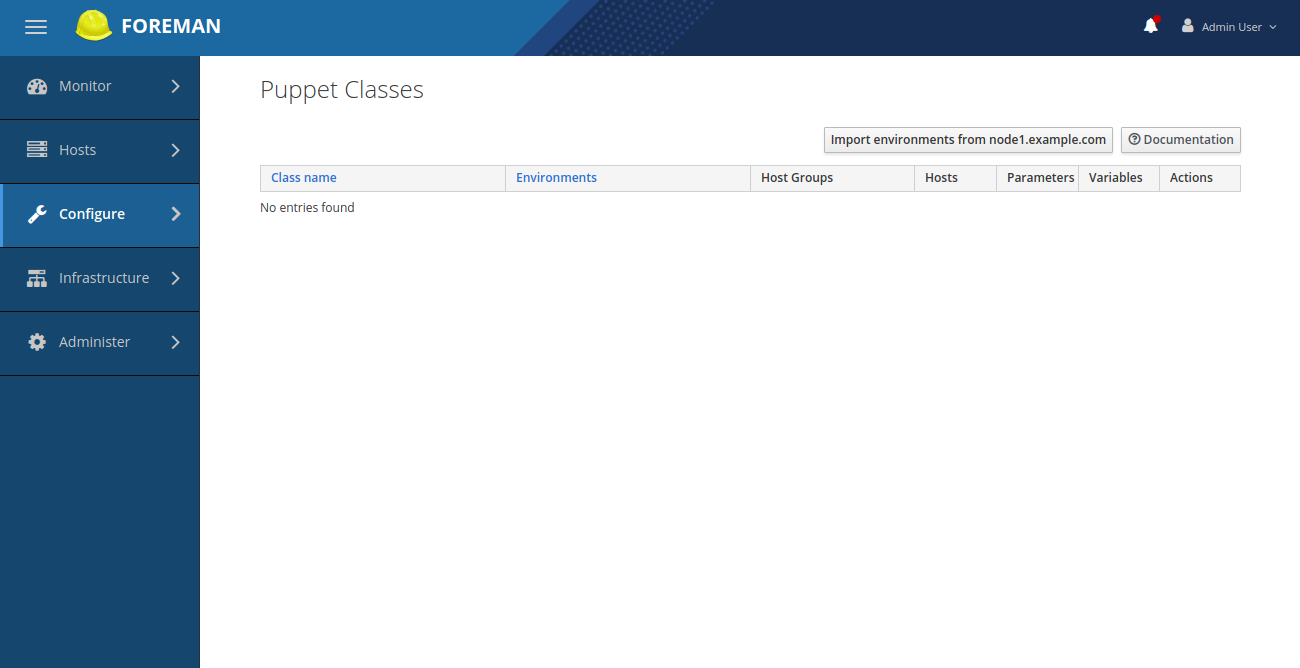
Now, click on the Import from node1.example.com to read the available Puppet classes from the puppet master and populate Foreman's database:
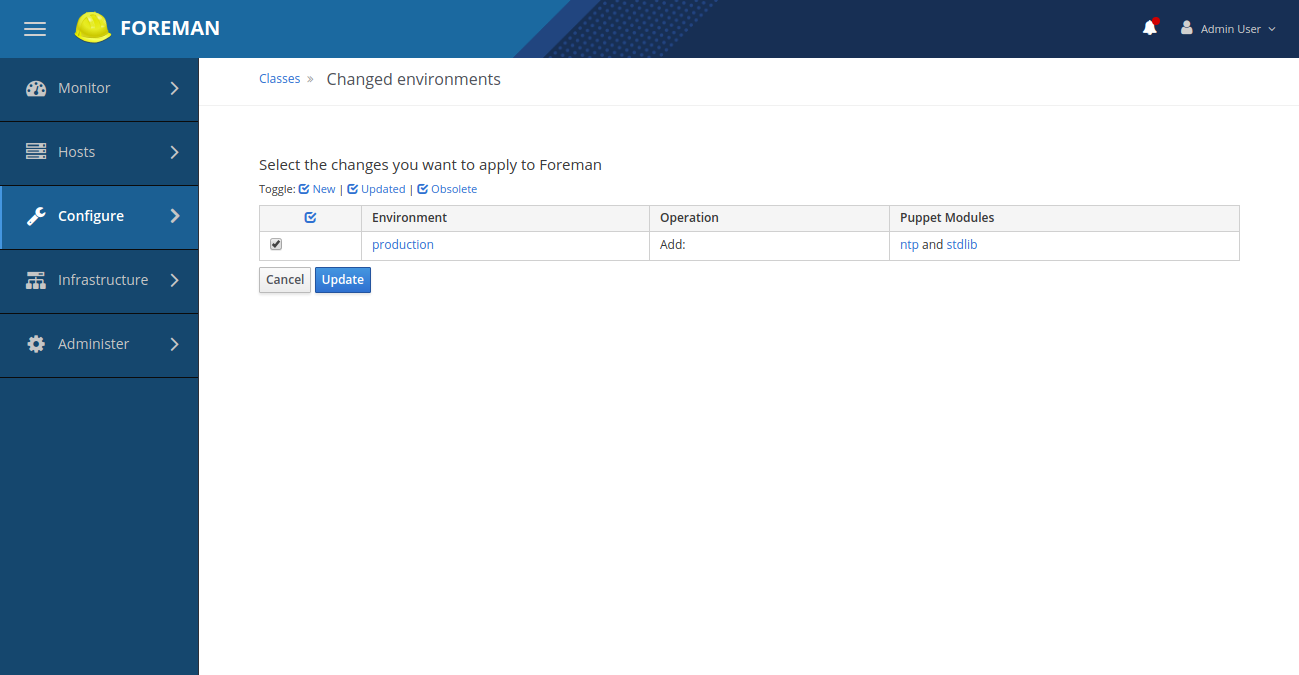
Now, select the NTP module and click the Update button. You should see the following page:
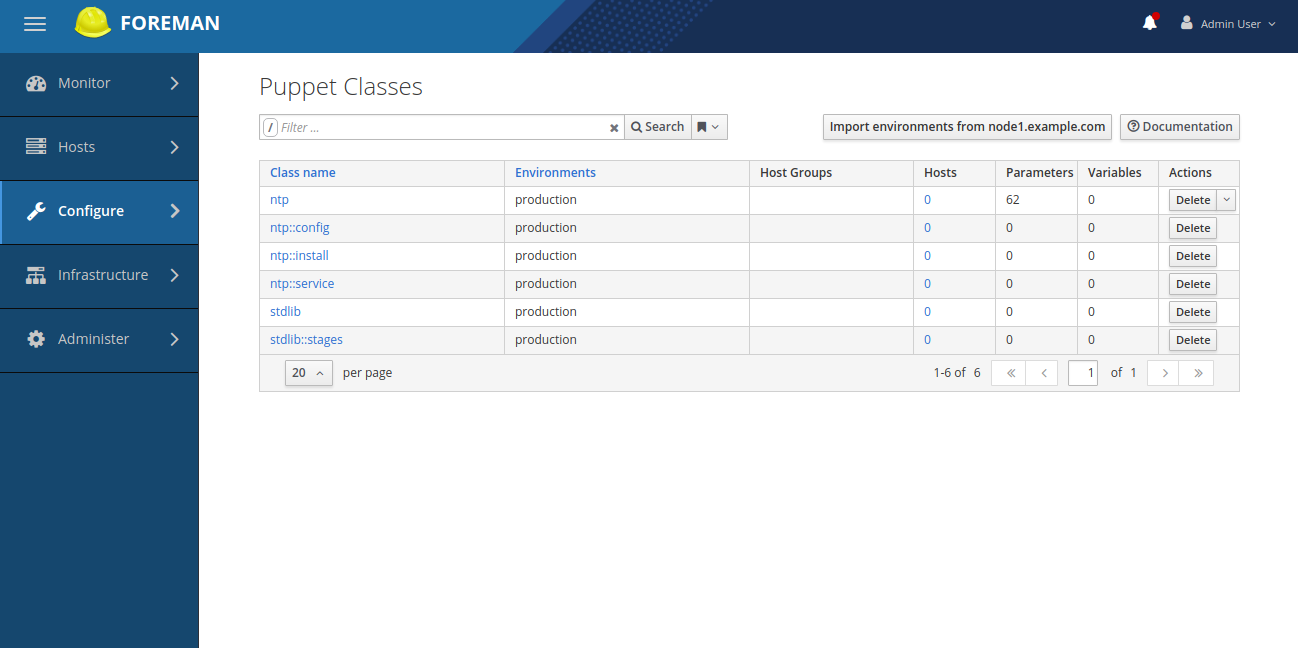
Now, click on the Configure >> Smart Class Parameter >> Servers. You should see the following page:
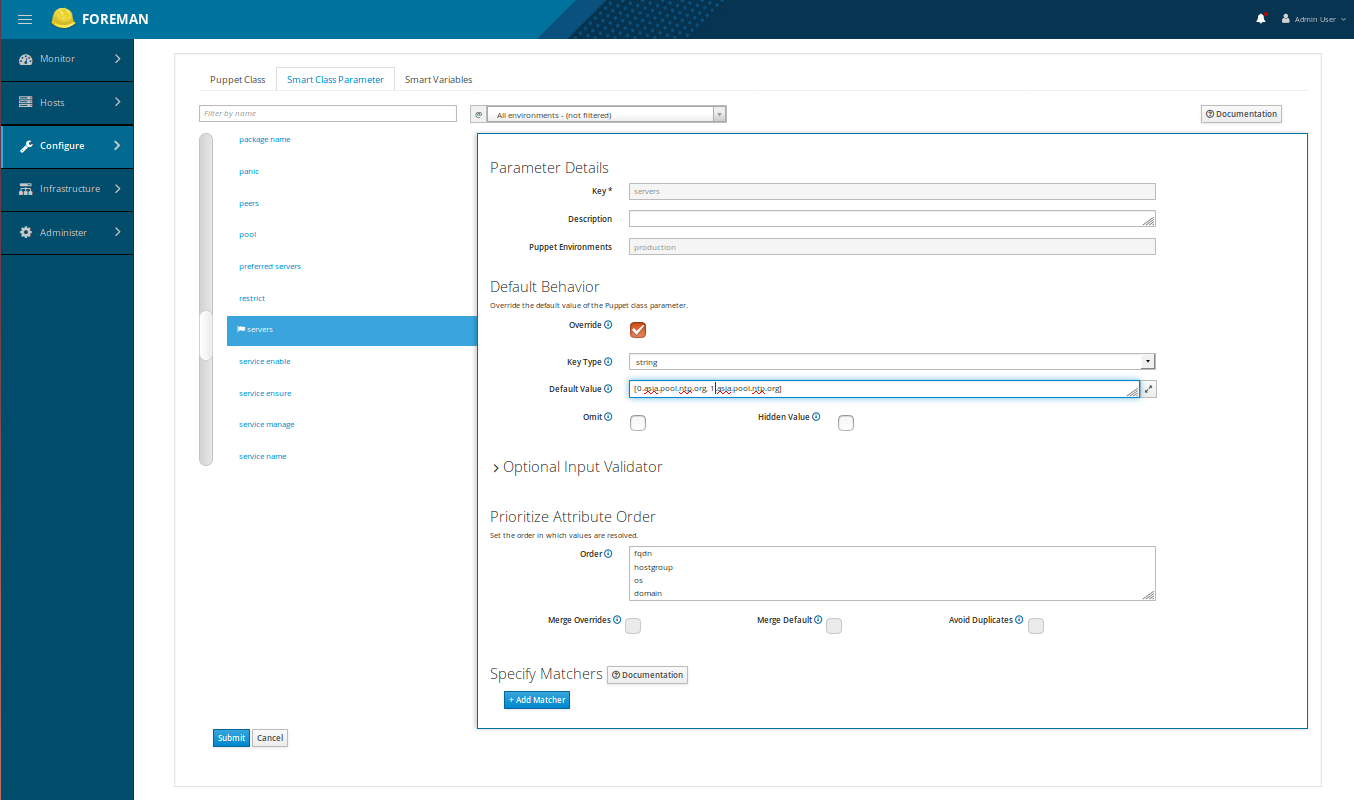
Here, select Override checkbox, change Key Type to array, change the Default value to your NTP server and click on the Submit button.
Next, go to Hosts >> All Hosts. You should see the following page:
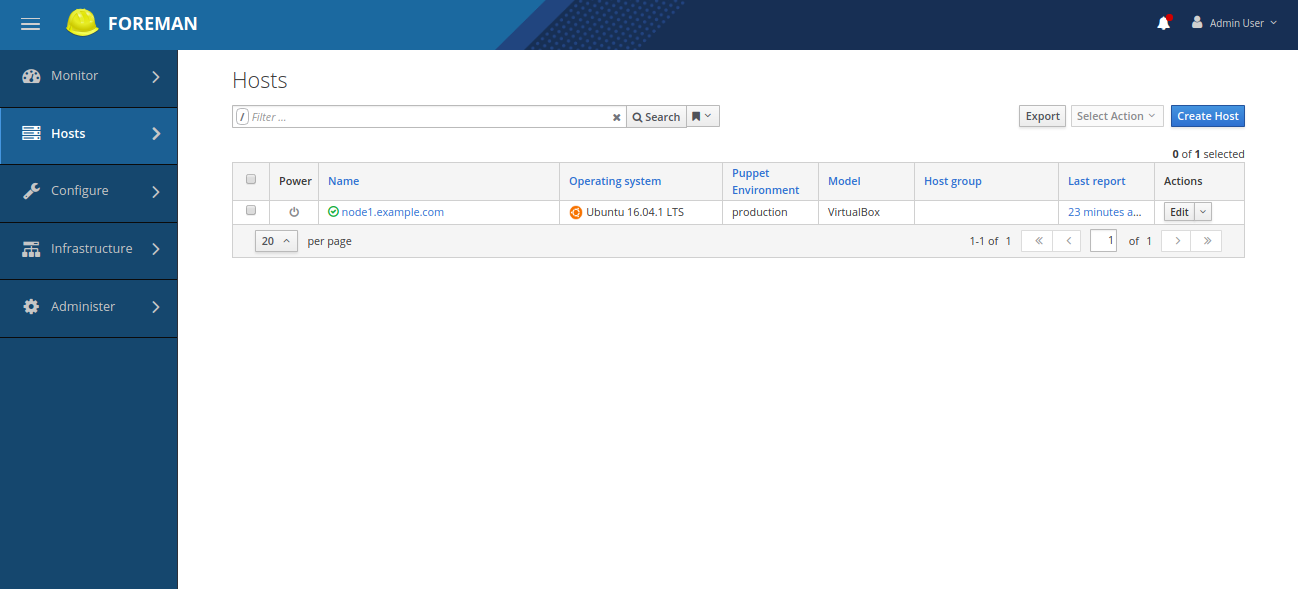
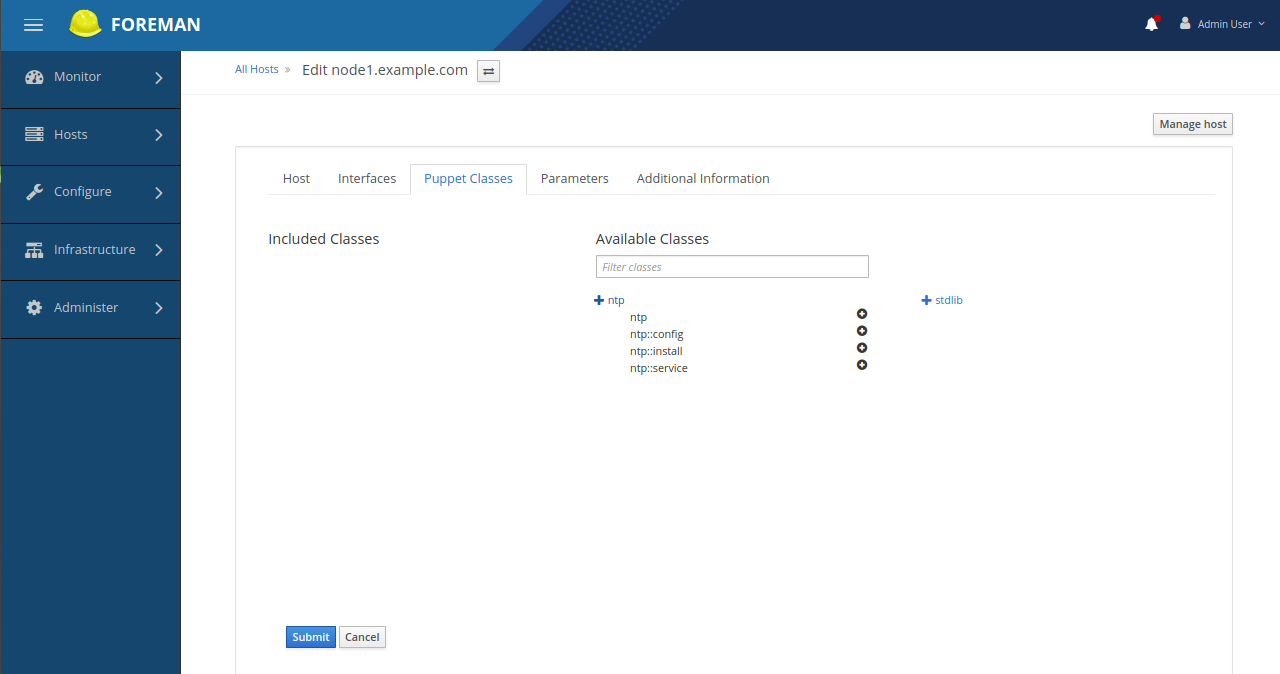
Now, click on the Edit button, go to Puppet Classes tab and expand the ntp module and click the + icon to add the ntp class to the host, then click on the Submit button. You will be redirected to the host details page:
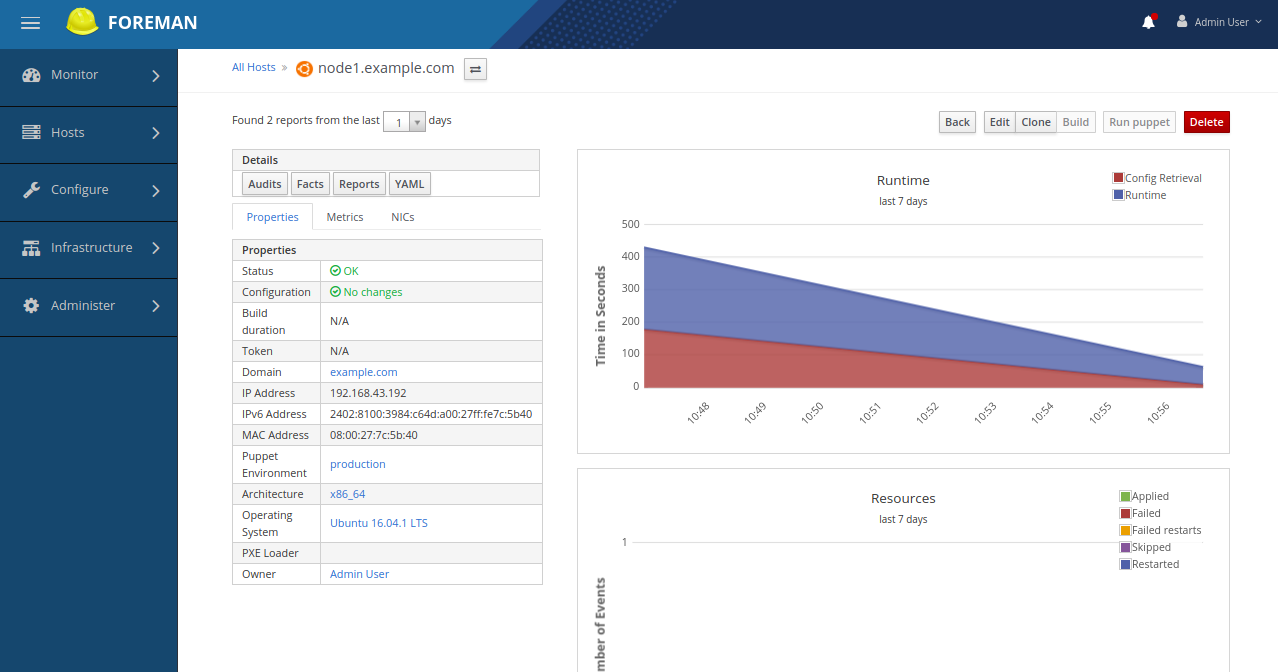
Now, click on the YAML button. You should see the ntp class and the servers parameter in the following page:

By default, Puppet agent is not available in the Ubuntu 14.04 default repository. So, you will need to add the Puppet repository to your client instance. You can do this by running the following command:
wget https://apt.puppetlabs.com/puppet5-release-trusty.deb
dpkg -i puppet5-release-trusty.deb
Next, update the repository and install Puppet agent with the following command:
apt-get update -y
apt-get install puppet-agent -y
Once the installation has been completed, you will need to update the Puppet default configuration file.
nano /etc/puppetlabs/puppet/puppet.confMake the following changes:
[agent]
    server = node1.example.com
    certname = client1.example.com
    environment = production
    listen = false
    pluginsync = true
    report = true
Next, run the following command to enable and run puppet agent service.
/opt/puppetlabs/bin/puppet resource service puppet ensure=running enable=trueFinally, restart the Puppet agent service with the following command:
service puppet restartNow, go to the Foreman server instance and list down the unsigned certificates with the following command:
/opt/puppetlabs/bin/puppet cert listYou should see the following output:
"client1.example.com" (SHA256) B6:41:A7:1D:9E:52:E5:7D:B0:B1:B6:D2:A3:E3:D2:CA:98:EE:EC:55:2F:86:40:31:8C:DF:47:68:A9:BE:60:07Now, sign the certificate with the following command:
/opt/puppetlabs/bin/puppet cert sign client1.example.comOutput:
Signing Certificate Request for:
  "client1.example.com" (SHA256) B6:41:A7:1D:9E:52:E5:7D:B0:B1:B6:D2:A3:E3:D2:CA:98:EE:EC:55:2F:86:40:31:8C:DF:47:68:A9:BE:60:07
Notice: Signed certificate request for client1.example.com
Notice: Removing file Puppet::SSL::CertificateRequest client1.example.com at '/etc/puppetlabs/puppet/ssl/ca/requests/client1.example.com.pem'
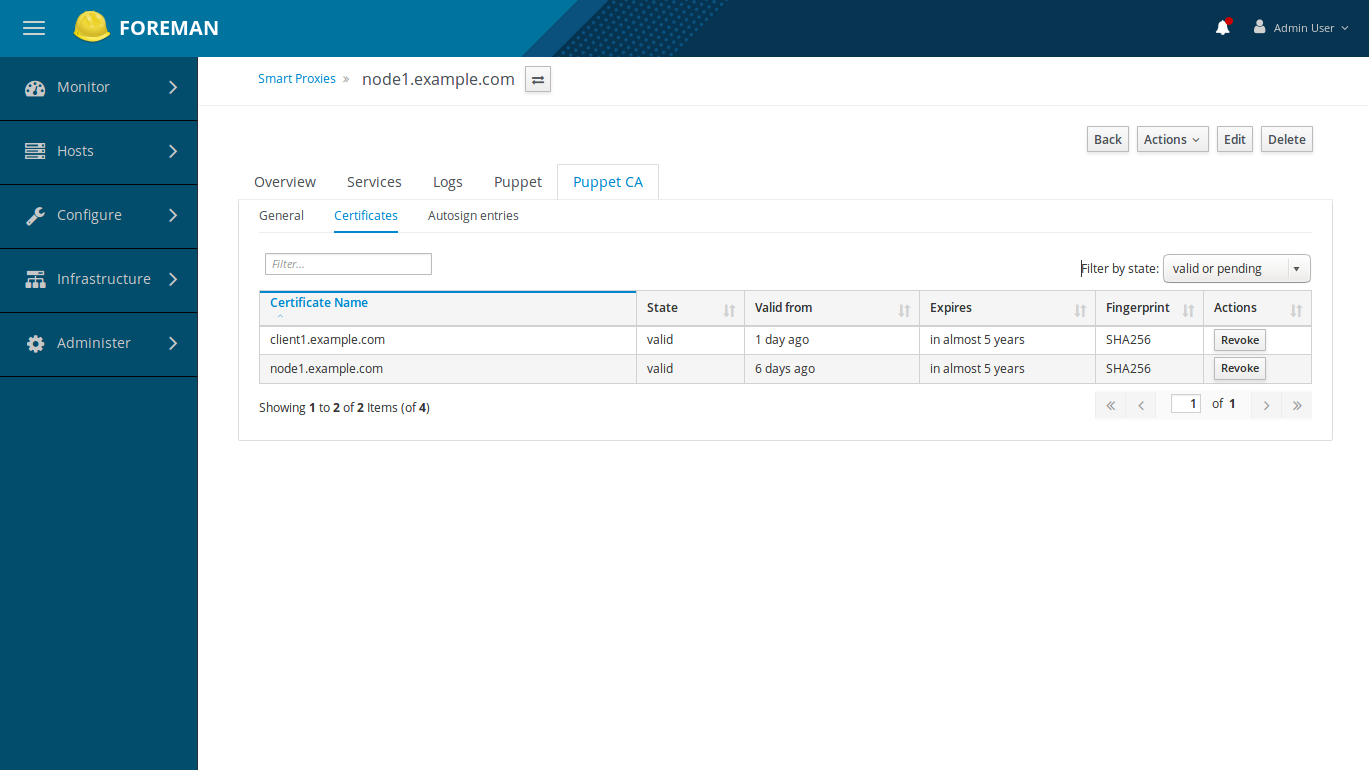
On the Foreman dashboard, go to Infrastructure >> Smart proxies and select the Certificates from drop down. you should see the server and client certificate in the following page:
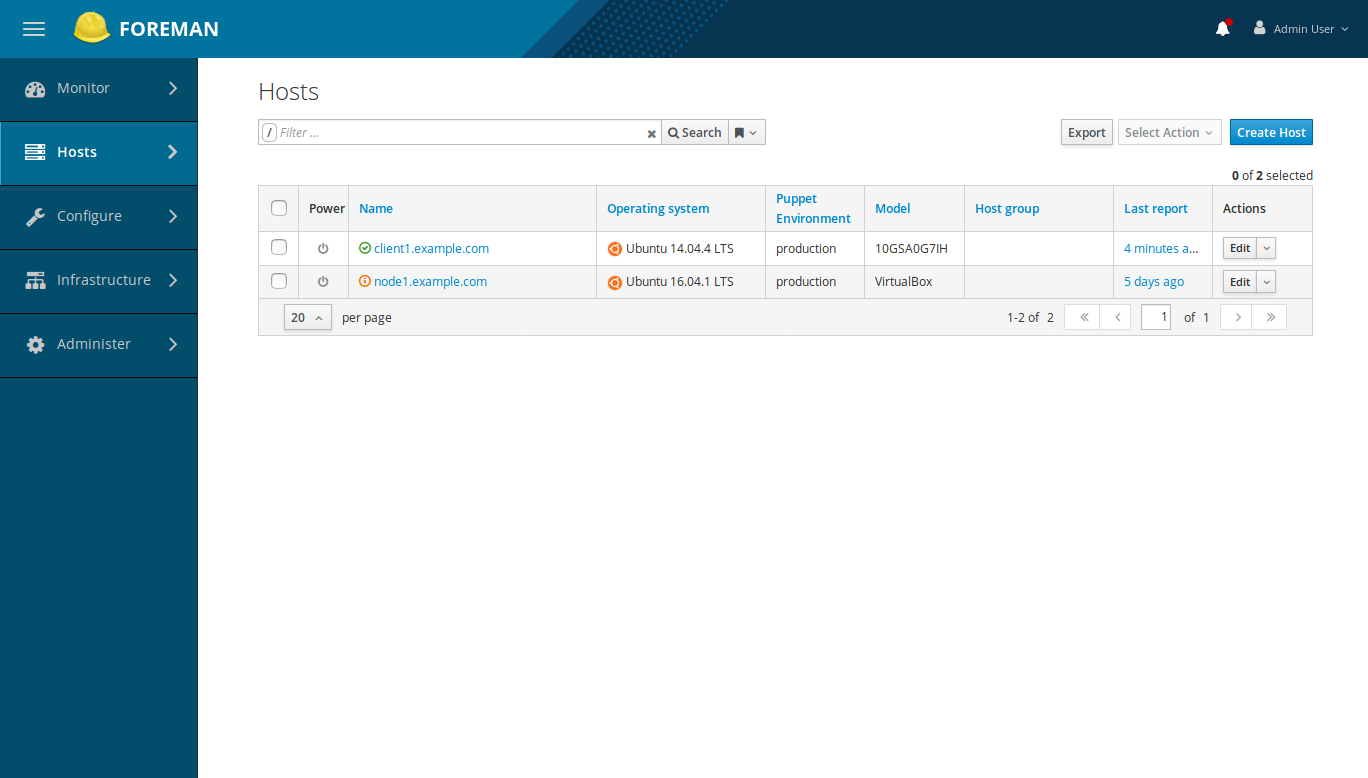
Now, go to Hosts >> All Hosts. you should see the newly added client node in the following page:

39 posts | 6 followers
FollowAlibaba Clouder - May 7, 2019
Alibaba Clouder - April 23, 2019
Alibaba Clouder - February 13, 2019
Alibaba Clouder - June 11, 2018
Alibaba Clouder - February 13, 2018
Alibaba Clouder - June 4, 2019

39 posts | 6 followers
Follow ECS(Elastic Compute Service)
Elastic and secure virtual cloud servers to cater all your cloud hosting needs.
Learn More Elastic Desktop Service
A convenient and secure cloud-based Desktop-as-a-Service (DaaS) solution
Learn More Marketplace
Marketplace is an online market for users to search and quickly use the software as image for Alibaba Cloud products.
Learn More Elastic High Performance Computing Solution
High Performance Computing (HPC) and AI technology helps scientific research institutions to perform viral gene sequencing, conduct new drug research and development, and shorten the research and development cycle.
Learn MoreMore Posts by Hiteshjethva