
Containerization is taking over the world, and Docker is the leading technology being used by nearly every major company.
This article explains what Docker is, and how to get started using it via Alibaba Cloud Container Service.
But what exactly is Docker?
In a nutshell, Docker is a platform for programmatically creating, managing, building, and deploying containers. For the uninitiated, containers are OS-level virtual services that allow you to run an application and its dependencies in isolated processes. While this might sound confusing, the long and short of it is that containerization allows you to isolate resources and their dependencies from each other.
The benefits of containerization (beyond simply isolating resources) are that they sandbox applications, provide a consistent runtime environment, reduce the physical footprint of each process, and offer a low—programmer-friendly—overhead. While they're not perfect for everything (though I wouldn't admit as much to the containerization advocates of the world), they are an excellent way to reduce cost in both infrastructure and resources.
"So…Docker is great," you might be thinking, "but how do we actually go about launching our first container (on Alibaba Cloud)?"
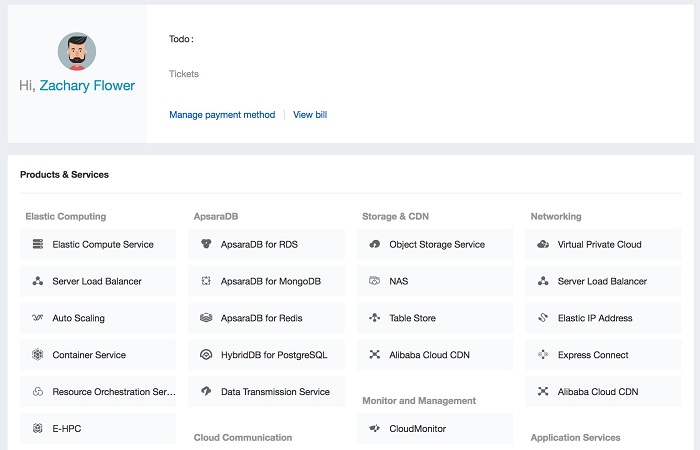
To get started with Docker on Alibaba Cloud, the first thing we need to do is navigate to the Container Service dashboard. This dashboard can be found under the Elastic Computing section on your Alibaba Cloud Console.
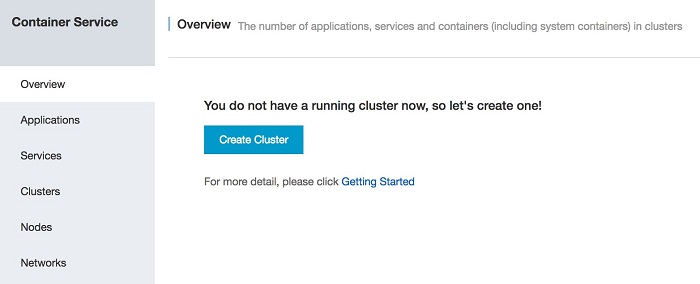
Once there, we then need to create a cluster. A cluster is a collection of nodes—the things the containers run on—that can be scaled up or down to meet the infrastructure demands of an application. To do this, click on the Create Cluster button from within the Container Service Overview tab:
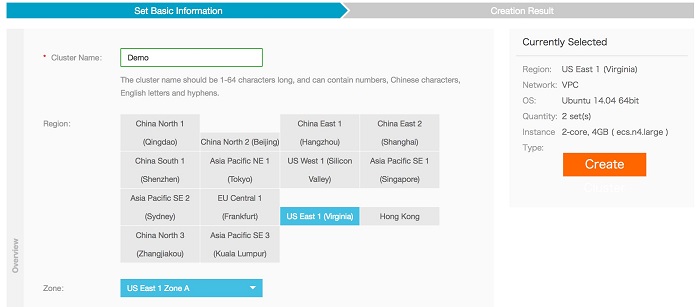
That button will take you to the cluster creation wizard. For the purposes of this demonstration, all of the default values will be fine, however one thing worth paying attention to is the Password field that appears towards the bottom of the page. It is required, however, it can be easily overlooked since it falls under the fold.
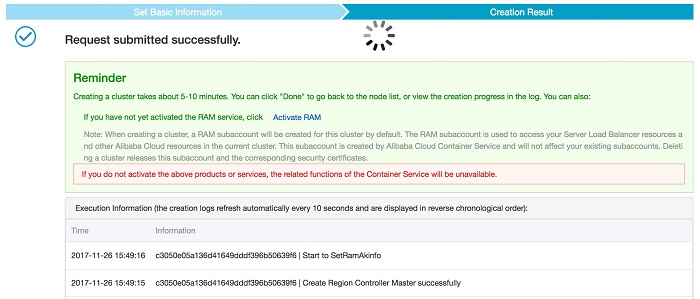
Once you request a cluster, Alibaba Cloud will go about provisioning the resources necessary to run it. This includes load balancers, virtual machines, routers…basically everything required to run your own Docker cluster. Take special note of the Reminder shown at the top of the confirmation page. The load balancer requires the Resource Access Management (RAM) service to be set up before it will work.
Deploying a cluster can take some time, but once it's all finished, head over to the Clusters tab in the Container Service dashboard. Here, you will see your new node, the status, and any other information associated with it:

So we have a cluster…Now what?
The cluster is the basic infrastructure required to actually run Docker containers on Alibaba Cloud. Once provisioned, we can create an application. To do this, navigate to the Applications tab in the Container Service dashboard and click on the Create Application button:

The Basic Information tab of the application creation wizard is fairly self-explanatory. The two most important fields for this example are the name and cluster (hint: the thing we just created above).
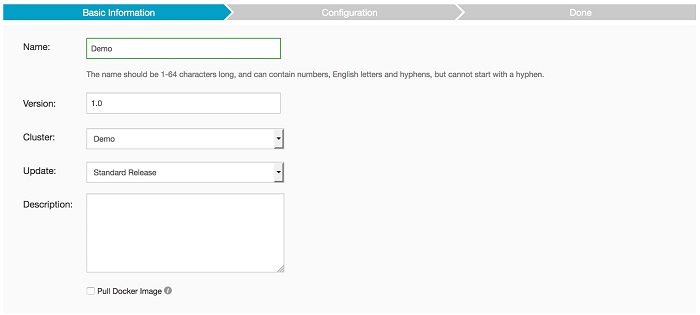
After setting the basic application information, we can now get into the meat of things. While you can use any private or public Docker base image, for the purposes of this demo, let's select one of the pre-provided Docker images. To do this, click on the Select Image link:

This link will bring up the Image Selection modal, which will allow you to browse popular and official Docker images. To make the demonstration as clear as possible, let's go with wordpress:
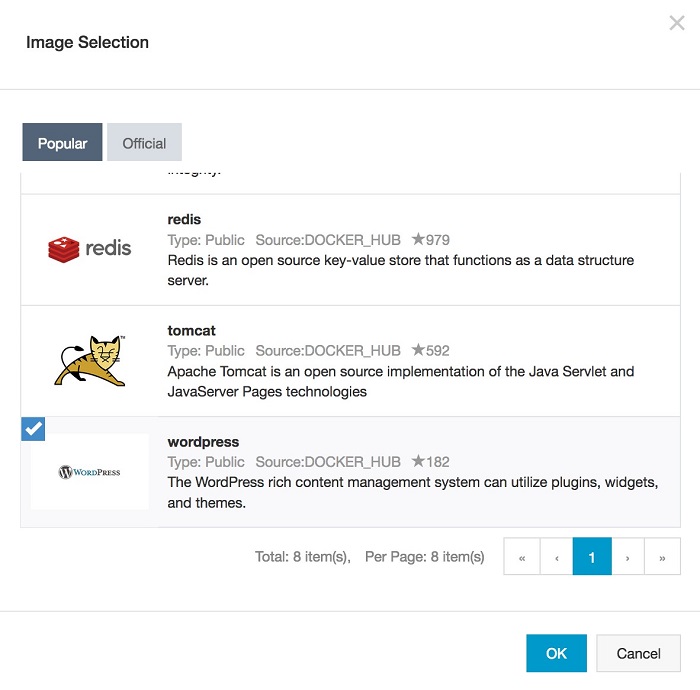
The WordPress image will automatically define some necessary information within our application (environment variables, ports, etc), but one thing that we will have to do is open our application up to the web. To do this, create a Web Routing entry with a Container Port of 80 and a domain. If you do not specify a specific domain, but instead choose a subdomain (as in the screenshot below), then a domain name will be generated for you:
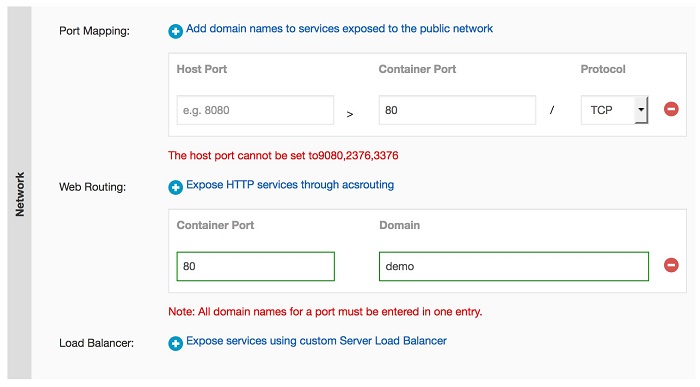
Once you create your application, head back to the Applications tab in the Container Service dashboard. Here, you'll see the new application you deployed:

To verify the installation of your application, click on the application name in the Applications tab. This will take you to an overview of the containers running within the application. Take special note of the Access Endpoint, as this is the domain name that is generated for your application based on the subdomain defined above:

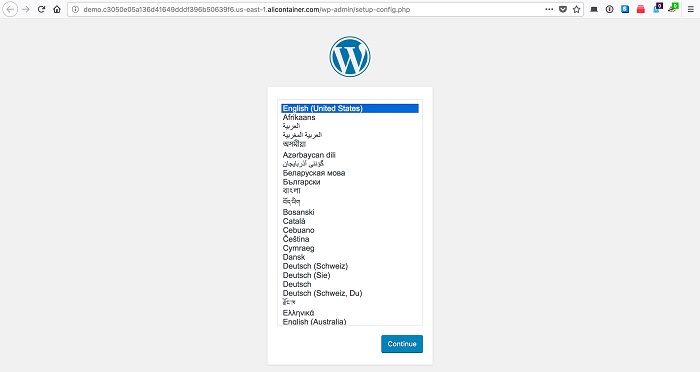
Clicking on the Access Endpoint will open up a new tab in your web browser to the application you created and opened up to the Internet at large. As you can see below, WordPress has been successfully installed via the Alibaba Cloud Container Service and is awaiting configuration:
All-in-all, the Alibaba Cloud Container Service is an incredibly straightforward and easy service to use. While there are some nuances that can be confusing at first, this is a problem that is common with Docker as a platform, rather than Alibaba Cloud itself. Despite the simplicity of this demonstration, it should also be noted that Alibaba Cloud Container Service has some excellent functionality around auto-scaling applications as load increases or decreases, and is a great solution for quickly spinning up new Docker containers with very little overhead.
If you'd like to give Alibaba Container Service a try for yourself, you can take advantage of Alibaba Cloud's current offer of $300 in free credit.
Bio

Zachary Flower (@zachflower) is a Fixate IO Contributor and lead developer at Emerson Stone, a Boulder-based design and branding agency. He has an eye for simplicity and usability, and strives to build products with both the end user and business goals in mind. From building projects for the NSA to creating features for companies like Name.com and Buffer, Zach has always taken a strong stand against needlessly reinventing the wheel, often advocating for the use of well established third-party and open source services and solutions to improve the efficiency and reliability of a development project.
Massive Parallel Processing with Alibaba Cloud HybridDB for PostgreSQL

2,593 posts | 792 followers
FollowAlibaba Clouder - April 10, 2019
Neel_Shah - February 14, 2025
Alibaba Clouder - December 20, 2018
Alibaba Clouder - August 19, 2019
Alex - January 22, 2020
Nick - May 15, 2019

2,593 posts | 792 followers
FollowLearn More
 Container Service for Kubernetes
Alibaba Cloud Container Service for Kubernetes is a fully managed cloud container management service that supports native Kubernetes and integrates with other Alibaba Cloud products.
Learn More ECS(Elastic Compute Service)
Elastic and secure virtual cloud servers to cater all your cloud hosting needs.
Learn MoreMore Posts by Alibaba Clouder