By Alex Muchiri.
Developing an FAQ chatbot is an intuitive way for you to be able to answer the common questions that your customers ask. The chatbot you develop could be easily integrated with your apps, website and even your related social media accounts to enhance your customer interactions on these platforms and provide instant feedback to simple but useful questions that would have otherwise take a longer time to answer.
In this tutorial, you will learn how you can develop an FAQ chatbot that is integrated with Facebook messenger by using the Botpress engine that we set up in a previous tutorial. Note that it is also possible to develop your very own chatbot entirely on your local machine and then upload it to your online server.
This is the second instalment of a three part series of tutorials about Botpress. Click on my name to see more blogs by me. Or, click these links to read the other articles in this series now: Getting Started with Botpress on Alibaba Cloud and Advanced Concepts in Botpress: A Crash Course.
To complete this tutorial, you'll need the following items:
As the first leg of this tutorial, we will need to design the chatbot's conversation flow. For this, we want to built an FAQ bot to achieve the following objectives:
Here is the general conversation structure of the chatbot:
Outline of our conversation structure:
FAQ    -> option 1     -> option 1
            -> option 2
            -> option 3, redirect to flow
    -> option 2     -> option 1
            -> option 2, redirect to flow
    -> option 3, redirect to flow
Our charges     -> option 1    -> option 1
                -> option 2, redirect to flow
        -> option 2, redirect to flow
Small talk     -> small talk
-> option 2, redirect to flowNow, since we have a conversation structure, we'll need to proceed to developing the chatbot's conversation materials to fit the conversation structure and flow we have established in the previous step.
General information bots provide customers with general information regarding your service offerings. You can think of it as an intuitive user manual that delivers answers to customers on an on-demand basis. Answers are broken up into several parts that are revealed to the user based on the information they request.
Support bots solve user problems to help improve their experience. You can use a support bot to reset user passwords, rectify a transaction or simply solve problems associated with their profile.
If you build chatbots for small talk, then they will mainly be used to engage users with small talk.
Now with all of that gone through, let's discuss what we will do in this tutorial. We will be employing the following Botpress concepts in our Facebook chatbot setup.
So, let's go on to create our simple bot. For this tutorial, I'm using the latest version of Botpress at the moment of writing this tutorial, which is version 12.14. To create our simple bot, follow these steps.
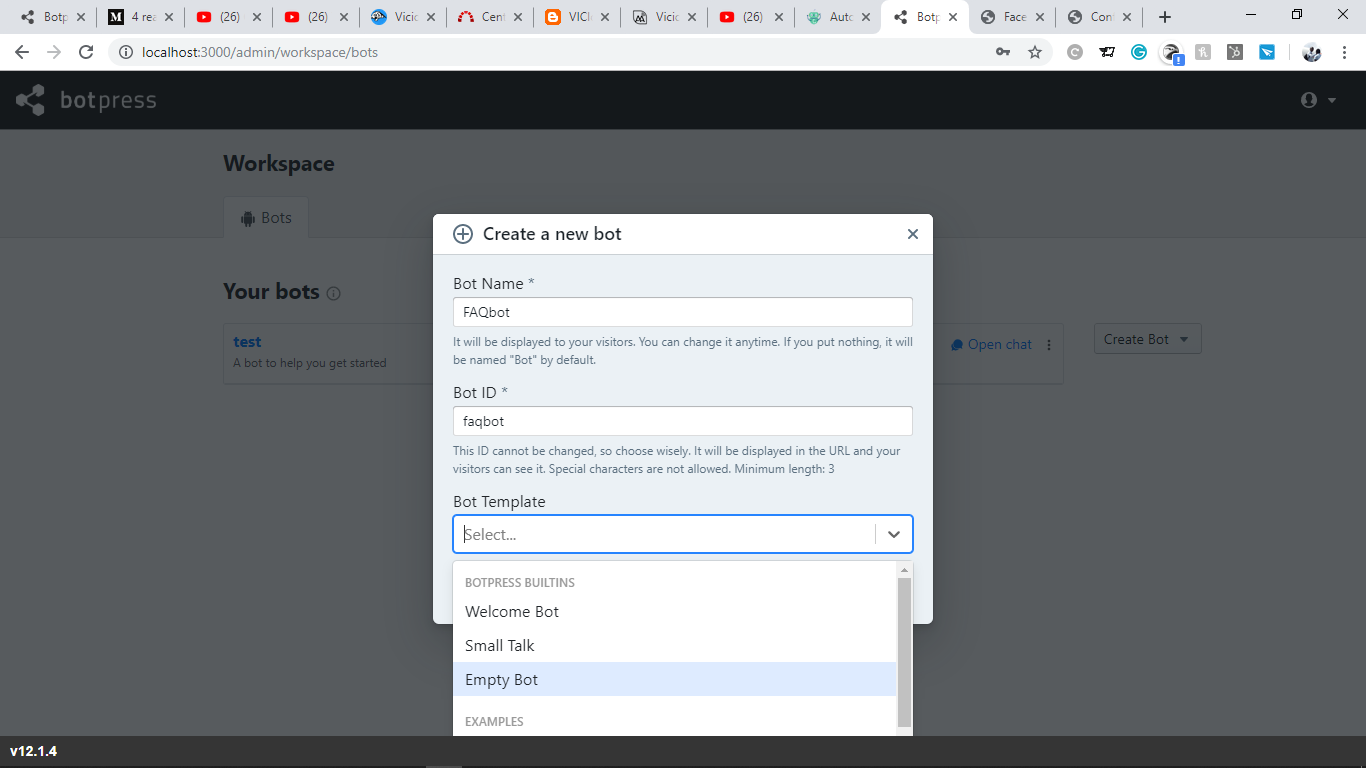
Create a bot named FAQbot using the empty template.
Now, we can use the bot studio to edit the bot content.
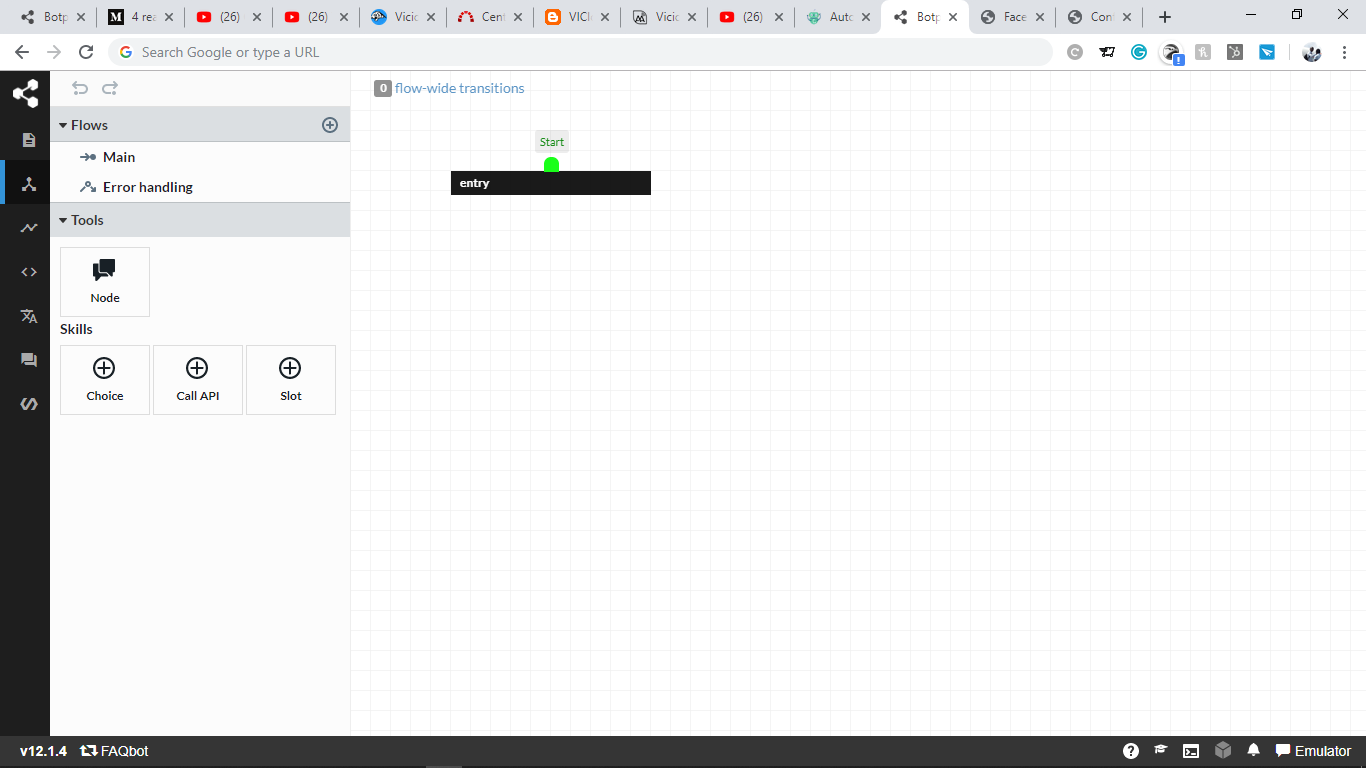
Here are the flows that I'll need to create.
main.small_talk.We will begin by editing the entry node, which has been created by default. Double-click on the node, then click through the following: enter > Plus button > Say something > Folder icon > Text > Create new text. Save the following as three separate entries:
After doing that, you should see the following in your studio interface:
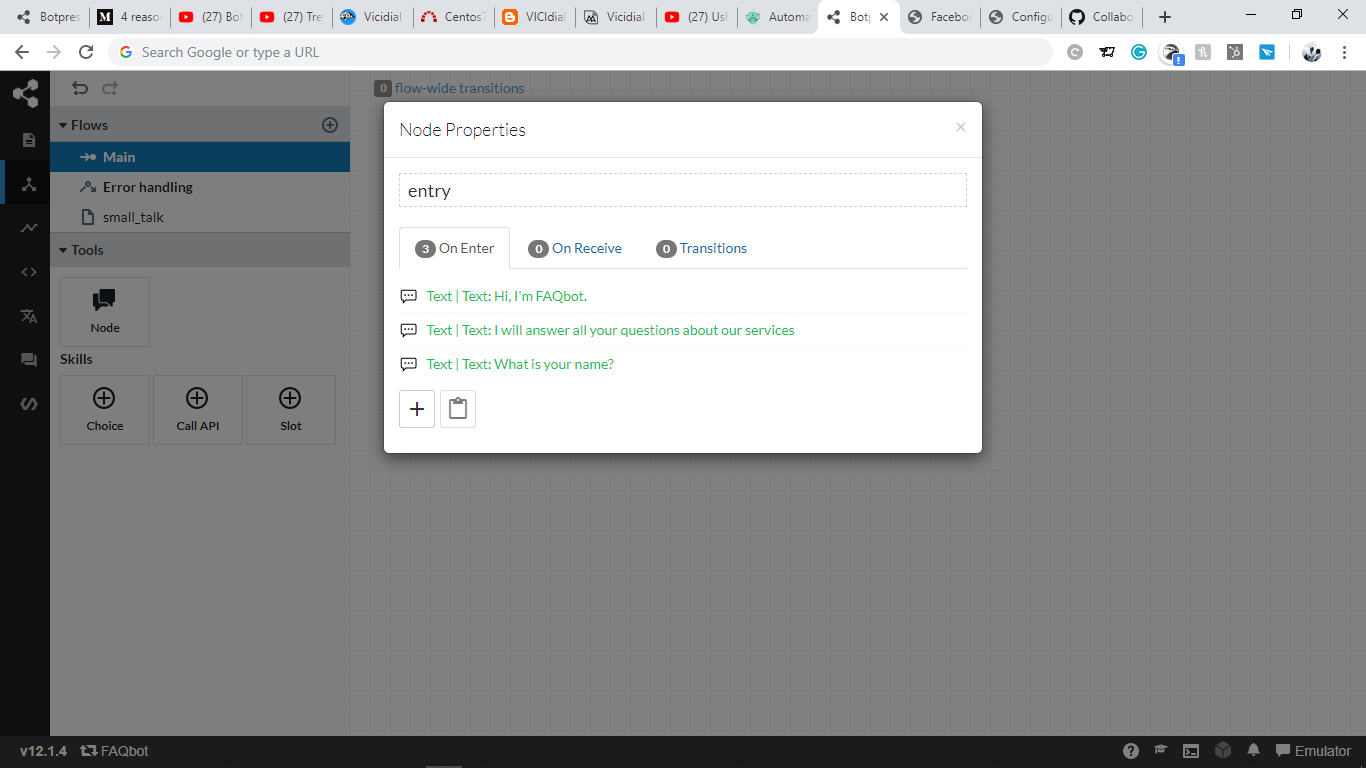
Test if it works using the emulator located at the bottom right corner.
Now let's move on to extract the user's name after they answer the above question from the Node properties > On receive> Execute code, as shown below. To set it up, we shall extract the name from the {{event.payload.text}} using the storage set variable built-in Botpress function.
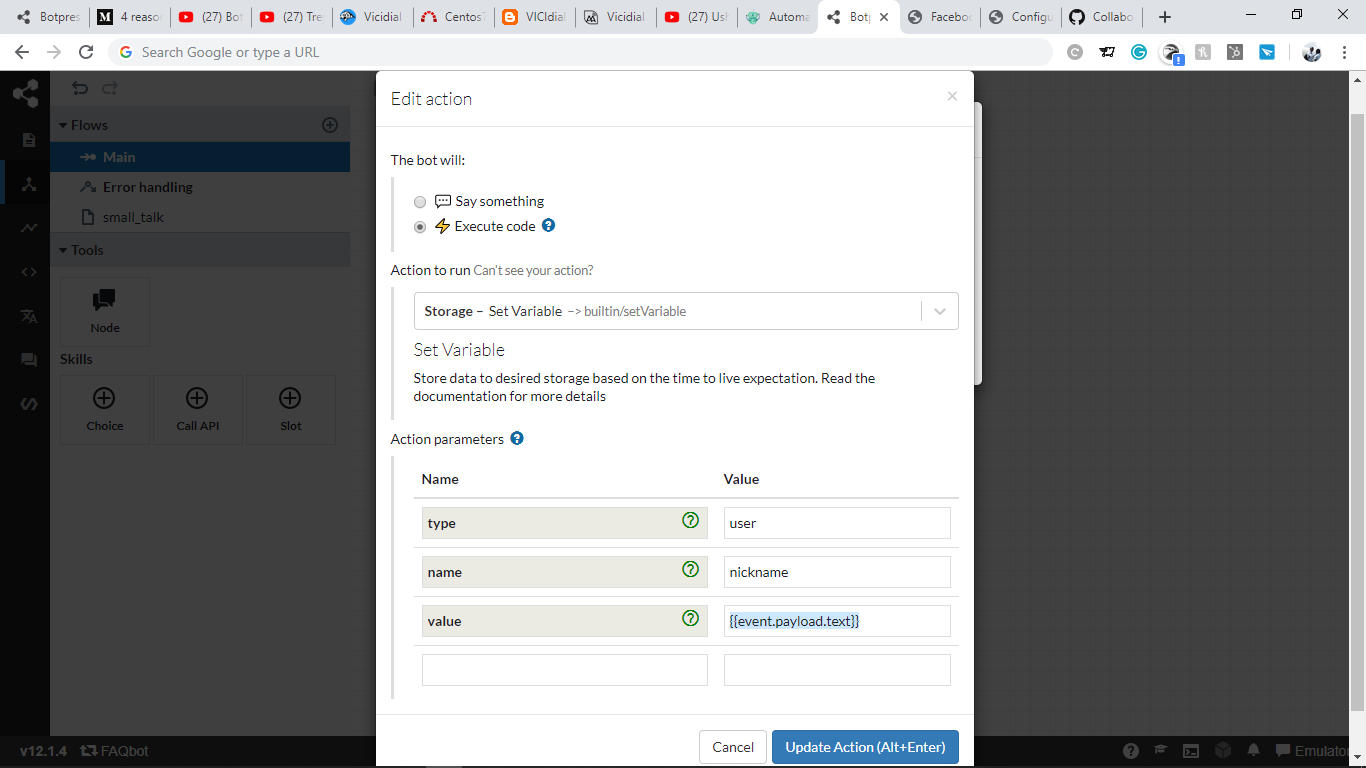
Drag and drop the node icon on the left to create a new node within the flow and rename it to choices. Note that we will address the user using their name in the next step and ask them to pick a choice.
Double-click the choices node and as above and add the next below as two separate entries:
{{user.nickname}}.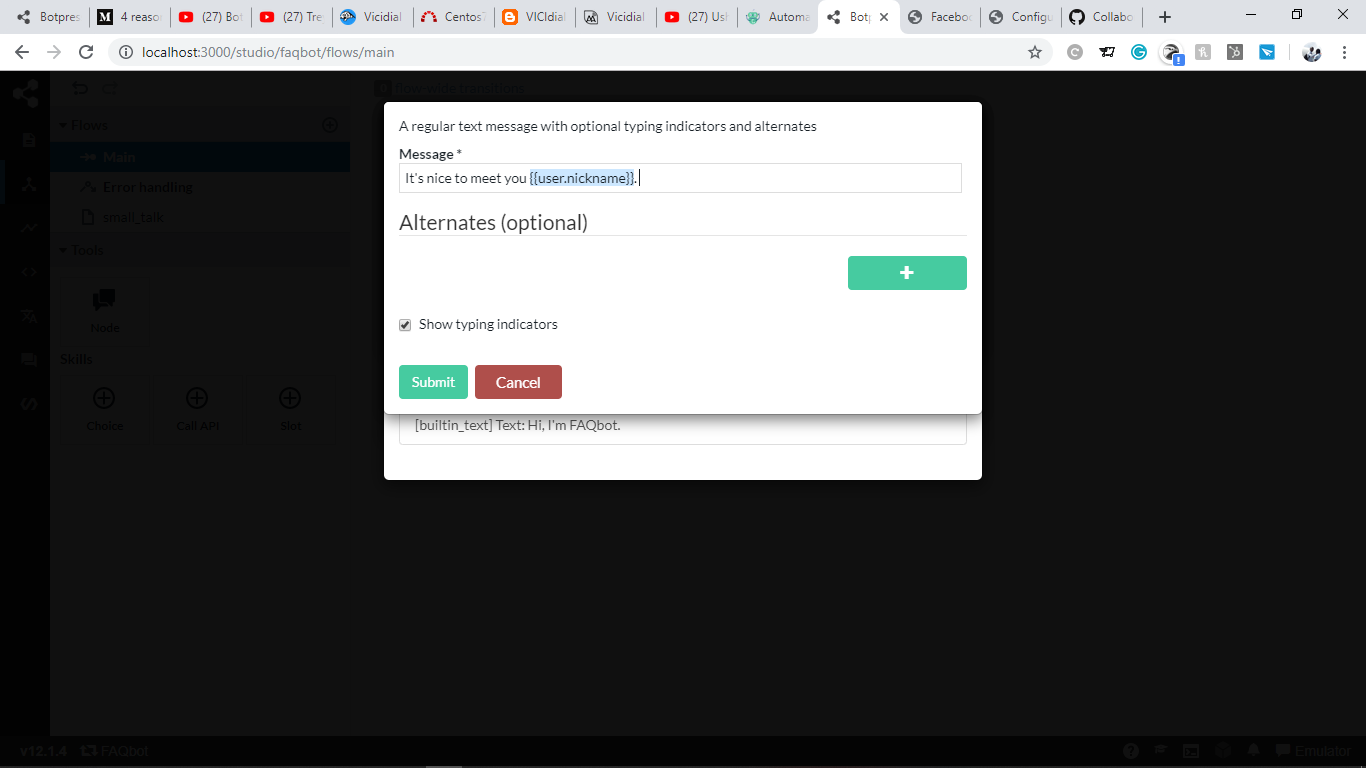
Now, from the left-side navigation pane, choose to insert a skill as choice.
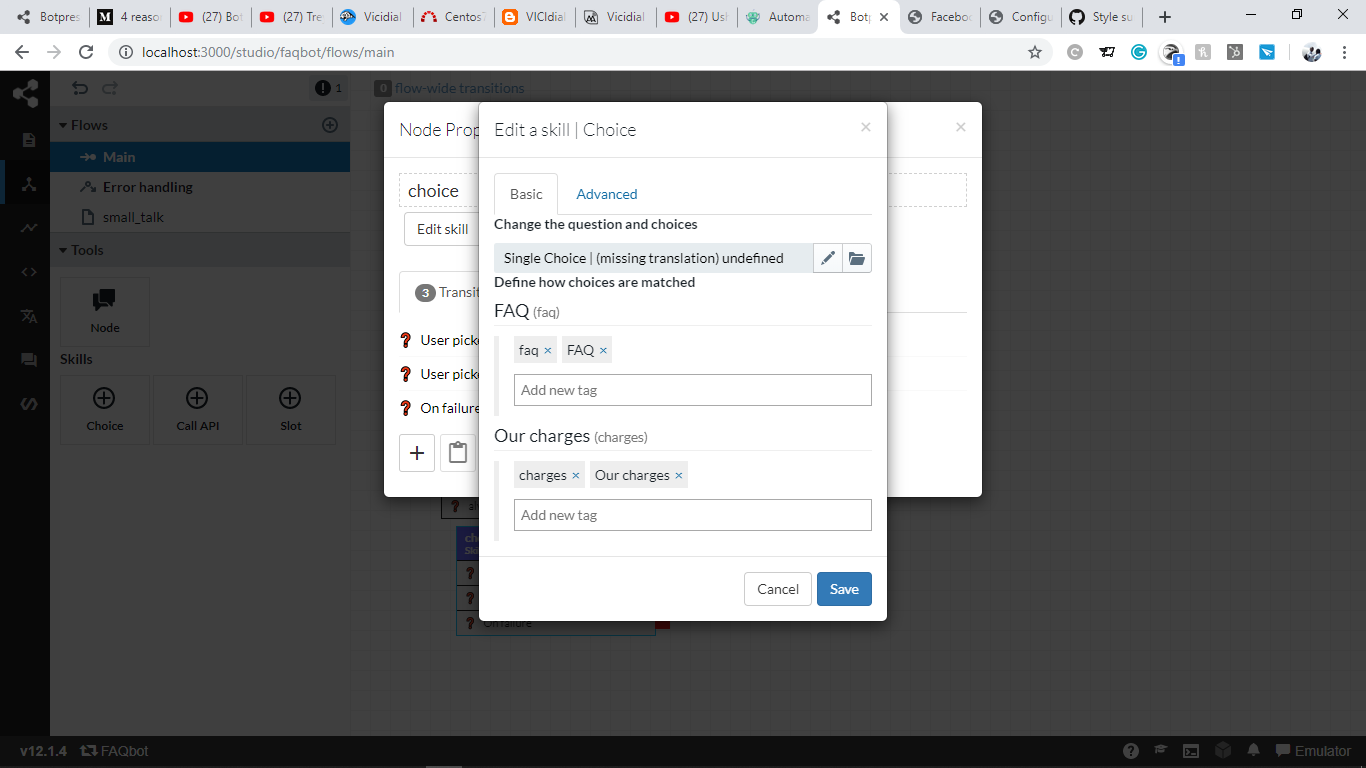
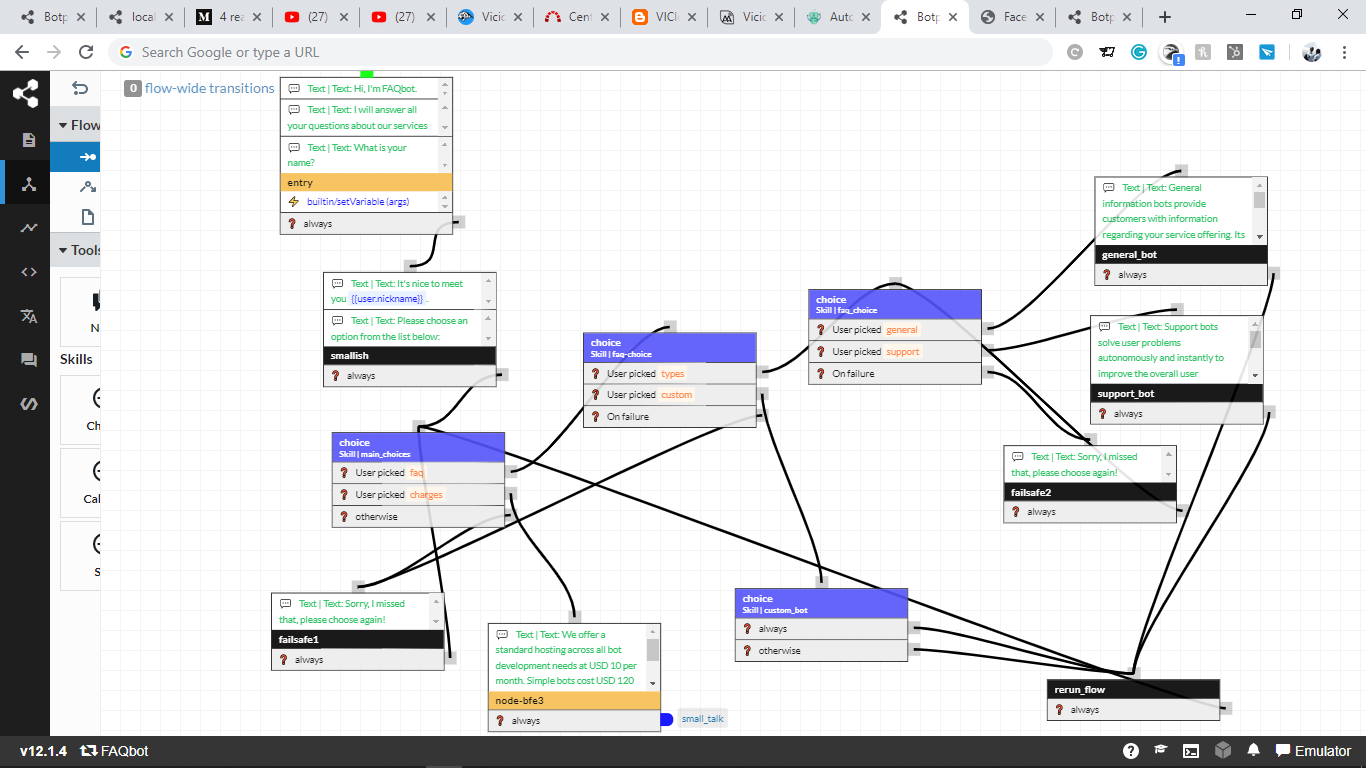
List of all nodes used, their transitions.
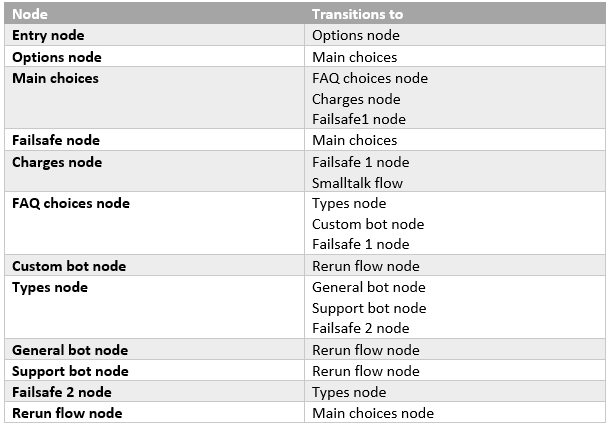
We will not concentrate on the small talk node as it was only meant to show how to transition from one flow to the other.
Now that we have a functional bot, we will use more concepts in Botpress to improve the accuracy of responses.
For this, we'll create the following intents:
Such intents will have flow-wide properties. When the intent is custom bot:
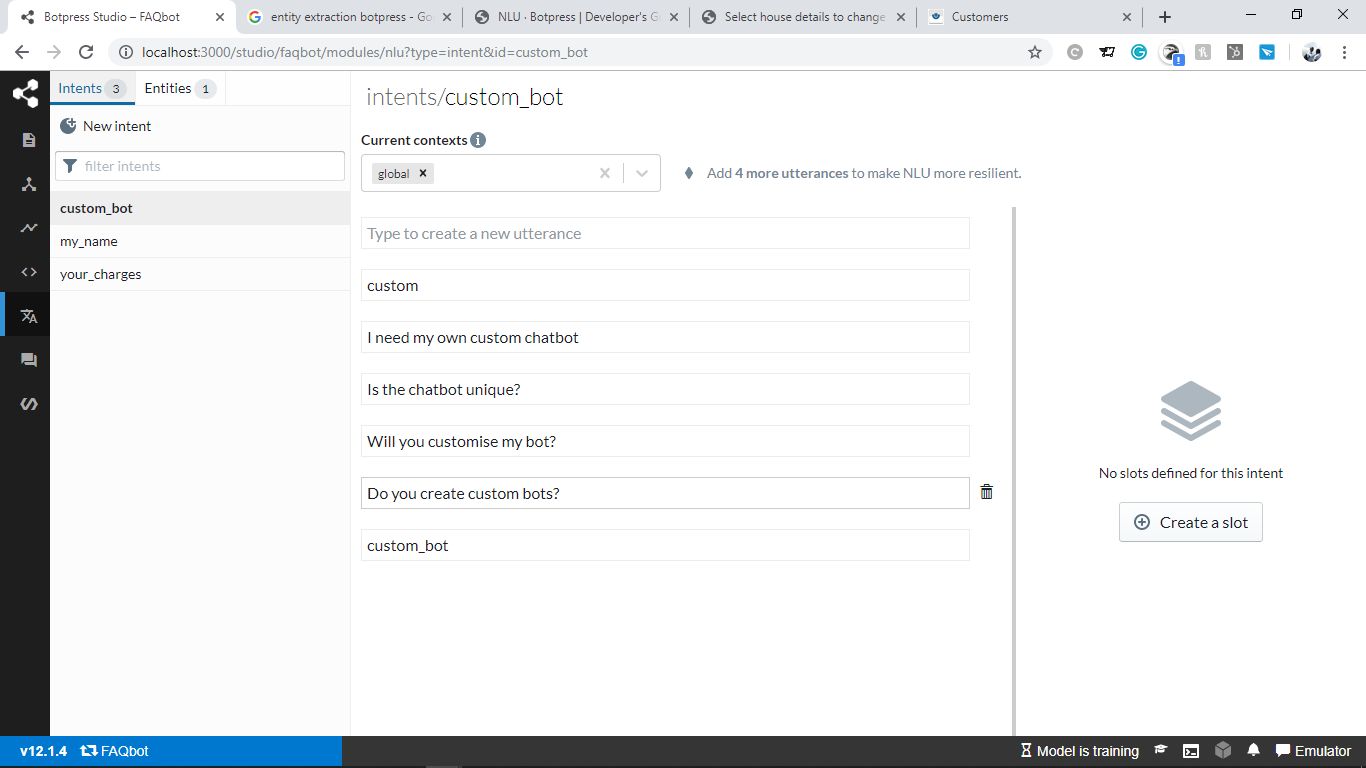
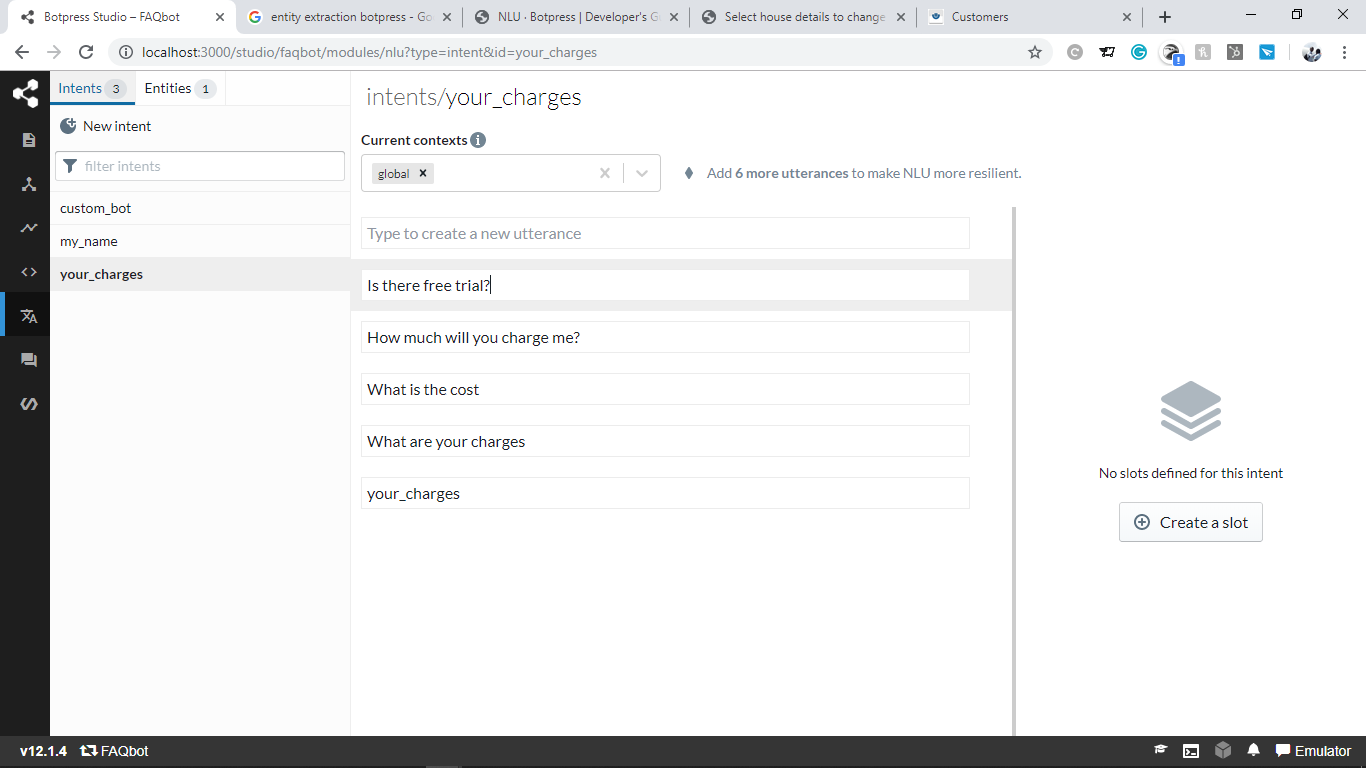
You need to include about five sample questions for the accurate training of the natural language understanding of your system. Below is an example of when the intent is understanding the charges:
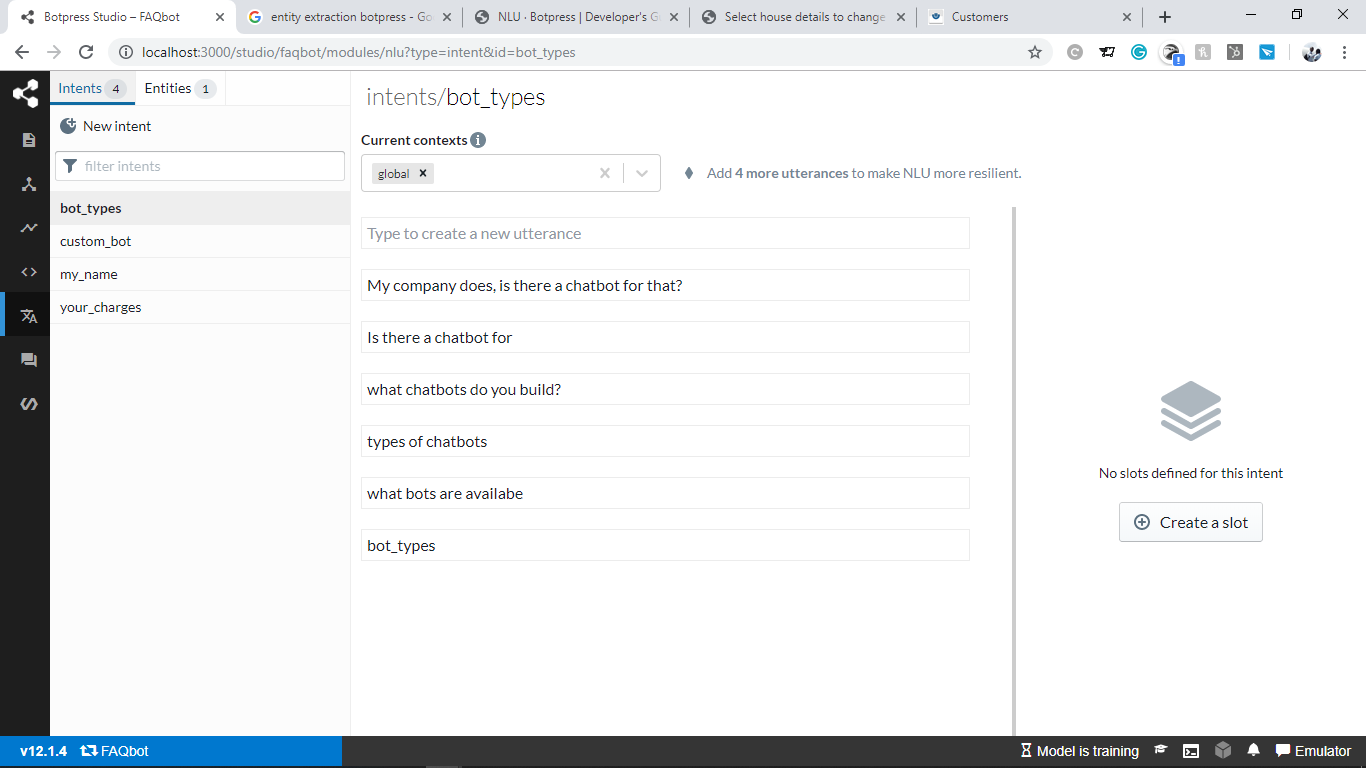
And, here's another example of when the intent is asking about the types of bots available:
Now, we need to create nodes and have them as flow-wide transitions so that we can direct the user to the specific node immediately when a certain type of question is detected, for example.
Create a new node, and under transitions, select intents and the node to transition to:
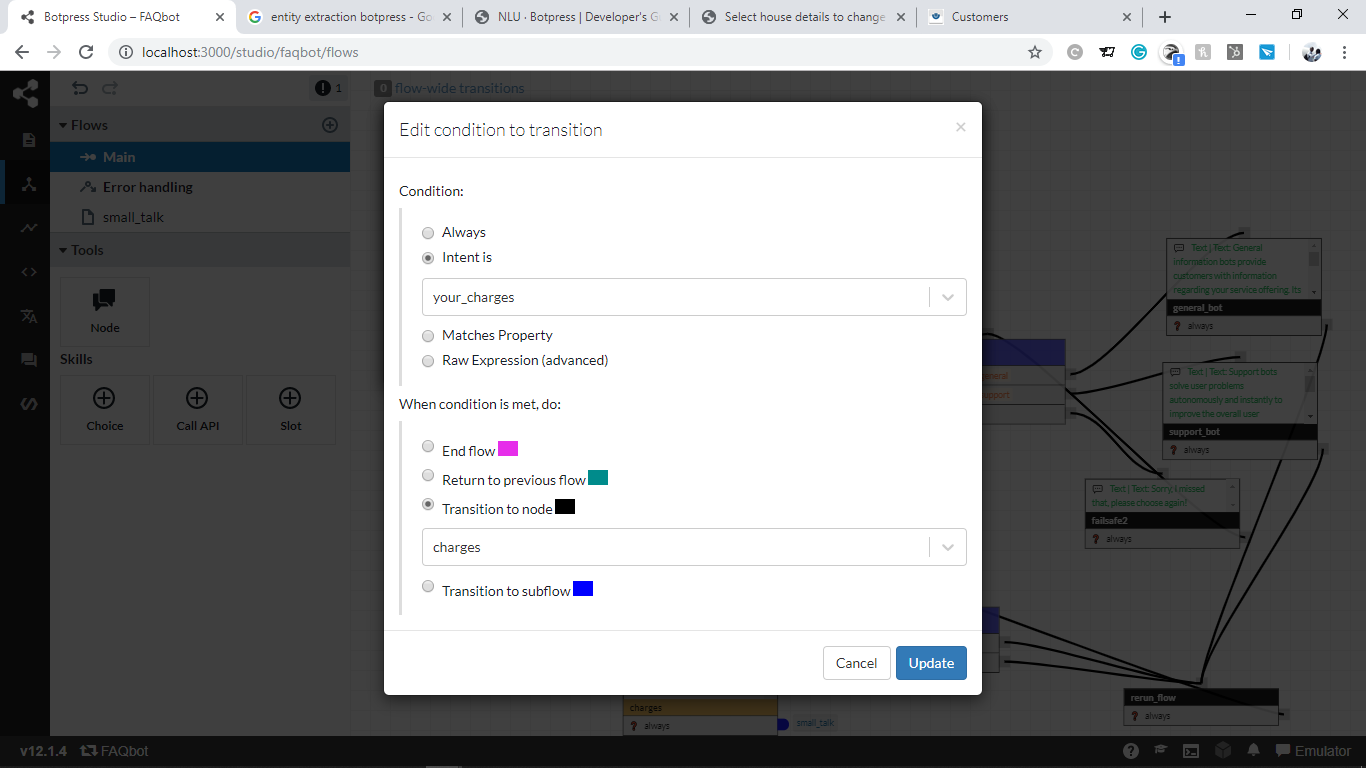
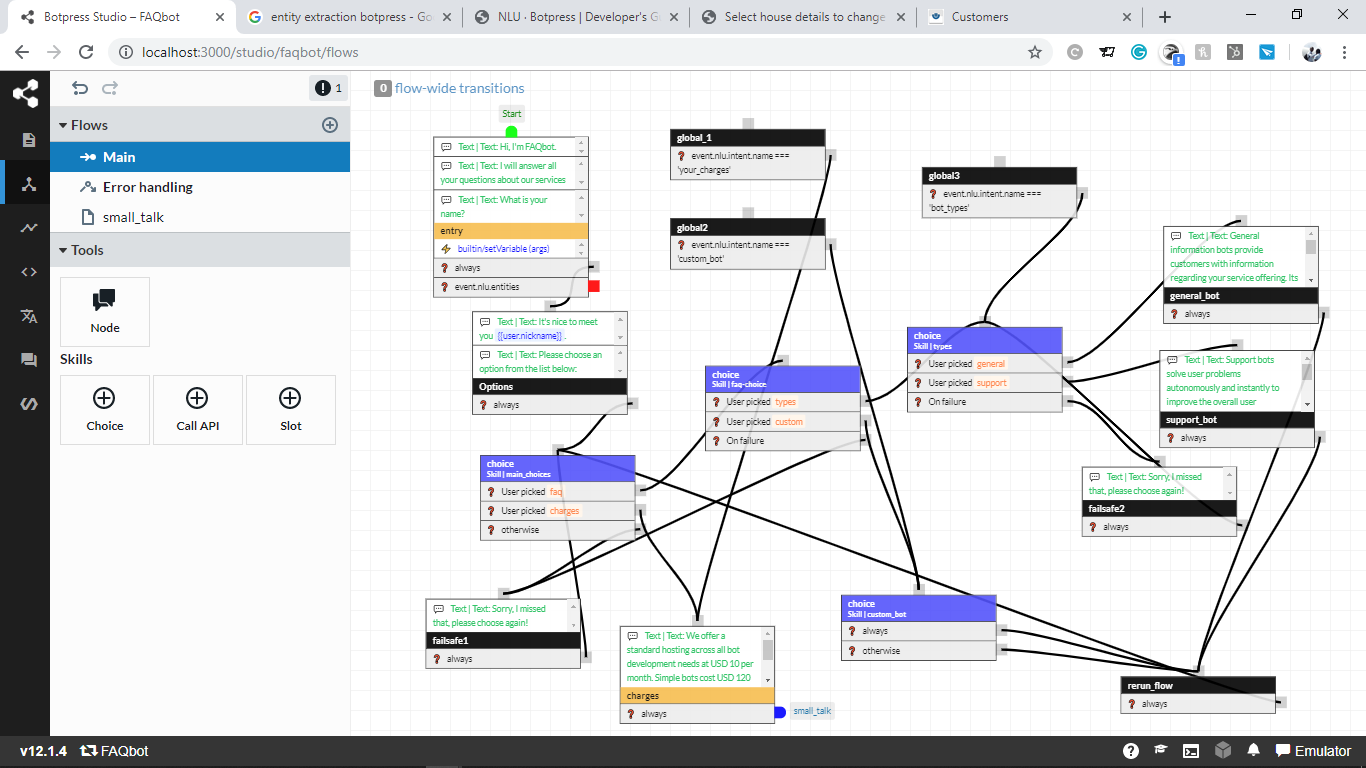
Repeat with all the intents we created. Here's my main flow currently:
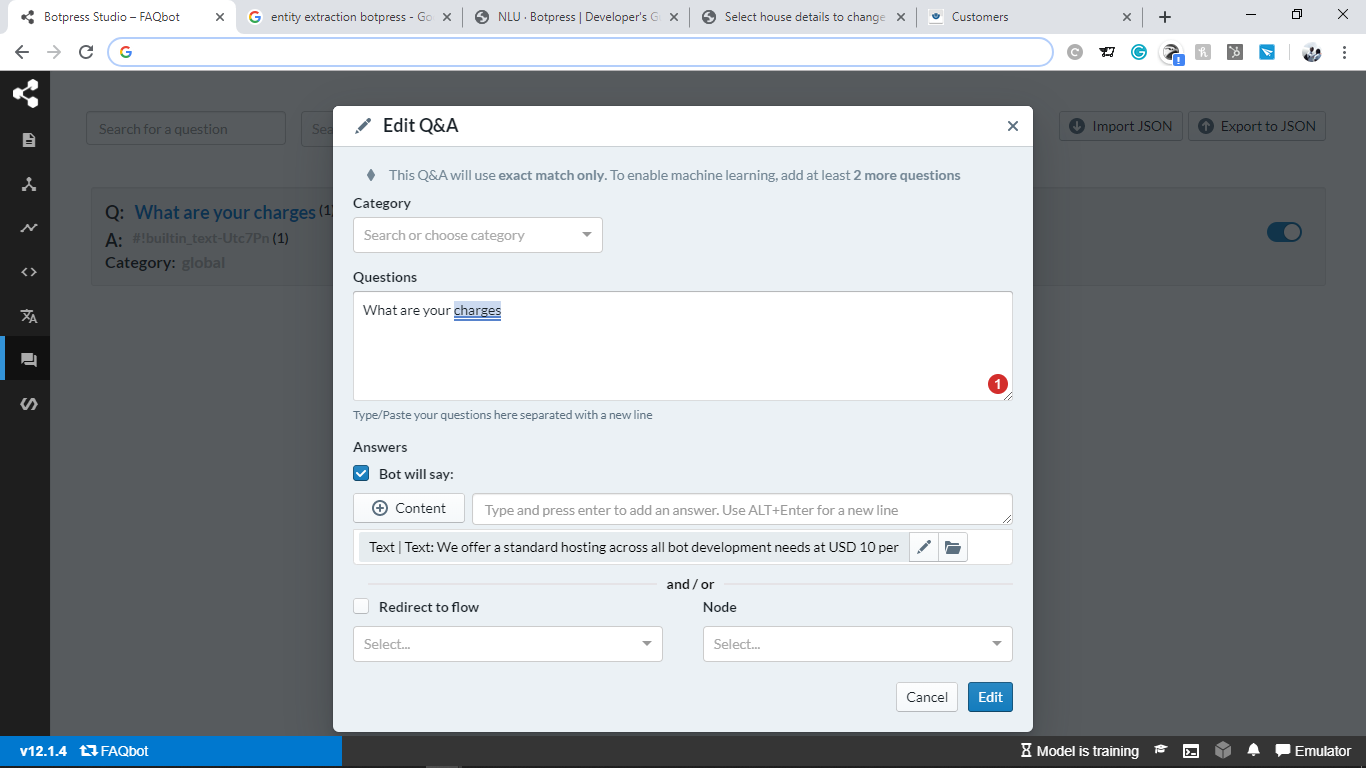
You could further create a questions-and-answers (QNA) list with a set of questions and possible answers to further anticipate your user's questions.
One helpful tip is to prompt the user with a statement to be able to control the conversation flow. That way you can ensure that the user take full advantage of the conversation you have prepared.
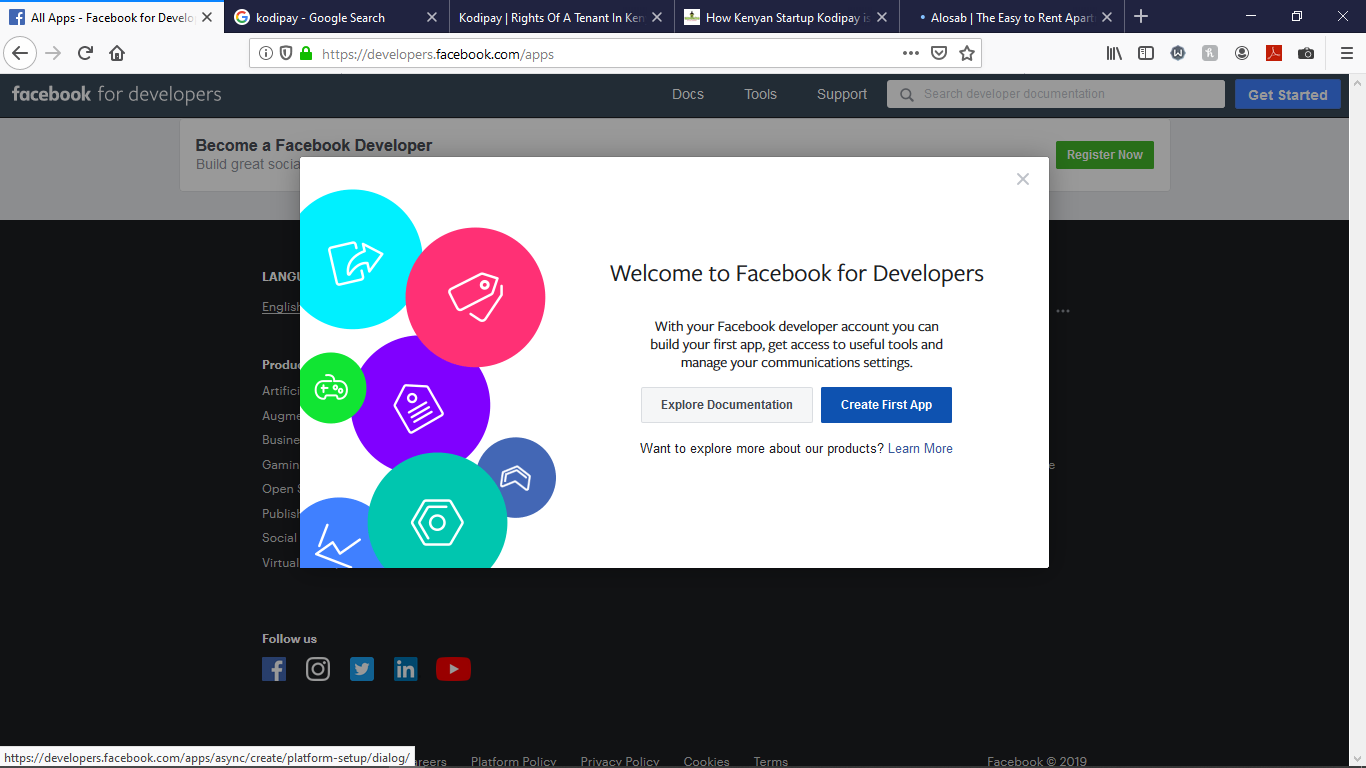
Now that we've completed all of the previous steps, it's time to integrate our chatbot with Facebook messenger. So, to do this, head over to https://developers.facebook.com/apps and register for an account, then create your first app:
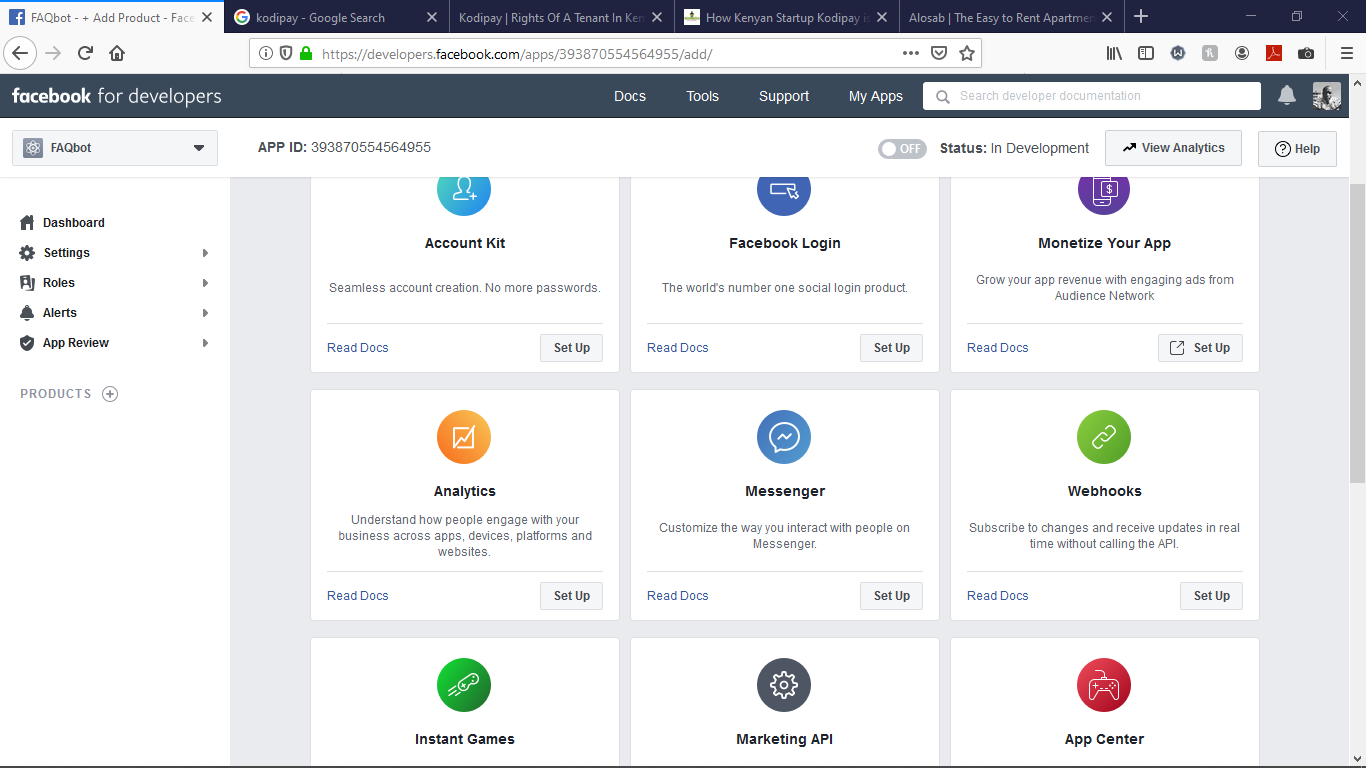
Create a Facebook page if you do not already have one. Next, select the option to set up Messenger:
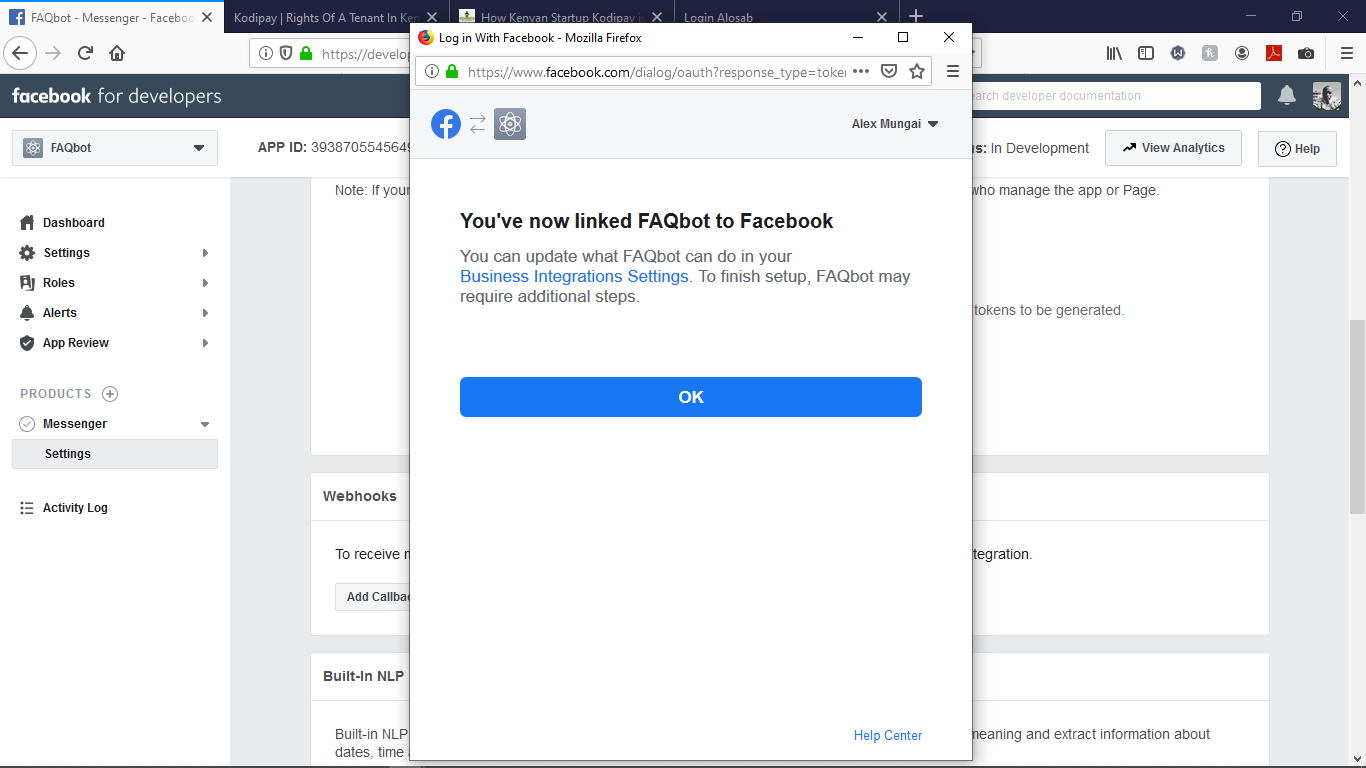
Next, add a page to manage.
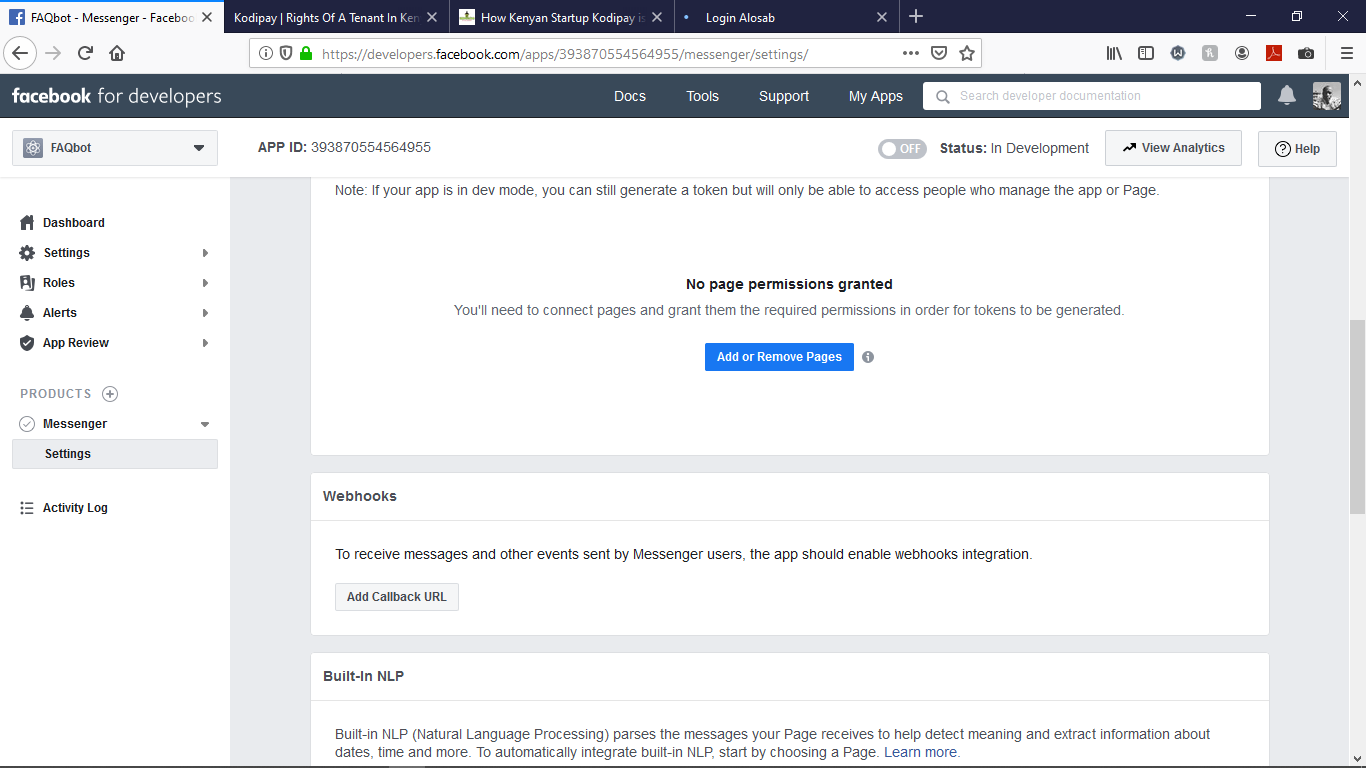
Once it's setup, you should see a screen like the one below:
Now we need to enable the Messenger channel on our Botpress server. To do this, stop the Botpress server and navigate to data > global > botpress.config.json.
"dialog": {
    "janitorInterval": "10s",
    "timeoutInterval": "2m",
    "sessionTimeoutInterval": "30m"
  },
  "logs": {
    "dbOutput": {
      "expiration": "2 weeks",
      "janitorInterval": "30s"
    },
    "fileOutput": {
      "enabled": false,
      "folder": "./",
      "maxFileSize": 10000
    }
  },
  "modules": [
    {
      "location": "MODULES_ROOT/analytics",
      "enabled": true
    },
    {
      "location": "MODULES_ROOT/basic-skills",
      "enabled": true
    },
    {
      "location": "MODULES_ROOT/builtin",
      "enabled": true
    },
    {
      "location": "MODULES_ROOT/channel-messenger",
      "enabled": true
    },
    {
      "location": "MODULES_ROOT/channel-telegram",
      "enabled": true
    },
    {
      "location": "MODULES_ROOT/channel-web",
      "enabled": true
    },
  ],
Ensure that the channel-messenger is enabled by setting the flag to true. Additionally, enable external URL in the same file. You can do this with the following code:
"$schema": "../botpress.config.schema.json",
  "httpServer": {
    "host": "localhost",
    "port": 3000,
    "backlog": 0,
    "externalUrl": "https://yourBotUrl.com",
    "bodyLimit": "100kb",
    "cors": {
      "enabled": true
    },
    "externalUrl": "https://yourBotUrl.com",
    "session": {
      "enabled": false,
      "maxAge": "1h"
    },
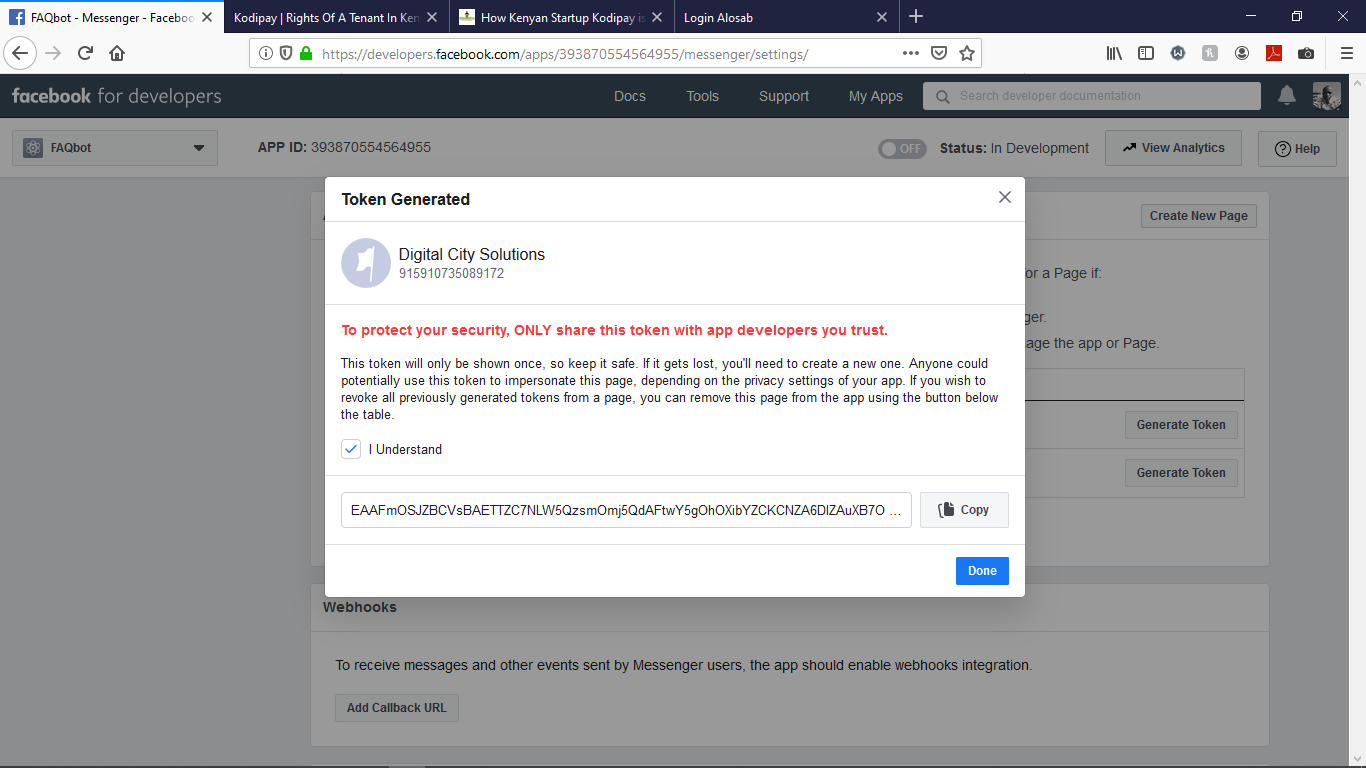
Now, generate a token for the page that you want to access.
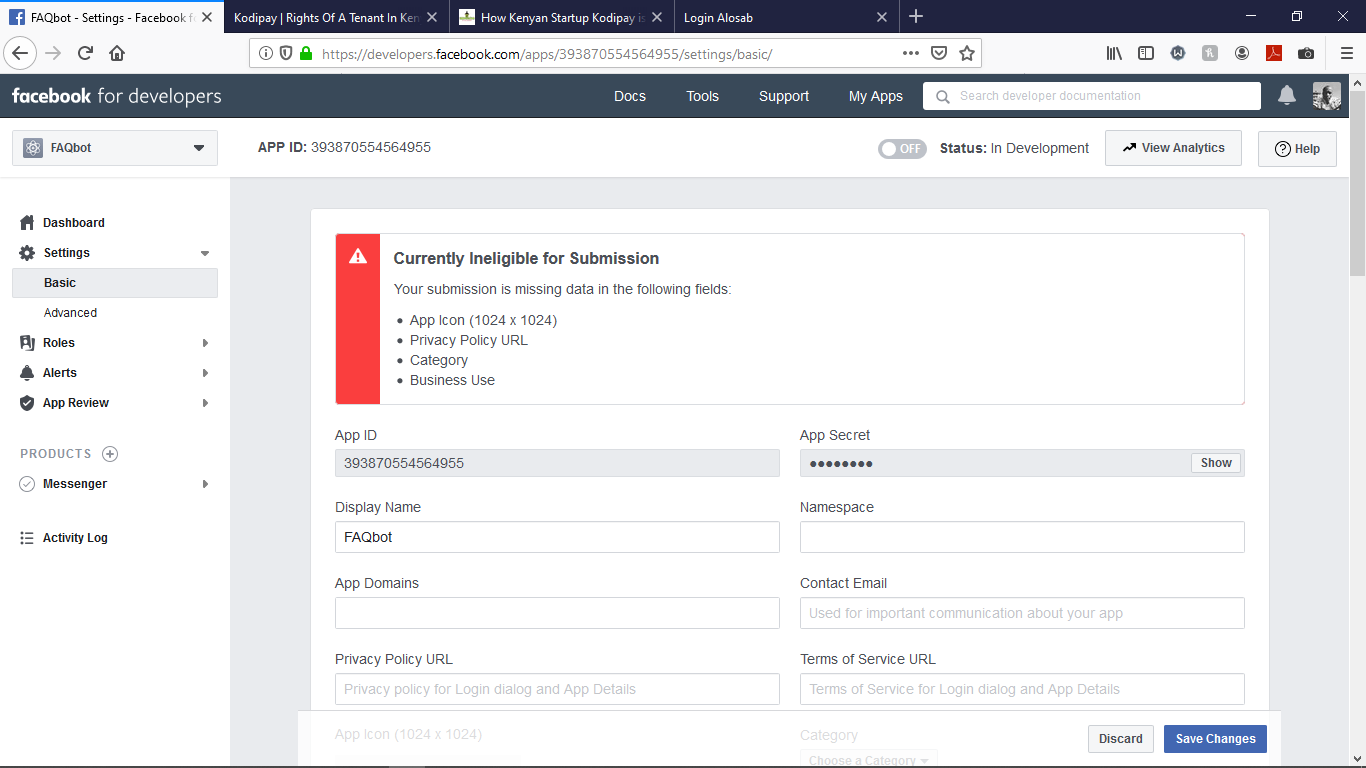
Next, navigate to settings > basic and obtain the app secret.
Next, head over to password generator and generate some random string to be used as a verifyToken. Then, restart the server so that it generates a config file for channel-messenger, and then, last, navigate to data > global > config > channel-messenger.json.
{
  "$schema": "../../assets/modules/channel-messenger/config.schema.json",
  "enabled": true,
  "appSecret": true,
  "verifyToken": true,
  "accessToken": true,
  "persistentMenu": []
}
Save the changes, and then access your bot config under data > bots > bot_id. There you'll need to create a new directory named config. Once created, open it and create a channel-messenger.json file. With that all done, here's our path: data > bots > bot_id > config > channel-messenger.json. Now, copy the contents of the global channel-messenger.json file and prefix the $schema property with an additional ../ like so:
{
  "$schema": "../../../assets/modules/channel-messenger/config.schema.json"
  "enabled": true,
  "appSecret": true,
  "verifyToken": true,
  "accessToken": true,
  "persistentMenu": []
}
Save the changes and restart the server again.
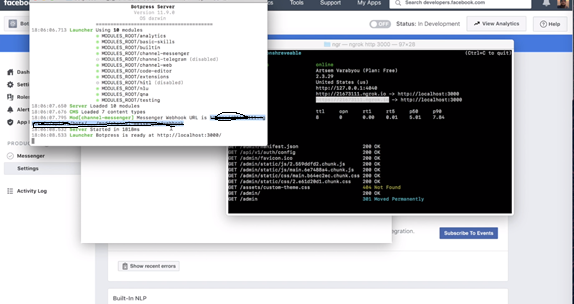
The server should generate a webhook URL for your channel-messenger as shown above. Head back to where your Facebook developer tab is opened and select Webhook.
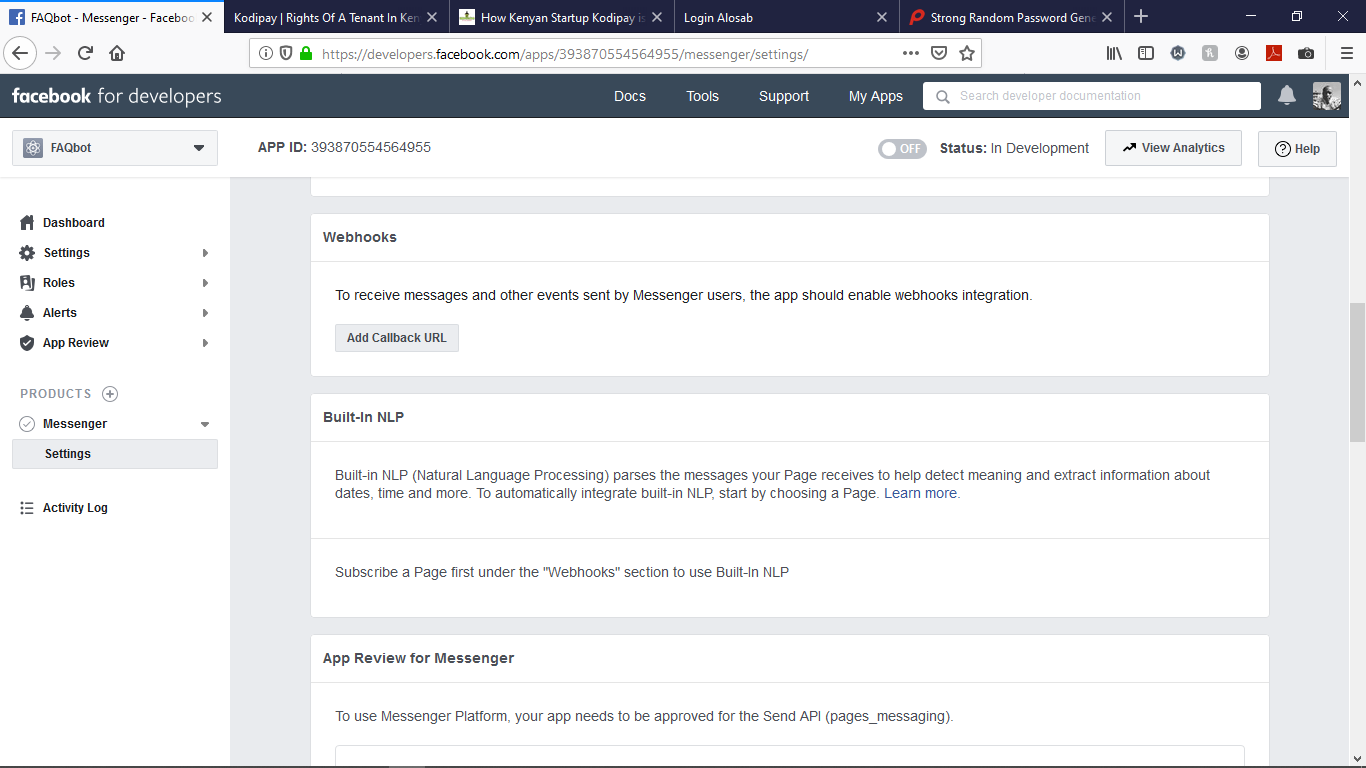
Set the callback-URL generated by Botpress and the verifyToken we generated for the channel-messenger config earlier as requested. Finally, set the permissions to allow the app to send and receive messages.
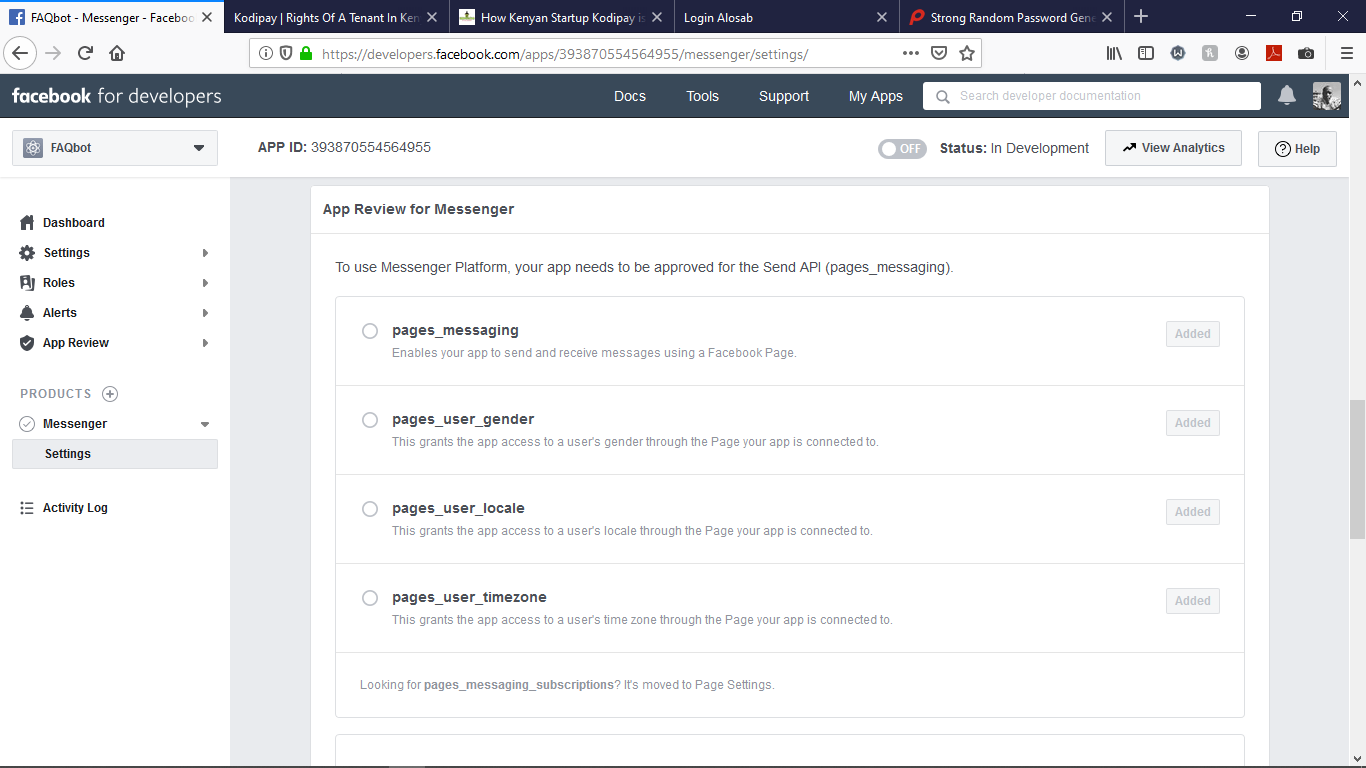
The setup is now complete. You can test the new bot on Facebook.
In this tutorial, we went through the process of creating an FAQ bot using Botpress and then integrated it with Facebook Messenger. We also explored the concept of Flows, Intents, Nodes, Choices and QNA in detail. These are the fundamental building blocks of any AI- powered chatbot. When creating chatbots, prepare your agent in a manner that builds trust with the end users. It is equally important to anticipate sudden changes in the flow using flow-wide transitions. In the next and final article of our Botpress series, which you can find here, we will explore more Botpress concepts in detail.
Do you have an Alibaba Cloud account? Sign up for an account and try over 40 products for free. This deal is worth up to $1300. Get Started with Alibaba Cloud to learn more.
The views expressed herein are for reference only and don't necessarily represent the official views of Alibaba Cloud.

2,593 posts | 792 followers
FollowAlibaba Clouder - March 16, 2021
Alibaba Clouder - May 20, 2020
Alibaba Clouder - May 20, 2020
Alibaba Clouder - May 20, 2020
Alibaba Clouder - July 10, 2018
Lee Li - April 2, 2021

2,593 posts | 792 followers
Follow Web Hosting Solution
Explore Web Hosting solutions that can power your personal website or empower your online business.
Learn More MaxCompute
Conduct large-scale data warehousing with MaxCompute
Learn More AI Acceleration Solution
Accelerate AI-driven business and AI model training and inference with Alibaba Cloud GPU technology
Learn More YiDA Low-code Development Platform
A low-code development platform to make work easier
Learn MoreMore Posts by Alibaba Clouder