By Victor Mak, Alibaba Cloud Solution Architect
Alibaba Cloud Identity as a Service (IDaaS) is a centralized platform that provides management over identities, permissions, and applications for enterprise users. You can use this service to integrate and manage identities in your office administration system, business system, and third-party SaaS systems deployed on-premises or on the cloud. This way, you can access all applications and services with one account.
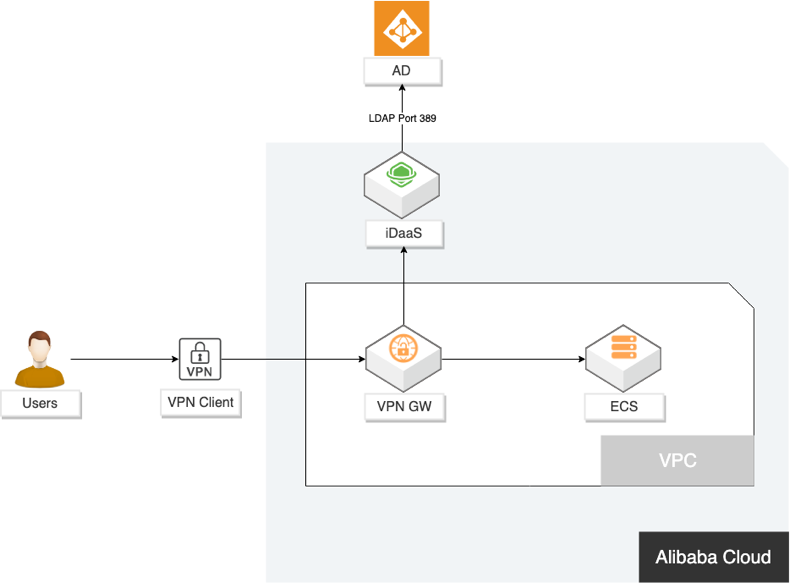
This article gives step-by-step directions about setting up a VPN Gateway with iDaaS and Active Directory. The following figure illustrates the integration architecture:
Before you begin, make sure:
In this tutorial, we will use 47.242.57.11 as the backend and 47.242.34.49 as the Active Directory:

Follow these steps to enable iDaaS in the iDaaS console and integrate with the Active Directory:
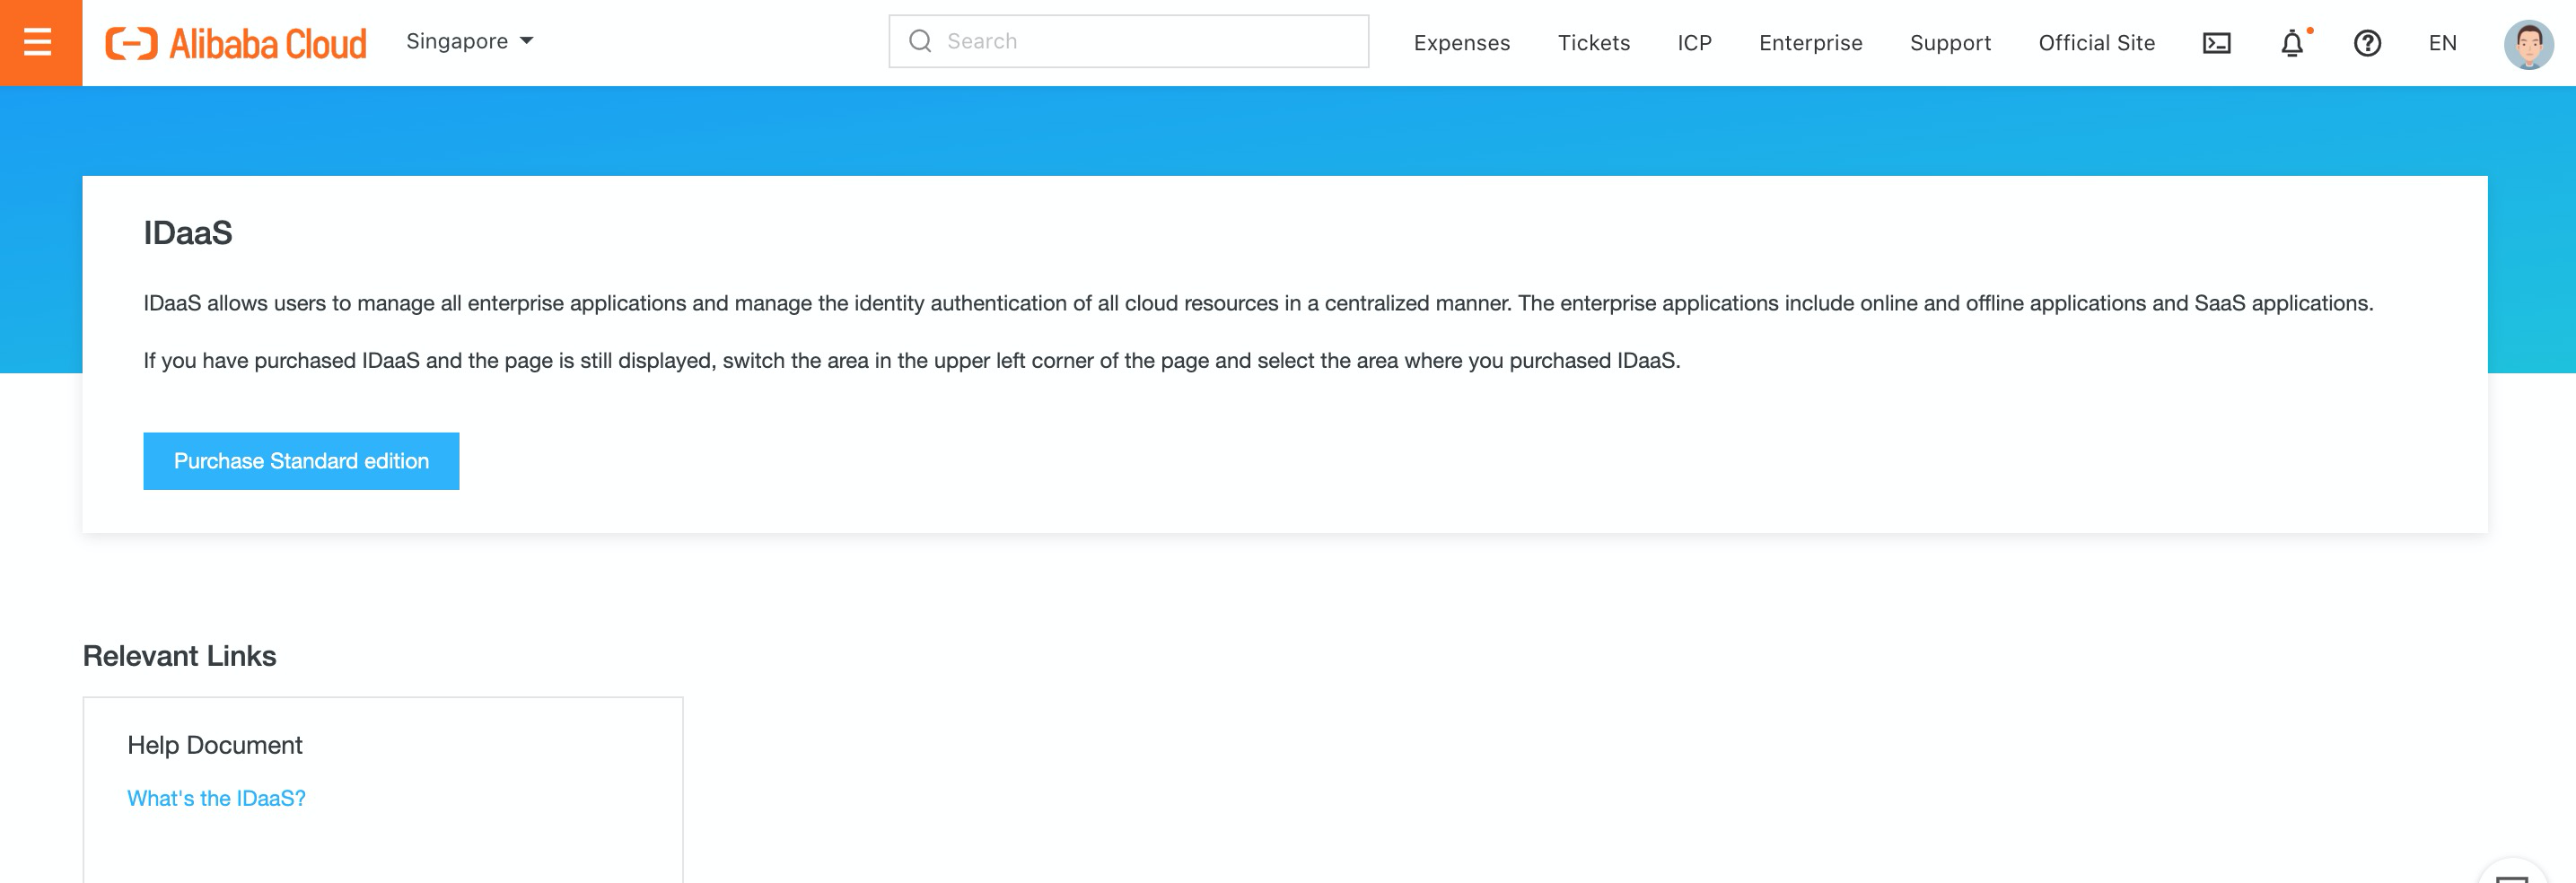
1. Log on to the Alibaba Cloud iDaaS console and click Purchase Standard edition:
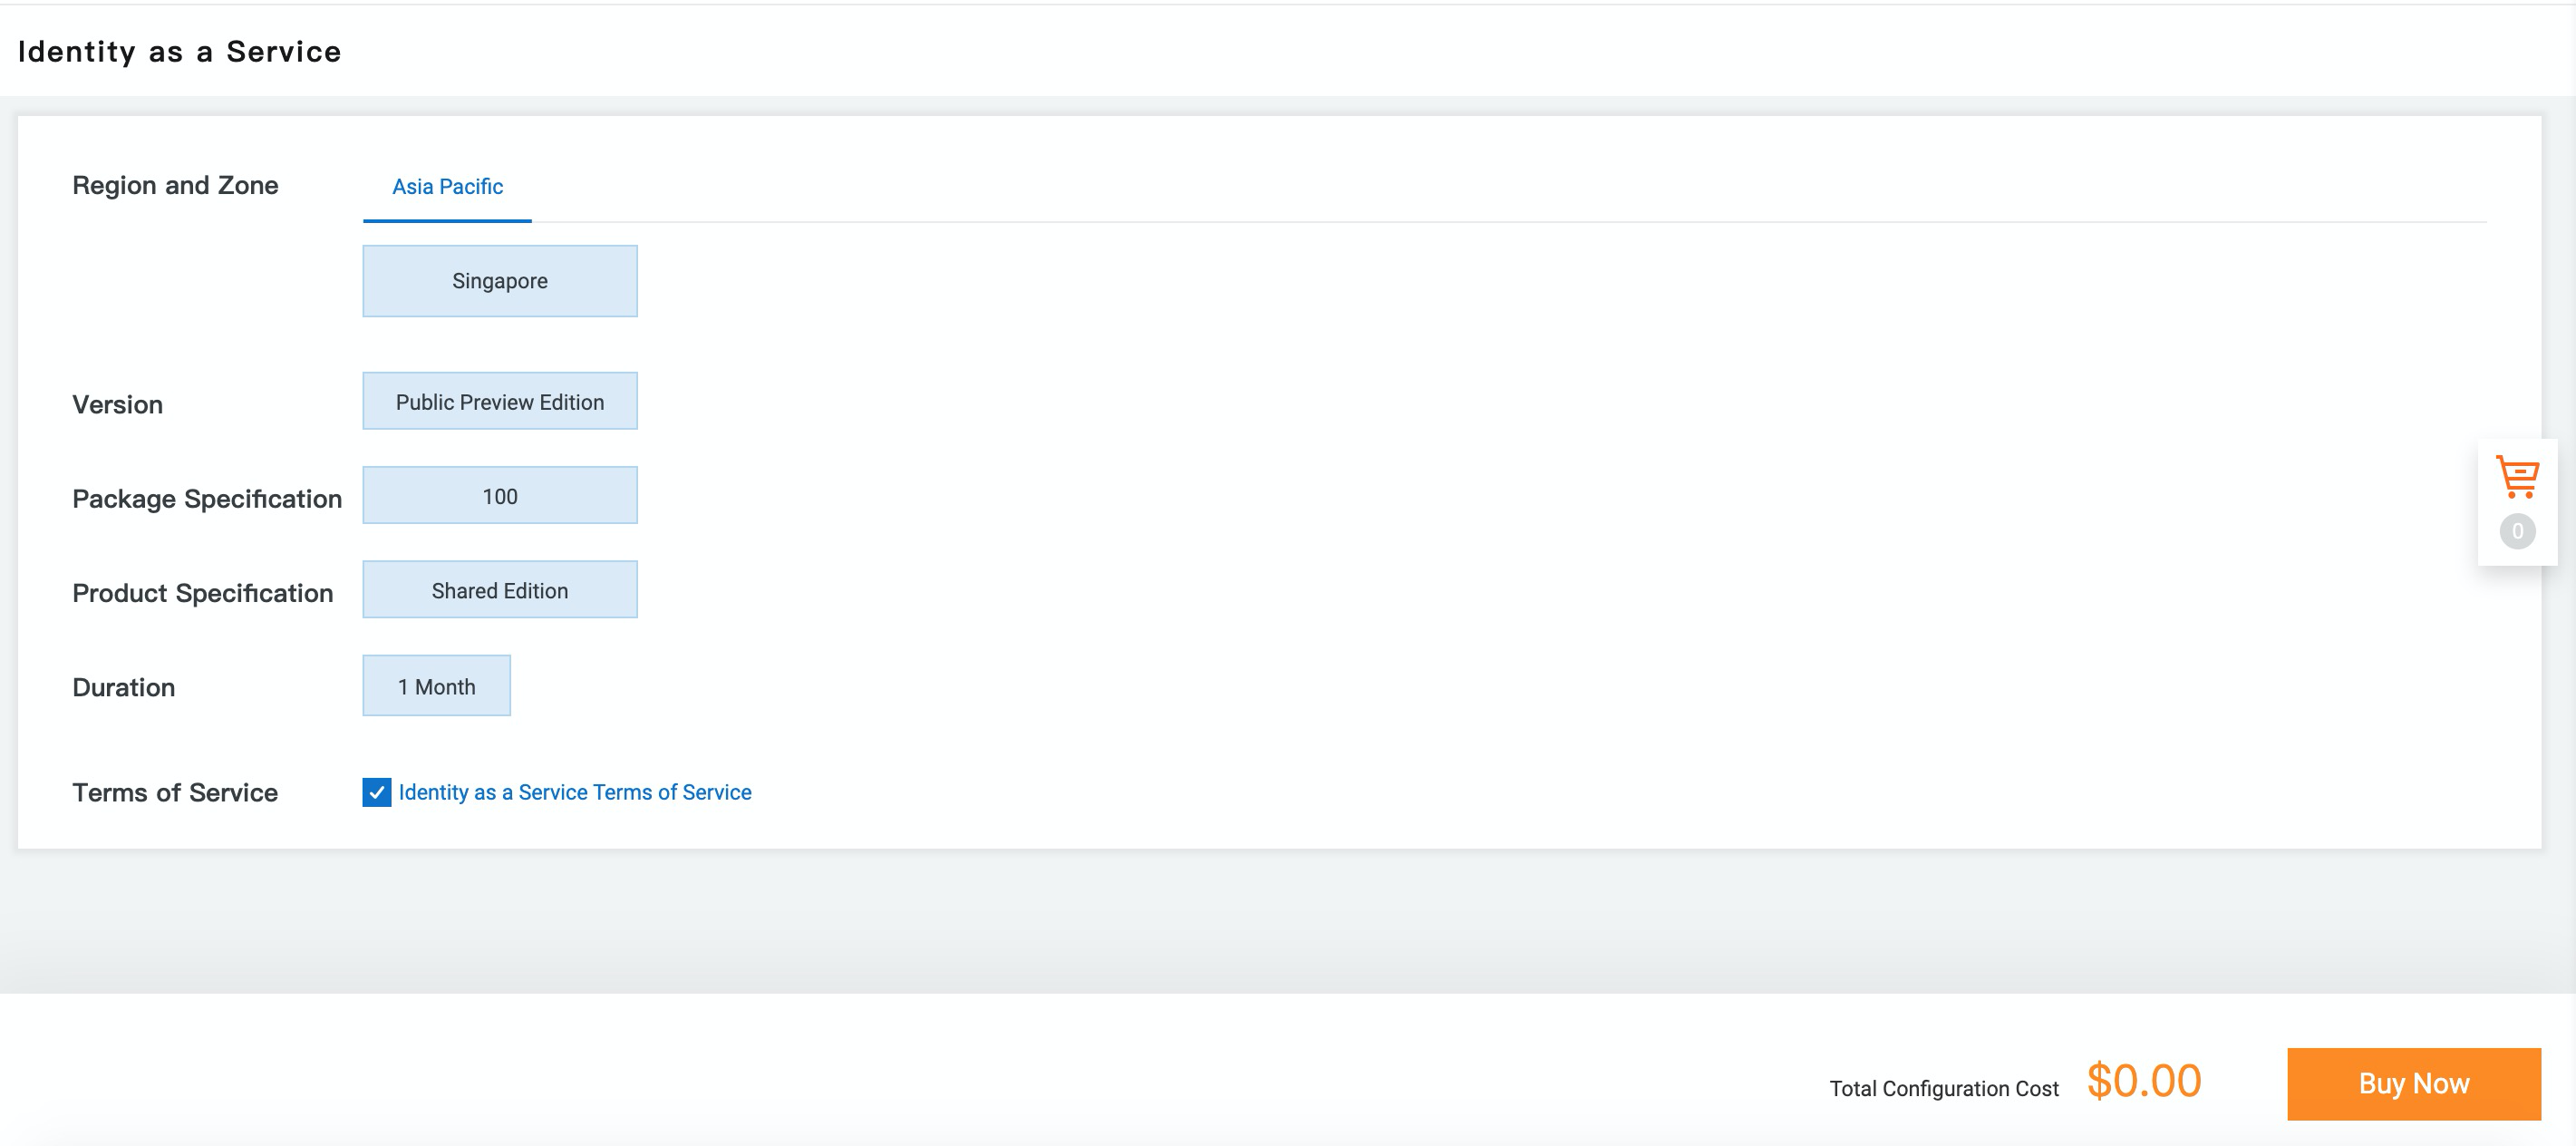
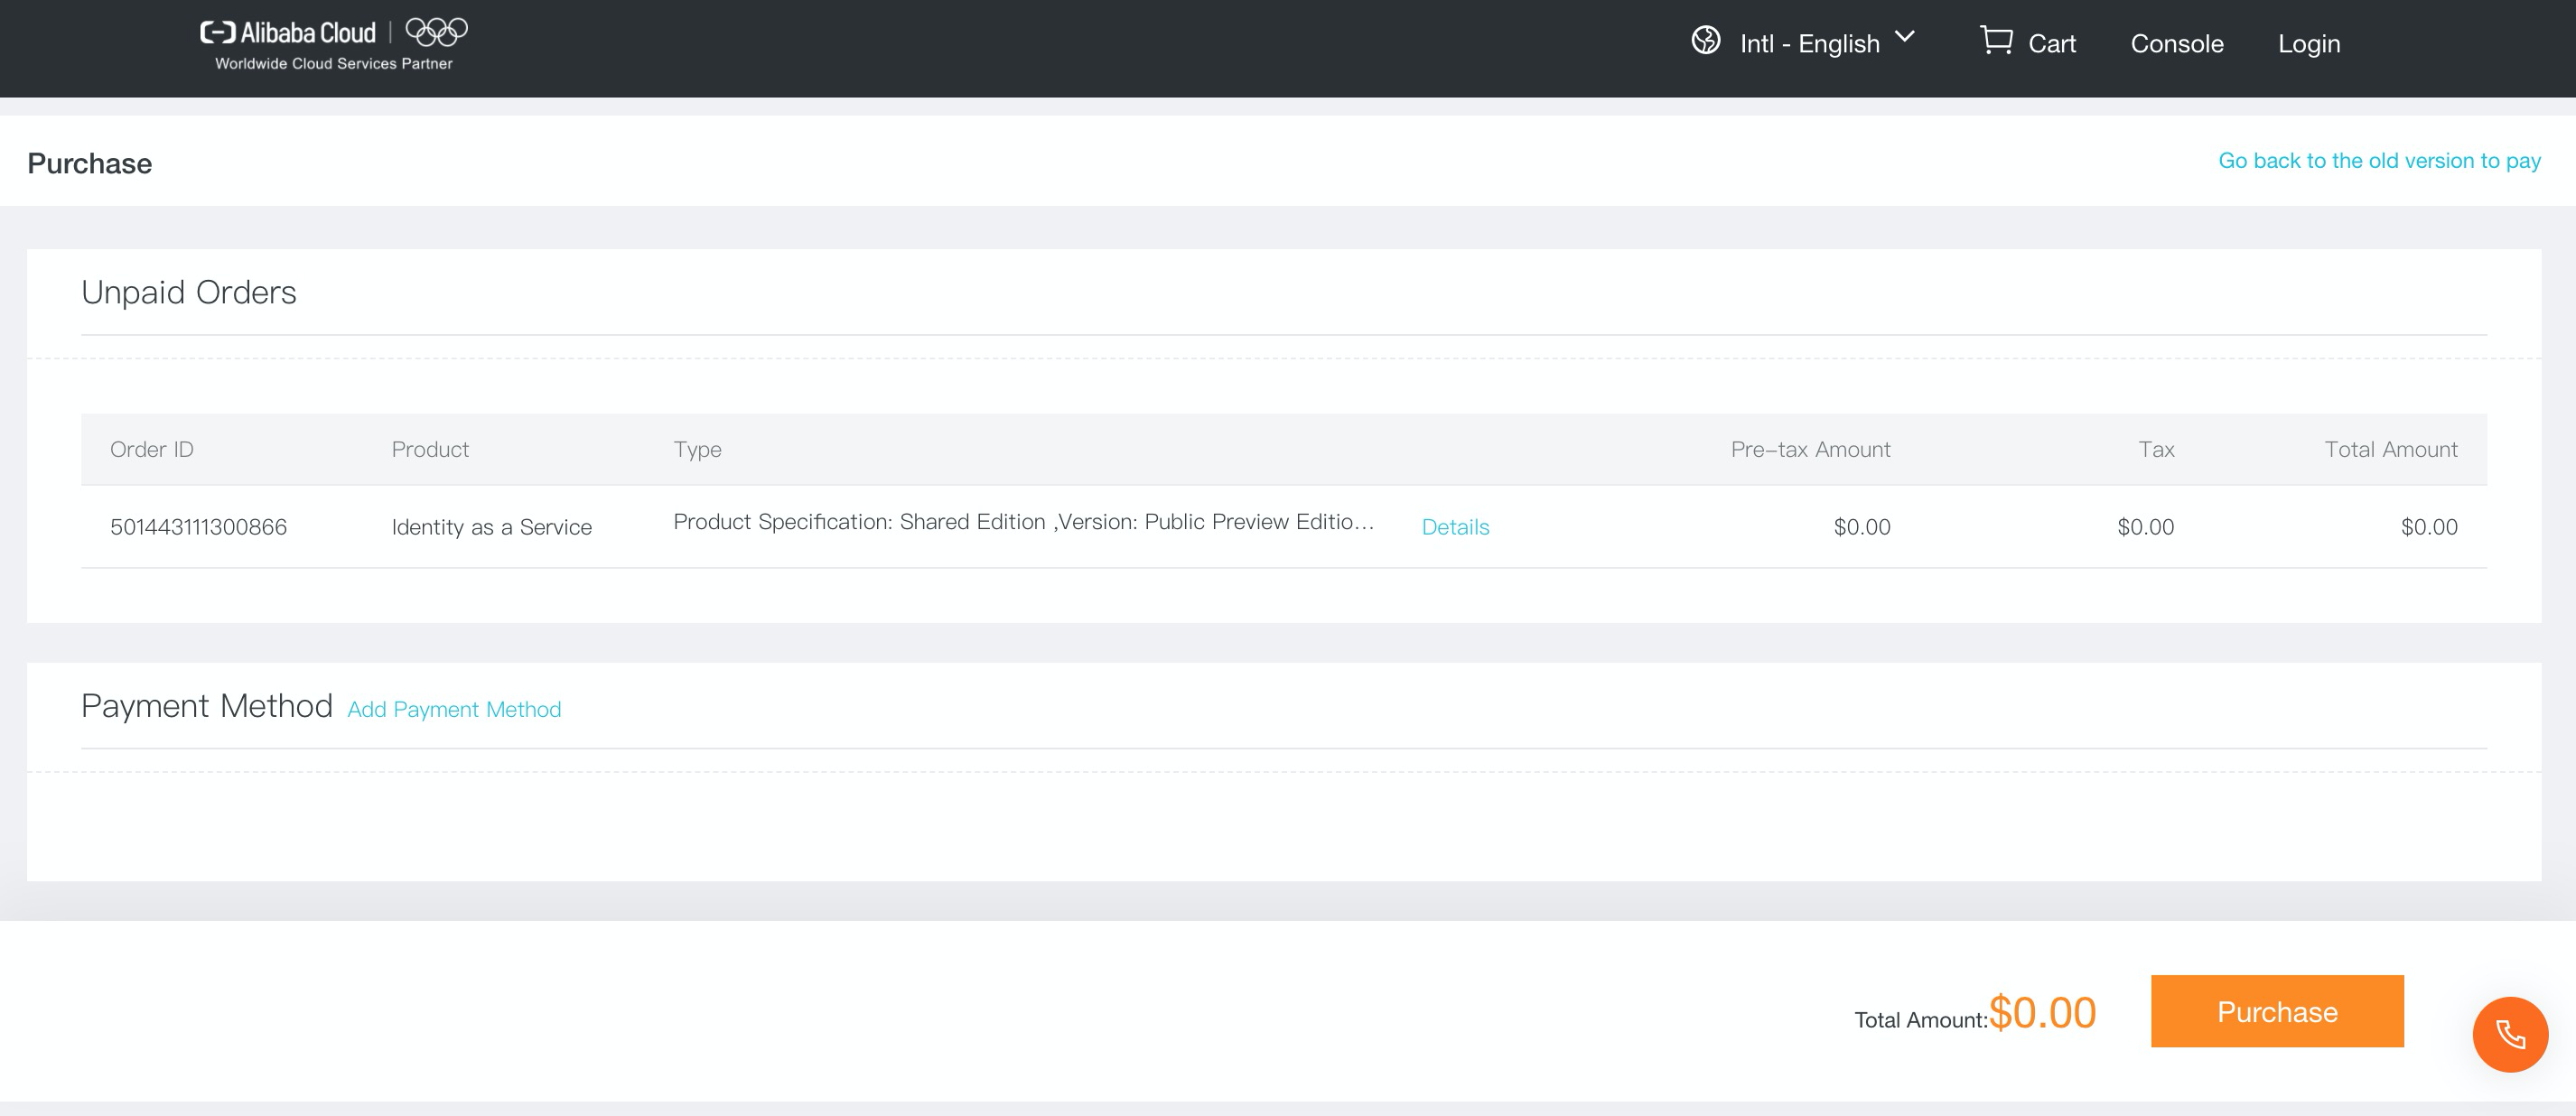
2. Since iDaaS is now in a public preview, click Buy Now and Purchase to enable iDaaS:
3. Once the iDaaS instance is ready, you can click Manage in the iDaaS console:

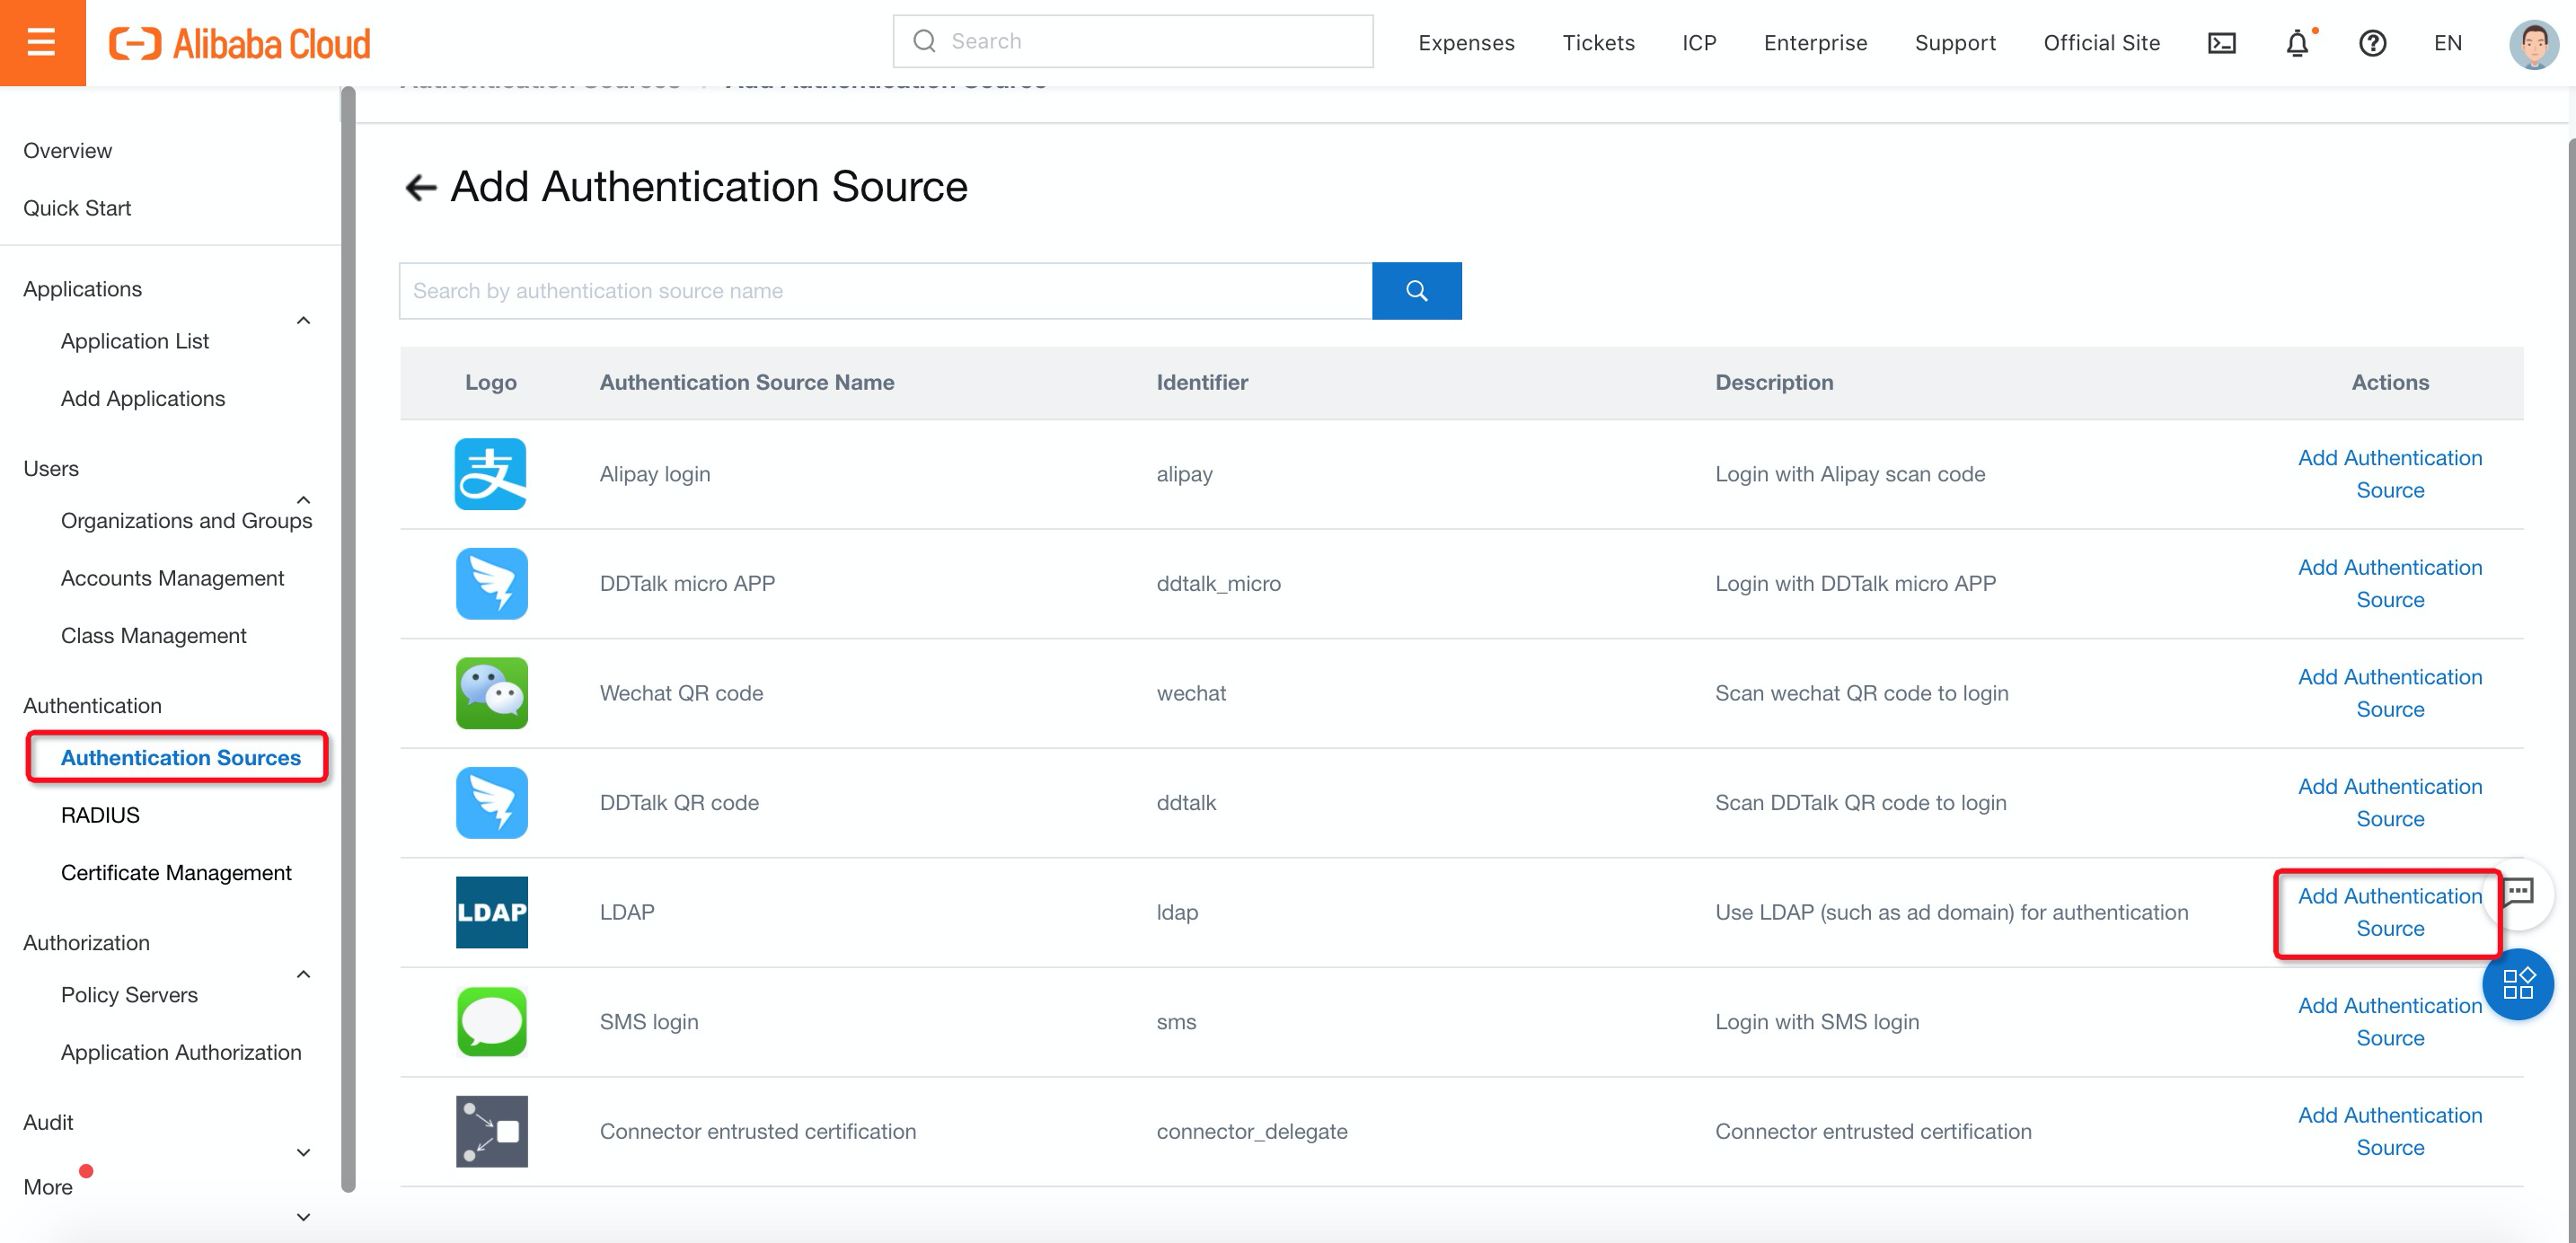
4. Navigate to Authentication Sources under Authentication, find LDAP, and click Add Authentication Source:
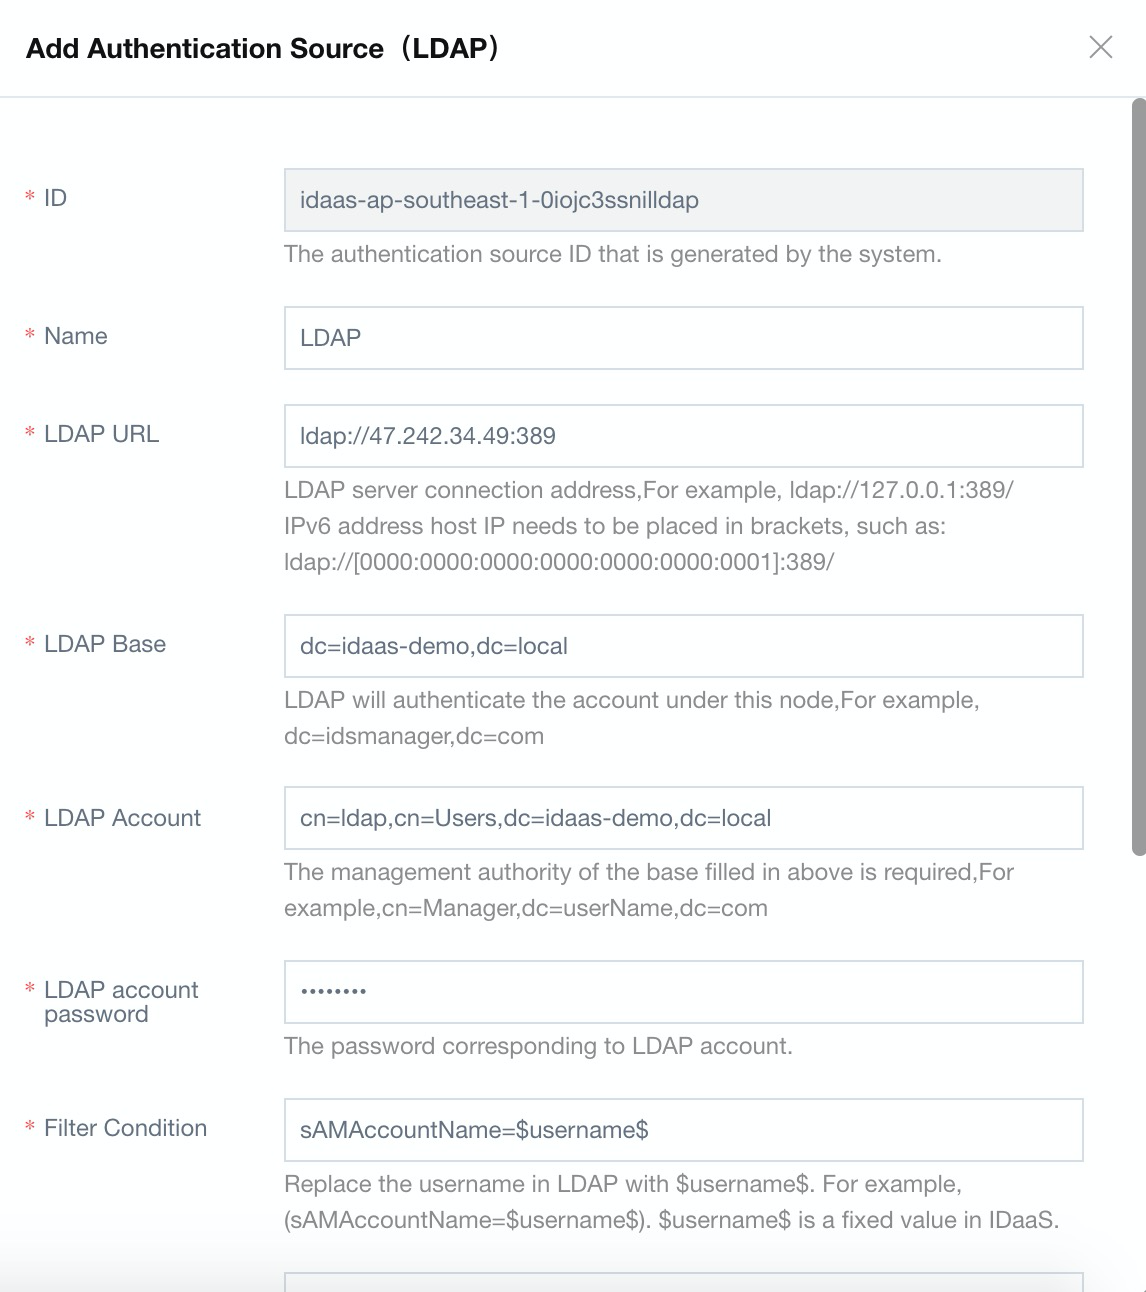
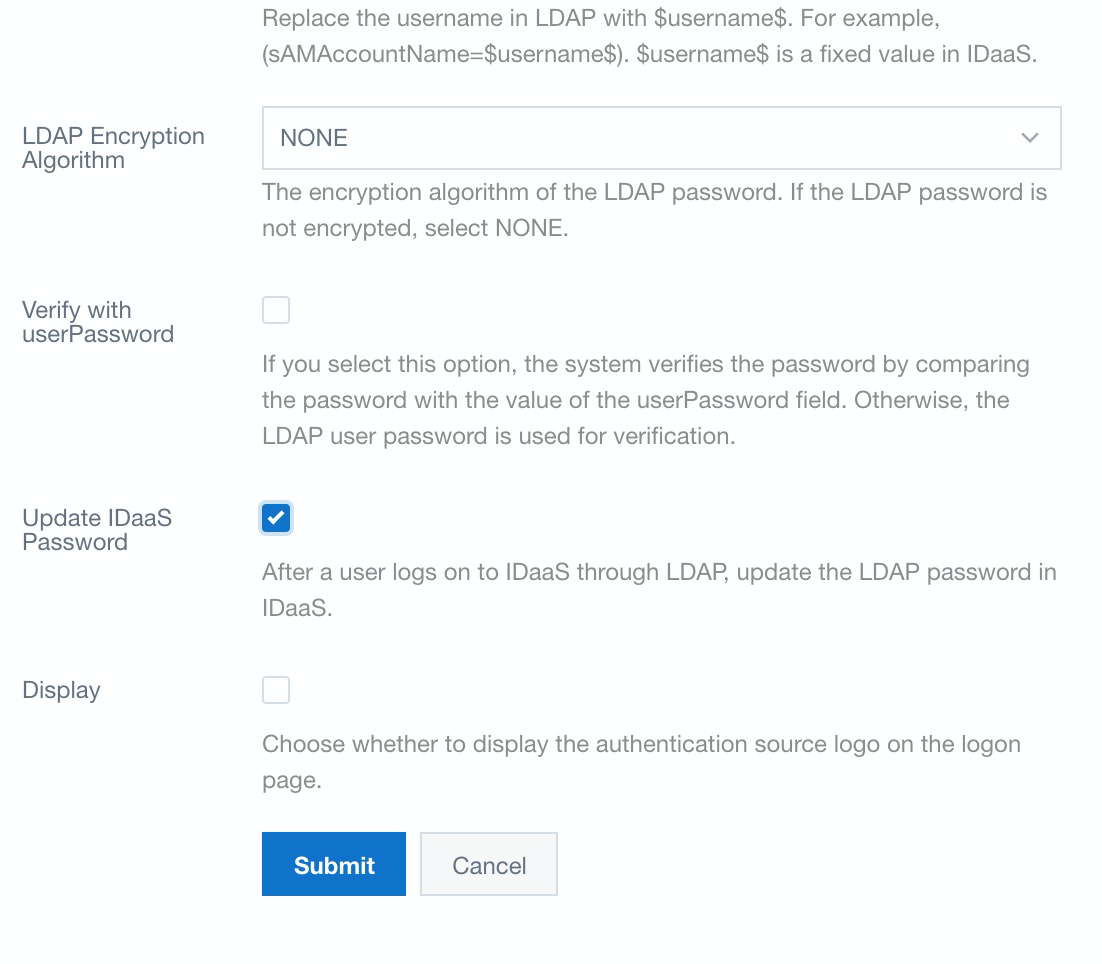
5. Fill in the LDAP information:
There is am LDAP configuration example shown below:
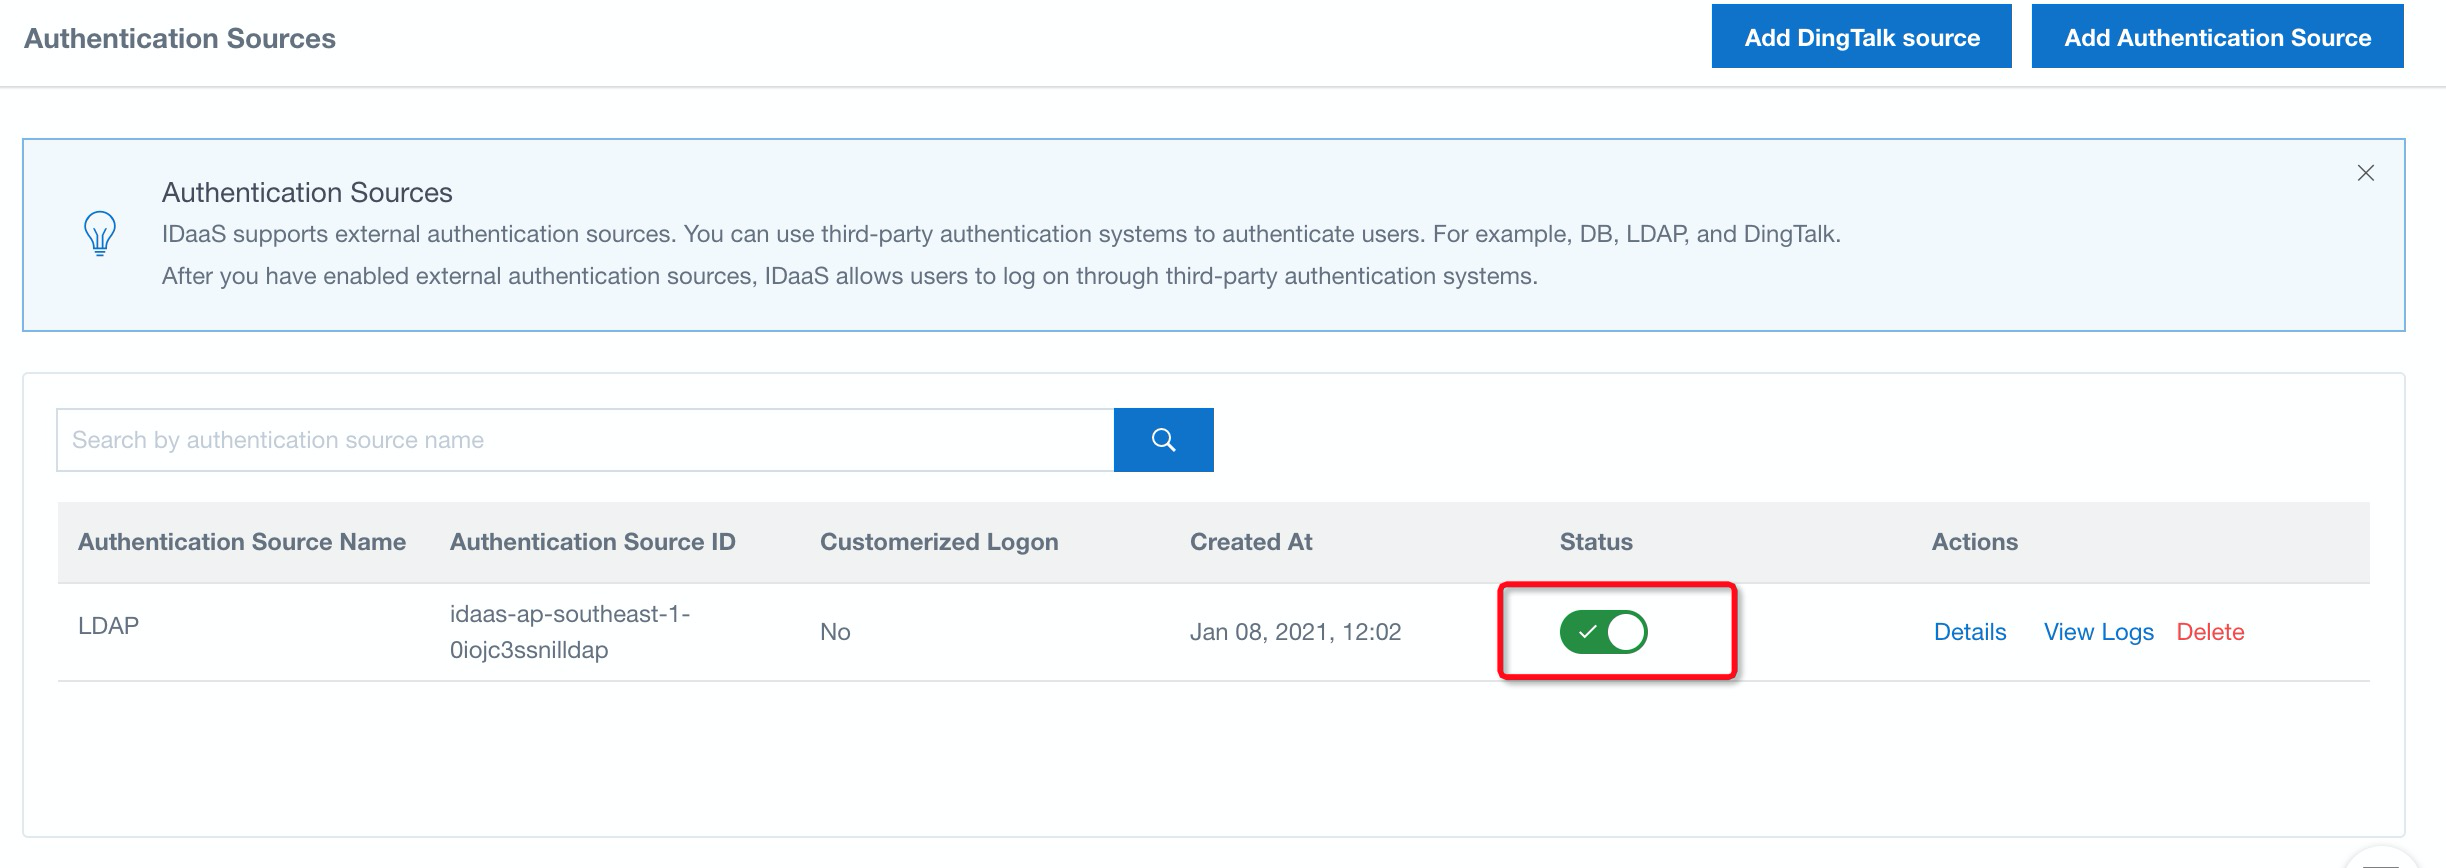
6. Make sure the LDAP status is switched ON:
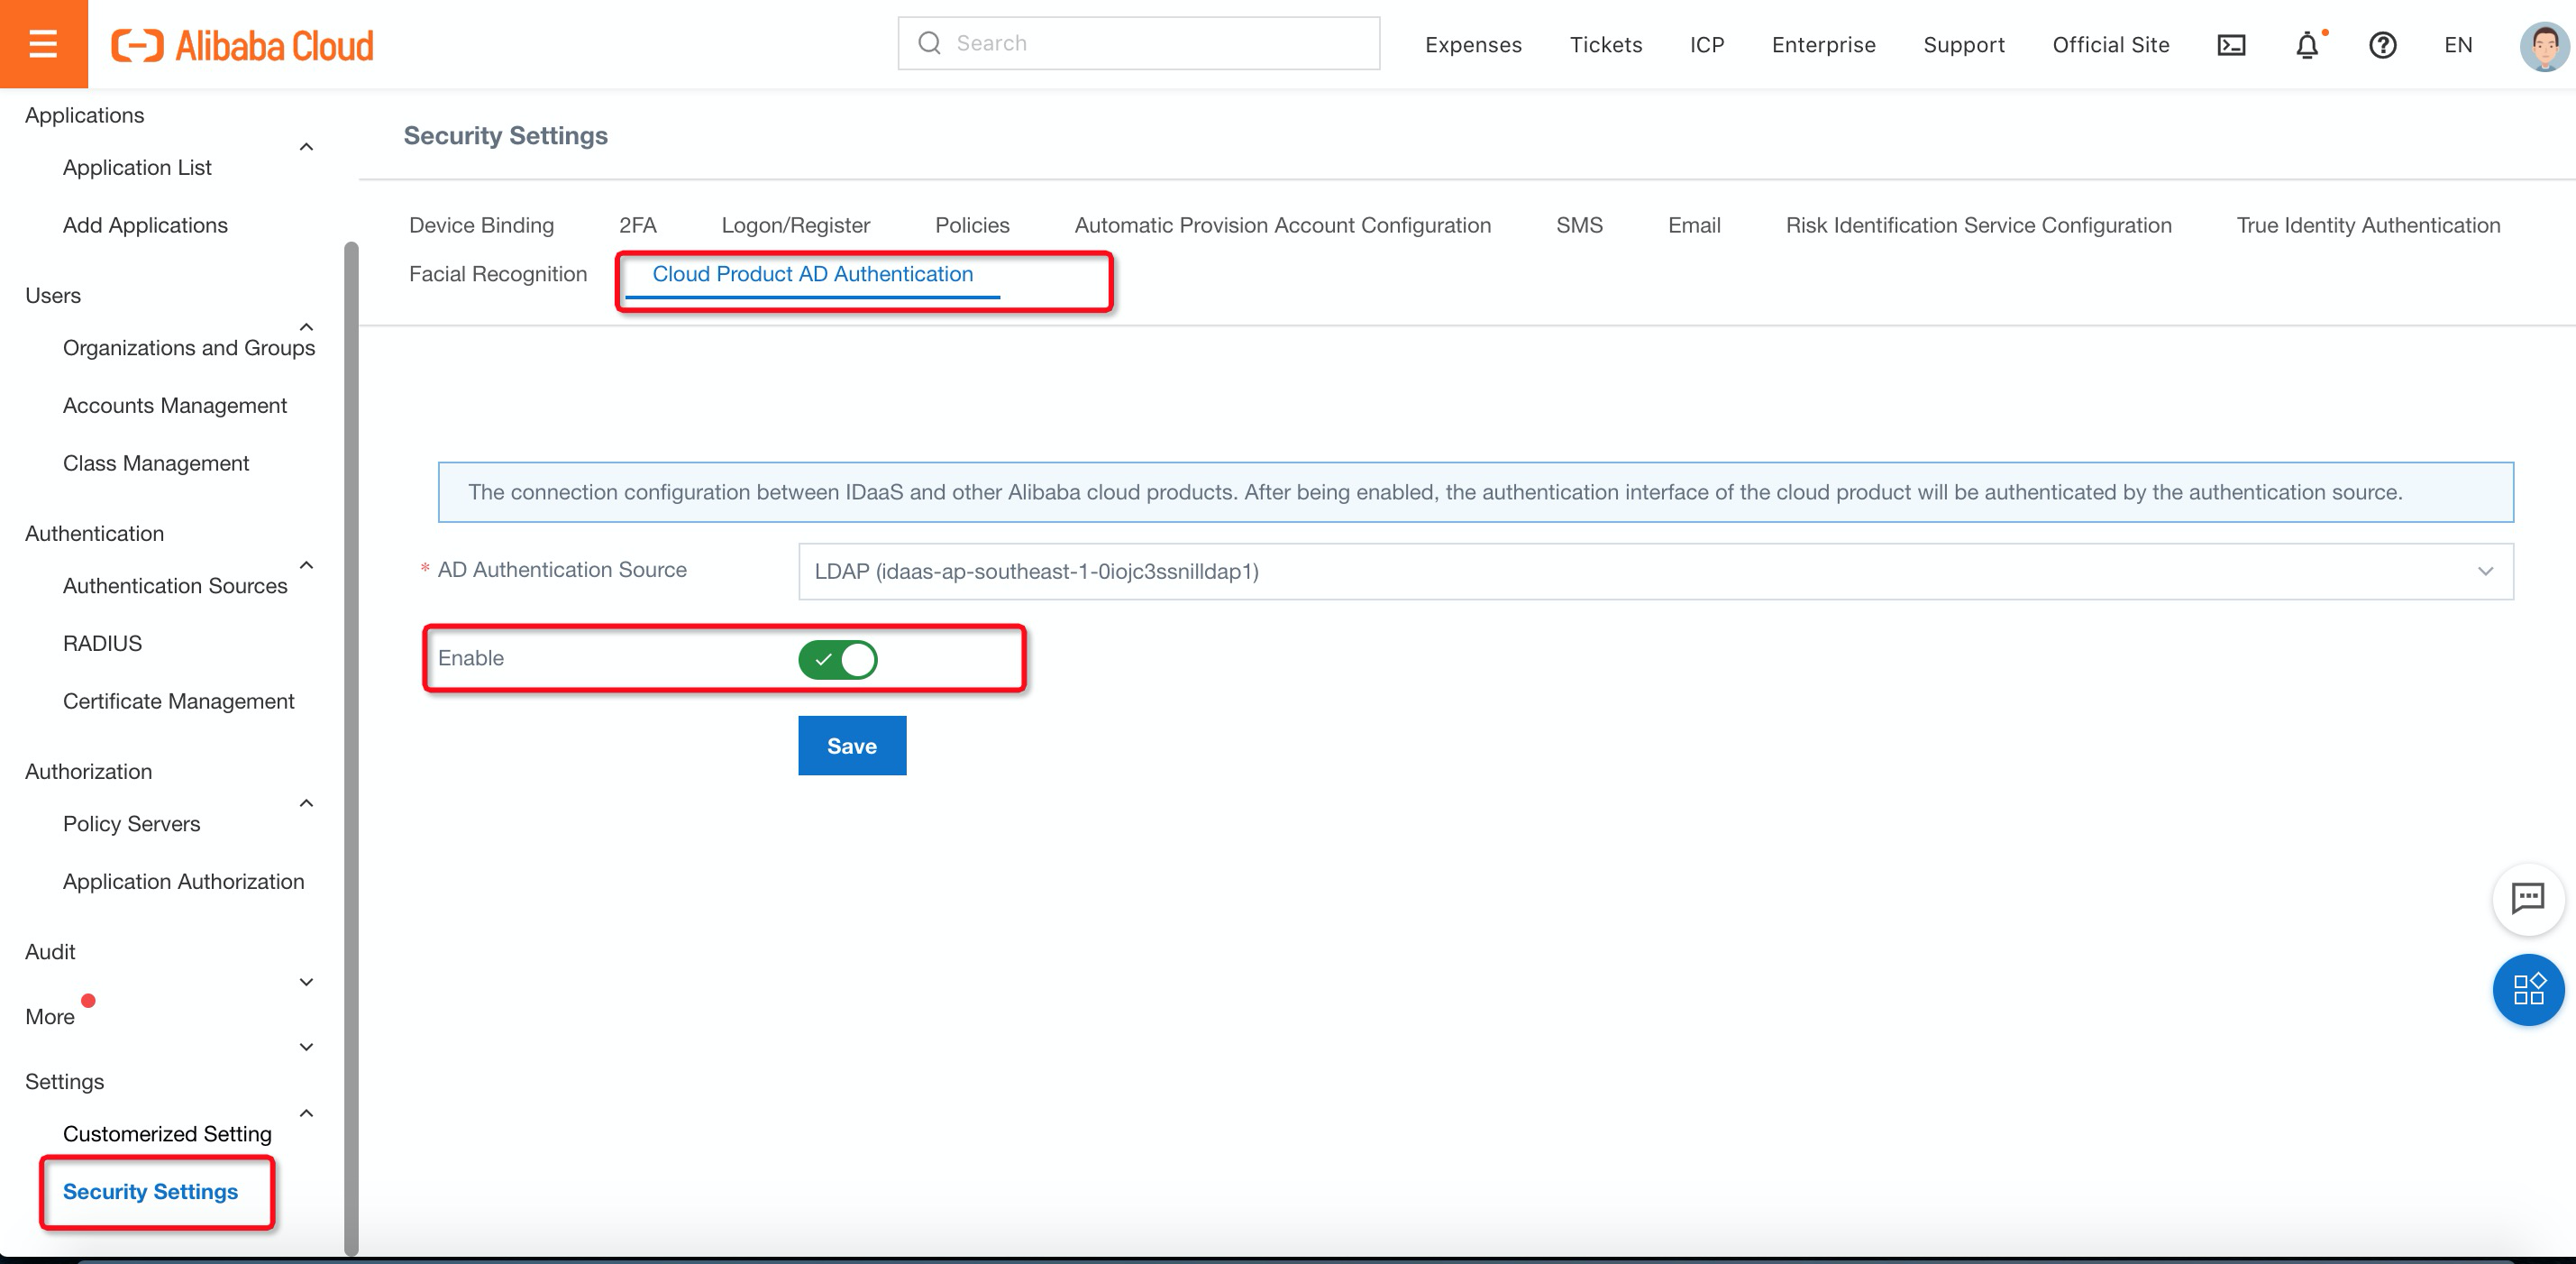
7. Navigate to Cloud Product AD Authentication under Security Settings, select AD Authentication Source, and switch to Enable. Then, click Save:
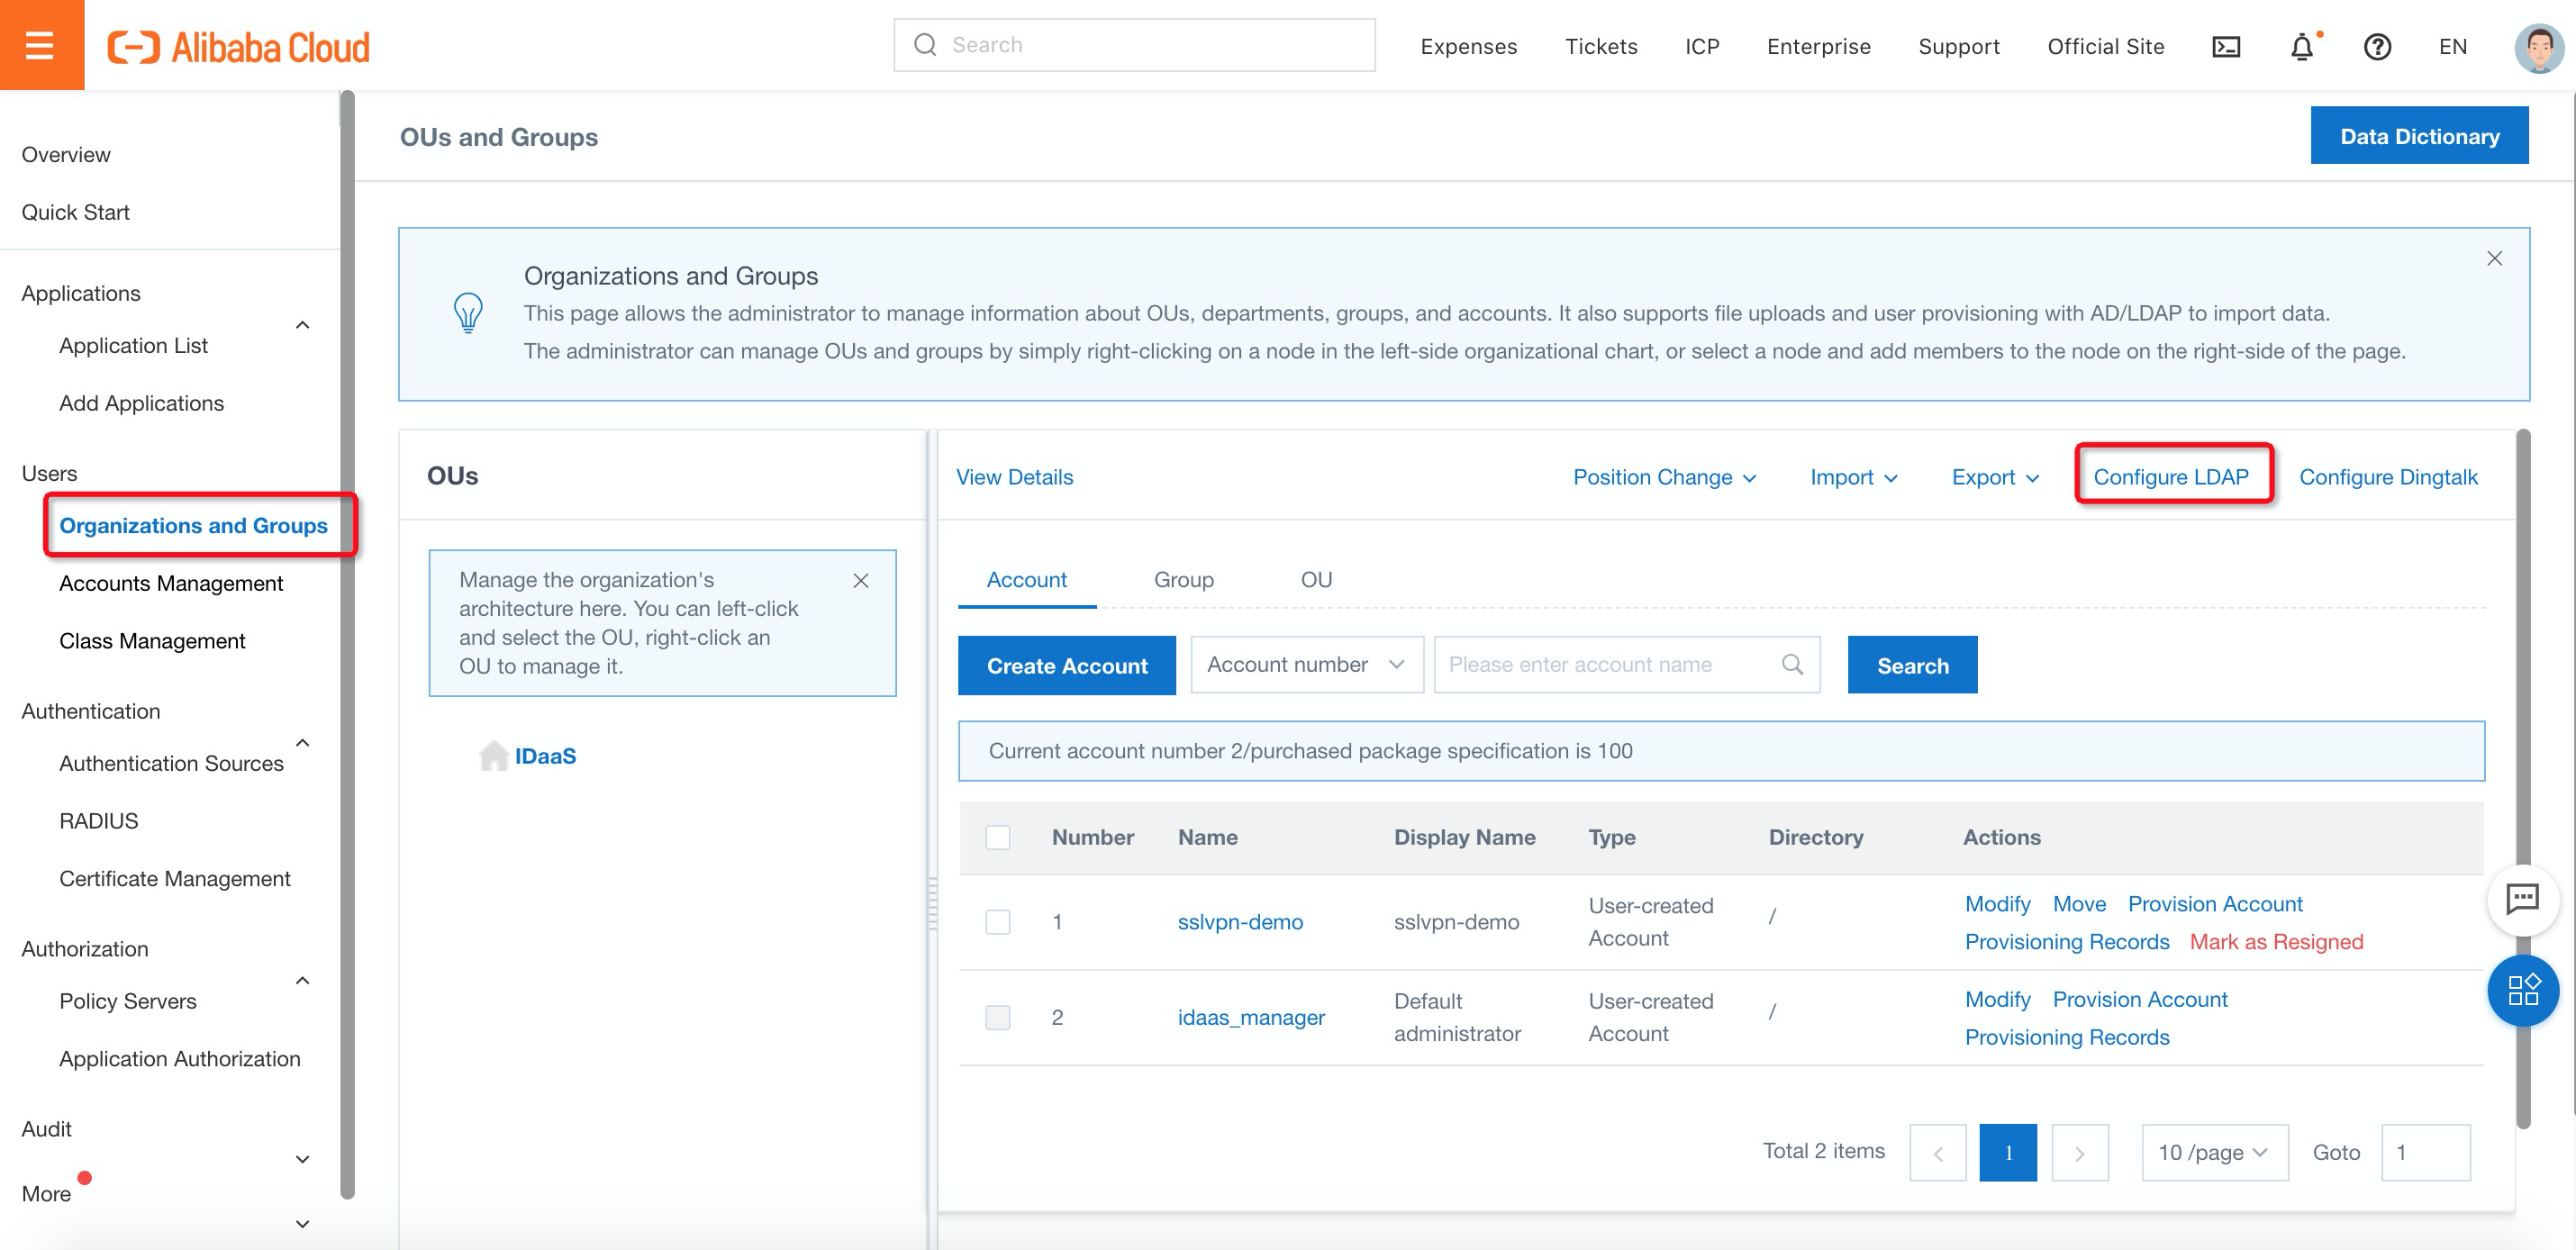
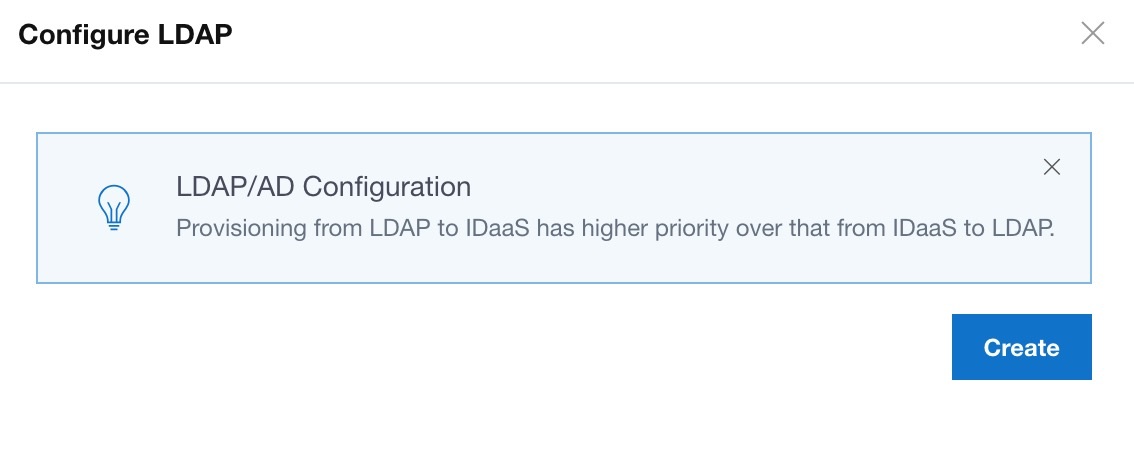
1. Navigate to Organizations and Groups under Users, click Configure LDAP, and Create on the right side to configure LDAP settings:
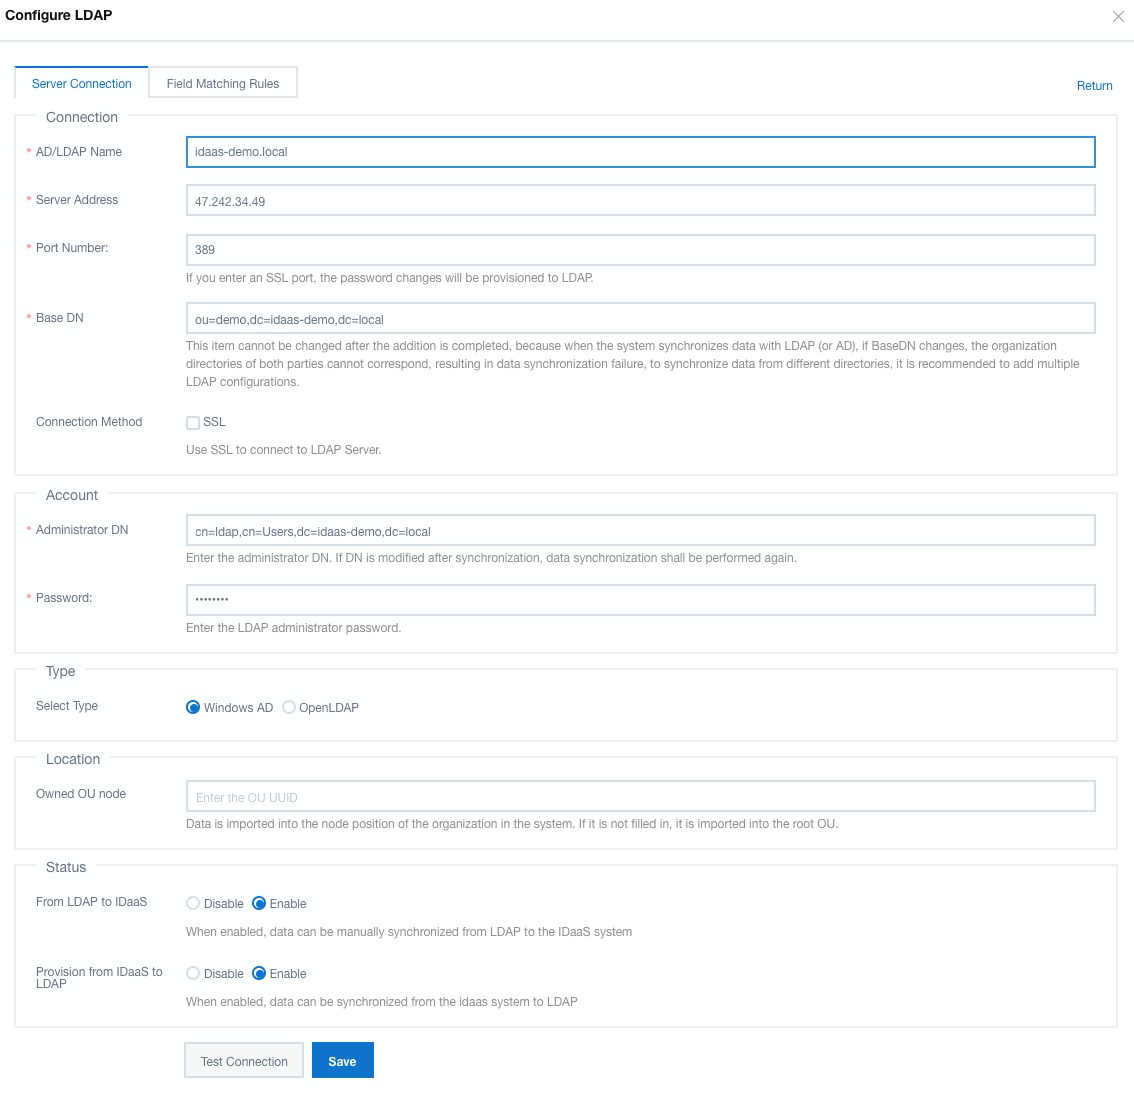
2. Fill in the LDAP server information on the Server Connection sheet:
There is a configuration example shown below:
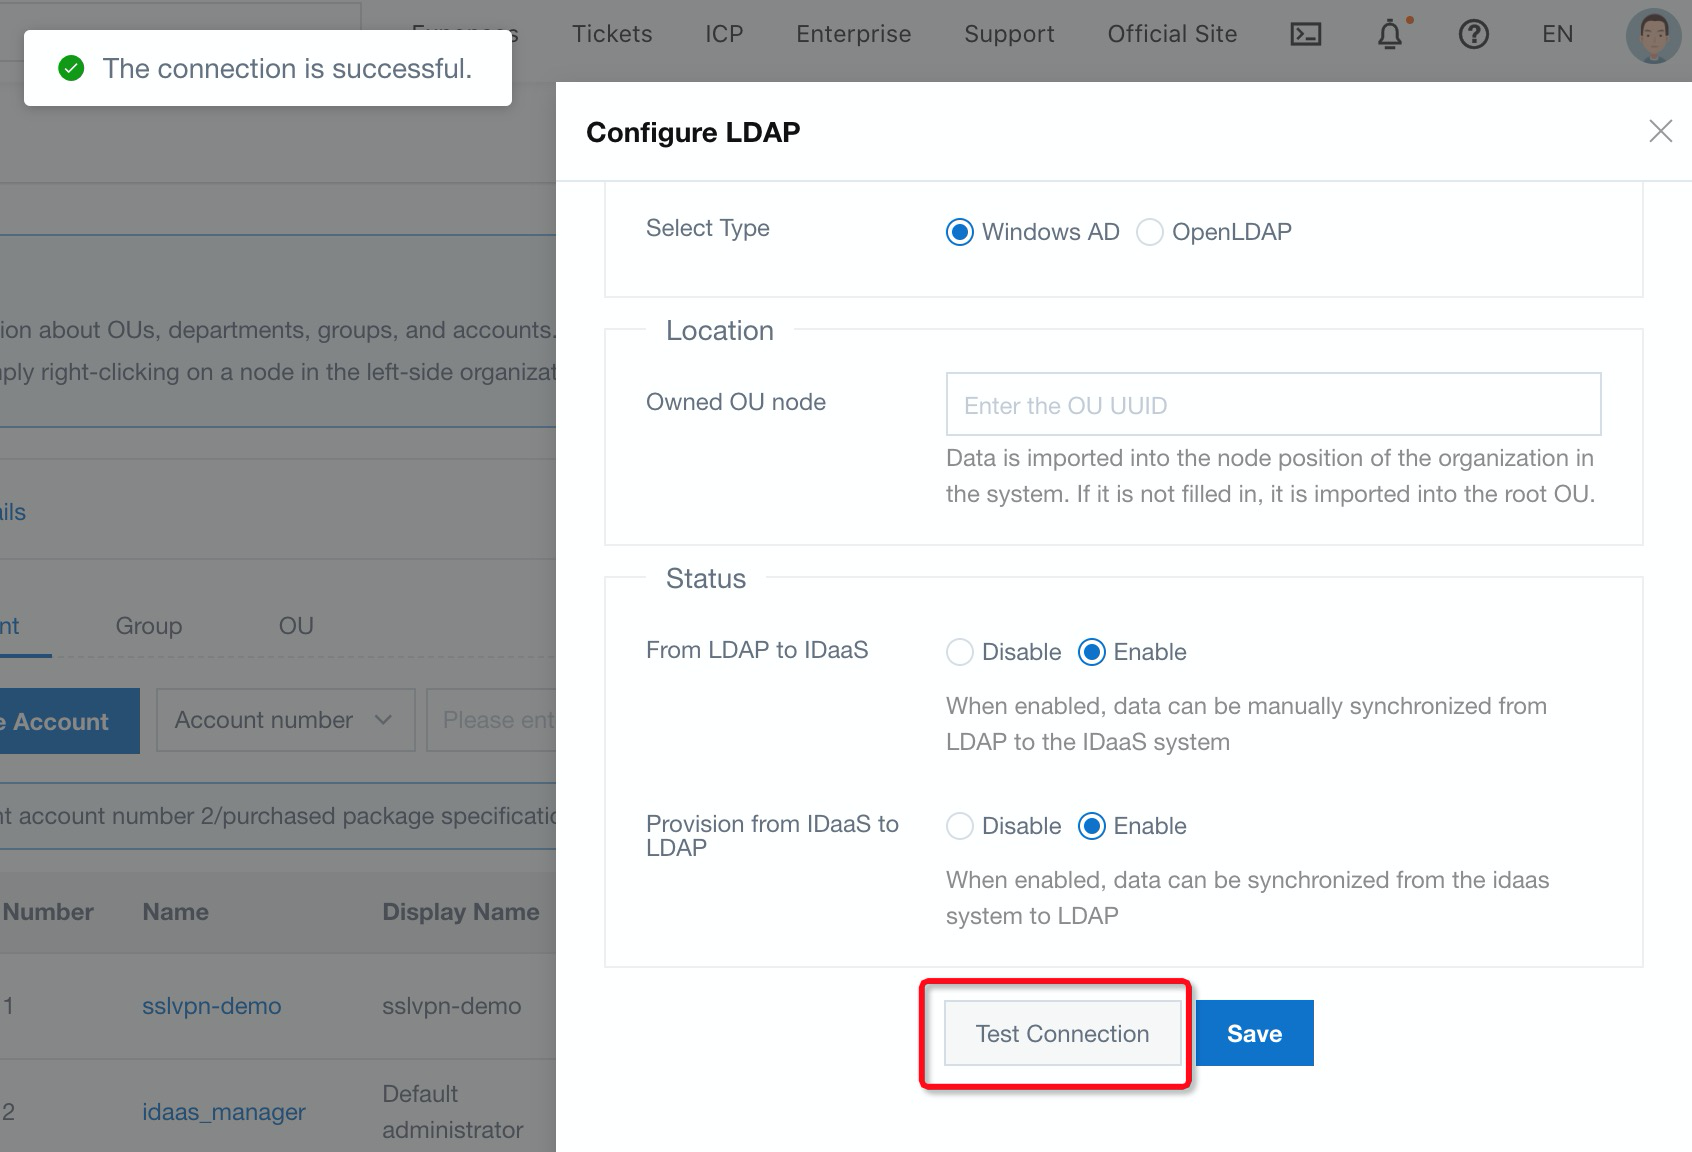
3. Click Test Connection to verify connectivity between iDaaS and AD:
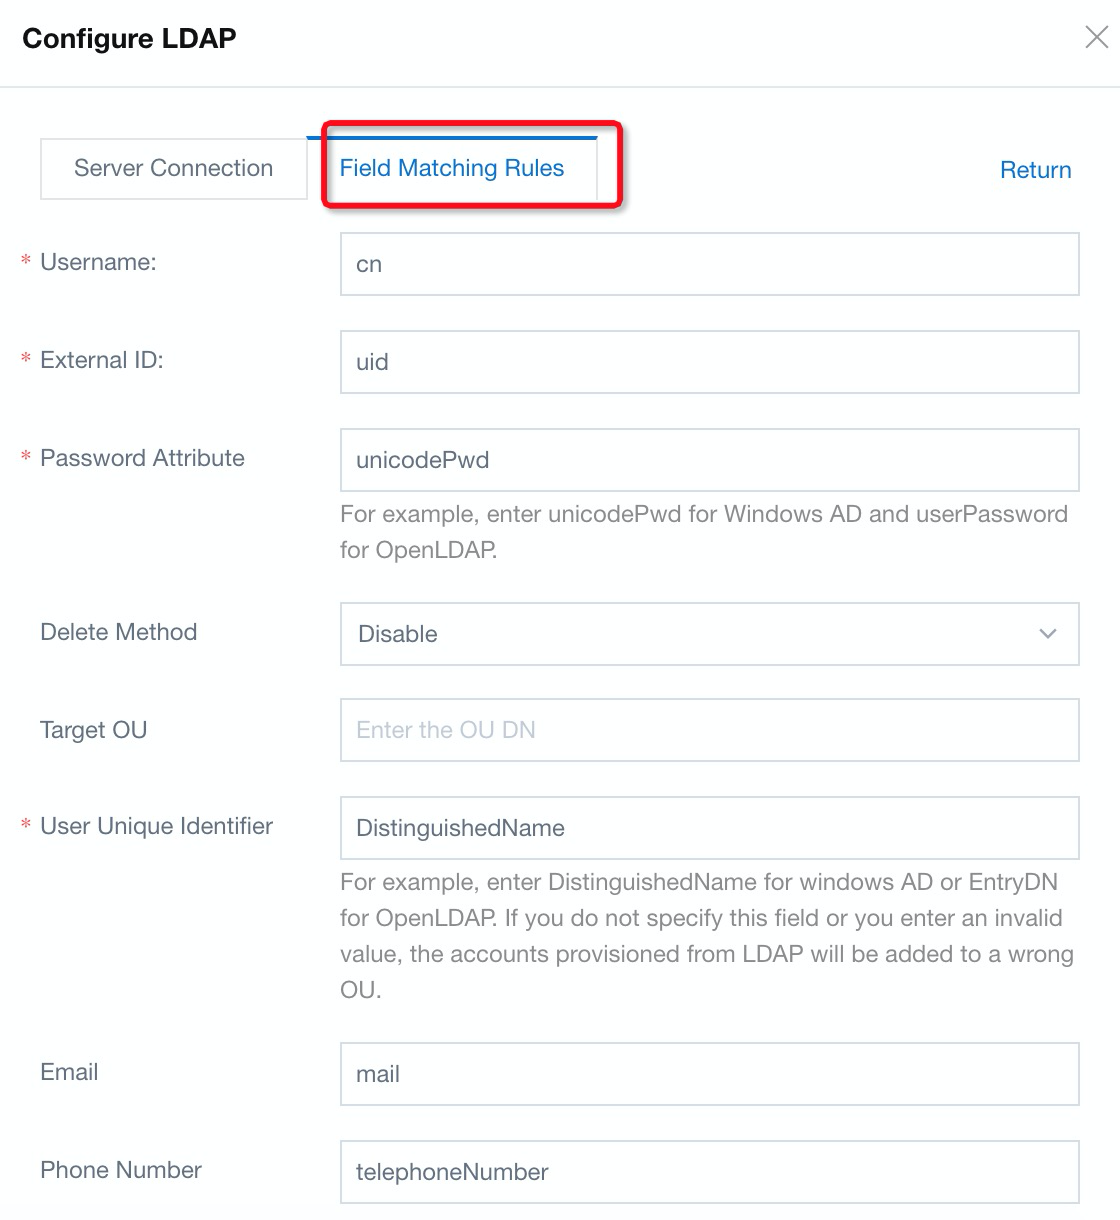
4. Switch to Field Matching Rules, follow the instructions, fill in the necessary information, and click Save. There is a configure LDAP sample shown below:
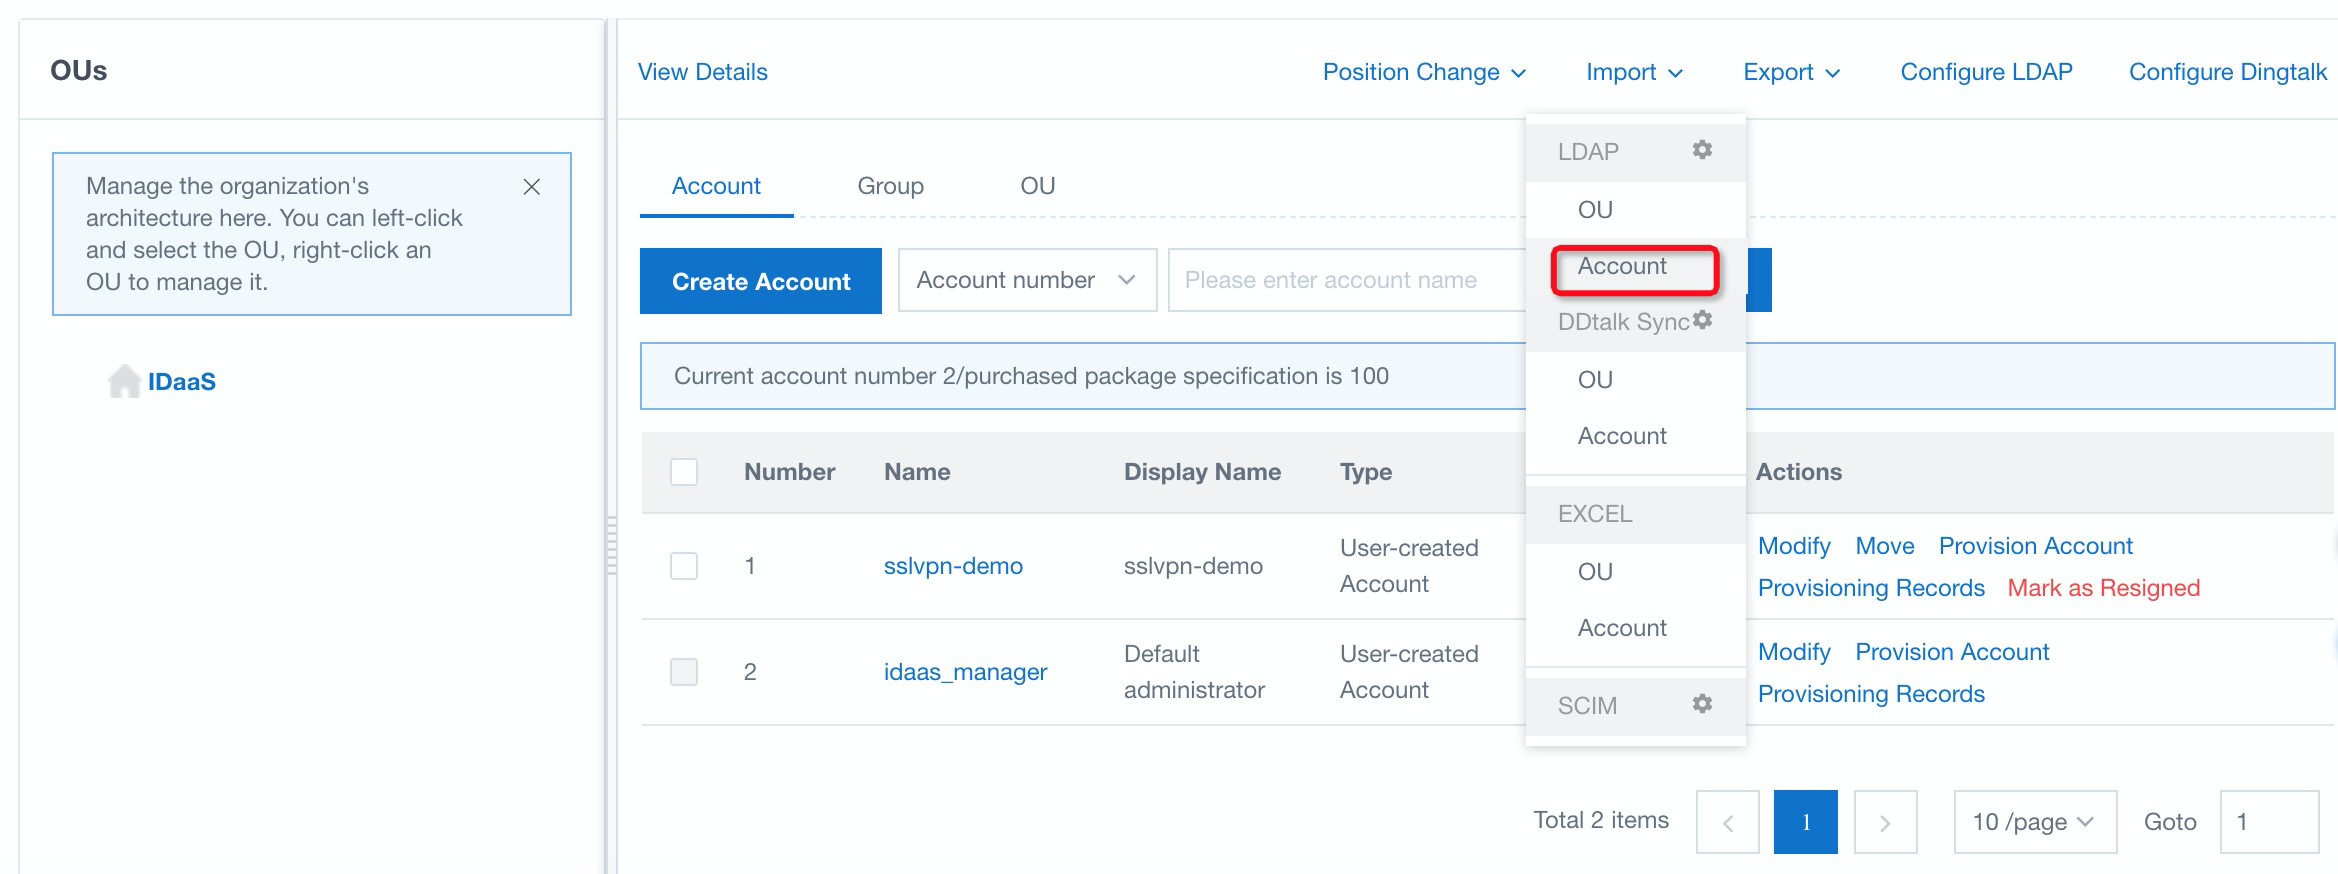
5. Navigate to Account under Import. Click import and OK to import the account to iDaaS:
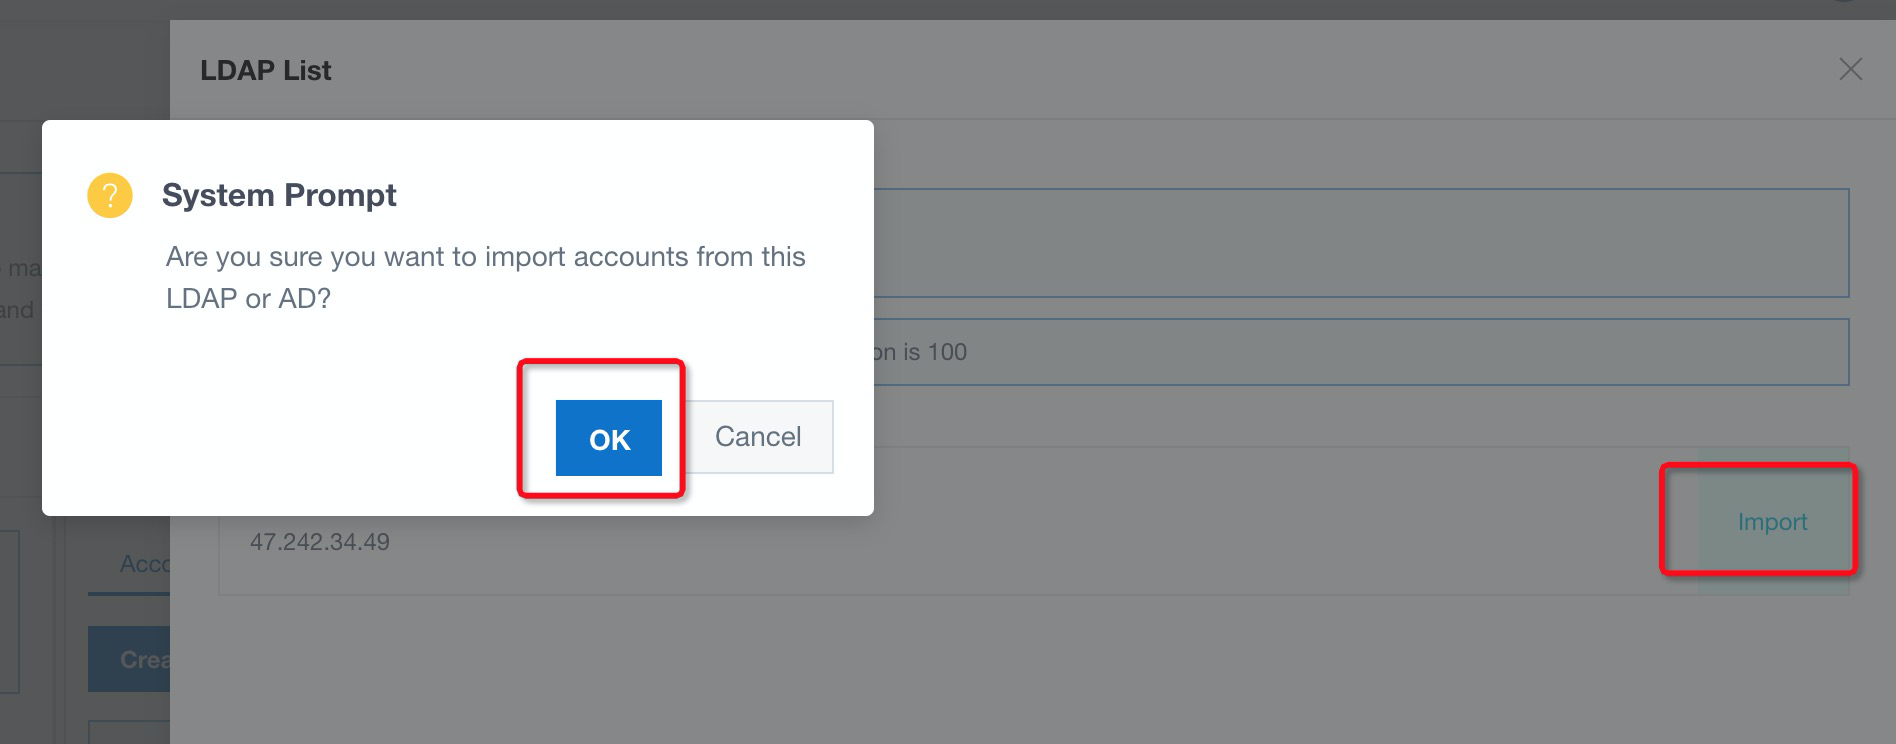
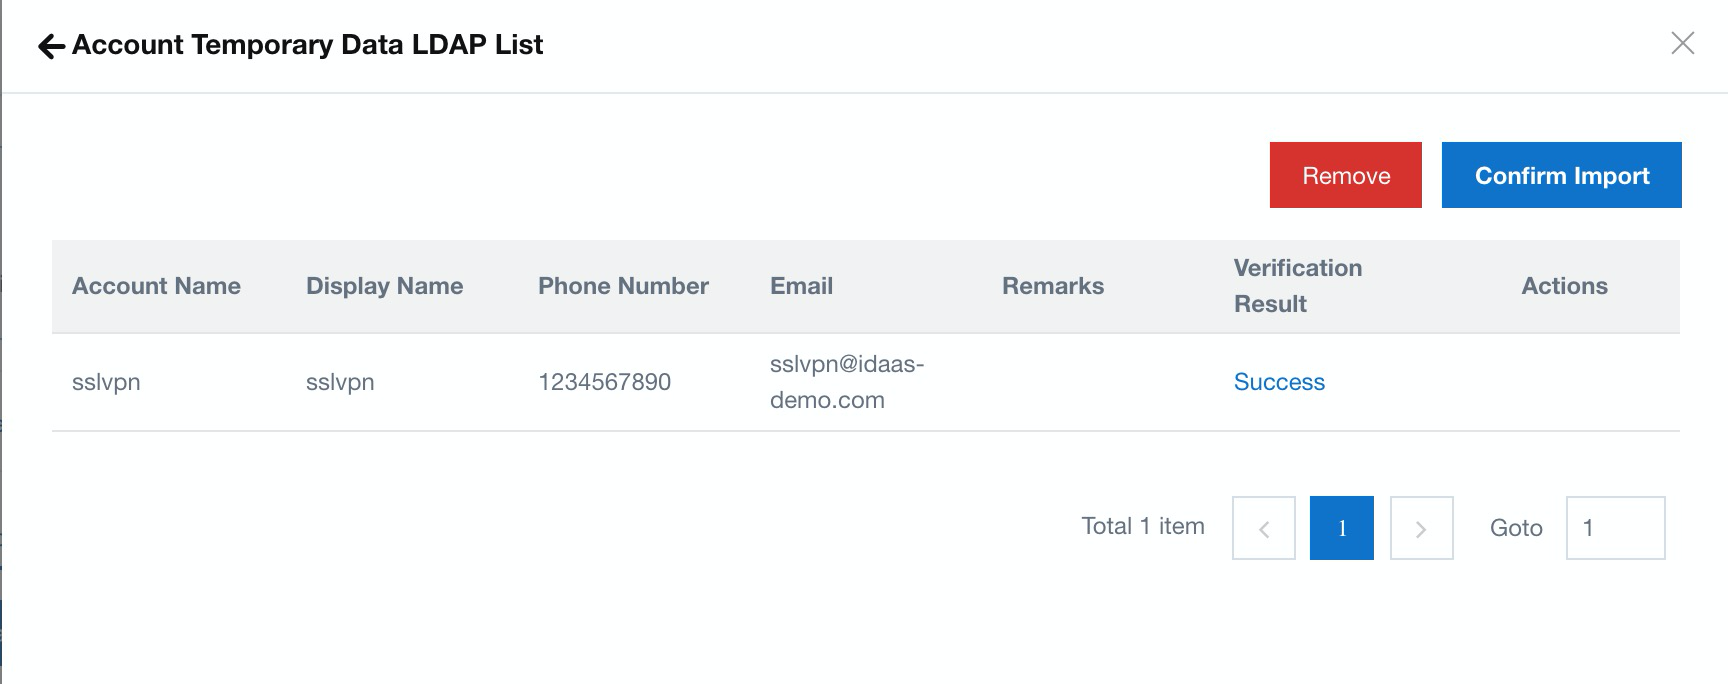
6. A list of accounts is ready to import to iDaaS; select Confirm Import:
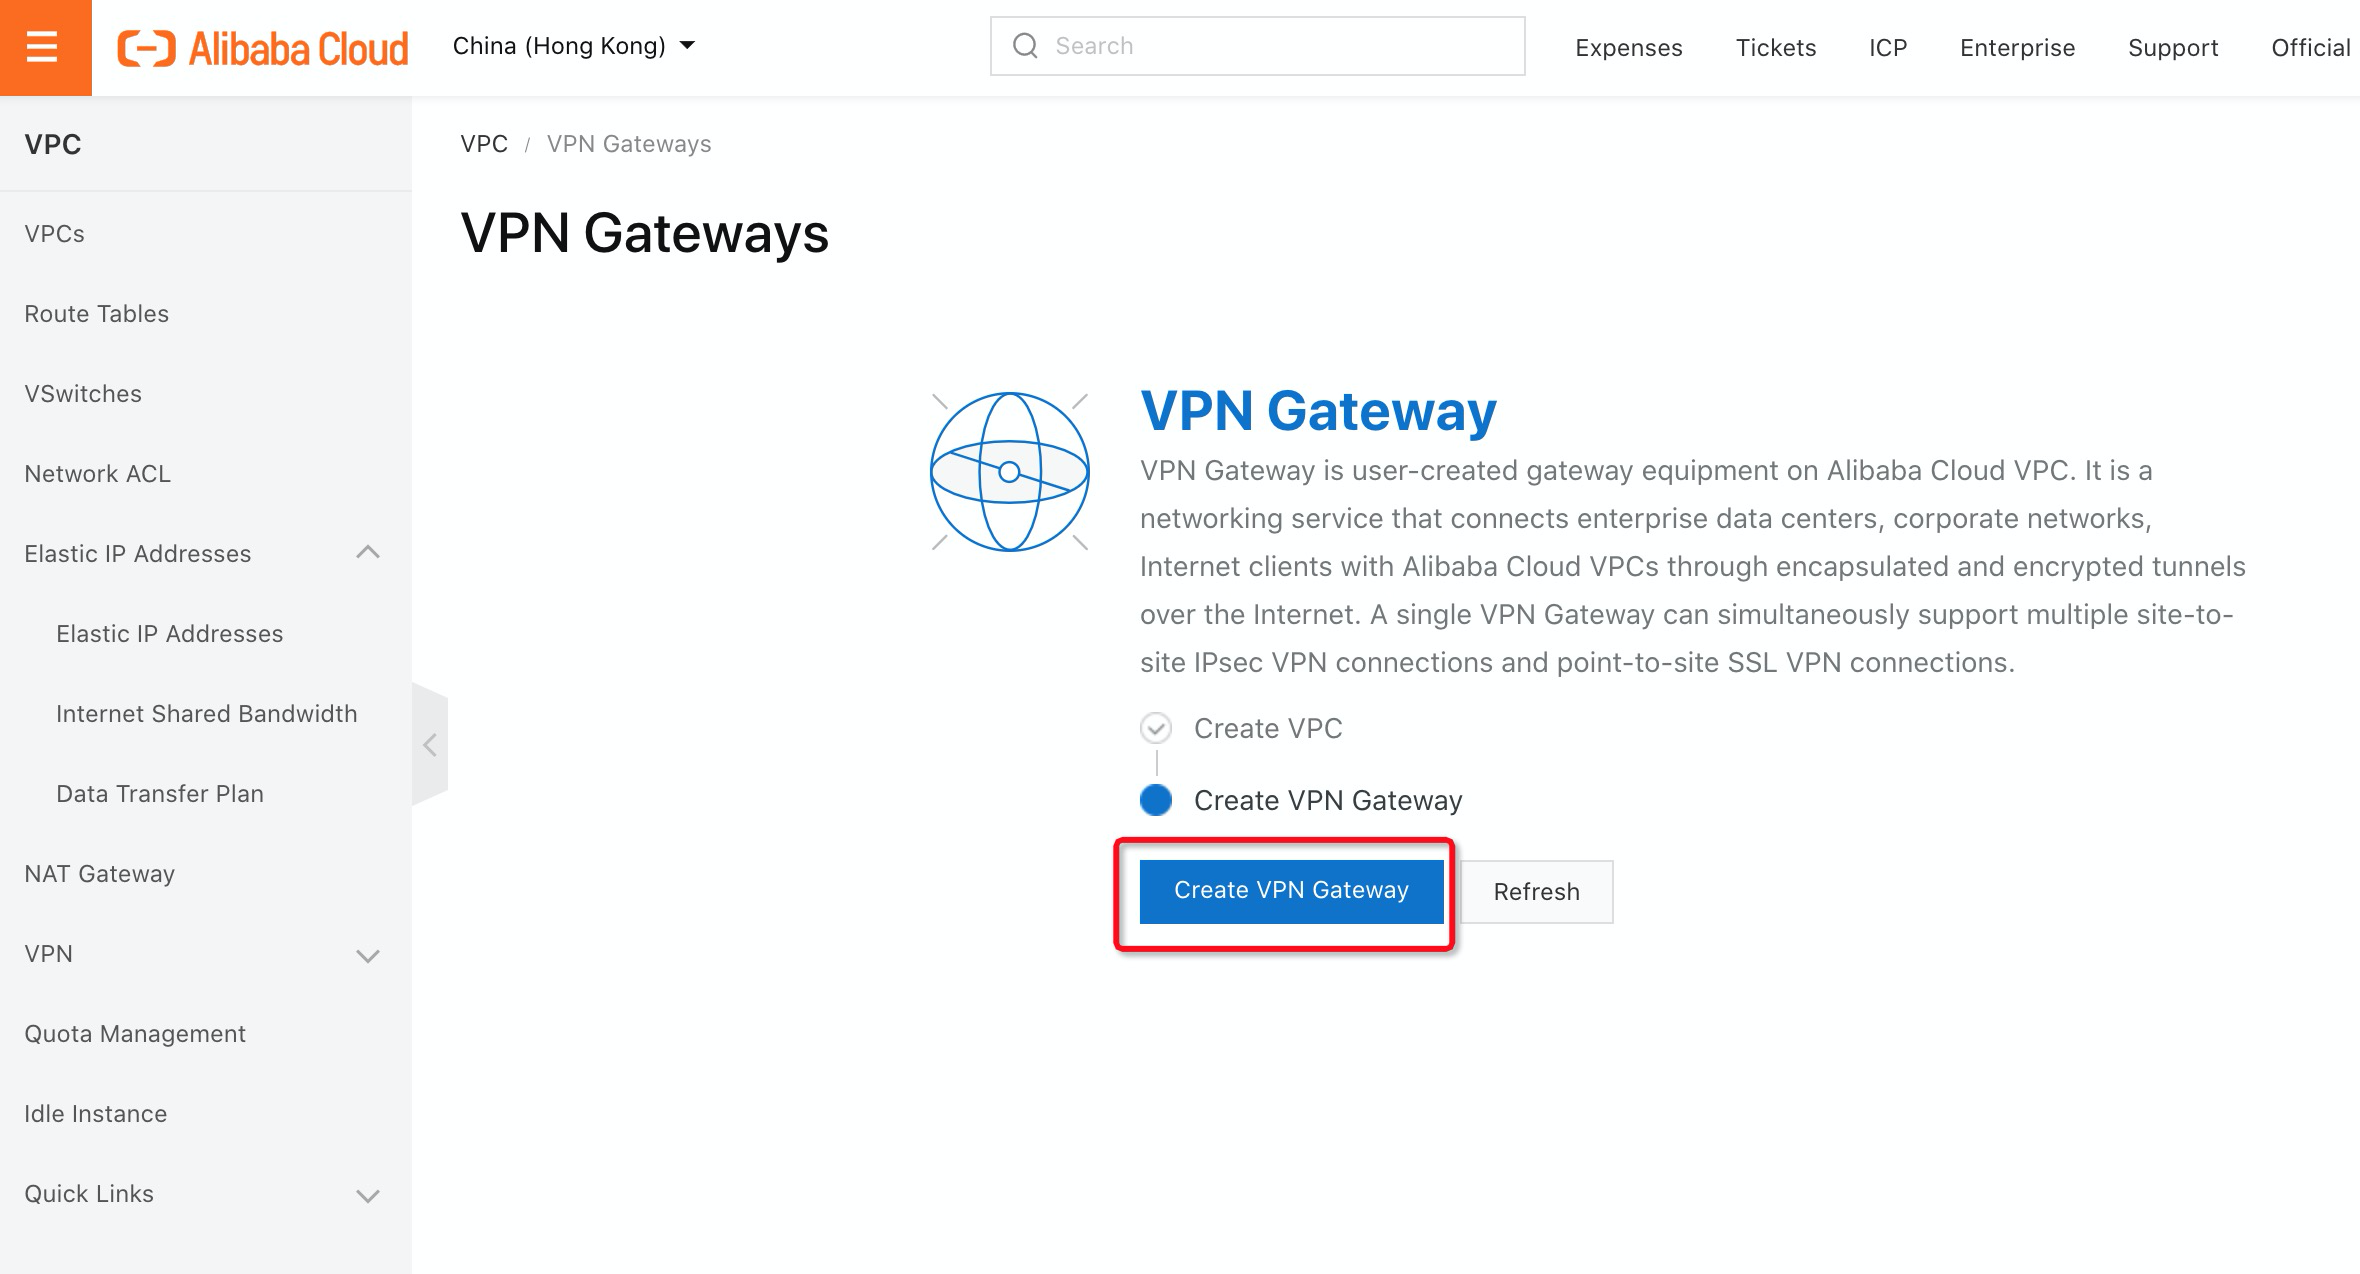
1. Log on to the Alibaba Cloud VPN Gateway console and click Create VPN Gateway:
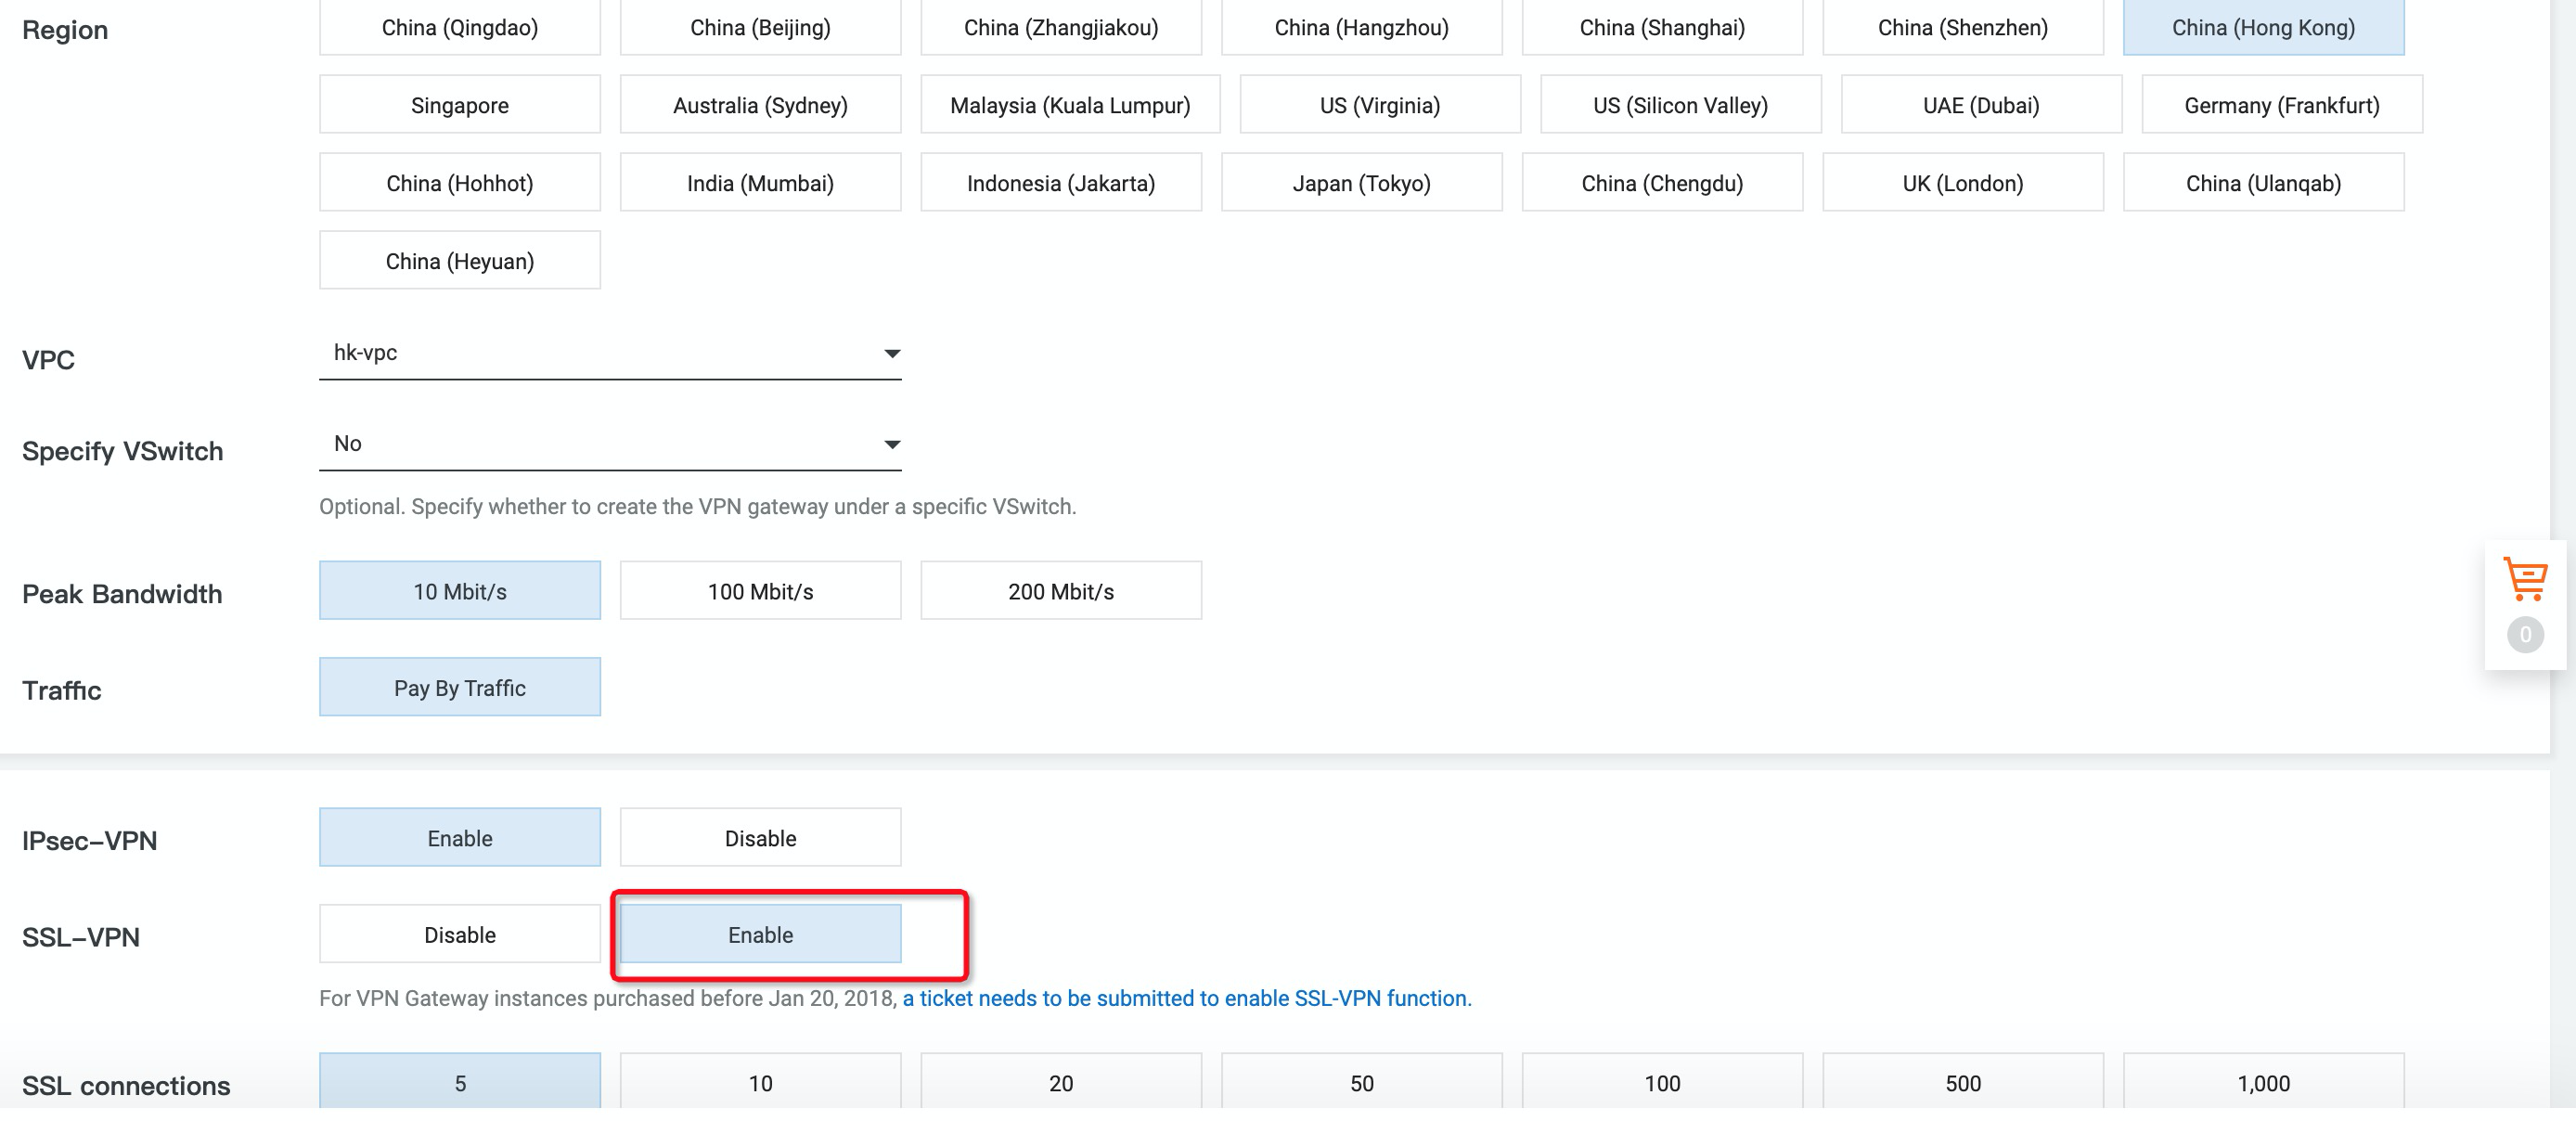
2. Select the Region, VPC, and vswitch where you want the VPN Gateway to be created. Make sure SSL-VPN Enable is selected, and then click Buy Now:
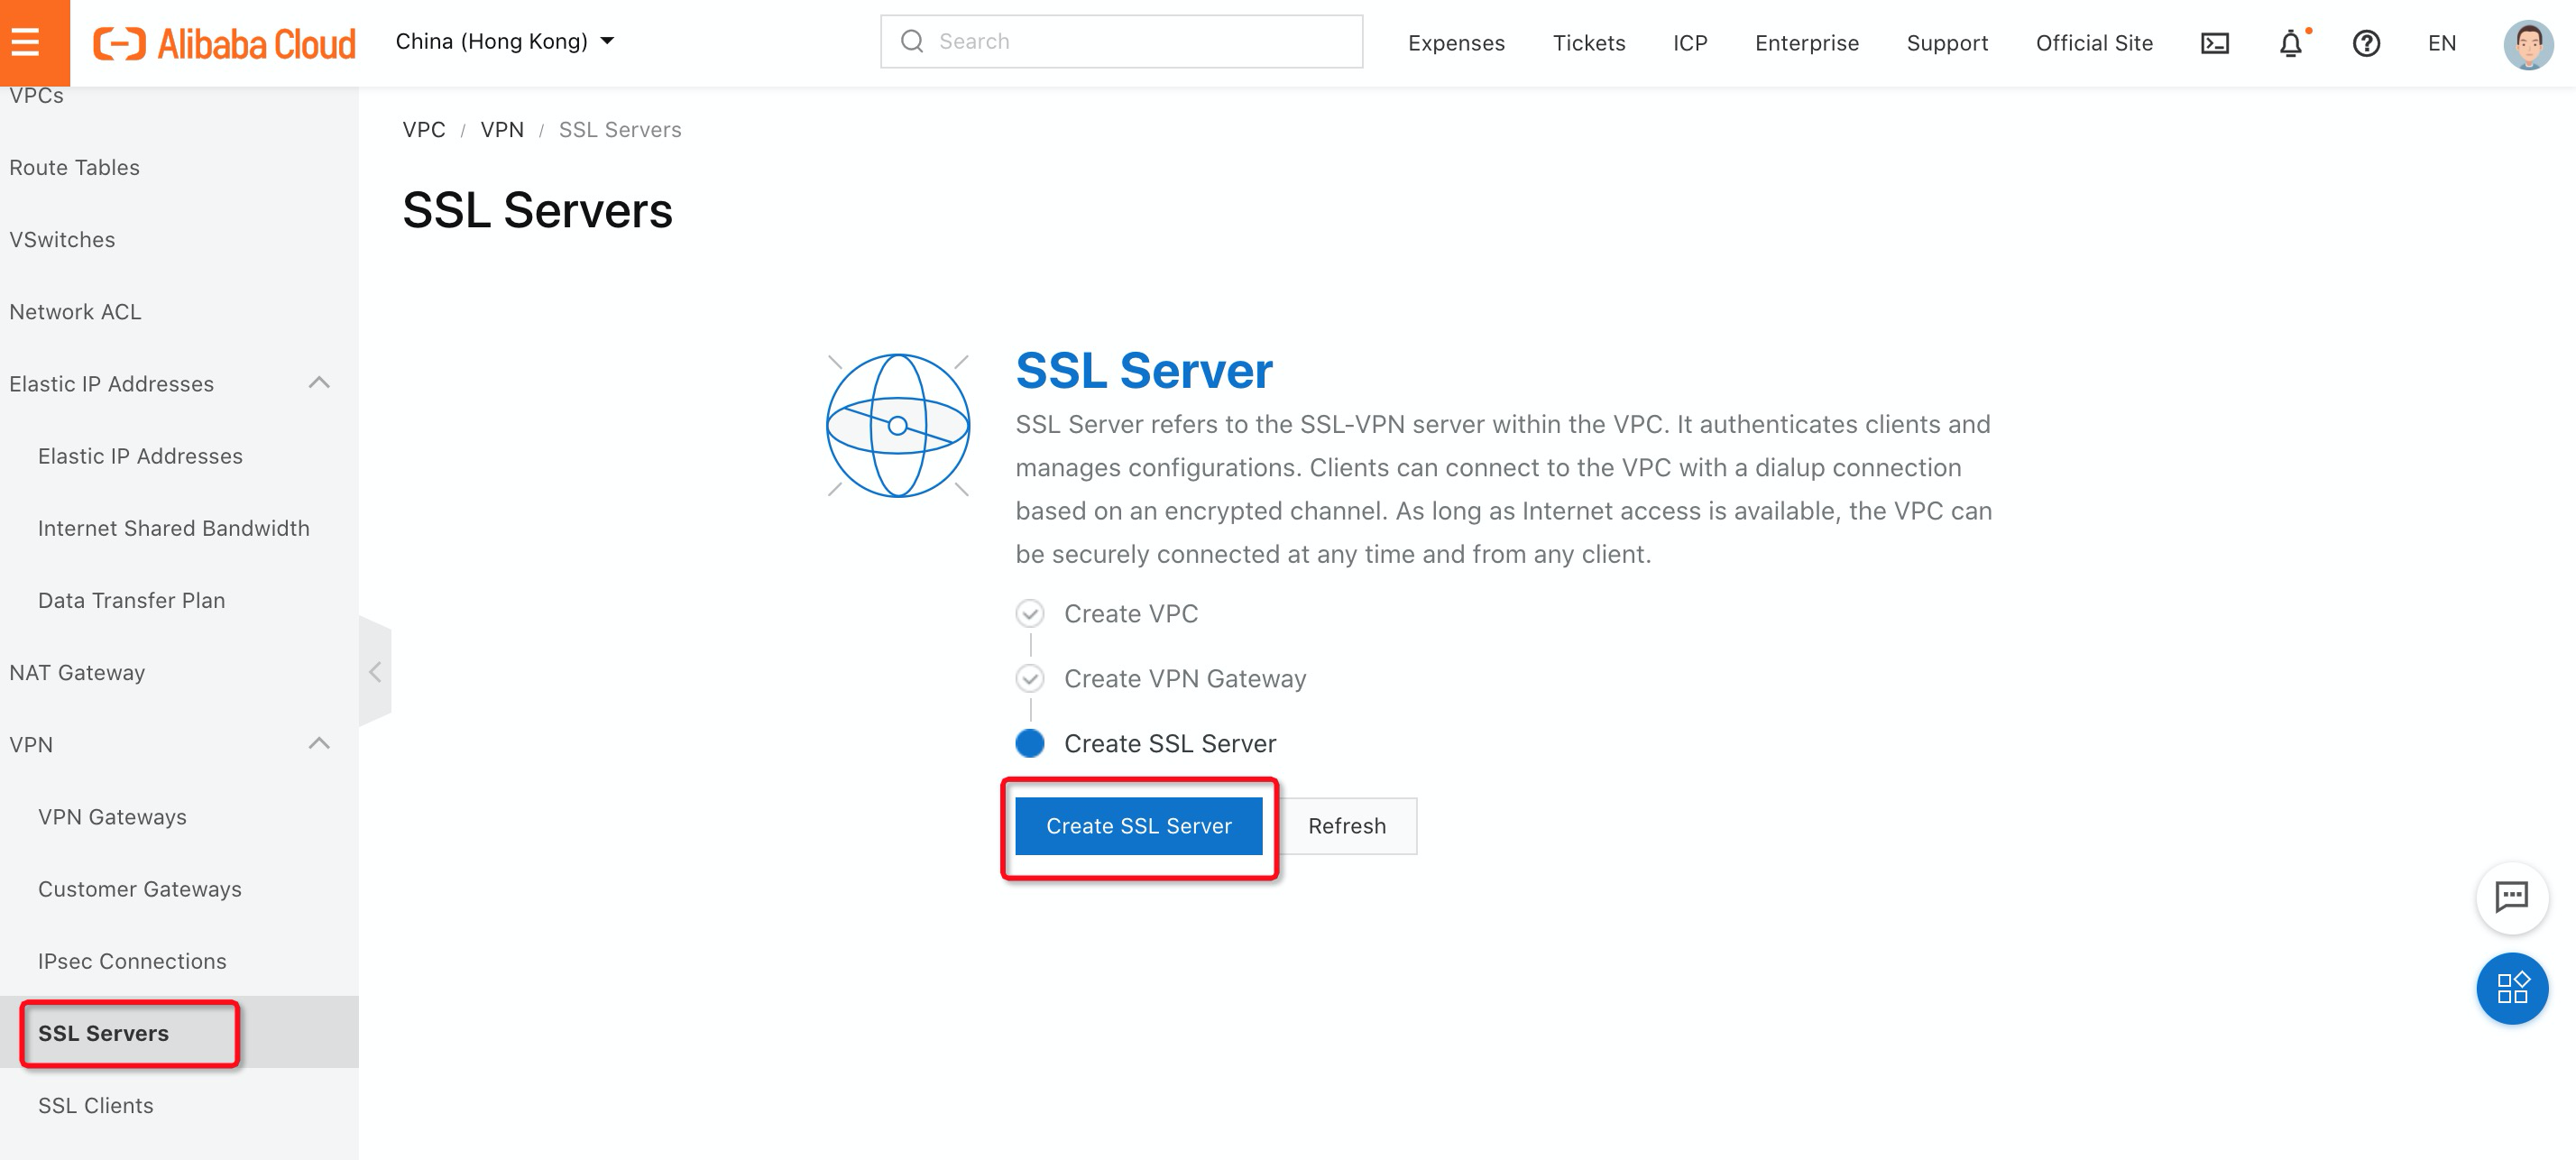
3. Navigate to SSL Servers and click Create SSL Server:
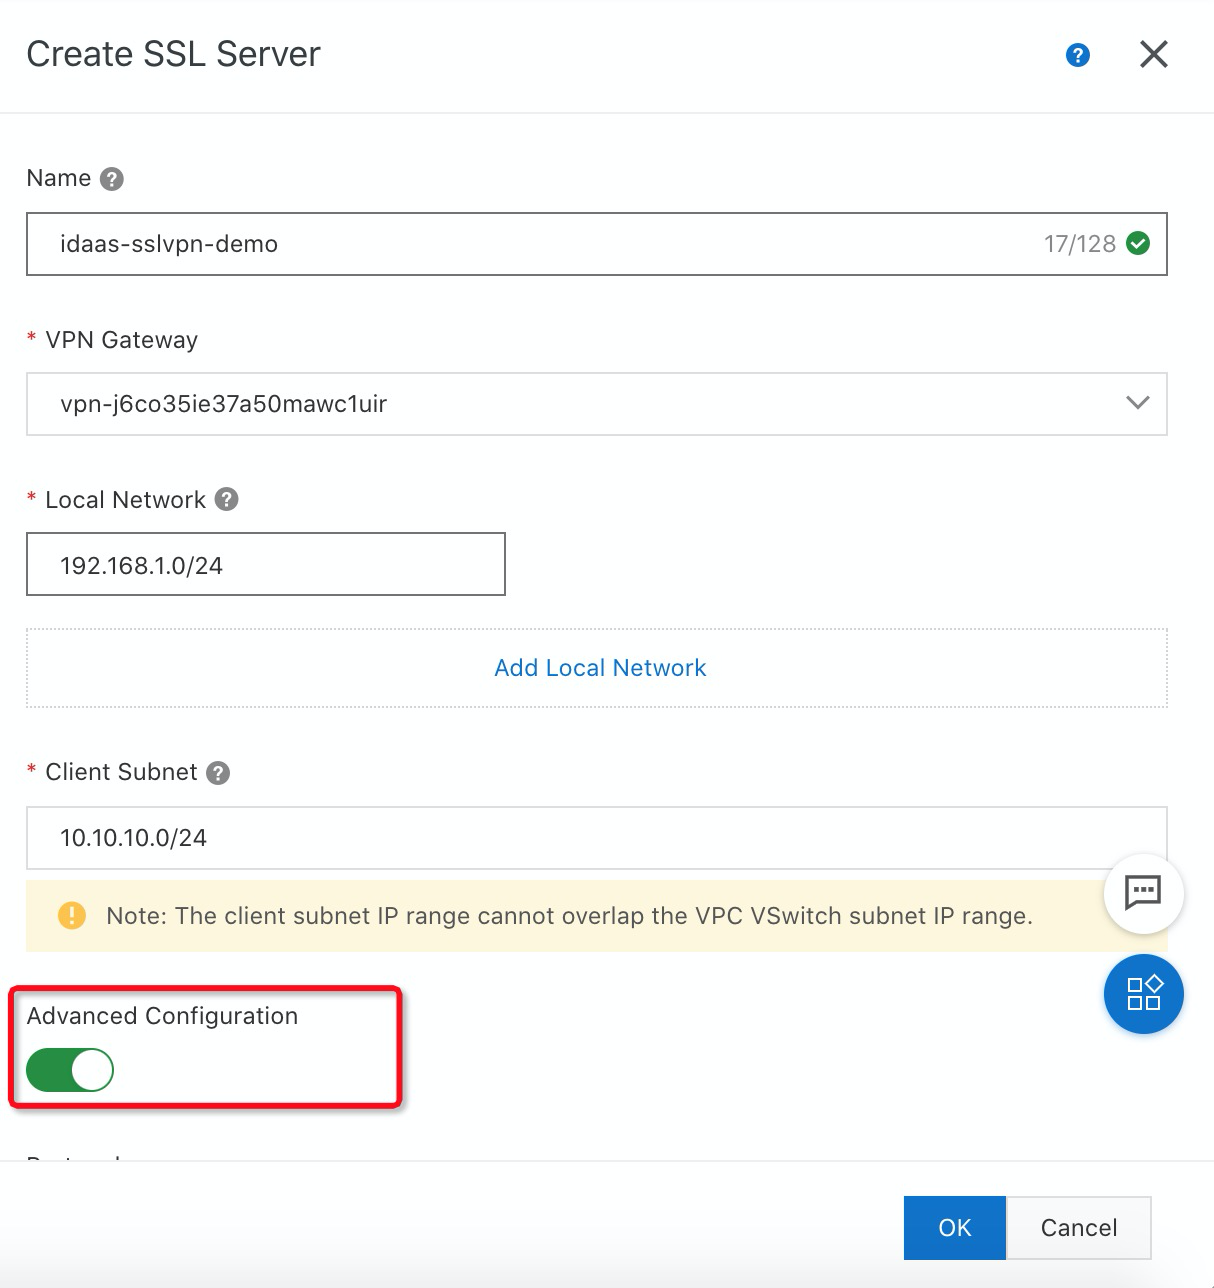
4. Fill in the value of the SSL Server name, VPN Gateway, Local Network, and Client Subnet, and then enable Advanced Configuration:
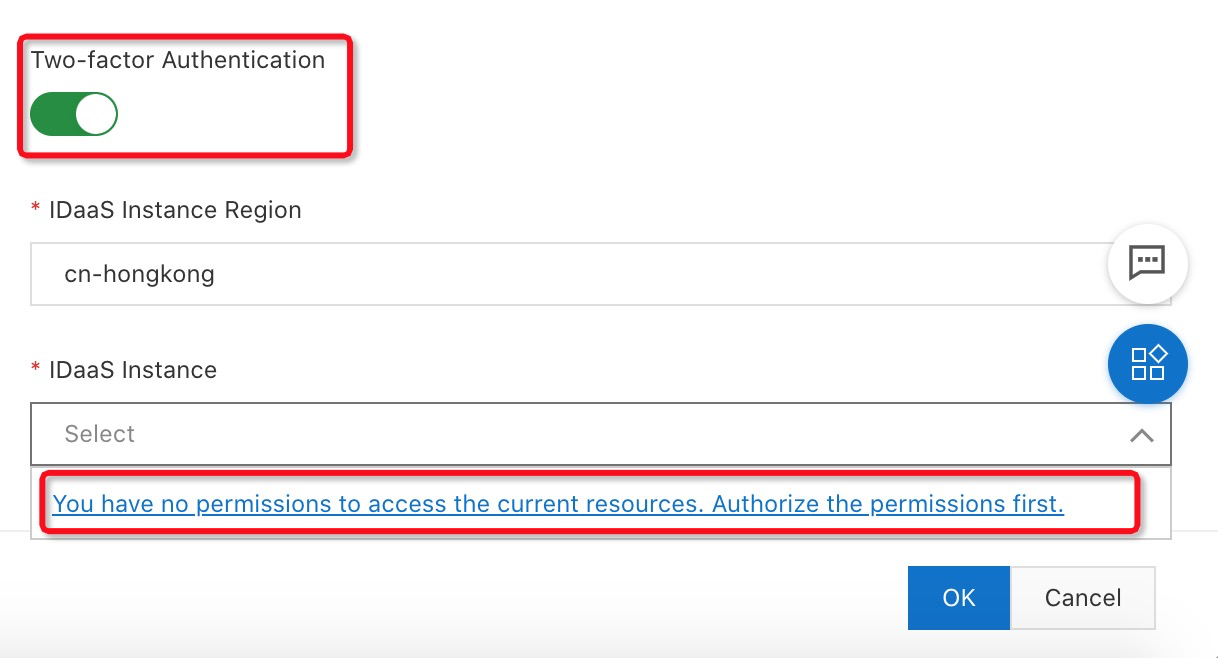
5. Enable Two-factor Authentication and select IDaaS Instance. You need to grant permissions to access iDaaS:
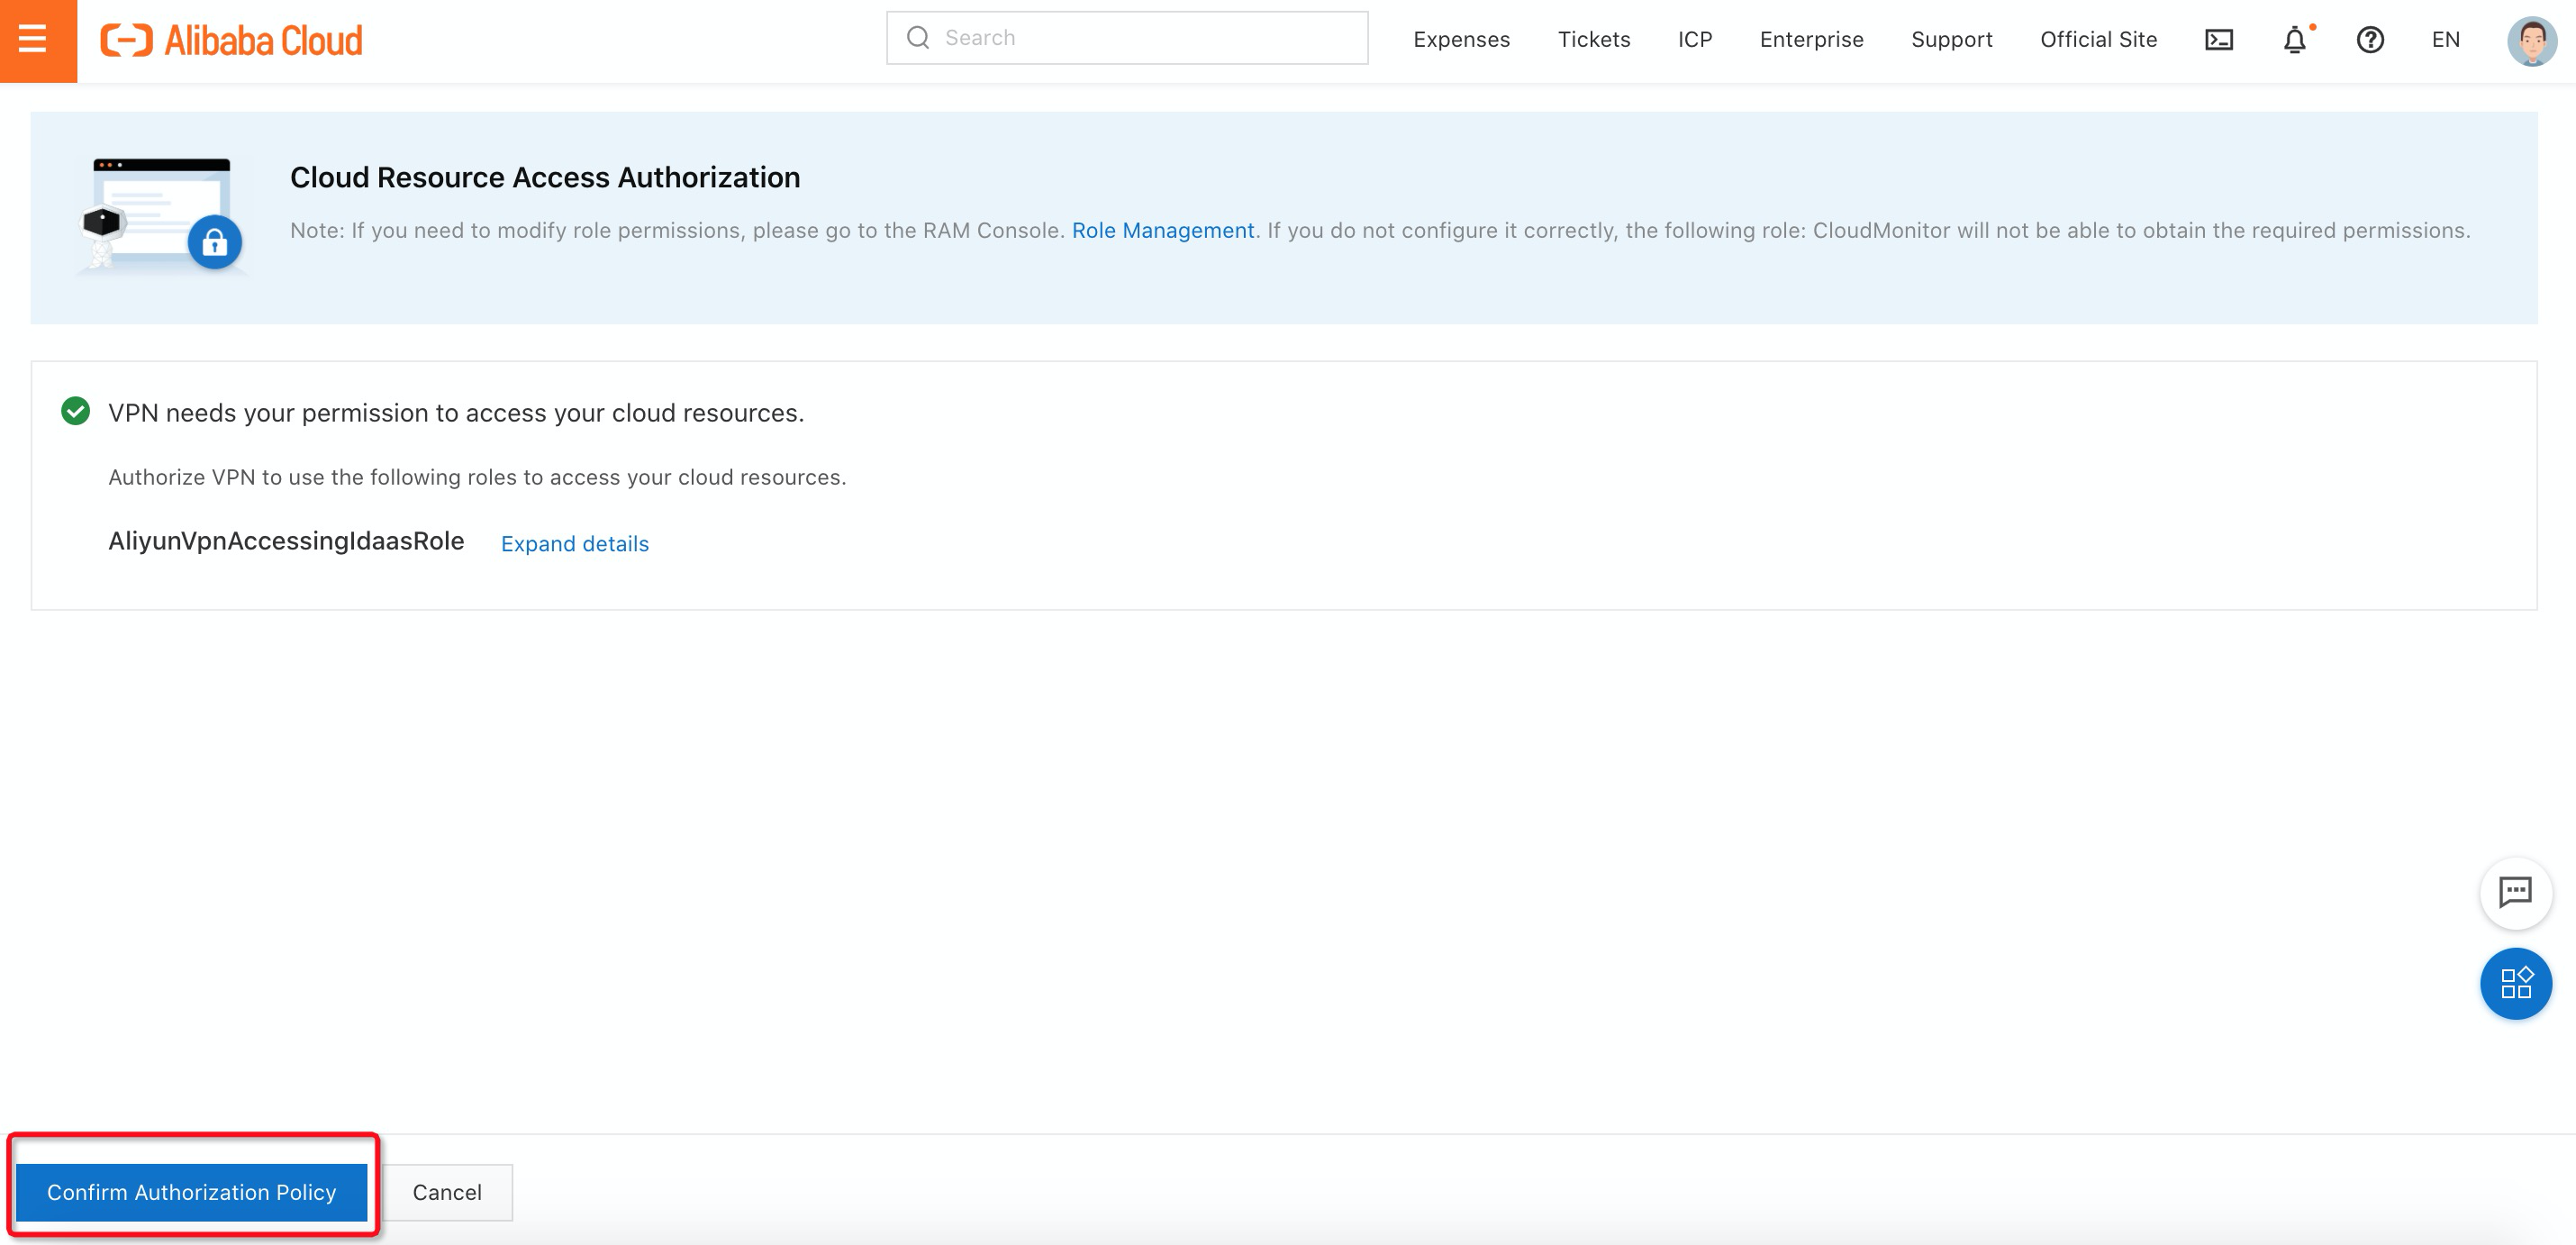
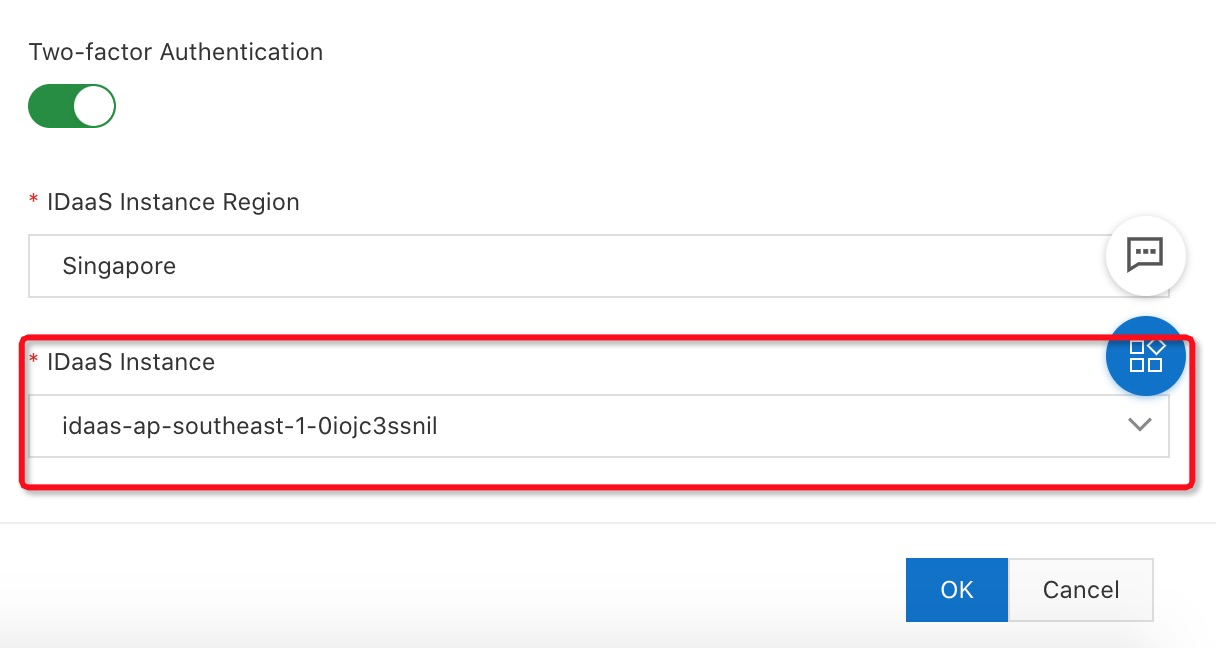
6. After permission is granted, you can select iDaaS:
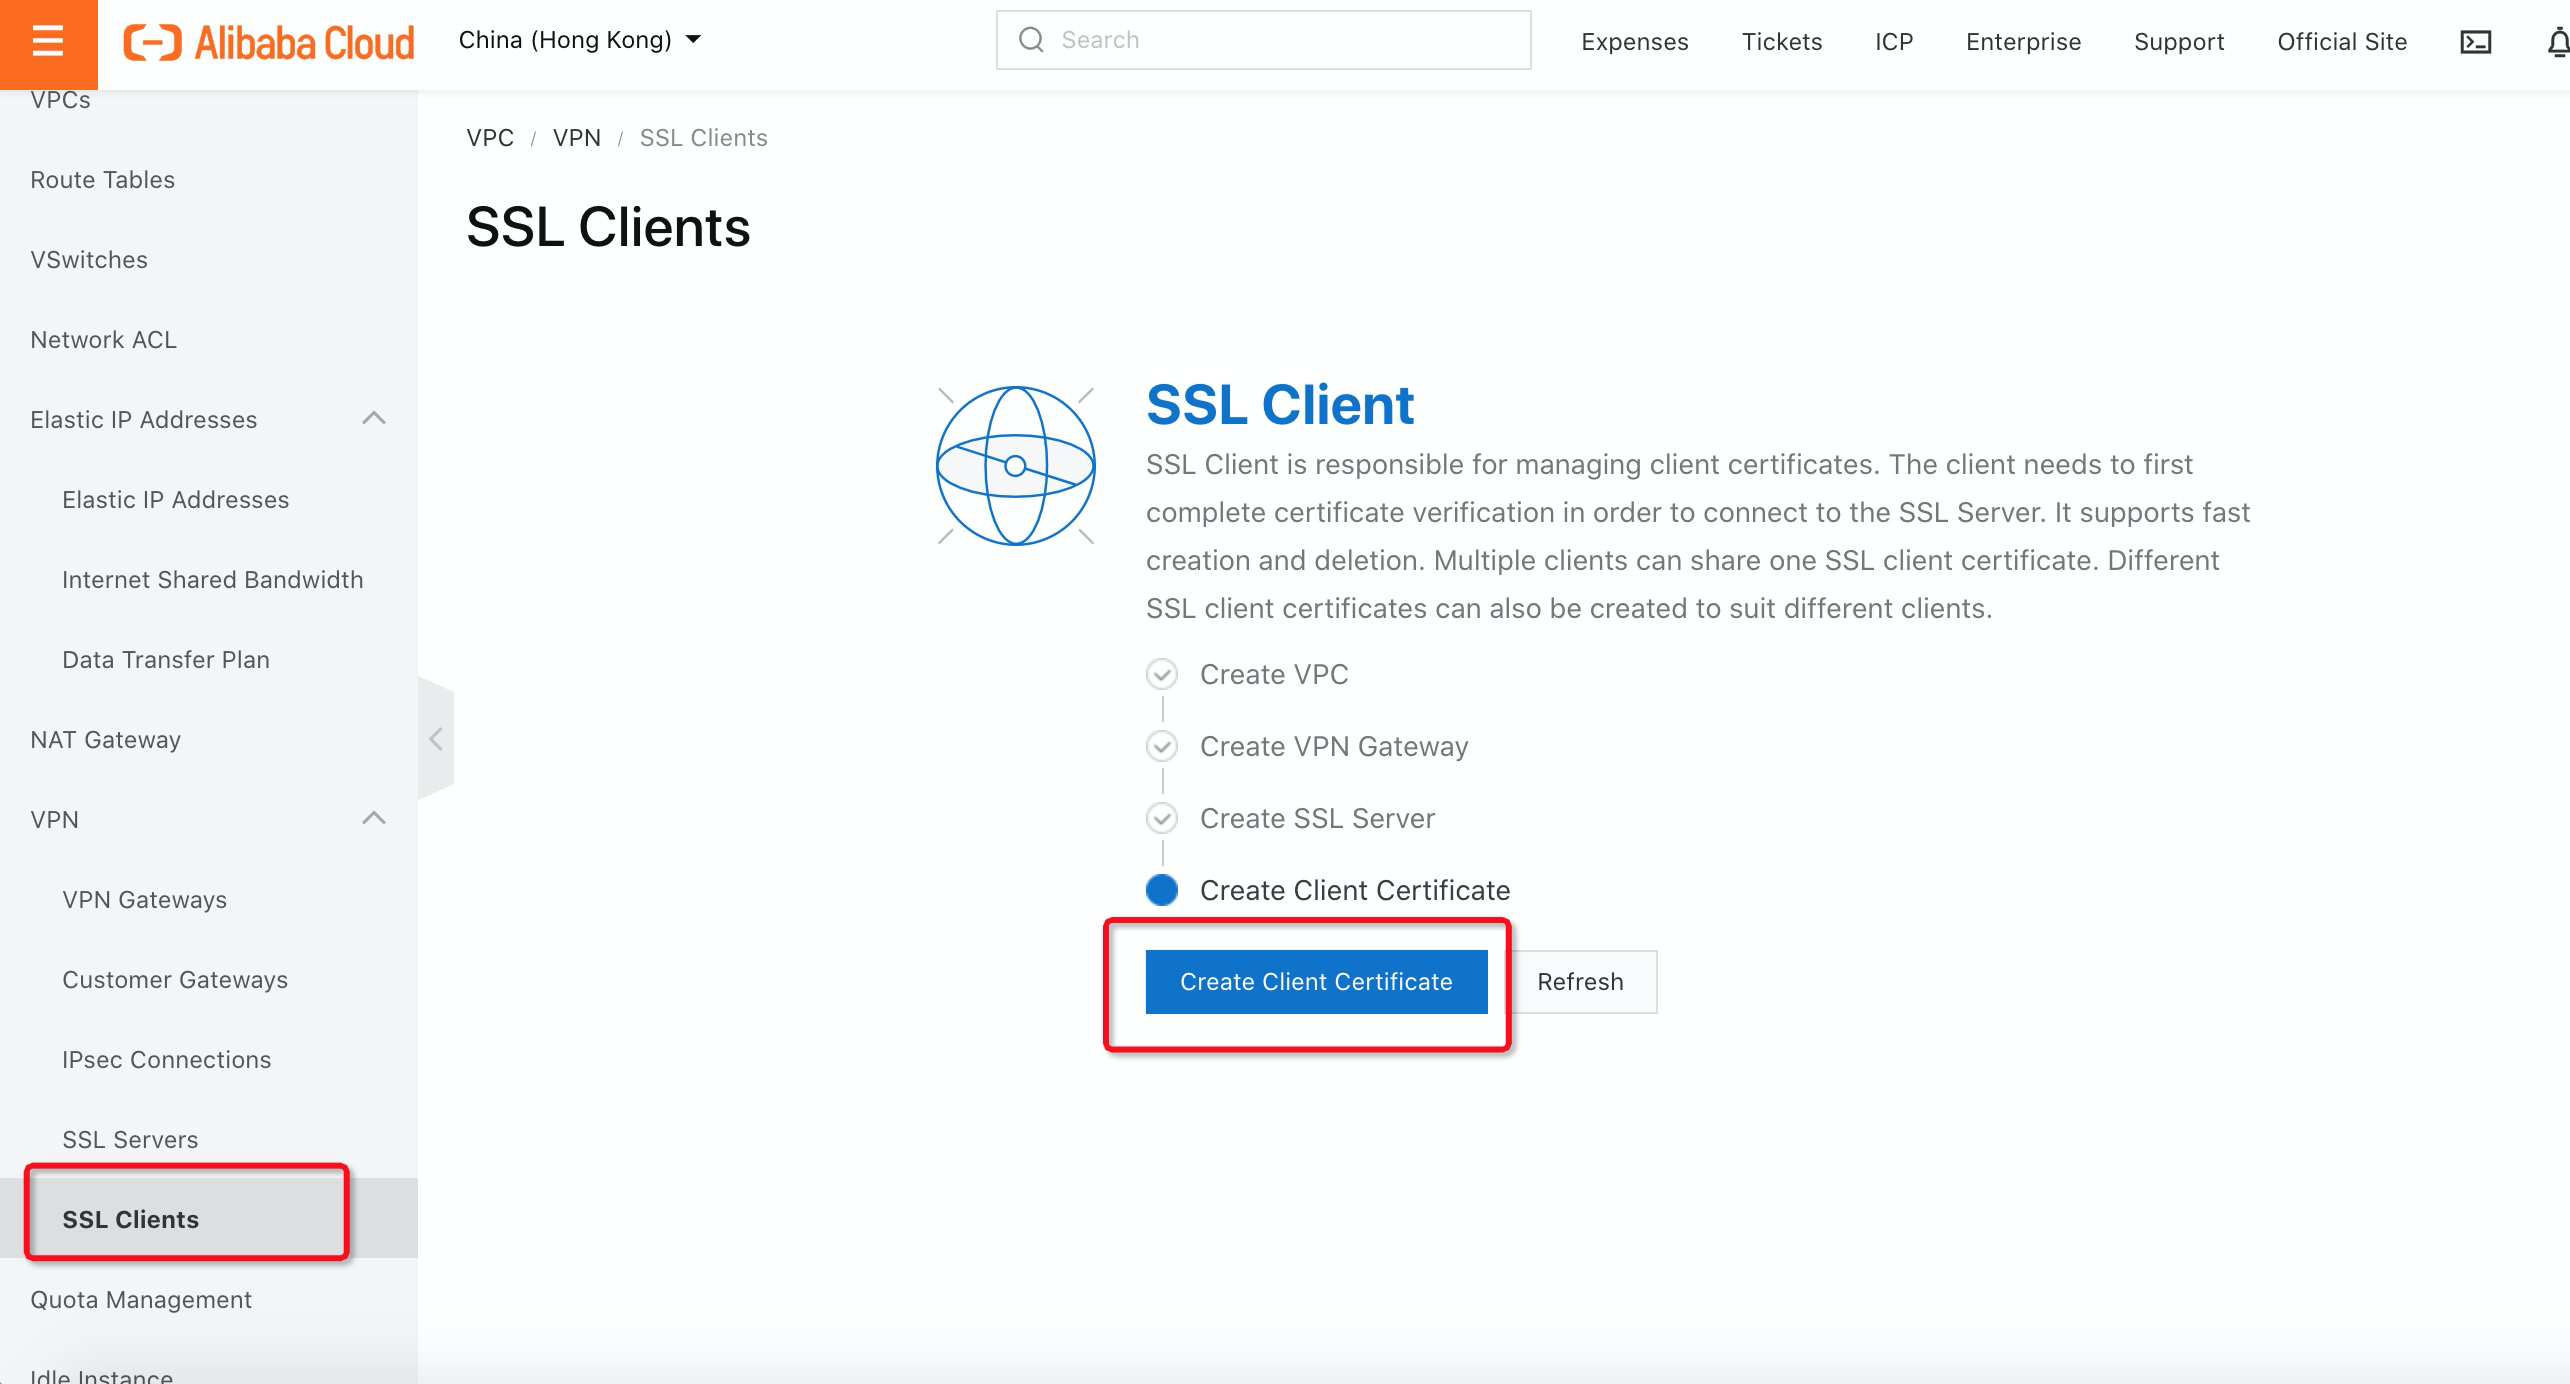
7. Navigate to SSL Clients under VPN and click Create Client Certificate:
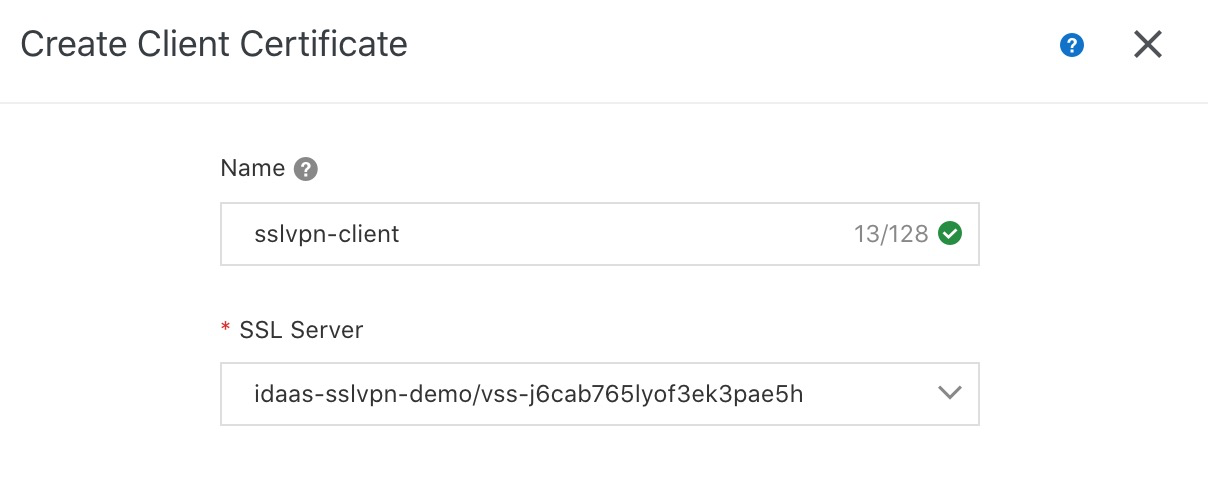
8. Fill in the Name and select SSL Server. Then, click OK:
9. Download the Client Certificate. Now, you are ready to test the SSLVPN with the Active Directory account login via iDaaS:

1. Depending on which operating system you are using, you will need to download and install the VPN software that supports the OpenVPN protocol. Double check the .ovpn file to connect to the Alibaba Cloud VPN Gateway:

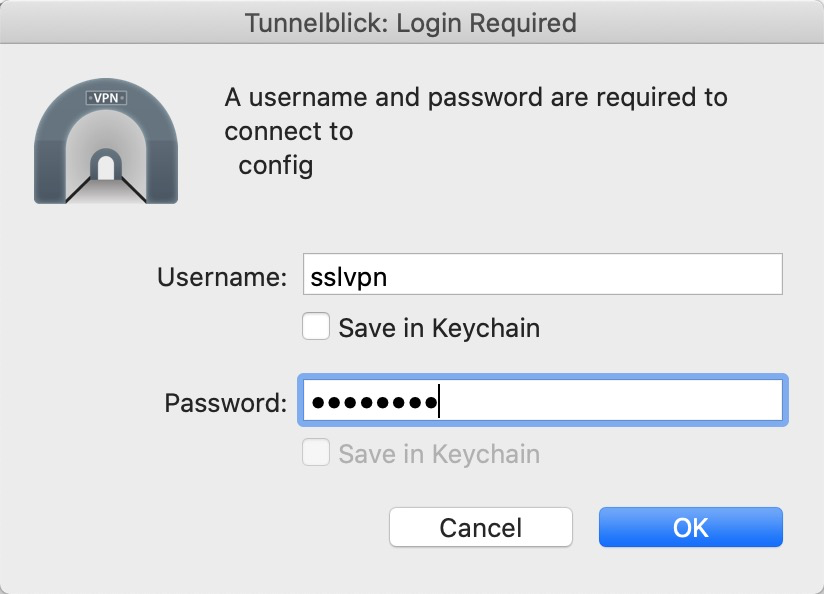
2. The VPN software will require a login before it establishes the VPN connection. Fill in the Active Directory username and password and click OK:
3. Now, you can access backend server using SSH with a private IP address:

Data Transmission Service (DTS): Migrate Data Between Different Data Storage Types

2,593 posts | 792 followers
FollowAlibaba Cloud Community - September 27, 2021
Alibaba Clouder - April 7, 2021
Alibaba Clouder - March 26, 2020
CloudSecurity - December 9, 2025
Alibaba Clouder - April 3, 2020
James Lee - February 28, 2024

2,593 posts | 792 followers
Follow RAM(Resource Access Management)
Secure your cloud resources with Resource Access Management to define fine-grained access permissions for users and groups
Learn More Resource Management
Organize and manage your resources in a hierarchical manner by using resource directories, folders, accounts, and resource groups.
Learn More IDaaS
IDaaS
Make identity management a painless experience and eliminate Identity Silos
Learn More Secure Access Service Edge
An office security management platform that integrates zero trust network access, office data protection, and terminal management.
Learn MoreMore Posts by Alibaba Clouder