Join us at the Alibaba Cloud ACtivate Online Conference on March 5-6 to challenge assumptions, exchange ideas, and explore what is possible through digital transformation.
By Garvin Li
Models generated on the Alibaba Cloud Machine Learning Platform for AI (PAI) can be deployed online to generate APIs that can be invoked by other services. This document is based on the Heart Disease Prediction Case, and describes how to use the Online Predictive Deployment feature of the machine learning platform to monitor user health in real time.
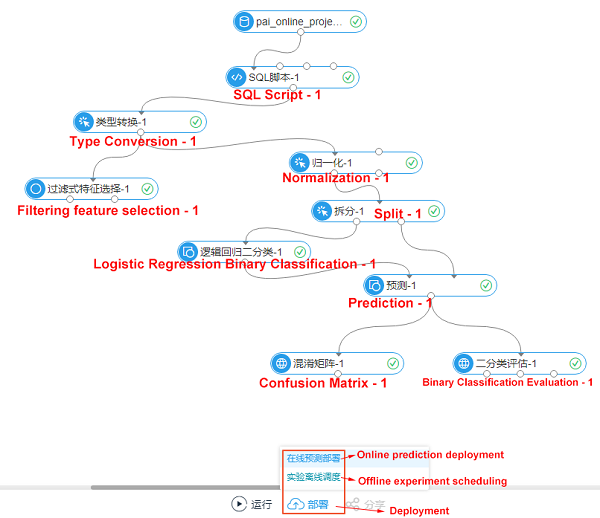
Click Deploy in the lower section of the current experiment interface and select Online Predictive Deployment. Select the logistic regression model generated in the heart disease prediction case, as shown in the following screenshot.

Go to the model configuration page, as shown in the following screenshot.
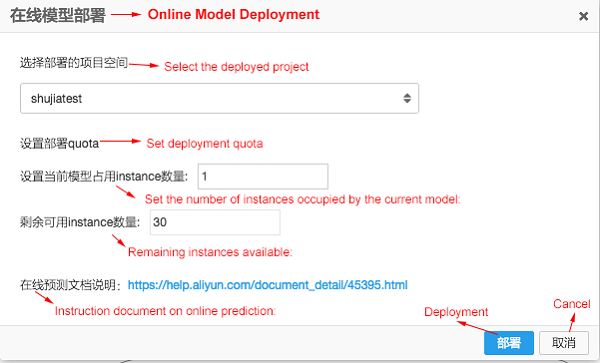
Select a corresponding project. If you are using this for the first time, you need to enable the online prediction permission, which will be enabled in real time upon request. Set the number of instances occupied by the current model. Instances are described as follows.
You can manage the deployed model in the interface shown below. Click View Service Details to check the newly deployed model.

You can manage the deployed model in Deployed Online Model, as shown in the following screenshot.
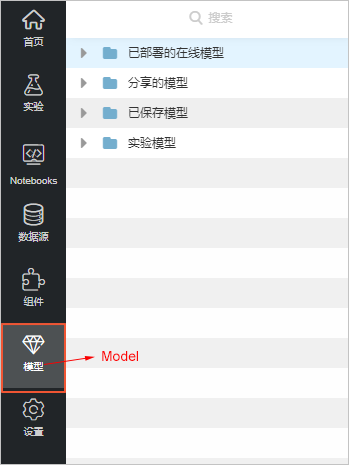
The following screenshot shows the model management interface. Different deployments of the same model can be differentiated by version. You can find the project where the model is located and the model name as shown in the following screenshot.
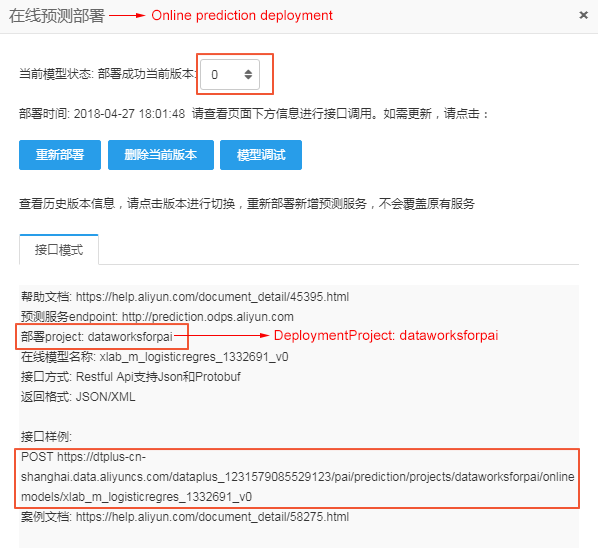
The model debugging page helps you understand the writing specifications of online prediction request parameters. Click Model Debugging shown in the preceding screenshot to access the model debugging page (Your browser may block this page. Please configure your browser to allow access to this link).
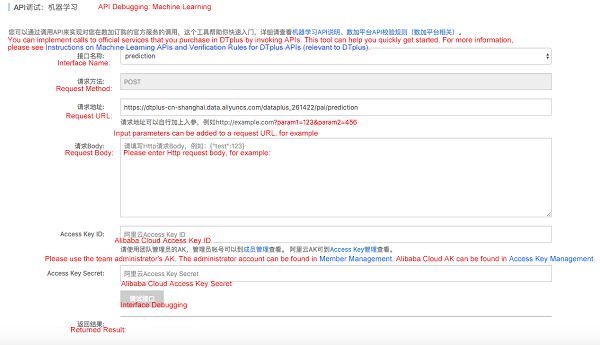
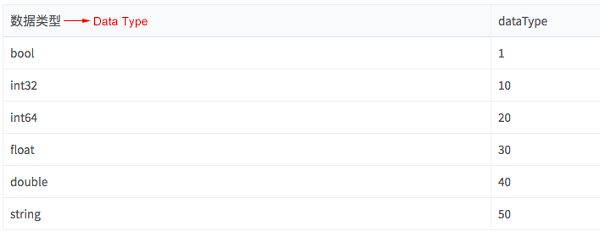
After the model is configured and debugged, edit the request body and send the request to get prediction results. Assume that parameters such as user gender, real-time blood pressure, and real-time heartbeat fluctuation are all 1. Send the following data to the server.
Here is the example body in this case.
1.    {
2.        "inputs": [
3.            {
4.                "sex": {
5.                    "dataType": 40,
6.                    "dataValue": 1
7.                },
8.                "cp": {
9.                    "dataType": 40,
10.                    "dataValue": 1
11.                },
12.                "fbs": {
13.                    "dataType": 40,
14.                    "dataValue": 1
15.                },
16.                "restecg": {
17.                    "dataType": 40,
18.                    "dataValue": 1
19.                },
20.                "exang": {
21.                    "dataType": 40,
22.                    "dataValue": 1
23.                },
24.                "slop": {
25.                    "dataType": 40,
26.                    "dataValue": 1
27.                },
28.                "thal": {
29.                    "dataType": 40,
30.                    "dataValue": 1
31.                },
32.                "age": {
33.                    "dataType": 40,
34.                    "dataValue": 1
35.                },
36.                "trestbps": {
37.                    "dataType": 40,
38.                    "dataValue": 1
39.                },
40.                "chol": {
41.                    "dataType": 40,
42.                    "dataValue": 1
43.                },
44.                "thalach": {
45.                    "dataType": 40,
46.                    "dataValue": 1
47.                }
48.            }
49.        ]
50.    }
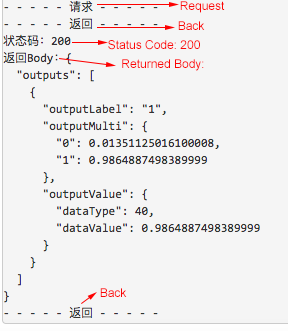
Results will be returned after the request is sent. Returned results in this example show that the label is 1 (1 indicates illness and 0 indicates health) and that the illness probability is 0.98649974.
To learn how to invoke APIs, please visit https://help.aliyun.com/document_detail/30245.html.
Alibaba Cloud Machine Learning Platform for AI: Image Classification by Caffe
Alibaba Clouder - June 29, 2020
Amuthan Nallathambi - June 4, 2023
Data Geek - February 27, 2025
Lana - April 14, 2023
Maya Enda - June 16, 2023
Alibaba Clouder - March 29, 2021
 Big Data Consulting for Data Technology Solution
Alibaba Cloud provides big data consulting services to help enterprises leverage advanced data technology.
Learn More MaxCompute
Conduct large-scale data warehousing with MaxCompute
Learn More Big Data Consulting Services for Retail Solution
Alibaba Cloud experts provide retailers with a lightweight and customized big data consulting service to help you assess your big data maturity and plan your big data journey.
Learn More ApsaraDB for HBase
ApsaraDB for HBase is a NoSQL database engine that is highly optimized and 100% compatible with the community edition of HBase.
Learn MoreMore Posts by GarvinLi
Start building with 50+ products and up to 12 months usage for Elastic Compute Service
Get Started for Free Get Started for Free