このトピックでは、Object Storage Service (OSS) SDK for iOS を使用して、オブジェクトのアップロードやダウンロードなどの一般的な操作を実行する方法について説明します。
前提条件
iOS SDK がインストールされていることを確認してください。 詳細については、「インストール (iOS SDK)」をご参照ください。
デモプロジェクト
次のデモプロジェクトを参照して、バケットの作成、ローカルファイルのアップロード、オブジェクトのダウンロード方法を学習できます。
次の方法でデモプロジェクトを試すことができます。
プロジェクトのクローン:`git clone` コマンドを実行してデモプロジェクトを取得します。
パラメーターの設定。
AliyunOSSSwift インスタンスを実行する前に、OSSSwiftGlobalDefines.swift ファイルで必須パラメーターを設定する必要があります。
AliyunOSSSDK を実行する前に、OSSTestMacros.h ファイルで必須パラメーターを設定する必要があります。
Security Token Service (STS) の開始。
プロジェクトの sts_local_server ディレクトリにあるローカルの認証スクリプトを実行してローカルの STS 認証サーバーを起動し、AccessKeyId、AccessKeySecret、および RoleArn パラメーターを設定します。
Python を使用してローカルの HTTP サービス httpserver.py を起動します。 この場合、クライアントコードを実行してローカルの HTTP サービスにアクセスし、StsToken.AccessKeyId、StsToken.SecretKey、および StsToken.SecurityToken パラメーターの値を取得できます。
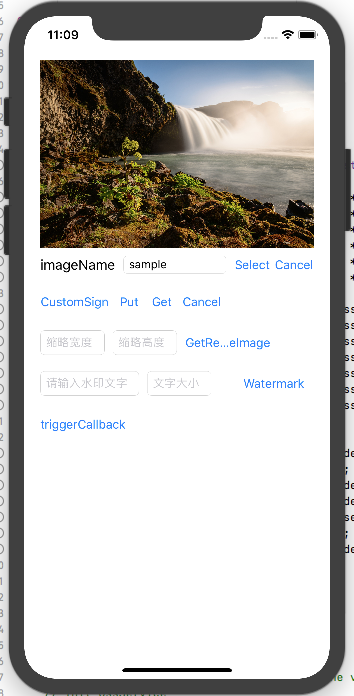
AliyunOSSSDK-iOS-Example デモプロジェクトを実行します。 次の図に示すように、結果が返されます。
サンプルコード
次のサンプルコードは、iOS および macOS プラットフォームでオブジェクトをアップロードおよびダウンロードする方法の例を示しています。
OSS ソフトウェアパッケージのインポート
OSS を使用する前に、必要なヘッダーファイルをインポートします。
#import <AliyunOSSiOS/OSSService.h>
OSSClient インスタンスの初期化
アクセス承認
OSS では、プレーンテキスト設定、自己署名、STS 認証の 3 つの認証モードがサポートされています。 モバイルデバイスには STS 認証モードを使用することを推奨します。 詳細については、「STS 認証モード」をご参照ください。
一時的なアクセス認証情報の取得
プレーンテキスト設定モード:AccessKey ID と AccessKeySecret を使用して認証します。
自己署名モード:署名文字列を生成して認証します。 詳細については、「自己署名モード」をご参照ください。
STS 認証モード:STS によって提供される一時的なアクセス認証情報を使用して認証します。 STS の AssumeRole 操作を呼び出す方法、またはさまざまなプログラミング言語で STS SDK を使用して一時的なアクセス認証情報を取得する方法の詳細については、「STS トークンを使用した OSS へのアクセス」をご参照ください。
一時的なアクセス認証情報を使用した OSS SDK for iOS の初期化
次のサンプルコードは、完全なアプリケーションライフサイクルで OSSClient インスタンスを初期化する方法の例を示しています。
@interface AppDelegate () @property (nonatomic, strong) OSSClient *client; @end /** * STS の URL を取得し、ユーザーが構築したサーバーで URL を設定します。 */ #define OSS_STS_URL @"oss_sts_url" /** * バケットが配置されているリージョンのエンドポイント。 */ #define OSS_ENDPOINT @"your bucket's endpoint" /** * バケットが配置されているリージョン。 */ #define OSS_REGION @"your bucket's region" @implementation AppDelegate - (BOOL)application:(UIApplication *)application didFinishLaunchingWithOptions:(NSDictionary *)launchOptions { // アプリケーションの起動後にカスタマイズするためのオーバーライドポイント。 // OSSClient インスタンスを初期化します。 [self setupOSSClient]; return YES; } - (void)setupOSSClient { // 自動的にリフレッシュする credentialProvider を初期化します。 id<OSSCredentialProvider> credentialProvider = [[OSSAuthCredentialProvider alloc] initWithAuthServerUrl:OSS_STS_URL]; // タイムアウト期間や DNS 解決など、クライアントを設定します。 OSSClientConfiguration *cfg = [[OSSClientConfiguration alloc] init]; cfg.signVersion = OSSSignVersionV4; client = [[OSSClient alloc] initWithEndpoint:OSS_ENDPOINT credentialProvider:credentialProvider clientConfiguration:cfg]; client.region = OSS_REGION; }説明アプリケーションが 1 つのリージョンで 1 つのバケットのみを使用する場合は、OSSClient インスタンスのライフサイクルをアプリケーションのライフサイクルと同じに設定することを推奨します。リージョンとエンドポイント
バケットの作成
次のサンプルコードは、examplebucket という名前のバケットを作成する方法の例を示しています。
// バケットを作成するリクエストを作成します。 OSSCreateBucketRequest * create = [OSSCreateBucketRequest new]; // バケット名を examplebucket に設定します。 create.bucketName = @"examplebucket"; // バケットのアクセス制御リスト (ACL) を private に設定します。 create.xOssACL = @"private"; // バケットのストレージクラスを低頻度アクセス (IA) に設定します。 create.storageClass = OSSBucketStorageClassIA; OSSTask * createTask = [client createBucket:create]; [createTask continueWithBlock:^id(OSSTask *task) { if (!task.error) { NSLog(@"create bucket success!"); } else { NSLog(@"create bucket failed, error: %@", task.error); } return nil; }]; // タスクが完了するまで待ちます。 // [createTask waitUntilFinished];説明すべての SDK 操作は
OSSTaskを返します。OSSTaskに継続アクションを設定して、結果を非同期に処理できます。 また、waitUntilFinishedを呼び出して、タスクが完了するまで現在のスレッドをブロックすることもできます。ローカルファイルのアップロード
次のサンプルコードは、ローカルファイルを OSS にアップロードする方法の例を示しています。
OSSPutObjectRequest * put = [OSSPutObjectRequest new];
// バケット名を指定します。 例:examplebucket
put.bucketName = @"examplebucket";
// オブジェクトの完全なパスを指定します。 完全なパスにバケット名を含めないでください。 例:exampledir/testdir/exampleobject.txt
put.objectKey = @"exampledir/testdir/exampleobject.txt";
put.uploadingFileURL = [NSURL fileURLWithPath:@"<filePath>"];
// put.uploadingData = <NSData *>; // NSData を直接アップロードします。
// NSData を直接アップロードします。
put.uploadProgress = ^(int64_t bytesSent, int64_t totalByteSent, int64_t totalBytesExpectedToSend) {
    NSLog(@"%lld, %lld, %lld", bytesSent, totalByteSent, totalBytesExpectedToSend);
};
OSSTask * putTask = [client putObject:put];
[putTask continueWithBlock:^id(OSSTask *task) {
    if (!task.error) {
        NSLog(@"upload object success!");
    } else {
        NSLog(@"upload object failed, error: %@" , task.error);
    }
    return nil;
}];
// タスクが完了するまで待ちます。
// [putTask waitUntilFinished];
オブジェクトのダウンロード
次のサンプルコードは、特定のオブジェクトをローカルコンピューターにダウンロードする方法の例を示しています。
OSSGetObjectRequest * request = [OSSGetObjectRequest new];
// バケット名を指定します。 例:examplebucket
request.bucketName = @"examplebucket";
// オブジェクトの完全なパスを指定します。 完全なパスにバケット名を含めないでください。 例:exampledir/testdir/exampleobject.txt
request.objectKey = @"exampledir/testdir/exampleobject.txt";
request.downloadProgress = ^(int64_t bytesWritten, int64_t totalBytesWritten, int64_t totalBytesExpectedToWrite) {
    NSLog(@"%lld, %lld, %lld", bytesWritten, totalBytesWritten, totalBytesExpectedToWrite);
};
OSSTask * getTask = [client getObject:request];
[getTask continueWithBlock:^id(OSSTask *task) {
    if (!task.error) {
        NSLog(@"download object success!");
        OSSGetObjectResult * getResult = task.result;
        NSLog(@"download result: %@", getResult.downloadedData);
    } else {
        NSLog(@"download object failed, error: %@" ,task.error);
    }
    return nil;
}];
// タスクが完了するまで待ちます。
// [task waitUntilFinished];