All Products
Search
Document Center

Realtime Compute for Apache Flink:Reference

最終更新日:Sep 12, 2024

This topic provides answers to some frequently asked questions about Realtime Compute for Apache Flink, including answers to questions about console operations, network connectivity, and JAR packages.

How do I upload a resource file in the OSS console?

Note

You can also upload resource files on the Artifacts page of the development console of Realtime Compute for Apache Flink. For more information, see Manage resources.

  1. In the management console of Realtime Compute for Apache Flink, view the information about the Object Storage Service (OSS) bucket that is associated with your workspace.

    image.png

    The following figure shows information about the OSS bucket.Bucket详情

  2. Log on to the OSS console and upload the resource file to the /artifacts/namespaces directory of the OSS bucket.OSS

  3. In the left-side navigation pane of the development console of Realtime Compute for Apache Flink, click Artifacts to view the resource file that you uploaded in the OSS console.

    image.png

How do I configure parameters for deployment running?

  1. Log on to the Realtime Compute for Apache Flink console.

  2. Find the workspace that you want to manage and click Console in the Actions column.

  3. In the left-side navigation pane, click O&M > Deployments. On the Deployments page, click the name of the deployment that you want to manage.

  4. In the upper-right corner of the Parameters section on the Configuration tab, click Edit.

  5. In the Parameters section, add the following related configurations to the Other Configuration field.

    Make sure that a space exists after the colon (:) between each key-value pair. Sample code:

    task.cancellation.timeout: 180s
  6. In the upper-right corner of the Parameters section, click Save.

How do I enable GC logs?

On the O&M > Deployments page, find the desired deployment and click the name of the deployment. In the upper-right corner of the Parameters section on the Configuration tab, click Edit. Add the following related configurations to the Other Configuration field. Then, click Save. The following figure shows the sample code.

env.java.opts:>--XX: +PrintGCDetails-XX:+PrintGCDateStamps-Xloggc:/flink/log/gc.log-XX:+UseGCLogFileRotation-XX:NumberOfGCLogFiles=2-XX:GCLogFileSize=50M

image.png

How do I find the deployment that triggers an alert?

The alert event contains JobID and Deployment ID. However, JobID changes after a failover is performed. In this case, you must use Deployment ID to find the deployment for which the error is returned. Deployment ID is not displayed in the development console of Realtime Compute for Apache Flink. You must obtain this information from the URL of the deployment.Depolyment ID

How do I view information about a workspace, such as the workspace ID?

Log on to the Realtime Compute for Apache Flink console, find the workspace that you want to manage, and then choose More > Workspace Details in the Actions column.工作空间详情

How do I view information about the AccessKey ID and AccessKey secret of the account?

Important

As of July 5, 2023, the AccessKey secret of the AccessKey pair can be displayed only when you create an Alibaba Cloud account or a RAM user to reduce the risks caused by the leak of an AccessKey pair. You cannot view the AccessKey secret of the AccessKey pair in the future.

You can perform the following operations to obtain your AccessKey ID and AccessKey secret in the Alibaba Cloud Management Console:

  1. Log on to the Alibaba Cloud Management Console.

  2. Move the pointer over your profile picture in the upper-right corner of the homepage and click AccessKey Management.accesskeys

  3. On the AccessKey Pair page, click Create AccessKey. In the Create AccessKey dialog box, click Download CSV File to download the AccessKey ID and AccessKey secret or click Copy to copy the AccessKey ID and AccessKey secret.

  4. In the Create AccessKey dialog box, select I have saved the AccessKey Secret and click OK.

Note

For more information about how to create the AccessKey pair of a RAM user, see Create an AccessKey pair.

How do I query the engine version of Realtime Compute for Apache Flink that is used by a deployment?

You can use one of the following methods to view the engine version of Realtime Compute for Apache Flink that is used by a deployment:

  • On the right side of the SQL Editor page, click the Configurations tab. In the Configurations panel, view the engine version of Realtime Compute for Apache Flink that is used by a deployment in the Engine Version field.

    image.png

  • On the O&M > Deployments page, click the name of the desired deployment. On the Configuration tab, view the engine version of Realtime Compute for Apache Flink that is used by a deployment in the Engine Version field of the Basic section.

    image.png

How do I deactivate Prometheus Service that is automatically activated with Realtime Compute for Apache Flink?

Important

If you deactivate Prometheus Service, Prometheus Service cannot be activated again and Ververica Platform (VVP) no longer displays common metrics of deployments in the development console of Realtime Compute for Apache Flink. If an exception occurs when you run a deployment, the time at which the exception first occurs cannot be determined and alerts cannot be reported. Proceed with caution.

If you no longer need to monitor Realtime Compute for Apache Flink, perform the following steps to deactivate Prometheus Service:

  1. Log on to the Prometheus Service console.

  2. In the left-side navigation pane, click Instances to go to the Prometheus Service page.

  3. Select the ID or name of the workspace that you want to manage from the Filter by Tag drop-down list.

  4. Find the instance whose Instance Type is Prometheus for Flink Serverless and click Uninstall in the Actions column.

  5. In the message that appears, click OK.

How do I configure a whitelist?

In most cases, the upstream and downstream storage systems that are supported by Realtime Compute for Apache Flink do not allow access from external systems. Therefore, you must add the Classless Inter-Domain Routing (CIDR) block of the vSwitch of Realtime Compute for Apache Flink to the whitelist of the storage system that Realtime Compute for Apache Flink needs to access. To add the CIDR block of the vSwitch of Realtime Compute for Apache Flink to the whitelist of the storage system that Realtime Compute for Apache Flink needs to access, perform the following steps:

  1. Log on to the Realtime Compute for Apache Flink console.

  2. Find the workspace that you want to manage, and choose More > Workspace Details in the Actions column.

  3. In the Workspace Details dialog box, view the CIDR block of the vSwitch of Realtime Compute for Apache Flink.网段

  4. Add the CIDR block of the vSwitch of Realtime Compute for Apache Flink to the whitelist of the storage system that Realtime Compute for Apache Flink needs to access.

    For example, you must configure a whitelist for an ApsaraDB RDS for MySQL database. For more information, see Configure an IP address whitelist for an ApsaraDB RDS for MySQL instance.

    Note
    • If you add a vSwitch later, you must also add the CIDR block of the new vSwitch to the whitelist of the storage system that Realtime Compute for Apache Flink needs to access.

    • If your vSwitch is not in the same zone as the upstream and downstream storage, the network can be connected after you add the CIDR block of the vSwitch to the whitelist.

What do I do if my account does not have the required permissions when I log on to the Realtime Compute for Apache Flink console?

  • Problem description

    When I log on to the Realtime Compute for Apache Flink console, the error message that is shown in the following figure appears.

    image.png

  • Cause

    You do not have the permissions to view Realtime Compute for Apache Flink workspaces, or you have only the permissions on a specific resource group.

  • Solution

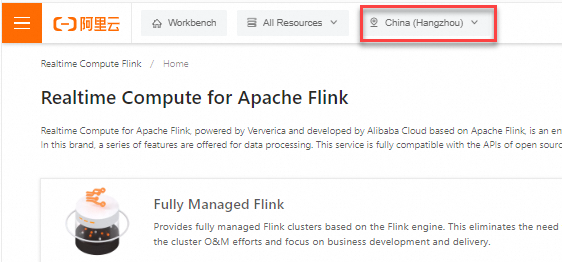
    • If you have only permissions on a specific resource group, select the related resource group in the upper part of the console and select the region to view the desired workspace.

      image.png

    • If you do not have the permissions to view Realtime Compute for Apache Flink workspaces, grant the related permissions to the RAM user or the Alibaba Cloud account to which the RAM role is assigned. For more information, see Grant permissions to a RAM user.

      You can select one of the following policies that include permissions to view Realtime Compute for Apache Flink workspaces:

      • System policy: AliyunStreamReadOnlyAccess (permissions to access Realtime Compute for Apache Flink in read-only mode) or AliyunStreamFullAccess (all permissions on Realtime Compute for Apache Flink). For more information, see System policies.

      • Custom policy: stream:DescribeVvpInstances (permissions to view workspaces). For more information, see Custom policies.

How does Realtime Compute for Apache Flink access the Internet?

  • Background information

    By default, Realtime Compute for Apache Flink cannot access the Internet. Therefore, Alibaba Cloud provides NAT gateways to enable communications between virtual private clouds (VPCs) and the Internet. This way, users of Realtime Compute for Apache Flink can access the Internet by using user-defined functions (UDFs) or DataStream code.背景说明

  • Solution

    Create a NAT gateway in the VPC. Then, create a source network address translation (SNAT) entry to bind the vSwitch that is associated with Realtime Compute for Apache Flink to an elastic IP address (EIP). This way, the service can access the Internet by using the EIP. To access the Internet by using the EIP, perform the following steps:

    1. Create a NAT gateway. For more information, see Create a NAT gateway.

    2. Create an SNAT entry and bind the vSwitch that is associated with Realtime Compute for Apache Flink to an EIP. For more information, see Create and manage SNAT entries.

How does Realtime Compute for Apache Flink access a service across VPCs?

You can use one of the following methods to allow Realtime Compute for Apache Flink to access a service across VPCs:

  • Submit a ticket. When you create the ticket, select VPC as the product name. Express Connect or other products are required to establish connections between VPCs. You are charged when you use this method.

  • Connect a network instance to Cloud Enterprise Network (CEN) to establish a network connection. For more information, see Overview.

  • Use a VPN Gateway to establish a VPN connection between VPCs. For more information, see Establish IPsec-VPN connections between two VPCs.

  • Unsubscribe from the service that resides in a different VPC from Realtime Compute for Apache Flink. Then, purchase the same service that resides in the same VPC as Realtime Compute for Apache Flink.

  • Release the Realtime Compute for Apache Flink workspace. Then, purchase another Realtime Compute for Apache Flink workspace that is in the same VPC as the service that you want Realtime Compute for Apache Flink to access.

  • Enable Internet access for Realtime Compute for Apache Flink. This way, Realtime Compute for Apache Flink can access other services over the Internet. By default, Realtime Compute for Apache Flink cannot access the Internet. For more information about how to allow Realtime Compute for Apache Flink to access the Internet, see How does Realtime Compute for Apache Flink access the Internet?

    Note

    The Internet has a longer latency than internal networks. If you have high performance requirements, we recommend that you do not enable Internet access for Realtime Compute for Apache Flink.

How do I use the network detection feature in the development console of Realtime Compute for Apache Flink?

Realtime Compute for Apache Flink supports the network detection feature. To use the network detection feature, perform the following steps in the development console of Realtime Compute for Apache Flink:

  1. Log on to the Realtime Compute for Apache Flink console.

  2. Find the workspace that you want to manage and click Console in the Actions column.

  3. In the top navigation bar, click the Network detection icon.

    Image 161.png

  4. In the Network detection dialog box, configure the Host parameter to specify an IP address or endpoint to check whether the running environment of a Realtime Compute for Apache Flink deployment is connected to the upstream and downstream systems.

    Important

    If you specify an endpoint, remove :<port> from the end of the endpoint and enter <port> in the Port field in the Network detection dialog box.

    image.png

How do I troubleshoot dependency conflicts of Realtime Compute for Apache Flink?

  • Problem description

    • An error is reported, which is caused by an exception related to Realtime Compute for Apache Flink or Hadoop.

      java.lang.AbstractMethodError
      java.lang.ClassNotFoundException
      java.lang.IllegalAccessError
      java.lang.IllegalAccessException
      java.lang.InstantiationError
      java.lang.InstantiationException
      java.lang.InvocationTargetException
      java.lang.NoClassDefFoundError
      java.lang.NoSuchFieldError
      java.lang.NoSuchFieldException
      java.lang.NoSuchMethodError
      java.lang.NoSuchMethodException
    • No error is reported, but one of the following issues occur:

      • Logs are not generated or the Log4j configuration does not take effect.

        In most cases, this issue occurs because the dependency contains the Log4j configuration. To resolve this issue, you must check whether the dependency in the JAR file of your deployment contains the Log4j configuration. If the dependency contains the Log4j configuration, you can configure exclusions in the dependency to remove the Log4j configuration.

        Note

        If you use different versions of Log4j, you must use maven-shade-plugin to relocate Log4j-related classes.

      • The remote procedure call (RPC) fails.

        By default, errors caused by dependency conflicts during Akka RPCs of Realtime Compute for Apache Flink are not recorded in logs. To check these errors, you must enable debug logging.

        For example, a debug log records Cannot allocate the requested resources. Trying to allocate ResourceProfile{xxx}. However, the JobManager log stops at the message Registering TaskManager with ResourceID xxx and does not display any information until a resource request times out and displays the message NoResourceAvailableException. In addition, TaskManagers continuously report the error message Cannot allocate the requested resources. Trying to allocate ResourceProfile{xxx}.

        Cause: After you enable debug logging, the RPC error message InvocationTargetException appears. In this case, slots fail to be allocated for TaskManagers and the status of the TaskManagers becomes inconsistent. As a result, slots cannot be allocated and the error cannot be fixed.

  • Cause

    • The JAR package of your deployment contains unnecessary dependencies, such as the dependencies for basic configurations, Realtime Compute for Apache Flink, Hadoop, and Log4j. As a result, dependency conflicts occur and cause some issues.

    • The dependency that corresponds to the connector that is required for your deployment is not included in the JAR package.

  • Troubleshooting

    • Check whether the pom.xml file of your deployment contains unnecessary dependencies.

    • Run the jar tf foo.jar command to view the content of the JAR package and determine whether the package contains the content that causes dependency conflicts.

    • Run the mvn dependency:tree command to check the dependency relationship of your deployment and determine whether dependency conflicts exist.

  • Solution

    • We recommend that you set scope to provided for the dependencies for basic configurations. This way, the dependencies for basic configurations are not included in the JAR package of your deployment.

      • DataStream Java

        <dependency>
          <groupId>org.apache.flink</groupId>
          <artifactId>flink-streaming-java_2.11</artifactId>
          <version>${flink.version}</version>
          <scope>provided</scope>
        </dependency>
      • DataStream Scala

        <dependency>
          <groupId>org.apache.flink</groupId>
          <artifactId>flink-streaming-scala_2.11</artifactId>
          <version>${flink.version}</version>
          <scope>provided</scope>
        </dependency>
      • DataSet Java

        <dependency>
          <groupId>org.apache.flink</groupId>
          <artifactId>flink-java</artifactId>
          <version>${flink.version}</version>
          <scope>provided</scope>
        </dependency>
      • DataSet Scala

        <dependency>
          <groupId>org.apache.flink</groupId>
          <artifactId>flink-scala_2.11</artifactId>
          <version>${flink.version}</version>
          <scope>provided</scope>
        </dependency>
    • Add the dependencies that correspond to the connectors required for the deployment, and set scope to compile. This way, the dependencies that correspond to the required connectors are included in the JAR package. The default value of scope is compile. In the following code, the Kafka connector is used as an example.

      <dependency>
          <groupId>org.apache.flink</groupId>
          <artifactId>flink-connector-kafka_2.11</artifactId>
          <version>${flink.version}</version>
      </dependency>
    • We recommend that you do not add the dependencies for Realtime Compute for Apache Flink, Hadoop, or Log4j. Take note of the following exceptions:

      • If the deployment has direct dependencies for basic configurations or connectors, we recommend that you set scope to provided. Sample code:

        <dependency>
            <groupId>org.apache.hadoop</groupId>
            <artifactId>hadoop-common</artifactId>
            <scope>provided</scope>
        </dependency>
      • If the deployment has indirect dependencies for basic configurations or connectors, we recommend that you configure exclusions to remove the dependencies. Sample code:

        <dependency>
            <groupId>foo</groupId>
              <artifactId>bar</artifactId>
              <exclusions>
                <exclusion>
                <groupId>org.apache.hadoop</groupId>
                <artifactId>hadoop-common</artifactId>
               </exclusion>
            </exclusions>
        </dependency>

How do I resolve the domain name of the service on which a Realtime Compute for Apache Flink deployment depends?

If your Realtime Compute for Apache Flink deployment depends on the domain name of the service, a domain name resolution failure is reported when you migrate the service data to Realtime Compute for Apache Flink. To solve this issue, you can use one of the following methods based on the scenario:

  • You have a self-managed DNS. Flink can connect to the self-managed DNS service over a VPC, and the self-managed DNS can normally resolve domain names.

    In this case, you can perform DNS resolution by using the deployment template of Realtime Compute for Apache Flink. For example, the IP address of your self-managed DNS is 192.168.0.1. Perform the following steps:

    1. Log on to the Realtime Compute for Apache Flink console.

    2. Find the workspace that you want to manage and click Console in the Actions column.

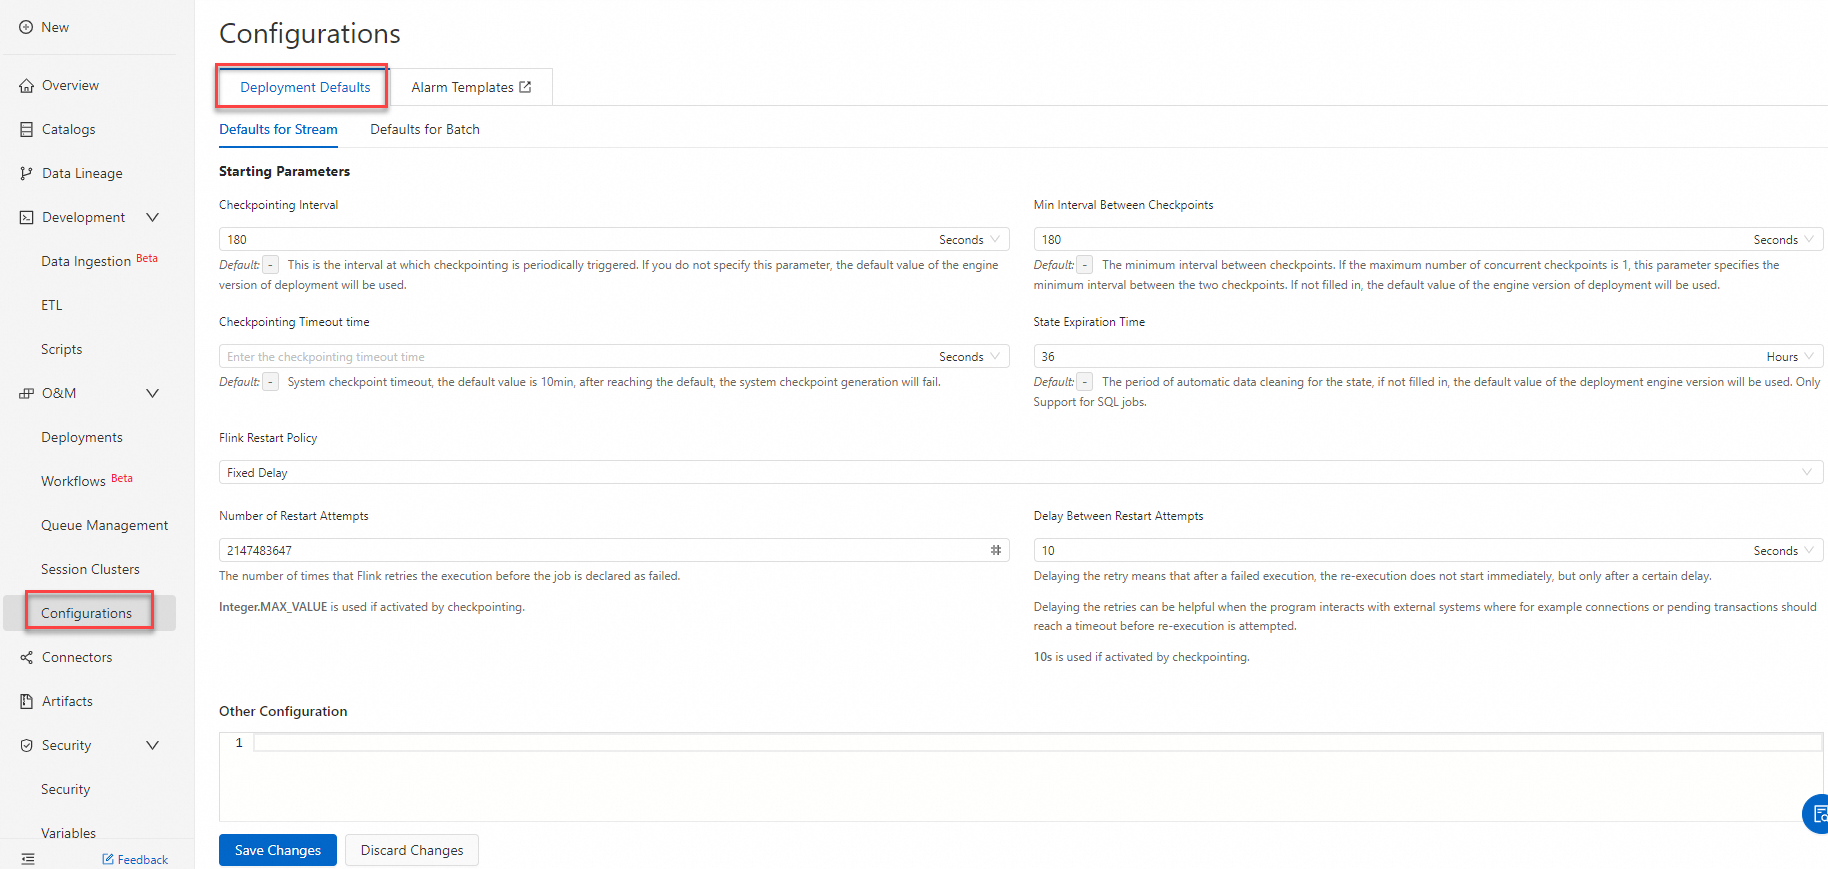
    3. In the left-side navigation pane, click Configurations. On the Deployment Defaults tab, add the following code to the Other Configuration field:

      env.java.opts: >-
        -Dsun.net.spi.nameservice.provider.1=default
        -Dsun.net.spi.nameservice.provider.2=dns,sun
        -Dsun.net.spi.nameservice.nameservers=192.168.0.1
      Note

      If your self-managed DNS has multiple IP addresses, we recommend that you separate the IP addresses with commas (,).

    4. Click Save Changes.

    5. Create a draft and run the deployment for the draft in the development console of Realtime Compute for Apache Flink.

      • If the UnknownHostException error persists, domain names cannot be resolved. In this case, contact Alibaba Cloud for technical support.

      • After self-managed DNS is configured, the deployment frequently fails, and the error message "JobManager heartbeat timeout" appears. For more information about the troubleshooting method, see What do I do if the error message "JobManager heartbeat timeout" appears?

  • You do not deploy self-managed DNS or Realtime Compute for Apache Flink cannot connect to self-managed DNS over a VPC.

    In this case, you must use Alibaba Cloud DNS PrivateZone to resolve domain names. For example, the VPC in which Realtime Compute for Apache Flink resides is named vpc-flinkxxxxxxx, and the domain names that your Realtime Compute for Apache Flink deployment needs to access are aaa.test.com 127.0.0.1, bbb.test.com 127.0.0.2, and ccc.test.com 127.0.0.3. To resolve the domain names, perform the following steps:

    1. Activate Alibaba Cloud DNS PrivateZone. For more information, see Activate Alibaba Cloud DNS PrivateZone.

    2. Add a zone and use the common suffix of the service that your Realtime Compute for Apache Flink deployment needs to access as the zone name. For more information, see Add a zone.

    3. Associate the zone with the VPC in which Realtime Compute for Apache Flink resides. For more information, see Associate a zone with a VPC or disassociate a zone from a VPC.

    4. Add DNS records to the zone. For more information, see Add DNS records.结果

    5. In the development console of Realtime Compute for Apache Flink, create and run a deployment or stop and rerun an existing deployment.

      If the UnknownHost error persists, domain names cannot be resolved. In this case, contact Alibaba Cloud for technical support.

What do I do if the error message "JobManager heartbeat timeout" appears?

  • Problem description

    After I configure self-managed DNS, the deployment frequently fails, and the error message "JobManager heartbeat timeout" appears.

  • Cause

    The network latency to self-managed DNS is high.

  • Solution

    Change the value of jobmanager.retrieve-taskmanager-hostname to false in the deployment code to disable DNS for the TaskManagers of the deployment. After the configuration is changed, the deployment can still be connected to external services by using the domain name. For more information about how to configure this parameter, see How do I configure parameters for deployment running?