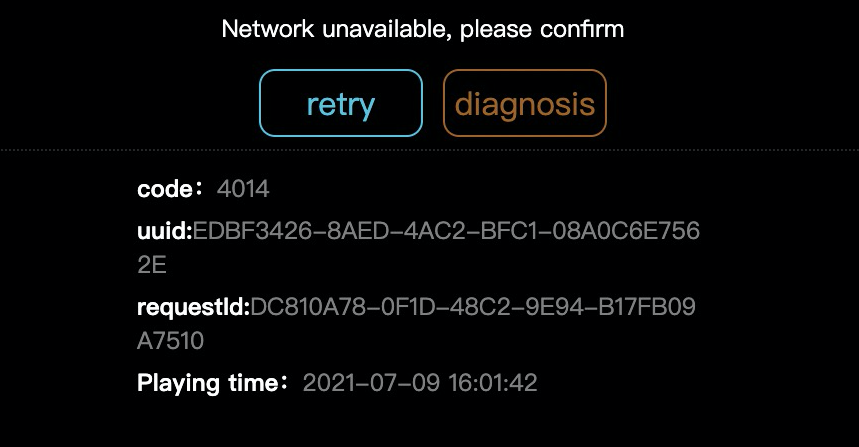
You can customize the error UI for the HTML5 player by using one of the following methods: modify the CSS file of the default error UI or define a new error UI.
Default error UI
The following figure shows the default error UI of ApsaraVideo Player.  Enable the displayError UI component
If you use the skinLayout attribute to customize the player skin in ApsaraVideo Player V2.1.0 or later, you must enable the displayError UI component in the skinLayout attribute, as shown in the following code. For more information about the skinLayout attribute, see Configure the skinLayout attribute.
skinLayout:[
    ......
    {name: "errorDisplay", align: "tlabs", x: 0, y: 0},
    {name: "infoDisplay", align: "cc"},
    ......
  ]
Custom error UI
You can customize the error UI by using one of the following two methods:
Modify the CSS file of the default error UI
You can customize the error UI based on the default error UI. You can modify the CSS file to change the background color, font, and position and specify whether to display the error message.
The following table describes the classes that you may need to modify in the CSS file.
Class
Description
.prism-ErrorMessage
The class of the outermost container.
.prism-error-content
The class that defines the area where an error message is displayed.
.prism-error-operation
The class that defines the area where operations can be performed.
.prism-detect-info
The class that defines the area where the additional information is displayed, such as the UUID and request ID. The additional information is used for diagnostics.
Define a new error UI
The following code shows how to subscribe to error events:
player.on('error',function(e){
      // Hide the error UI.
      $('.prism-ErrorMessage').hide();
      // Parse the data about the error.
      var errorData = e.paramData;
      console.dir(errorData);
    });
Procedure for defining a new error UI:
Hide the error UI of ApsaraVideo Player, as shown in the preceding code.
Parse the data about the error in the paramData parameter, as shown in the preceding code. The following figure shows the fields about the error in the data.

After you complete the two steps, you can obtain specific error codes. Then, assign the error codes to the parameters on the error UI.