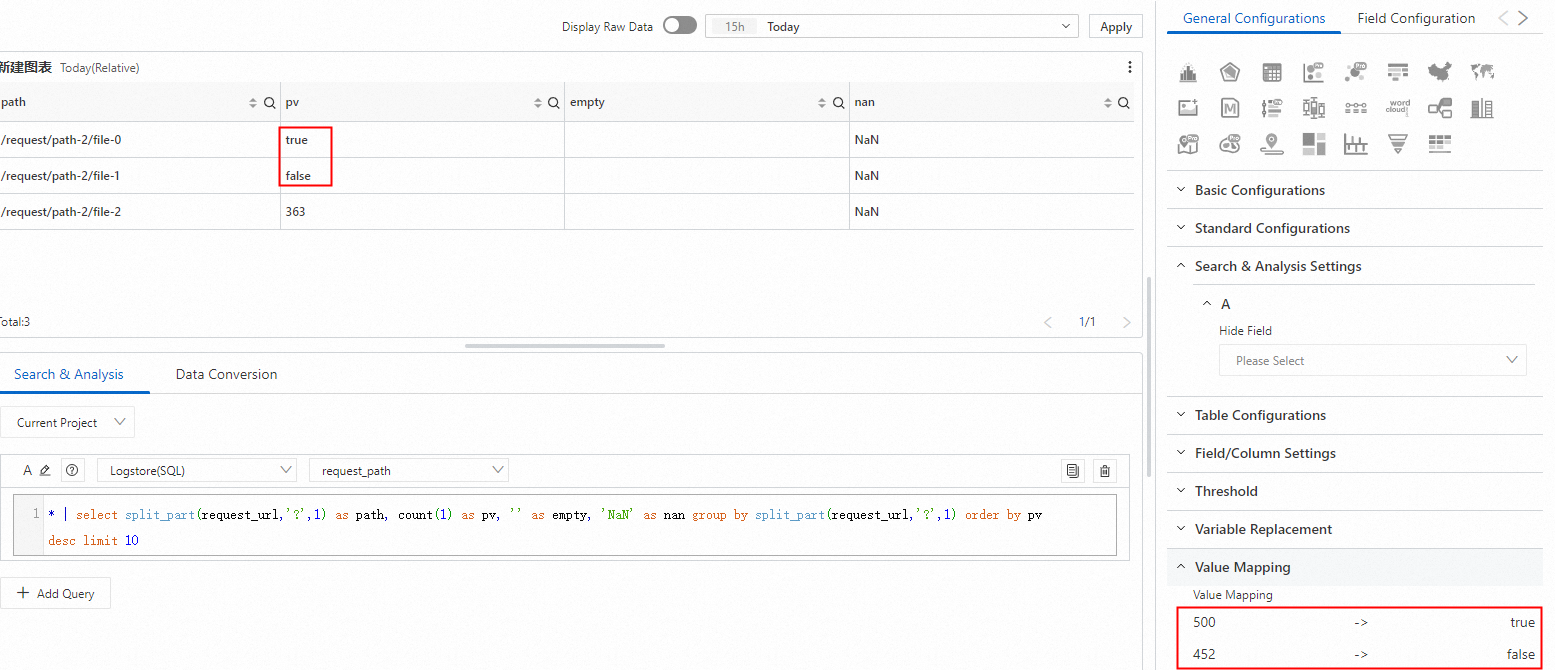
To replace the values in a table with other values or icons and view the results in a dashboard, you can use the value mapping feature of the table.
Prerequisites
Log data is collected. For more information, see Collect text logs from servers.
Indexes are created. For more information, see Create indexes.
Step 1: Query data
Log on to the Simple Log Service console. In the Projects section, click the project you want.
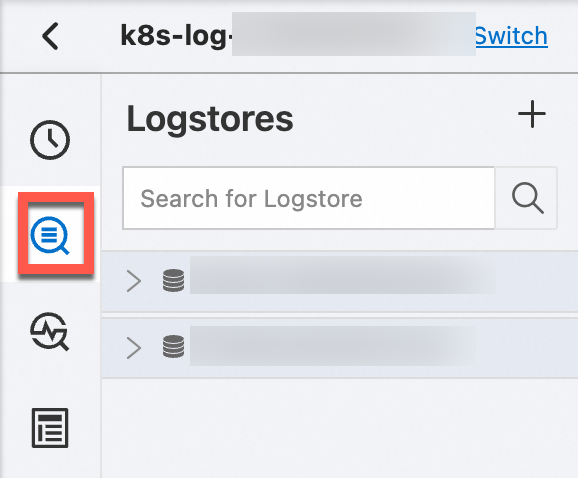
In the left-side navigation pane, click Log Storage. In the Logstores list, click the logstore you want.
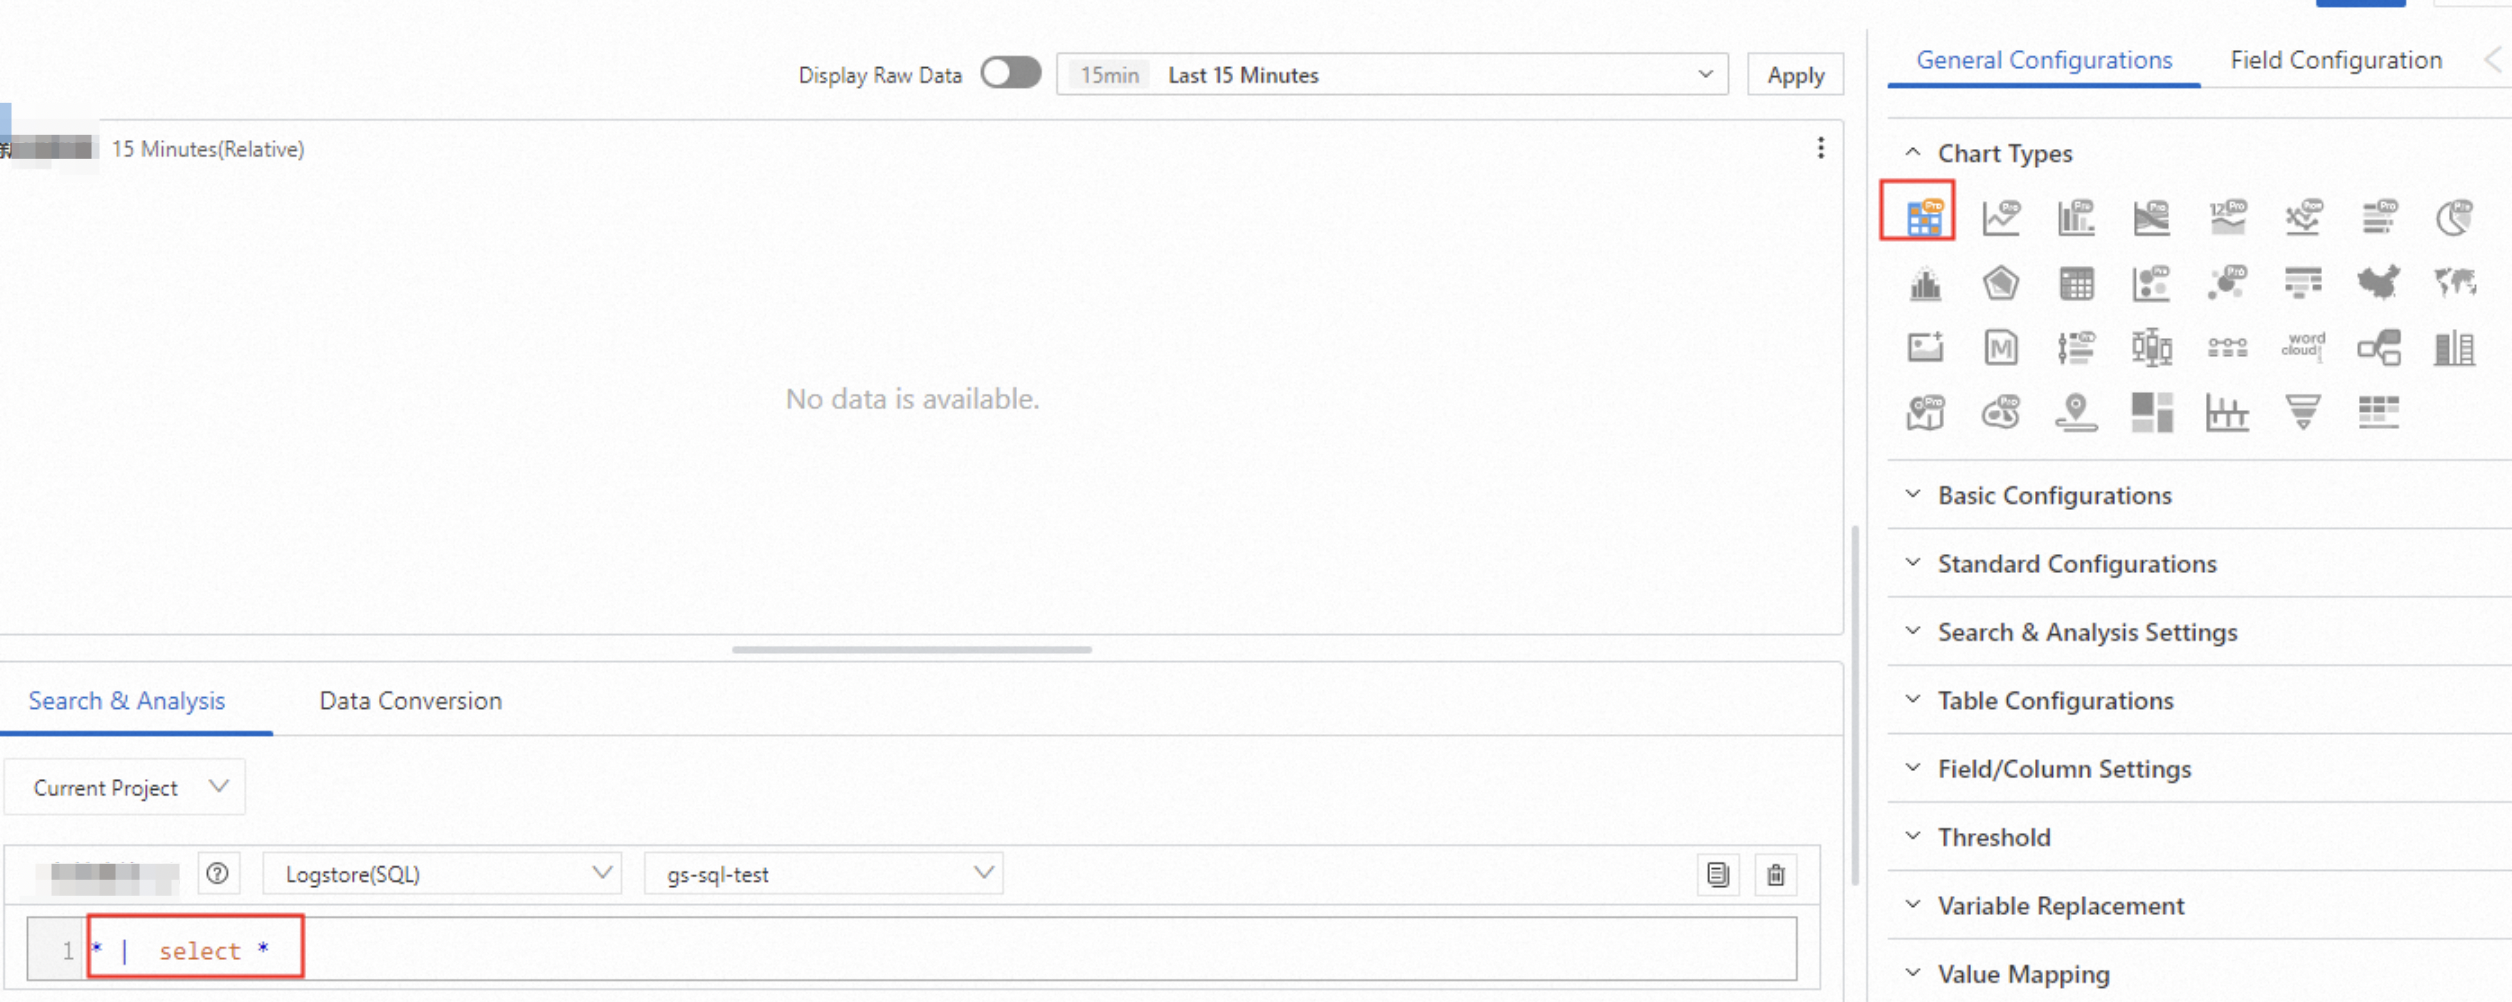
Enter the query and analysis statement, and then click Last 15 Minutes to set the time range for your query and analysis.
For example, you can use the following query and analysis statement to view the path and import volume of a file.
* | select split_part(request_uri,'?',1) as path, count(1) as pv, '' as empty, 'NaN' as nan group by split_part(request_uri,'?',1) order by pv desc limit 10
Step 2: Add a table
In the left-side navigation pane, choose Dashboard > Dashboards. In the dashboard list, click the dashboard you want. In the upper-right corner of the dashboard page, click Edit. In edit mode, click Add > Add Chart.

On the General Configurations tab, click the Table Pro icon in the Chart Types section. On the Search & Analysis tab, select Logstore (SQL) and choose the logstore you want, and enter the query statement. Select a time range, such as Last 15 Minutes, and click OK.
Step 3: Add value mapping
Replace empty values
On the General Configurations tab, click Value Mapping, and then click Add Value Mapping or Edit Value Mapping.
On the Value Mapping dialog box, click Add, and then select Special from the drop-down list.
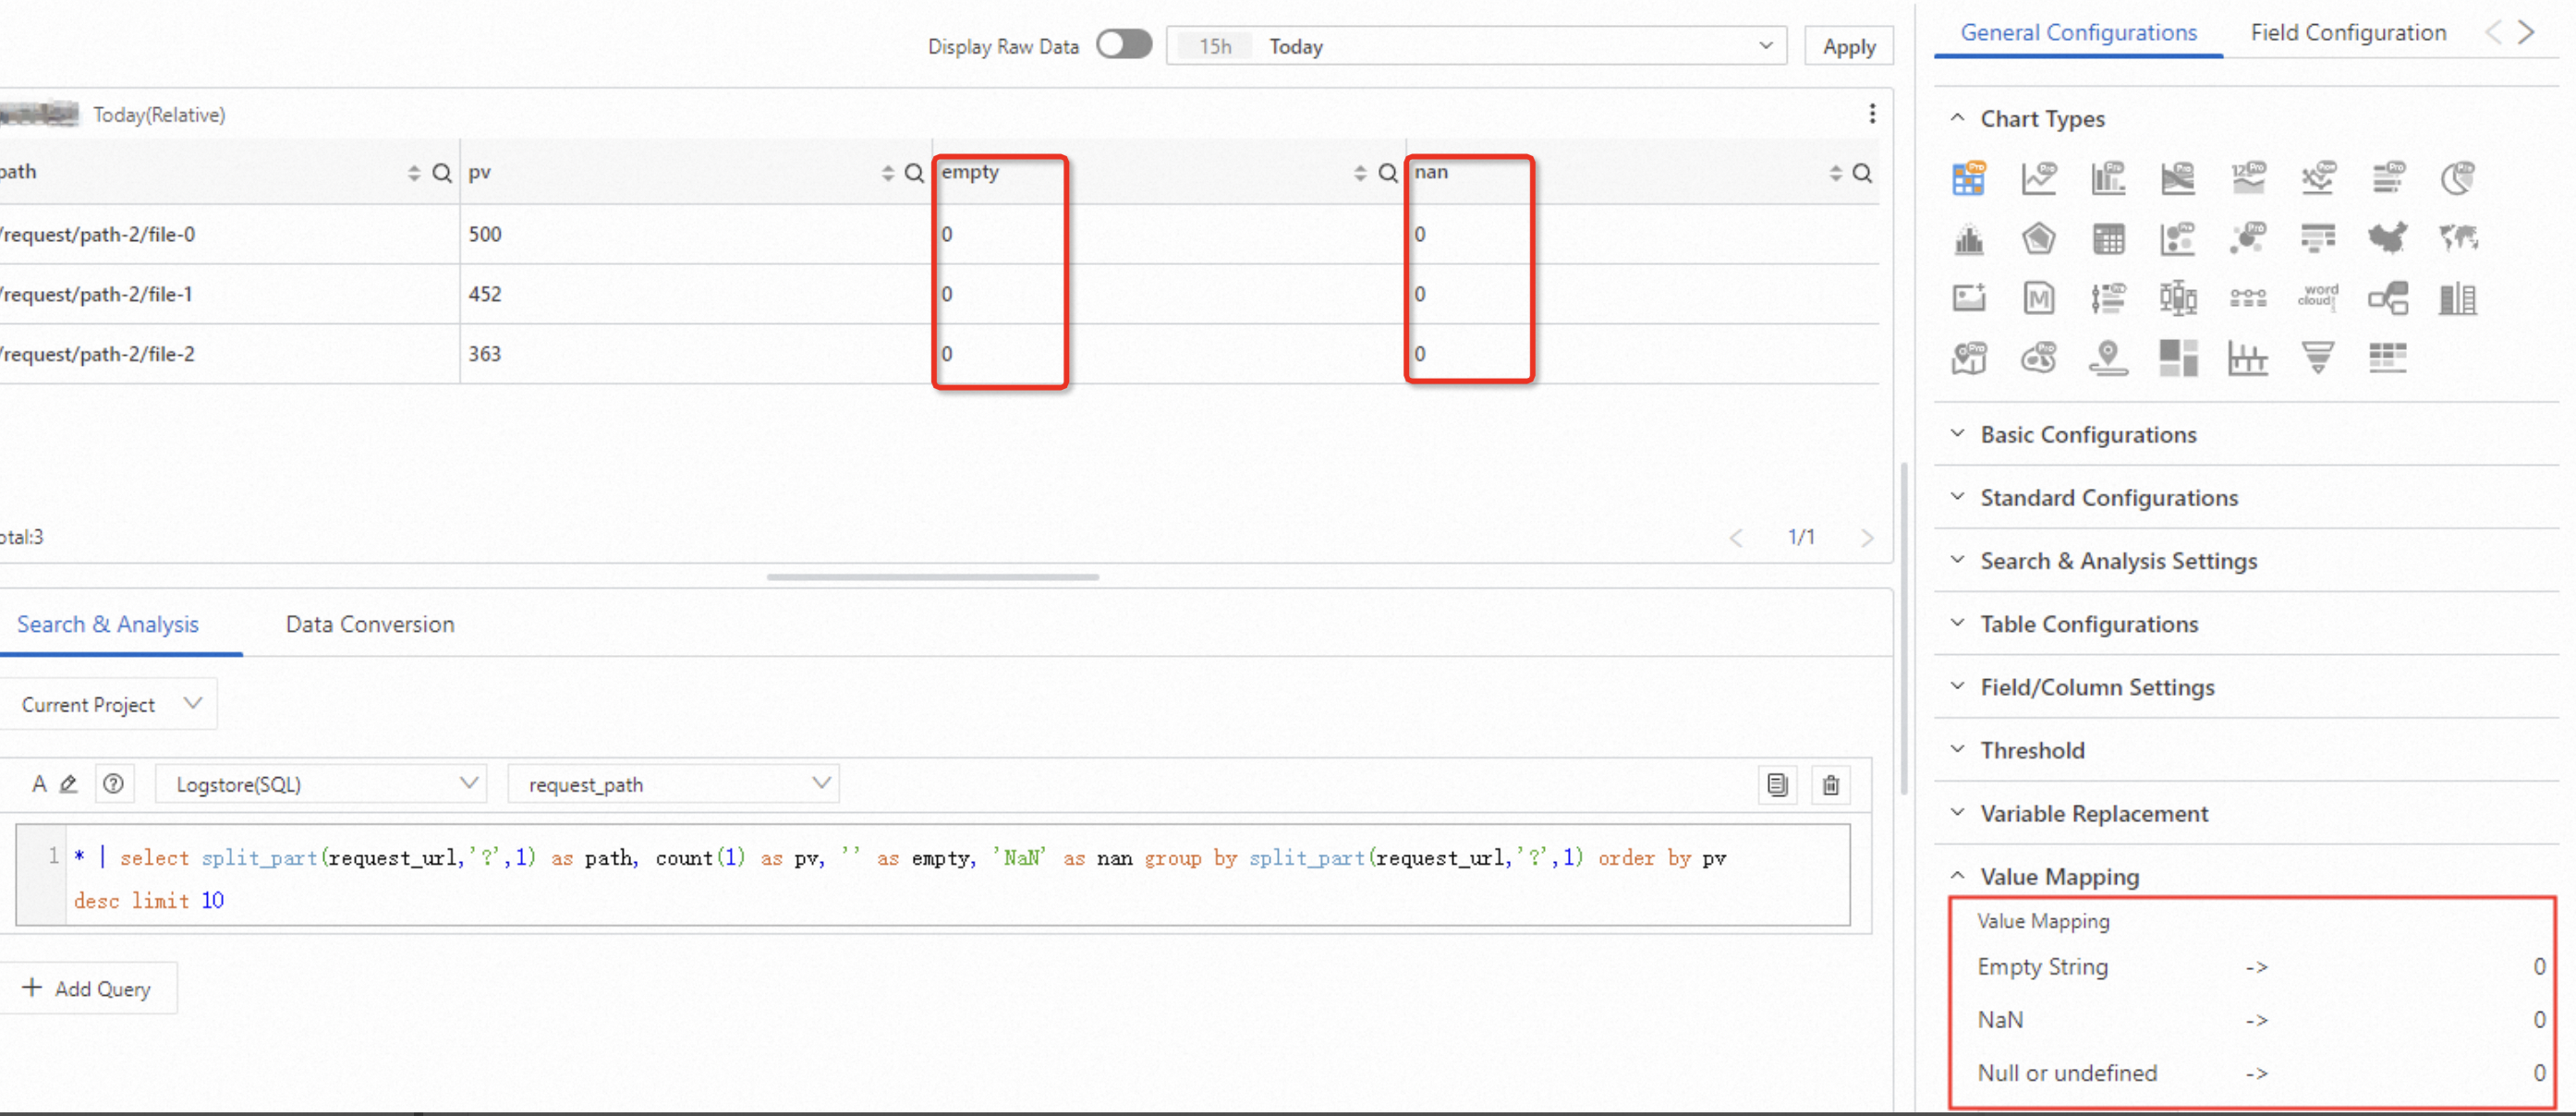
Select Empty String, and set its mapping value to your preferred value, such as 0.
Use the same method to set the mapping values of NaN and Null or undefined respectively. Then click OK.
The results are shown in the figure below.
Replace with icons
On the General Configurations tab, click Value Mapping, and then click Add Value Mapping or Edit Value Mapping.
On the Value Mapping dialog box, click Add, and then select Value from the drop-down list.
Enter the value to be replaced (such as 500), set its mapping type to Icon, and select an icon you want (such as
 ).
).Use the same method to replace other values with icons. Then click OK.
The results are shown in the figure below.
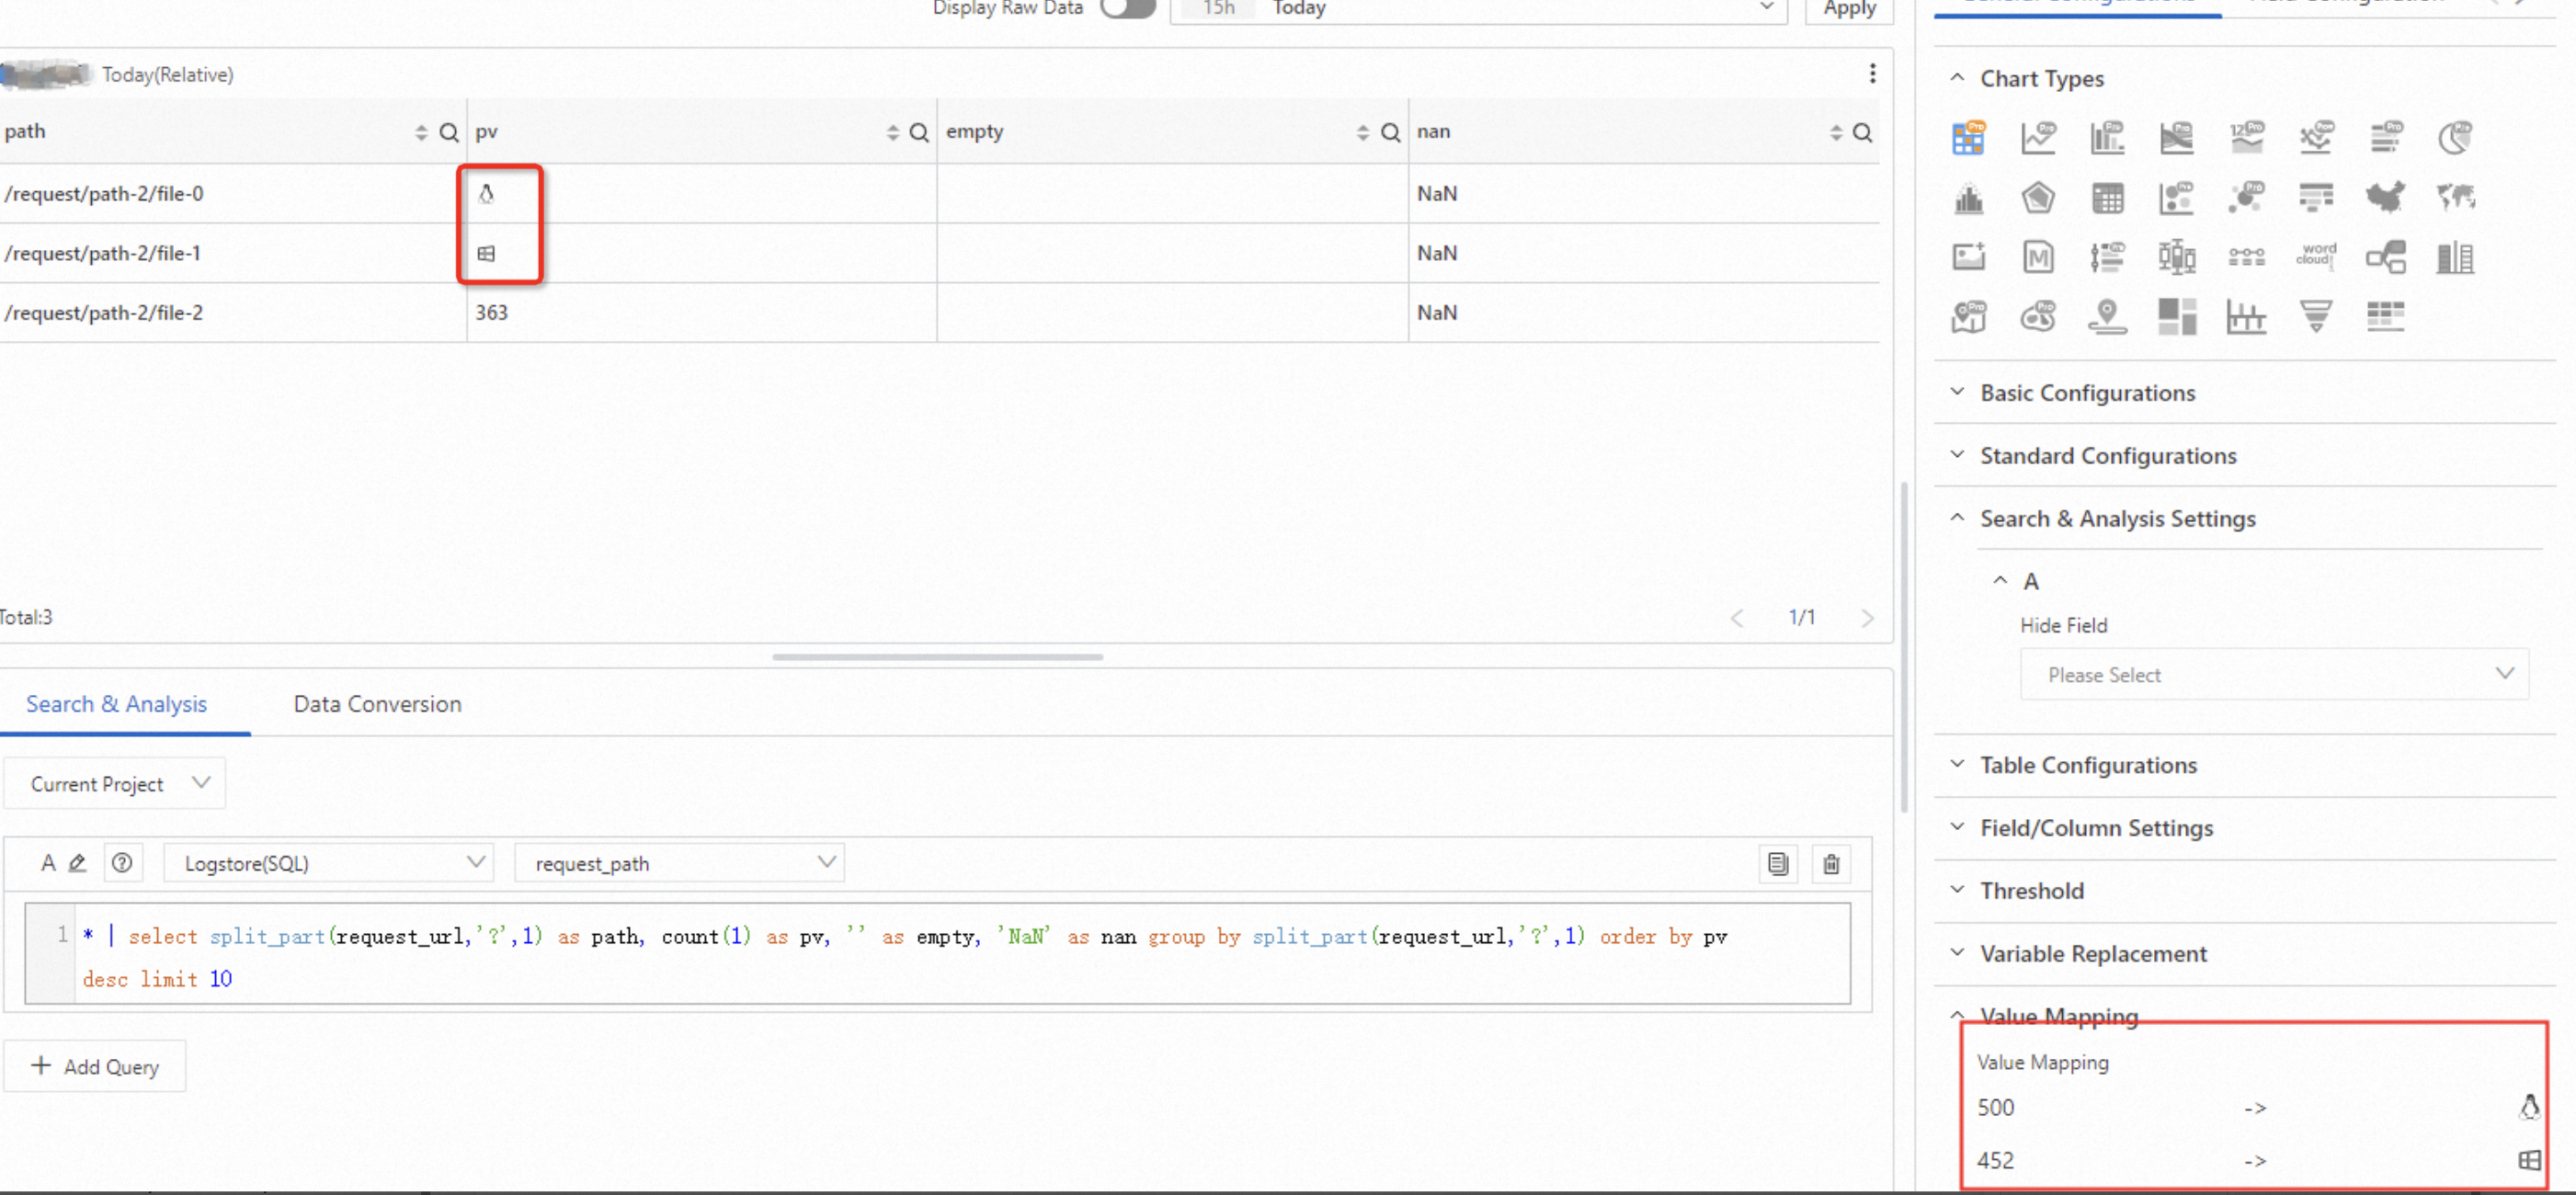
Replace with text
On the General Configurations tab, click Value Mapping, and then click Add Value Mapping or Edit Value Mapping.
In the Value Mapping dialog box, click Add, and then select Value from the drop-down list.
Enter the value to be replaced (such as 500), set its mapping type to Text, and enter the text you want (such as true).
Use the same method to replace other values with text. Then click OK.
The results are shown in the figure below.
