All Products
Search
Document Center

Server Load Balancer:Use WebSocket to enable real-time messaging

Last Updated:Aug 09, 2024

WebSocket is a communication protocol that supports full-duplex communication over a single TCP connection. WebSocket is designed to establish two-way communication between clients and servers over persistent connections. WebSocket requires fewer overheads and supports lower network latency because connections are less frequently created or closed. Compared with the traditional request-response HTTP protocol, WebSocket supports higher efficiency for real-time interactions. WebSocket is suitable for scenarios that require real-time communication. Application Load Balancer (ALB) supports WebSocket by default.

Introduction to WebSocket

Why WebSocket?

With the rapid development of Internet technologies, web applications become more diversified. Some scenarios, such as livestreaming chat and live comments, require server-side real-time push. In traditional solutions, the round-robin algorithm is used to initiate HTTP requests from client browsers to servers at a fixed interval, such as 1 second. Then, the servers return the latest data to the clients. However, this solution has a shortcoming. Clients must frequently initiate requests, which contain large HTTP headers but less useful information. The requests not only increases loads on servers but also cause a significant waste of bandwidth resources.

To address this issue, HTML5 adopts the WebSocket protocol, which establishes more efficient communication between clients and servers. WebSocket supports full-duplex communication that allows simultaneous, two-way communication between clients and servers. It enables servers to proactively push the latest data to clients without the need for client-side polling. With fewer unnecessary requests, two-way communication significantly improves the efficiency of data exchange and reduces the consumption of server and bandwidth resources while providing smoother real-time interactions for users.

WebSocket characteristics

Before a WebSocket connection can be established, the client and the server must complete a three-way TCP handshake and a special HTTP request also called handshake to upgrade HTTP connections to WebSocket connections. During the upgrade, the client and the server communicate over WebSocket instead of HTTP. Two-way communication can be established over the same WebSocket connection.

After a WebSocket connection is established, it remains open to allow two-way communication similar to sockets. WebSocket does not require a new connection or wait for a response for each round of data exchange. The persistent, low-latency connections established over WebSocket significantly improve the efficiency of data exchange.

image

WebSocket exchanges data between clients and servers as data frames. WebSocket messages require smaller headers and can be exchanged as text or binary data. This type of communication reduces overheads on persistent connections and improves the efficiency of data exchange. It requires less server and bandwidth resources while providing high-performance real-time interactions.

For more information about WebSocket, see The WebSocket Protocol.

Use scenarios

WebSocket is suitable for scenarios that require instant or real-time two-way communication, such as AI applications, online chatrooms, real-time notification systems, multi-play online games, and real-time message push.

Examples

A company deployed an online chat application on Alibaba Cloud. Users can visit the domain name to access the backend servers, on which the users can interact with each other. The application requires instant communication to support low-latency, high-efficiency, two-way, and real-time data exchange between users.

High concurrency and persistent connection management become challenges. As the number of users increases, the traditional HTTP model can no longer support simultaneous, real-time communication for a large number of users. Each round of data exchange requires a new connection. This model greatly increases loads on the servers and decreases the server performance.

In this scenario, the company can use ALB together with WebSocket to manage persistent connections and maintain high concurrency. The company can deploy WebSocket applications on multiple backend servers and use Redis to synchronize messages. This solution ensures service high availability and enables reliable, efficient, and real-time message push for online chatrooms.

image

Usage notes

HTTP listeners of ALB support WebSocket by default. In addition, ALB supports rolling updates. Configuration changes do not affect existing persistent connections.

When you use ALB, take note of the following items:

  • If you want to establish a connection between ALB and a backend server over a specific version of HTTP, such as HTTP/1.1, we recommend that you use web servers that support the HTTP version as backend servers.

  • The default timeout period of HTTP listeners is 60 seconds. If ALB does not exchange data with a backend server for 60 seconds, the connection is closed.

    • You can change the value of the Connection Request Timeout parameter on the HTTP listener to set the timeout period to a desired value.

    • To maintain a connection, you must use a keepalive mechanism to exchange packets between ALB and the backend servers every 60 seconds.

Prerequisites

  • An Internet-facing ALB instance is created. For more information, see Create an ALB instance.

  • Three Elastic Compute Service (ECS) instances are created. In this example, the ECS instances are named ECS01, ECS02, and ECS03.

    • WebSocket applications are deployed on ECS01 and ECS02. Redis is deployed on ECS03.

    • In this example, all ECS instances use the CentOS 7.9 operating system.

    • We recommend that you add ECS01, ECS02, and ECS03 to the same security group. If you add the ECS instances to different security groups, you must allow access to the communication ports from each other.

  • A domain name is registered and an Internet Content Provider (ICP) number is obtained for the domain name. For more information, see Register a generic domain name and Overview.

Procedure

Step 1: Deploy applications

Deploy Redis on ECS03 and WebSocket applications on ECS01 and ECS02.

The following example shows how to deploy a test online chatroom. In this example, the ECS instances use the CentOS 7.9 operating system. The example is for reference only. Adjust the configurations for your programs and applications.

Deploy Redis on ECS03

  1. Log on to ECS03.

  2. Run the following commands on ECS03 to deploy and configure Redis:

    # Install Extra Packages for Enterprise Linux (EPEL)
    sudo yum install epel-release -y
    
    # Install Redis
    sudo yum install redis -y
    
    # Start and enable Redis
    sudo systemctl start redis
    sudo systemctl enable redis
    
    # Check and modify the Redis configuration file to allow remote connections
    sudo sed -i 's/^bind 127.0.0.1$/bind 0.0.0.0/' /etc/redis.conf
    sudo sed -i 's/^protected-mode yes/protected-mode no/' /etc/redis.conf
    
    # Restart Redis to apply the configuration modifications
    sudo systemctl restart redis
    
    # Query whether Redis is running
    sudo systemctl status redis
    
  3. If commands do not report an error and the output shows that Redis is in the active (running) state, Redis is deployed and the configurations take effect, as shown in the following figure.

    image

Deploy a WebSocket application on ECS01

  1. Log on to ECS01.

  2. Run the sudo pip3 install flask flask-socketio flask-cors redis command to install the dependency library.

  3. Run the vi ECS01_ws.py command and press the I key to enter the edit mode.

  4. Copy and paste the following code:

    Sample code for deploying a test application

    Note

    Replace the IP address in the redis_url field on line 13 with the IP address of the Redis server, which is the IP address of ECS03.

    import os
    import redis
    from flask import Flask, render_template, request
    from flask_cors import CORS
    from flask_socketio import SocketIO, emit, disconnect
    
    app = Flask(__name__)
    app.config['SECRET_KEY'] = 'secret!'
    # Enable cross-origin resource sharing (CORS)
    CORS(app)
    
    # Configure Redis to manage queues and store states
    redis_url = "redis://192.168.*.*:6379/0"  # Replace the IP address with the IP address of your Redis server
    redis_client = redis.StrictRedis.from_url(redis_url)
    
    # Add the DEBUG log level to facilitate debugging
    socketio = SocketIO(app, message_queue=redis_url, manage_session=True, logger=True, engineio_logger=True, cors_allowed_origins="*")
    
    SESSION_PREFIX = "session:"
    
    
    def set_session_data(session_id, key, value):
        redis_client.hset(f"{SESSION_PREFIX}{session_id}", key, value)
    
    
    def get_session_data(session_id, key):
        return redis_client.hget(f"{SESSION_PREFIX}{session_id}", key)
    
    
    def delete_session_data(session_id):
        redis_client.delete(f"{SESSION_PREFIX}{session_id}")
    
    
    @app.route('/')
    def index():
        return render_template('index.html')
    
    
    @socketio.on('connect')
    def handle_connect():
        try:
            session_id = request.sid  # Obtain the client-side session ID
            print(f"Session {session_id} connected.")
            welcome_message = "Welcome to the chatroom!"
            emit('message', welcome_message)
            set_session_data(session_id, "username", '')  # The initialized username is empty
        except Exception as e:
            print(f"Error during connection: {str(e)}")
    
    
    @socketio.on('disconnect')
    def handle_disconnect():
        try:
            session_id = request.sid
            username = get_session_data(session_id, "username")
            if username:
                username = username.decode()
                leave_message = f"{username} left the chatroom."
                emit('message', leave_message, broadcast=True)
                print(leave_message)
            delete_session_data(session_id)
            print(f"Session {session_id} disconnected.")
        except Exception as e:
            print(f"Error during disconnection: {str(e)}")
    
    
    @socketio.on('set_username')
    def handle_set_username(username):
        session_id = request.sid
        set_session_data(session_id, "username", username)
        print(f"Set the username of the client {session_id} to {username}")
        emit('message', f"Your username is set to {username}")
    
    
    @socketio.on('message')
    def handle_message(msg):
        session_id = request.sid
        username = get_session_data(session_id, "username")
        if username:
            username = username.decode()
            formatted_message = f"{username}: {msg}"
            emit('message', formatted_message, broadcast=True)
            print(formatted_message)
        else:
            warning_message = "Failed to send the message. Specify a username first."
            emit('message', warning_message)
            print(warning_message)
    
    
    if __name__ == '__main__':
        # Store in the templates directory
        if not os.path.exists('templates'):
            os.makedirs('templates')
    
        # Use the Flask template (index.html)
        html_code = '''<!DOCTYPE html>
    <html lang="en">
    <head>
        <meta charset="UTF-8">
        <meta name="viewport" content="width=device-width, initial-scale=1.0">
        <title>Chatroom</title>
        <style>
            body {
                font-family: Arial, sans-serif;
                display: flex;
                flex-direction: column;
                align-items: center;
                margin: 0;
                padding: 0;
                background-color: #f0f0f0;
            }
            h1 {
                color: #333;
            }
            .chat-container {
                width: 90%;
                max-width: 600px;
                background: white;
                padding: 20px;
                border-radius: 8px;
                box-shadow: 0 0 10px rgba(0, 0, 0, 0.1);
            }
            .user-container, .message-container {
                display: flex;
                margin-bottom: 10px;
            }
            .user-container input, .message-container input {
                flex: 1;
                padding: 10px;
                margin-right: 10px;
                border: 1px solid #ccc;
                border-radius: 4px;
            }
            .message-container {
                margin-top: 10px;
            }
            button {
                padding: 10px;
                background-color: #0056b3;
                color: white;
                border: none;
                border-radius: 4px;
                cursor: pointer;
            }
            button:hover {
                background-color: #004099;
            }
            #messages {
                border: 1px solid #ccc;
                padding: 10px;
                height: 300px;
                overflow-y: scroll;
                margin-bottom: 10px;
                border-radius: 4px;
                background-color: #f9f9f9;
            }
        </style>
        <script src="https://cdnjs.cloudflare.com/ajax/libs/socket.io/4.0.1/socket.io.js"></script>
        <script src="https://code.jquery.com/jquery-3.6.0.min.js"></script>
    </head>
    <body>
        <h1>Online Chatroom</h1>
        <div class="chat-container">
            <div class="user-container">
                <input type="text" id="username" autocomplete="off" placeholder="Enter a username">
                <button onclick="setUsername()">Set as Username</button>
            </div>
            <div id="messages"></div>
            <div class="message-container">
                <input type="text" id="myMessage" autocomplete="off" placeholder="Enter a message...">
                <button onclick="sendMessage()">Send</button>
            </div>
        </div>
        <script>
            var socket = io({ transports: ['websocket', 'polling', 'flashsocket'] });
            var usernameSet = false;
            socket.on('connect', function() {
                console.log("Connected to the server!");
                socket.on('message', function(msg){
                    $('#messages').append($('<div>').text(msg));
                    $('#messages').scrollTop($('#messages')[0].scrollHeight);
                });
            });
            function setUsername() {
                var username = $('#username').val();
                if (username) {
                    socket.emit('set_username', username);
                    usernameSet = true;  // Enter a username identifier
                } else {
                    alert("The username cannot be empty.");
                }
            }
            function sendMessage() {
                if (usernameSet) {
                    var message = $('#myMessage').val();
                    if (message) {
                        socket.send(message);
                        $('#myMessage').val('');
                    } else {
                        alert("The message cannot be empty.");
                    }
                } else {
                    alert("Specify a username first.");
                }
            }
        </script>
    </body>
    </html>
    '''
    
        # Save the template as a file
        with open('templates/index.html', 'w') as file:
            file.write(html_code)
    
        socketio.run(app, host='0.0.0.0', port=5000)
    

  5. Press the Esc key and enter :wq to save the configurations.

  6. Run the sudo python3 ECS01_ws.py command to execute the script.

  7. The following output indicates that the WebSocket application is enabled and uses port 5000:

    Server initialized for threading.
     * Serving Flask app 'ECS01_ws' (lazy loading)
     * Environment: production
       WARNING: This is a development server. Do not use it in a production deployment.
       Use a production WSGI server instead.
     * Debug mode: off
     * Running on all addresses.
       WARNING: This is a development server. Do not use it in a production deployment.
     * Running on http://192.168.*.*:5000/ (Press CTRL+C to quit)
    

    If you fail to enable the WebSocket application, check whether the specified port is occupied by another application or errors exist in the commands or code.

Deploy a WebSocket application on ECS02

  1. Log on to ECS02.

  2. Run the sudo pip3 install flask flask-socketio flask-cors redis command to install the dependency library.

  3. Run the vi ECS02_ws.py command and press the I key to enter the edit mode.

  4. Copy and paste the following code:

    Sample code for deploying a test application

    Note

    Replace the IP address in the redis_url field on line 13 with the IP address of the Redis server, which is the IP address of ECS03.

    import os
    import redis
    from flask import Flask, render_template, request
    from flask_cors import CORS
    from flask_socketio import SocketIO, emit, disconnect
    
    app = Flask(__name__)
    app.config['SECRET_KEY'] = 'secret!'
    # Enable cross-origin resource sharing (CORS)
    CORS(app)
    
    # Configure Redis to manage queues and store states
    redis_url = "redis://192.168.*.*:6379/0"  # Replace the IP address with the IP address of your Redis server
    redis_client = redis.StrictRedis.from_url(redis_url)
    
    # Add the DEBUG log level to facilitate debugging
    socketio = SocketIO(app, message_queue=redis_url, manage_session=True, logger=True, engineio_logger=True, cors_allowed_origins="*")
    
    SESSION_PREFIX = "session:"
    
    
    def set_session_data(session_id, key, value):
        redis_client.hset(f"{SESSION_PREFIX}{session_id}", key, value)
    
    
    def get_session_data(session_id, key):
        return redis_client.hget(f"{SESSION_PREFIX}{session_id}", key)
    
    
    def delete_session_data(session_id):
        redis_client.delete(f"{SESSION_PREFIX}{session_id}")
    
    
    @app.route('/')
    def index():
        return render_template('index.html')
    
    
    @socketio.on('connect')
    def handle_connect():
        try:
            session_id = request.sid  # Obtain the client-side session ID
            print(f"Session {session_id} connected.")
            welcome_message = "Welcome to the chatroom!"
            emit('message', welcome_message)
            set_session_data(session_id, "username", '')  # The initialized username is empty
        except Exception as e:
            print(f"Error during connection: {str(e)}")
    
    
    @socketio.on('disconnect')
    def handle_disconnect():
        try:
            session_id = request.sid
            username = get_session_data(session_id, "username")
            if username:
                username = username.decode()
                leave_message = f"{username} left the chatroom."
                emit('message', leave_message, broadcast=True)
                print(leave_message)
            delete_session_data(session_id)
            print(f"Session {session_id} disconnected.")
        except Exception as e:
            print(f"Error during disconnection: {str(e)}")
    
    
    @socketio.on('set_username')
    def handle_set_username(username):
        session_id = request.sid
        set_session_data(session_id, "username", username)
        print(f"Set the username of the client {session_id} to {username}")
        emit('message', f"Your username is set to {username}")
    
    
    @socketio.on('message')
    def handle_message(msg):
        session_id = request.sid
        username = get_session_data(session_id, "username")
        if username:
            username = username.decode()
            formatted_message = f"{username}: {msg}"
            emit('message', formatted_message, broadcast=True)
            print(formatted_message)
        else:
            warning_message = "Failed to send the message. Specify a username first."
            emit('message', warning_message)
            print(warning_message)
    
    
    if __name__ == '__main__':
        # Store in the templates directory
        if not os.path.exists('templates'):
            os.makedirs('templates')
    
        # Use the Flask template (index.html)
        html_code = '''<!DOCTYPE html>
    <html lang="en">
    <head>
        <meta charset="UTF-8">
        <meta name="viewport" content="width=device-width, initial-scale=1.0">
        <title>Chatroom</title>
        <style>
            body {
                font-family: Arial, sans-serif;
                display: flex;
                flex-direction: column;
                align-items: center;
                margin: 0;
                padding: 0;
                background-color: #f0f0f0;
            }
            h1 {
                color: #333;
            }
            .chat-container {
                width: 90%;
                max-width: 600px;
                background: white;
                padding: 20px;
                border-radius: 8px;
                box-shadow: 0 0 10px rgba(0, 0, 0, 0.1);
            }
            .user-container, .message-container {
                display: flex;
                margin-bottom: 10px;
            }
            .user-container input, .message-container input {
                flex: 1;
                padding: 10px;
                margin-right: 10px;
                border: 1px solid #ccc;
                border-radius: 4px;
            }
            .message-container {
                margin-top: 10px;
            }
            button {
                padding: 10px;
                background-color: #0056b3;
                color: white;
                border: none;
                border-radius: 4px;
                cursor: pointer;
            }
            button:hover {
                background-color: #004099;
            }
            #messages {
                border: 1px solid #ccc;
                padding: 10px;
                height: 300px;
                overflow-y: scroll;
                margin-bottom: 10px;
                border-radius: 4px;
                background-color: #f9f9f9;
            }
        </style>
        <script src="https://cdnjs.cloudflare.com/ajax/libs/socket.io/4.0.1/socket.io.js"></script>
        <script src="https://code.jquery.com/jquery-3.6.0.min.js"></script>
    </head>
    <body>
        <h1>Online Chatroom</h1>
        <div class="chat-container">
            <div class="user-container">
                <input type="text" id="username" autocomplete="off" placeholder="Enter a username">
                <button onclick="setUsername()">Set as Username</button>
            </div>
            <div id="messages"></div>
            <div class="message-container">
                <input type="text" id="myMessage" autocomplete="off" placeholder="Enter a message...">
                <button onclick="sendMessage()">Send</button>
            </div>
        </div>
        <script>
            var socket = io({ transports: ['websocket', 'polling', 'flashsocket'] });
            var usernameSet = false;
            socket.on('connect', function() {
                console.log("Connected to the server!");
                socket.on('message', function(msg){
                    $('#messages').append($('<div>').text(msg));
                    $('#messages').scrollTop($('#messages')[0].scrollHeight);
                });
            });
            function setUsername() {
                var username = $('#username').val();
                if (username) {
                    socket.emit('set_username', username);
                    usernameSet = true;  // Enter a username identifier
                } else {
                    alert("The username cannot be empty.");
                }
            }
            function sendMessage() {
                if (usernameSet) {
                    var message = $('#myMessage').val();
                    if (message) {
                        socket.send(message);
                        $('#myMessage').val('');
                    } else {
                        alert("The message cannot be empty.");
                    }
                } else {
                    alert("Specify a username first.");
                }
            }
        </script>
    </body>
    </html>
    '''
    
        # Save the template as a file
        with open('templates/index.html', 'w') as file:
            file.write(html_code)
    
        socketio.run(app, host='0.0.0.0', port=5000)
    

  5. Press the Esc key and enter :wq to save the configurations.

  6. Run the sudo python3 ECS02_ws.p command to execute the script.

  7. The following output indicates that the WebSocket application is enabled and uses port 5000:

    Server initialized for threading.
     * Serving Flask app 'ECS02_ws' (lazy loading)
     * Environment: production
       WARNING: This is a development server. Do not use it in a production deployment.
       Use a production WSGI server instead.
     * Debug mode: off
     * Running on all addresses.
       WARNING: This is a development server. Do not use it in a production deployment.
     * Running on http://192.168.*.*:5000/ (Press CTRL+C to quit)
    

    If you fail to enable the WebSocket application, check whether the specified port is occupied by another application or errors exist in the commands or code.

Step 2: Configure a server group

  1. Log on to the ALB console.

  2. In the top navigation bar, select the region in which the ALB instance is deployed.

  3. In the left-side navigation pane, click Server Groups.

  4. On the Server Groups page, click Create Server Group. In the Create Server Group dialog box, configure the parameters and click Create. The following table describes only some of the parameters. Configure the other parameters based on your business requirements or use the default values.

    Parameter

    Description

    Server Group Type

    Select the type of server group that you want to create.

    VPC

    Select the virtual private cloud (VPC) of ECS01 and ECS02.

    The ALB instance and backend servers must be in the same VPC.

  5. In the The server group is created message, click Add Backend Server.

  6. In the Add Backend Server wizard, add ECS01 and ECS02 as backend servers. Set the port to the port of the WebSocket applications. In this example, the WebSocket applications use port 5000.

Step 3: Add an HTTP listener

  1. Log on to the ALB console.

  2. In the top navigation bar, select the region in which the ALB instance is deployed.

  3. In the left-side navigation pane, click Instances.

  4. On the Instances page, find the ALB instance and click Create Listener in the Actions column.

  5. In the Configure Listener step, configure the parameters. The following table describes some of the parameters. Configure the other parameters based on your business requirements or use the default values. After you configure the parameters, click Next.

    Parameter

    Description

    Listener Protocol

    Select HTTP.

    Listener Port

    In this example, port 5000 is used.

  6. In the Select Server Group step, configure the parameters. The following table describes some of the parameters. Configure the other parameters based on your business requirements or use the default values. After you configure the parameters, click Next.

    Parameter

    Description

    Server Group

    Select a server group.

  7. In the Configuration Review step, check whether the parameters are valid and click Submit.

Step 4: Add a DNS record

  1. Log on to the ALB console.

  2. In the top navigation bar, select the region in which the ALB instance is deployed.

  3. Find the ALB instance for which you want to add a DNS record and copy the domain name.

  4. To create a CNAME record, perform the following steps:

    1. Log on to the Alibaba Cloud DNS console.

    2. On the Domain Name Resolution page, click Add Domain Name.

    3. In the Add Domain Name dialog box, enter the domain name of your host and click OK.

      Important

      Before you create a CNAME record, you must use a TXT record to verify the ownership of the domain name.

    4. Find the domain names that you want to manage and click DNS Settings in the Actions column.

    5. On the DNS Settings page, click Add Record.

    6. In the Add DNS Record panel, configure the parameters and click OK. The following table describes the parameters.

      Parameter

      Description

      Record Type

      Select CNAME from the drop-down list.

      Hostname

      Enter the prefix of the domain name.

      DNS Request Source

      Select Default.

      Record Value

      Enter the CNAME, which is the domain name of the ALB instance.

      TTL

      Select a time-to-live (TTL) value for the CNAME record to be cached on the DNS server. In this example, the default value is used.

Step 5: Verify the result

Prepare two computers that have different IP addresses and support Internet access. Send messages from browsers on the computers to test whether the ALB instance can push the WebSocket messages in real time.
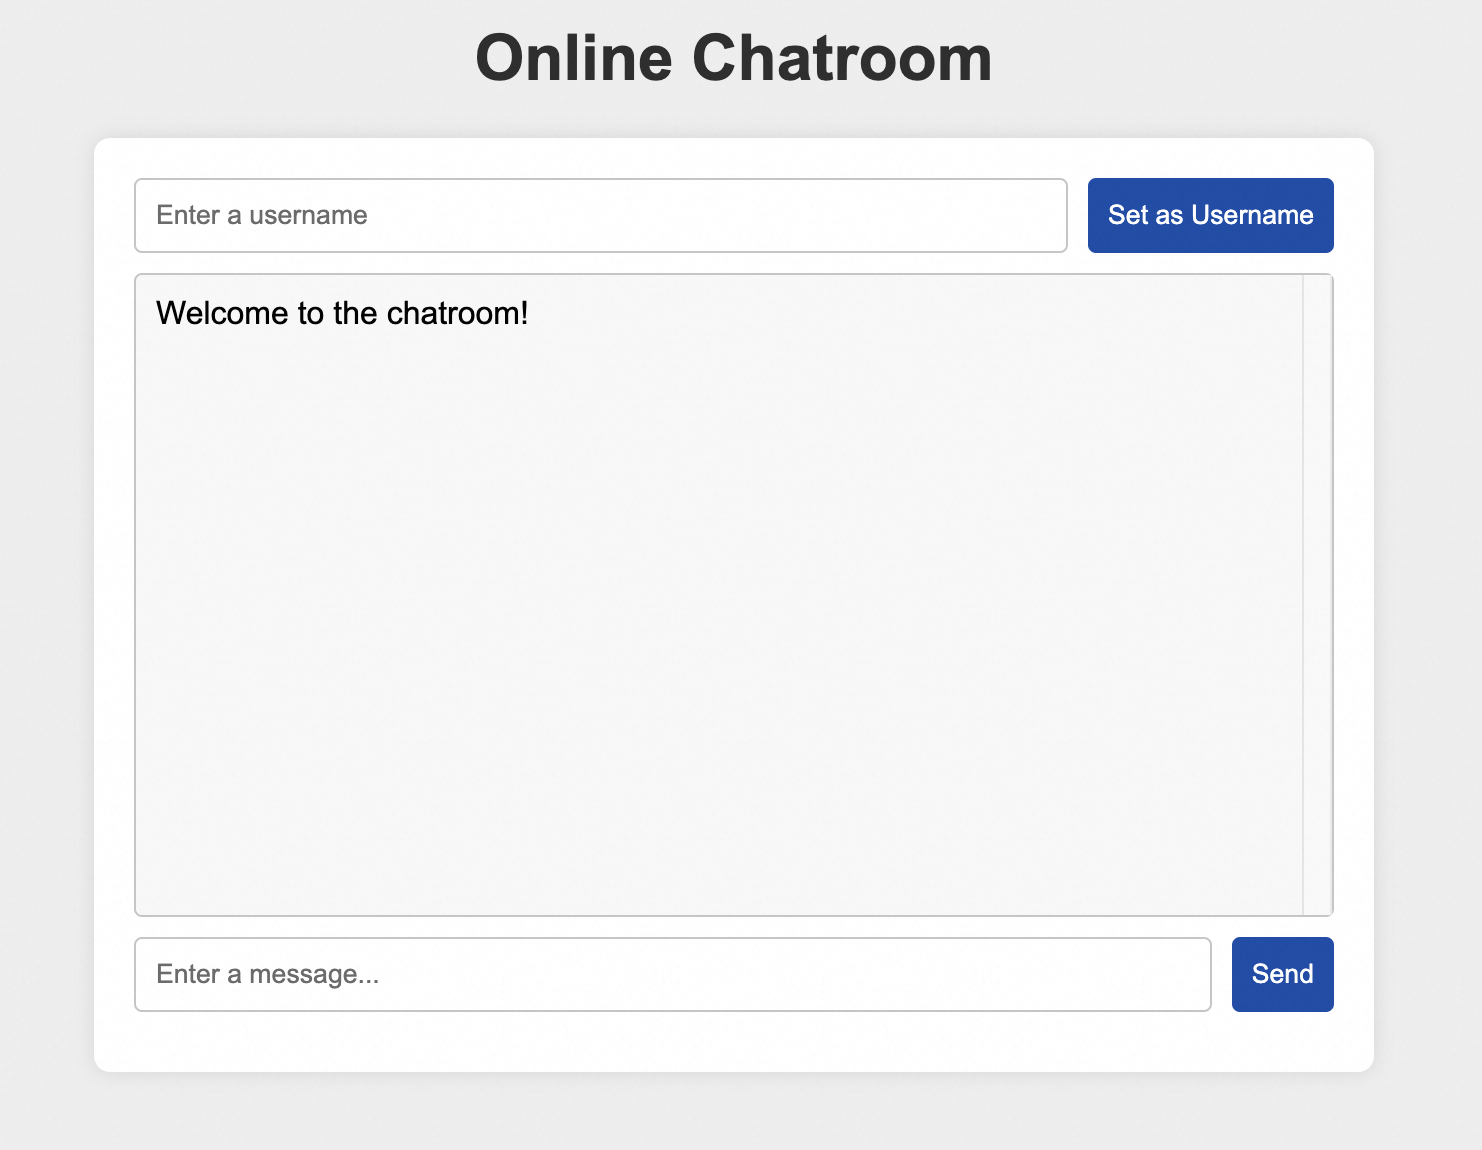
  1. Visit http://Domain name:5000 from the browsers to access the online chatroom.

    The following figure shows that the chatroom is accessible.

    image

    If you open the developer tools on your browser, you can find that WebSocket communication is established on the Network tab.

    image

  2. Enter a username and click Set as Username.

  3. Enter a message and click Send. Repeat this operation on multiple computers.

    The following figure shows that messages from different computers are displayed on the browsers.

    image

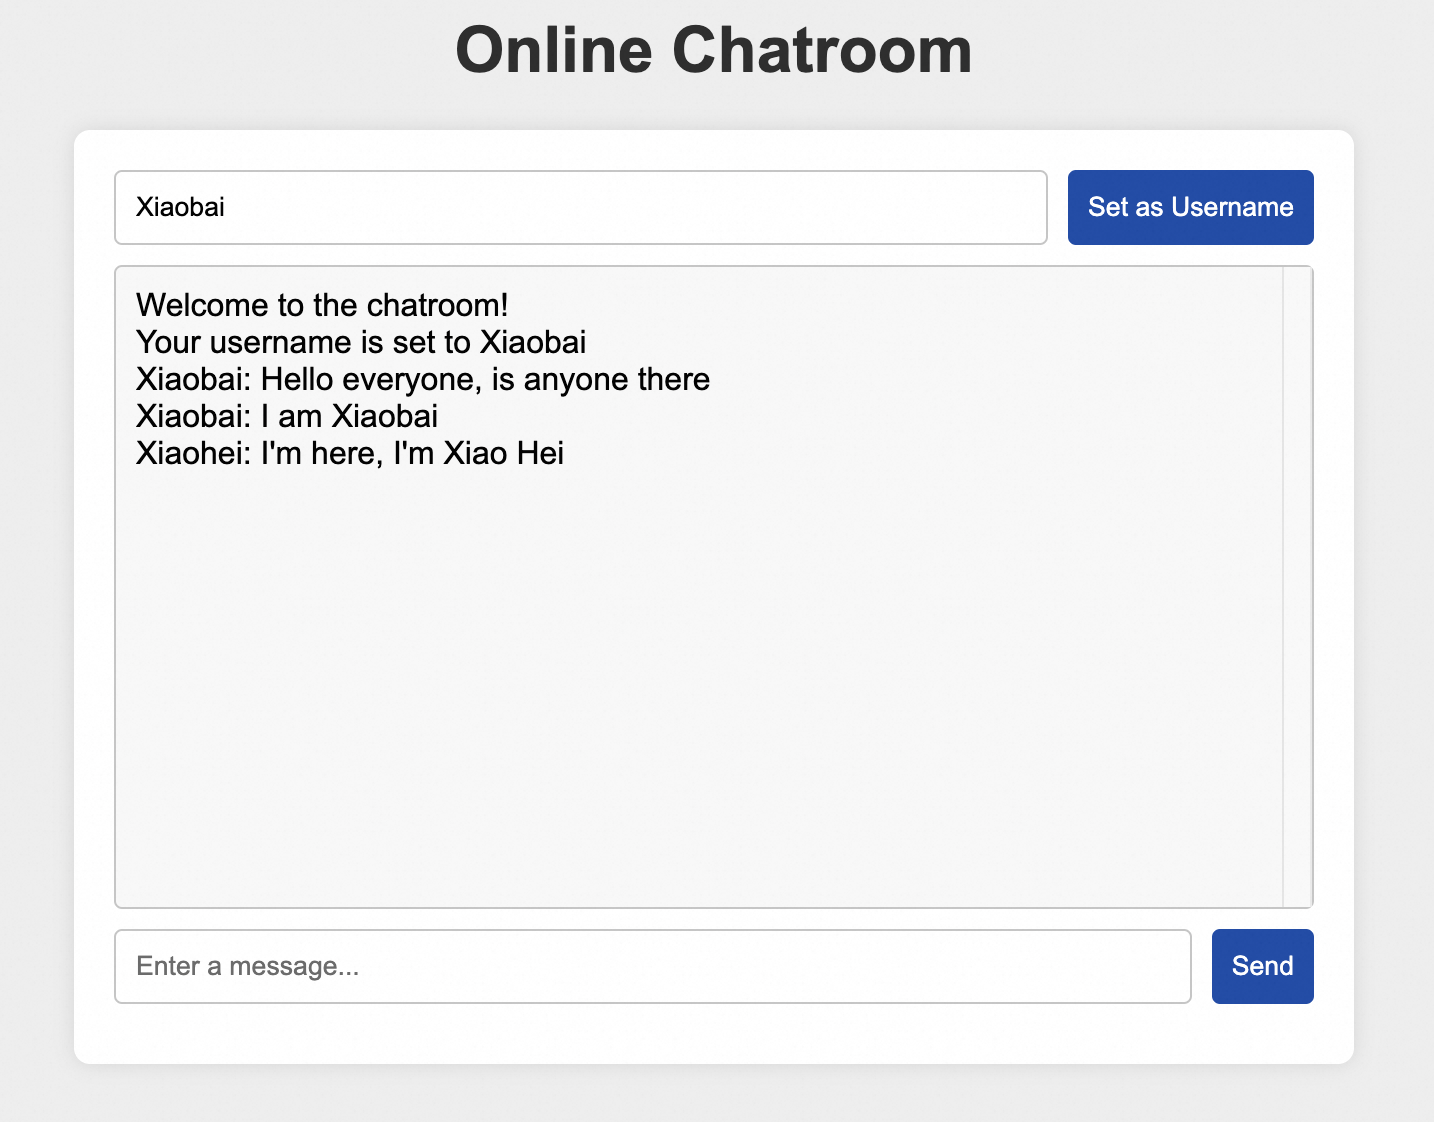
  4. The preceding tests show that ALB can push WebSocket messages in real time while maintaining high availability.

FAQ

How do I use the WebSocket Secure protocol?

WebSocket Secure is the encrypted version of WebSocket.

By default, HTTPS listeners support WebSocket Secure. To enable WebSocket Secure, create an HTTPS listener.

Am I charged for using WebSocket?

You are not charged for using WebSocket or WebSocket Secure.

Which regions support WebSocket?

WebSocket and WebSocket Secure are supported in all regions of ALB.

References

To facilitate the tests, this topic uses a simple example to describe how to deploy Redis on an ECS instance. However, Redis server errors may cause single points of failure (SPOFs). In your production environment, we recommend that you use ApsaraDB for Redis to improve application high availability. For more information, see Overview.