This topic describes how to poll for task status in Serverless Workflow.
Overview
If no callback is specified after a long-running task is completed, developers usually poll the task status to check whether the task is completed. Reliable polling requires task status to be persistent. Therefore, even if the current polling process fails, the polling continues after the process resumes. In this example, assume that a user calls Function Compute to submit a multimedia processing task that takes one minute to several hours. The task execution status can be queried by calling the corresponding API. This topic describes how to implement a common and reliable workflow for polling task status in Serverless Workflow.
Implementation in Serverless Workflow
The following tutorial shows how to orchestrate two functions deployed in Function Compute as a workflow for polling task status in the following three steps:
Step 1: Create a function in Function Compute
Create a service named fnf-demo in Function Compute, and create two functions (StartJob and GetJobStatus) in Python 3.10 in this service. For more information, see Quickly create a function.
The StartJob function is used to simulate calling an API to start a long-running task and return the task ID.
import logging
import uuid

def handler(event, context):
  logger = logging.getLogger()
  id = uuid.uuid4()
  logger.info('Started job with ID %s' % id)
  return {"job_id": str(id)}
The GetJobStatus function is used to simulate calling an API to query the execution result of the specified task. The GetJobStatus function compares the value of the current time minus the time when the function is first executed with the value specified in
delayand then returns the task status "success" or "running" accordingly.import logging import uuid import time import json start_time = int(time.time()) def handler(event, context): evt = json.loads(event) logger = logging.getLogger() job_id = evt["job_id"] logger.info('Started job with ID %s' % job_id) now = int(time.time()) status = "running" delay = 60 if "delay" in evt: delay = evt["delay"] if now - start_time > delay: status = "success" try_count = 0 if "try_count" in evt: try_count = evt["try_count"] try_count = try_count + 1 logger.info('Job %s, status %s, try_count %d' % (job_id, status, try_count)) return {"job_id": job_id, "job_status":status, "try_count":try_count}
Step 2: Create a workflow in Serverless Workflow
In the left-side navigation pane of the old CloudFlow console, click Flows. On the Flows page, click Create Flow. In the Flow Definition step of the Create Flow wizard, configure the Details and Definition sections.
The following steps show the main logic of the workflow:
StartJob: Serverless Workflow calls the
StartJobfunction to start a task.Wait10s: Serverless Workflow waits for 10s.
GetJobStatus: Serverless Workflow calls the
GetJobStatusfunction to query the status of the current task.CheckJobComplete: Serverless Workflow checks the result returned by the
GetJobStatusfunction.The result "success" indicates that the workflow succeeds.
If the polling requests are sent three or more times, Serverless Workflow considers that the task fails, and then the workflow fails.
If the result "running" is returned, the system goes back to the
Wait10sstep.
version: v1
type: flow
steps:
  - type: task
    name: StartJob
    resourceArn: acs:fc:{region}:{accountID}:services/fnf-demo/functions/StartJob
  - type: pass
    name: Init
    outputMappings:
      - target: try_count
        source: 0
  - type: wait
    name: Wait10s
    duration: 10
  - type: task
    name: GetJobStatus
    resourceArn: acs:fc:{region}:{accountID}:services/fnf-demo/functions/GetJobStatus
    inputMappings:
      - target: job_id
        source: $local.job_id
      - target: delay
        source: $input.delay
      - target: try_count
        source: $local.try_count
  - type: choice
    name: CheckJobComplete
    inputMappings:
      - target: status
        source: $local.job_status
      - target: try_count
        source: $local.try_count
    choices:
        - condition: $.status == "success"
          goto: JobSucceeded
        - condition: $.try_count > 3
          goto: JobFailed
        - condition: $.status == "running"
          goto: Wait10s
  - type: succeed
    name: JobSucceeded
  - type: fail
    name: JobFailed
Step 3: Execute the workflow and view the result
In the old CloudFlow console, find the workflow that you want to execute, click Start Execution, and then enter the following JSON object as the input of this execution. The value of delay indicates the time that the task takes to run. In this example, "delay" is set to 20, which means that the GetJobStatus function returns "success" 20s later after the task is started, before which "running" is returned. You can change the value of delay to view different execution results.
{
  "delay": 20
}
The following figure is the visual display of the polling workflow from start to end.
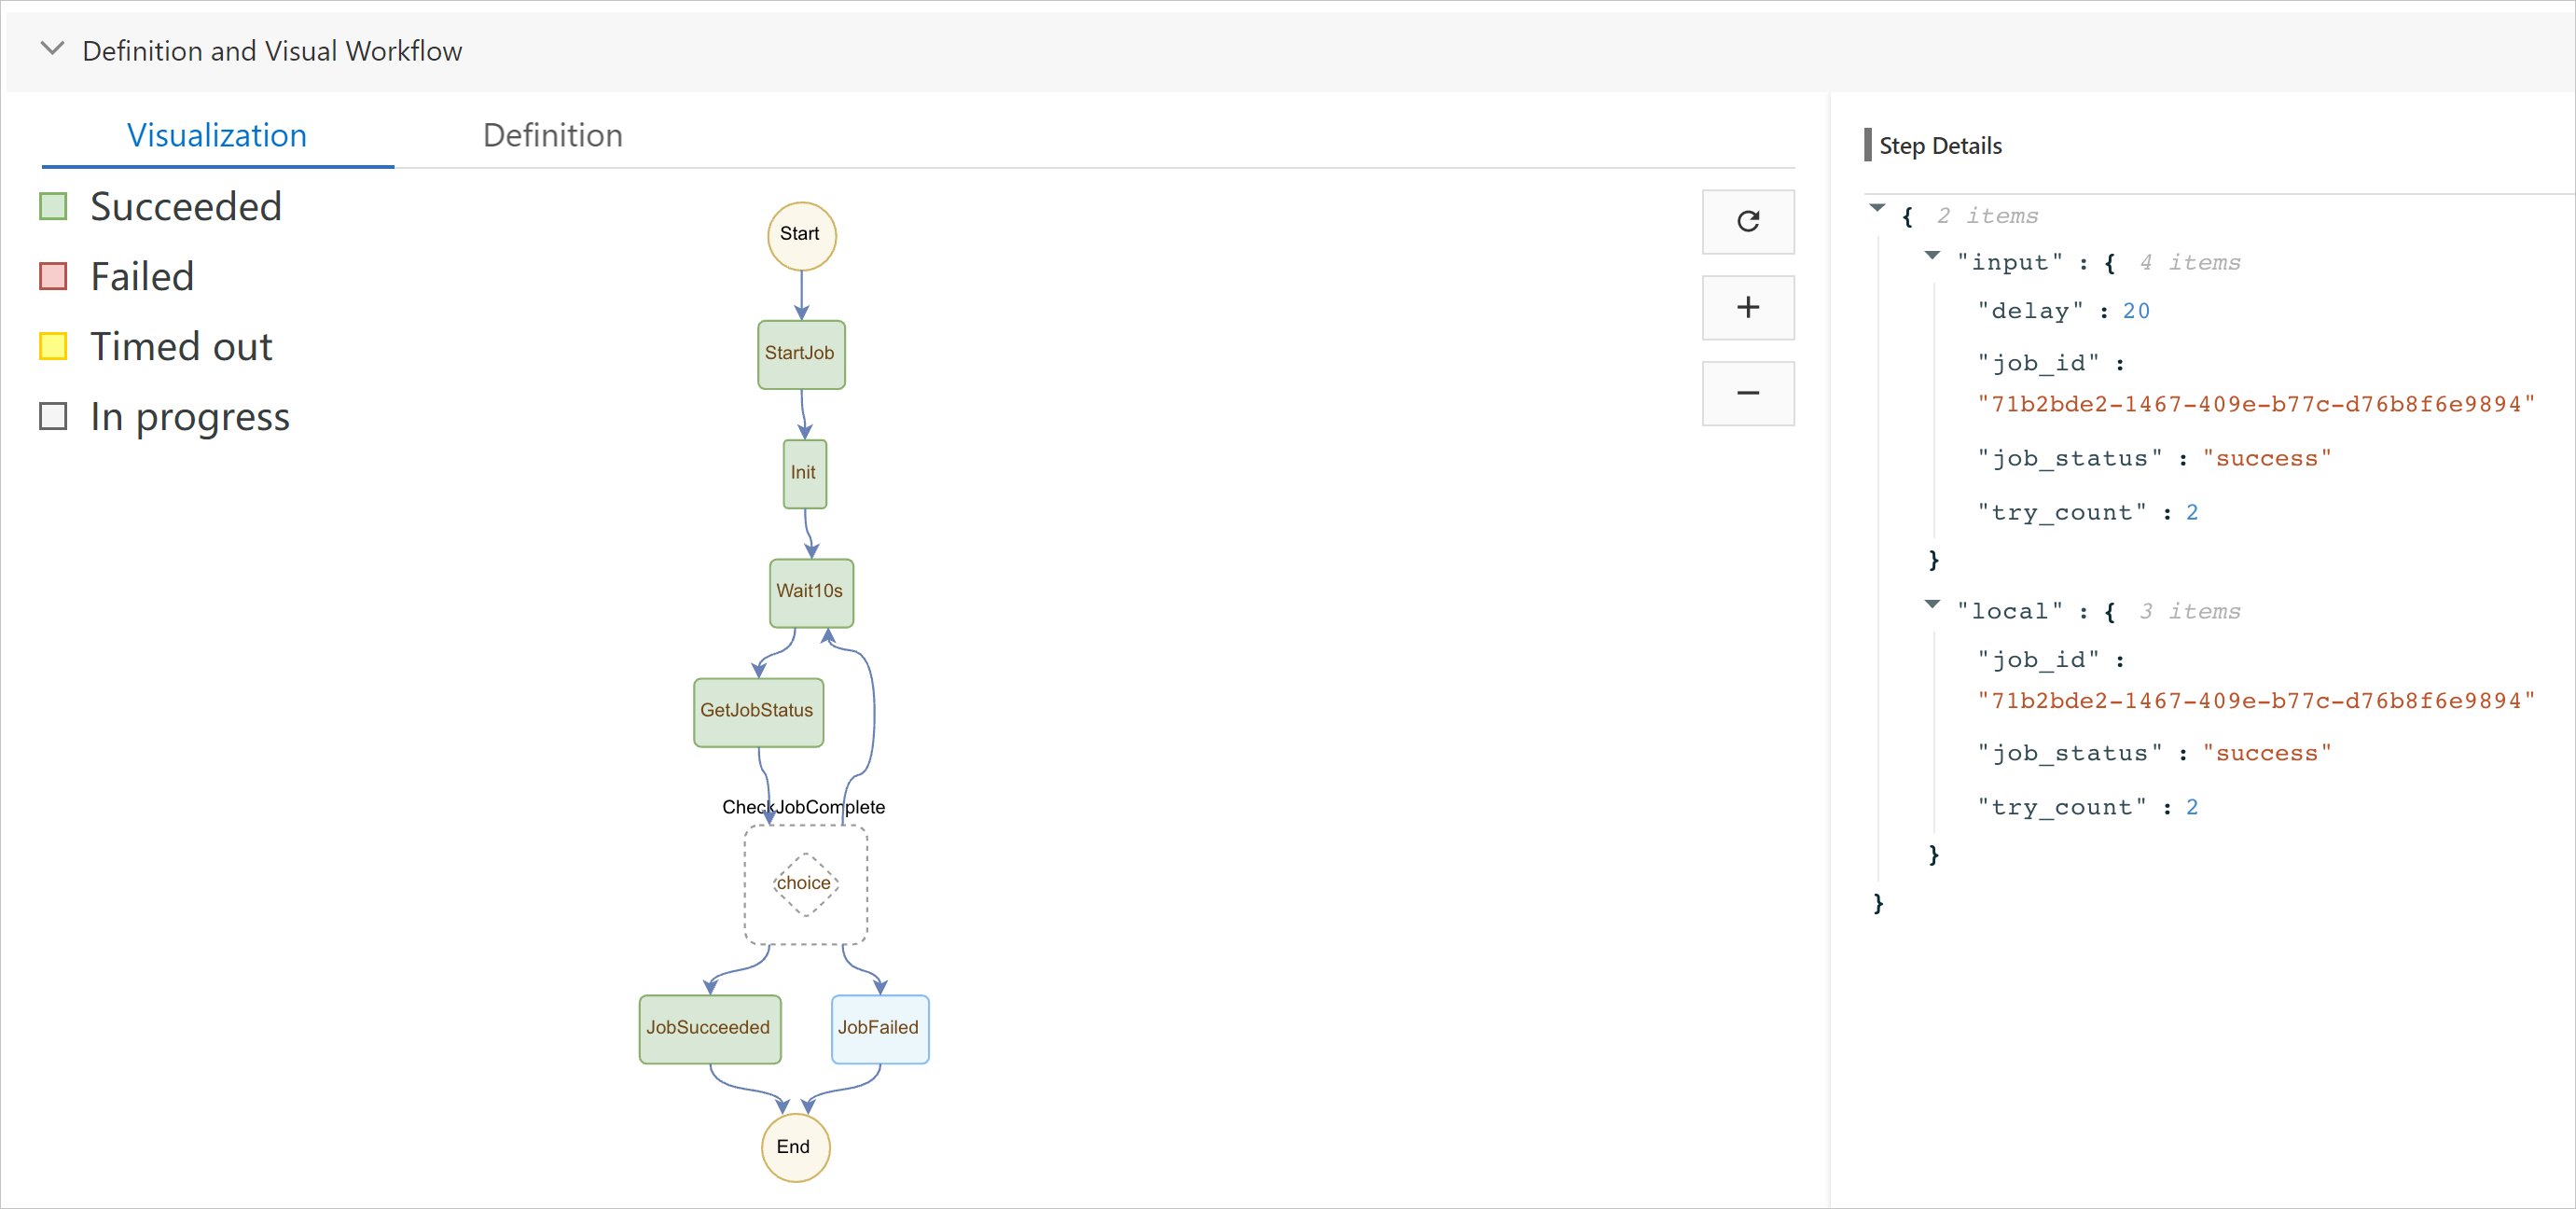
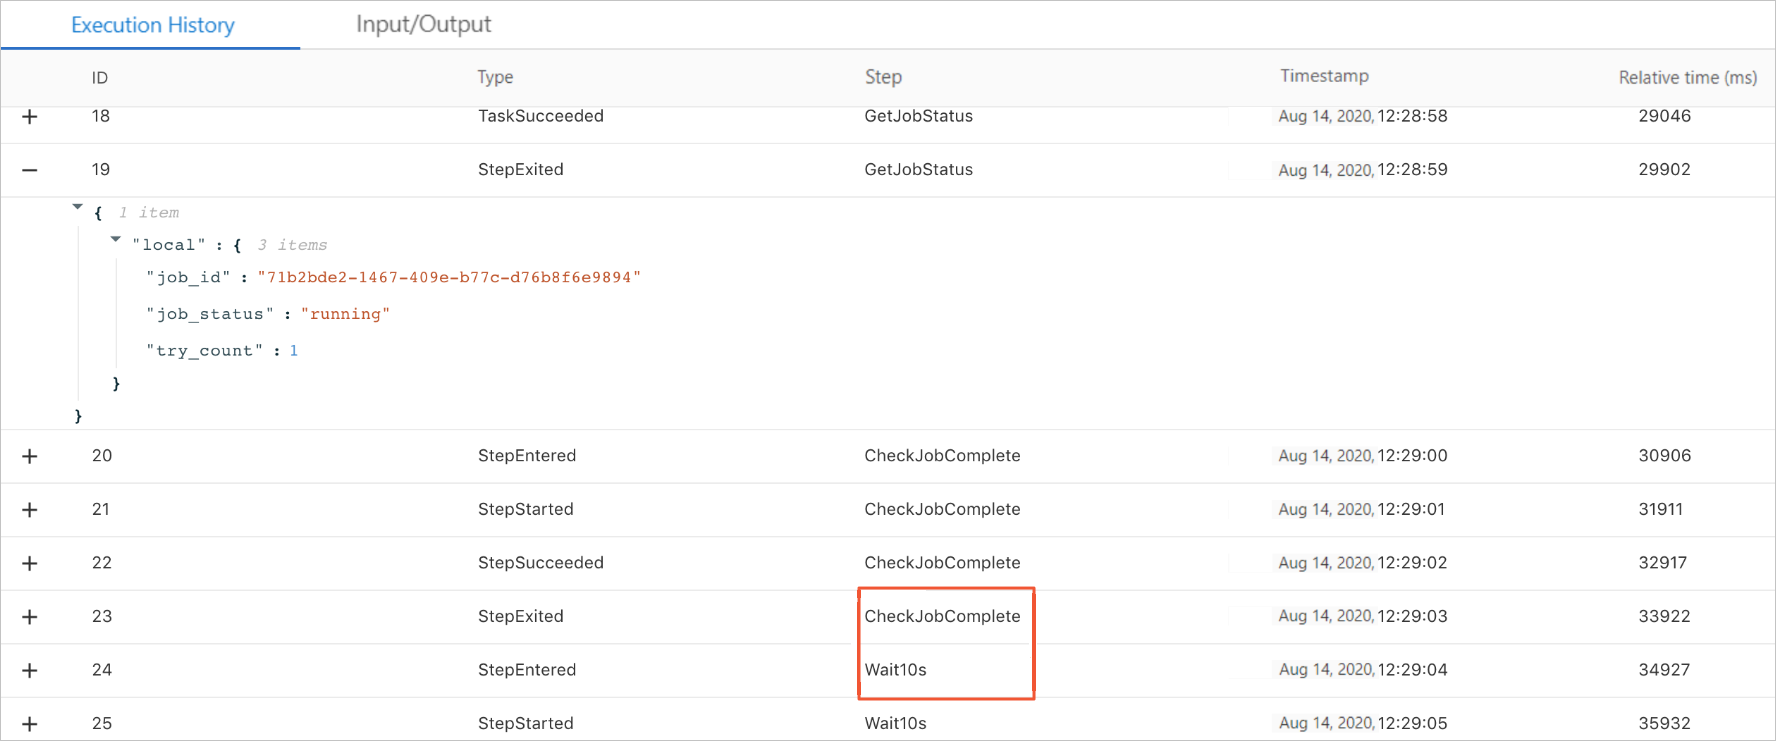
As shown in the following figure, the task takes 20s to run. When the
GetJobStatusfunction is called for the first time, "running" is returned. Therefore, whenCheckJobCompleteis called, the system proceeds to theWait10sstep to wait 10s before the next query is initiated. The "success" result is returned for the second query, and the workflow ends.