This topic describes how to create an Elastic Compute Service (ECS) instance in Resource Orchestration Service (ROS) Infrastructure Composer to build and deploy a website.
Sample scenario
You may need to create the resources required to build a website from scratch, such as a virtual private cloud (VPC), vSwitch, security group, and ECS instance, and deploy the website on the ECS instance.
Step 1: Drag resources and create connections
Go to the ROS Infrastructure Composer module in the ROS console.
In the left-side navigation pane, click Infrastructure Templates. On the Infrastructure Templates page, click Create Infrastructure Template. In the dialog box that appears, select ROS and click OK.
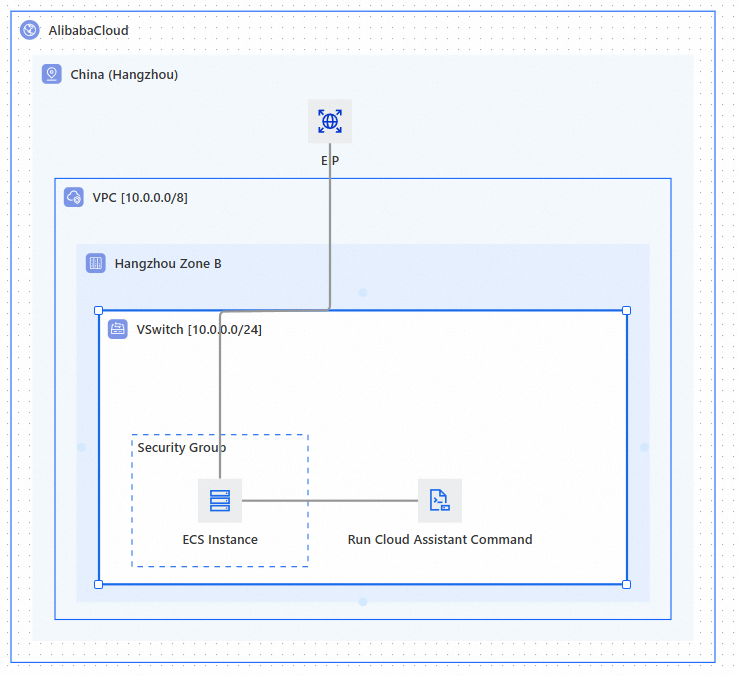
Drag the Single-zone Network card from the left-side navigation pane to the canvas.
Drag the ECS Instance card from the left-side navigation pane to the vSwitch card on the canvas.
Drag the EIP card from the left-side navigation pane to the region card on the canvas.
Enter Run Cloud Assistant Command in the left-side search box and drag the Run Cloud Assistant Command card to the vSwitch card on the canvas.
On the canvas, click the EIP card to highlight the card and display a connector port on each of the four sides. Click a connector port and drag the line to the ECS Instance card to create a connection between the two cards.
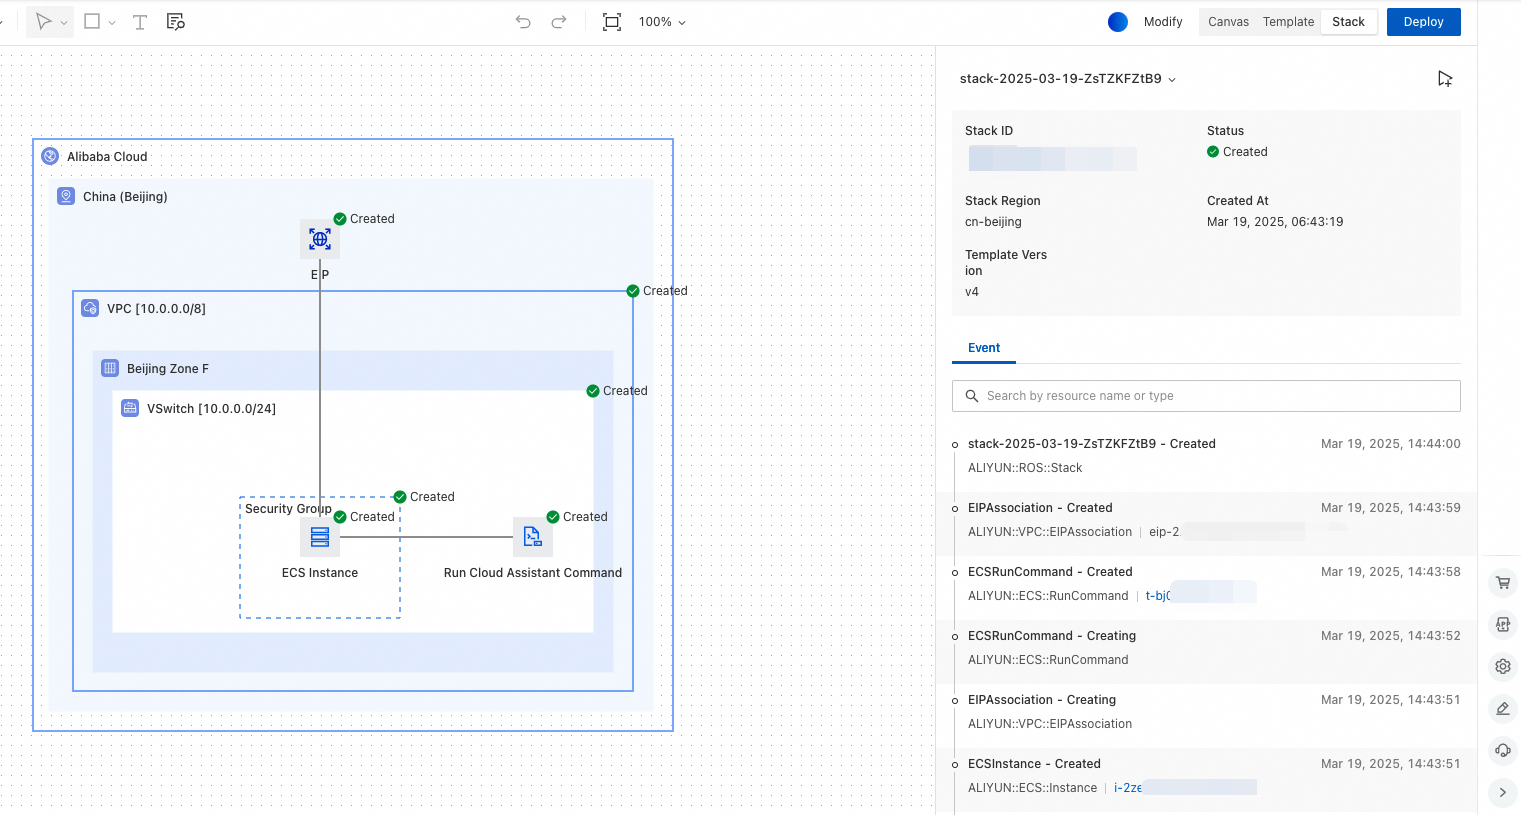
On the canvas, use the same method to create a connection between the Run Cloud Assistant Command and ECS Instance cards. The following figure shows the display effect of the resources and connections.
Step 2: Configure resource properties for the website
On the canvas, click the ECS Instance card. On the right-side form that appears, configure the following resource properties. The property values are displayed based on the actual query result.
InstanceType: Specify ecs.t5-lc1m2.large as the property value.
ImageId: Select Alibaba Cloud Linux and 3.2104 LTS 64 bit Quick Boot from the relevant drop-down lists.
SystemDiskCategory: Specify ESSD as the property value.
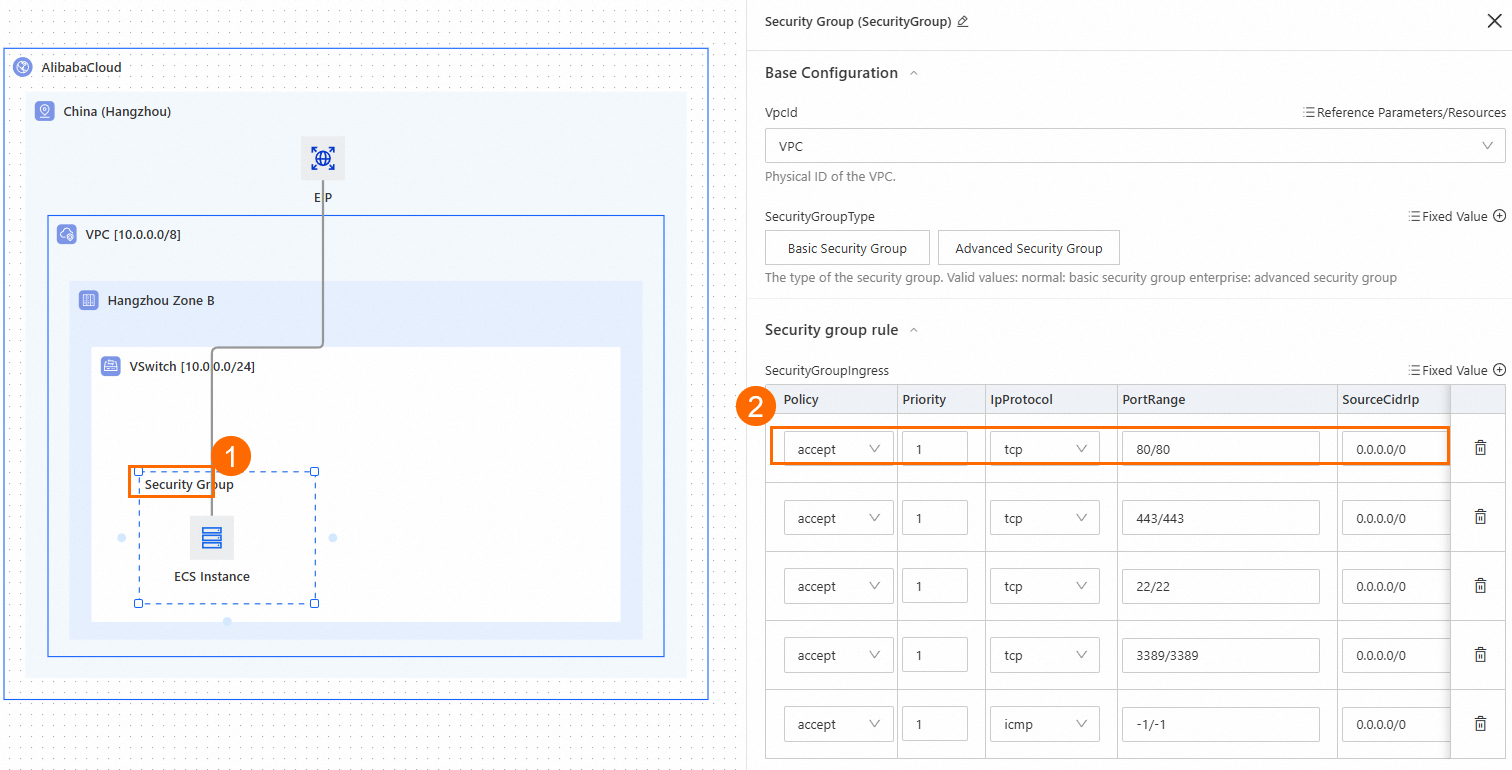
On the canvas, click the Security Group card. On the right-side form that appears, specify whether to allow traffic on port
80.
On the canvas, click the EIP card. On the right-side form that appears, configure the following resource properties:
InstanceChargeType: Specify Pay-as-you-go as the property value.
InternetChargeType: Specify By Bandwidth as the property value.
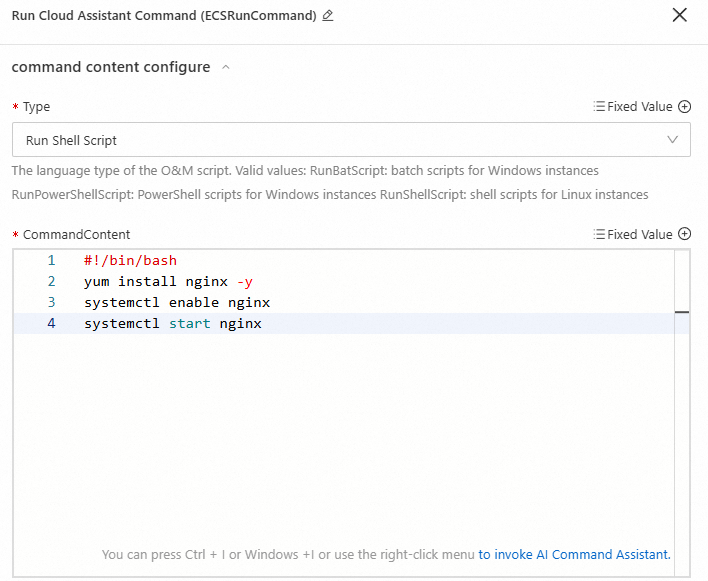
On the canvas, click the Run Cloud Assistant Command card. On the right-side form that appears, configure the following resource properties:
CommandContent: Enter the following content in the field.
#!/bin/bash
yum install nginx -y
systemctl enable nginx
systemctl start nginx
Timeout of execution(Unit: second): Enter 600 in the field.
Step 3: Implement automated deployment of the website
In the upper-right corner above the canvas, click Deploy.
In the deployment settings step of the Create Stack panel, configure parameters based on your business requirements and click Next.
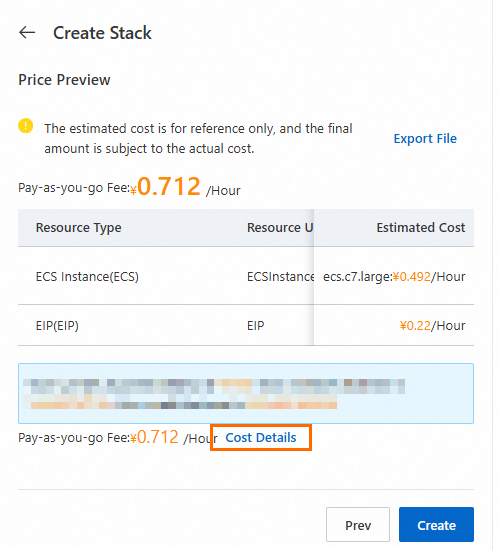
In the Price Preview step, view the estimated fees of all resources. You can also click Cost Details to view the details of billable items.
Click Create to implement automated deployment and view the deployment status and events of the resources in real time.
Step 4: Access the website
On the Event tab in the panel, click the instance ID below the ECSInstance resource to go to the Instance Details tab in the ECS console.
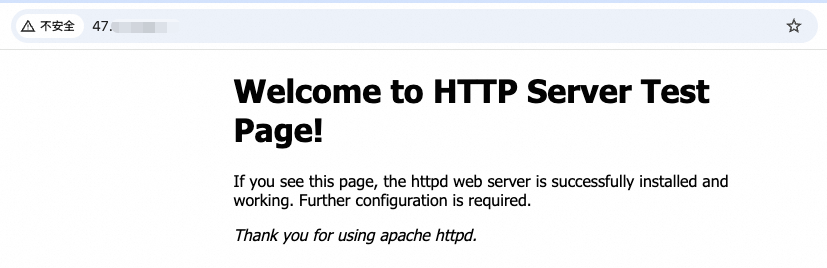
On the Instance Details tab, copy the EIP and access the EIP in your browser. The following figure shows the access result.
Step 5: (Optional) Delete the website resources
You can delete the stack of the website resources that you no longer need and release the website resources to prevent unnecessary costs.
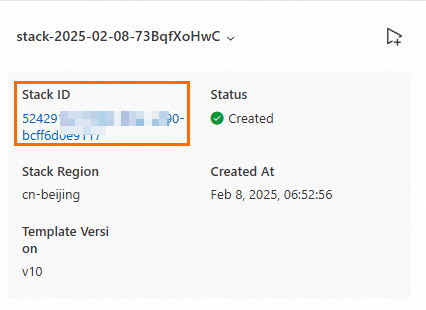
In the upper-right corner above the canvas, click Stack. In the panel that appears, click the ID of the desired stack.
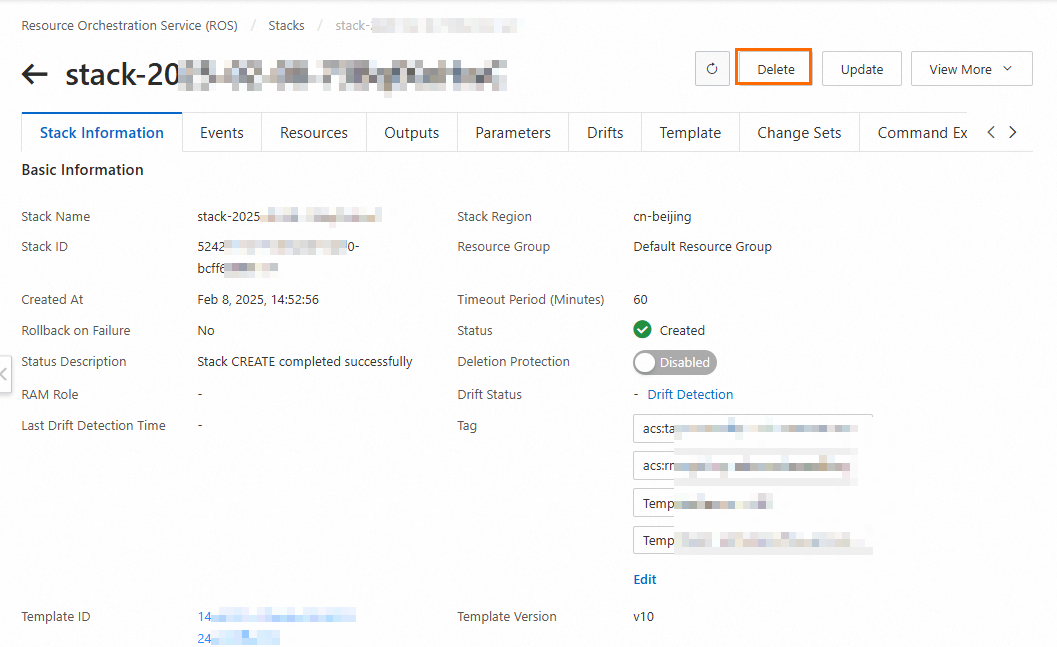
On the stack details page, click Delete.
In the Delete Stack dialog box, set the Method to Delete the Stack parameter to Release Resources.
Click OK.