Before you create a disaster recovery instance, you must ensure that there is network connectivity between the source instance and the destination instance. The source instance is the instance for which you want to enable disaster recovery. The destination instance is the disaster recovery instance, which is an RDS for PostgreSQL instance. You must also create a synchronization account on the source instance and configure the related files. This topic describes these preparations using a self-managed PostgreSQL database that runs on an ECS instance as an example.
Prerequisites
You must have a destination RDS for PostgreSQL instance that meets the following conditions. For more information, see Create an RDS for PostgreSQL instance.
The major version of the destination instance is the same as that of the source instance.
The instance must be a primary instance. Read-only instances cannot be used as disaster recovery instances.
The billing method of the instance must be subscription or pay-as-you-go. Serverless instances cannot be used as disaster recovery instances.
The instance must be empty and contain no data. The available storage space must be greater than or equal to the total data size of the self-managed PostgreSQL database.
Establish network connectivity
Network connectivity solutions
Source instance type | Network connectivity method |
Self-managed database in an on-premises data center | Express Connect, VPN Gateway, Smart Access Gateway, or Cloud Enterprise Network (CEN). |
Self-managed database on another cloud platform | |
Self-managed database on an Alibaba Cloud ECS instance | Note If the ECS instance and the destination RDS for PostgreSQL instance are in the same virtual private cloud (VPC), you do not need to establish network connectivity. |
Other cloud hosting | |
Alibaba Cloud RDS | Note If the source RDS for PostgreSQL instance and the destination RDS for PostgreSQL instance are in the same VPC, you do not need to establish network connectivity. |
If the source instance supports public network access, you can use an Internet NAT gateway to connect various types of source instances to the VPC of the destination instance. This topic describes how to configure the destination instance, which is an RDS for PostgreSQL instance, to establish network connectivity using an Internet NAT gateway.
For source instances that do not support public network access, you can use a CEN instance to establish network connectivity. For more information, see Establish network connectivity by configuring a CEN instance.
Configure an Internet NAT gateway for the destination instance
Log on to the ApsaraDB RDS console and go to the Instances page. In the top navigation bar, select the region in which the RDS instance resides. Then, find the RDS instance and click the instance ID.
In the navigation pane on the left, click Database Connection. On the Database Connection page, you can view the VPC and vSwitch of the destination instance.
Hover over the VPC ID to view the vSwitch ID.

Click the VPC ID to go to the VPC console.
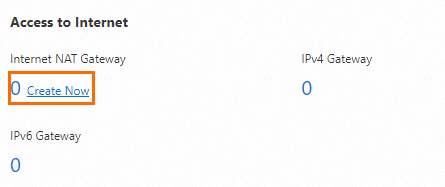
Go to the Resource Management tab. In the Access to Internet section, hover over Internet NAT Gateway and click Create Now.
On the page that appears, configure the purchase information and click Buy Now.
Configuration
Description
Billing Method
The default value is Pay-As-You-Go. This is a billing method where you pay for resources after you use them. For more information, see NAT Gateway billing.
Instance Name
Set a name for the Internet NAT gateway instance.
The name must be 2 to 128 characters in length. It must start with a letter or a Chinese character and can contain digits, underscores (_), and hyphens (-).
Region
Select the region where the destination RDS for PostgreSQL instance is located.
Resource Group
Select the resource group to which the VPC belongs. For more information, see What is Resource Group?.
Network And Zone
Select the VPC and vSwitch of the destination RDS for PostgreSQL instance.
Network Type
Select Internet NAT Gateway.
EIP
Select an Elastic IP Address (EIP). If you have not purchased an EIP, see Purchase an Internet NAT gateway and an EIP in unified access mode.
On the Confirm page, confirm the configuration of the Internet NAT gateway and click Activate Now.
Configure the source instance
Step 1: Create a synchronization account for disaster recovery
To create a disaster recovery relationship, you must have a database account on the source instance for synchronization. This account is called a synchronization account.
Connect to the source PostgreSQL instance. Then, create a synchronization account and set the required permissions. For example, you can create a synchronization account named replicatoraccount.
CREATE ROLE replicatoraccount CREATEROLE REPLICATION LOGIN PASSWORD 'your_password';Grant the
pg_monitorpermission to the synchronization account replicatoraccount.GRANT pg_monitor TO replicatoraccount;Connect to the source PostgreSQL instance using the replicatoraccount synchronization account that you created. Then, run the following SQL statements to check whether the account has the required permissions.
Execute the following SQL statement to create a test account named testreplicator and grant it the
REPLICATIONpermission. This grants the account the required permissions for synchronization.CREATE USER testreplicator WITH REPLICATION;If an error such as
must be superuser to create replication usersis returned, connect to the source instance using an account that has theSUPERUSERpermission. Then, grant theSUPERUSERpermission to the synchronization account, replicatoraccount. For example, run the commandALTER USER replicatoraccount WITH SUPERUSER;.Delete the testreplicator test account.
DROP USER IF EXISTS testreplicator;
Step 2: Configure an ECS security group
Log on to the ECS console.
In the navigation pane on the left, choose .
In the top navigation bar, select a region.
Find the source ECS instance and click the instance ID.
On the Security Groups tab, click the name of the security group.
On the Security Group Details page, in the Rules section on the Inbound tab, click Add Rule. Add the following security group rule.
The following table describes the key parameters for the security group rule:
Protocol Type
Port Range
Authorization Object
All ICMP (IPv4)
Source: -1/-1Destination: -1/-1Set this parameter to the EIP of the Internet NAT gateway that is created for the destination RDS for PostgreSQL instance in the Establish network connectivity step.
NoteYou can view the EIP of the Internet NAT gateway on the Associated EIPs tab of the gateway.
TCP
The port of the self-managed PostgreSQL database on the ECS instance. You can run the
netstat -a | grep PGSQLcommand to view the port.
Step 3: Configure the pg_hba.conf file
The following steps use PostgreSQL 13 that is installed on a CentOS 7 system as an example.
Log on to the ECS instance on which the self-managed PostgreSQL database is deployed. For more information, see Remotely connect to an ECS instance.
Find the location of the pg_hba.conf file.
NoteYou must switch to the root user to run this command.
find / -name pg_hba.confThe following output is returned:
/var/lib/pgsql/13/data/pg_hba.confGo to the directory where the pg_hba.conf file is stored.
cd /var/lib/pgsql/13/data/Edit the pg_hba.conf file and add the following lines to the end of the file.
host  all    replicatoraccount  121.XX.XX.XX/32  md5
host  replication  replicatoraccount  121.XX.XX.XX/32  md5
Key parameters:
replicatoraccount: The synchronization account that you created. For more information, see Step 1: Create a synchronization account for disaster recovery.121.XX.XX.XX: The elastic IP address (EIP) of the Internet NAT gateway that is created for the destination RDS for PostgreSQL instance. For more information, see the Establish network connectivity section.NoteYou can view the EIP of the Internet NAT gateway on the Associated EIPs tab of the gateway details page.
Connect to the source PostgreSQL instance and reload the configuration file for the changes to take effect.
SELECT pg_reload_conf();Sample output:
 pg_reload_conf
----------------
 t
(1 row)
Step 4: Configure the postgresql.conf file
For more information, see Configure the postgresql.conf file.
Step 5: Configure the server firewall
For more information, see Configure the server firewall.