You can enable the release protection feature for your ApsaraDB RDS for MySQL instance that runs critical workloads. This feature prevents manual release and avoids irreparable consequences arising from accidental instance release. This topic describes how to enable or disable the release protection feature for your ApsaraDB RDS for MySQL instance.
Prerequisites
The billing method of the instance is pay-as-you-go or serverless.
Limits
The release protection feature cannot prevent the automatic release of RDS instances in normal scenarios such as the following scenarios:
A payment in your account is overdue for more than 15 days.
The RDS instance does not comply with the security compliance policies.
Benefits of release protection
If you release an RDS instance for which the release protection feature is enabled, the result is returned based on the method that you use to release the RDS instance:
If you manually release the RDS instance in the ApsaraDB RDS console, an error message indicating that the RDS instance fails to be released is displayed.
If you call the DeleteDBInstnace operation to release the RDS instance, an error message indicating that the RDS instance fails to be released is returned.
Enable the release protection feature when you create an RDS instance
This section describes how to configure release protection settings when you create an RDS instance. For more information about how to create an RDS instance, see Create an ApsaraDB RDS for MySQL instance.
- Log on to the ApsaraDB RDS console. In the left-side navigation pane, click Instances. In the top navigation bar, select the region in which your RDS instance resides.
On the Instances page, click Create Instance.
In the Basic Resources step, set Billing Method to Pay-as-you-go and configure other required parameters. Then, click Next: Instance Configuration.
In the Instance Configuration step, select Prevents instances from being unexpectedly deleted by using the console or calling an API operation and configure other required parameters. Then, click Next: Confirm Order.
Configure the required parameters.
When you call the CreateDBInsance or CloneDBInstance operation to create an RDS instance, you can enable or disable the release protection feature for the RDS instance by configuring the DeletionProtection parameter.
Modify release protection settings
You can also enable or disable the release protection feature for an RDS instance by modifying the settings of the RDS instance.
- Log on to the ApsaraDB RDS console. In the left-side navigation pane, click Instances. In the top navigation bar, select the region in which your RDS instance resides.
On the Instances page, find the RDS instance whose release protection settings you want to modify. In the Actions column, click .
In the dialog box that appears, turn on or turn off Release Protection.
Click OK.
You can also call the ModifyDBInstanceDeletionProtection operation to enable or disable the release protection feature for an RDS instance.
Check the status of the release protection feature
- Go to the Instances page. In the top navigation bar, select the region in which the RDS instance resides. Then, find the RDS instance and click the ID of the instance.
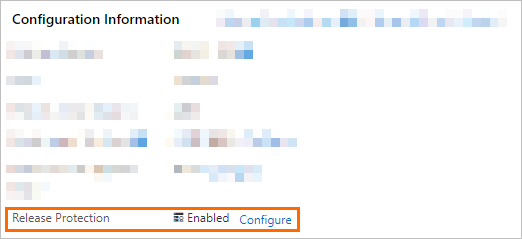
On the Basic Information page, view the Release Protection parameter in the Configuration Information section.

Related operations
Operation | Description |
Creates an instance. | |
Restores the data of the original instance to a new instance. The new instance is called a cloned instance. | |
Enables or disables the release protection feature for an instance. |