This topic describes the procedures for editing, querying, shifting, sharing, transferring, and deleting a workbook.
Prerequisites
You have created a workbook. For more information, see Create a Workbook.
Procedures
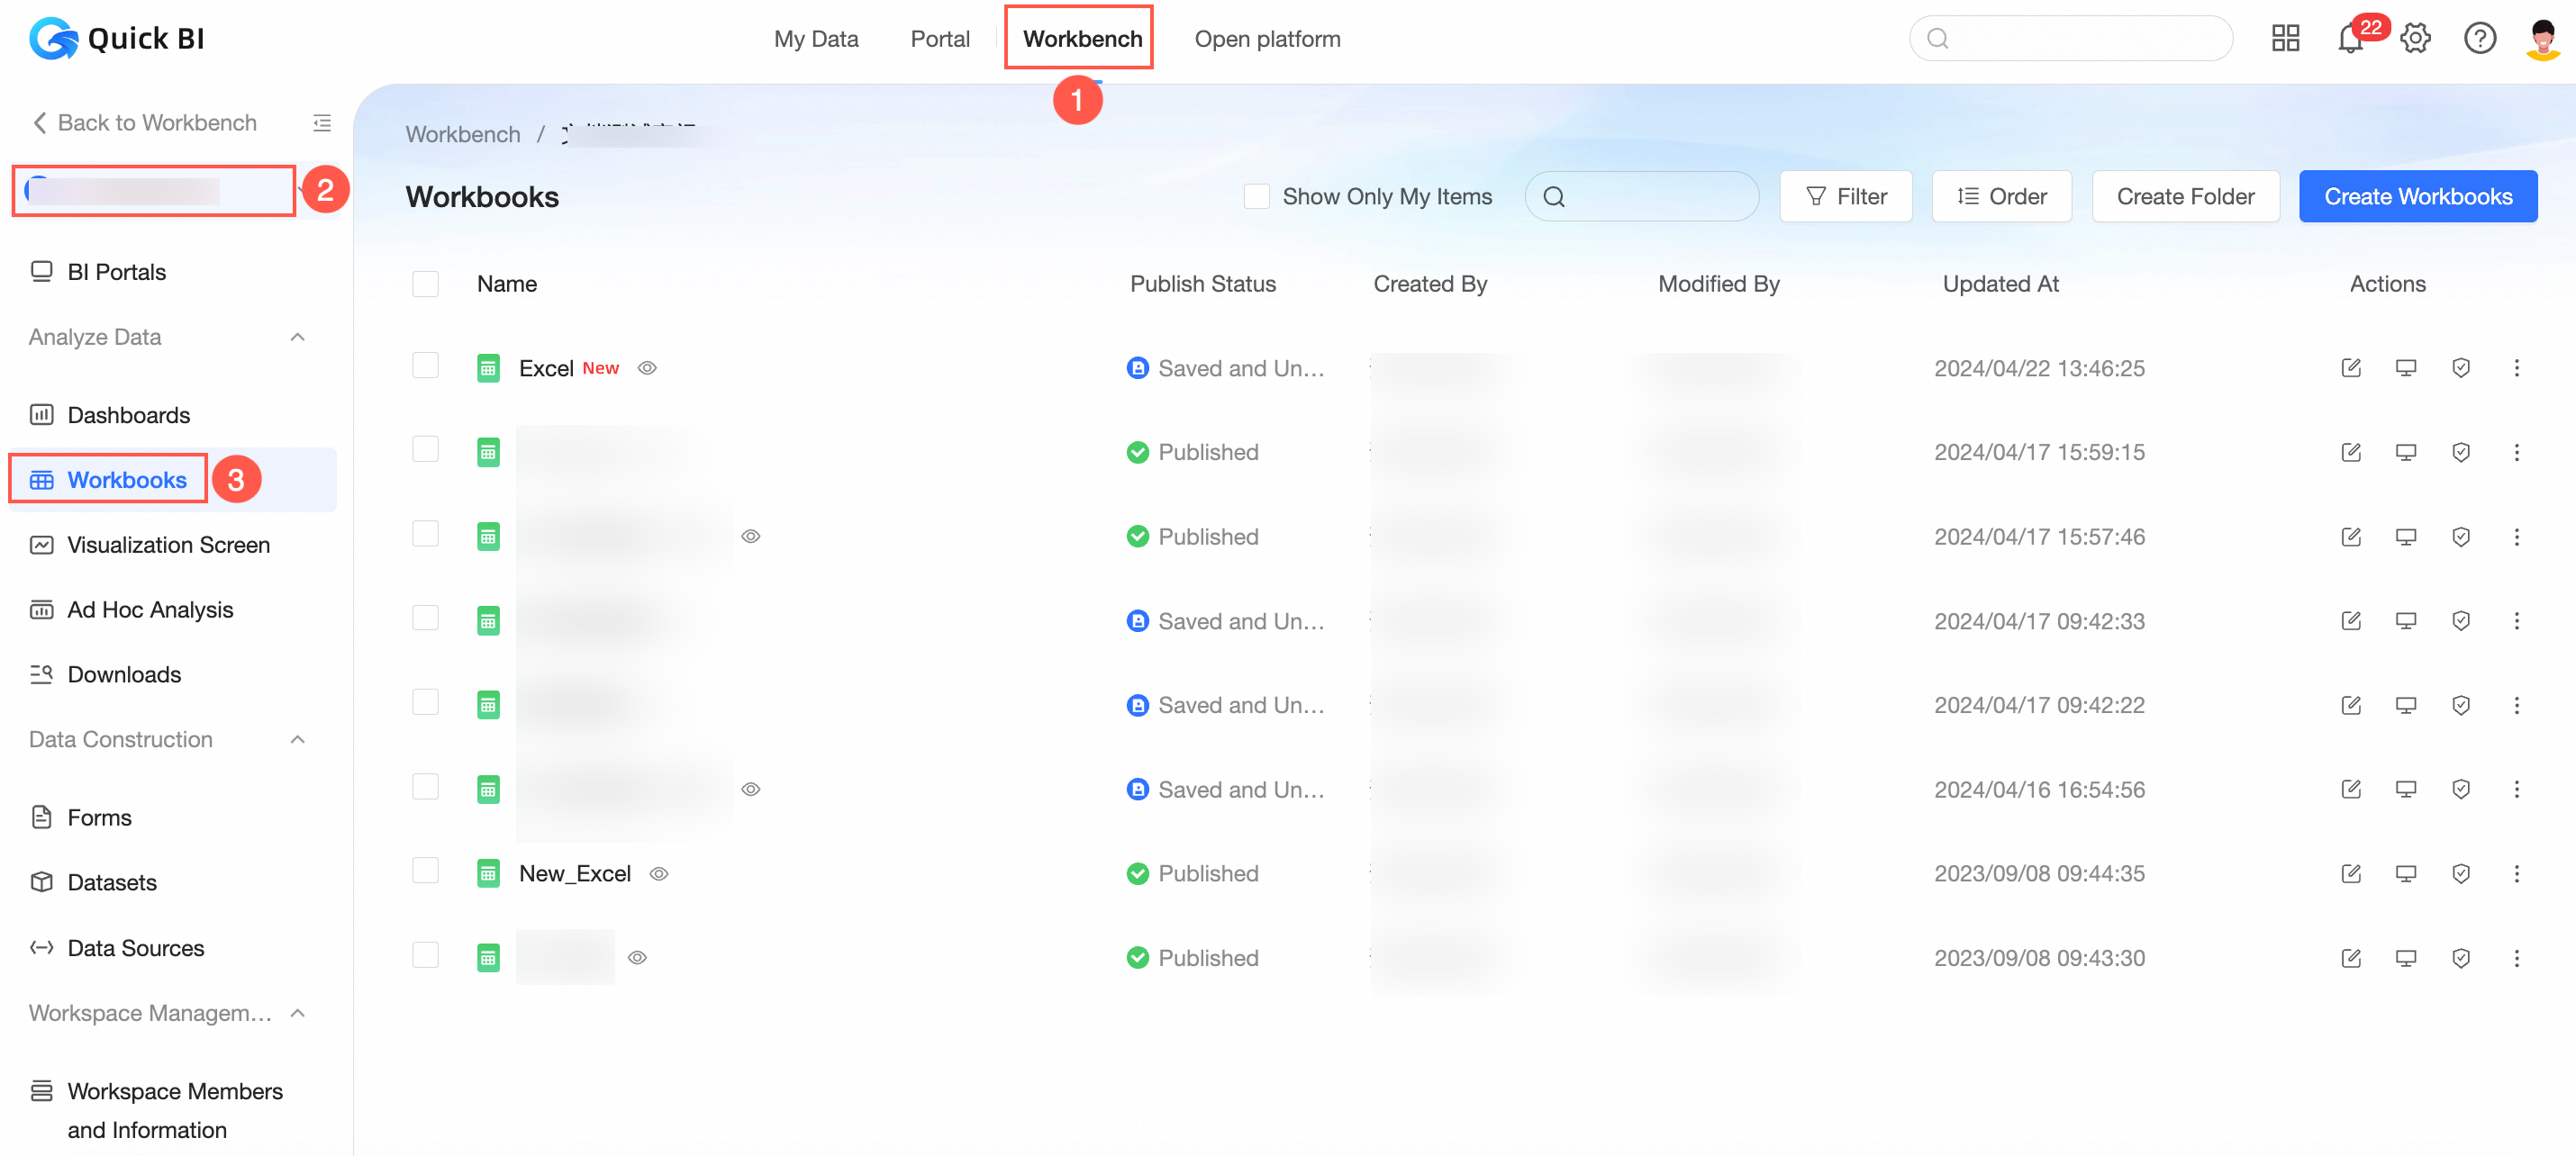
Log on to the or the international Quick BI console, and use the instructions in the figure below to navigate to the workbook management page.
Edit
On the Workbook management page, locate the desired workbook, right-click and select Edit.
Alternatively, click the
 icon next to the workbook you want to edit.
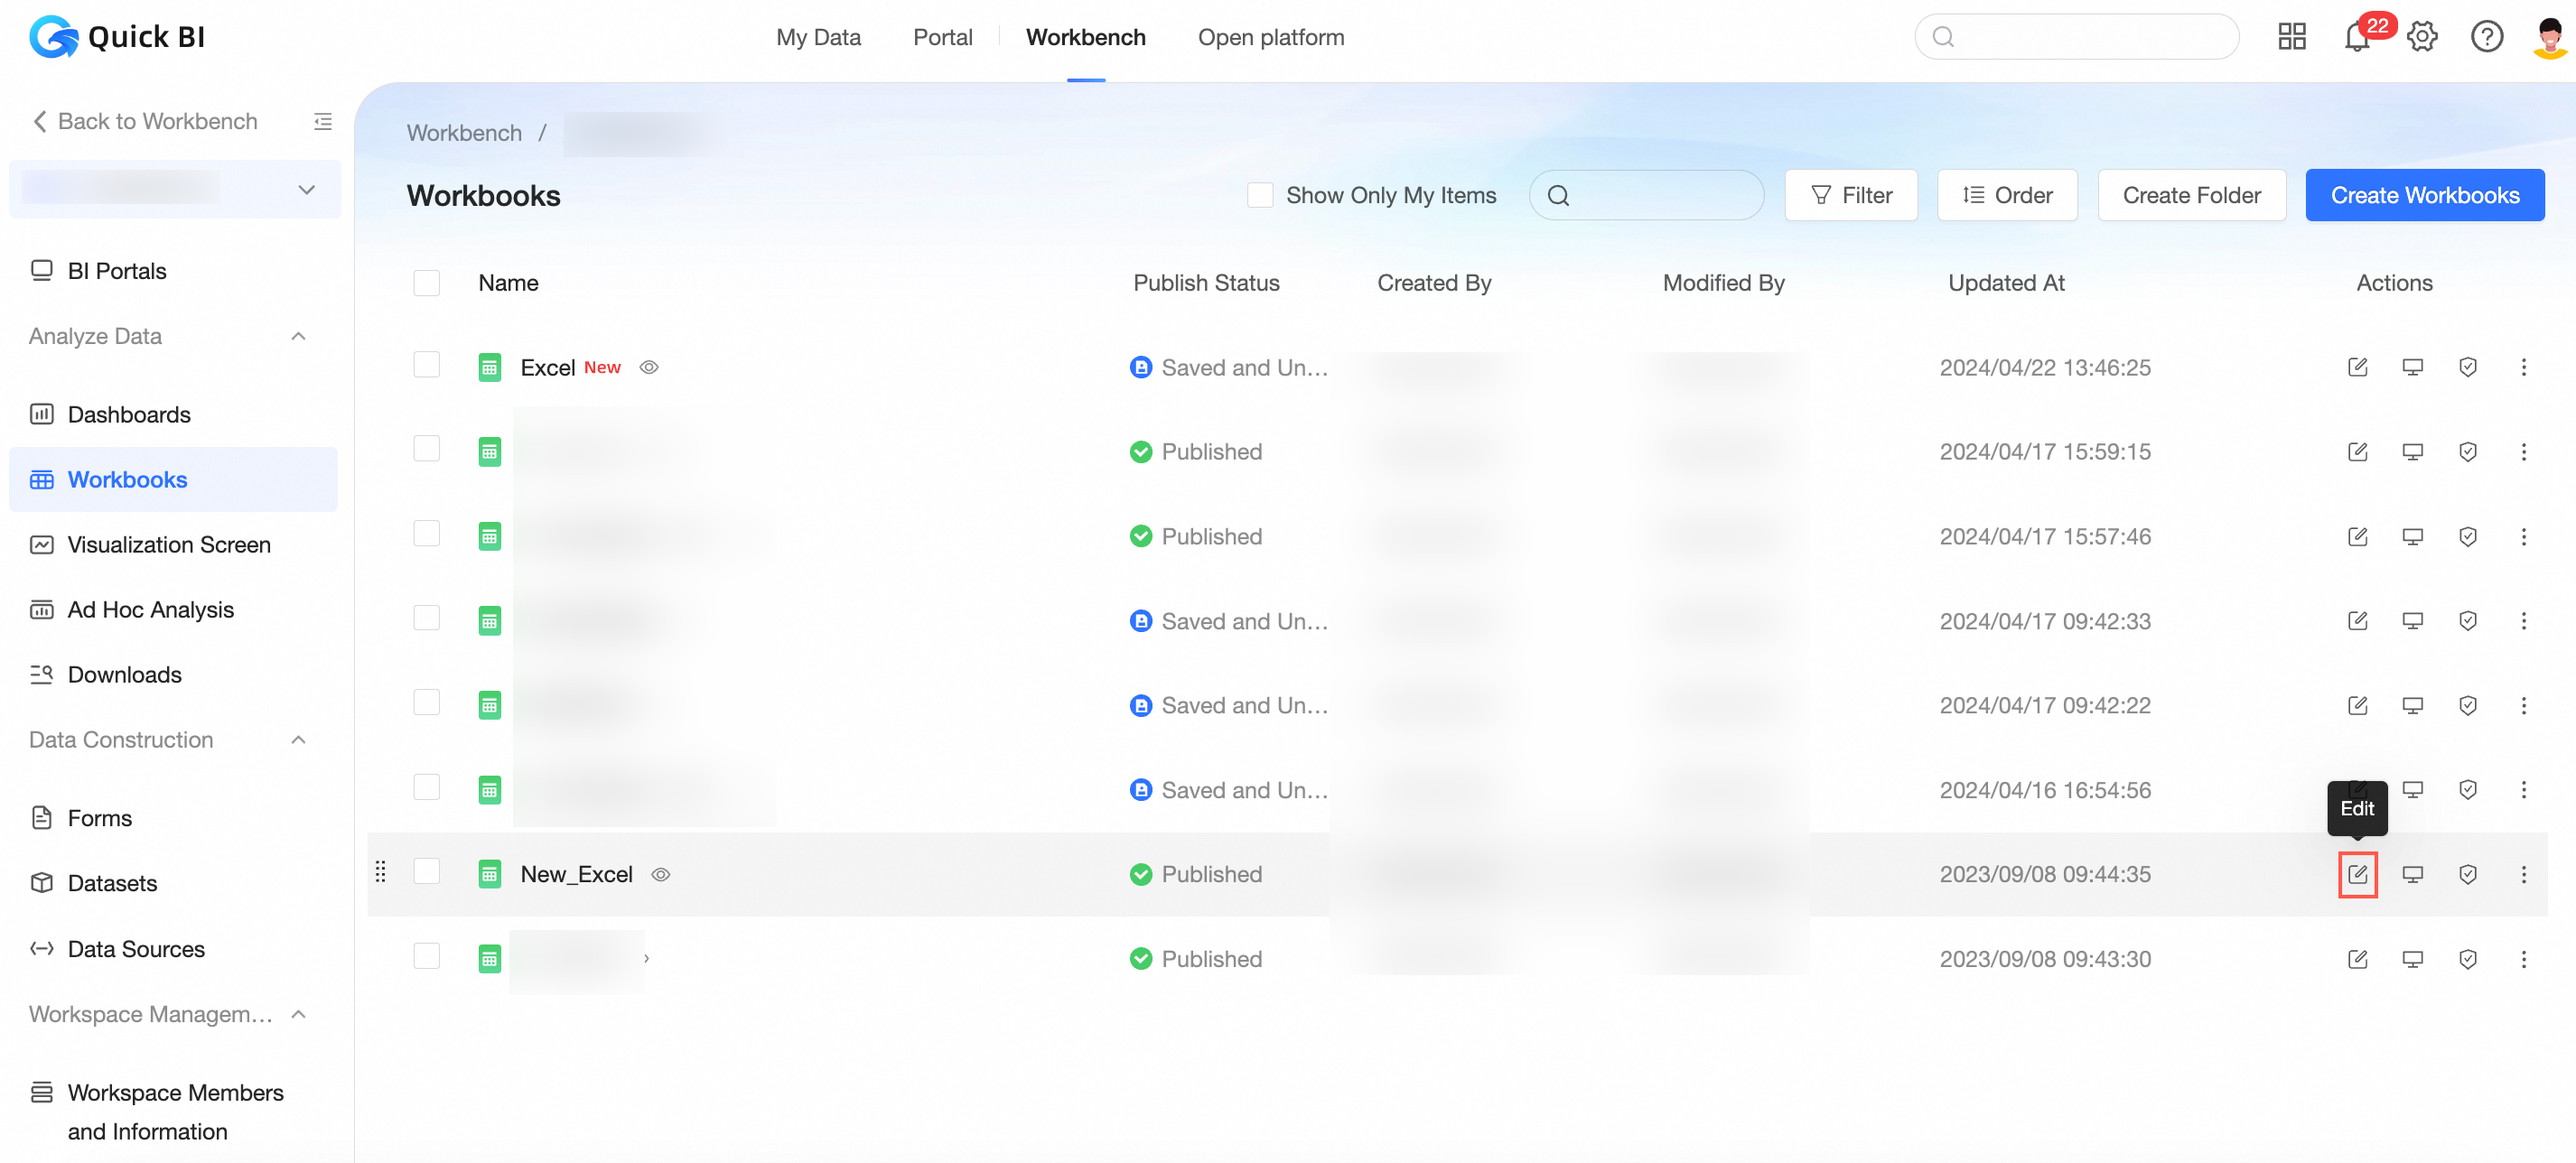
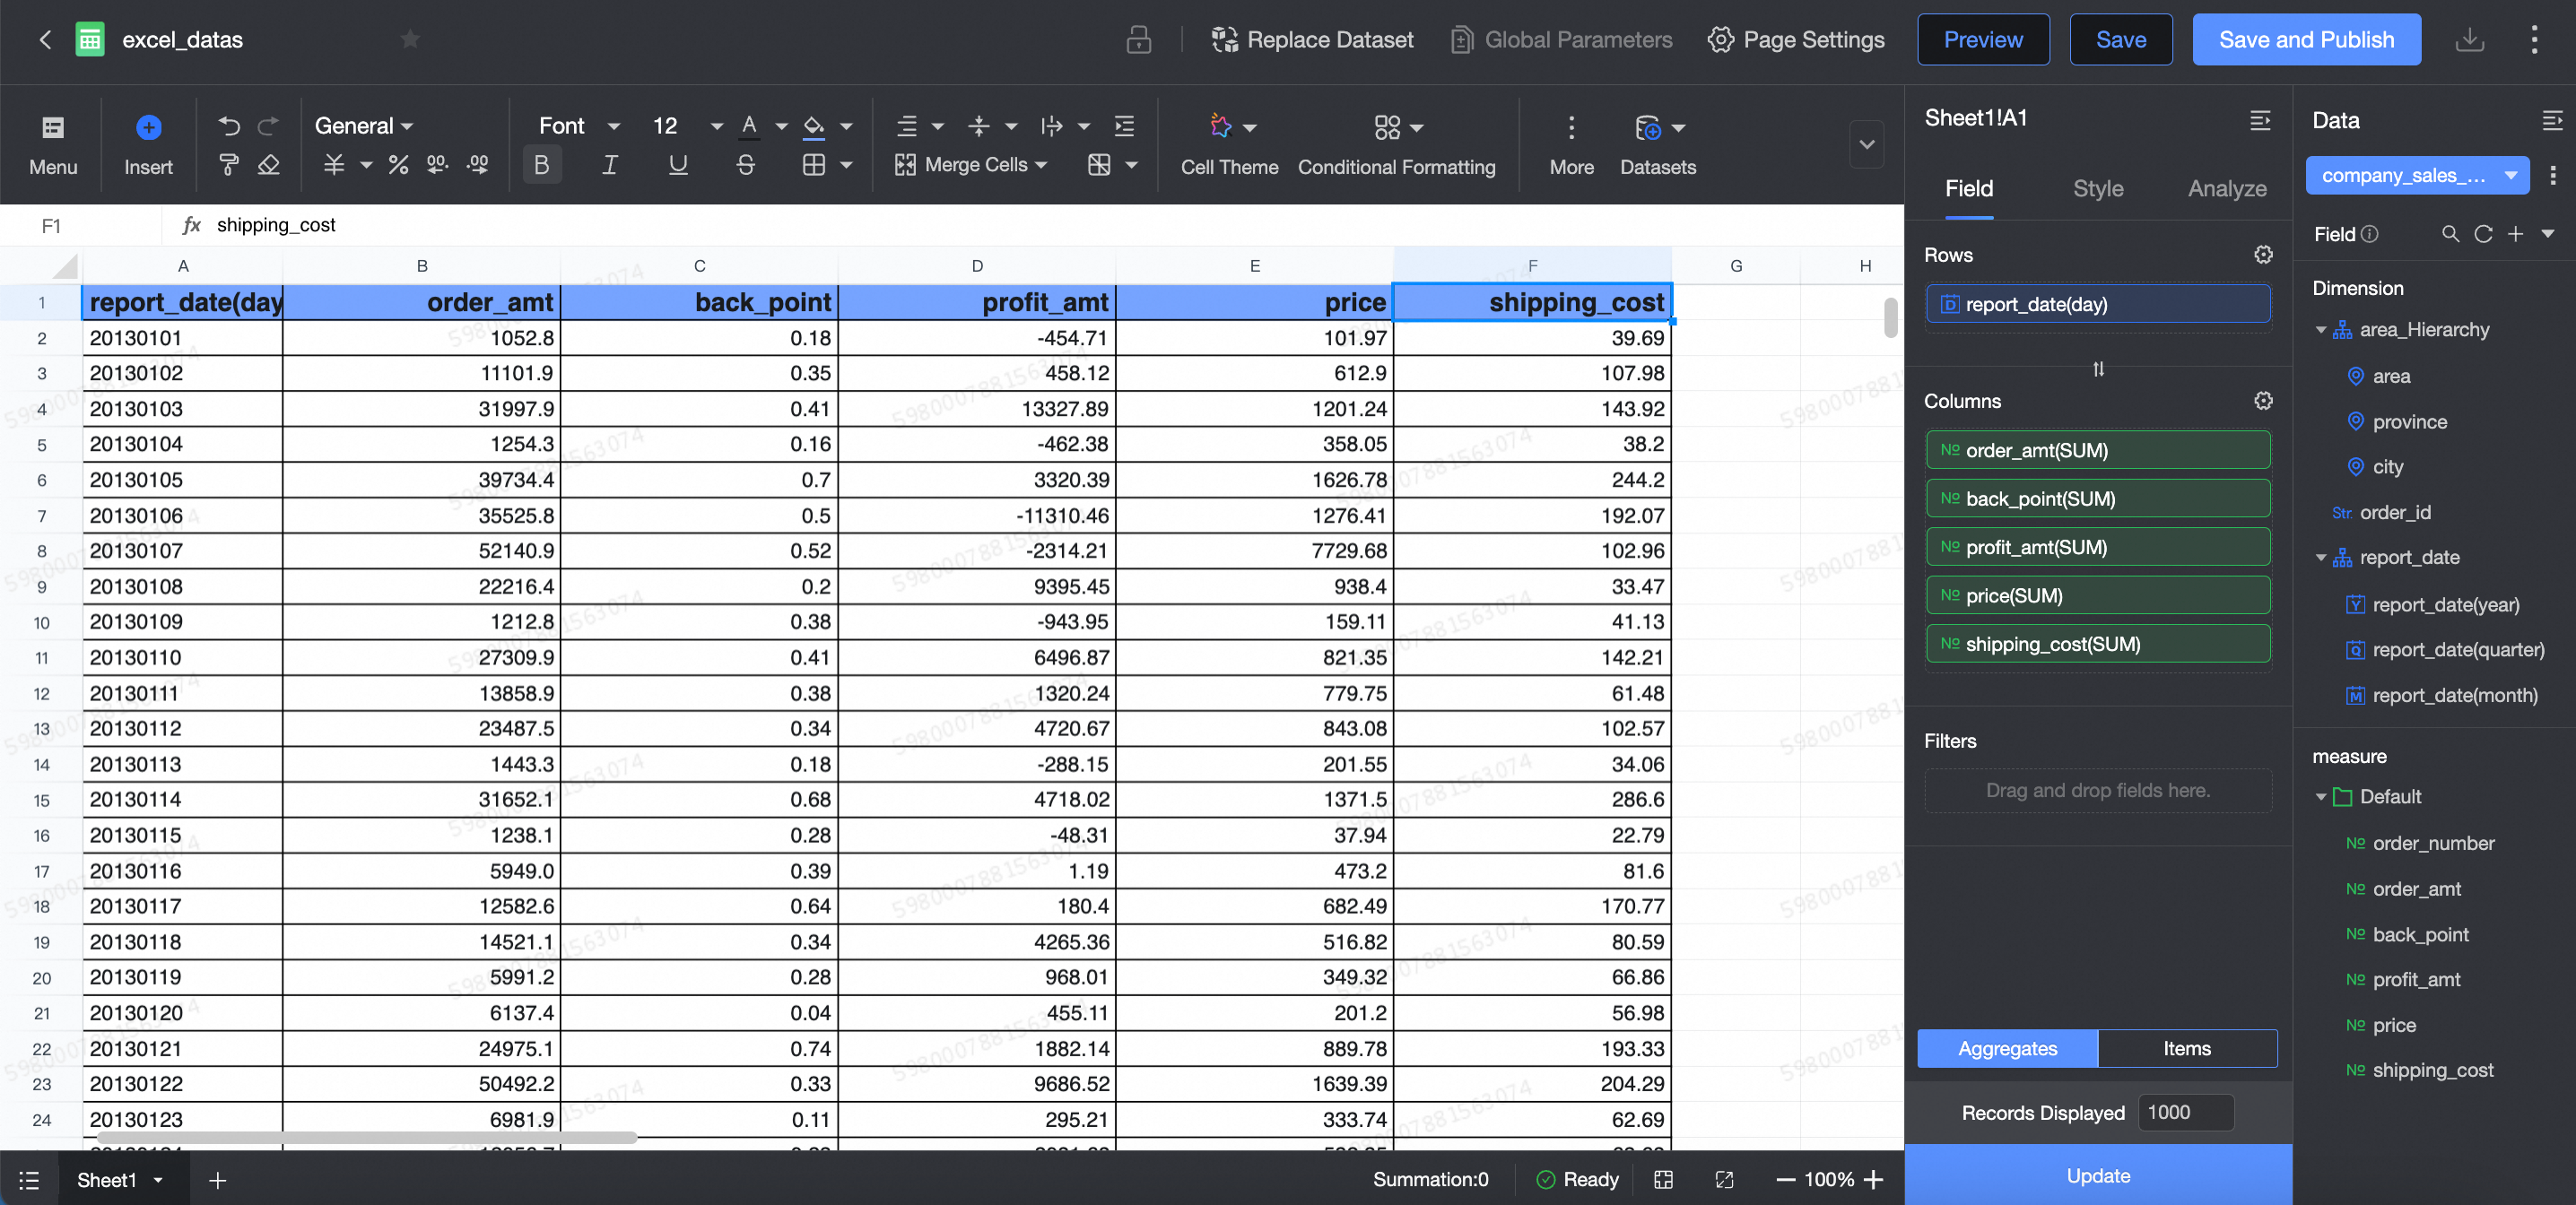
On the workbook editing page, make the necessary changes to the workbook.
Query
On the Workbook management page, perform a search for the target workbook.
Search query
Enter the name of the workbook in the search box to quickly locate it.

Filtered query
Click Filter to reveal the filter options. You can filter by publication status, creator, and creation time.
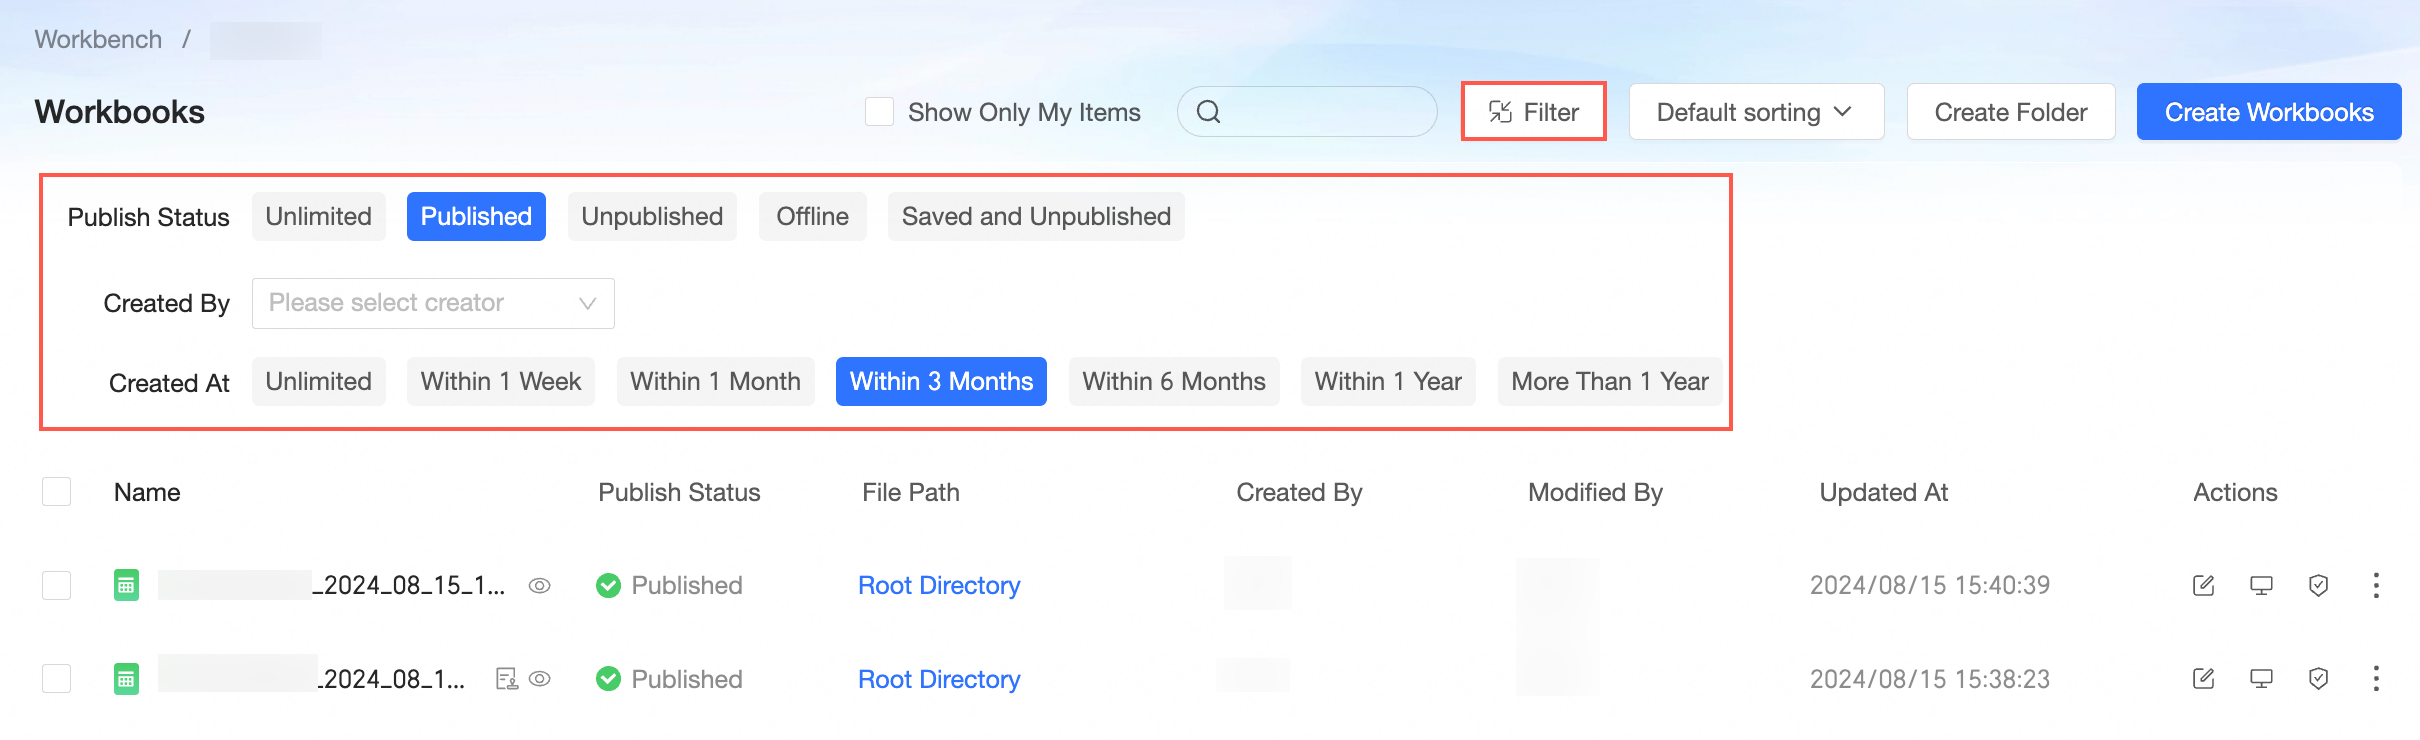
To hide the filter options, click the
 icon. The applied filters will be displayed, and you can remove or clear them as needed.
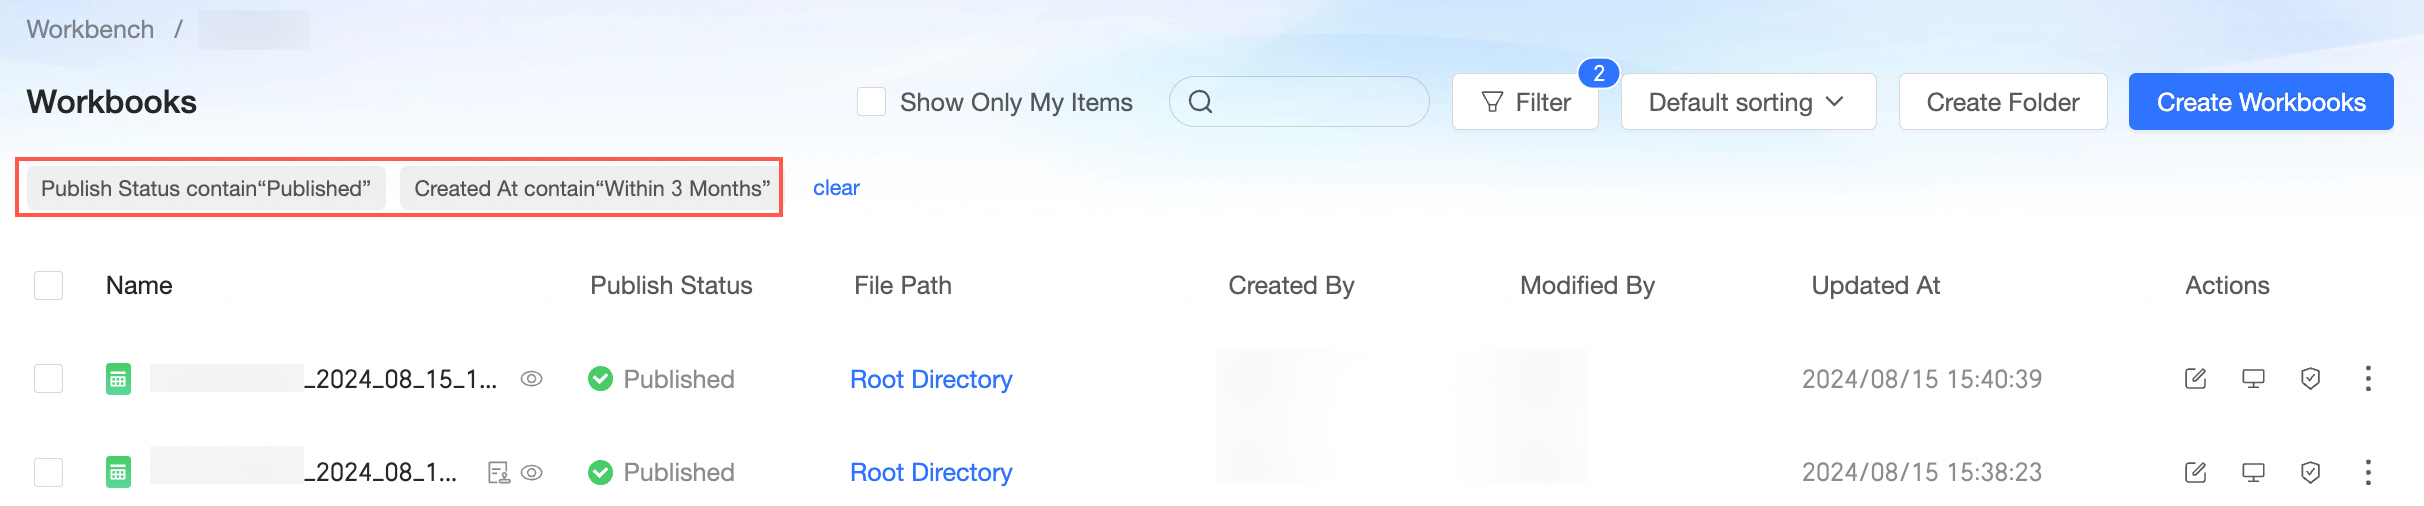
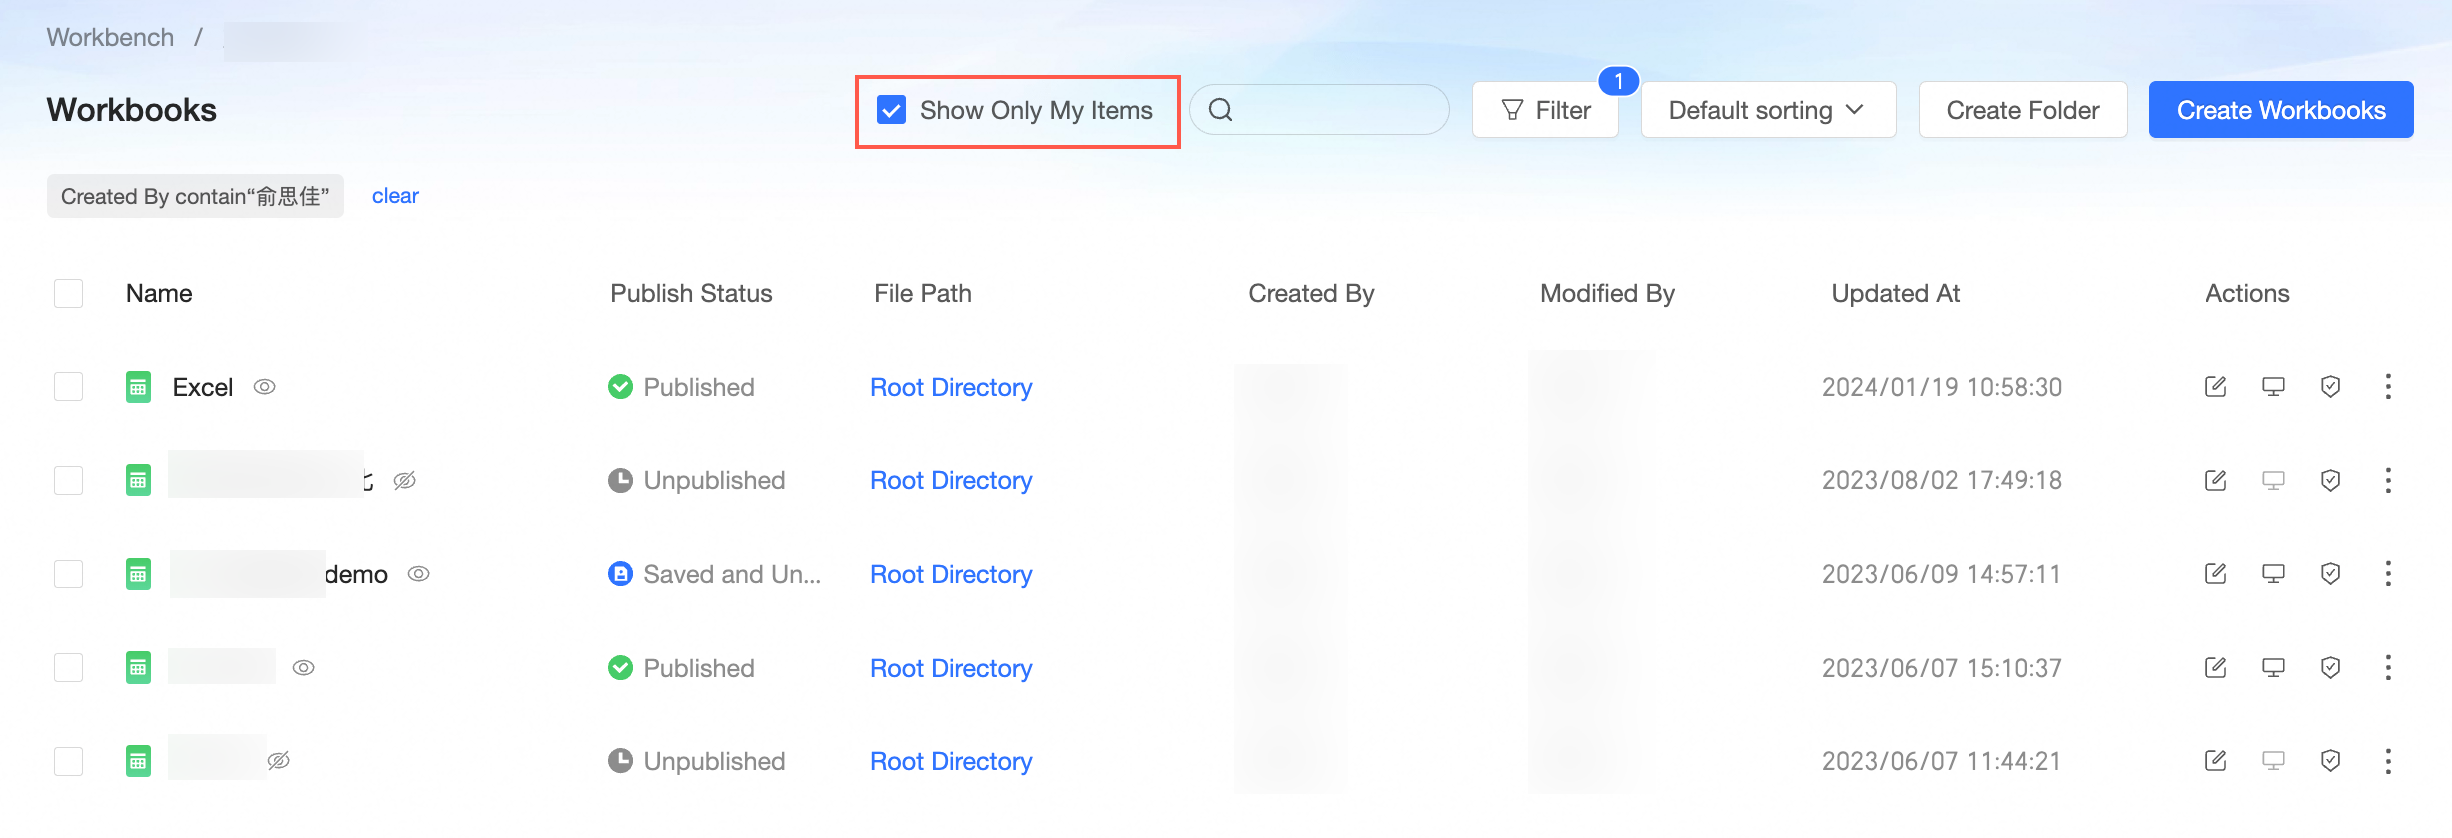
Select Show only mine to quickly find workbooks you have created.
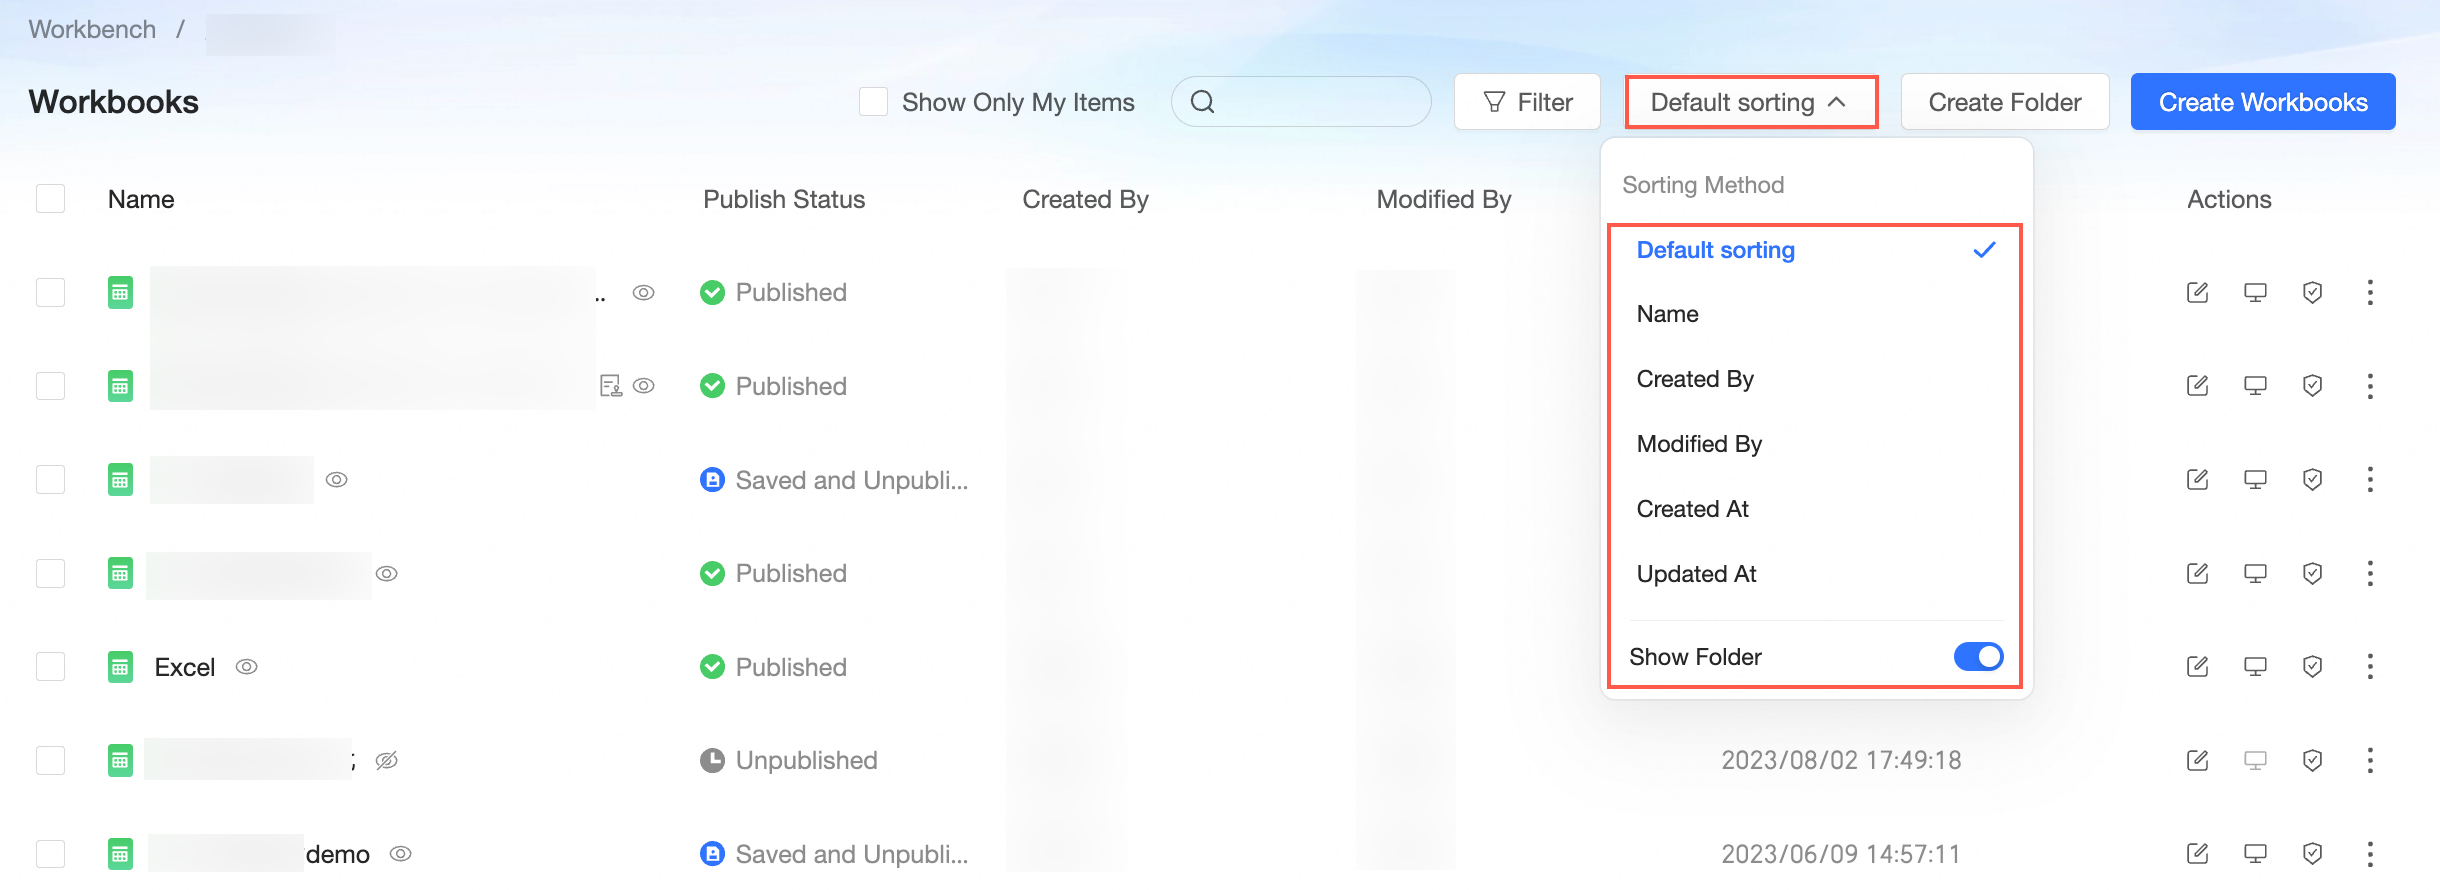
Sort
Sorting of workbooks is supported by name, creator, modifier, creation time, or modification time. The option to retain the folder structure is selected by default. When selected, folders are not included in the sorting.
Transfer and rename
On the Workbook management page, locate the desired workbook, right-click and select Properties.
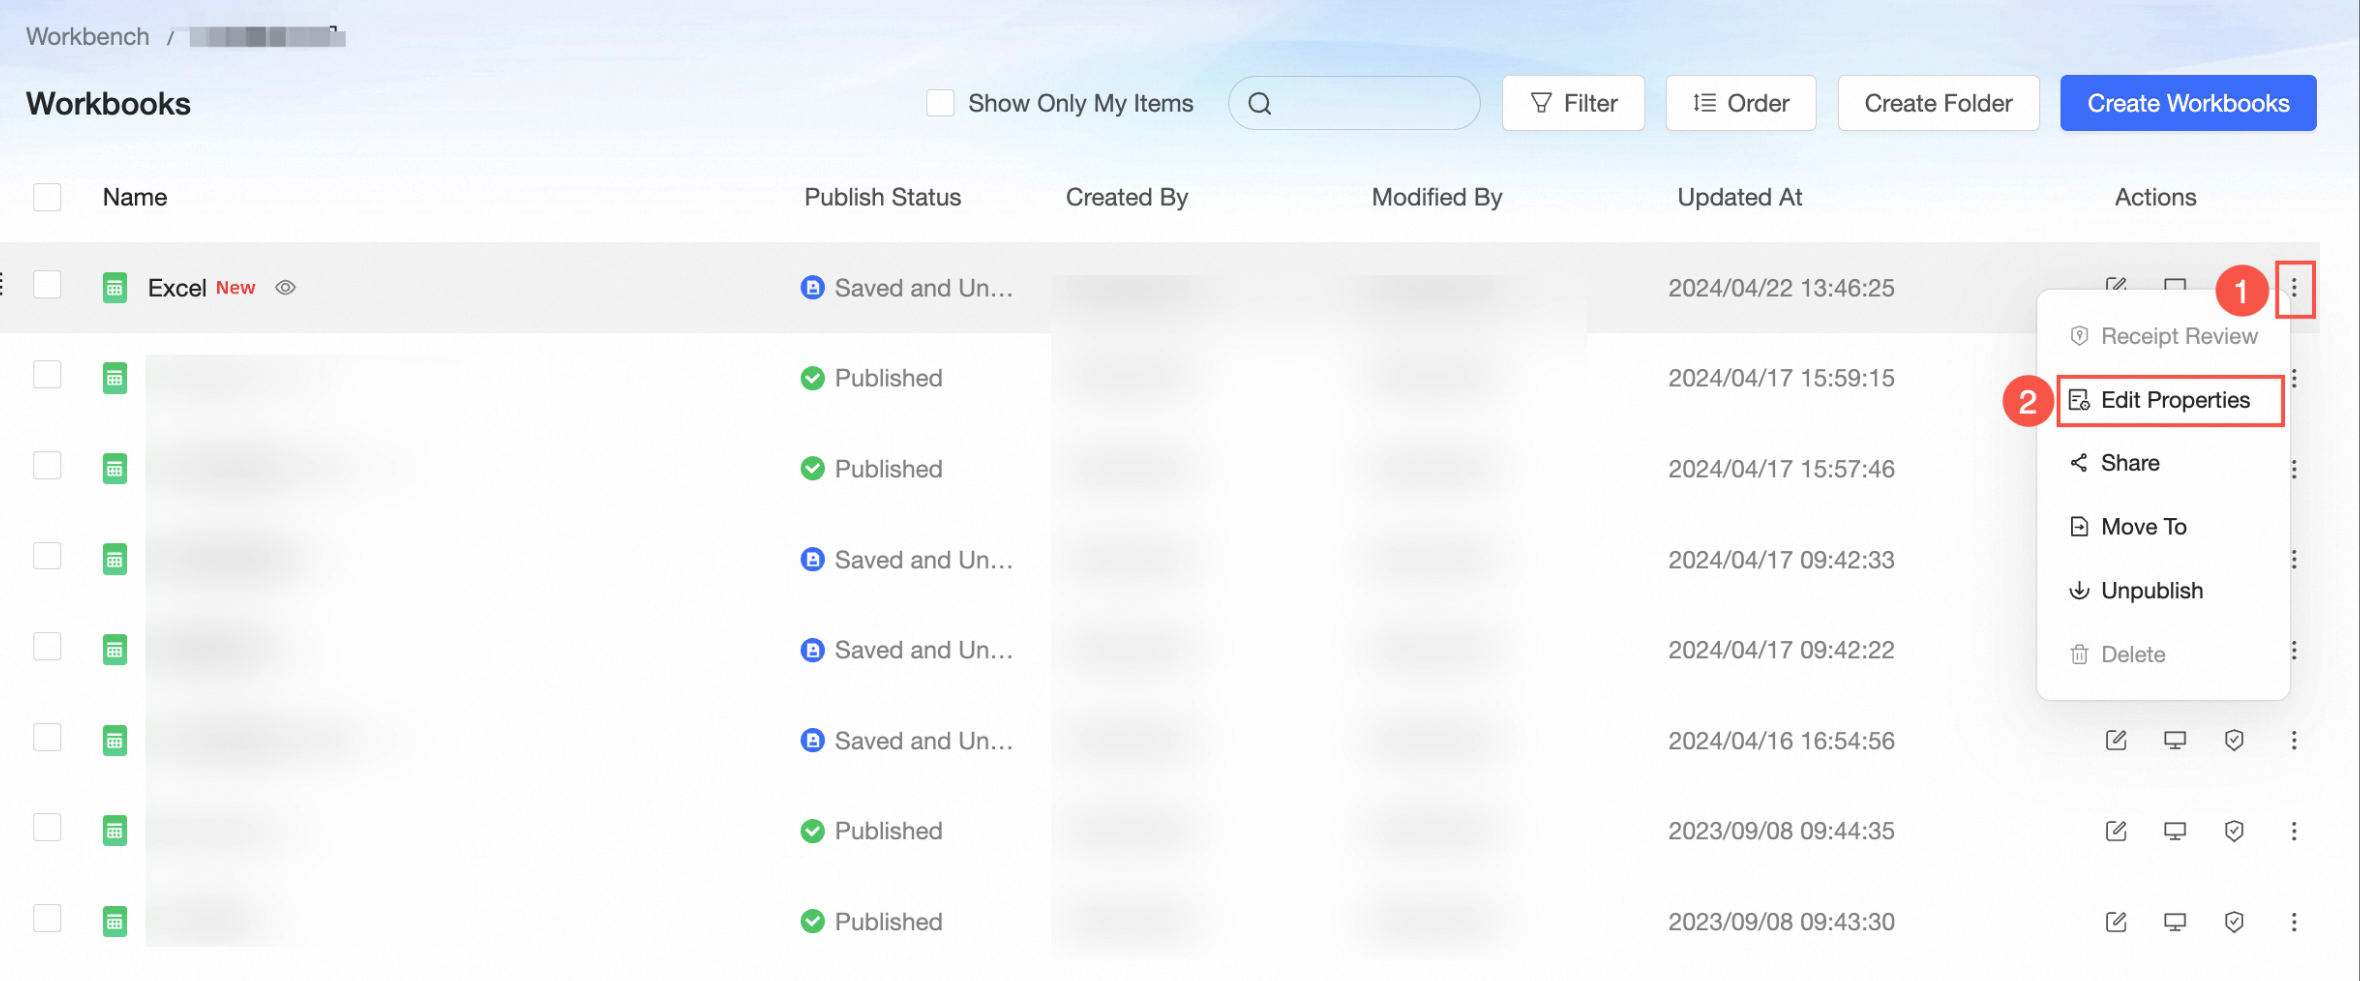
In the Properties panel, set the following parameters.
Parameter name
Description
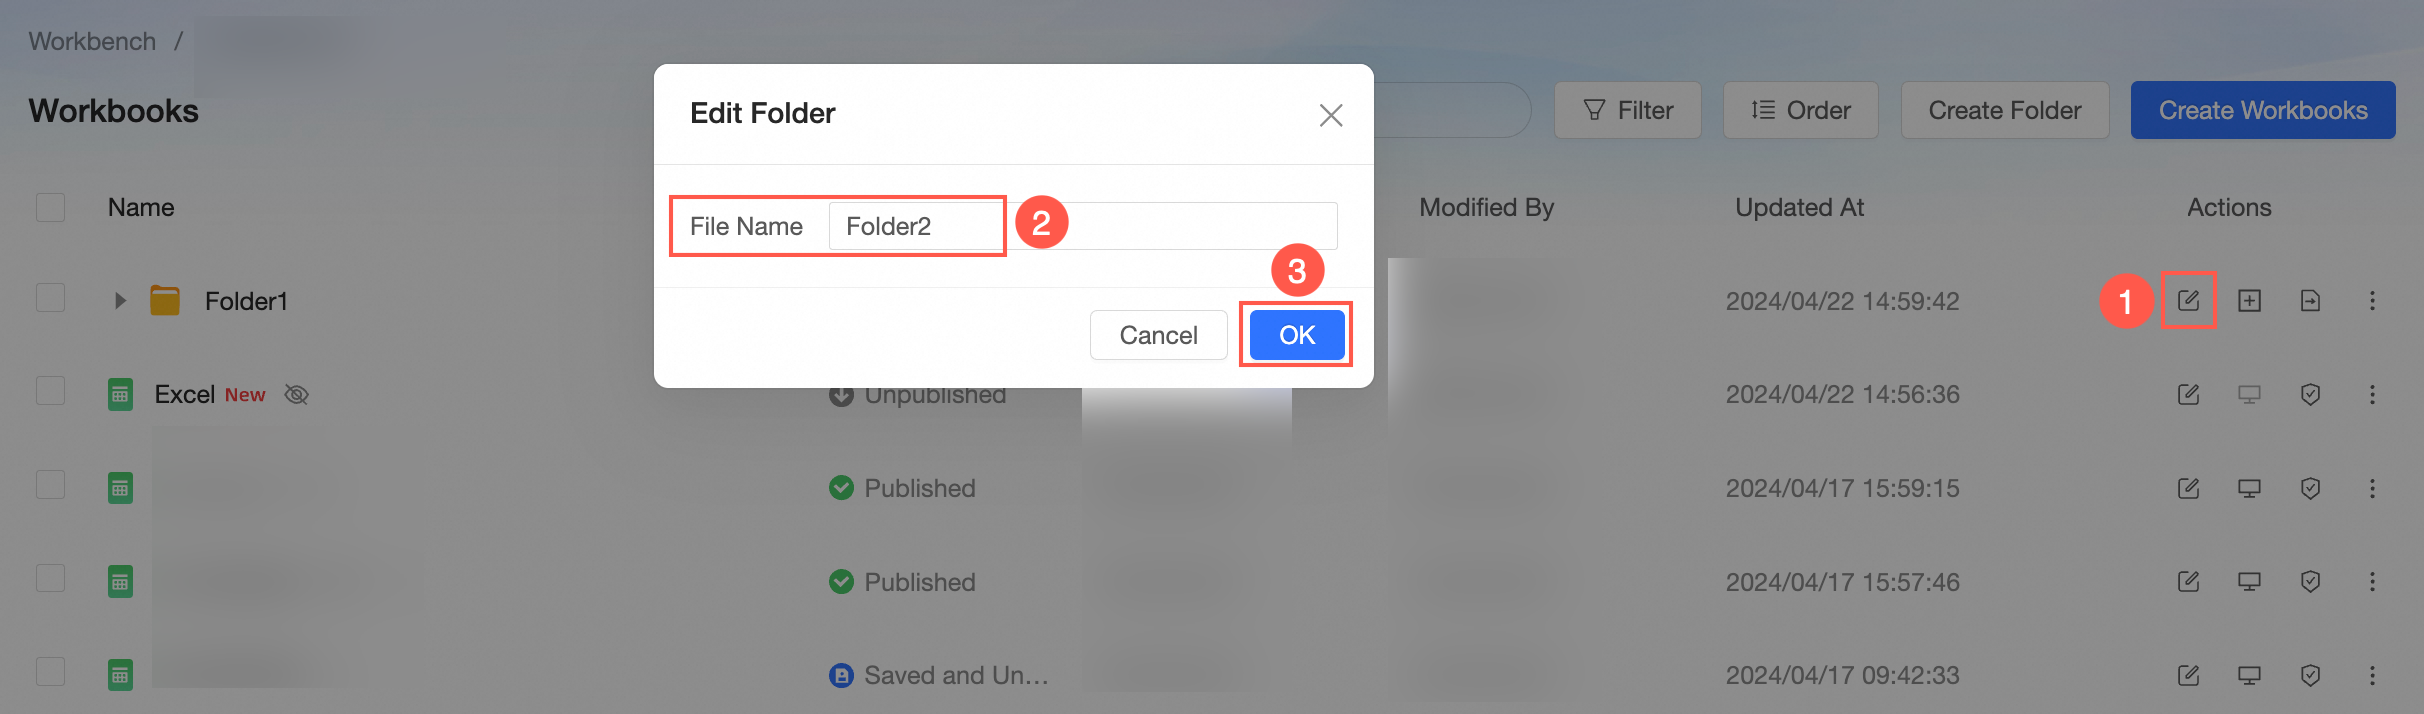
Name
You can modify the workbook name to complete the renaming.
NoteThe workbook name does not support the same name in the same folder, but supports the same name in different folders.
Owner
Click the drop-down icon to select the owner to complete the transfer of the workbook.
Description
Add a description to the workbook.
Click Confirm.
Collaborative authorization
On the Workbook management page, locate the target workbook, right-click and select Collaborative Authorization.
You can also click the
 icon for the workbook you want to authorize for collaboration.
For detailed instructions, see Grant report permissions.
Share
This feature is available only when the workbook's Publication Status is set to Published.
On the Workbook management page, follow the steps shown in the figure below to access the share page.

In the Link Sharing dialog box, choose the type of link you want to share.
Private link sharing
On the Link Sharing page, select Private link.
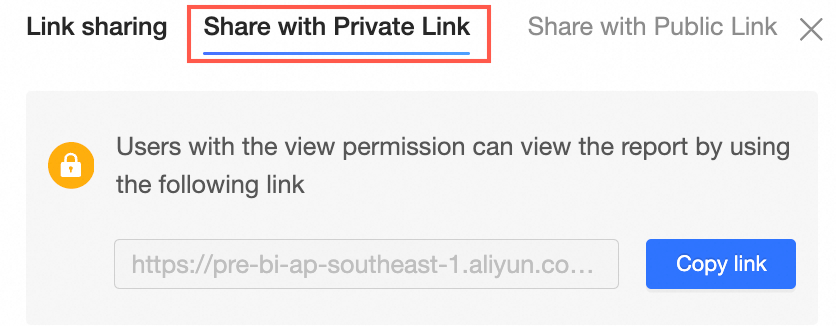
To share the link with users who have viewing permissions, click the Copy link button on the right side of the link box.
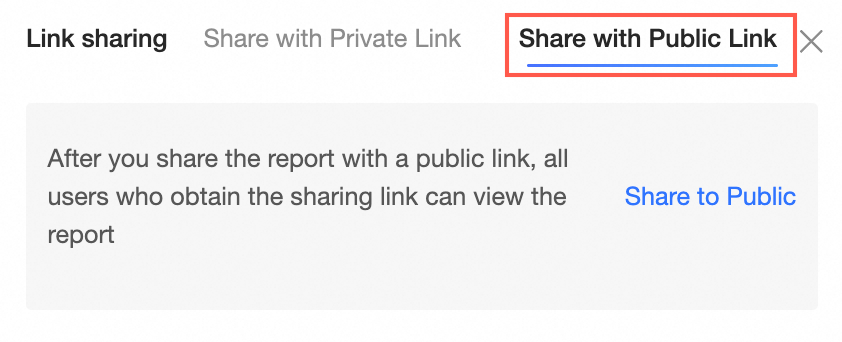
Public link sharing
Publicly sharing a dashboard generates an accessible link for all users, without requiring them to log on to an Alibaba Cloud account.
On the Link Sharing page, select Public link.
Click Public Sharing to view the link URL, expiration date, and the option to discontinue public sharing.
You can set the expiration date to long-term by selecting Long-term. To stop public sharing of the report, click No longer public.
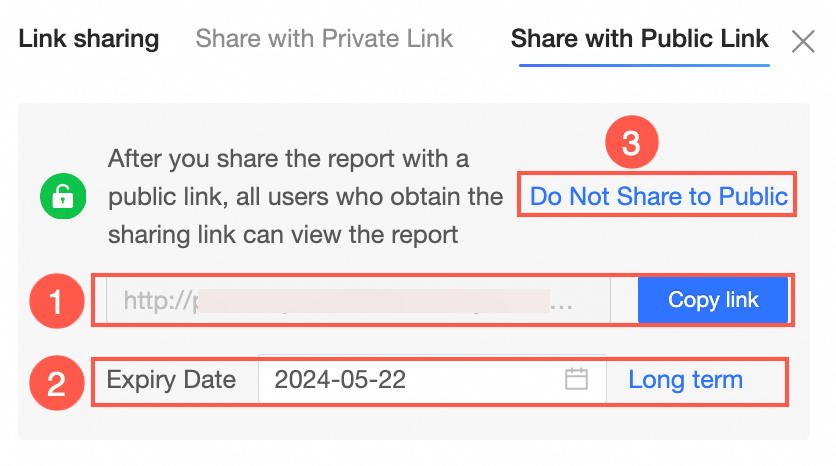
To share the link with others, click the Copy link button.
Shift to
On the Workbook management page, use the steps shown in the figure below to shift the workbook.

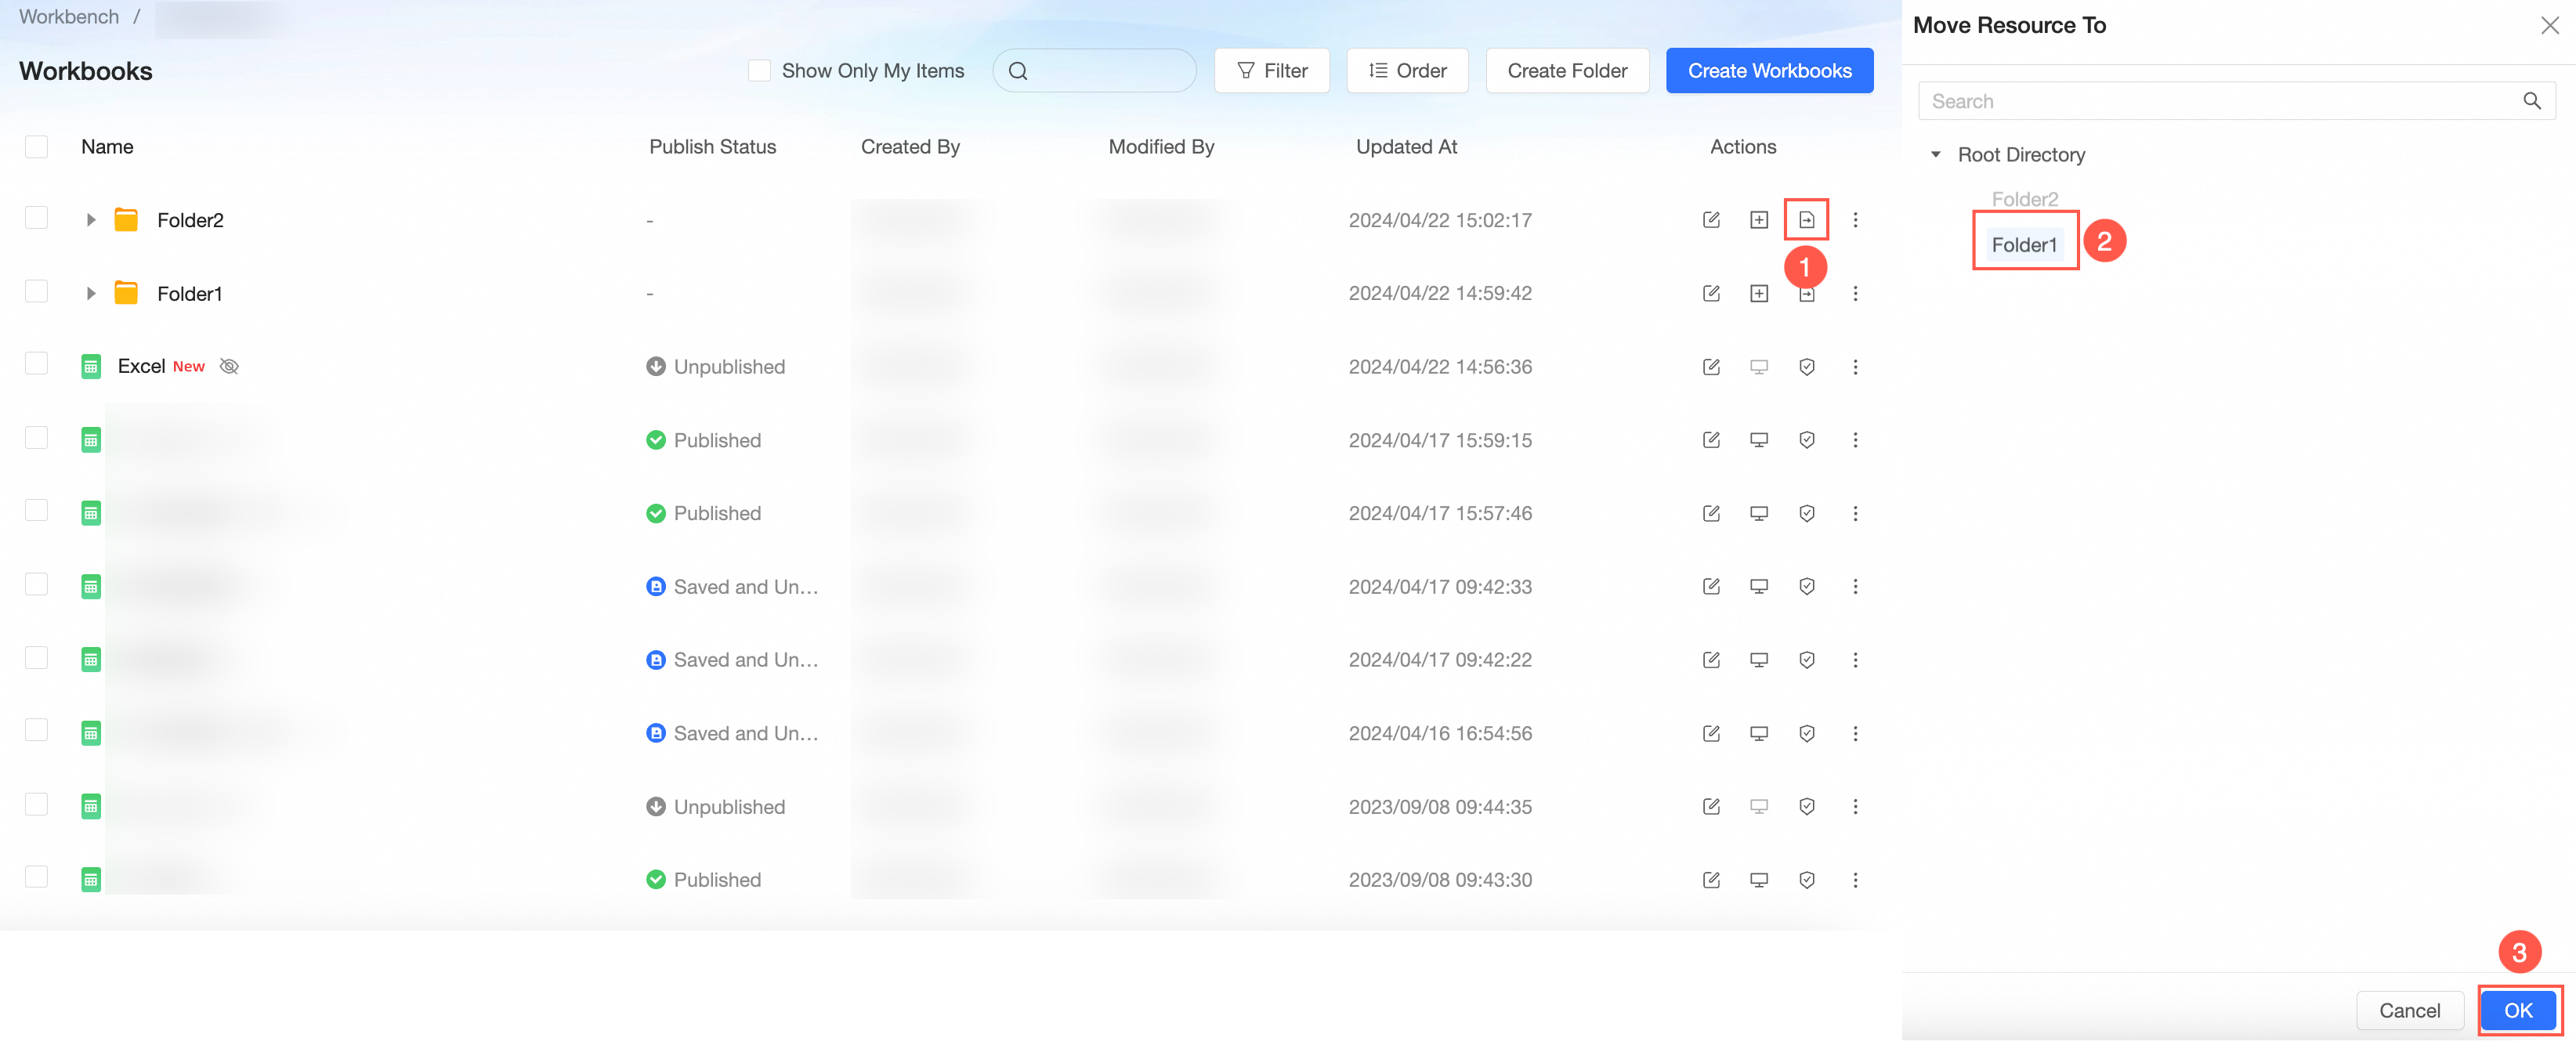
In the Resource Shift To panel, select the destination folder and then click Confirm.
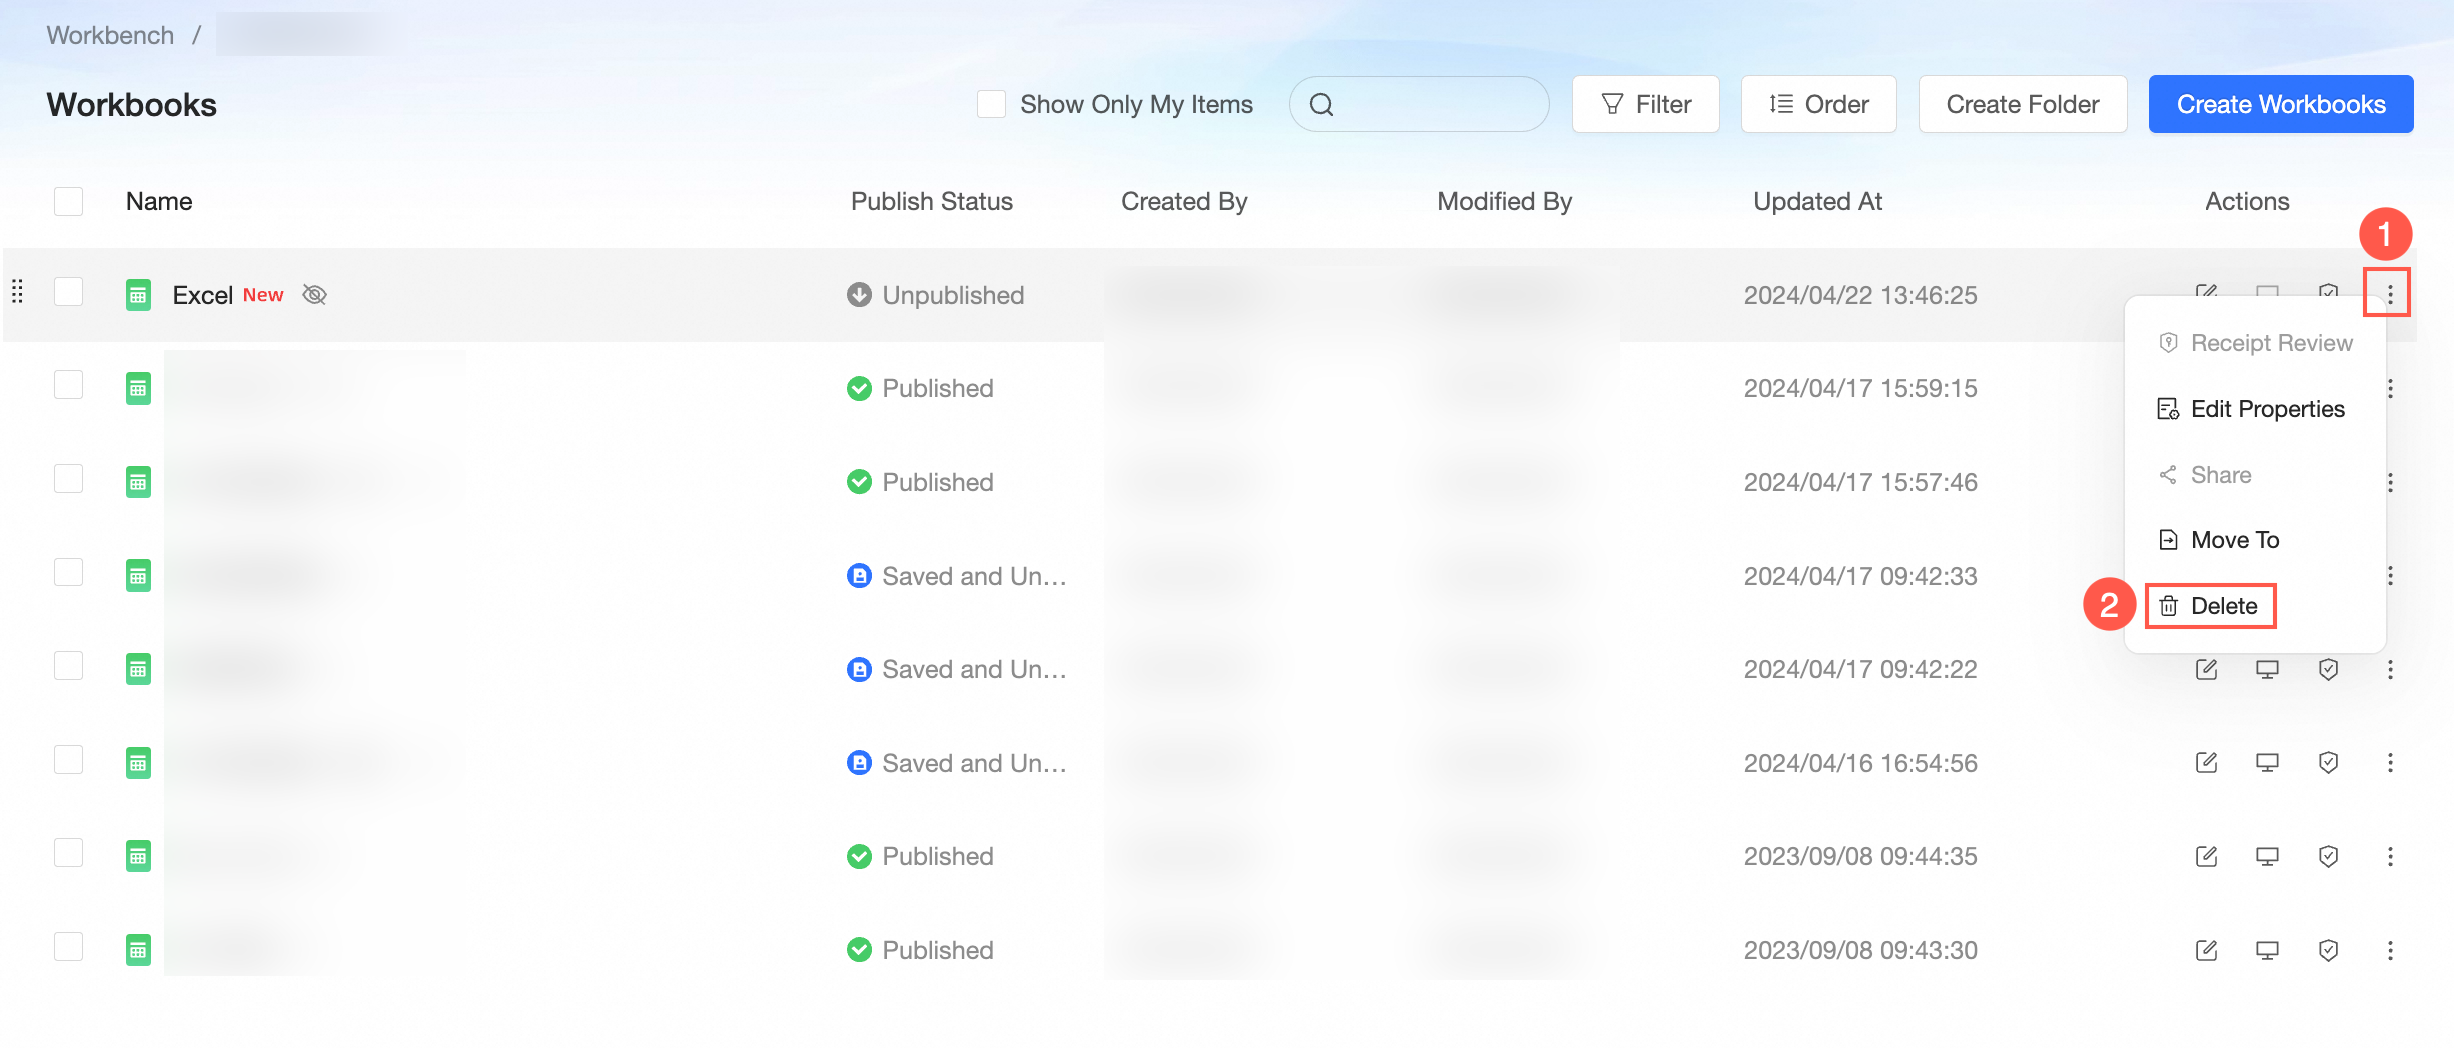
Delete
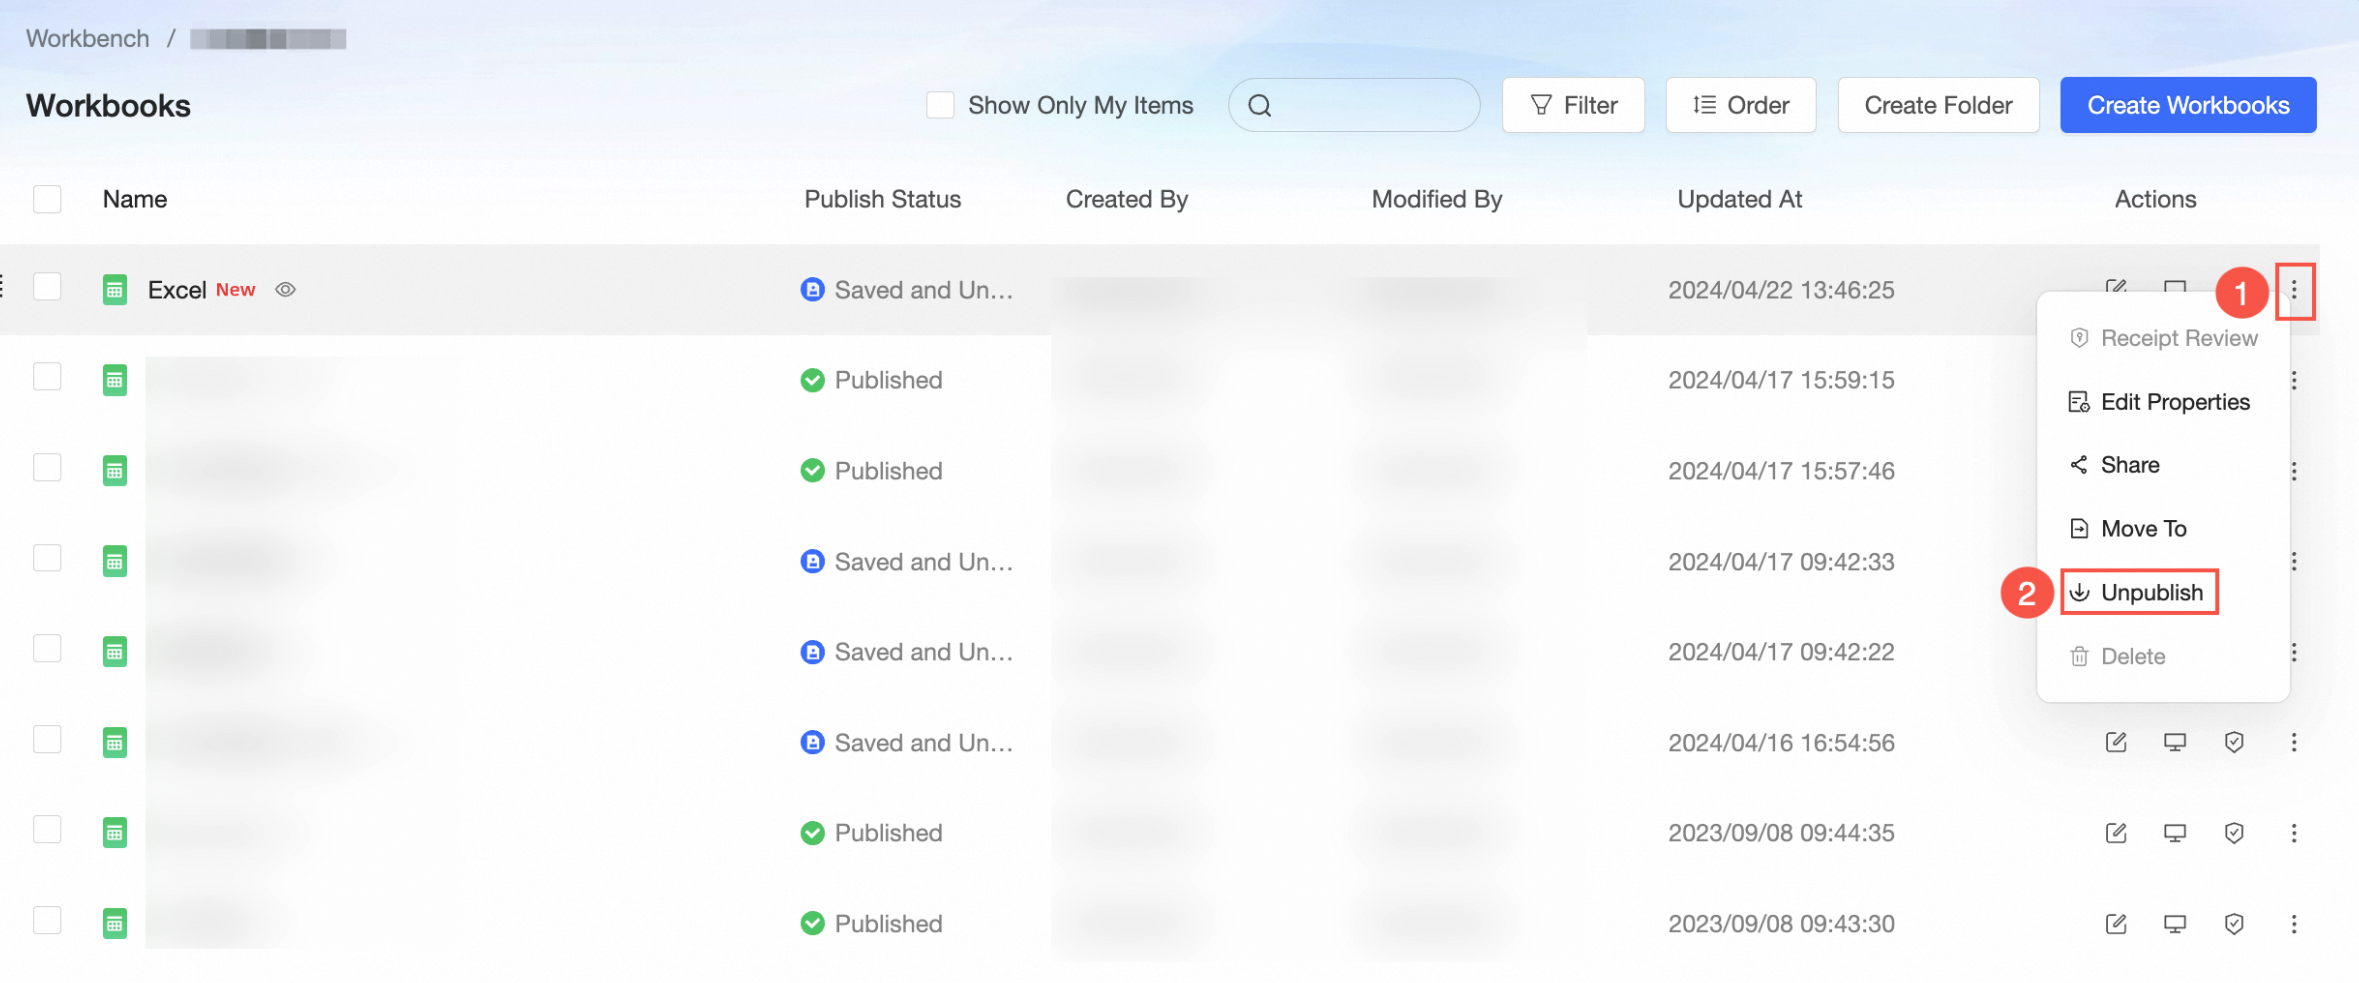
To delete a workbook in the Published status, you must first unpublish it, then proceed with deletion.
(Optional) On the Workbook management page, use the steps shown in the figure below to unpublish the workbook.
NoteSkip this step if your workbook is already unpublished.
On the Workbook management page, follow the steps shown in the figure below to delete the workbook.
If you have created a BI portal, subscription, or monitoring alert through this workbook, the system will prompt you with the names, owners, modifiers, and modification times of the published resources affected by the deletion.
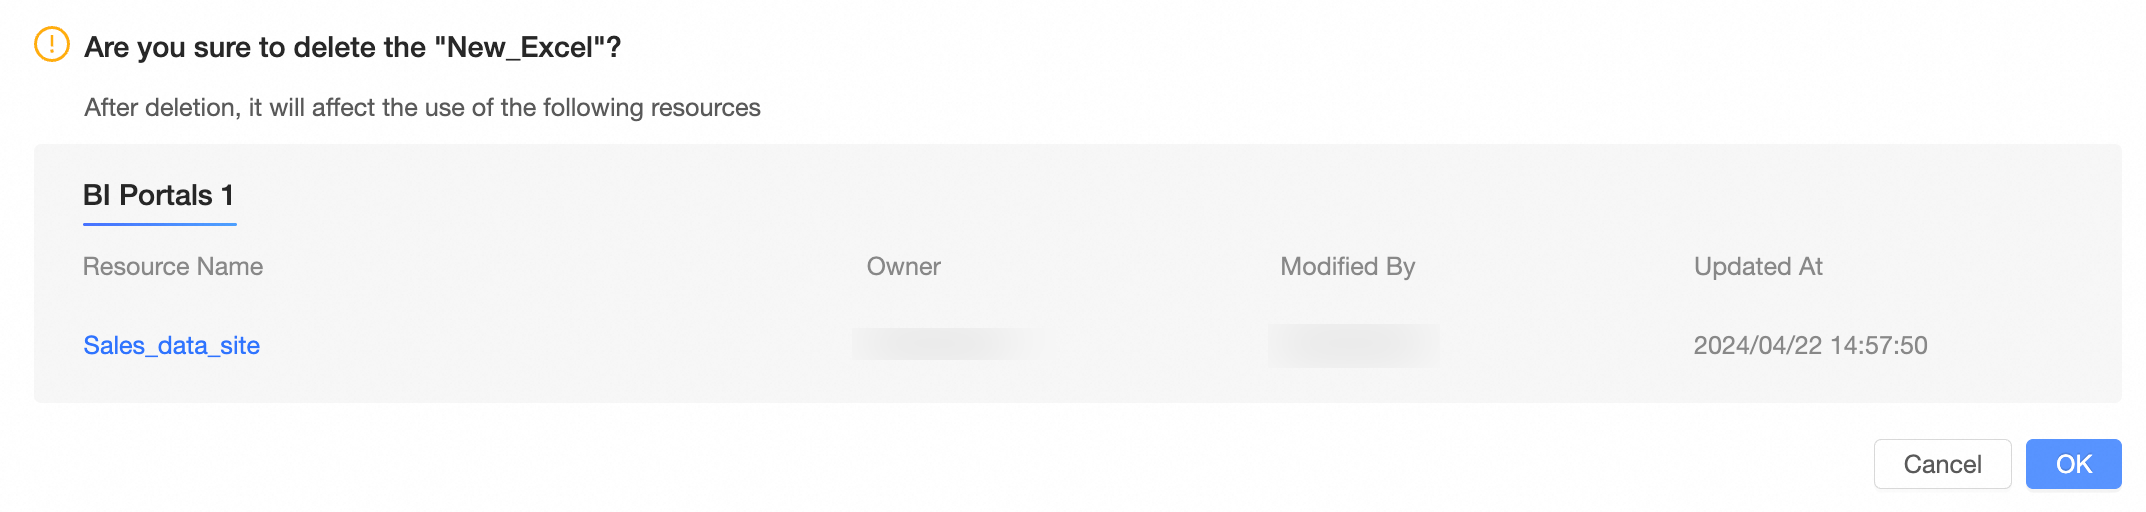
In the confirmation dialog box, click Confirm.
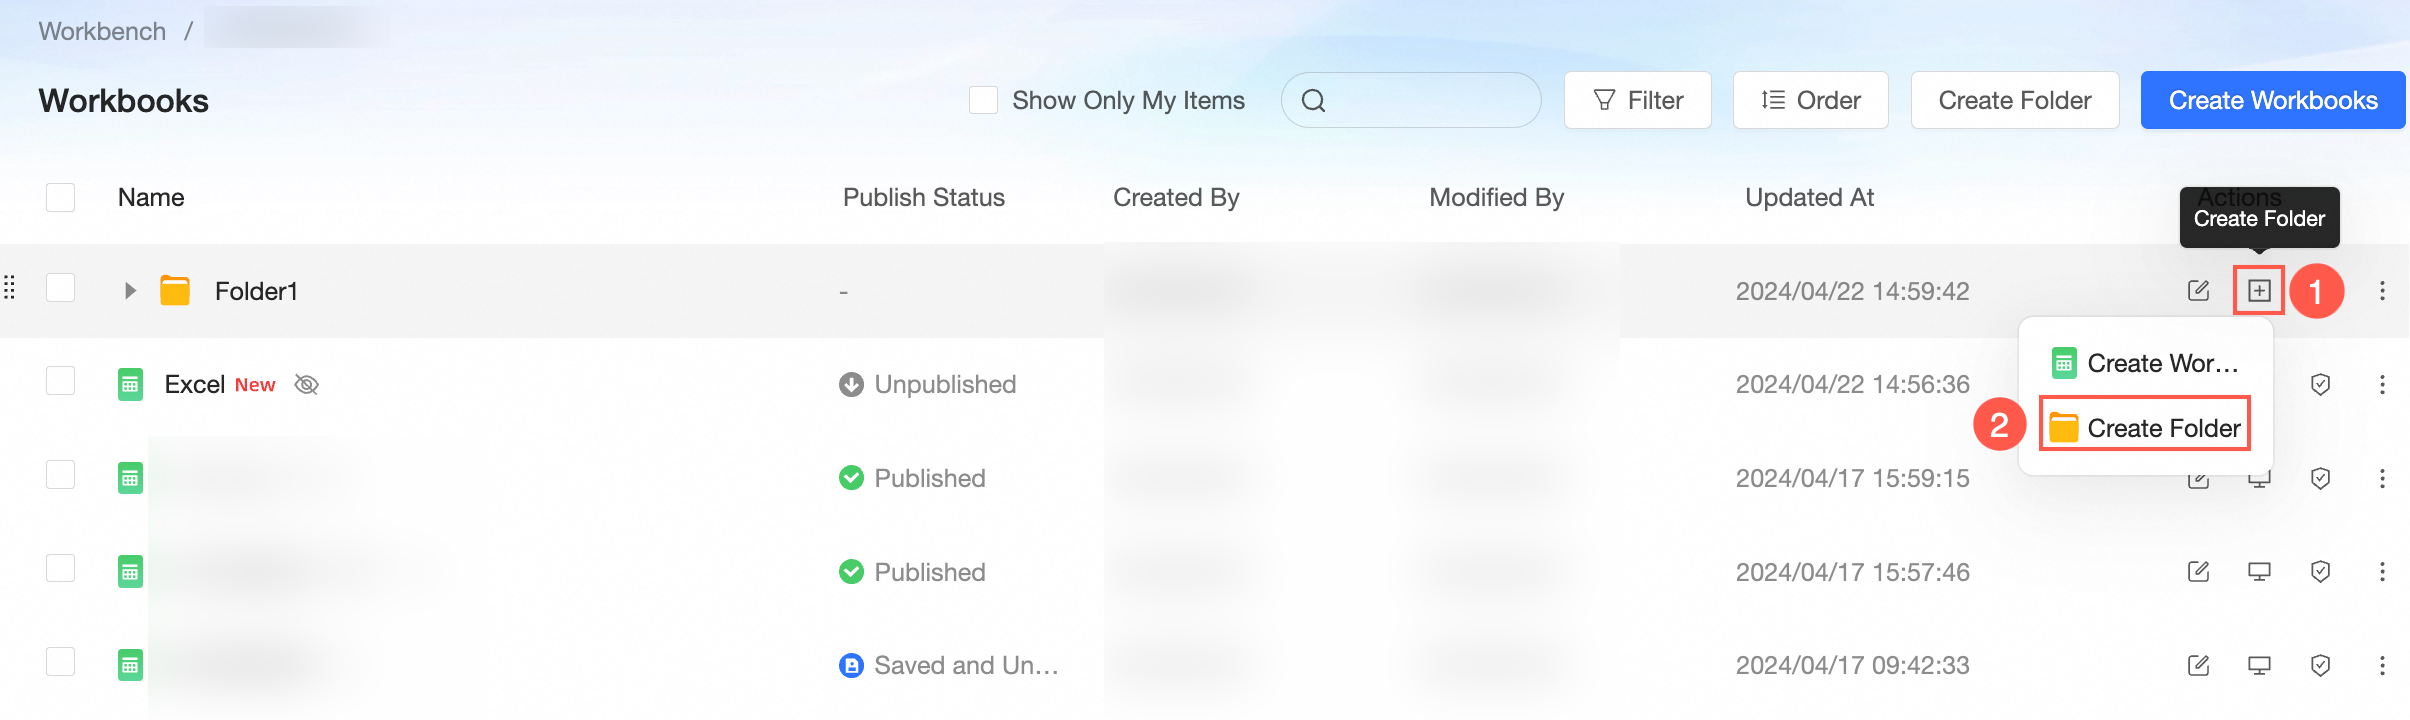
Create a directory
On the Workbook management page, use the steps shown in the figure below to create a directory.
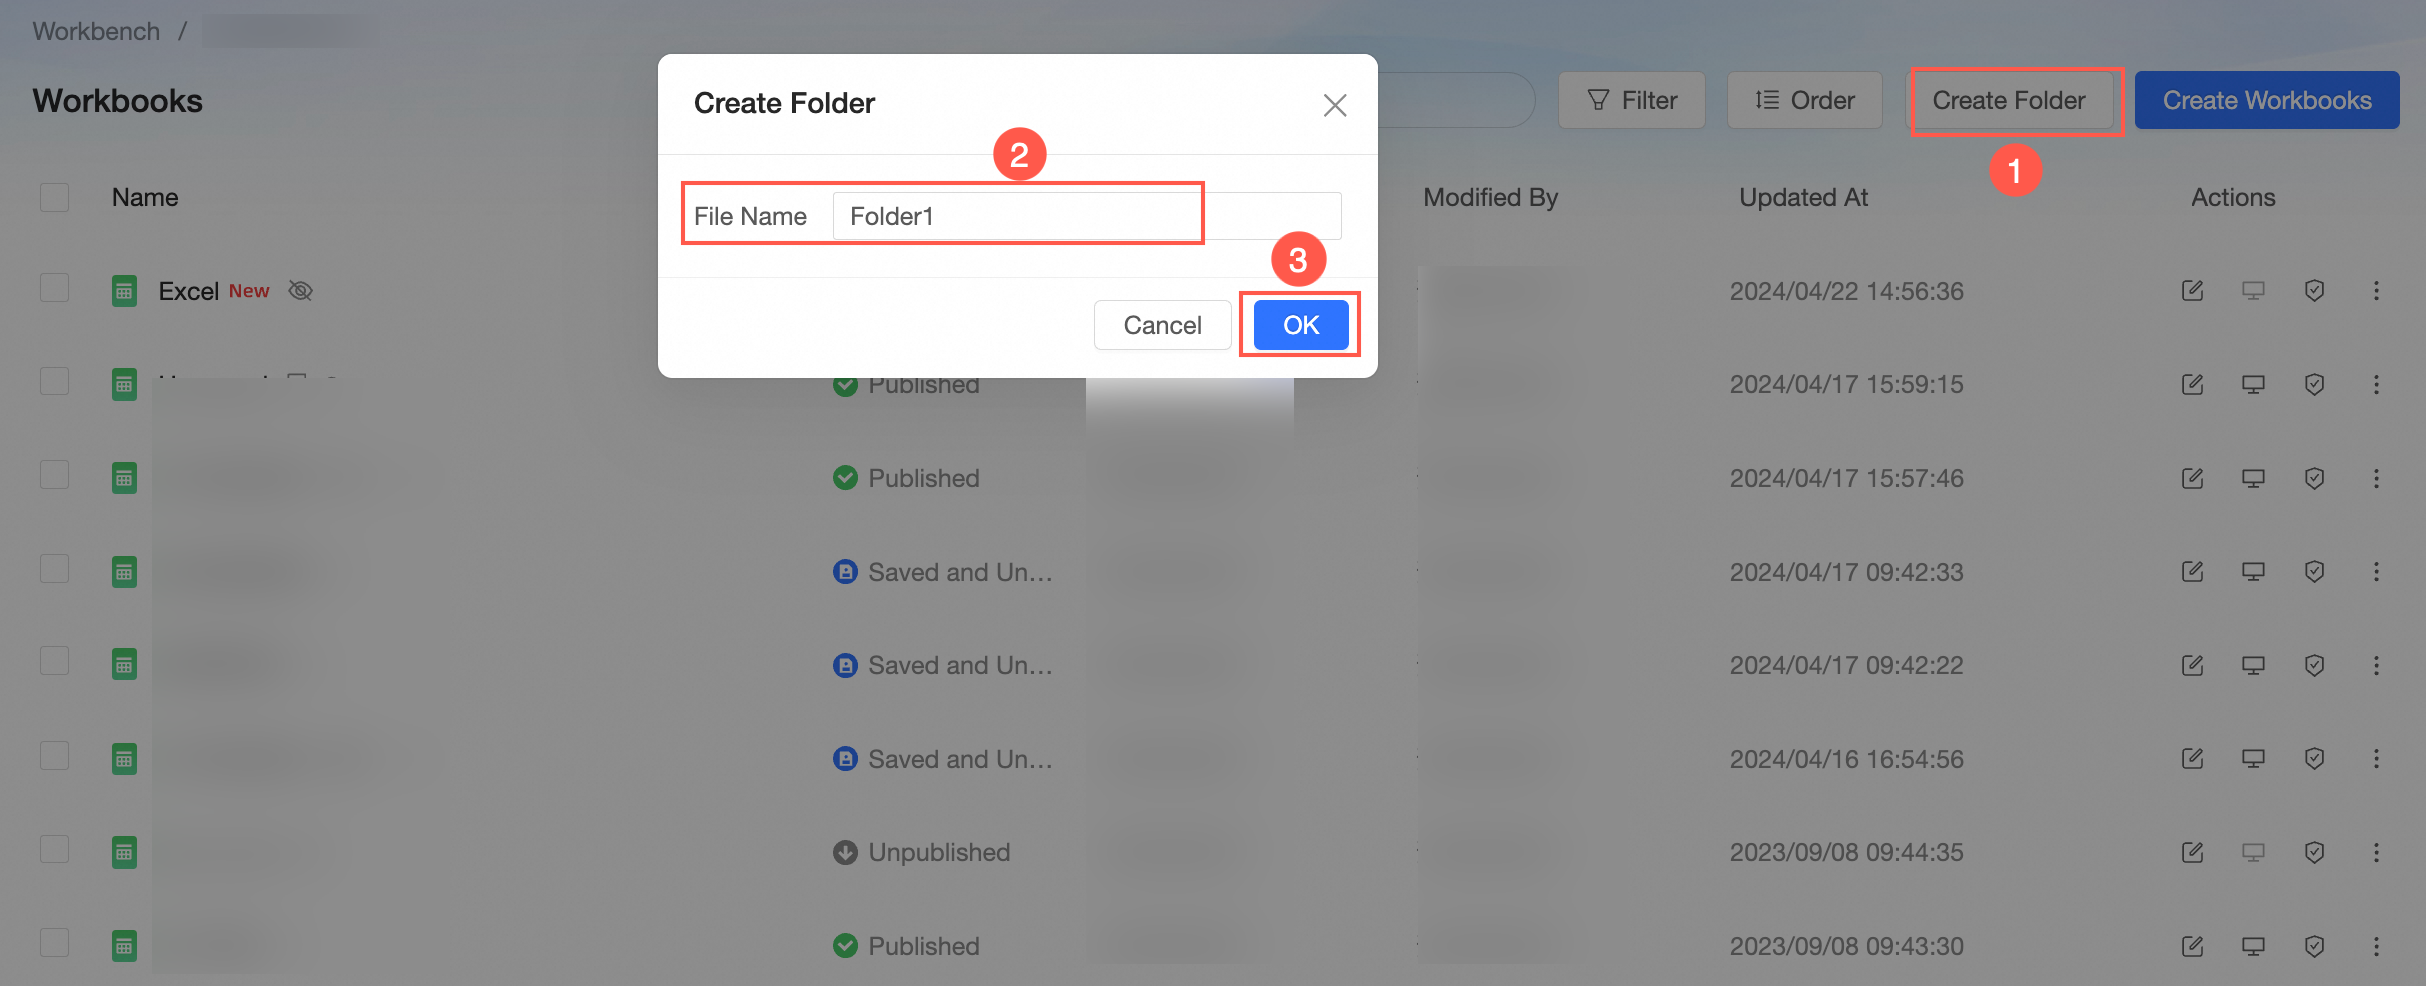
Locate the desired directory, click the Operation column's Create A Directory icon to add a subdirectory.
 Note
NoteA maximum of five directory levels can be created.
Rename a directory
On the Workbook management page, use the steps shown in the figure below to rename a directory.
Shift a directory
On the Workbook management page, use the steps shown in the figure below to shift a directory.
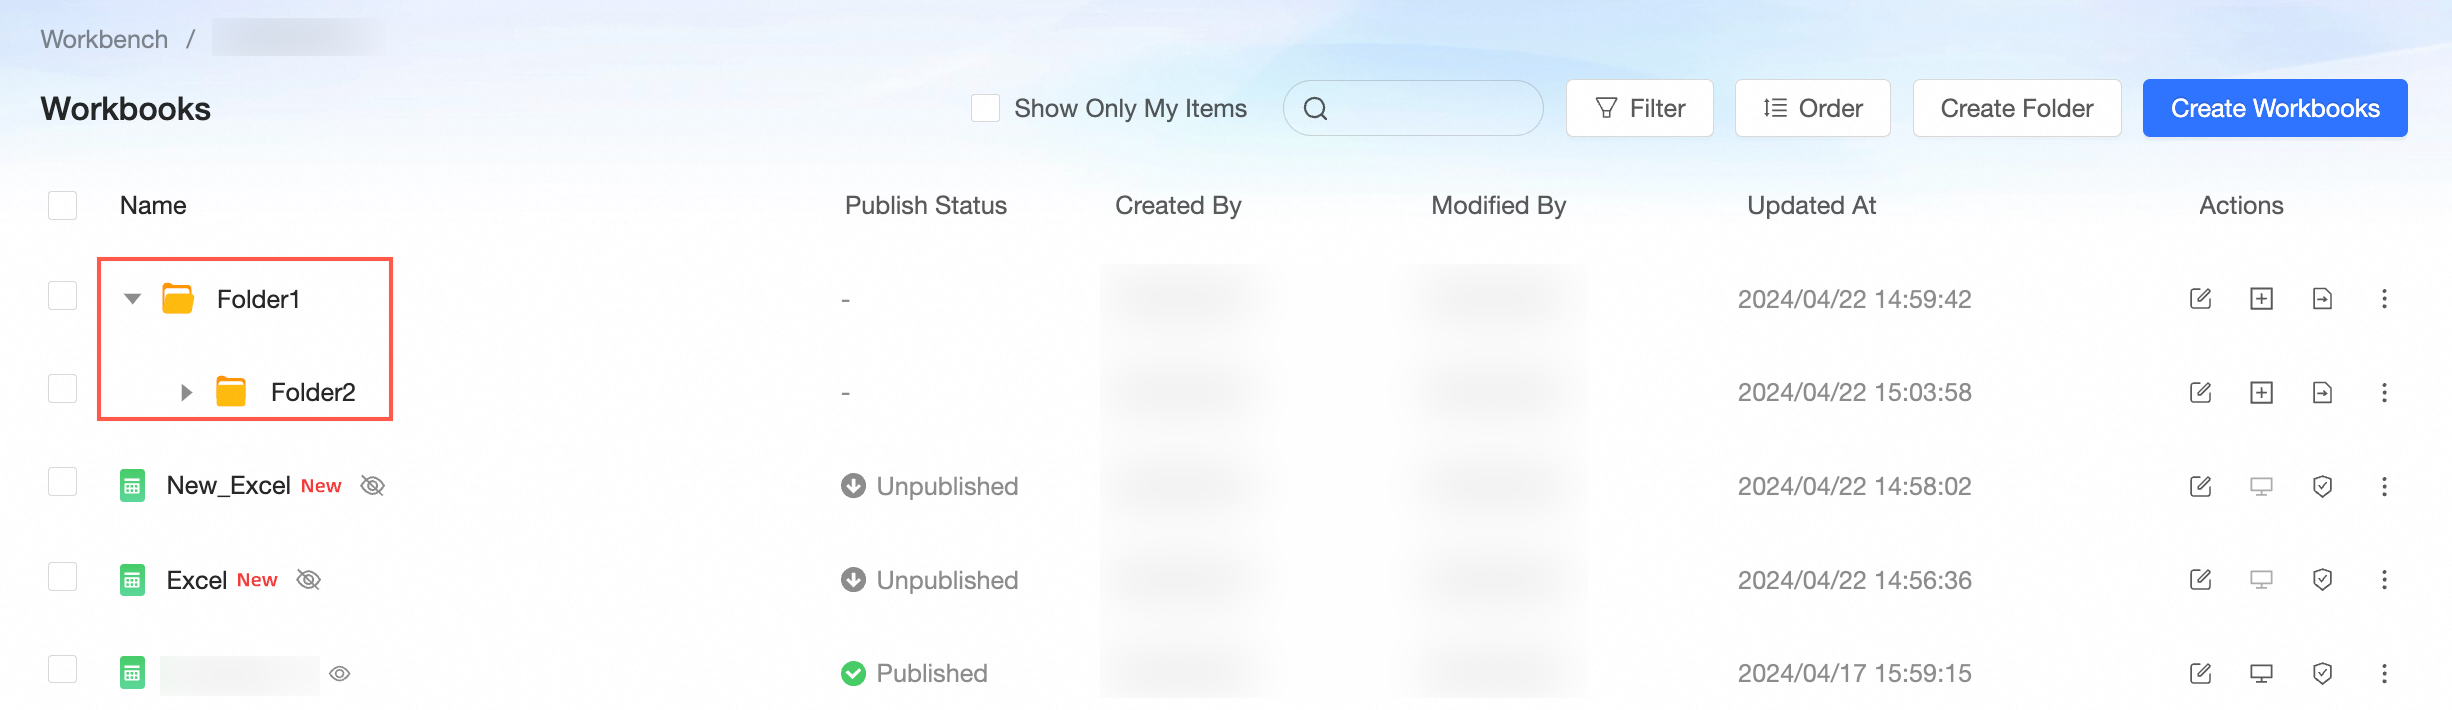
Here is an example of the shift results.
Delete a directory
Please be cautious when deleting a directory, as it will also remove all workbooks contained within it.
On the Workbook management page, use the steps shown in the figure below to delete a directory.
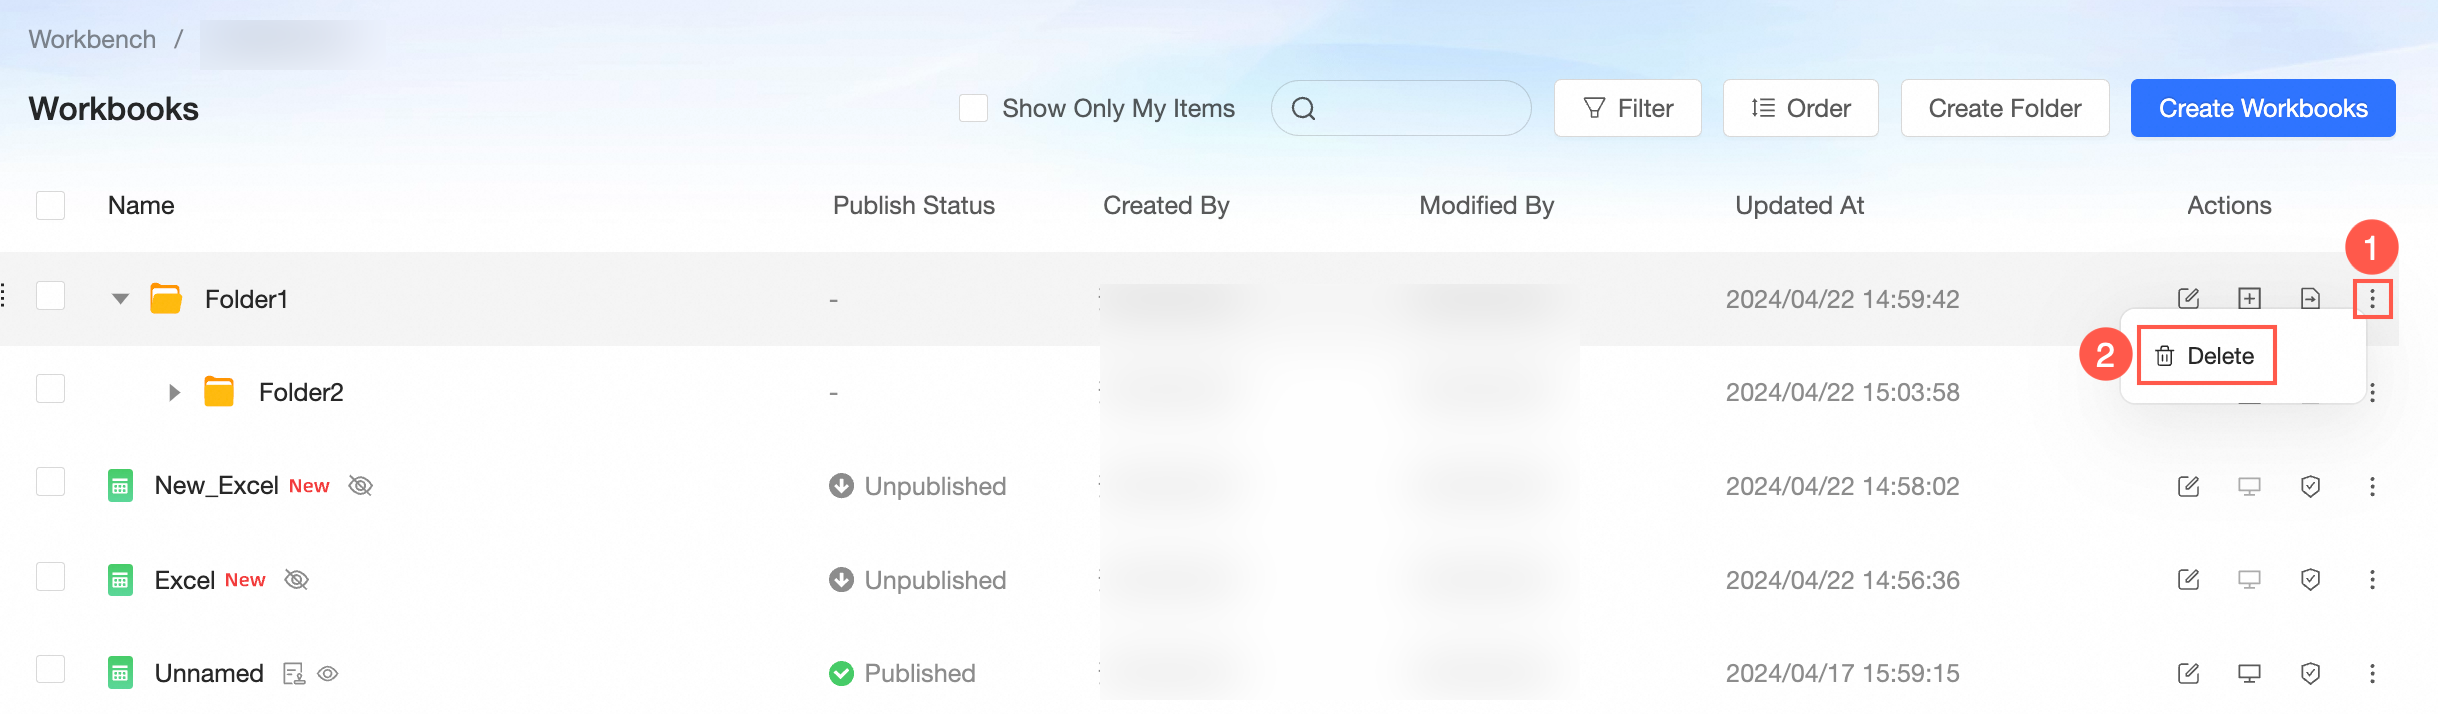
In the confirmation dialog box, click Confirm.