Quick BI's cross tables support interactive data entry events, allowing users to input data directly into the target database to facilitate data entry.
Prerequisites
Before adding data entry events:
Ensure a cross table has been created. For more information, see cross table.
Ensure a data entry form is created. For more information, see Create a Form.
Add Data Entry Events
Configuration Entry
Refer to Create a Dashboard to access the dashboard editing page.
Add a cross table as depicted below.
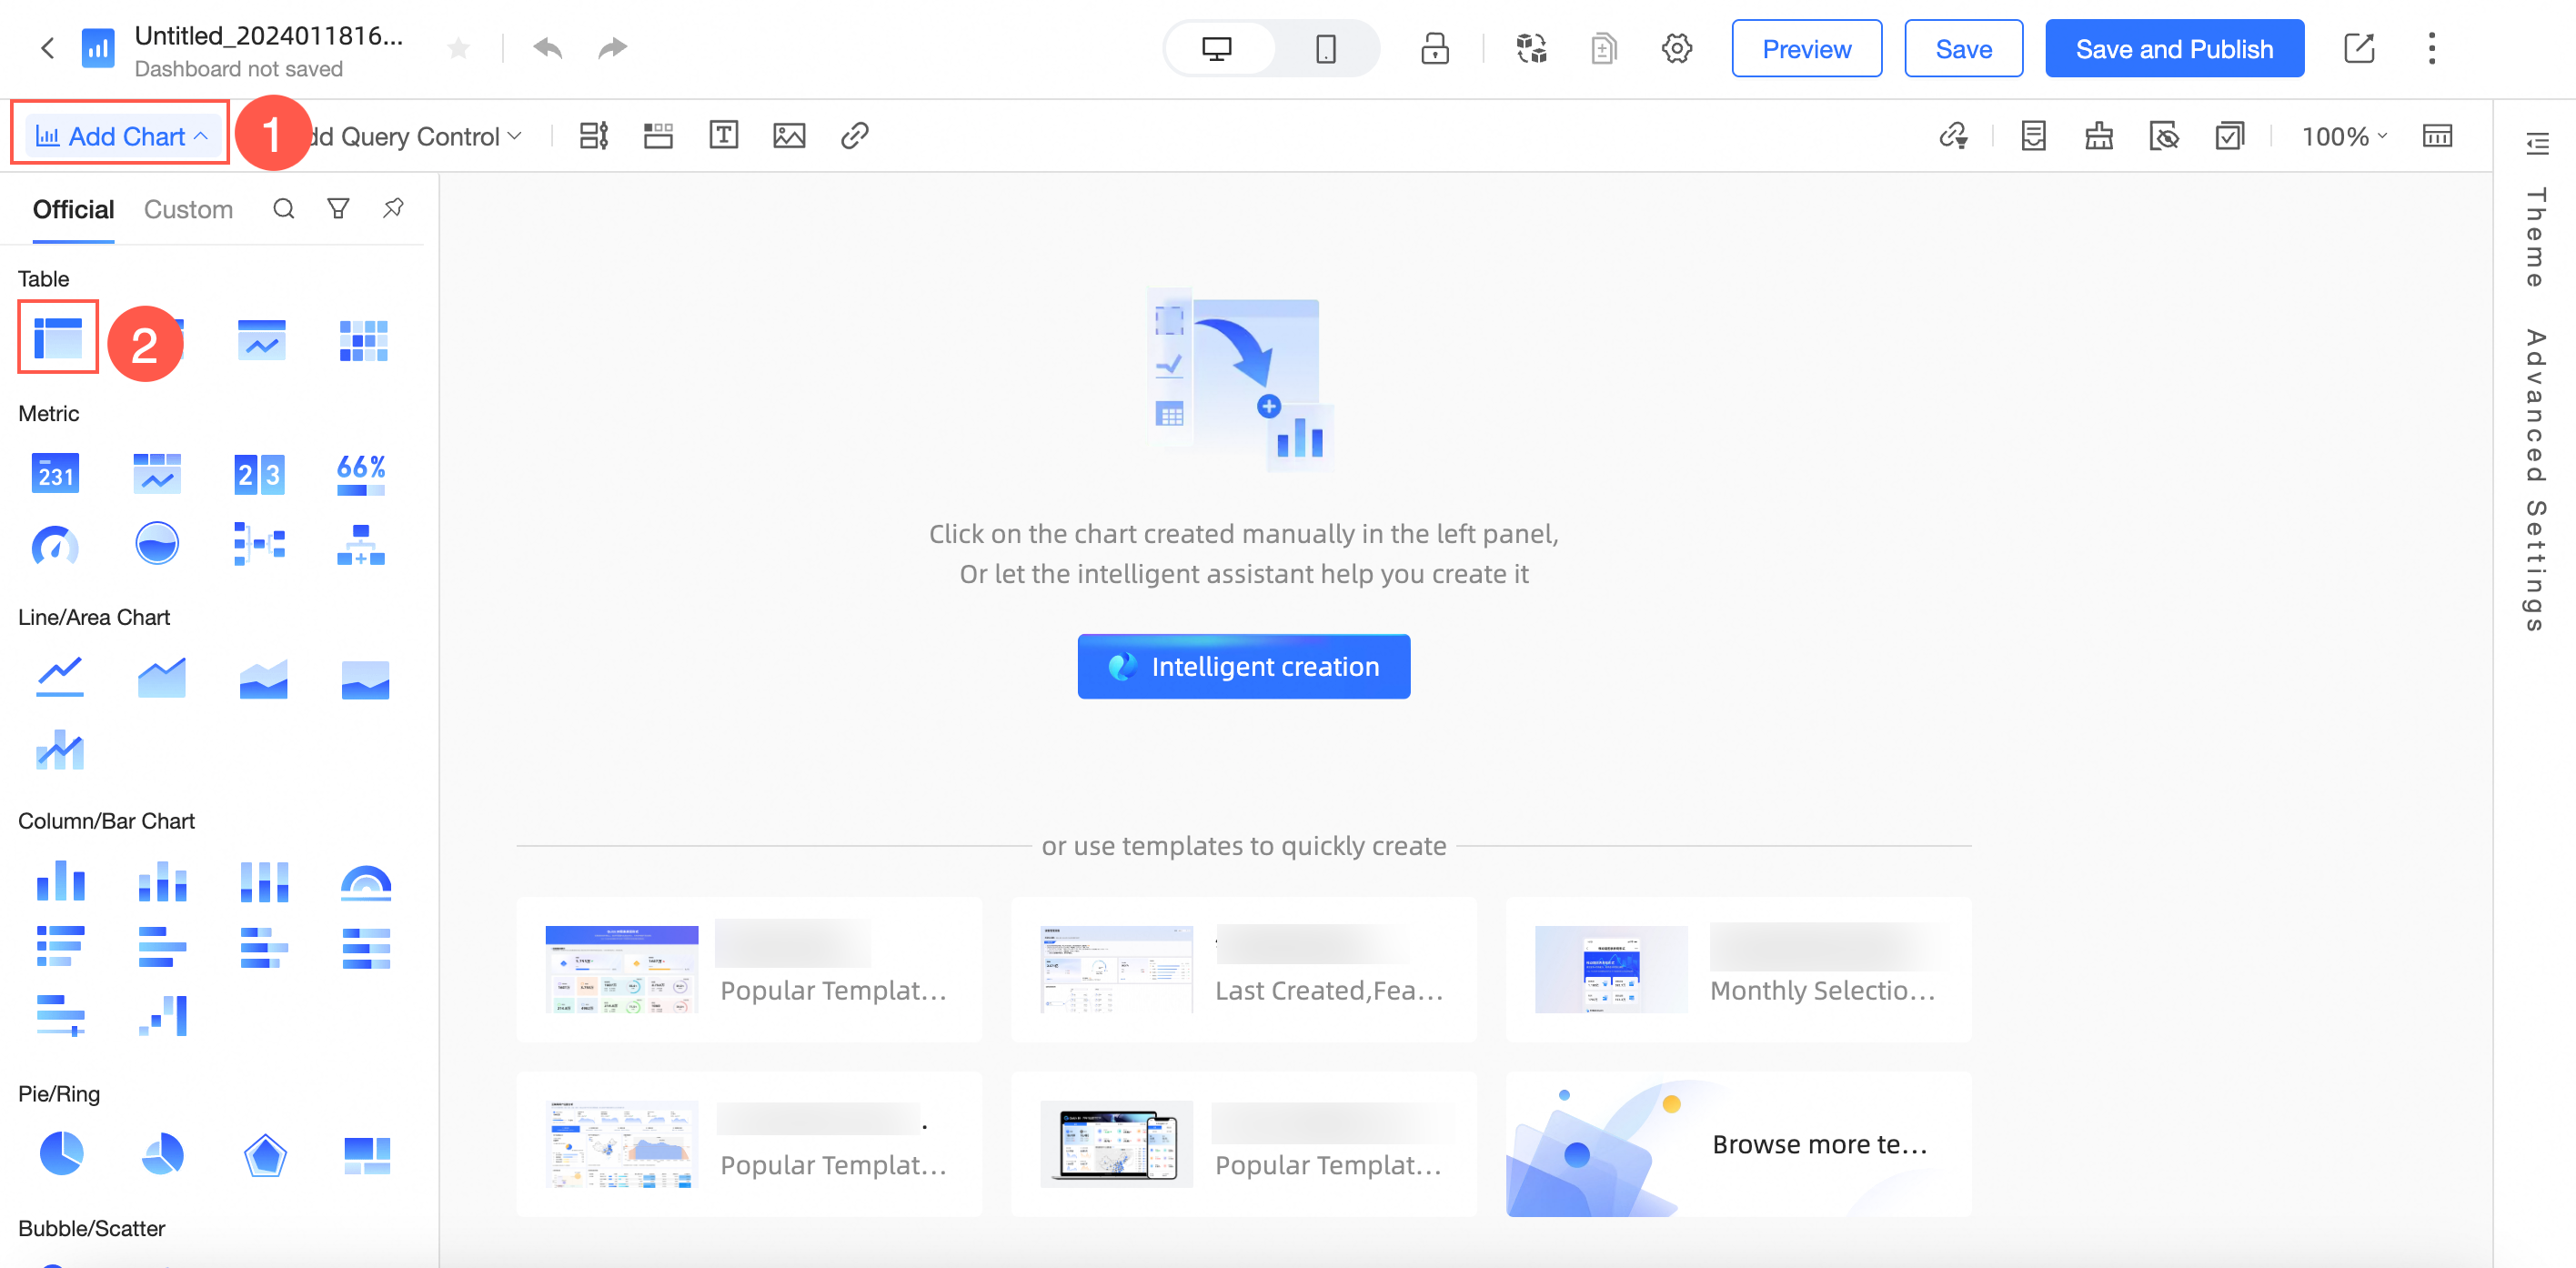
Configure the cross table on the dashboard editing page.
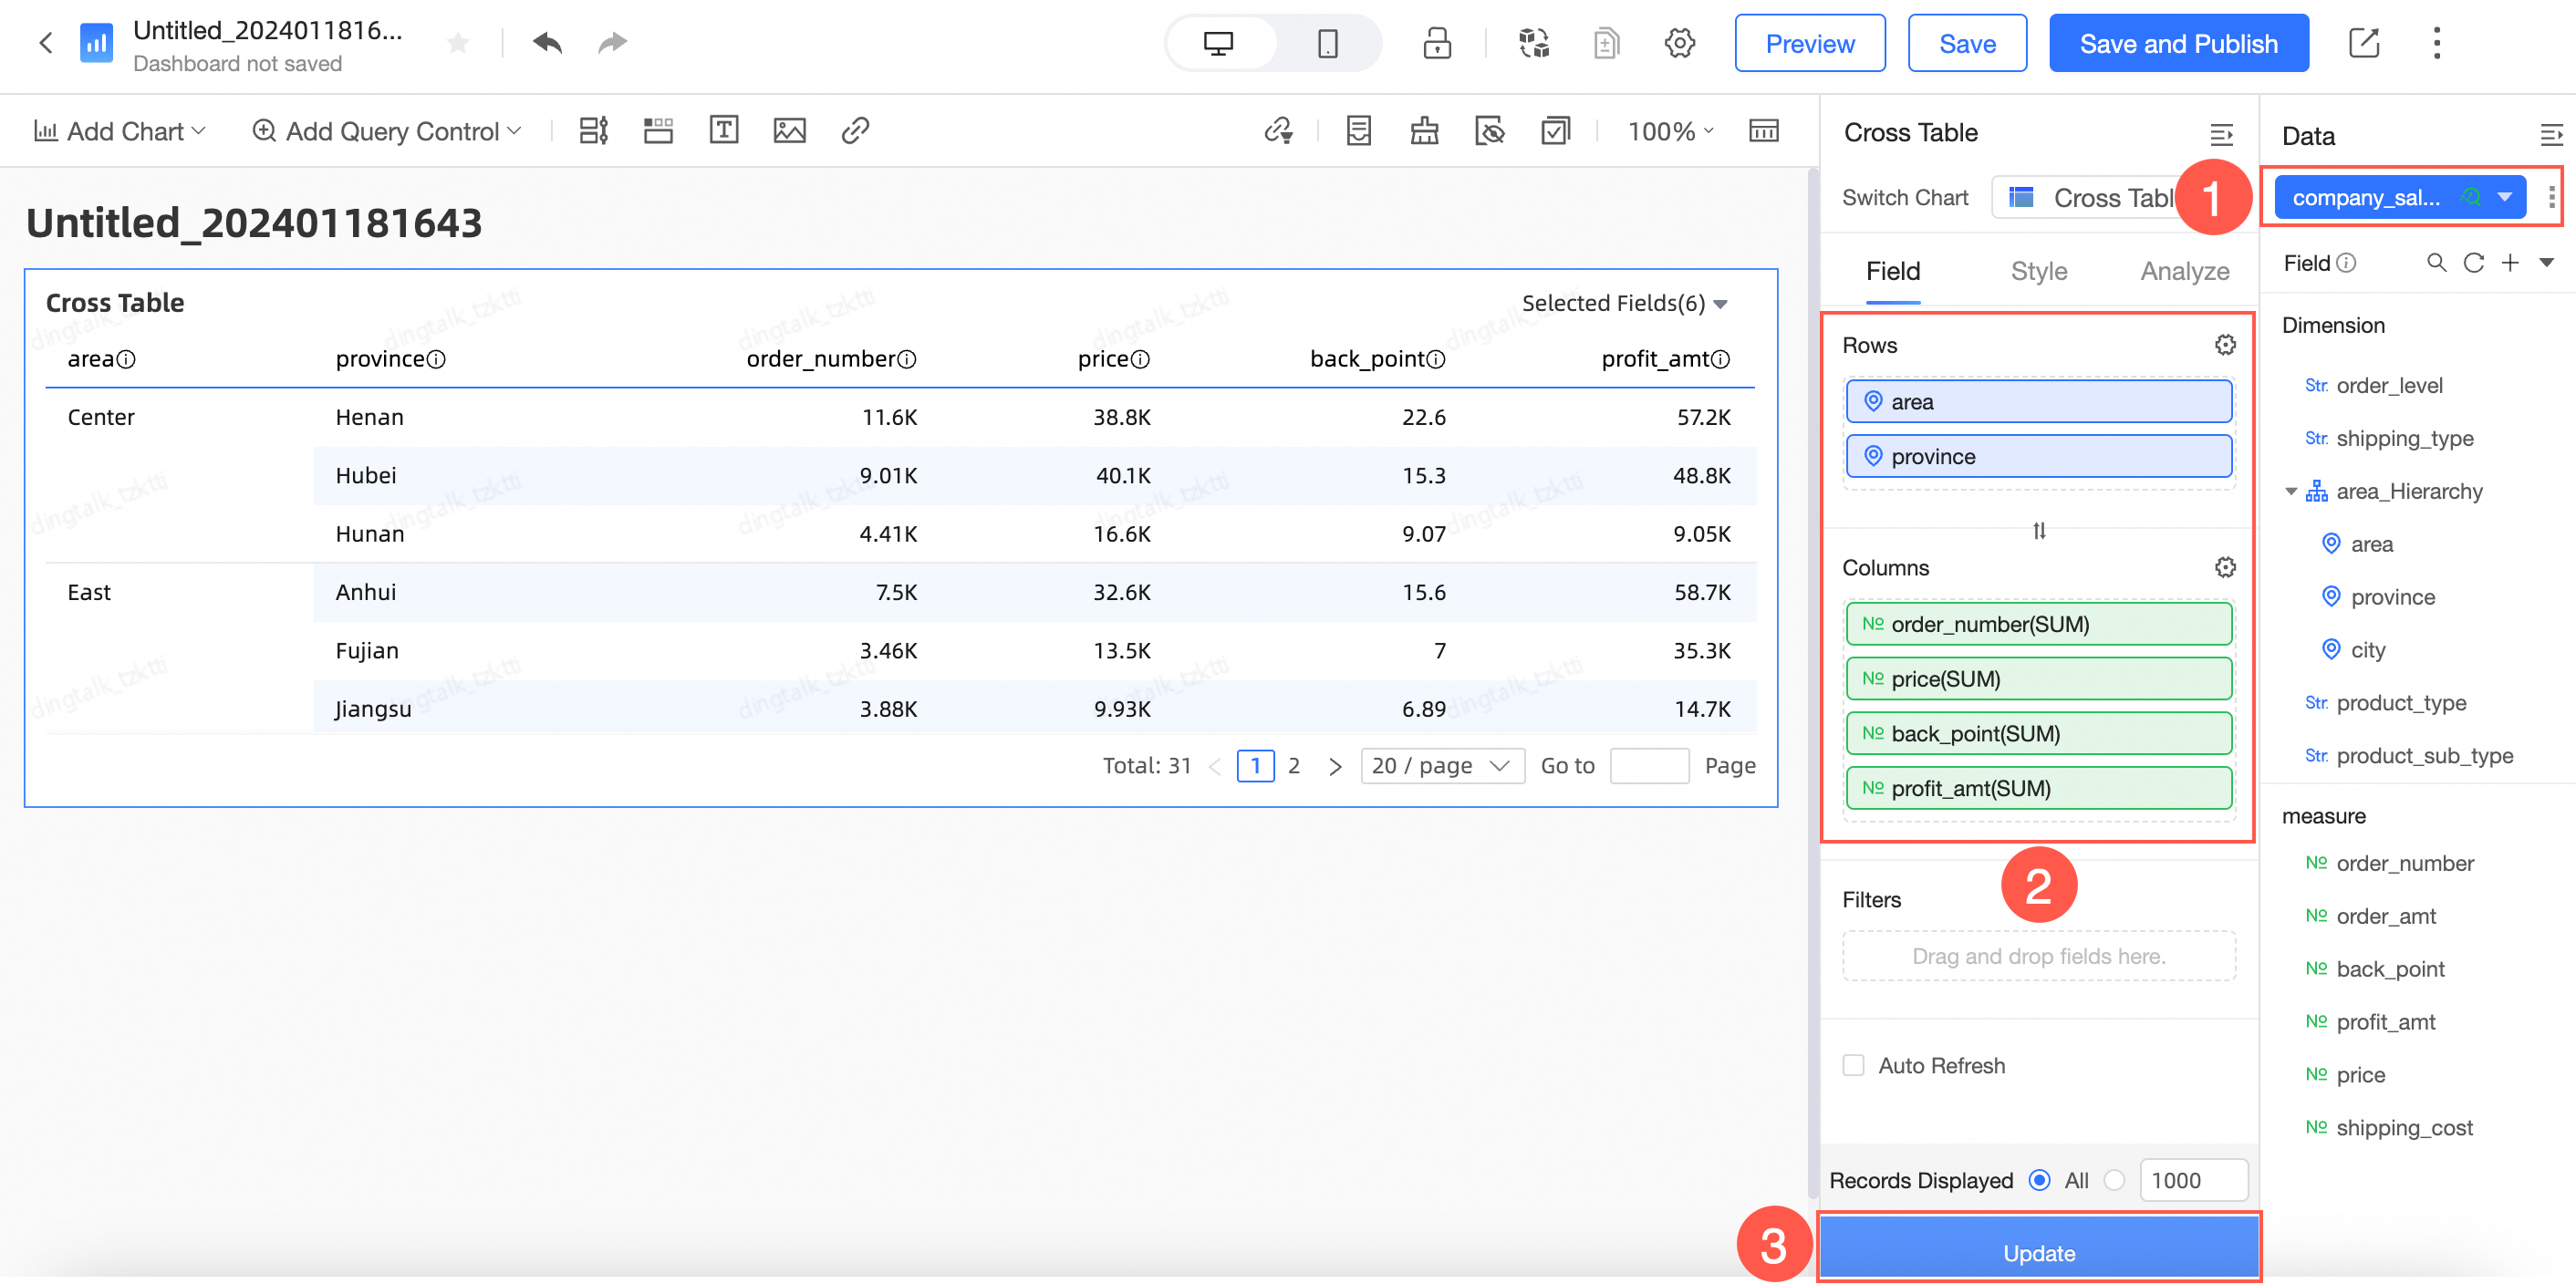
In the Parse tab > Advanced settings, select Event and customize the Event Column Name.

Click Add Event.
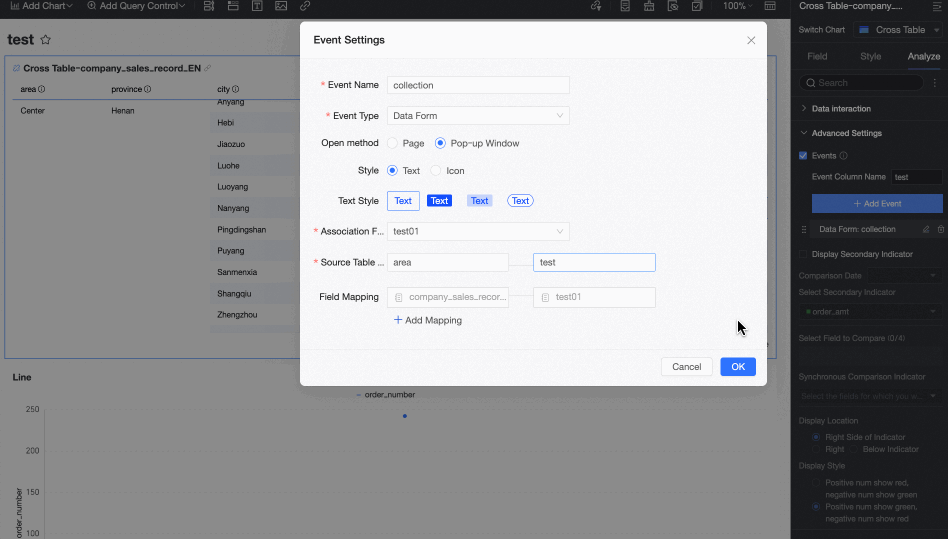
On the Event Configuration page, set the following parameters:
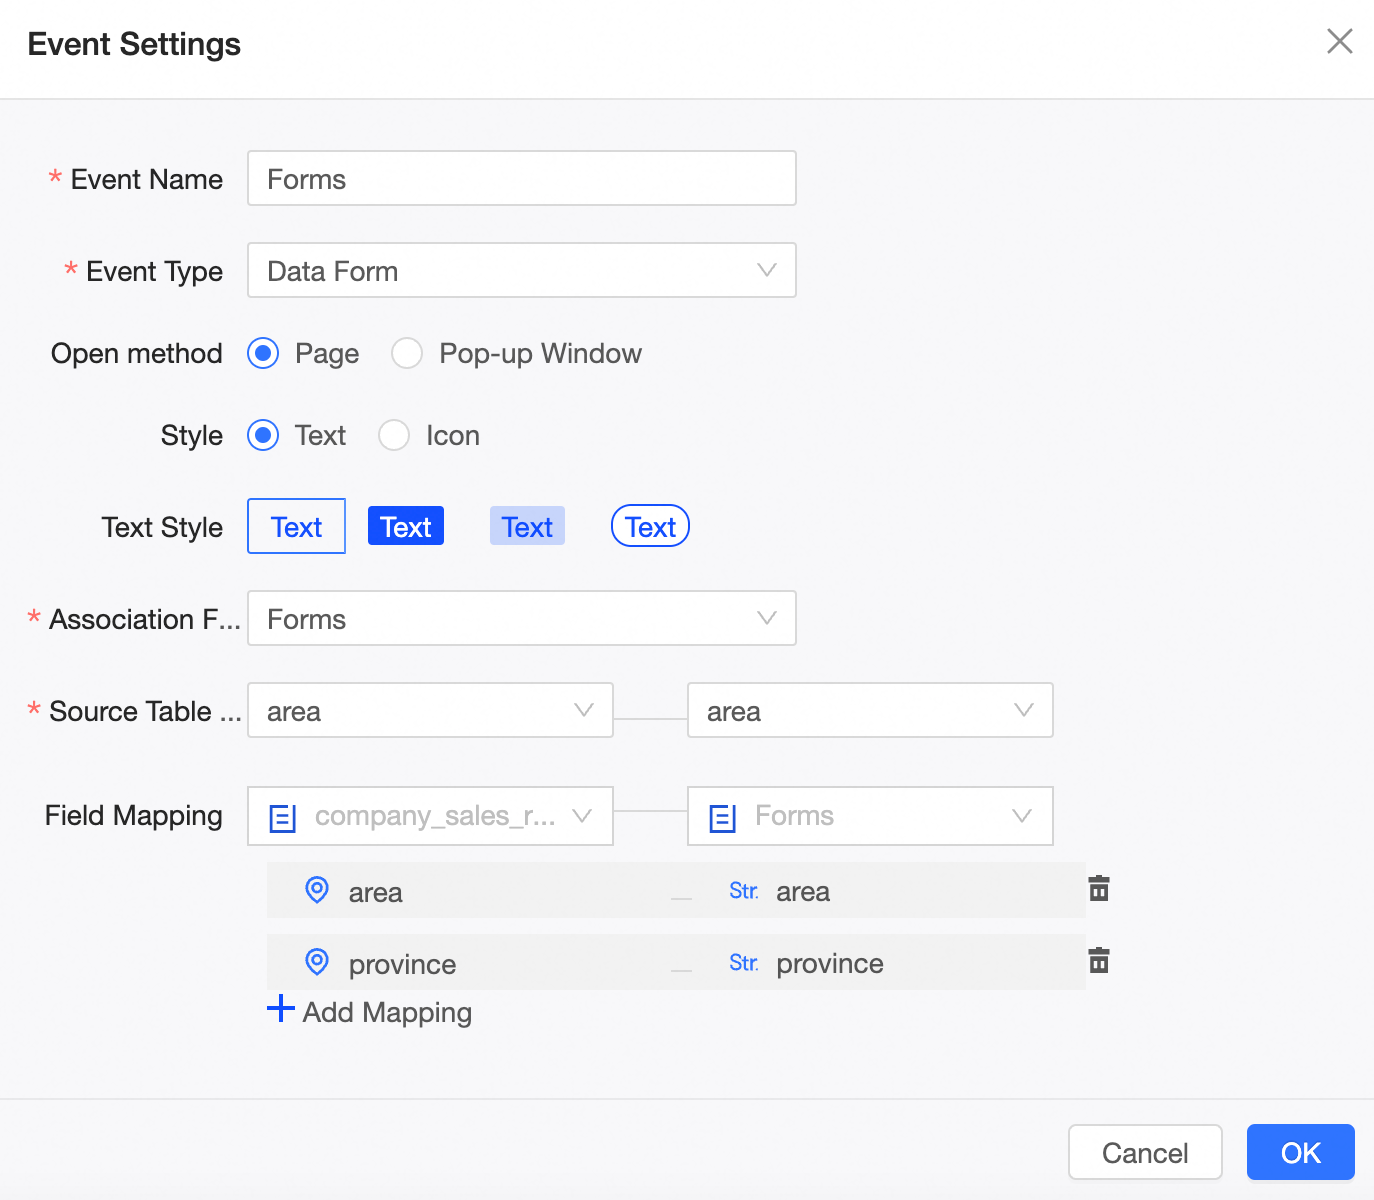
Event Name: Required. Customize the event name as needed.
Event Type: Required. Choose between data entry and DingTalk. For this example, select data entry.
Open Method: Optional. Choose to open in Page or Popup.
Style: Optional. Choose between text and icon styles and configure accordingly.
Associate Form: Required. Select the form created during data entry.
Source Table Unique Primary Key: Required. Choose a unique primary key to link with the data entry data source's unique primary key, ensuring data uniqueness.
Field Relationship Mapping: Optional. Sync the dataset fields of the cross table with the form. This field is not required here.
The field relationship is only effective when clicking the entry and does not dynamically change with the cross table dataset.
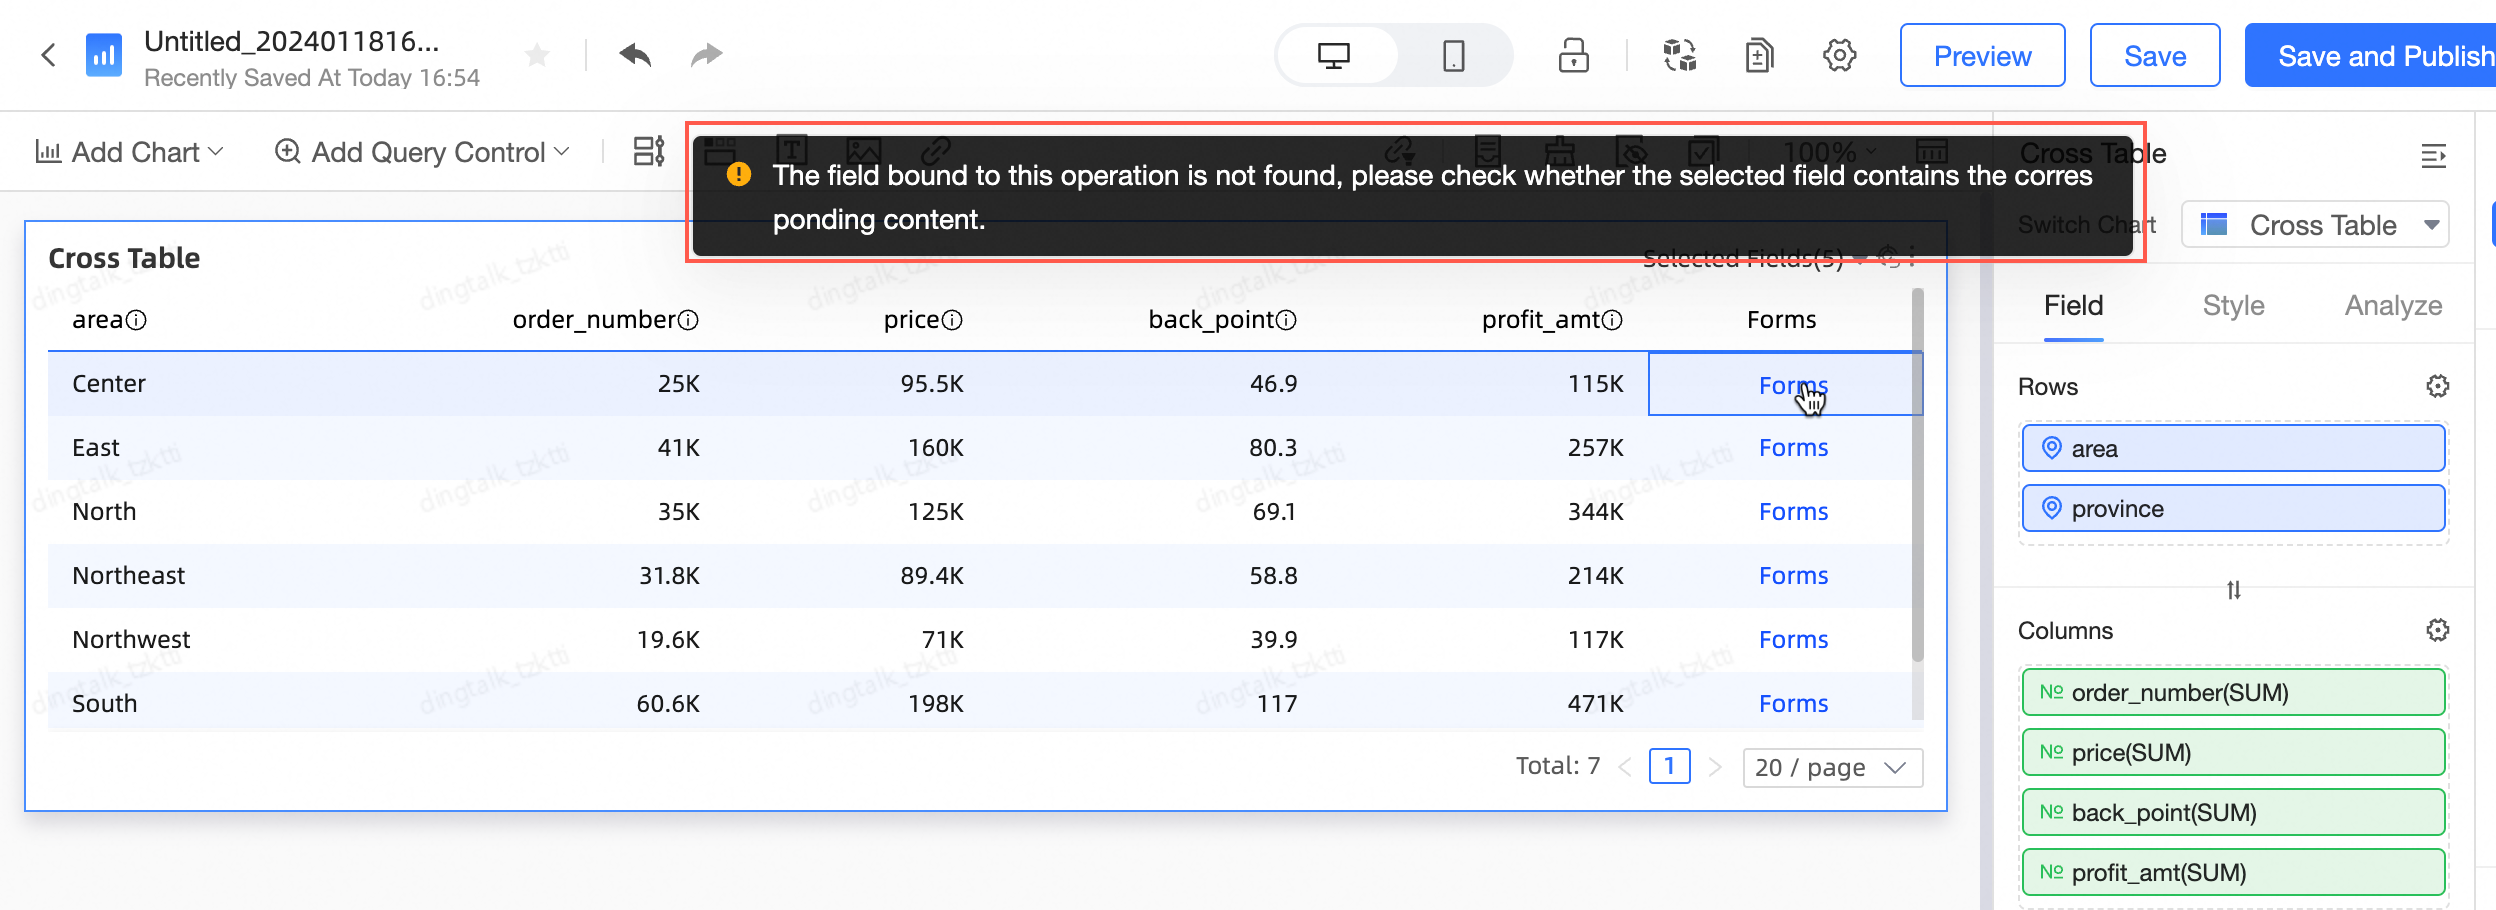
NoteIf the cross table field filter list excludes fields bound in the entry form, the entry interface cannot be accessed by clicking.
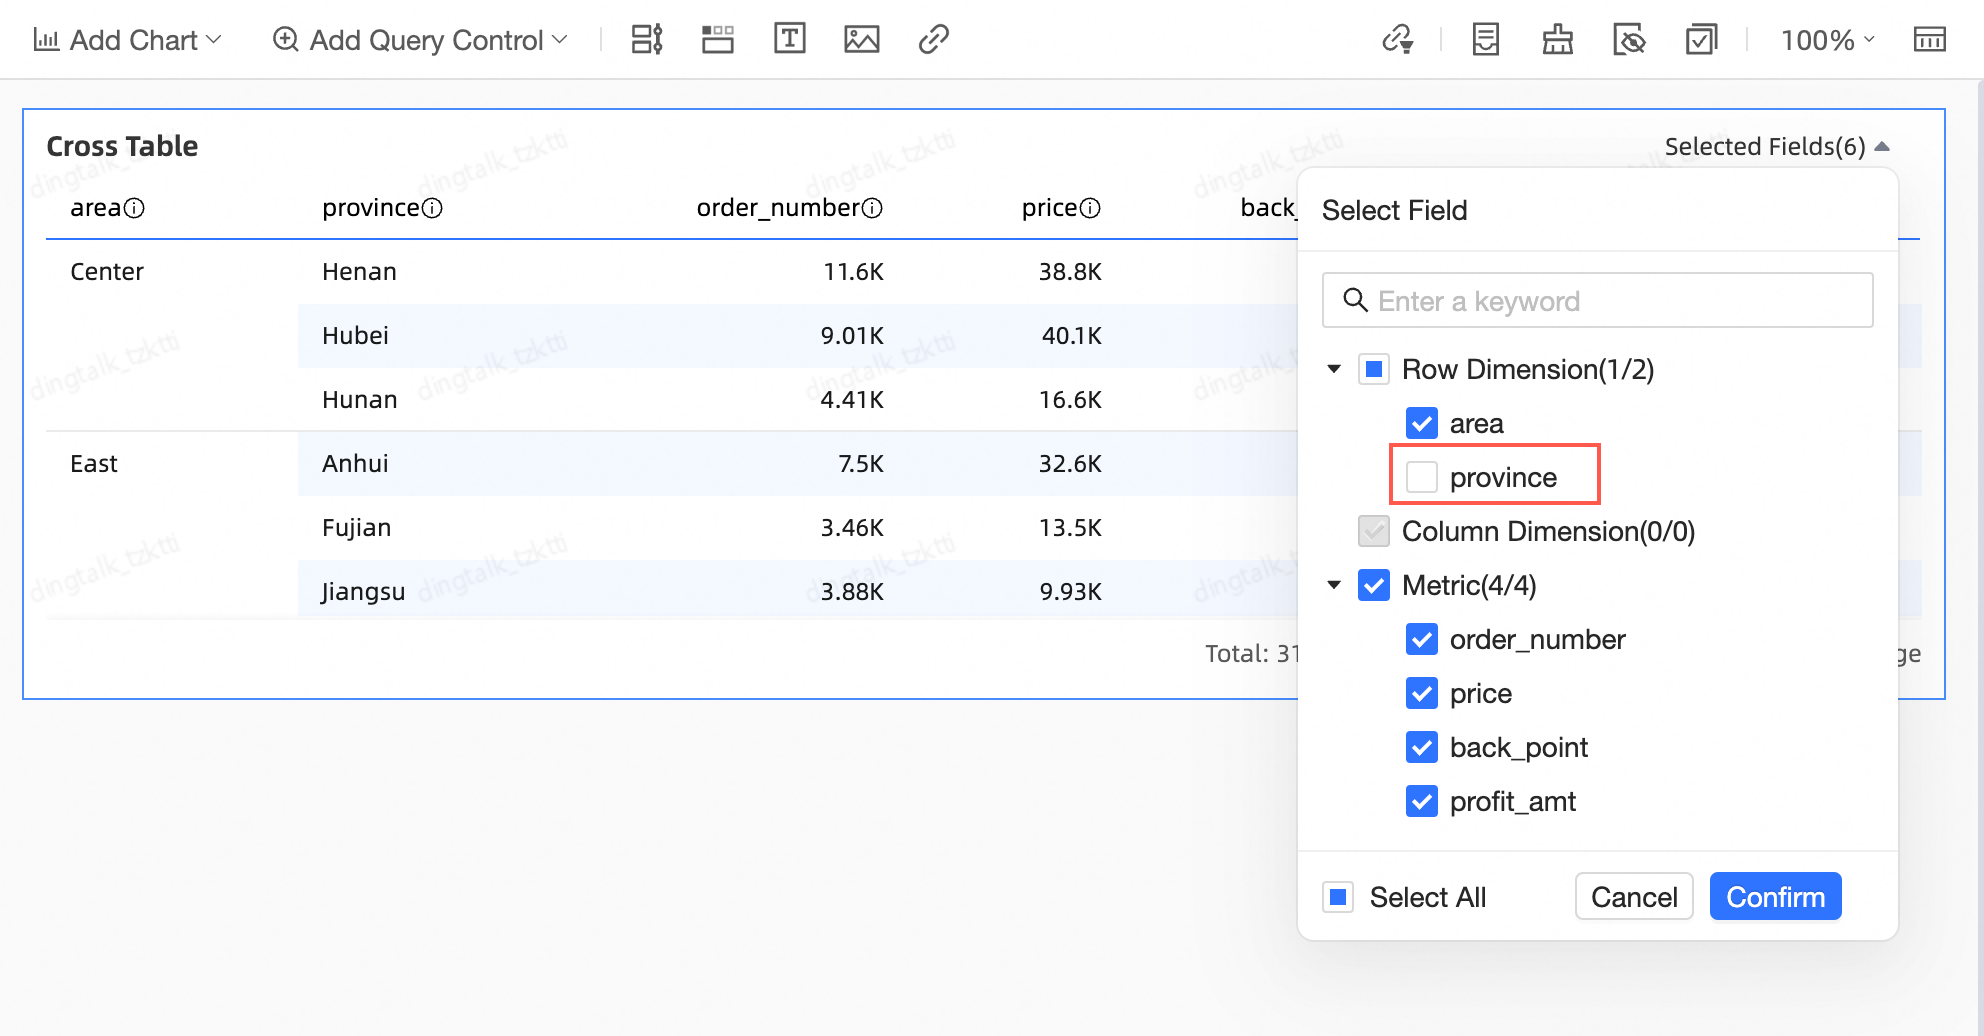
For instance, if "Province" in the cross table is bound to "province" in the entry:

And the "Province" field is then deselected,
Clicking the entry event will result in the following prompt.
Click Confirm.
PC-side Effect
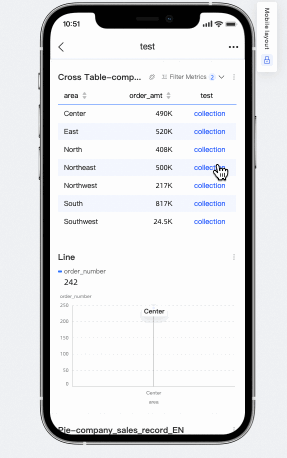
Click the Feedback column's Feedback Entry to navigate to the data entry page and add new data.
Once configured, you can add or modify records in the corresponding data entry report table.
Mobile-side Effect