This topic explains the process of creating and managing cell filling, as part of complex table filling, which also includes table and dataset filling.
Configuration Effect
The example below of a workshop inspection table demonstrates cell filling for various fields such as employee ID, name, device, team, position, production line, and time. 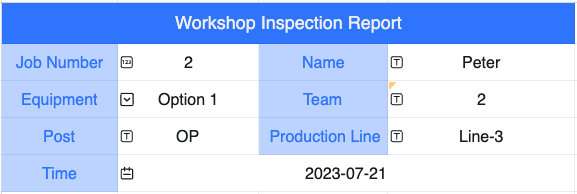
Create Cell Filling
The cell is the fundamental unit for filling. To enable cell filling, assign a filling control to the cell. 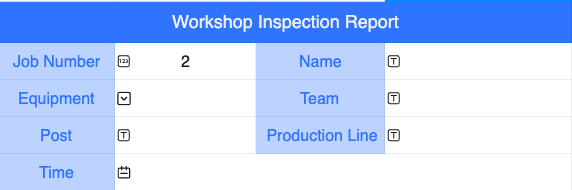
Note that converting multiple cells to filling controls simultaneously will only affect one cell, as field names and other settings necessitate individual configuration.
Insert Control
Operation Entry
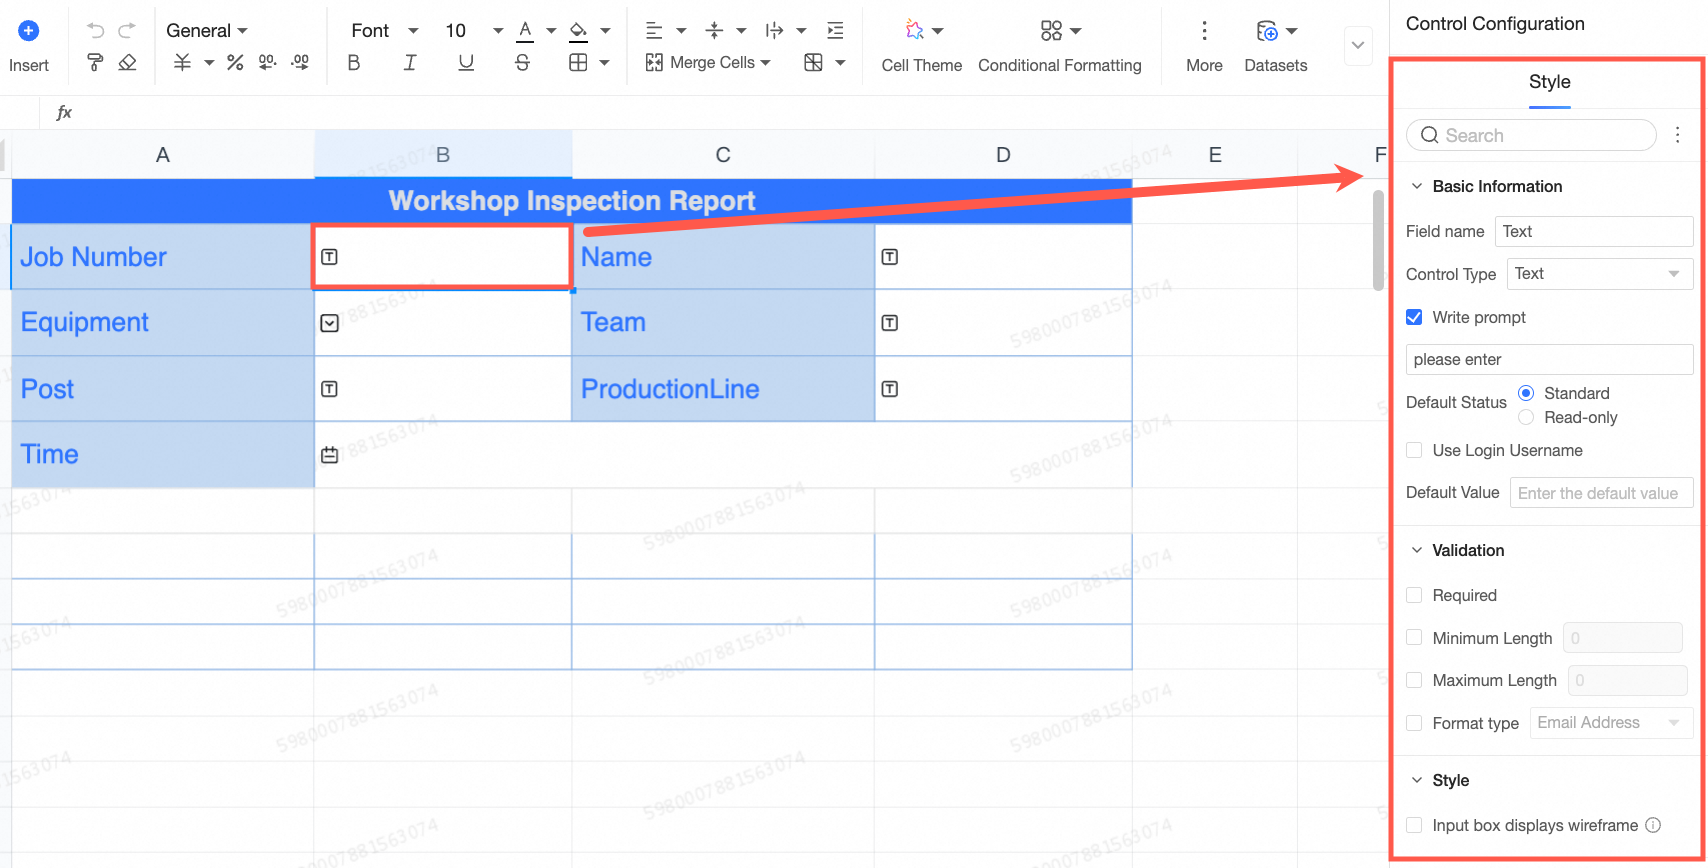
Entry 1: Select a cell, click Data Filling in the upper right corner of the toolbar, choose the appropriate filling control based on the content type, and set its parameters in the configuration panel that appears on the right.

Entry 2: Select a cell, click Insert in the upper left corner of the menu bar, choose the appropriate filling control based on the content type, and set its parameters in the configuration panel that appears on the right.

After setting up the value control for the employee ID field, proceed to insert various filling controls such as text, dropdown, time into the corresponding cells for name, device, team, position, production line, time.
Control Configuration
Configure the parameters in the pop-up widget's configuration window. For step-by-step instructions, see Filling Control.
Once the control configuration is complete, click the
 icon to edit parameters again, or click the
  icon to delete.
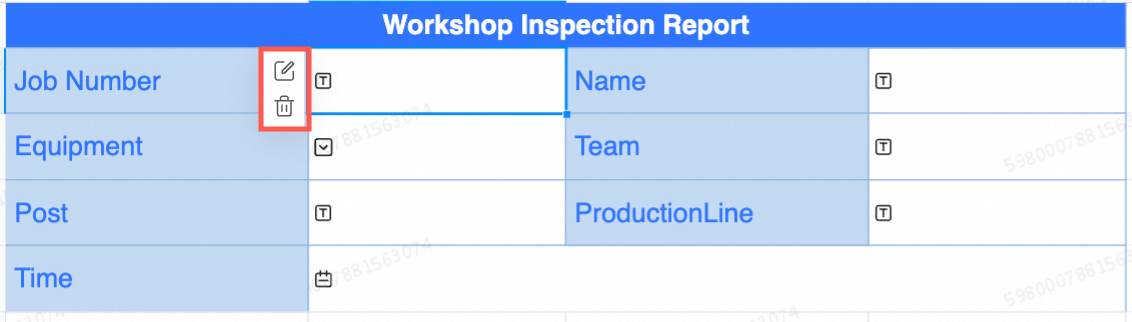
What to Do next
Once you have completed the cell filling process, continue by configuring the submission area to link the filled data with the underlying table data. For detailed instructions, see Set Filling Submission Area.