This topic describes how to create a Microsoft Cloud PostgreSQL data source.
Prerequisites
A Microsoft Cloud PostgreSQL database has been created.
You have obtained the username and password for the Microsoft Cloud PostgreSQL database.
Limits
Support is provided for PostgreSQL version 8.2 and above.
Procedure
Add a whitelist.
Before connecting to Microsoft Cloud PostgreSQL, you must add the IP address of Quick BI to the Microsoft Cloud PostgreSQL whitelist.
Verify the data source connection and create the data source.
Log on to the or the international Quick BI console.
You can add a data source by following the instructions in the figure below.
Access the data source creation interface through the data source creation entry.
On the Microsoft Cloud Database tab, select Azure Database PostgreSQL data source.

In the configuration connection dialog box, configure the connection based on your business scenario.
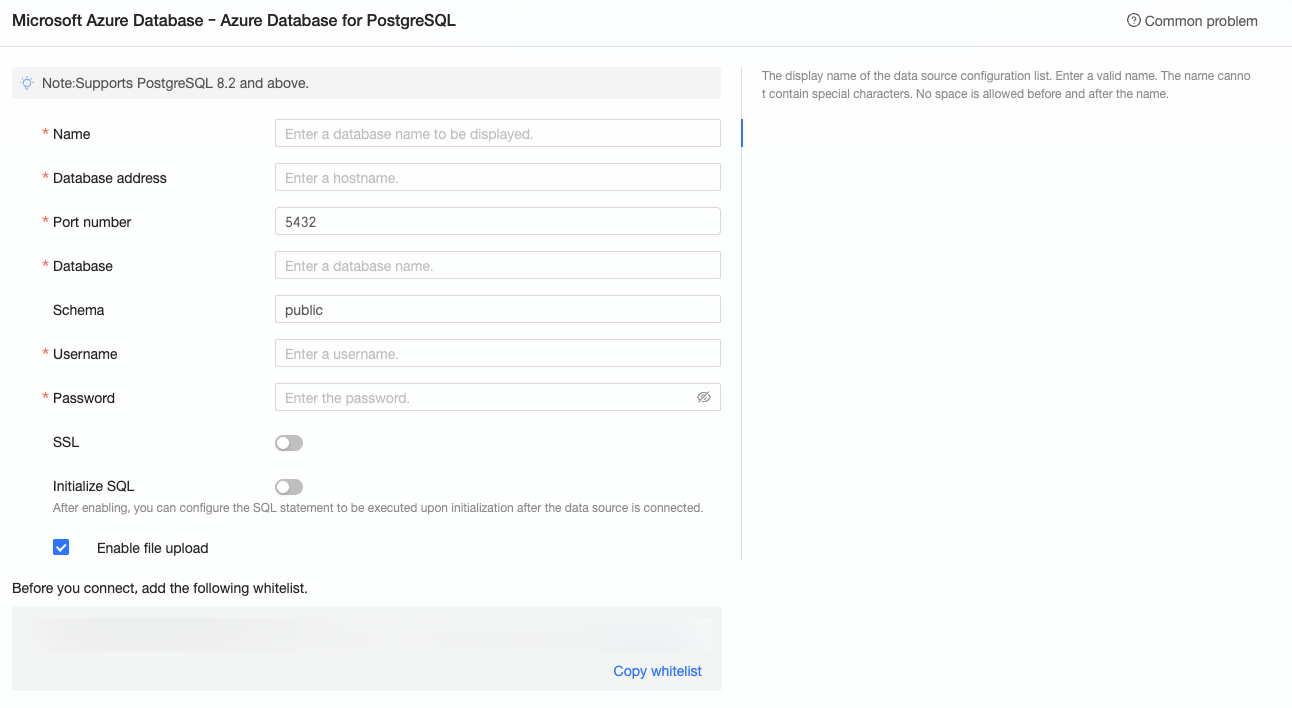
Name
Description
Display name
The display name in the datasource config list.
Please enter a standard name without special characters or spaces at the beginning or end.
Database address and port
The external address and port where the PostgreSQL database is deployed. Please log on to the Azure portal to obtain the external address.
Database
The name of the database to be connected.
Schema
The schema name of the PostgreSQL database.
Username and password
The username and password for logging on to the PostgreSQL database.
SSL
If the target data source is configured with SSL, you can select the secure protocol SSL to protect data security.
Initialize SQL
After enabling, you can configure the SQL statement to be executed after the data source connection is initialized.
Only SET statements are allowed for the SQL statement executed after each data source connection initialization, separated by semicolons.
Enable file upload entry
After enabling, file upload is supported.
Click connection test to verify the data source's connectivity.

Once the test is successful, click OK to finalize the data source addition.
What to Do next
After the data source is created, you can proceed to create datasets and analyze data.
To import data tables from the PostgreSQL database or use custom SQL statements in Quick BI, see Create and manage datasets.
For adding visualization charts and data analysis, see Create a dashboard and Overview of visualization charts.
To explore in-depth data analysis, refer to Drilling settings and display.