You can perform performance testing using JMeter to simulate upload, which is used to test the API for uploading files and images. This topic describes how to use the Apache JMeter client to construct a script and test the upload API in the PTS console.
Prerequisites
This example uses
Apache JMeter 5.6.3to create scripts. PTS supports JMeter 5.0 and 5.6.3.
Overview
During large-scale testing, performance of JMeter may become a bottleneck, especially in standalone mode. Despite the distributed testing feature of JMeter, which allows load distribution across multiple machines, achieving consistent scheduling and data collection remains a challenge. Furthermore, built-in reporting and analysis capabilities of JMeter may not meet your complex analytical needs, which necessitates the use of external tools such as Grafana and Kibana for data visualization and analysis. On PTS, you can use JMeter for performance testing. Seamless resource expansion and integration with cloud monitoring enhance the capabilities of JMeter in simulating high concurrency and identifying bottlenecks and other issues.
You need to complete two configuration steps before using JMeter for performance testing on PTS to simulate image upload.
First, install
Apache JMeter 5.6.3on your local computer to create a script.Then, upload the script and image to the JMeter performance testing scenario and debug. After the debugging is successful, initiate a performance testing.
Step 1: Use the Apache JMeter client to construct an upload script
Configure properties of the HTTP request, including the server name or IP address, port number, HTTP method (such as POST), path (the path of the upload API), and file upload parameters.
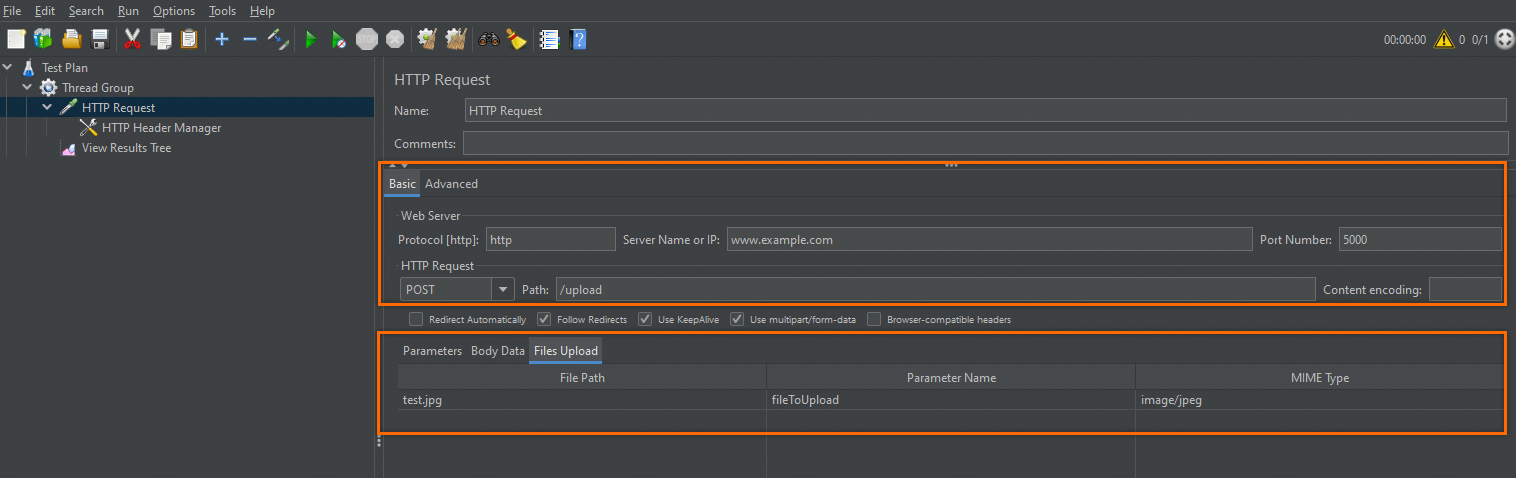
Description of configuration items on the Basic tab:
Protocol: Select
httporhttps.Server name or IP: specifies the API domain name, for example,
www.example.com.Port Number: specifies the service port number, for example,
5000.Method: Select
POST.Path: specifies the path of the upload API, for example,
/upload.
Description of configuration items on the Files Upload tab:
File Path: specifies the name of the file to be uploaded to the JMeter scenario, excluding the local path. For example,
test.jpg.Parameter Name: specifies the parameter name of the file upload form, for example,
fileToUpload.MIME Type: specifies the MIME type of the file, for example,
image/jpeg.
Add the required HTTP header information.
The upload API generally requires configuring the Cookie and Content-Type. This example does not involve logon operations. Therefore, only the Content-Type is configured.

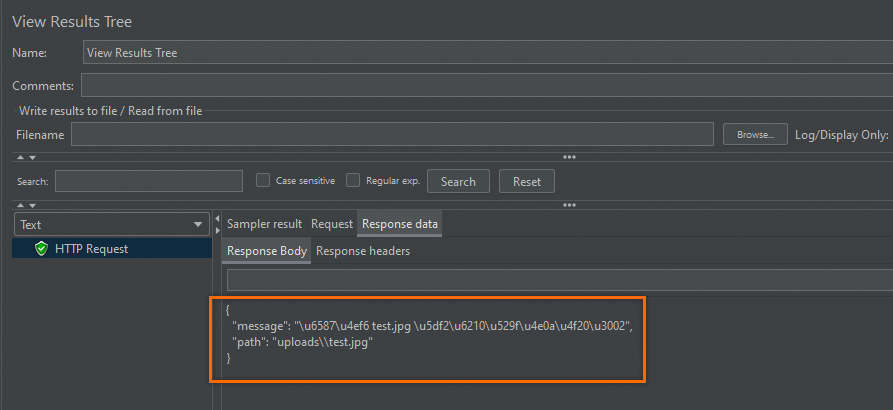
Run the test plan and view the results in View Results Tree. The following information indicates a successful upload.
After successful debugging, export the test plan file, named
uploads.jmxhere.
Step 2: Create and start JMeter performance testing
Log on to the PTS console, choose , and then click JMeter.
Configure a scenario
Enter the scenario name.
On the Scenario Settings page, upload the
uploads.jmxfile exported in Step 1: Use the Apache JMeter client to construct an upload script.Click Upload File to add an image file. The file name must be the same as that configured in
uploads.jmx.
Click JMeter Version and select
5.6.3. Note that the version should be consistent with the local JMeter version used to create the script. Otherwise, an error may be reported.
Configure a performance testing task
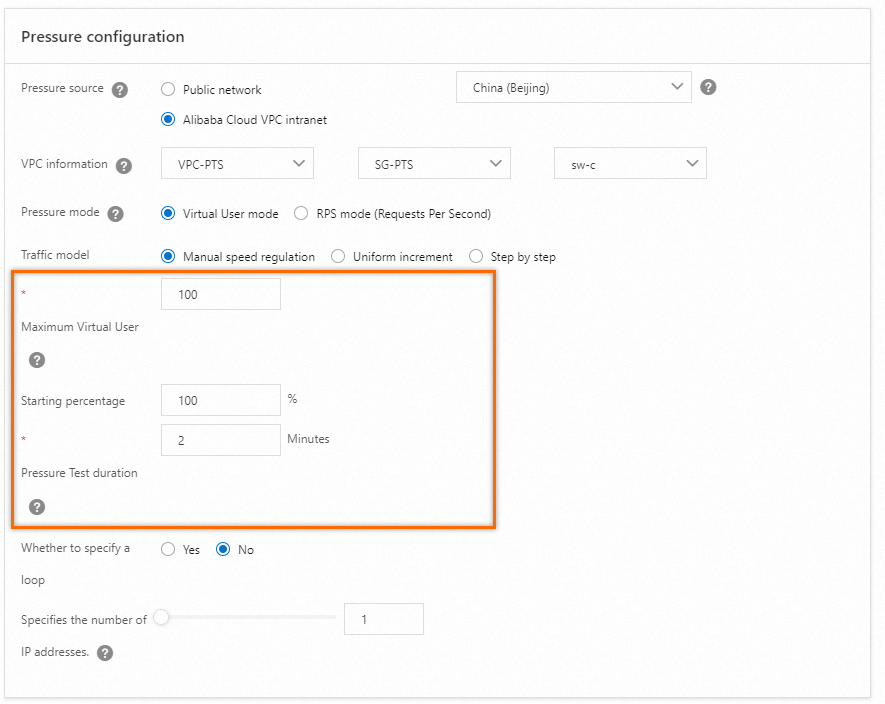
In this example, the performance testing is initiated from the Alibaba Cloud VPC. You are charged for performance testing. You can select stress sources and stress parameters based on your needs. For more information, see Configure the stress testing model and level and Billing overview.
Debug and start performance testing
You can check whether the configurations are reasonable through Debug a stress testing scenario. To avoid performance testing failures, we recommend debugging scenarios first.
After successful scenario debugging, click Save and Test. On the Tips page, select Trigger Now and Make sure that the test is approved and complies with local laws, and then click Start Testing.
Analyze the stress testing result
After the stress testing is finished, the system automatically obtains the stress testing data and generates a stress testing report. The stress testing data includes the stress testing scenario metrics, business details, monitoring details, and API sampling logs. For more information, see View a JMeter performance testing report.