Feature discretization is a process of converting continuous data into multiple discrete intervals. To implement feature discretization, Platform for AI (PAI) provides the Binning and Data Conversion Module components. You can use the binning component to discretize continuous features, and then use the Data Conversion Module component to convert the original continuous data in the bins to discrete data. This topic describes how to discretize continuous features by using algorithm components in Machine Learning Designer.
Prerequisites
A workspace is created. For more information, see Create a workspace.
MaxCompute resources are associated with the workspace. For more information, see Manage workspaces.
Procedure
Go to the Machine Learning Designer page.
Log on to the PAI console.
In the left-side navigation pane, click Workspaces. On the Workspaces page, click the name of the workspace that you want to manage.
In the left-side navigation pane, choose to go to the Machine Learning Designer page.
Create an empty pipeline and open the pipeline. For more information, see Prepare data.
The following section describes the parameters:
Pipeline Name: Set the value to Use the Binning component to implement the discretization of continuous features.
Description: Enter Use the Binning component provided by PAI for the discretization of continuous features.
Visibility: Set the value to Visible to Me.
Configure the pipeline.
In the component list on the left side, find and drag the Read Table component in the Data Source/Target folder to the canvas.
In the component list on the left side, find and drag the Binning and Data Conversion Module components in the Financials folder to the canvas.
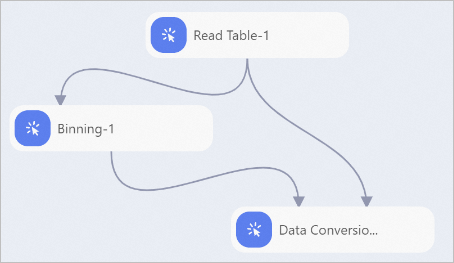
Connect the preceding components as shown in the following figure.

Configure the component parameters.
Click the Read Table component on the canvas. In the right-side panel, configure the parameters described in the following table.
Tab
Parameter
Description
Select Table
Table Name
Enter pai_online_project.iris_data.
Partition
The pai_online_project.iris_data table is not a partitioned table. Therefore, the Partition check box is dimmed.
Fields Information
Source Table Columns
You do not need to manually specify this parameter. After you specify the Table Name parameter, the system synchronizes the information of columns in the table specified by the Table Name parameter to the Source Table Columns field.
Click the Binning component on the canvas. In the right-side panel, configure the parameters described in the following table and use the default values for other parameters.
Tab
Parameter
Description
Fields Setting
Feature Columns
Select the f1, f2, f3, and f4 columns.
Parameters Setting
Bins
Set this parameter to 10. This value indicates that continuous features are converted to 10 discrete intervals.
Binning Mode
Valid values: Equal Frequency, Equal Width, and Automatic Binning. If you set this parameter to Automatic Binning, you must specify the label column in binary classification scenarios. In this example, Equal Frequency is used.
Click the Data Conversion Module component on the canvas. In the right-side panel, configure the parameters described in the following table and use the default values for other parameters.
Tab
Parameter
Description
Fields Setting
Columns without Data Conversion
Select the type column. Data in the output of this column is the same as that in the input.
Data Conversion Mode
Select Index.
Click
 in the upper part of the canvas to run the pipeline.
 View the pipeline results.
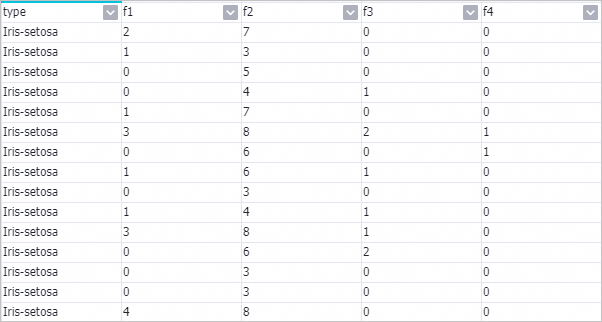
After you run the pipeline, right-click the Data Conversion Module component on the canvas and choose . Then, view the discretization results.

Right-click the Binning component on the canvas and select Binning.
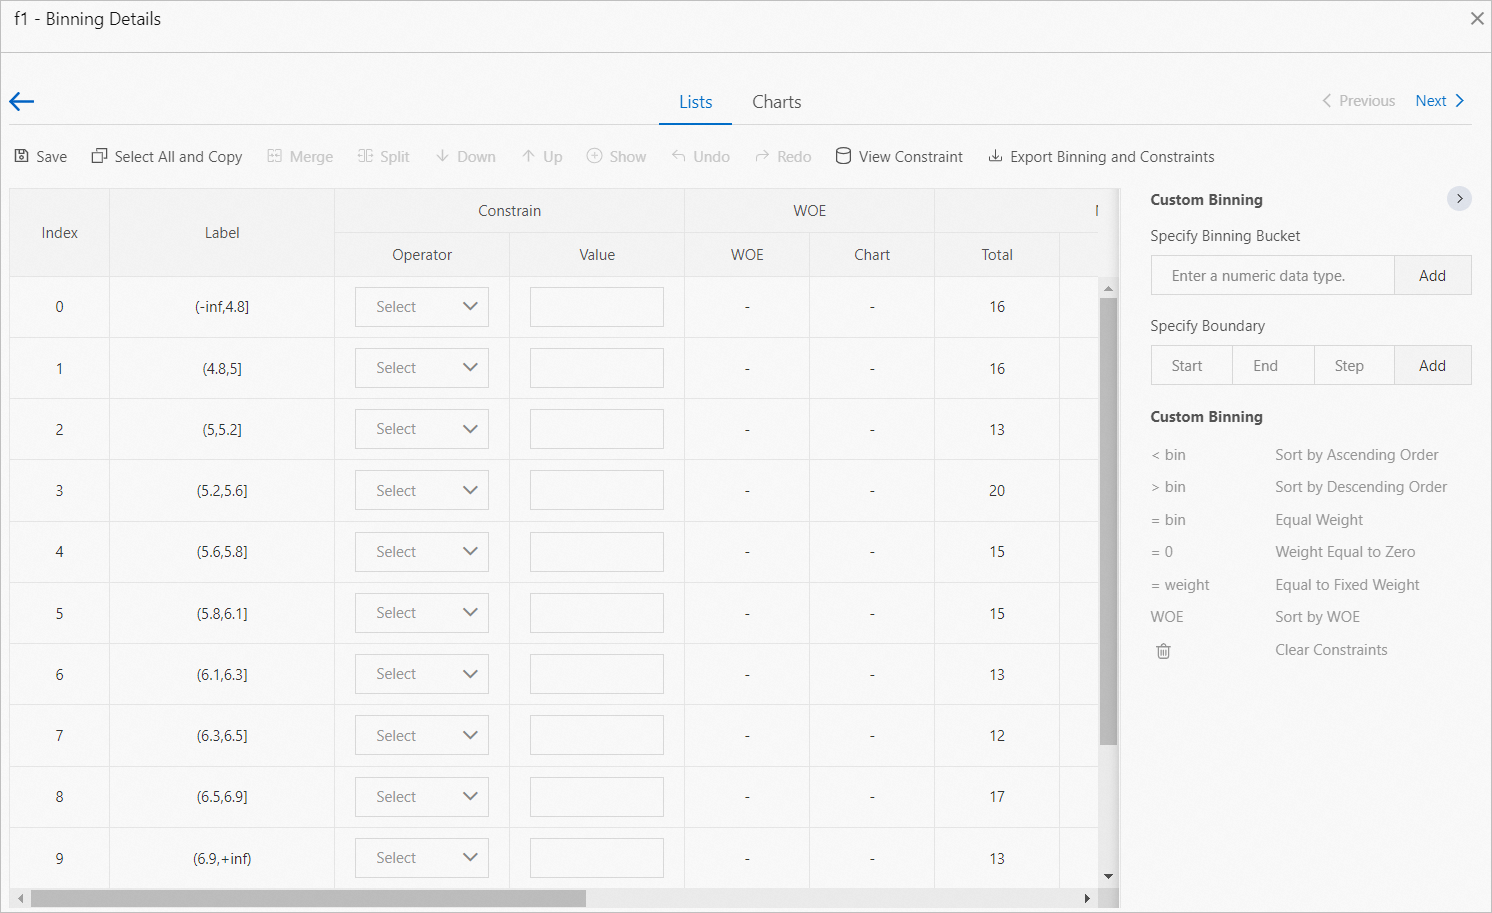
Click the name of the feature that you want to view. The binning details of the feature are displayed in the following figure. The f1 feature is used in this example.

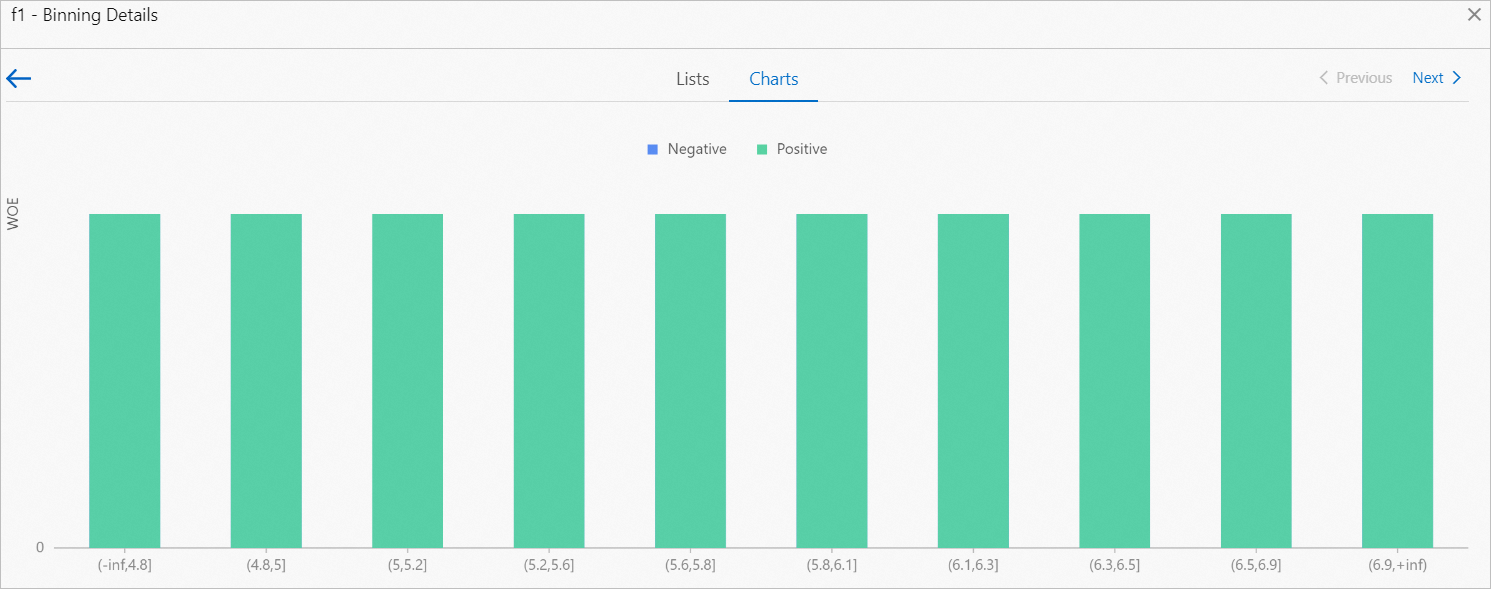
Click the Charts tab to view the binning results.

References
For more information about algorithm components, see Binning and Data Conversion Module.
You can use Machine Learning Designer to perform other AI development tasks. For more information, see Overview of Designer.