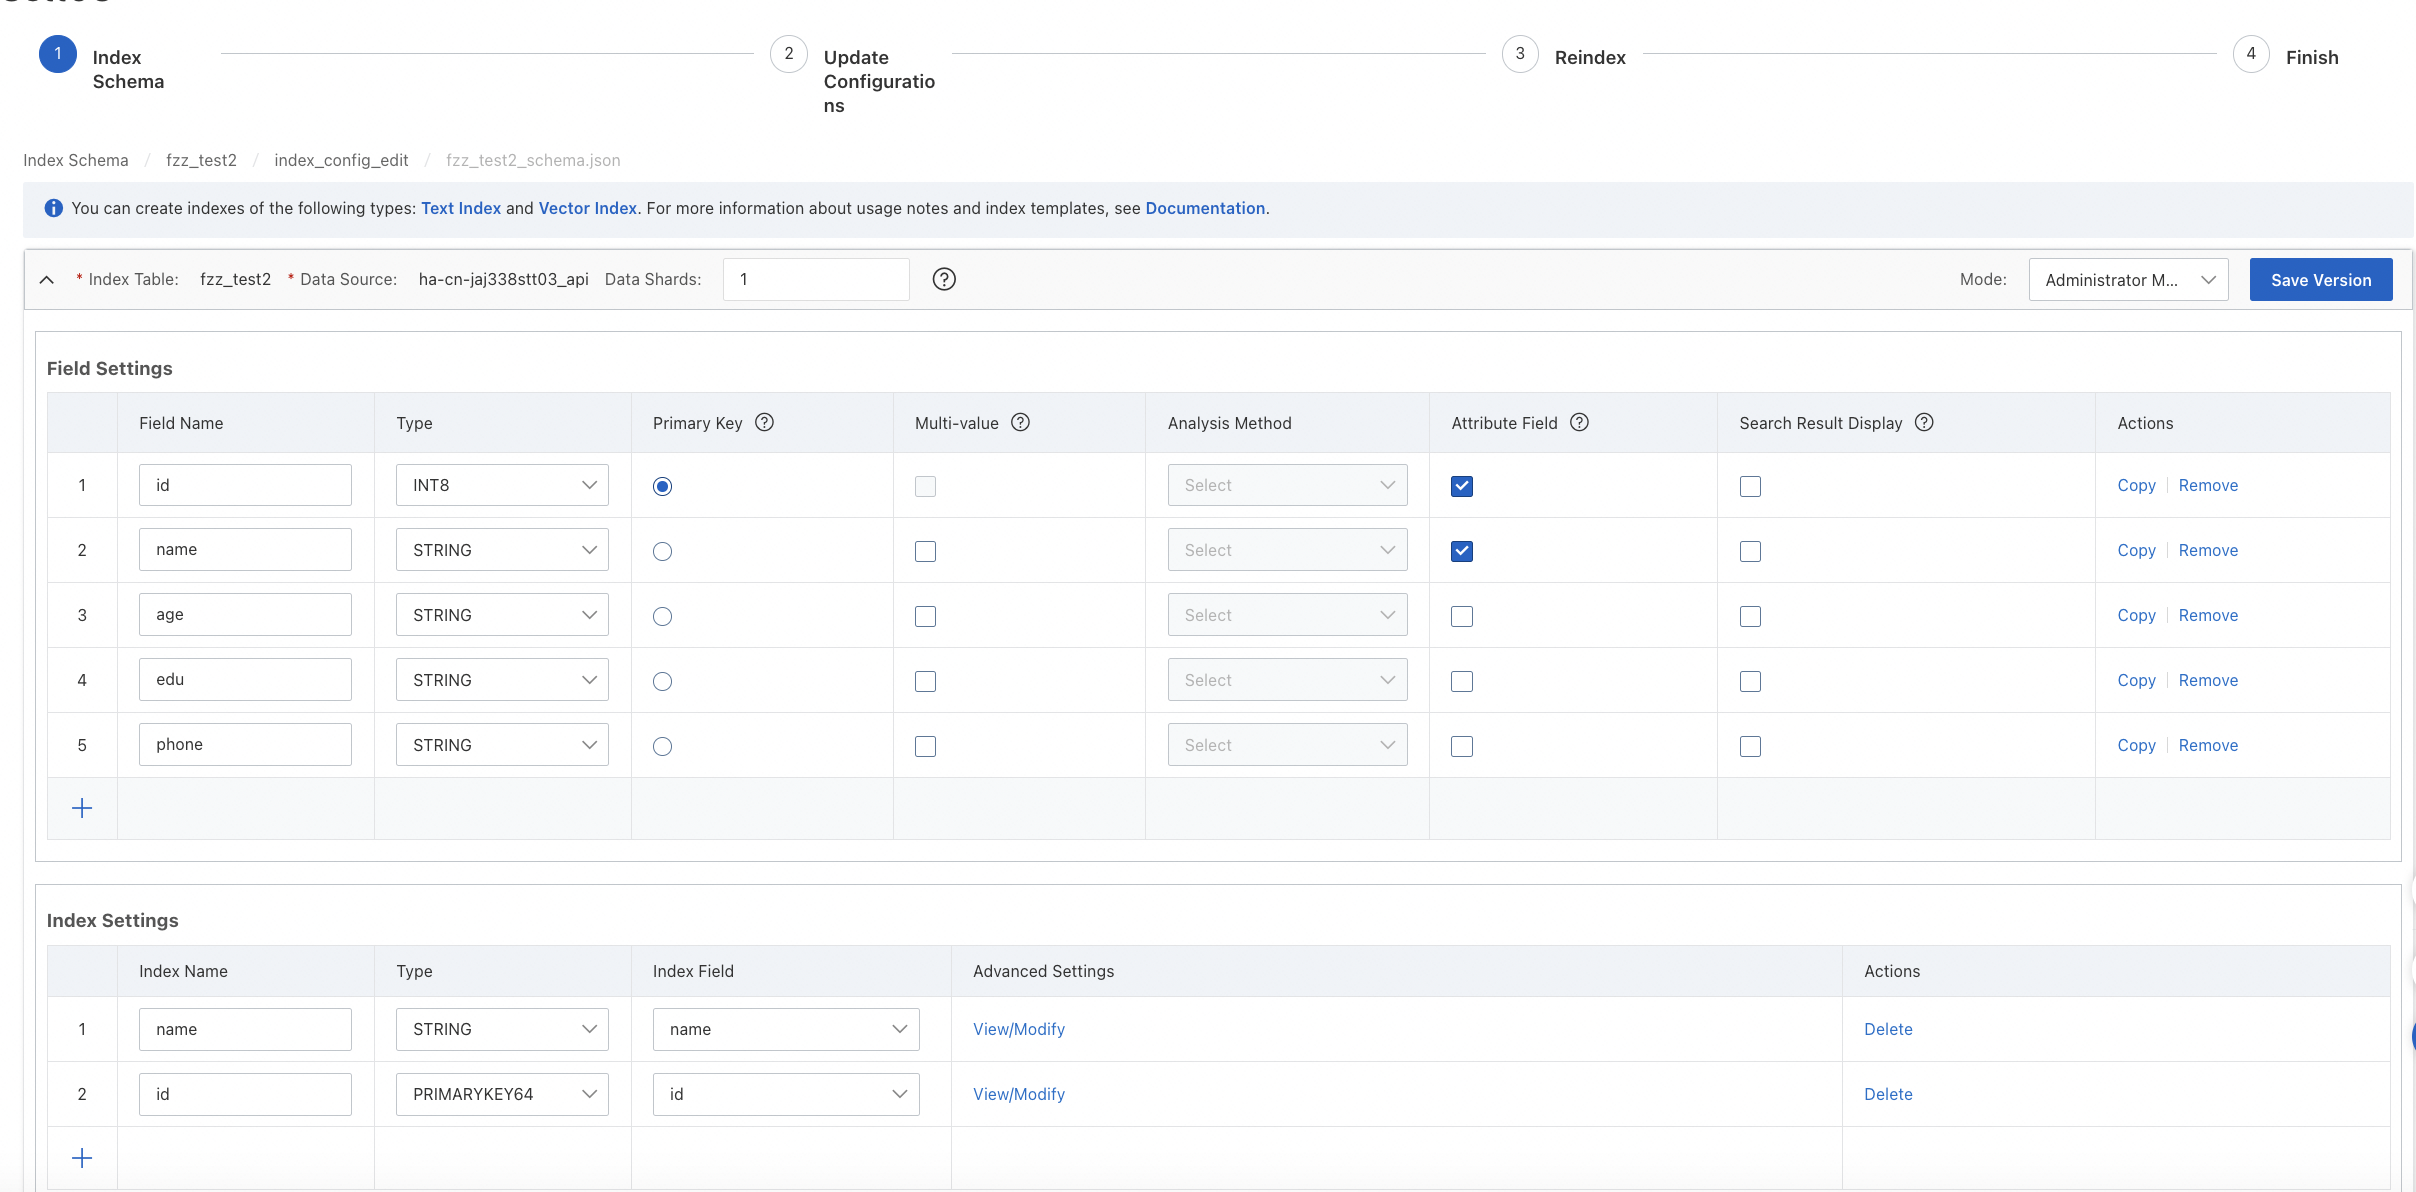
You can perform the following steps to modify an index table: adding/modifying the index table, updating the configurations, and reindexing.
1. On the O&M Management page, click Change Index Table. 
2. Modify the index schema. Find the index table that you want to manage, and click View/Modify in the Actions column.
3. Modify the index table configurations in the index_config_edit version. After the modification is complete, click Save Version and publish the version.
After the version is published, the system automatically generates an index table version named index_config_v2. The version number increments by one each time. Then, click Next.
4. Update configurations. Configure the Data Source Name, Index Table, Index Table Version, Dictionary Configuration Version, and Destination Cluster parameters. Click Next.
5. Perform reindexing. Select a data source and click Next.
Select MaxCompute Data Source for Data Source Type, as shown in the following figure.

Select API Data Source for Data Source Type, and select Empty Data for Data Source.
Select API Data Source for Data Source Type, and select Restore Data from Index for Data Source.
If you select API Data Source, you must retain the data in the current full index version. For more information, see Restore data from index.
The timestamp configuration must meet the verification rules: You cannot enter a point in time after the API data source is added.
After you start reindexing, you are redirected to the Change History page. You can view the reindexing progress on the Data Source Changes tab.

The index table can be queried online immediately after the reindexing operation is complete.