Background information
If you grant permissions to a Resource Access Management (RAM) user in the RAM console or by calling API operations, the permissions immediately take effect. This way, security cannot be ensured in scenarios in which you need to perform frequent authorization or grant privileges. This topic describes an efficient authorization and approval mechanism that can ensure security by using the following two templates provided by CloudOps Orchestration Service (OOS): ACS-RAM-ApproveAttachPolicyToUser and ACS-RAM-ApproveAttachCustomPolicyToUser. You can create templates that apply to your scenarios by using these two templates. This way, a regular user of your enterprise can apply for permissions by creating an execution. Then, the permission administrator of your enterprise receives an approval notification. After the permission administrator approves the request, the regular user who created the execution can be granted the requested permissions.
Prerequisites
A RAM user that assumes the permission administrator role is created. The AliyunRAMFullAccess policy is attached to the RAM user. The name of the RAM user is used as the value of the approvers variable. If you do not have such a RAM user, you can create a RAM user and grant the required permissions to the RAM user. For more information, see Create a RAM user and Grant permissions to a RAM user.
A RAM user that assumes the permission applicant role is created. The RAM user is granted the permissions to manage OOS executions. For more information, see Create a RAM user and Access control.
A RAM policy is available. You can query system and custom policies on the Policies page of the RAM console. If the existing policies do not meet your requirements, you can create a custom policy. For more information, see the Create and attach a custom policy section of this topic.
The permission administrator has joined a DingTalk group, and the webhook URL of the DingTalk group is obtained. This way, if a regular user applies for permissions, OOS sends an approval notification to the webhook URL to notify the permission administrator of reviewing the request. For more information about how to obtain the webhook URL, see Use DingTalk to approve OOS tasks. After you obtain the webhook URL, save it for subsequent use. Example of a webhook URL: https://oapi.dingtalk.com/robot/send?access_token=1234zxcvbnm67890.
Procedure
This section describes two templates for your reference. One template is used for scenarios in which you want to attach an existing policy such as a system policy or a custom policy. The other template is used for scenarios in which you want to create a custom policy and attach the created custom policy.
Attach an existing policy
The following procedure involves three stages and two roles: (1) The permission administrator configures a template. (2) The permission applicant applies for permissions. (3) The permission administrator reviews the request.
Permission administrator: Configure a template
Log on to the OOS console.
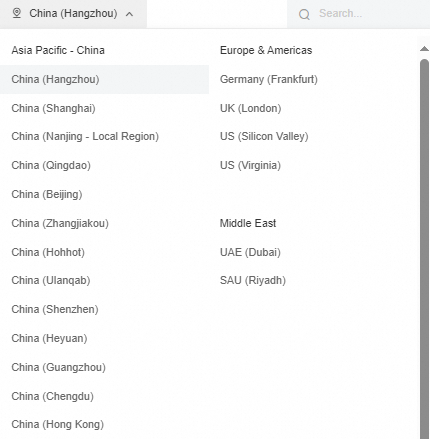
Confirm that you have selected the correct region.
To help the permission applicant create an execution and protect the approval information from being improperly modified, perform the following operations: Modify a public template based on the actual situation to configure the approval management parameters in the template, delete the parameter definitions that are not required from the template, and then create a template on the Custom Template page. The following steps describe how to fix the approval information to a template.
In the left-side navigation pane, choose Automated Task > Public Template.
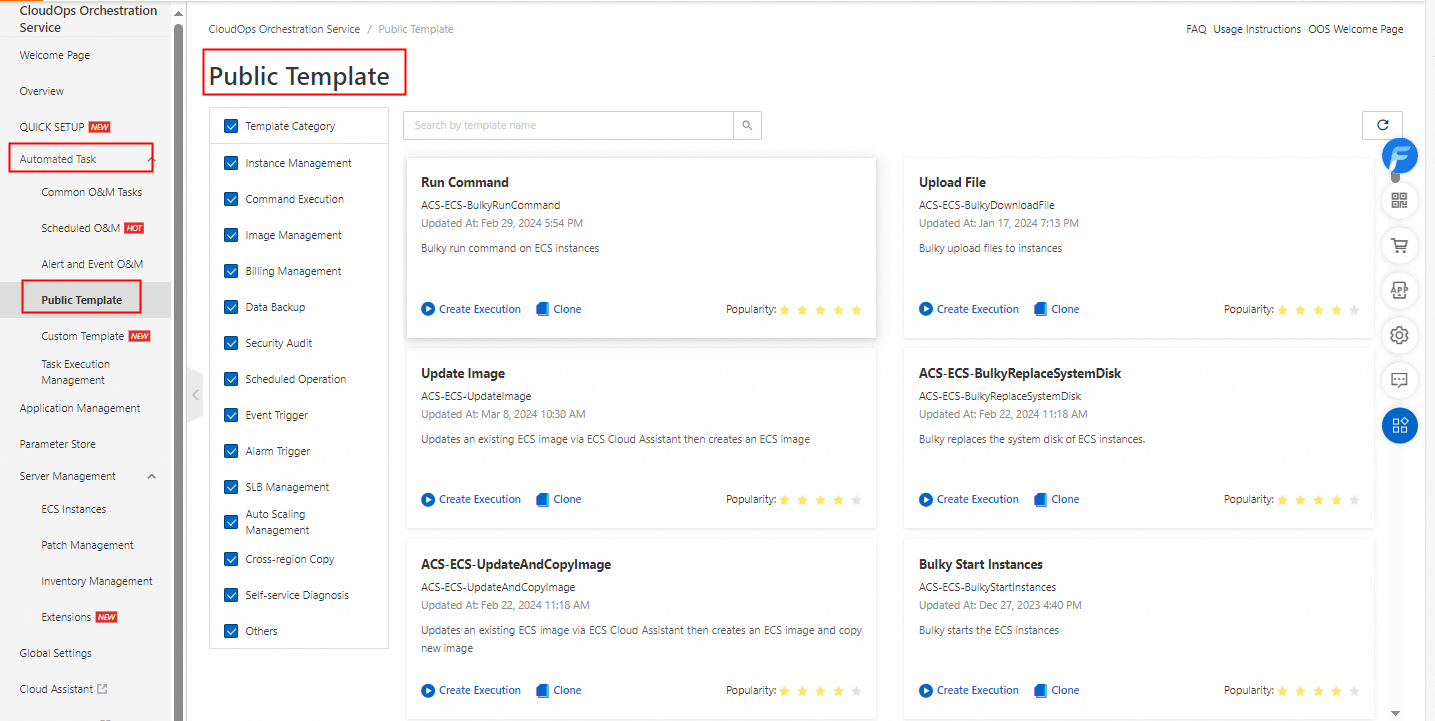
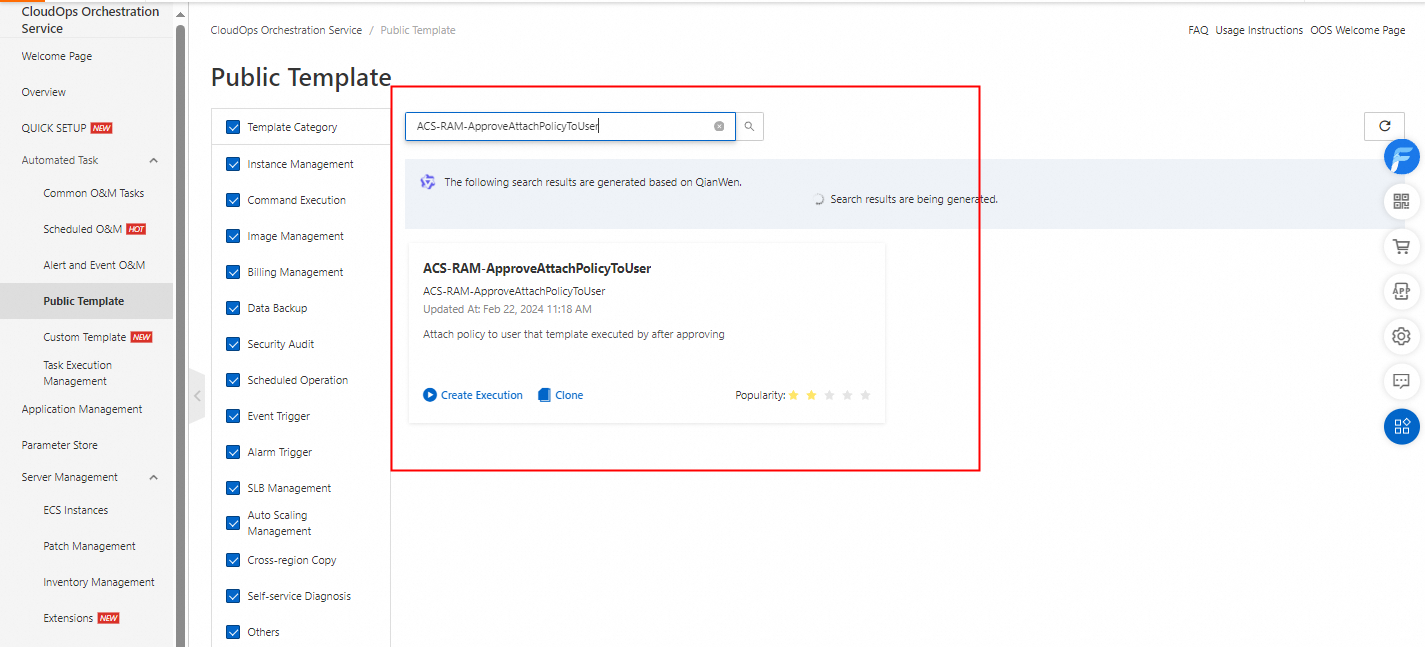
On the Public Template page, find the ACS-RAM-ApproveAttachPolicyToUser template and click the template to go to the template details page.
On the template details page, click the YAML tab.
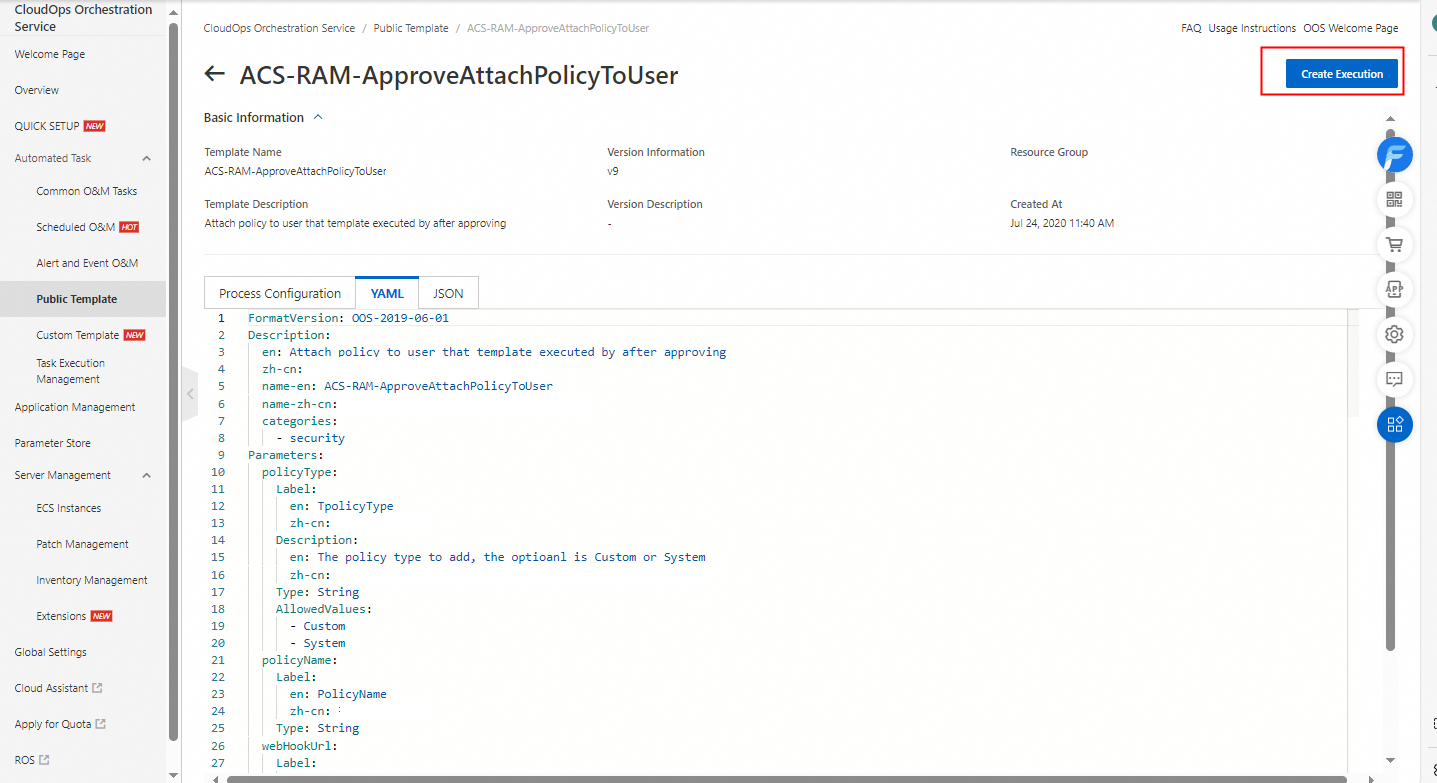
Modify the parameters of the approveAttachPolicy task in the template. Change the values of the parameters framed in red in the following figure to fixed values.
The Approvers parameter specifies the account name of the permission administrator on Alibaba Cloud. Replace the
'{{approvers}}'variable with the account name of the permission administrator, such as['zhangsan'].The MinRequiredApprovals parameter specifies the minimum number of permission administrators who are required to approve a request. Replace the
'{{minRequiredApprovals}}'variable with the minimum number of permission administrators who are required to approve a request, such as1.The URI parameter specifies the webhook URL of the DingTalk group to which an approval notification is sent. Replace the
'{{webhookUrl}}'variable with the webhook URL that you obtained, such as'https://oapi.dingtalk.com/robot/send?access_token=1234zxcvaksdq31414'.The atMobiles parameter specifies the users who are notified in the DingTalk group when an approval notification is sent. Replace the
'{{atMobiles}}'variable with the mobile number that is used by the permission administrator to register the DingTalk account, such as['1390000****'].The isAtAll parameter specifies whether to notify all users in the DingTalk group when an approval notification is sent. Replace the
'{{atAll}}'variable withfalseortruebased on your business requirements, such asfalse.

8. The following code shows an example of the task script after the parameters of the approveAttachPolicy task are modified in the template:
Tasks:
  - Name: approveAttachPolicy
    Action: 'ACS::Approve'
    Description:
      en: Approve task add policy.

    Properties:
      Approvers: ['zhangsan']
      MinRequiredApprovals: 1
      NotifyType: WebHook
      WebHook:
        URI: 'https://oapi.dingtalk.com/robot/send?access_token=1234zxcvaksdq31414'
        Headers:
          Content-Type: application/json
        Content:
          msgtype: text
          text:
            content: |
              Notice: Please approve the task execution to attach {{policyType}} policy {{policyName}}
              for target user {{ACS::ExecuteUser}}.
              sent by {{ACS::RegionId}} oos {{ACS::ExecutionId}}.
          at:
            atMobiles: ['1390000****']
            isAtAll: false # Modify this parameter based on your actual situation.
Delete the parameter definitions that are not required from the template. The following figure shows an example of such parameter definitions.

The following sample code shows an example of the complete YAML script of the template after modification:
FormatVersion: OOS-2019-06-01
Description:
  en: Attach policy to user that template executed by after approving.

  name-en: ACS-RAM-ApproveAttachPolicyToUser

  categories:
    - security
Parameters:
  policyType:
    Description:
      en: 'The policy type to add,the optioanl is Custom or System.'

    Type: String
    AllowedValues:
      - Custom
      - System
  policyName:
    Description:
      en: The policy to add.

    Type: String
  OOSAssumeRole:
    Description:
      en: The RAM role to be assumed by OOS.

    Type: String
    Default: OOSServiceRole
RamRole: '{{ OOSAssumeRole }}'
Tasks:
  - Name: approveAttachPolicy
    Action: 'ACS::Approve'
    Description:
      en: Approve task add policy.

    Properties:
      Approvers: ['zhangsan']
      MinRequiredApprovals: 1
      NotifyType: WebHook
      WebHook:
        URI: 'https://oapi.dingtalk.com/robot/send?access_token=1234zxcvaksdq31414'
        Headers:
          Content-Type: application/json
        Content:
          msgtype: text
          text:
            content: |
              Notice: Please approve the task execution to attach {{policyType}} policy {{policyName}}
              for target user {{ACS::ExecuteUser}}.
              sent by {{ACS::RegionId}} oos {{ACS::ExecutionId}}.
          at:
            atMobiles: ['1390000****']
            isAtAll: false # Modify this parameter based on your business requirements.
  - Name: checkPolicyExist
    Action: 'ACS::CheckFor'
    Description:
      en: Check for the existence of policy.

    Properties:
      Service: RAM
      API: GetPolicy
      Parameters:
        PolicyType: '{{ policyType }}'
        PolicyName: '{{ policyName }}'
      DesiredValues:
        - 'true'
      PropertySelector: .DefaultPolicyVersion != null|tostring
    Outputs:
      policyDocumentToAttach:
        Type: Json
        ValueSelector: .DefaultPolicyVersion.PolicyDocument
  - Name: createStack
    Action: 'ACS::Template'
    Description:
      en: Attach policy by Ros resource stack.

    Properties:
      TemplateName: 'ACS::ROS::CreateStack'
      Parameters:
        stackName: 'OOS-{{ACS::ExecutionId}}'
        disableRollback: true
        parameters:
          - ParameterKey: PolicyType
            ParameterValue: '{{ policyType }}'
          - ParameterKey: UserName
            ParameterValue: '{{ACS::ExecuteUser}}'
          - ParameterKey: PolicyName
            ParameterValue: '{{ policyName }}'
        templateBody: |
          {
            "Parameters": {
              "PolicyType": {
                "Type": "String",
                "Description": "Authorization policy type. Value: \"System\" or \"Custom\"."
              },
              "UserName": {
                "Type": "String",
                "Description": "User name."
              },
              "PolicyName": {
                "Type": "String",
                "Description": "Authorization policy name."
              }
            },
            "ROSTemplateFormatVersion": "2015-09-01",
            "Outputs": {},
            "Resources": {
              "AttachPolicyToUser": {
                "Type": "ALIYUN::RAM::AttachPolicyToUser",
                "Properties": {
                  "PolicyType": {
                    "Ref": "PolicyType"
                  },
                  "UserName": {
                    "Ref": "UserName"
                  },
                  "PolicyName": {
                    "Ref": "PolicyName"
                  }
                }
              }
            }
          }
    Outputs:
      stackId:
        Type: String
        ValueSelector: stackId
Outputs:
  statement:
    Type: Json
    Value: '{{ checkPolicyExist.policyDocumentToAttach }}'
  stackId:
    Type: String
    Value: '{{createStack.stackId}}'
After you modify the template, enter the template name.
In this example, copy-ACS-RAM-ApproveAttachPolicyToUser is used.
Click Create Template.
Permission applicant: Apply for permissions
Log on to the OOS console.
Confirm that you have selected the correct region.
In the left-side navigation pane, choose Automated Task > Custom Template. On the Custom Template page, find the copy-ACS-RAM-ApproveAttachPolicyToUser template and click Create Execution in the Actions column.
On the Create Task page, configure the required parameters in the Basic Information step. Then, click Next Step: Parameter Settings. In the Parameter Settings step, set the PolicyType and PolicyName parameters to the type and name of the policy for which you want to apply.
In this example, the system policy AliyunECSReadOnlyAccess is used.

Click Next Step: OK.
Click Create. After you create an execution, an approval notification is sent to the specified DingTalk group to notify the permission administrator of reviewing the request. If the request is approved, you are immediately granted the requested permissions.
Permission administrator: Review the request
After the permission applicant creates an execution, you can receive an approval notification in the specified DingTalk group.

To review the request, click the link in the approval notification. On the page that appears, approve the request as prompted.

On the execution details page, view the details of the authorization task. If the task is successful, the RAM user that created the execution is granted the requested permissions.

Create and attach a custom policy
The following procedure involves three stages and two roles: (1) The permission administrator configures a template. (2) The permission applicant applies for permissions. (3) The permission administrator reviews the request.
Permission administrator: Configure a template
Log on to the OOS console.
Confirm that you have selected the correct region.
To help the permission applicant create an execution and protect the approval information from being improperly modified, you can modify a public template and fix the approval information to a template. In this example, the
ACS-RAM-ApproveAttachCustomPolicyToUsertemplate is modified. For more information, see the "Attach an existing policy" section of this topic.Create a template based on the
ACS-RAM-ApproveAttachCustomPolicyToUsertemplate. In this example, the created template is named copy-ACS-RAM-ApproveAttachCustomPolicyToUser.
Permission applicant: Apply for permissions
Log on to the OOS console.
Confirm that you have selected the correct region.
In the left-side navigation pane, choose Automated Task > Custom Template. On the Custom Template page, find the copy-ACS-RAM-ApproveAttachCustomPolicyToUser template and click Create Execution in the Actions column.
On the Create Task page, configure the required parameters in the Basic Information step. Then, click Next Step: Parameter Settings. In the Parameter Settings step, set the PolicyDocument and PolicyName parameters to the JSON script and name of the custom policy that you want to create and request.
In this example, the following JSON script is entered in the PolicyDocument field, which indicates the read-only permissions on Elastic Compute Service (ECS) instances. For more information about how to write the script of a policy, see Policy structure and syntax.
{
    "Version": "1",
    "Statement": [
        {
            "Action": "ecs:Describe*",
            "Resource": "*",
            "Effect": "Allow"
        },
        {
            "Action": "ecs:List*",
            "Resource": "*",
            "Effect": "Allow"
        },
        {
            "Action": [
                "vpc:DescribeVpcs",
                "vpc:DescribeVSwitches"
            ],
            "Resource": "*",
            "Effect": "Allow"
        }
    ]
}
Click Next Step: OK.
Click Create. After you create an execution, an approval notification is sent to the specified DingTalk group to notify the permission administrator of reviewing the request. If the request is approved, you are immediately granted the requested permissions.
Permission administrator: Review the request
After the permission applicant creates an execution, you can receive an approval notification in the specified DingTalk group.

To review the request, click the link in the approval notification. On the page that appears, approve the request as prompted.

On the execution details page, view the details of the authorization task. If the task is successful, the RAM user that created the execution is granted the requested permissions.
Summary
This topic describes how to use templates to grant permissions in a reliable and secure way. If you want to create a custom policy and attach the created custom policy, you can create a template based on the ACS-RAM-ApproveAttachCustomPolicyToUser template. This way, other users can apply for permissions by creating an execution. This simplifies the process of creating and attaching custom policies, without the need to perform complex operations in the console.