Integrate Microservices Engine (MSE) traffic governance with Jenkins CI/CD pipelines to automate canary releases for microservice applications. This workflow combines build, deployment, verification, and promotion (or rollback) into a single pipeline, reducing deployment risk while maintaining release velocity.
How it works
The Jenkins pipeline automates the entire release lifecycle:
Build -- Package source code and build a container image.
Deploy canary -- Deploy the new version alongside the stable base version.
Route canary traffic -- MSE routes a subset of traffic to the canary based on headers, cookies, or request parameters you define.
Verify -- Confirm the canary behaves as expected.
Promote or roll back -- Promote the canary to full production if it passes verification, or roll back to the base version.
The following diagram illustrates the architecture:

MSE supports three canary routing strategies:
| Strategy | Description |
|---|---|
| Percentage-based | Route a fixed percentage of traffic to the canary. |
| Rule-based | Route traffic that matches specific headers, cookies, or request parameters. |
| Tag-based | Mark canary traffic with a built-in header such as x-mse-tag: gray and route it through the entire call chain. |
This tutorial uses tag-based routing with the x-mse-tag: gray header.
Prerequisites
Before you begin, make sure that you have:
Enabled Microservices Governance for microservice applications in an ACK cluster
Deployed Jenkins in an ACK cluster with permissions to push images to your container registry
Deployed the demo applications described in the next section, or prepared your own microservice applications
Deploy demo applications
This tutorial uses five applications deployed in an ACK cluster:
| Application | Role | Container port |
|---|---|---|
| spring-cloud-zuul | Ingress gateway | 20000 |
| spring-cloud-a | Application A | 20001 |
| spring-cloud-b | Application B | 8080 |
| spring-cloud-c | Application C | 20003 |
| nacos-server | Service registry (standalone mode) | -- |
The call chain is: spring-cloud-zuul -> spring-cloud-a -> spring-cloud-b -> spring-cloud-c.
The spring-cloud-zuul gateway handles 100 QPS of normal traffic and an additional 10 QPS of canary traffic. Requests with the x-mse-tag: gray header are automatically routed to downstream nodes tagged with gray. You can replace gray with any custom tag value to match your requirements.
Step 1: Create the deployments
Log on to the ACK console. In the left-side navigation pane, click Clusters.
On the Clusters page, find and click the name of your cluster.
In the left-side navigation pane, choose Workloads > Deployments.
Click Create from YAML and apply the following YAML files.
spring-cloud-zuul (ingress gateway)
spring-cloud-a (base version)
spring-cloud-b (base version)
spring-cloud-c (base version)
nacos-server (service registry) and SLB service
Step 2: Verify the deployment
After deploying all applications, open the MSE console and check traffic for Application A. All traffic should flow to untagged nodes, with no traffic on canary nodes.
Create a lane for canary routing
Lanes define how MSE routes canary traffic through a microservice call chain. Set up a lane group first, then create a lane with routing rules.
Step 1: Create a lane group
Log on to the MSE console and select a region in the top navigation bar.
In the left-side navigation pane, choose Microservices Governance > Full link grayscale.
Click Create Lane Group and Lane. If a lane group already exists in your microservice namespace, click + Create Lane Group.
Configure the lane group:
Parameter Value Lane Group Name A descriptive name for the lane group. Ingress Type Select Java Microservice Gateway. Lane Group Traffic Entry Select your ingress application (spring-cloud-zuul). Lane Group Application Select all applications in the call chain. Click OK.
After creation, verify that the ingress application and related applications appear in the applications involved in the lane group section on the Full link grayscale page. To modify the lane group, click  .
.
Step 2: Create a lane
On the Full link grayscale page, select the same microservice namespace as your lane group.
Click Click to Create First Split Lane. If a lane already exists, click Create Lane.
ImportantAfter you configure an end-to-end canary release for applications, these applications no longer support features such as canary release and tag-based routing.
Configure the lane parameters: Routing conditions support the following parameter types:
ImportantTraffic that does not match any canary routing condition is routed to untagged nodes in the base version.
Parameter Description Add Node Tag Add a tag (for example, gray) to identify canary nodes.Enter lane information Set the Lane Tag and use Confirm Matching Relationship to verify the tagged node count. Configure Routing and Canary Release Rules Define routing conditions (see the following table). Parameter type Description Parameter Request parameter Header Request header Cookie HTTP cookie Body Content JSON-formatted request body Click OK.
After configuration, the gateway routes traffic as follows:
Traffic that does not match the canary rules goes to the base version.
Traffic that matches the canary rules goes to the canary version.

Configure the Jenkins pipeline
Step 1: Set up image registry credentials
Create a Kubernetes Secret so Jenkins can push images to your container registry. After generating a config.json file with your registry credentials, run:
kubectl create secret generic jenkins-docker-cfg -n jenkins --from-file=/root/.docker/config.jsonFor details, see Set up Jenkins to build an application delivery pipeline.
Step 2: Create the pipeline
In the Jenkins dashboard, click New Item in the left-side navigation pane.
Enter the pipeline name, select pipeline as the type, and click OK.
On the configuration page, click the Pipeline tab and set the following:
Definition: Select Pipeline script from SCM.
SCM: Select Git.
Repository URL: Enter your Git repository URL. This tutorial uses
https://github.com/aliyun/alibabacloud-microservice-demo/tree/master/mse-simple-demo. > Note: If your Jenkins instance cannot access GitHub, use a Gitee mirror instead.Script Path: Enter
Jenkinsfile.
Click Save.
The Jenkinsfile defines four pipeline stages:
Pipeline stages:
| Stage | What it does | Container |
|---|---|---|
| Code packaging | Builds the application with Maven (mvn clean package). | maven |
| Image building and releasing | Builds and pushes a container image with Kaniko. | kaniko |
| Canary deployment | Updates the gray deployment YAML with the new image tag and applies it. | kubectl |
| Completing canary deployment | Waits for manual input. Enter true to promote or false to roll back. | kubectl |
Pipeline parameters:
| Parameter | Default | Description |
|---|---|---|
image_region | cn-shanghai | Container Registry region. |
image_namespace | yizhan | Container Registry namespace. |
image_reponame | spring-cloud-a | Image repository name. |
image_tag | gray | Image tag for the canary build. |
branch | master | Git branch to build from. |
number_of_pods | 2 | Number of pod replicas. |
Run the pipeline and verify
Step 1: Build the pipeline
On the Jenkins dashboard, click
 next to the pipeline name.
Click Build.
NoteThe first build pulls configuration from the Git repository and initializes the pipeline. If an error occurs, click Build with Parameters, configure the parameters, and rebuild.
Wait for the Code packaging, Image building and releasing, and Canary deployment stages to complete. The pipeline pauses at the Completing canary deployment stage, waiting for your confirmation.
Step 2: Verify the canary deployment
Log on to the ACK console. Navigate to your cluster and choose Workloads > Deployments.
Confirm that the
spring-cloud-a-graydeployment exists and uses thespring-cloud-a:grayimage.Navigate to Network > Services, select your namespace, and click the public endpoint of the zuul-slb service.
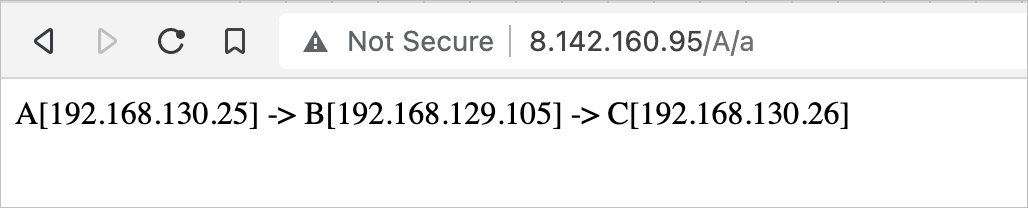
Test traffic routing: Normal traffic (no canary header) -- routed to the base version: Expected output: Canary traffic (with canary tag) -- routed to the canary node: Expected output:
curl http://<zuul-slb-public-endpoint>/A/aA[10.4.XX.XX] -> B[10.4.XX.XX] -> C[10.4.XX.XX]%curl http://<zuul-slb-public-endpoint>/A/a?name=xiaomingAgray[10.4.XX.XX] -> B[10.4.XX.XX] -> C[10.4.XX.XX]%In the MSE console, open the application details page and confirm that canary traffic is routed to the canary node.
Promote to full release
After verification passes, promote the canary to production.
On the Jenkins dashboard, click the pipeline name.
Click the Completing canary deployment stage, enter
truein the Are you sure that you want to enable a full release dialog box, and click OK.In the ACK console, verify that:
The
spring-cloud-a-graydeployment is deleted.The
spring-cloud-adeployment now uses thespring-cloud-a:grayimage.
In the MSE console, confirm that canary traffic no longer appears.
Roll back
If verification fails, roll back to the base version.
On the Jenkins dashboard, click the pipeline name.
Click the Completing canary deployment stage, enter
falsein the Are you sure that you want to enable a full release dialog box, and click OK.In the ACK console, verify that:
The
spring-cloud-a-graydeployment is deleted.The
spring-cloud-adeployment still uses its original image version.
In the MSE console, confirm that canary traffic no longer appears.