ApsaraVideo Media Processing (MPS) provides the automated review feature that is implemented based on large amounts of tagged data and deep learning algorithms. This feature supports content moderation and content quality analysis. Content moderation detects prohibited content including pornography, terroristic content, politically sensitive content, and ads from multiple dimensions such as audio, text, and vision. Content quality analysis reviews the quality of videos. The automated review feature helps reduce the workload of manual reviews and improve the review efficiency and accuracy. This topic describes the automated review feature and how to create a content moderation job.
Overview
Scenarios
Accurate and efficient moderation for user-generated content (UGC): uses intelligent media review technologies to detect prohibited content and identify quality issues in large amounts of UGC. This reduces the workload of manual reviews.
Accurate and real-time content moderation for live streams: detects prohibited content in audio, text, and images of live streams in real time. This helps prevent business risks.
Efficient and accurate content moderation for on-demand videos: detects prohibited content such as terrorism-related and politically sensitive scenes in on-demand videos based on current affairs and politics.
Feature
For more information about the feature, see the "Automated review" section of the Functions and features topic.
For more information about how to experience this feature online, visit the Automated Review page of the Multimedia AI platform.
Limits
The automated review feature is supported only in the Singapore region.
Before you begin
Perform the following operations before you create a content moderation job:
Create an MPS queue for content moderation. If no MPS queue for content moderation is displayed in the MPS console, create and enable an MPS queue for content moderation.
Upload the video to be processed to OSS.
If you want to create a job, directly upload the video to OSS. For more information, see Upload a video.
If you want to create a workflow and automatically trigger the workflow, you must add media buckets and create a workflow before you upload the video. After you specify the input and output media buckets and upload a media file to the input media bucket, MPS receives a message about the upload and triggers the associated workflow. After the workflow is complete, the processed media file is uploaded to the output media bucket. For more information, see Add media buckets.
Optional. Enable the notification feature. If you want MPS to send notifications on jobs and workflows to MNS topics or queues, configure an MNS queue or topic as required. For more information, see Enable the notification feature for MPS jobs or workflows.
Create a content moderation job in the MPS console
Create a content moderation job
Log on to the MPS console.
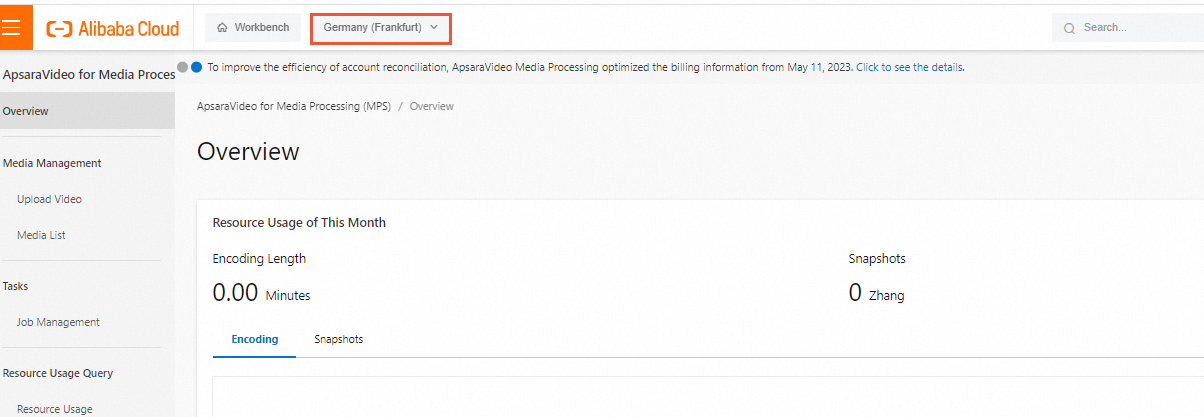
In the top navigation bar, select a region from the drop-down list.

In the left-side navigation pane, choose Tasks > Job Management.
On the Tasks page, click the Content Moderation tab. Then, click Create Task.
On the Create Content Moderation Task page, configure the parameters that are described in the following table.
Parameter
Description
Input File URL
The path of the input file that is stored in an OSS bucket. Click Select next to the Input File URL field. In the Select File dialog box, select an OSS bucket from the Bucket drop-down list. Folders of the OSS bucket that you selected are automatically displayed in the Path section. Select a file from a folder as the input file.
NoteIf no bucket name is displayed in the Bucket drop-down list, add media buckets in the specified region. For more information, see Add media buckets.
If no files are displayed after you select an OSS bucket, go to the OSS console and upload files to the specified bucket.
If an error message appears to inform you that the current Resource Access Management (RAM) role is invalid or you do not have the required permissions, go to the RAM console to grant the RAM user the permissions to access OSS. You can attach the AliyunOSSFullAccess policy to the RAM user to grant the RAM user full permissions on OSS, or you can customize permissions based on your business requirements. For more information, see Create a RAM user and grant permissions to the RAM user.
Content Moderation Pipeline
The MPS queue for content moderation. Select an MPS queue from the Content Moderation Pipeline drop-down list.
NoteIf no MPS queue name is displayed in the drop-down list, create and enable an MPS queue for content moderation. For more information, see Create an MPS queue.
Moderation Type
The types of prohibited content to be detected. By default, Pornography and Terrorism are selected.
Storage Path
The path of the output file to be stored in an OSS bucket. Click Select next to the Storage Path field. In the Select Storage Path dialog box, select an OSS bucket from the Bucket drop-down list. Folders in the OSS bucket that you select are automatically displayed in the Path section. Select a folder as the output path.
NoteIf the output path is the same as the input path, specify an output file name that is different from the input file name. This way, the input file is not overwritten. If the input file and output file share the same name, the relevant OSS settings determine whether the output file overwrites the input file. For information about how to disable file overwriting, see Prevent objects from being overwritten by objects that have the same names. If you disable file overwriting, the transcoded output file that shares the same name as the input file fails to be written to the OSS bucket. We recommend that you do not specify the same name for the input and output files.
For more information, see the description of the Input File URL parameter.
Click Submit. The content moderation job is created and submitted.
After the job is submitted, you can view the status and configurations of the job. You can also click the name of the job to view other information, such as the input and output paths.
Create a content moderation workflow
Log on to the MPS console.
In the top navigation bar, select a region from the drop-down list.

In the left-side navigation pane, choose Workflow > Workflow Orchestration.
Click Create Workflow.
On the page that appears, configure the parameters. The following table describes the parameters.
Parameter
Description
Workflow Name
The name of the workflow.
Configuration Plan
The type of the workflow. Select Custom from the drop-down list.
Configure the Input node.
Click the Pen icon next to the Input node. The Input dialog box appears.
In the Input dialog box, configure the parameters that are described in the following table.
Parameter
Description
Input Path
The path of the output file to be stored in an OSS bucket. Click Select next to the Storage Path field. In the Select Storage Path dialog box, select an OSS bucket from the Bucket drop-down list. Folders in the OSS bucket that you select are automatically displayed in the Path section. Select a folder as the input path.
NoteIf no bucket name is displayed in the Bucket drop-down list, add media buckets in the specified region. For more information, see Add media buckets.
Encoding Pipeline
The MPS queue for content moderation.
NoteThe MPS queue specified for this parameter is used for transcoding and snapshot jobs. You can specify an MPS queue for content moderation when you configure subsequent nodes.
If no MPS queue name is displayed in the Encoding Pipeline drop-down list, create and enable an MPS queue for transcoding and snapshot jobs. For more information, see Create an MPS queue.
Notifications
Optional. Specifies whether to send notifications about the workflow. If you turn on Notifications, configure the Message Type parameter and select a Simple Message Queue (SMQ) queue or topic from the Queue Name or Topic Name drop-down list.
NoteIf no SMQ queue name or topic name is displayed in the drop-down list, create an SMQ queue or topic and enable the notification feature based on the SMQ queue or topic. For more information, see Enable the notification feature for a media workflow.
Click OK. The Input node of the workflow is configured.
Add a Content Moderation node.
Click the Add icon next to the Input node and select Content Moderation.
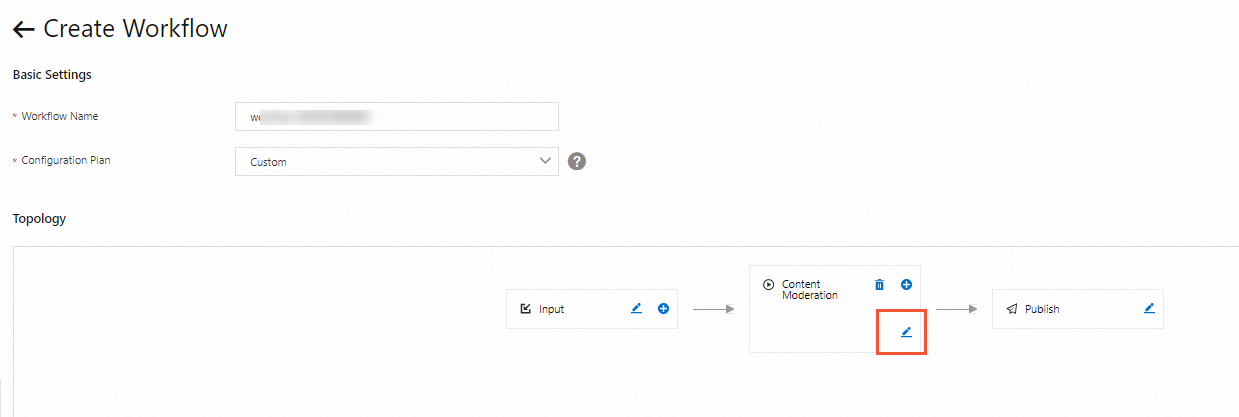
Click the Pen icon next to the Content Moderation node.

In the Content Moderation dialog box, configure the parameters that are described in the following table.
Parameter
Description
Moderation Pipeline
The MPS queue for content moderation.
NoteIf no MPS queue name is displayed in the Moderation Pipeline drop-down list, create and enable an MPS queue for content moderation.
Output Path
The path of the output file to be stored in an OSS bucket. Click Select next to the Output Path field. In the Select Output Path dialog box, select an OSS bucket and then select a folder as the output path.
Workflow Termination
Configure this parameter based on your business requirements.
Click OK. The Content Moderation node is configured.
Configure the Publish node of the workflow.
Click the Pen icon on the right side of the Publish node.
In the Publish dialog box, configure the parameter that is described in the following table.
Parameter
Description
Publish Type
The way in which the output file is published. Select Auto. Valid values:
Manual: The output file is unpublished after the workflow is run. You need to manually publish the output file. For more information, see Manage media files.
Auto: The output file is automatically published after the workflow is run.
NoteIf this parameter is set to Auto, the access permissions on all resources related to the output video, including playback files and captured video images, are the same as those on the OSS bucket in which the output video resides.
If this parameter is set to Manual, all these resources can be accessed only by the current user.
Click OK. The Publish node is configured.
Click Save.
If a file is uploaded to the path specified by the Input Path parameter after the workflow is created, the workflow is triggered.
Create a content moderation job by calling an API operation

Submit a content moderation job.
You can specify the URLs of videos, images, or audio files stored in an OSS bucket or the URLs of videos stored in a third-party service in the request when you call the SubmitMediaCensorJob operation to submit a content moderation job. For more information, see SubmitMediaCensorJob.
Receive a callback notification.
If the notification feature is enabled for the content moderation job, you can receive a notification in the specified Simple Message Queue (formerly MNS) queue or topic after the content moderation job is complete. For more information, see Receive notifications.
Query the results of the content moderation job.
You can call the QueryMediaCensorJobDetail operation to query the status and results of the content moderation job by job ID. For more information, see QueryMediaCensorJobDetail.