In some common scenarios, you can use the official public layers provided by Function Compute to reduce the sizes of your code packages. Compared with custom layers, official public layers of Function Compute are easier to use. Standard runtimes and common dependency packages are preset for various programming languages. You do not need to worry about configurations of the underlying environment. You can directly select an applicable public layer and bind it to a function. This topic provides examples on how to use official public layers.
Usage notes
To view the latest versions of and the instructions for using official common layers, see awesome-layers.
Example 1: Capture web page screenshots based on Node.js 16 and Puppeteer
Puppeteer can control Chrome (or Chromium) to implement various automated processes, such as web page screenshot capturing, PDF generation, automatic form submission, automated UI testing, and keyboard input simulation. Basically, Puppeteer implements a headless Chrome browser based on Node.js.
In this example, Puppeteer is used to implement a sample program to capture screenshots of web pages.
Create an event function.
On the Create Function page, configure the following parameters and use the default values for other parameters. For more information, see Create an event function.
Select Event Function as the function type.
Runtime: Select Node.js 16 from the drop-down list.
Set Memory Capacity to 1024 MB.
Edit the function code. On the function details page, click the Code tab, edit the function code in the index.js file, and then click Deploy.
The following sample code shows an example:
const fs = require('fs');
const puppeteer = require('puppeteer');

function autoScroll(page) {
  return page.evaluate(() => {
      return new Promise((resolve, reject) => {
          var totalHeight = 0;
          var distance = 100;
          var timer = setInterval(() => {
              var scrollHeight = document.body.scrollHeight;
              window.scrollBy(0, distance);
              totalHeight += distance;
              if (totalHeight >= scrollHeight) {
                  clearInterval(timer);
                  resolve();
              }
          }, 100);
      })
  });
}

exports.handler = async (event, context, callback) => {
  console.log('Node version is: ' + process.version);

  try {
    const browser = await puppeteer.launch({
        headless: true,
        args: [
            '--disable-gpu',
            '--disable-dev-shm-usage',
            '--disable-setuid-sandbox',
            '--no-first-run',
            '--no-zygote',
            '--no-sandbox'
        ]
    });

    let url = 'https://www.serverless-devs.com';
    if (event.queryStringParameters && event.queryStringParameters.url) {
        url = event.queryStringParameters.url;
    }
    if (!url.startsWith('https://') && !url.startsWith('http://')) {
        url = 'http://' + url;
    }

    const page = await browser.newPage();
    await page.emulateTimezone('Asia/Shanghai');
    await page.goto(url, { waitUntil: 'networkidle2' });
    await page.setViewport({ width: 1200, height: 800 });
    await autoScroll(page);

    let path = '/tmp/example';
    let contentType = 'image/png';
    await page.screenshot({ path: path, fullPage: true, type: 'png' });

    await browser.close();

    const screenshot = fs.readFileSync(path);

    const response = {
        statusCode: 200,
        headers: {
            'Content-Type': contentType
        },
        body: screenshot.toString('base64'),
        isBase64Encoded: true
    };

    callback(null, response);
} catch (err) {
    const errorResponse = {
        statusCode: 500,
        headers: {
            'Content-Type': 'text/plain'
        },
        body: err.message
    };
    callback(null, errorResponse);
  }
};
Description:
Parse the query parameter to obtain the URL of the snapshot. If the parsing fails, the Serverless Devs homepage is automatically used.
Use Puppeteer to take a screenshot of the web page. Save the screenshot to the /tmp/example folder of the running instance, and then return the path as the return body of the HTTP request.
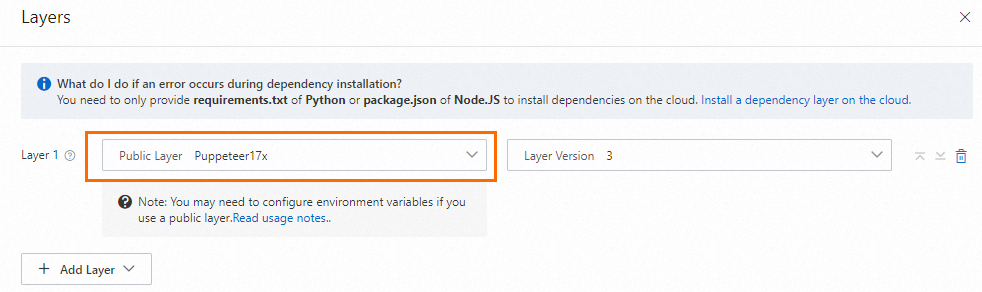
Configure the Puppeteer public layer for the function.
For more information, see Configure common layers in the Function Compute console. Select the Puppeteer17x official public layer.
Create an HTTP trigger. In the Configurations column of the trigger, view and copy the value of Public Endpoint. Then, paste the endpoint in a browser to perform tests.
For more information about how to create an HTTP trigger, see Create a trigger.
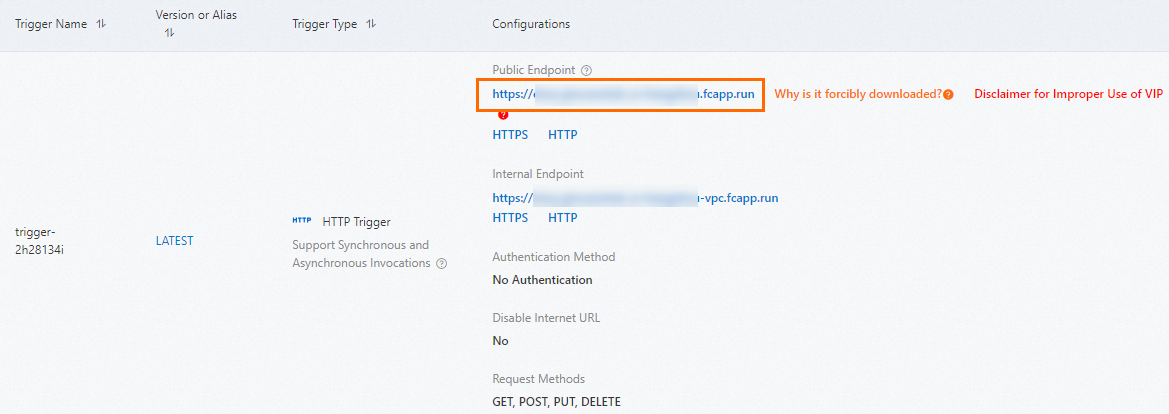
After the test, a screenshot (in PNG format) of the Serverless Devs web page is captured and automatically downloaded to your on-premises machine.
Example 2: Implement a .NET 6 custom runtime based on public layers
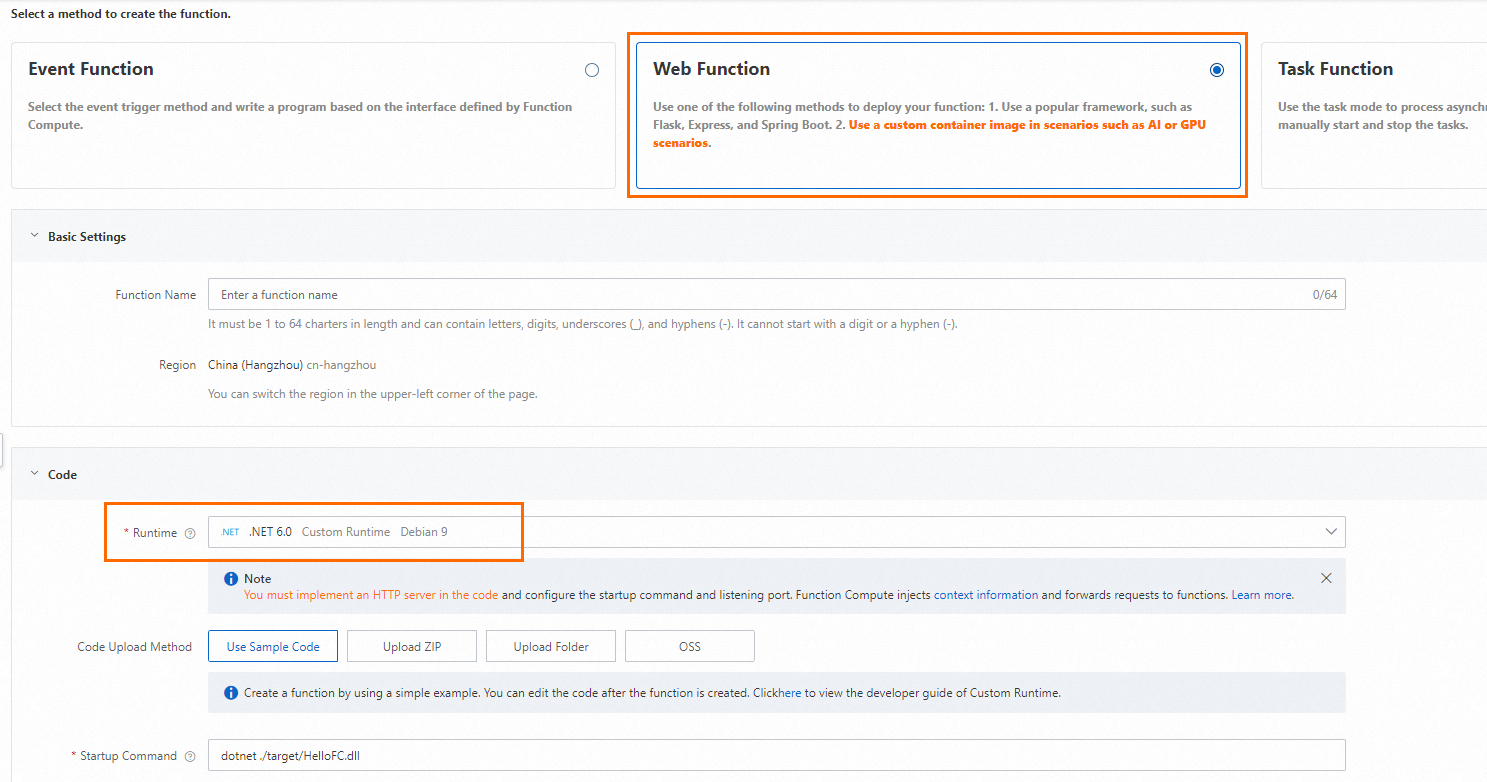
Create a web function.
On the Create Function page, configure the parameters as shown in the following figure. Retain the default values for other parameters. For more information, see Create a web function.
After the function is created, you can view the Program.cs sample code on WebIDE. Description:

①: This function listens on the
0.0.0.09000 port. Services that are started by the custom runtime must listen on0.0.0.0:CAPortor*:CAPort, but cannot listen on127.0.0.1orlocalhost. For more information, see Principles.②: Add a route / and directly return the string
"Hello World! ".③: Add the /invoke route that uses the path of an event handler. For more information, see Web functions.
④: Add the /initialize route, which is the path that corresponds to the Initializer hook of the function. The Initializer hook is executed once during the initialization of the sample program. For more information, see Lifecycle hooks for function instances.
Test the function.
In the Configurations column of the trigger, view and copy the value of Public Endpoint. Then, paste the endpoint in a browser to perform tests. In this case, no path information is added.
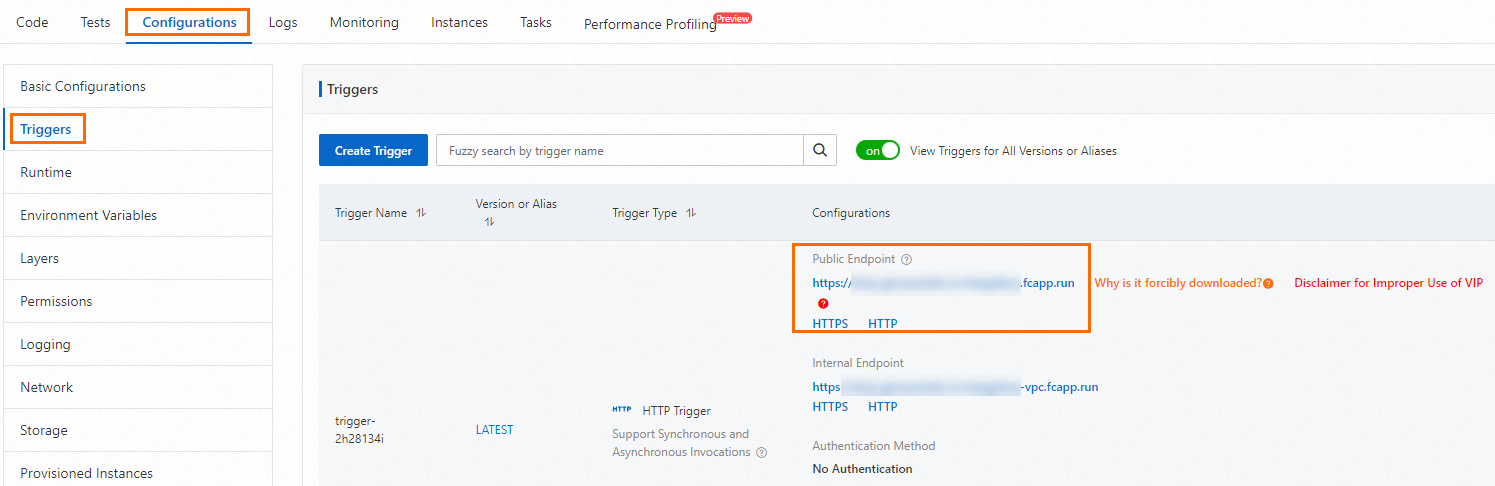
After the execution is complete, the attachment is automatically downloaded to your on-premises machine
Use curl to add a
/invokeor/initializepath to the public endpoint obtained in the previous step. The routing method is POST. You can run the curl -XPOST command to perform a test.The following figure shows the execution result.
