To integrate ZOLOZ with your application, use the phased approach described below to get prepared, implement the integration solution and test the product.

Figure 1. Integration flow
As Figure 1 shows, 3 phases are involved in the ZOLOZ integration:
Prepare
To get prepared for implementing the integration, perform the following actions:
1. Plan your integration
Before you take any real actions, make a plan of your integration process:
a. find out the corresponding service endpoints to be accessed.
The service endpoints that you need to access, including the ZOLOZ portal and base API URI, are different. To find out more information about the environment and its related service endpoints, see Understand service endpoints.
b. Choose the integration mode as required.
ZOLOZ provides different integration modes for you to integrate with different ZOLOZ products. Currently 3 kinds of integration modes are supported:
Native App SDK mode: use this mode if you wish to integrate ZOLOZ services with your native mobile application(iOS/Android).
Mobile Web HTML5(H5) mode: use this mode if you wish to integrate ZOLOZ services with mobile web (H5) application or interact via a modern mobile web browser.
Pure API mode: use this mode if you wish to integrate ZOLOZ services with your server-side applications via API.
For more information about each integration mode and the supported products, refer to Understand integration modes.
2. Set up your ZOLOZ portal account
a. administrator account: The ZOLOZ administrator account is redirected from the Alibaba Cloud account to the ZOLOZ console. Here are two specific ways:
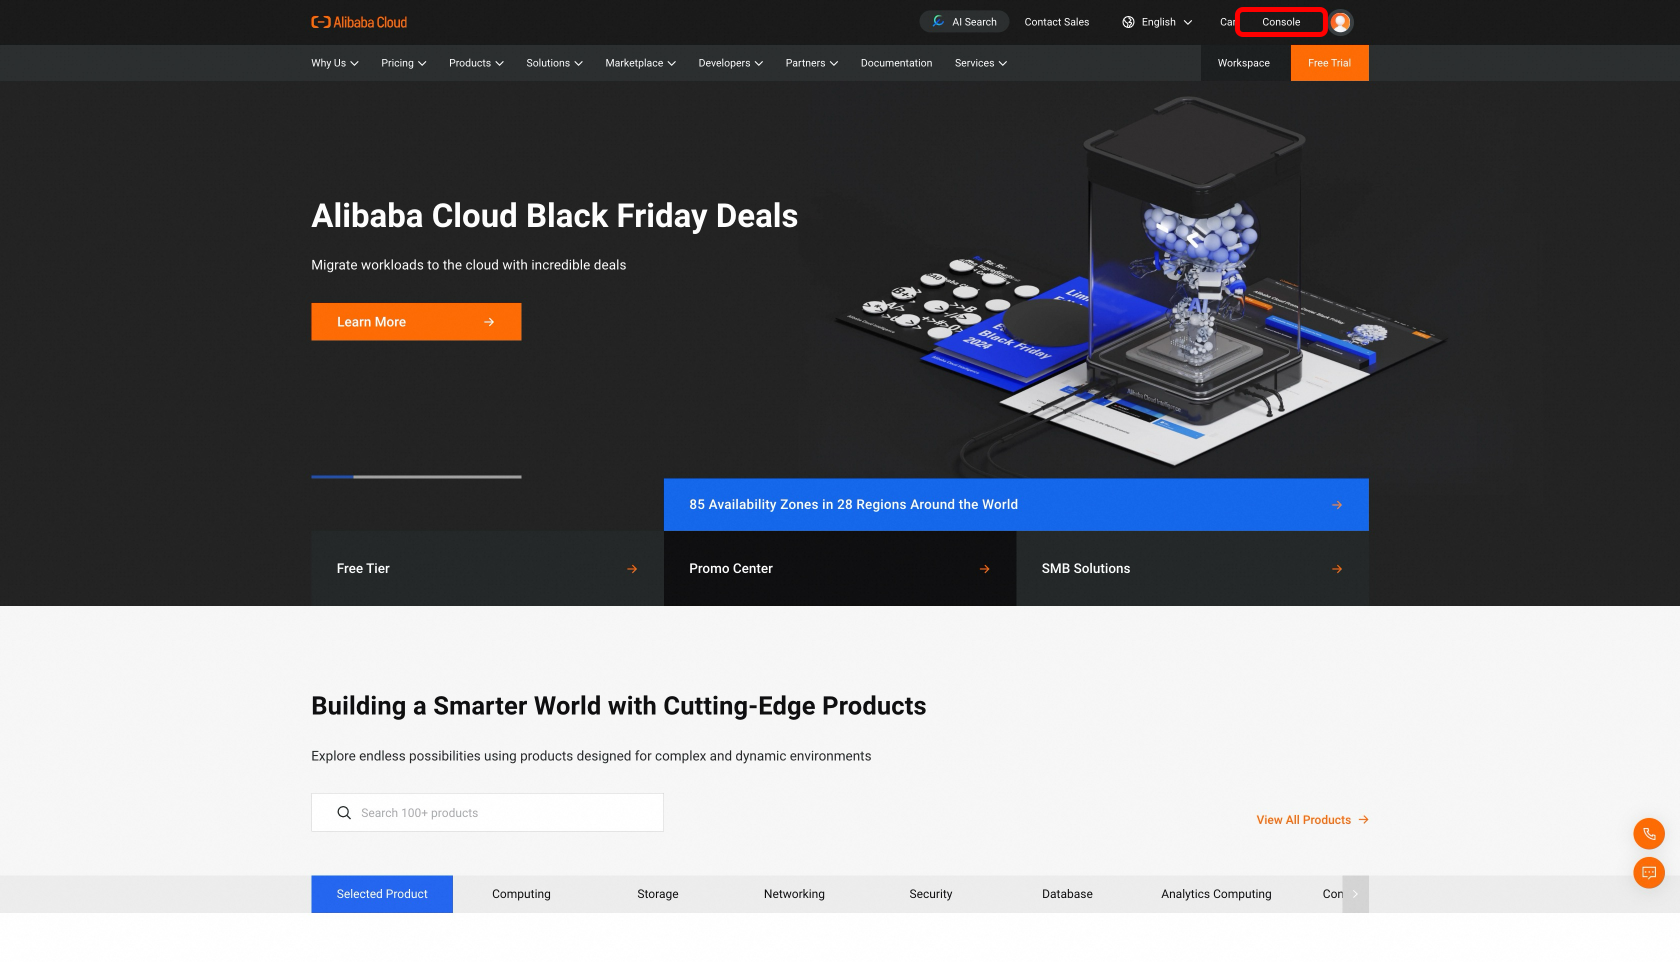
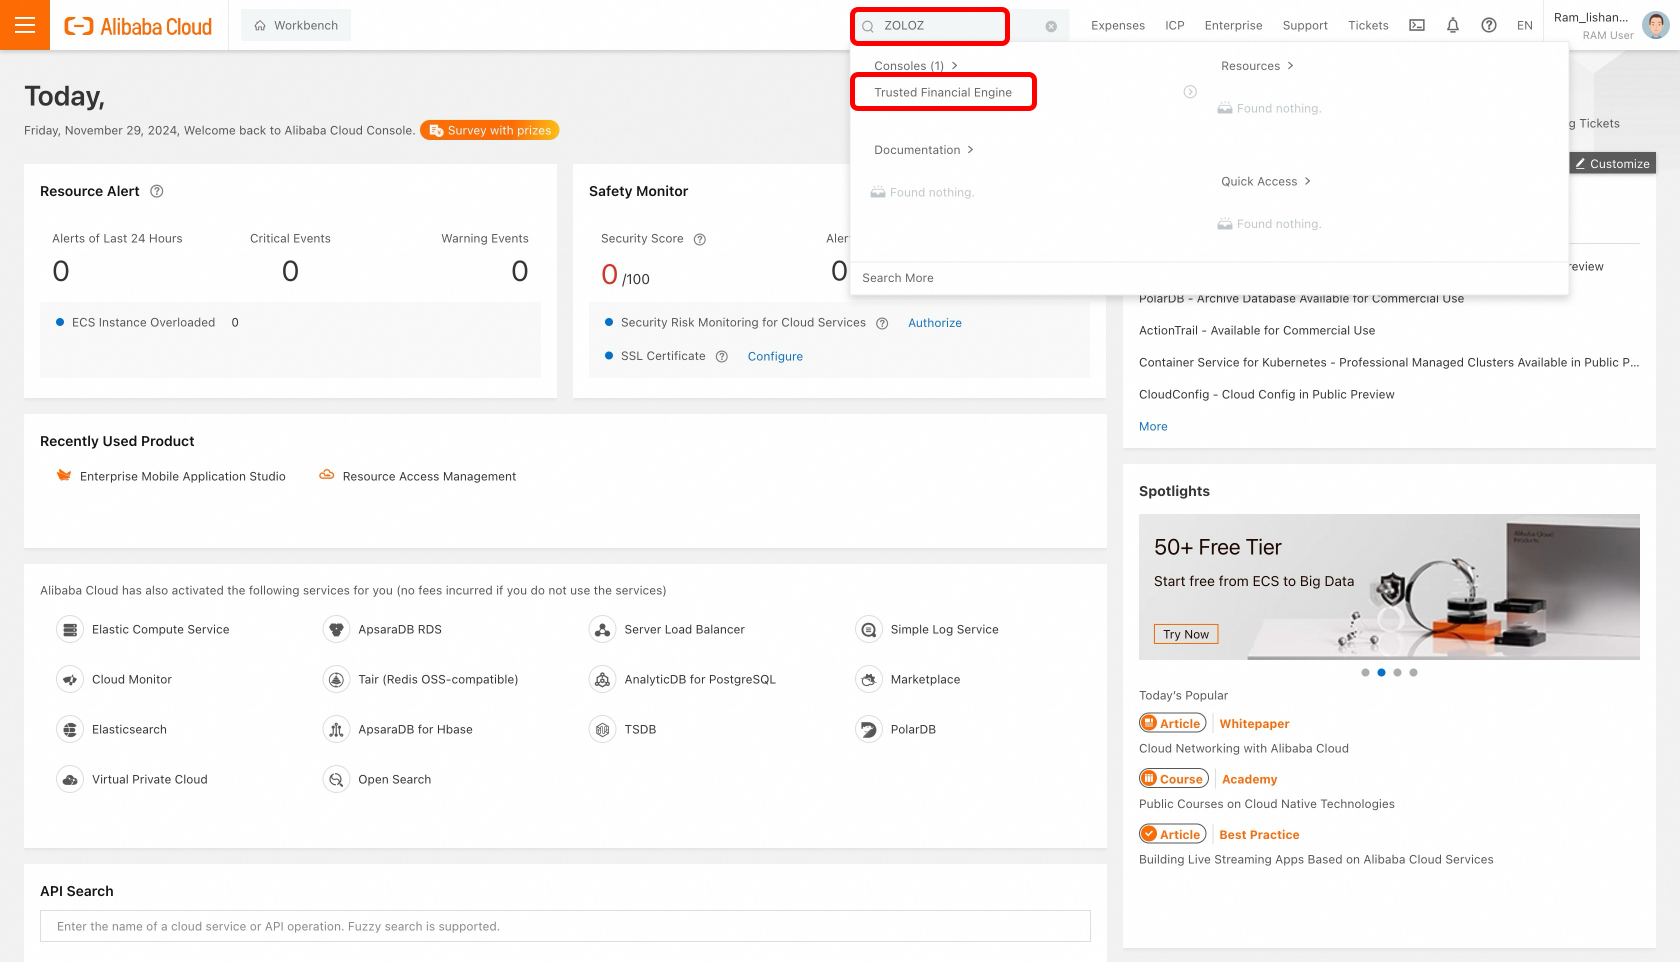
Method 1: Open Alibaba Cloud and log in with your Alibaba Cloud account. Find the "Console" button at the top of the page and click to enter the console page. In the search box at the upper end of the console page, enter ZOLOZ and select Trusted Financial Engine to log in to the ZOLOZ console.
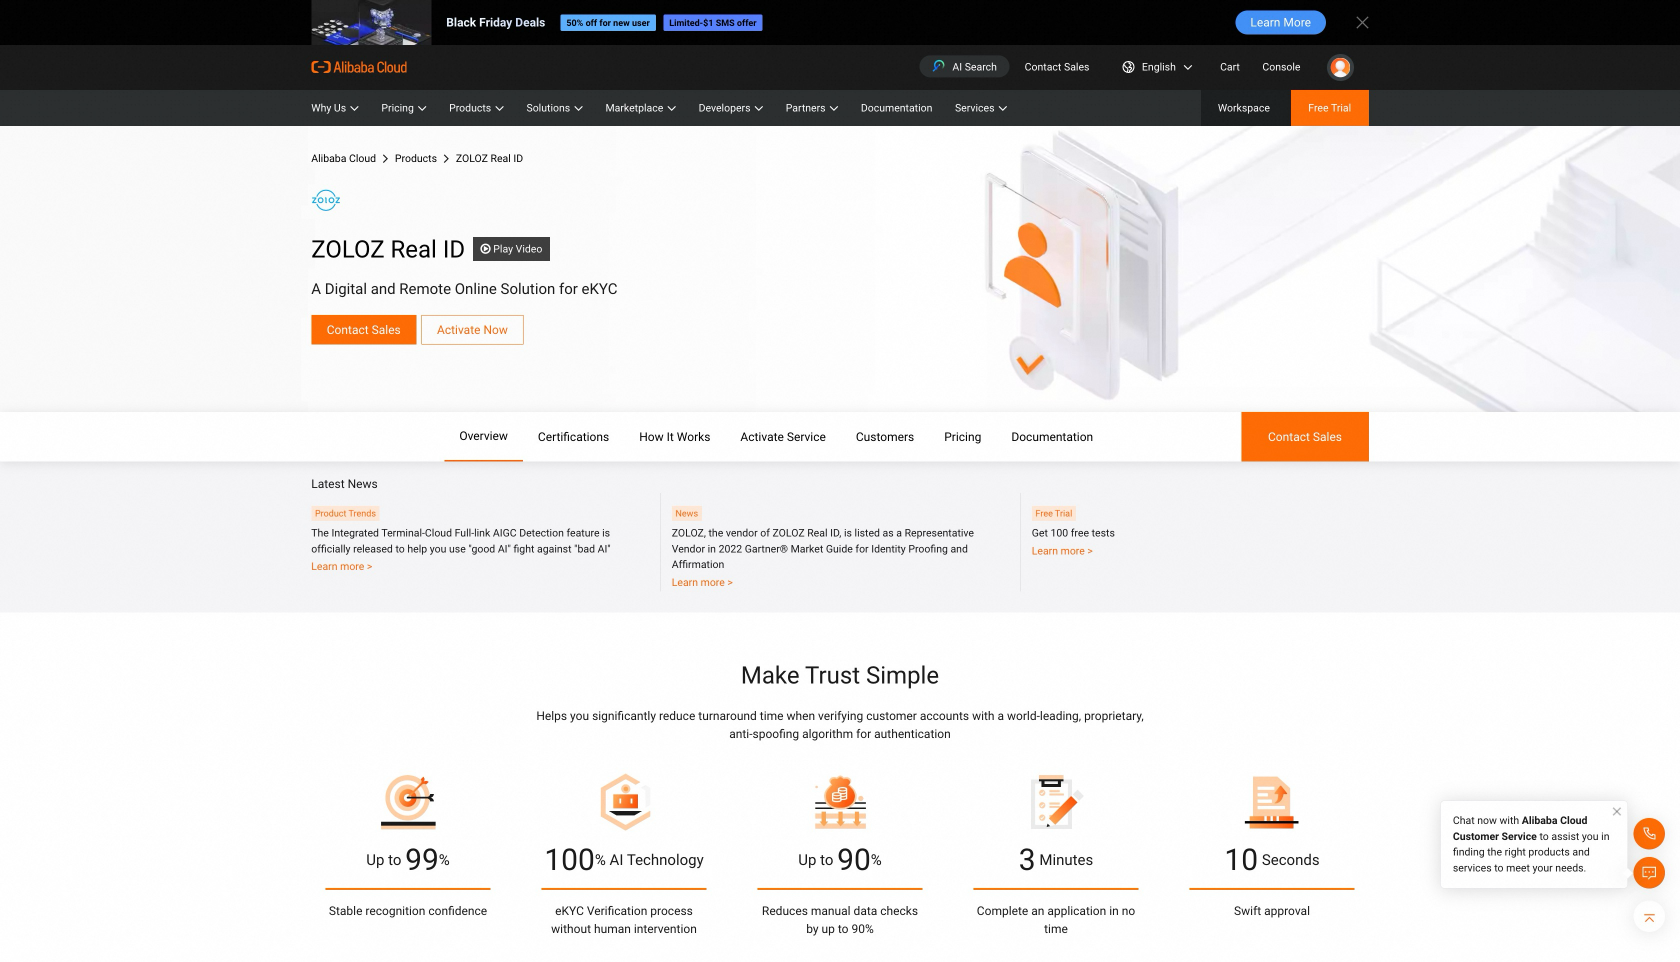
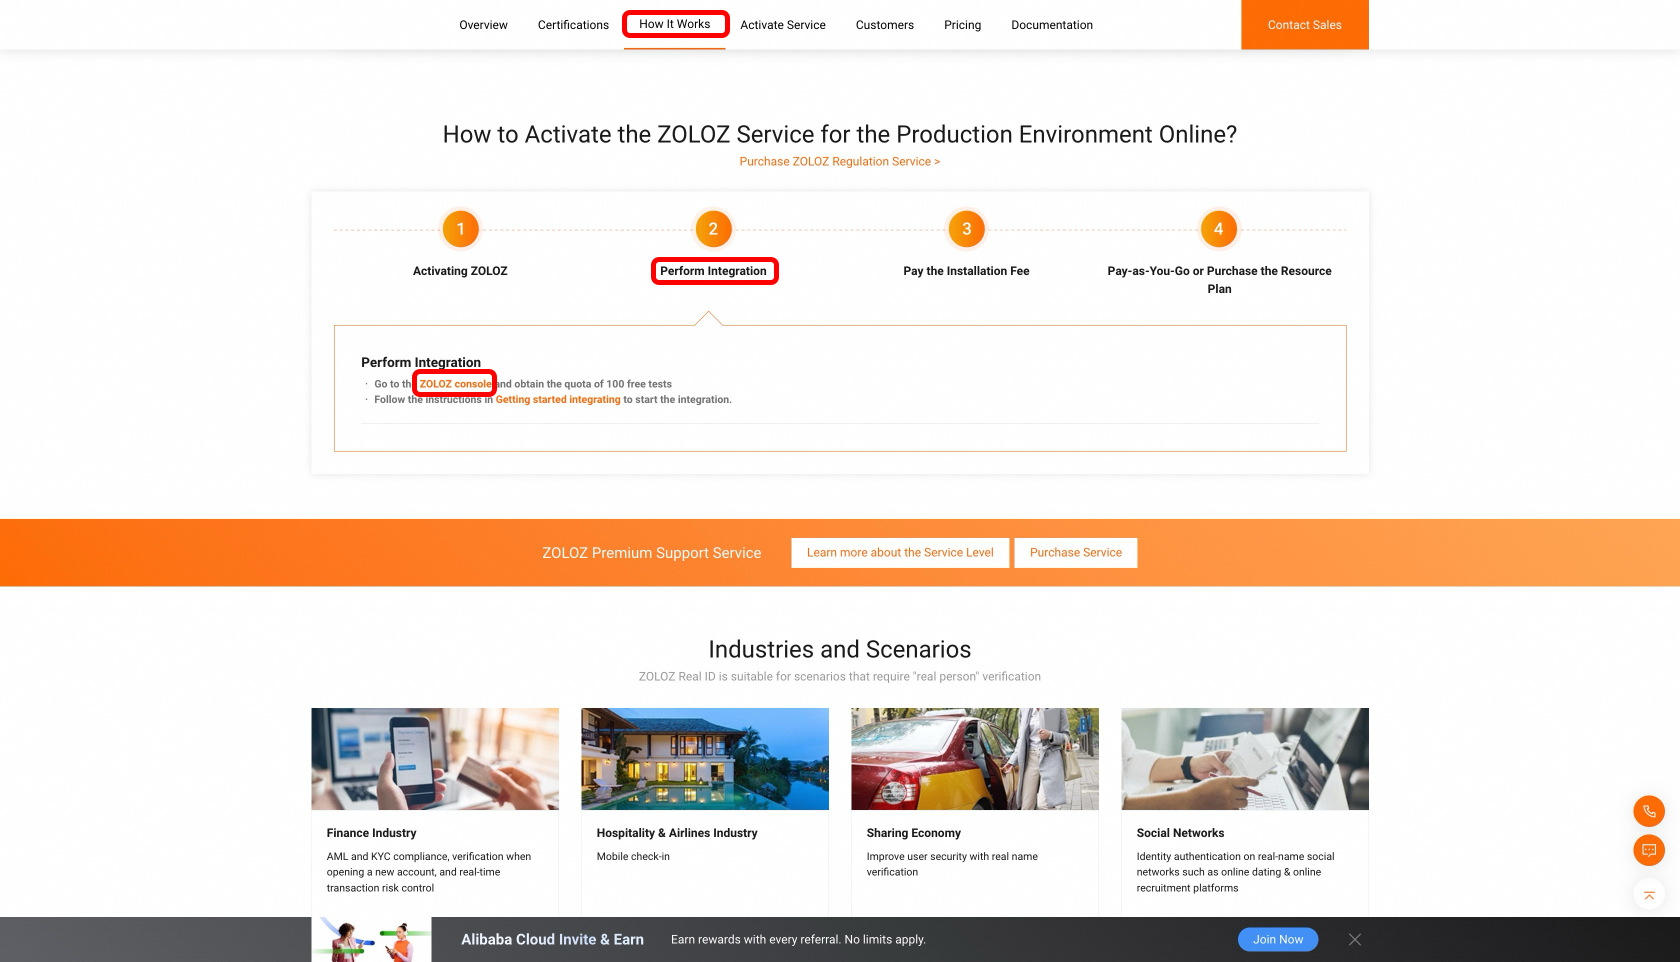
Method 2: In the Alibaba Cloud account login state, open the ZOLOZ Real ID product page. Find "Open online - Start docking" and click on "ZOLOZ Console".
The administrator account cannot modify the password in the ZOLOZ console. (If you want to change your password, check the FAQ) User path: first enter the Console, and after activating the corresponding product, and click ZOLOZ Portal, then you can log in to the ZOLOZ console.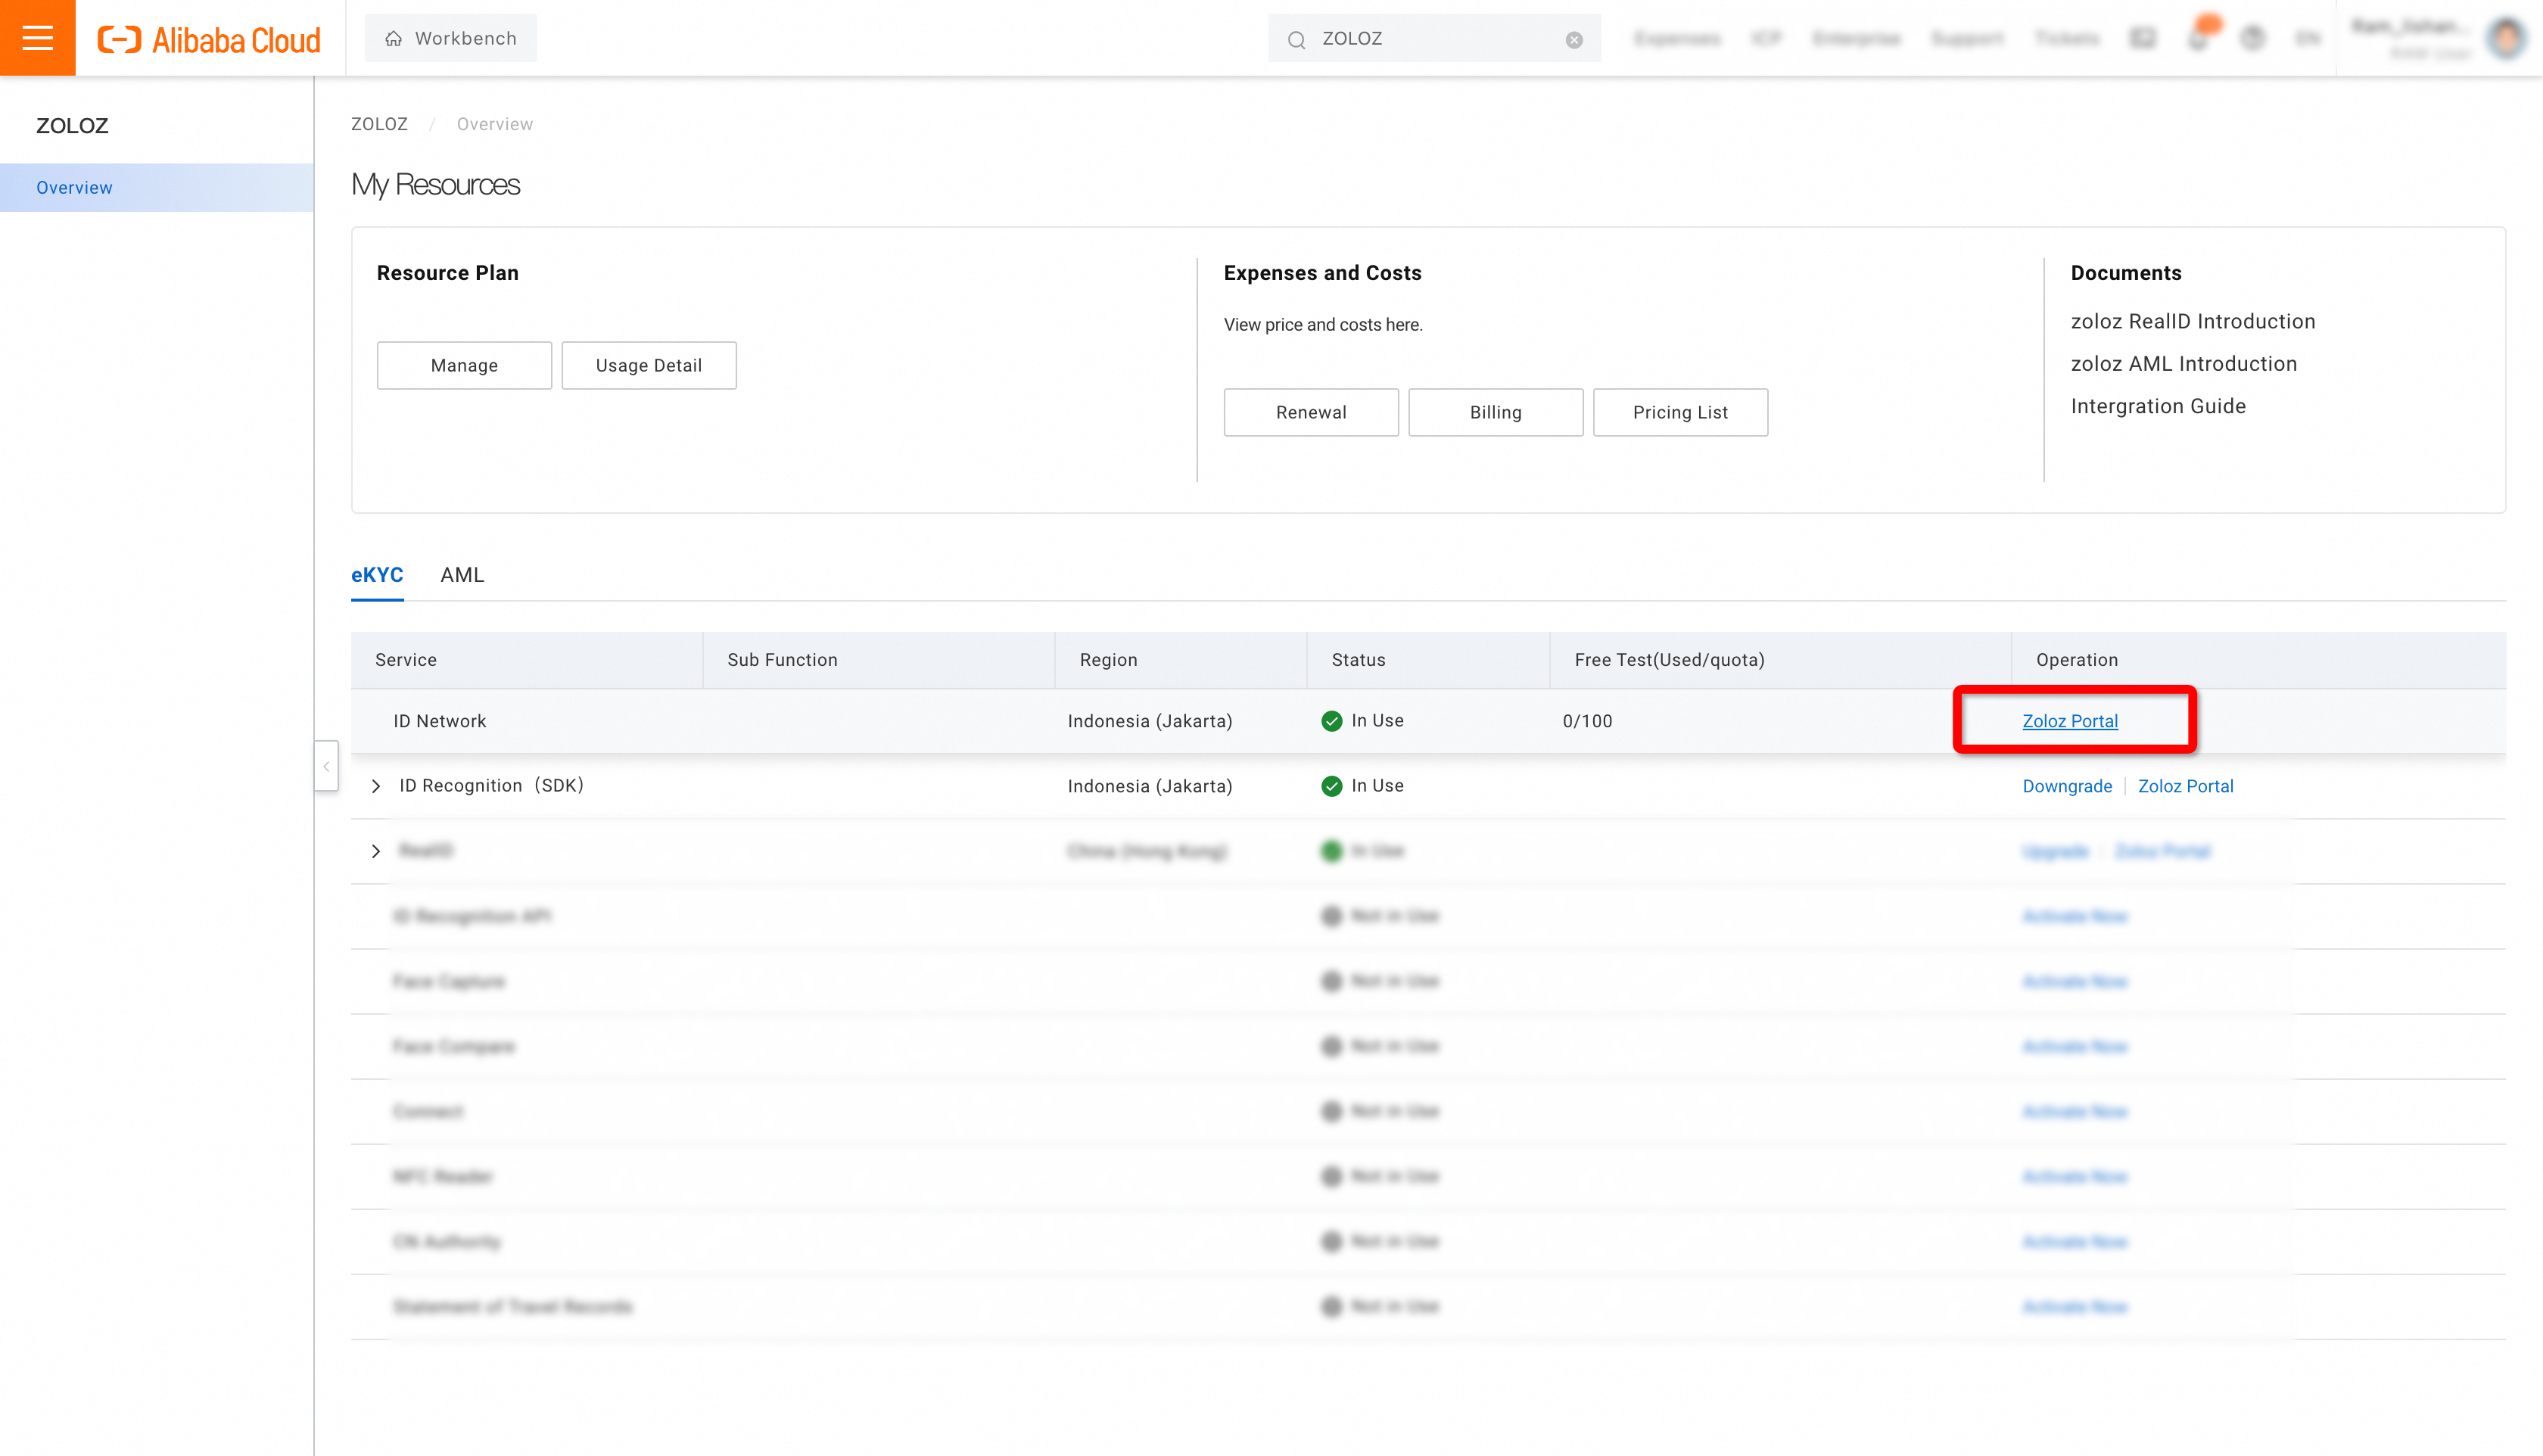
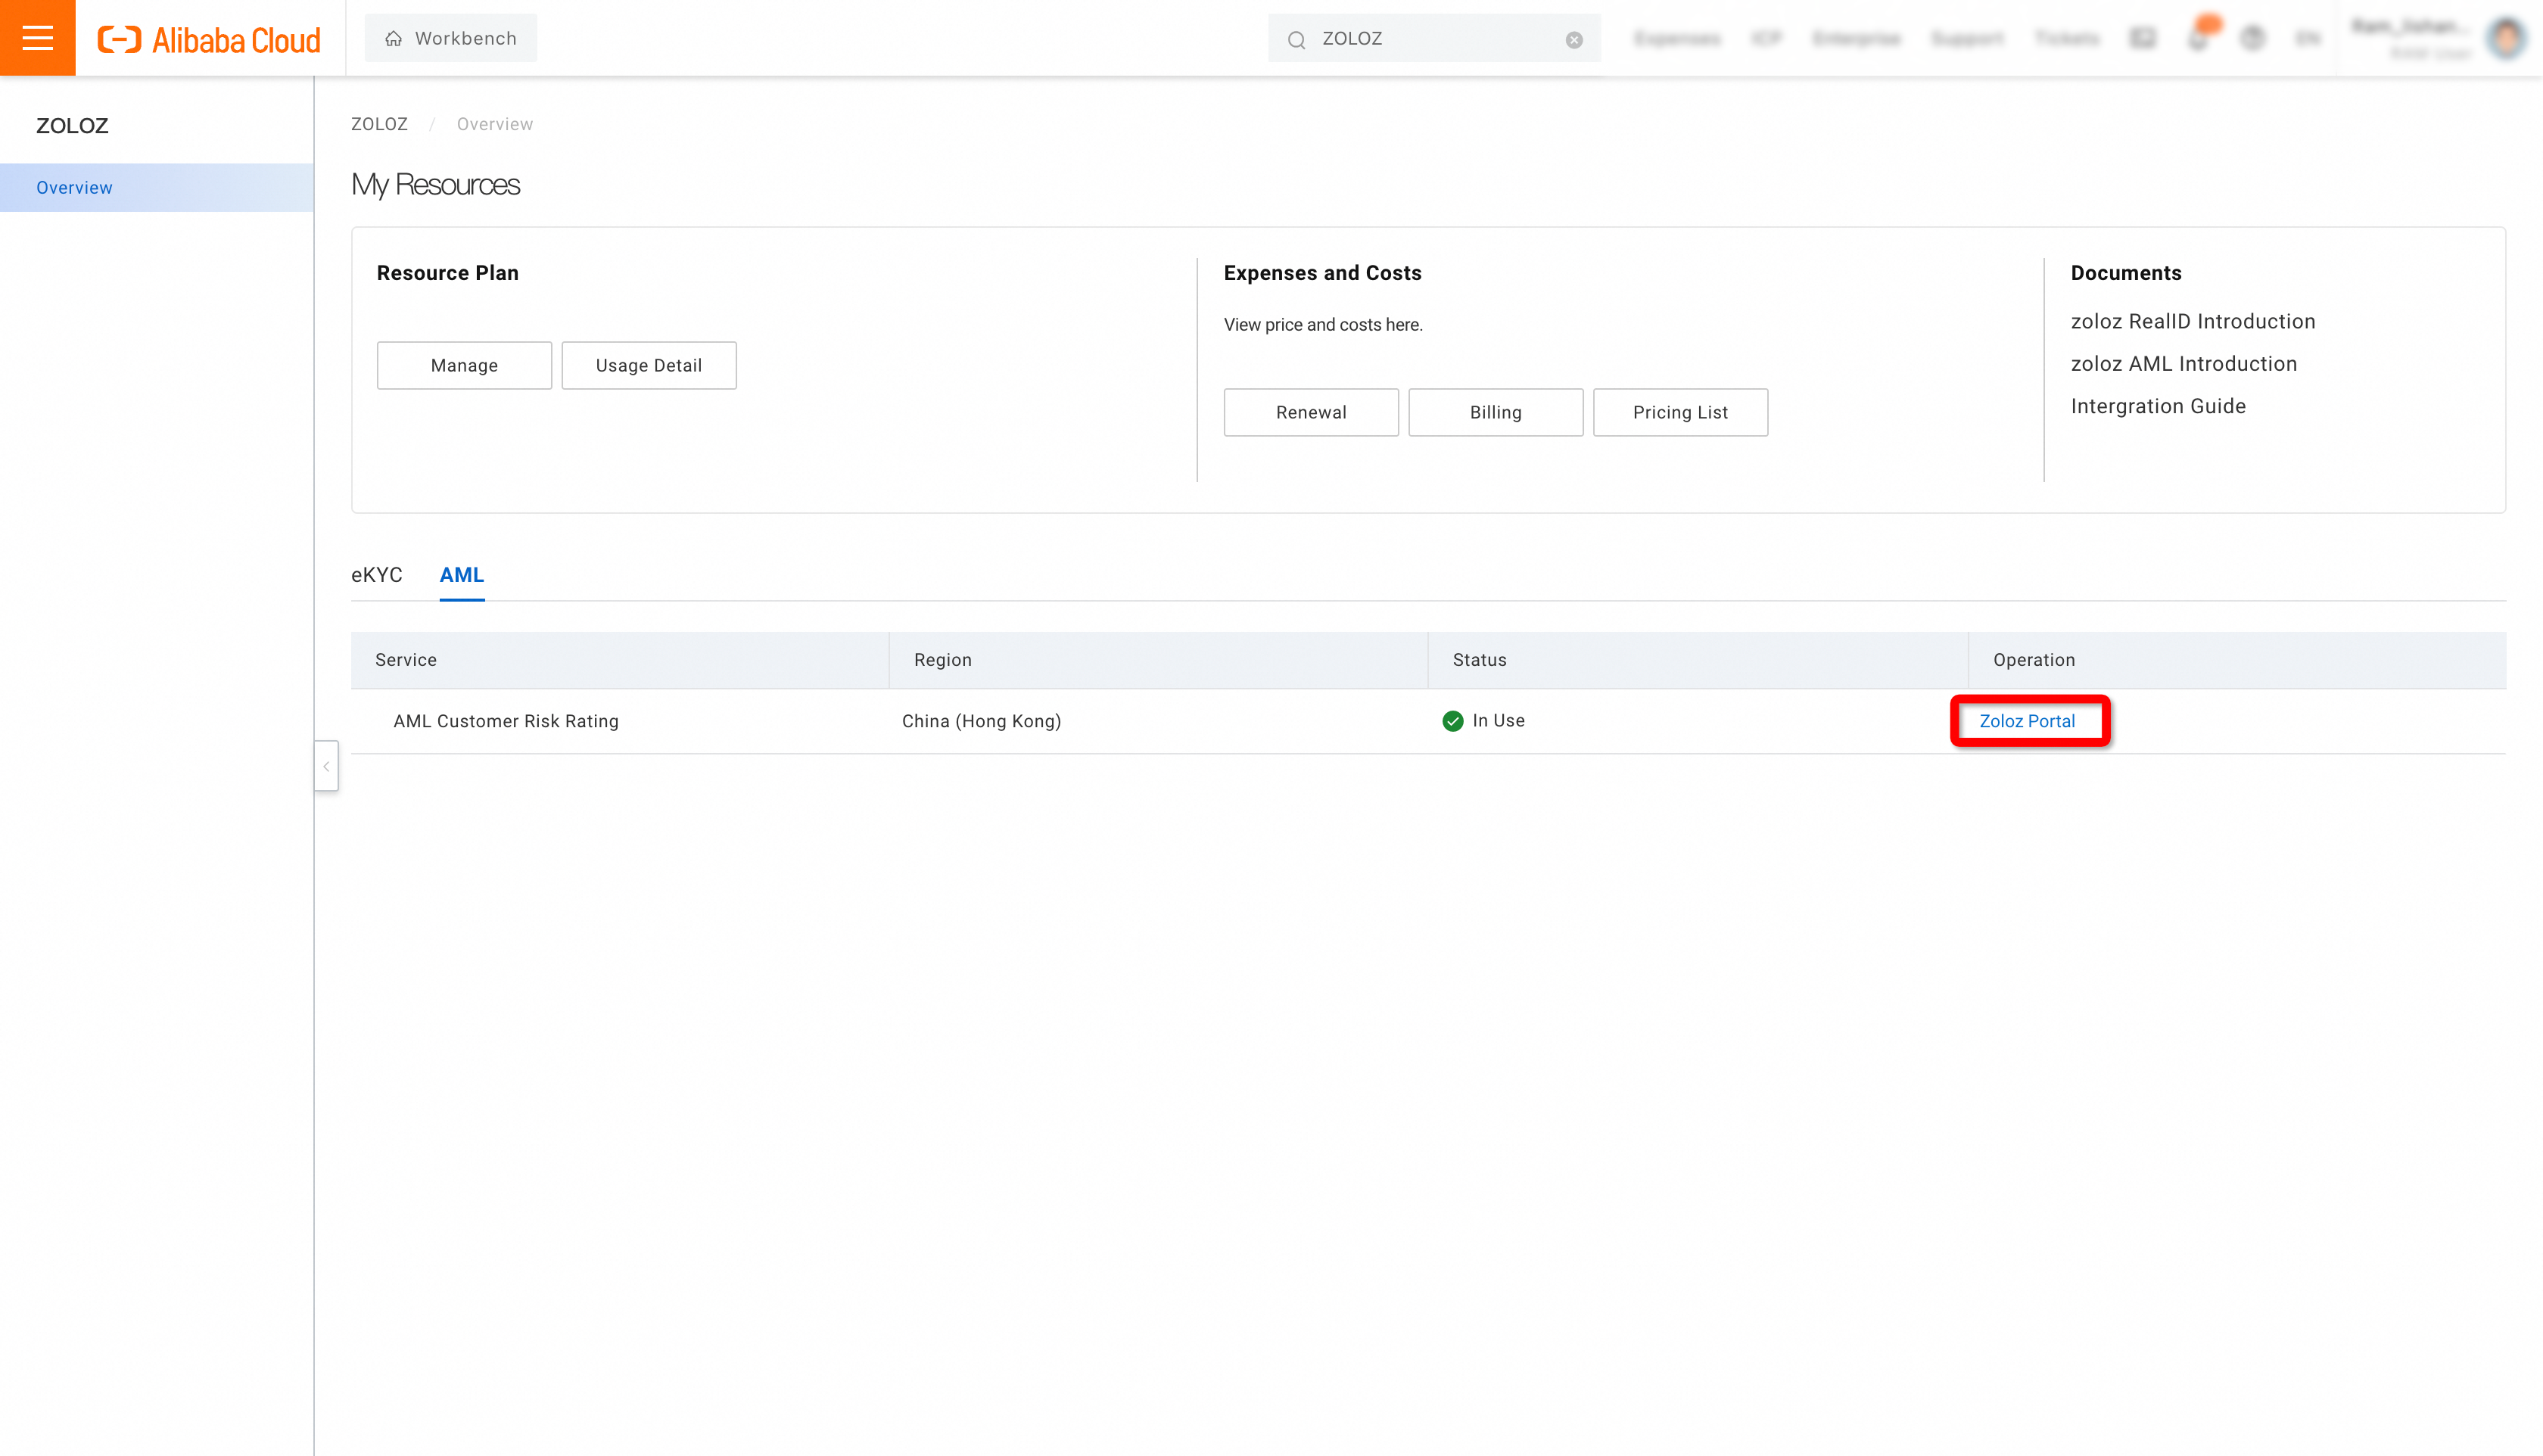
b. Sub-account settings
After logging in with the Alibaba Cloud main account and jumping to the ZOLOZ console, you can set sub-accounts in the console. Sub-accounts can be logged in directly on the ZOLOZ console without logging in from Alibaba Cloud.
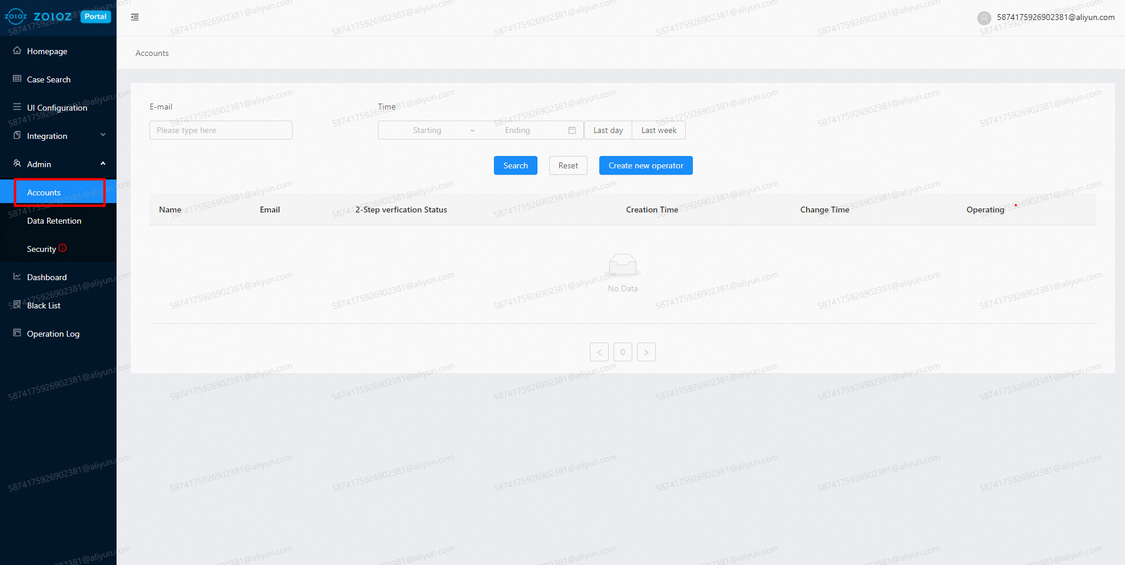
3. Get API credentials ready
To ensure the message transmission security between your business and the ZOLOZ service, you need to get the following API credentials ready so that they can be used in the succeeding gateway integration:
Client ID: the unique identifier of your account, which is used to trace your transaction. It is generated when your account is created and can be obtained from the ZOLOZ portal.
ZOLOZ transaction public key: the public key that you can use to encrypt your request or validate the signature of the response returned from ZOLOZ. It is generated when your account is created and guaranteed to be unique. You can obtain it from the ZOLOZ portal.
Your transaction key pair: the key pair that is provided by you. Your public key must be registered in the ZOLOZ system so that the ZOLOZ service can use the key to validate the signature of your request or encrypt the response returned to you. You can use the ZOLOZ portal to automatically generate a key pair for convenience, or generate it by yourself.
For more information about how to get the API credentials ready, see Get API credentials ready for use.
4. Integrate the ZOLOZ gateway
To integrate with the ZOLOZ API, you must firstly integrate the ZOLOZ gateway so that API requests and responses can be transmitted and handled correctly. For more information about how to integrate the ZOLOZ gateway, see Interact with the ZOLOZ gateway
Integration
For different integration modes, the integration solution is different. The pure API-mode integration only focuses on the server-side integration with the ZOLOZ APIs, while the App SDK-mode integration and mobile web (H5)-mode integration involves both the server-side and client/mobile web-side integration.
Follow the related integration guide below as you require:
Test
Once you complete the integration, you can test your product to verify whether the integration is successful.
After connecting, please ensure to purchase the setup fee before your free trial quota is exhausted. For specific steps on how to do this, please refer to How to purchase the setup fee
FAQ
How do you modify the password for an administrator account?
Open the Alibaba Cloud official website and log in to your account. Move your mouse to the user avatar at the top right corner of the page. In the pop-up menu, click “Account Management”.
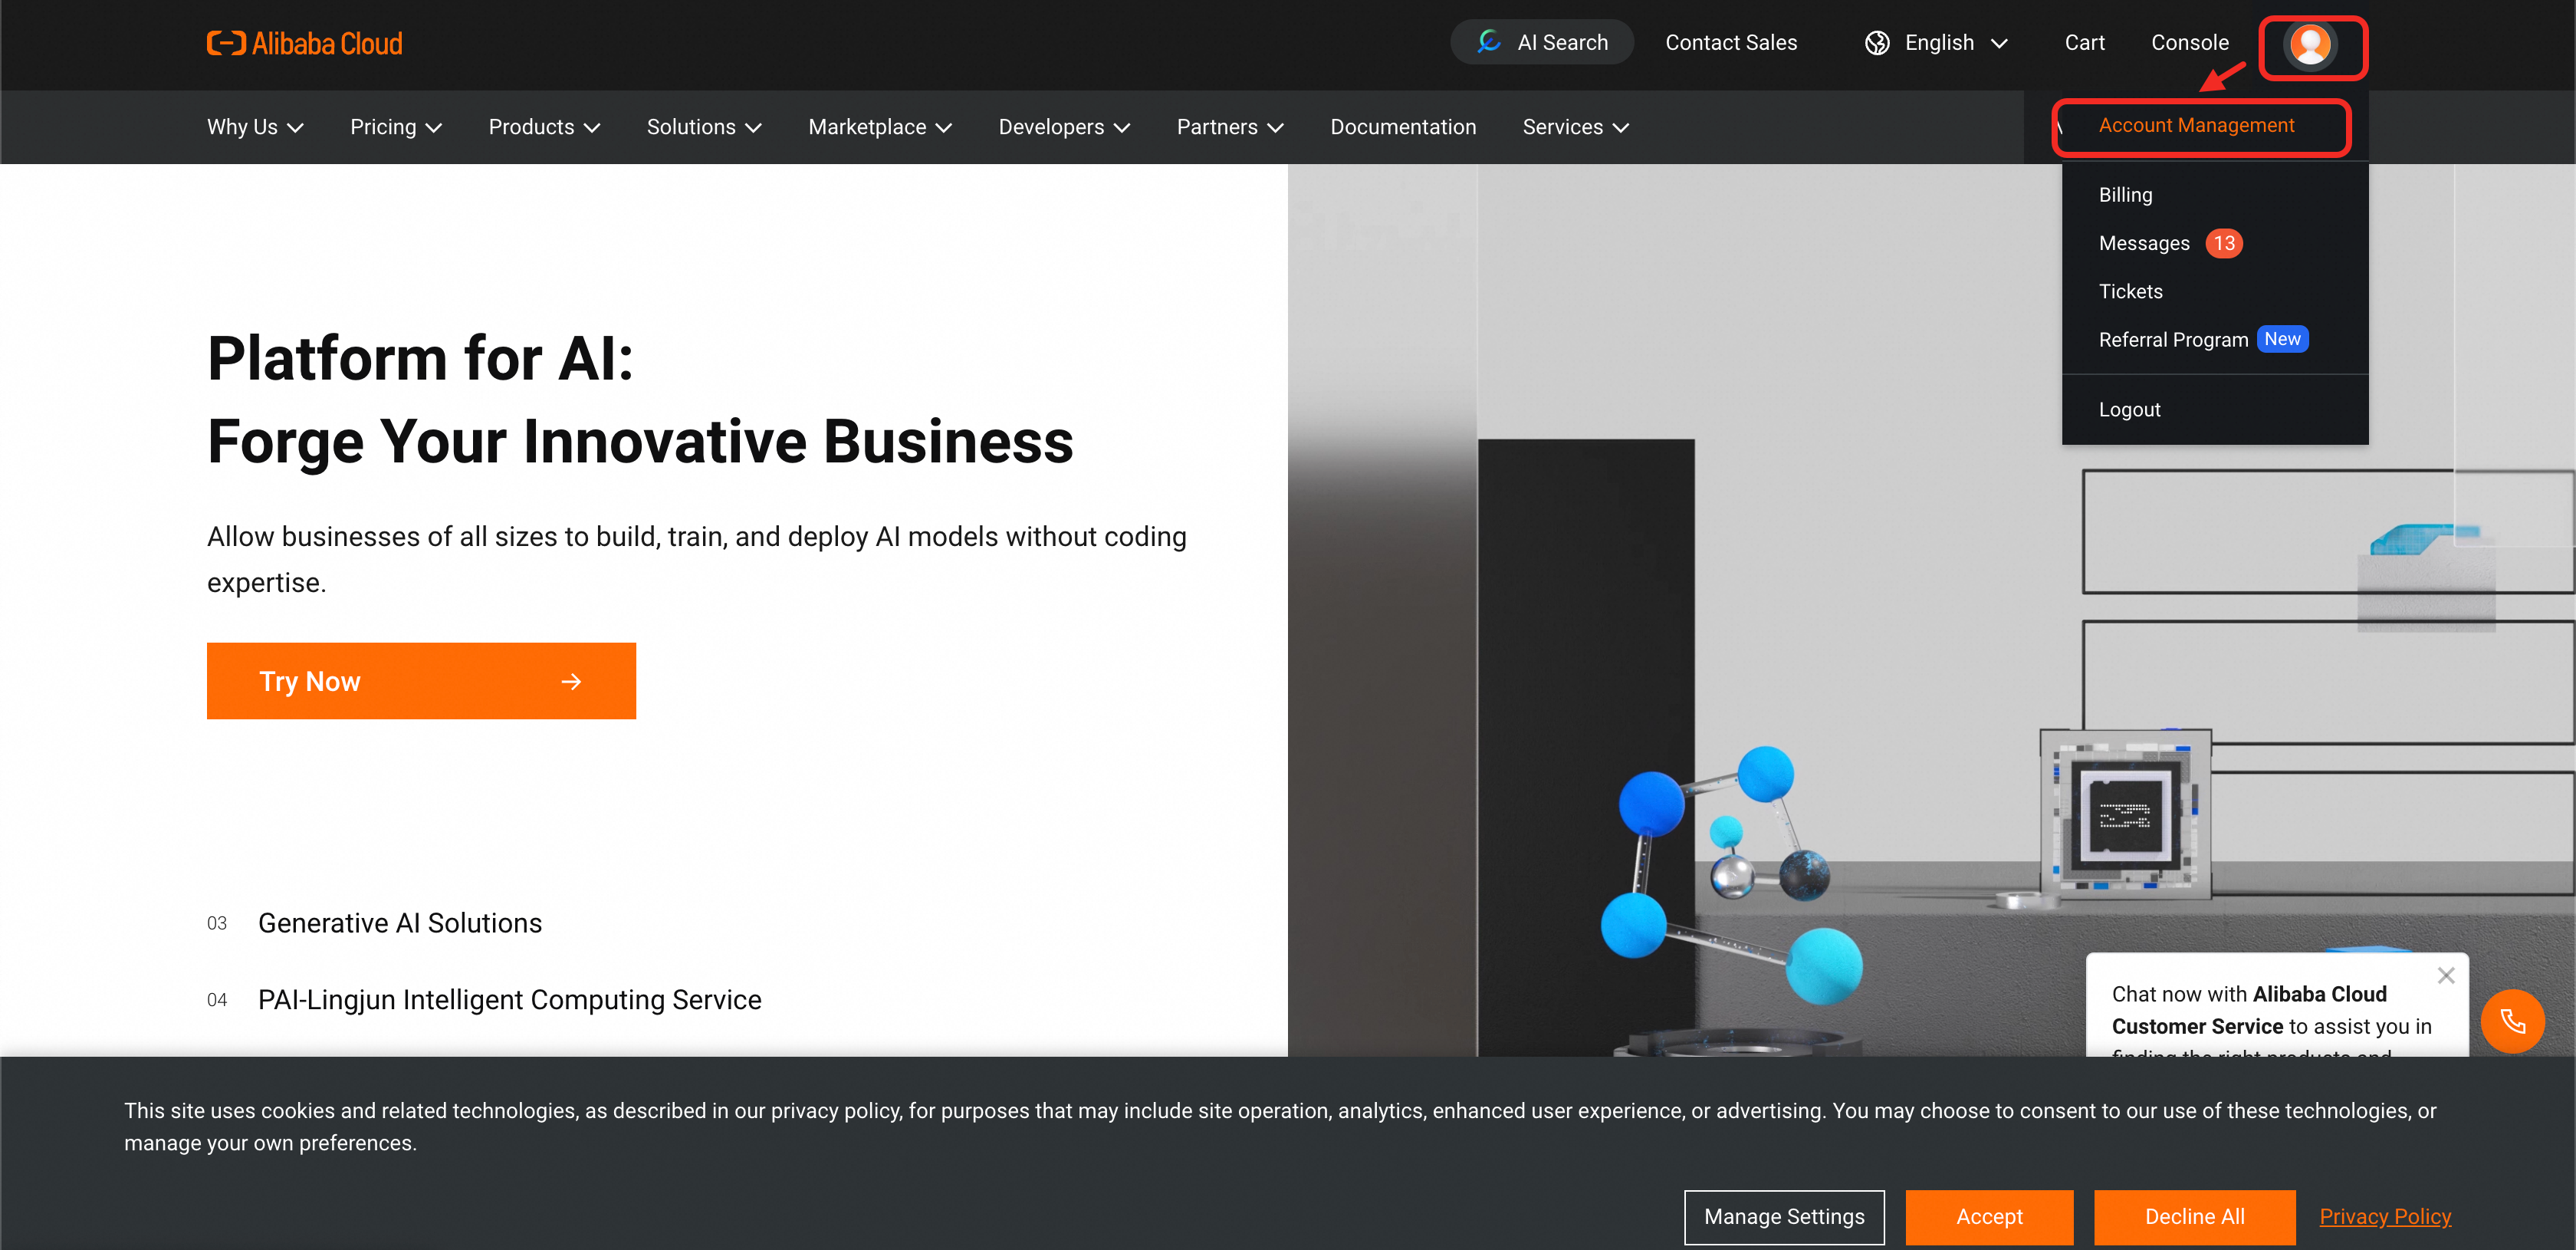
In the Account Management page, find “Login Password” and click the “Change” button.
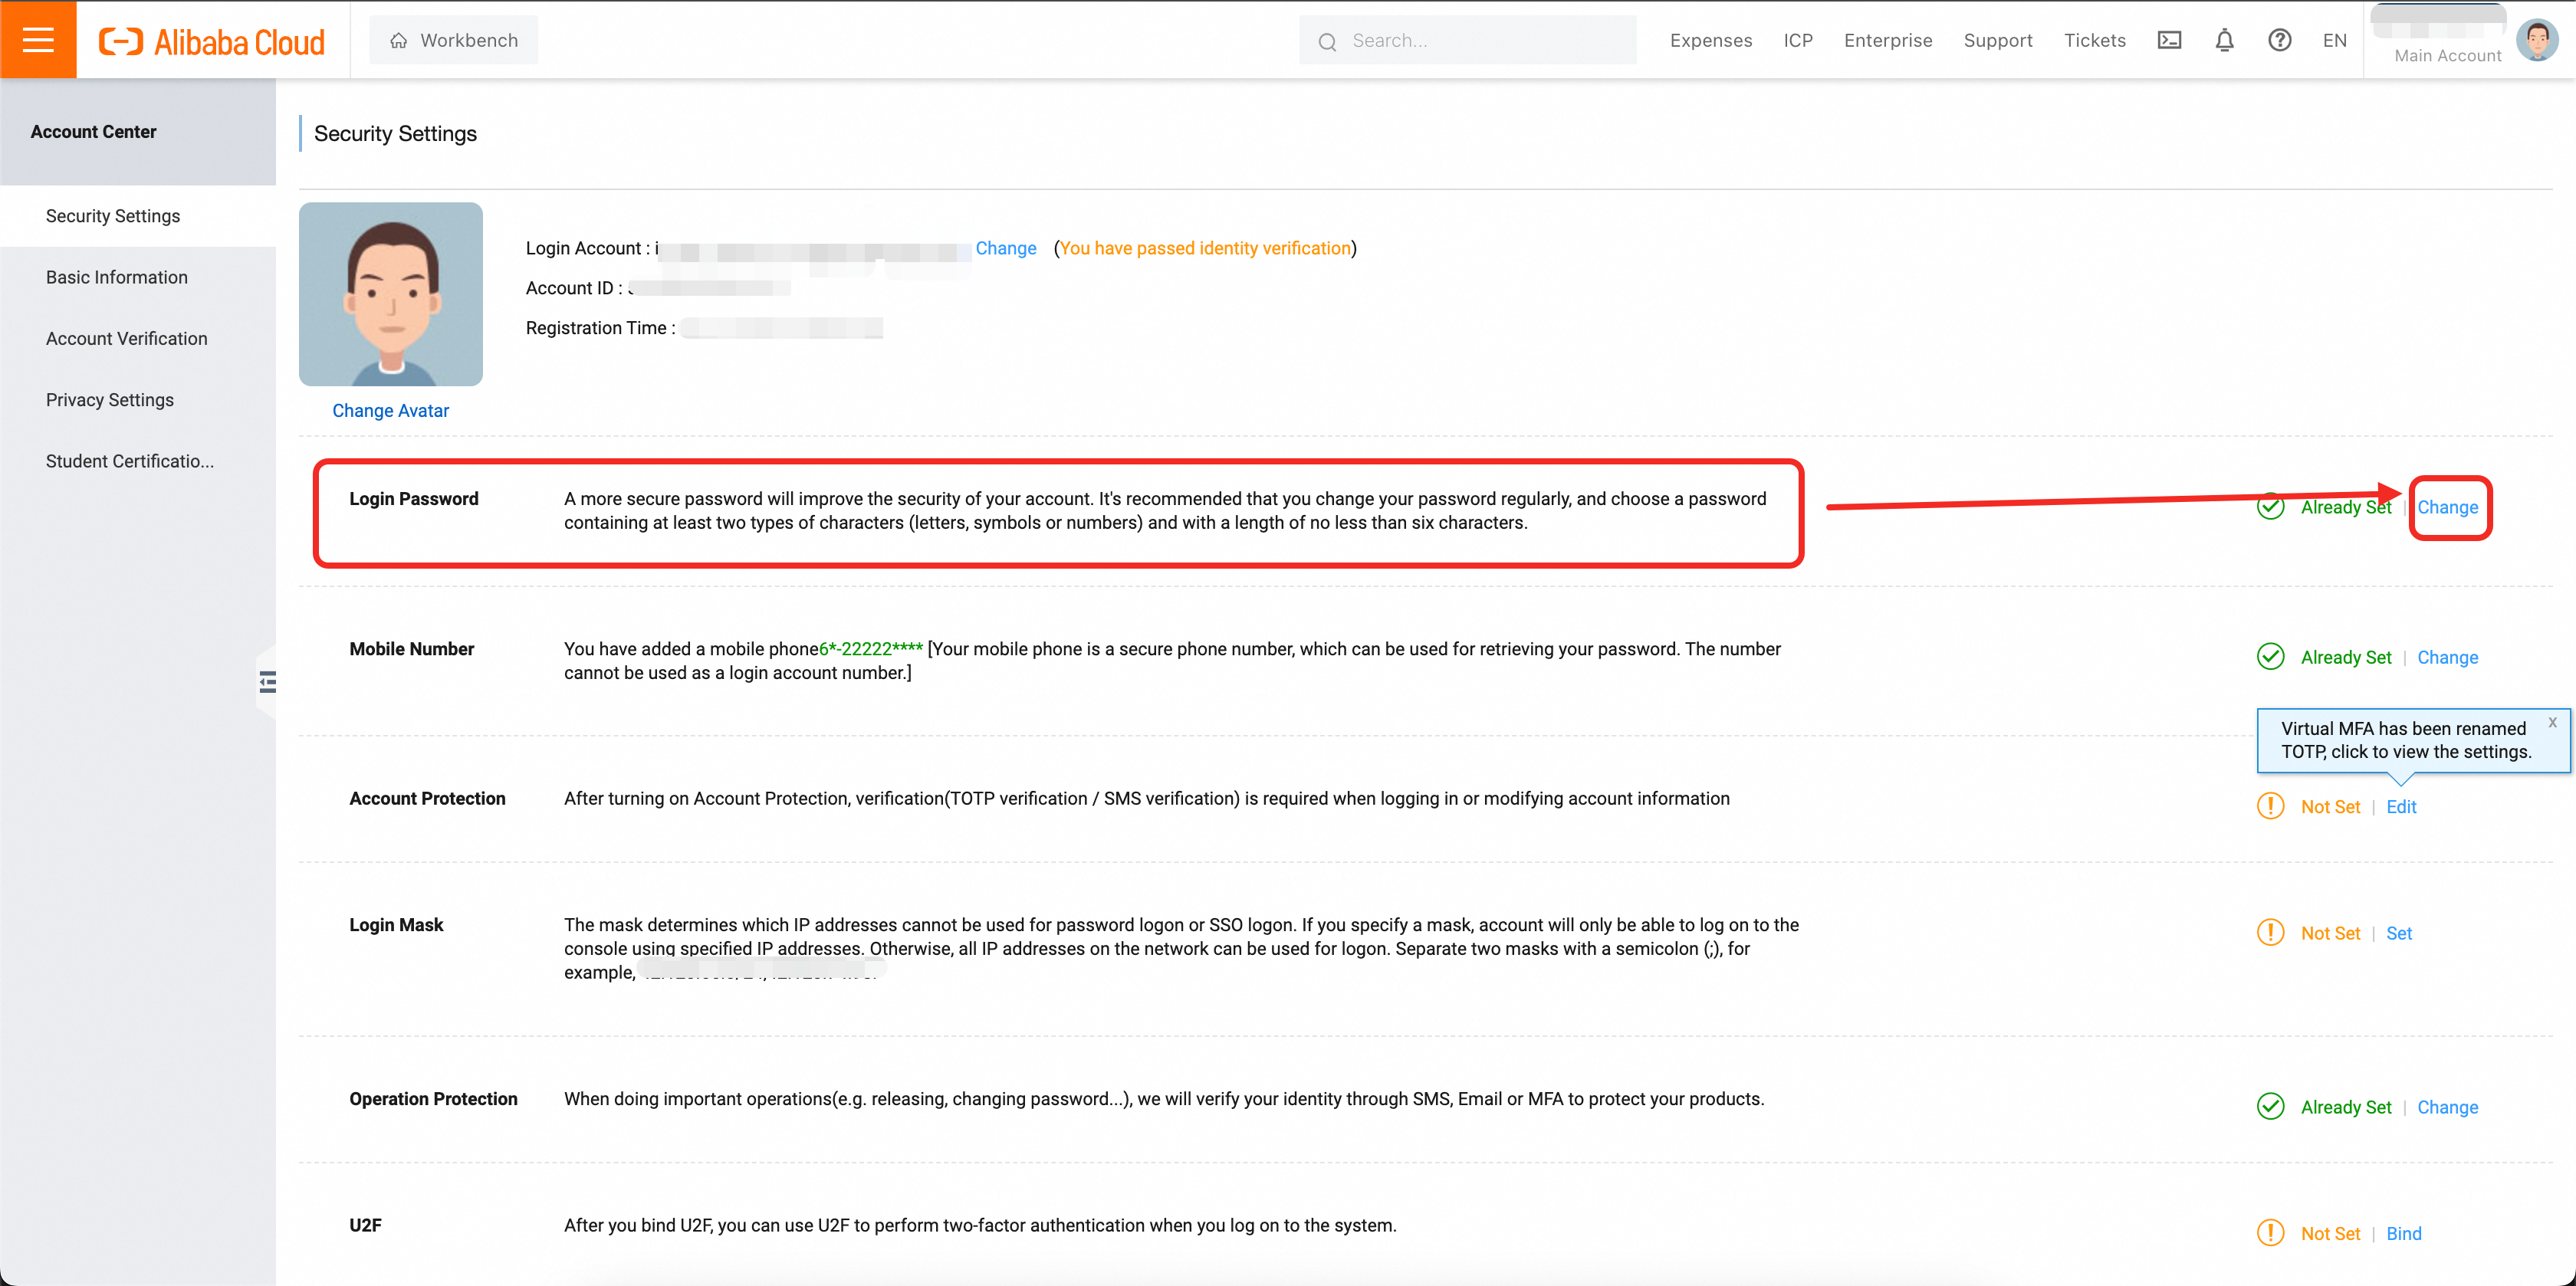
Based on the phone number or email address associated with your account, receive and enter the verification code. Follow the prompts on the page to complete the password change.
