Instances in the Super Computing Cluster (SCC) instance family have no virtualization overheads, and are ideal for applications that require high parallelization, high bandwidth, and low latency. Such applications include high-performance computing (HPC) applications such as Artificial Intelligence (AI) and machine learning. This topic describes how to create and test the performance of an SCC-based cluster.
Background
SCC instances are based on Elastic Compute Service (ECS) Bare Metal Instance family, using high-speed Remote Direct Memory Access (RDMA) based interconnections to significantly improve the network performance and acceleration ratio of large-scale clusters. In short, SCC instances have all the benefits of ECS Bare Metal Instance and can provide high-quality network performance with high bandwidth and low latency. For more information, see Overview.
SCC-based clusters leverage RDMA networks to provide low-latency networking to meet the parallel computing requirements. You can also isolate individual clusters by virtual private clouds (VPCs). SCC-based clusters have no virtualization overheads, providing your applications with direct access to hardware resources. SCC-based clusters are suitable for scenarios such as manufacturing simulations, life sciences, machine learning, large-scale molecular dynamics (MD) simulations, and weather predictions.
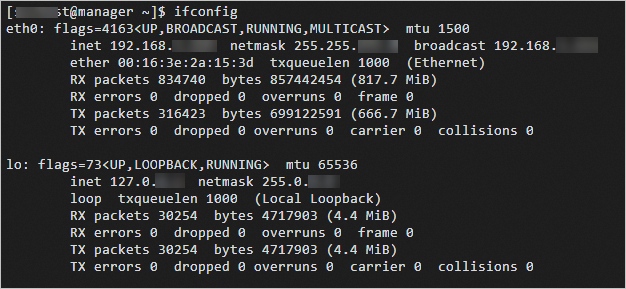
Compared with ECS instances, SCC instances are connected over high-bandwidth and low-latency RDMA networks. Therefore, SCC instances provide more powerful communication capabilities than ECS instances. The following figure shows the port information that is displayed when you access an SCC instance. Eth0 represents the RDMA port and lo represents the VPC port.
Limits
SCC instances are only available in some regions. For more information, see ECS Instance Types Available for Each Region.
Create an SCC cluster
Log on to the E-HPC console.
Create an SCC-based E-HPC cluster. For more information, see Create a cluster by using the wizard.
Configure the following settings.
Parameter
Description
Hardware settings
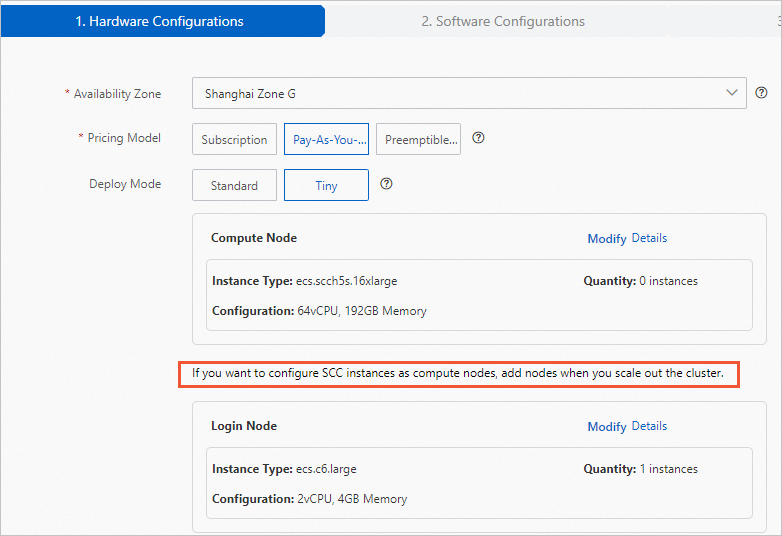
Deploy a tiny cluster with one management node and zero compute nodes. The compute node uses an SCC instance.
ImportantIf you use an SCC instance as the compute node, you cannot add the instance to a cluster when you create the cluster. You need to add the SCC instance that is used as the compute node to the cluster by resizing the cluster after the cluster is created.
Software settings
Deploy a CentOS 7.6 public image and the PBS scheduler.
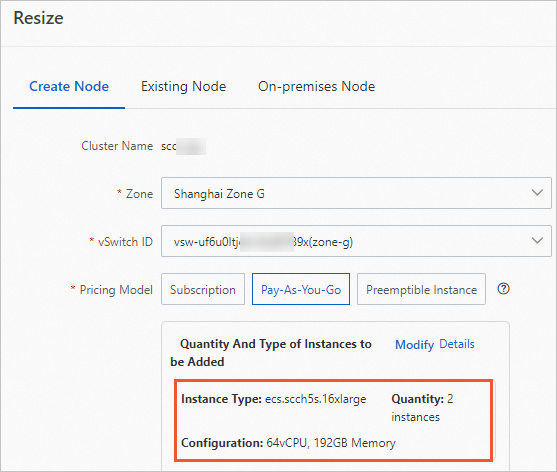
Scale out the cluster and add compute nodes that use SCC instances. For more information, see Scale out a cluster.
In this example, two SCC instances of the ecs.scch5s.16xlarge type are used.
Create a cluster user. For more information, see Create a user.
The user is used to log on to the cluster, compile LAMMPS, and submit jobs. Grant the sudo permissions to the user.
Install software. For more information, see Install software.
Install the following software:
LINPACK 2018
Intel MPI 2018
Test the network performance of the SCC cluster
Test the peak bandwidth of the RDMA network
Log on to the compute000 node and the compute001 node, respectively.
Perform the following steps to test the peak read BPS:
Run the following command on the compute000 node:
ib_read_bw -a -q 20 --report_gbits ## Run the command on the compute000 node.Run the following command on the compute001 node:
ib_read_bw -a -q 20 --report_gbits compute000 ## Run the command on the compute001 node.The following code provides an example of the returned output.
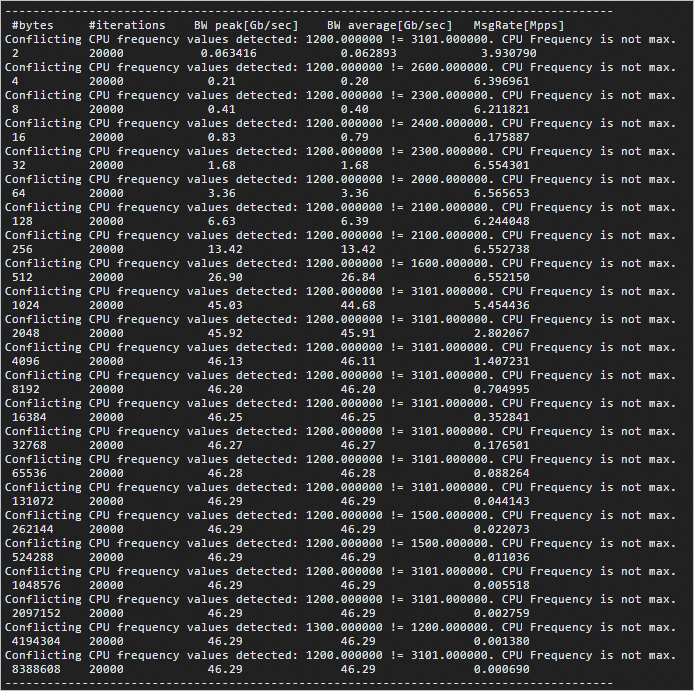
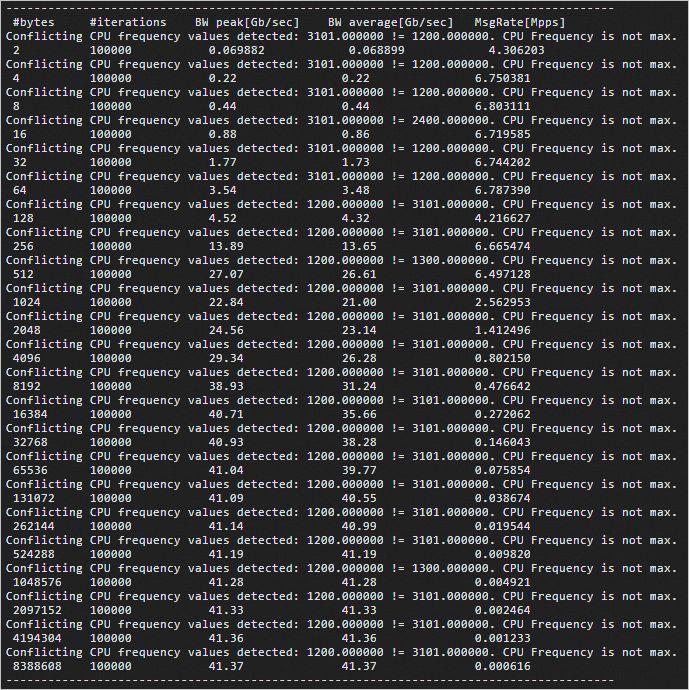
Perform the following steps to test the peak write BPS:
Run the following command on the compute000 node:
ib_write_bw -a -q 20 --report_gbits ## Run the command on the compute000 node.Run the following command on the compute001 node:
ib_write_bw -a -q 20 --report_gbits compute000 ## Run the command on the compute001 node.The following code provides an example of the returned output.
Test the latency of the RDMA network
Connect to your Kubernetes cluster. For more information, see Log on to an E-HPC cluster.
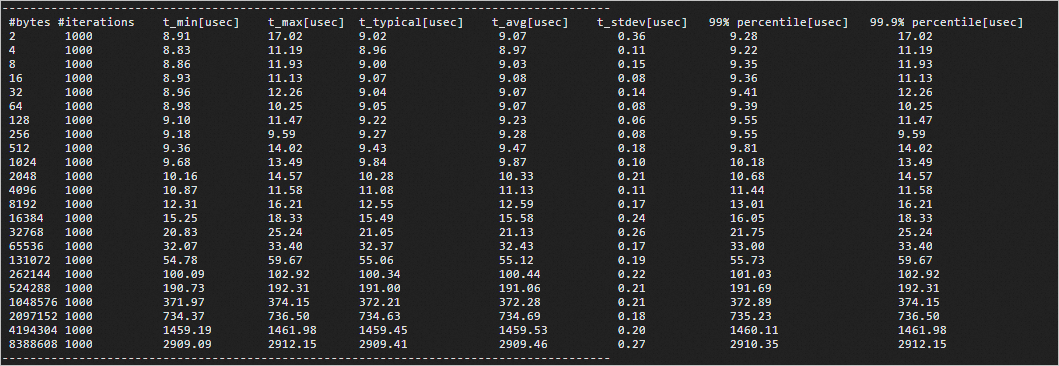
Perform the following steps to test the read latency of the RDMA network:
Run the following command on the compute000 node:
ib_read_lat -a ## Run the command on the compute000 node.Run the following command on the compute001 node:
ib_read_lat -F -a compute000 ## Run the command on the compute001 node.The following code provides an example of the returned output.
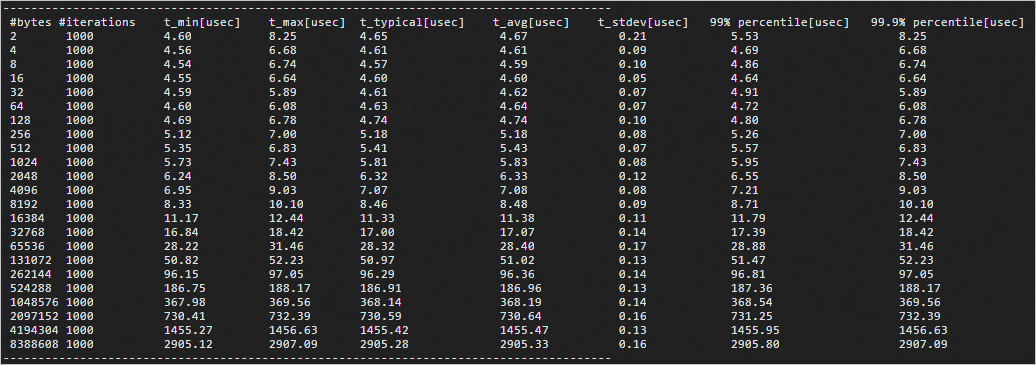
Perform the following steps to test the write latency of the RDMA network:
Run the following command on the compute000 node:
ib_write_lat -a ## Run the command on the compute000 node.Run the following command on the compute001 node:
ib_write_lat -F -a compute000 ## Run the command on the compute001 node.The following code provides an example of the returned output.
Monitor the bandwidth utilization of the RDMA network
Log on to a compute node (such as the compute000 node) as the root user.
Run the following command to monitor the bandwidth utilization of the RDMA network:
rdma_monitor -sThe following figure provides a sample response.
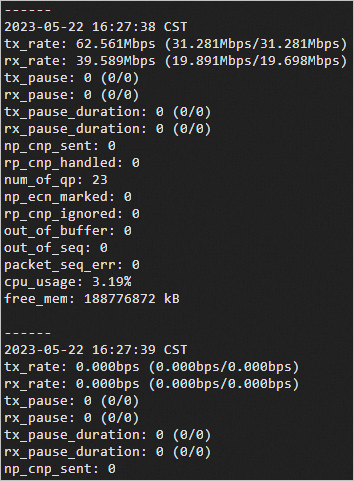
View the performance data of the SCC instances
In the left-side navigation pane of the E-HPC console, choose Job and Performance Management > E-HPC Tune.
On the ClusterView page, find the cluster that you want to view and click Node in the Operation column.
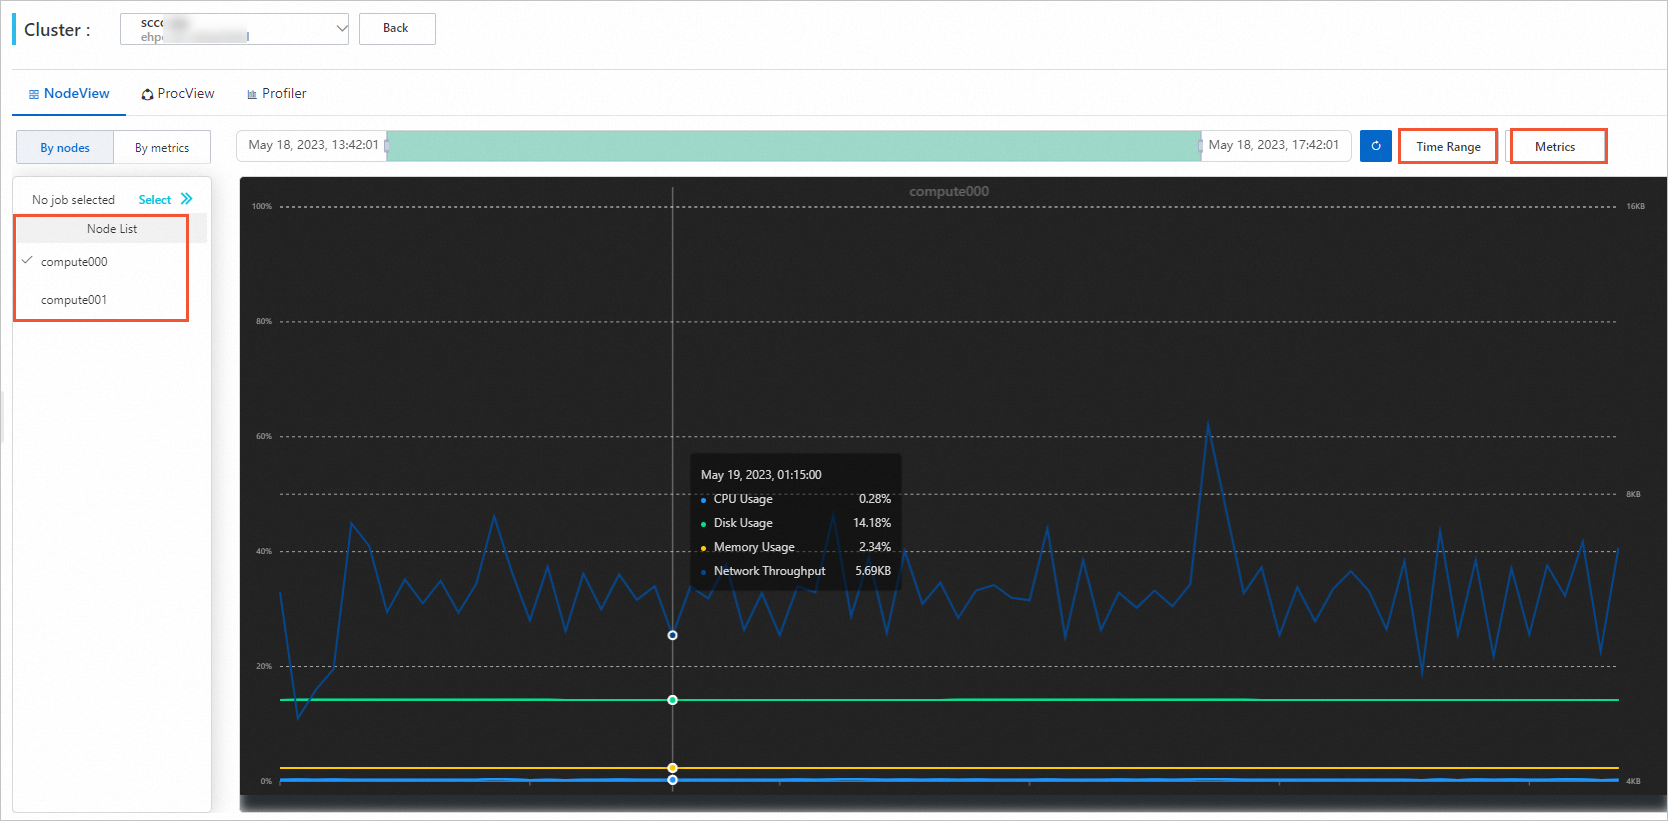
On the NodeView tab, select nodes, time period, and metrics to view the performance data of the nodes in the instance.
