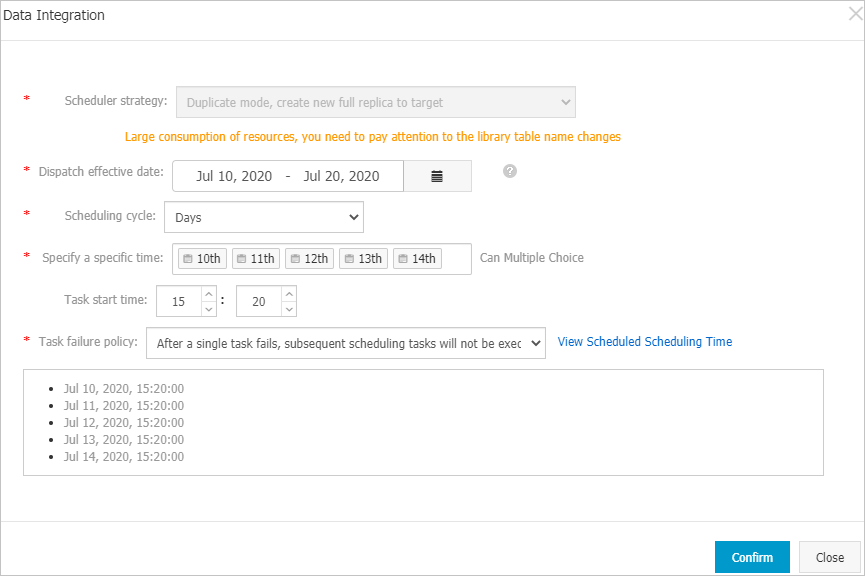
This topic describes how to modify the settings of a scheduling policy that you configured for a data integration task.
Prerequisites
A data integration task is created. For more information, see Configure a data integration task between ApsaraDB RDS for MySQL instances.
Procedure
Log on to the DTS console.
In the left-side navigation pane, click Data Integration.
At the top of the page that appears, select the region where the destination instance resides.
Find the data integration task and click the instance ID.
In the upper-right corner of the page, click Modify Scheduling Policy.
In the dialog box that appears, view the settings of the current scheduling policy and change the settings based on your needs.

Parameter
Description
Scheduler strategy
The scheduling policy cannot be changed. For more information, see Scheduling policies.
Dispatch effective date
Click the
 icon, and specify the start date and end date of the schedule. The maximum effective duration is 365 days.
Scheduling cycle
Select Day or Week as the scheduling cycle and set the specific scheduled time.
NoteDuring full data migration, DTS uses the read and write resources of the source and destination databases. This may increase the loads of the database servers. Before you start scheduling, evaluate the impact of data migration on the performance of the source and destination databases. We recommend that you set the scheduled time to off-peak hours.
After you complete the settings, click View Scheduled Time next to Task Failure Policy to check whether the set scheduled time meets the expectation.
Task failure policy
Select one of the following policies based on your business requirements:
Do not run subsequent scheduling tasks if a task fails
Ignore a failed scheduling task and run subsequent scheduling tasks
Click Confirm.