Cloud Firewall is a SaaS-based network security solution that protects your cloud infrastructure from threats. This guide walks you through setting up basic protection in 15-20 minutes—from service activation to validating that your defenses work.
Step 1: Activate pay-as-you-go Cloud Firewall
Go to the Cloud Firewall purchase page. Set Product Type to Pay-as-you-go 2.0, and complete the following configuration items.
Configuration item
Description
Auto Protection for Internet Assets
Select Yes to automatically add all public assets to the firewall and enable automatic protection for new assets. You can adjust this setting later in the console.
Log Analysis and Log Analysis and Storage Capacity
Keep the default option to store access logs. This setting enables real-time collection, querying, analysis, processing, and consumption of traffic logs from protected assets, meeting classified protection compliance requirements.
Service-linked Role
To provide traffic access control and monitoring analysis features, Cloud Firewall needs access to your Alibaba Cloud service resources. Click Create Service-linked Role. The system automatically creates the role AliyunServiceRoleForCloudFW. Do not modify this role manually.
Read and accept the Cloud Firewall (pay-as-you-go) Service Agreement, then click Buy Now and complete payment.
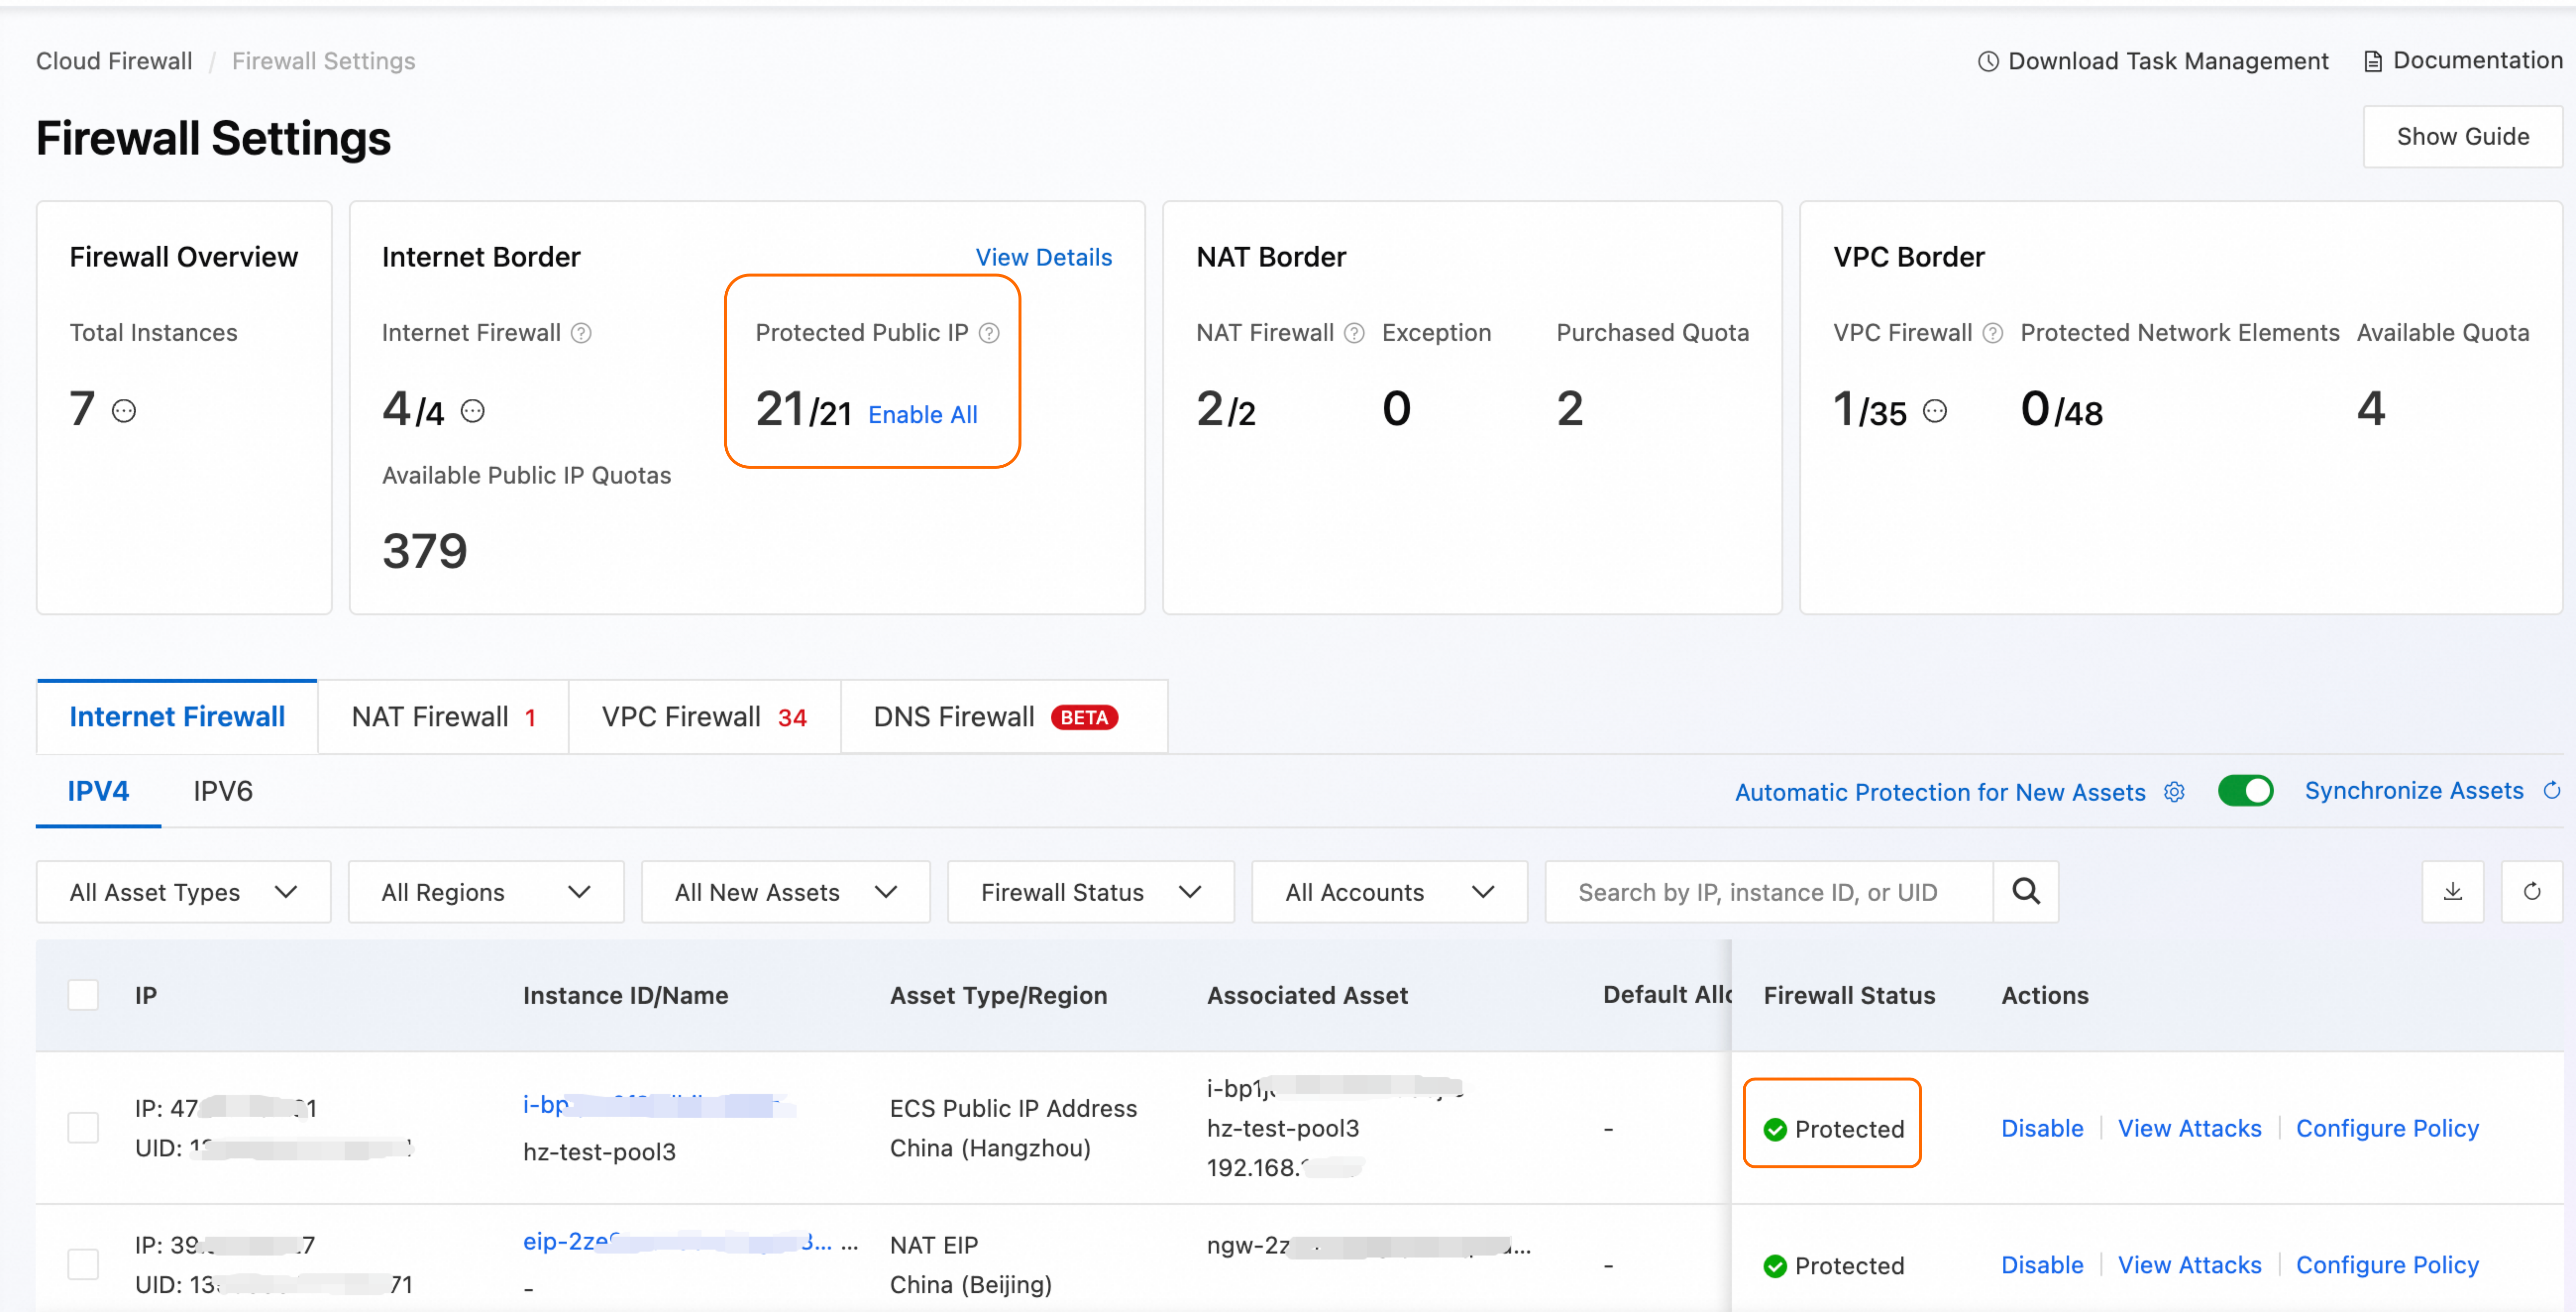
Step 2: View asset protection
Log on to the Cloud Firewall console. In the navigation pane on the left, click Switch.
On the Internet Firewall tab, view your public assets under the current Alibaba Cloud account and their protection status. Because you enabled Auto Protection for Internet Assets during purchase, all public assets are in Protected status by default.
Step 3: Understand default IPS protection
Cloud Firewall includes intrusion prevention (IPS) that blocks these threats automatically:
Network attacks (SQL injection, XSS, command injection)
Vulnerability exploits (CVE-tracked vulnerabilities)
Brute-force attacks (SSH, RDP, database logins)
Worm propagation and cryptomining activity
Backdoor trojan communications
Denial-of-service (DoS) attacks
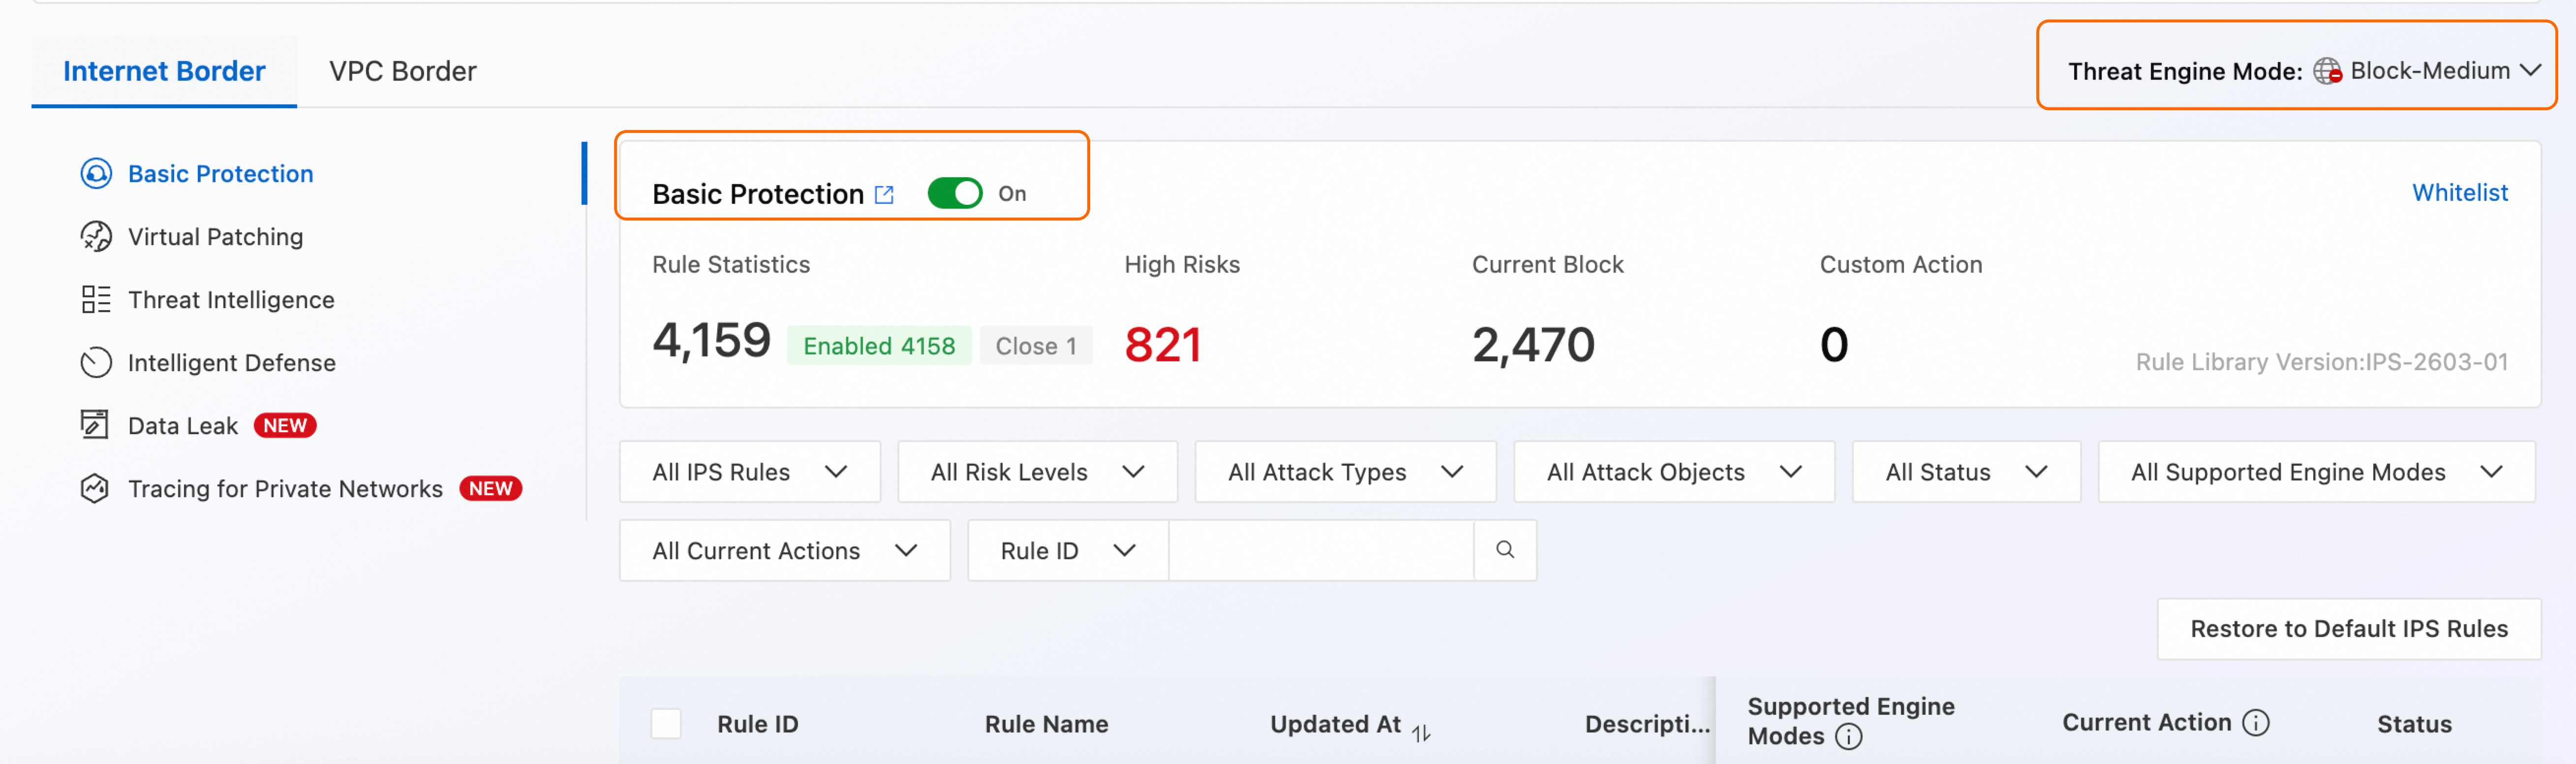
Follow these steps to view IPS rules:
In the navigation pane on the left, choose .
By default, the system enables Basic Protection and Virtual Patching, using the Block - Medium Threat Engine Mode, which is suitable for routine security protection scenarios.
Step 4: Configure access control (ACL) policies
Access control (ACL) policies define which traffic reaches your servers. Use a whitelist approach: explicitly allow required traffic, deny everything else.
By default, Cloud Firewall includes the following policies with Action set to Allow. You can view them in the navigation pane on the left under .
Direction | Source | Purpose | Protocol | Port | Policy description |
Outbound | 0.0.0.0/0 | 0.0.0.0/0 | ICMP | - | Allow cloud assets to send ICMP requests (such as |
Outbound | 0.0.0.0/0 | 0.0.0.0/0 | UDP | 53 | Allow cloud assets to initiate DNS queries for domain name resolution (such as website access or service discovery). |
Outbound | 0.0.0.0/0 | 0.0.0.0/0 | UDP | 123 | Allow cloud assets to connect to NTP servers for time synchronization, ensuring accurate system time. |
Inbound | 0.0.0.0/0 | 0.0.0.0/0 | ICMP | - | Allow external networks to perform |
Most network attack risks originate from the Internet. Therefore, configure security policies that match your actual business needs. Use a whitelist approach: create a low-priority catch-all policy with a Deny All action, then add specific allow rules above it.
Risk of misconfiguration: The following policy examples include a Deny All rule. Applying them directly to a production environment may cause service disruption. If production traffic does not match an explicit "allow" rule before the catch-all policy, it will be blocked by default.
Configuration recommendations:
Order principle: Always place whitelist rules before the catch-all rule. Before deploying, ensure all required production traffic is explicitly allowed above the deny rule.
Grayscale validation: Initially set the catch-all policy action to Monitor. Use Log Audit to analyze traffic, gradually refine policies, and allow only trusted business traffic. After thorough testing, change the action to Deny.
Environment isolation: Enable the catch-all rule fully in staging environments. In production, if you cannot define a complete whitelist immediately, limit the source address of the catch-all rule to test IP ranges to avoid impacting live services.
Configure policies: Go to the page and configure the following:
Inbound (priority from high to low):
Source
Purpose
Protocol
Application
Port
Action
Alibaba trusted IPs
Public IP of cloud asset
All
ANY
All
Allow
Origin URLs of Alibaba Cloud services (such as WAF, DDoS)
Public IP of cloud asset
All
ANY
All
Allow
Trusted O&M engineer or Bastionhost addresses
Public IP of cloud asset
TCP
RDP, SSH
3389, 22
Allow
Trusted Operations and Maintenance (O&M) Engineer Address
Public IP of cloud asset
ICMP
ANY
-
Allow
All
Public IP of cloud asset providing web services
TCP
HTTPS
443
Allow
All
Public IP of cloud asset providing API services
TCP
HTTP
Corresponding API port
Allow
All
All
All
All
All
Deny
Outbound (priority from high to low):
Source
Purpose
Protocol
Application
Port
Action
All
Alibaba trusted IPs, Alibaba trusted domains
All
ANY
All
Allow
All
Software repositories, Certificate Service
All
ANY
All
Allow
All
Trusted domains such as Microsoft, Google, Windows
TCP
HTTPS, HTTP
All
Allow
All
All
UDP
ANY
53, 123
Allow
All
All
ICMP
ANY
-
Allow
All
All
All
All
All
Deny
Adjust ACL engine mode: By default, Cloud Firewall allows traffic with unrecognized applications or domains to prevent false blocking during initial policy setup. After confirming your policies are correct, click ACL Engine Management in the upper-right corner and switch the ACL Engine Mode for your assets to Strict Mode.
Validation test: After configuring policies, wait 3–5 minutes. Test using commands such as
pingorcurl. Then refresh the Cloud Firewall console and click the number in the Hits/Last Hit At column to go to the Log Audit page and view hit logs.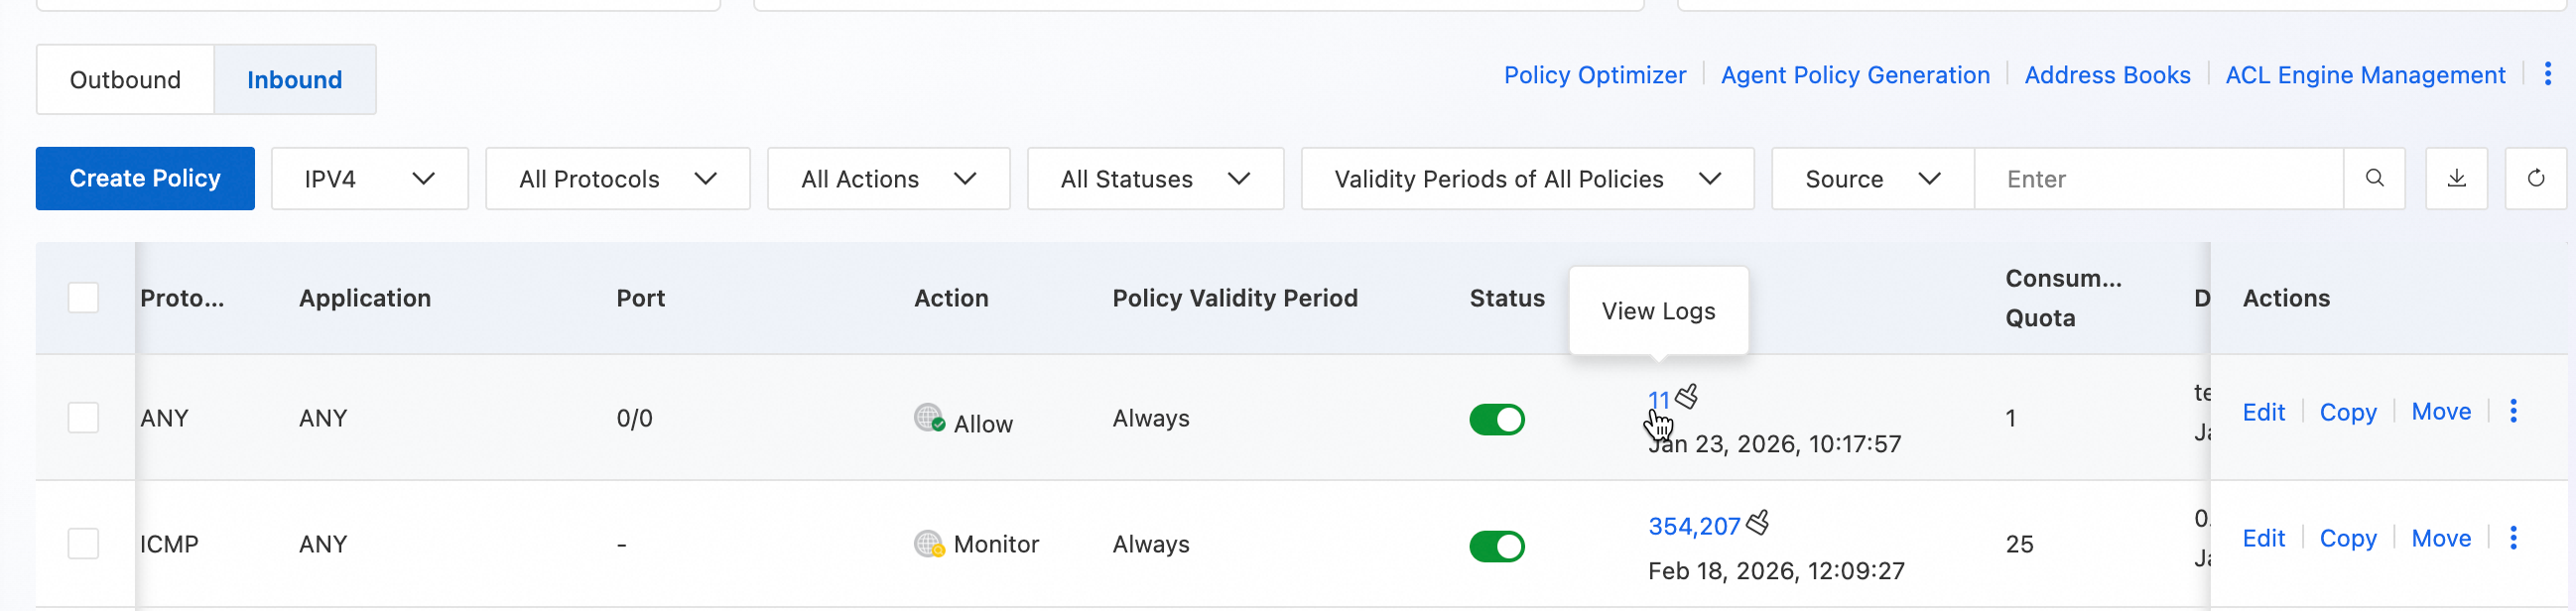
You have completed all steps in this Quick Start guide. Choose your next step based on your needs:
(Recommended) Continue using Cloud Firewall: Go to Advanced Optimization to refine your configuration and meet enterprise-grade security and compliance requirements.
Stop using Cloud Firewall: Go to Release Resources to stop billing.
Advanced Optimization
Use address books to improve management efficiency
When access control policies become complex, using address books greatly simplifies management. Predefine business-related IP addresses—such as office egress IPs or trusted partner IPs—as address books, then reference them directly in policies.
Go to the page.
Click the Cloud Service IP Address Book tab to view address books provided by Alibaba Cloud.
Click the Custom IP Address Book tab, then click Create Address Book to define a group of frequently used IP addresses as a collection. For more information, see Address Book.
IPS configuration
The default Block - Medium mode suits most scenarios. Adjust IPS settings in the following cases:
High-risk protection scenarios—such as frequent attacks, major event support, or red team exercises:
Add trusted IPs to the Whitelist;
Change the Threat Engine Mode to Block - Strict;
Enable the Threat Intelligence feature.
High false-positive rate:
Add trusted IPs to the Whitelist;
Change the Threat Engine Mode to Block - Loose;
If issues persist, switch to Monitor mode.
Enable VPC firewall to control private network traffic
If you use multiple VPCs or Cloud Enterprise Network to connect on-premises data centers, enable VPC Firewall Overview to detect and control east-west traffic between VPCs connected via TransitRouter or Express Connect, and between VPCs and on-premises data centers, securing internal-facing traffic.
Use subscription billing to reduce costs
If you plan to use Cloud Firewall long-term, purchase the subscription version, or use the pay-as-you-go version with a pay-as-you-go savings plan for better pricing.
Release resources to stop billing
After completing this Quick Start guide, if you no longer need the Cloud Firewall instance created during the tutorial, go to the upper-right corner of the Overview page and choose .
