You can add the Elastic Compute Service (ECS) instances that require disaster recovery protection to a protection group. You can also change the type of ECS instance at the disaster recovery site and manually specify an IP address for the disaster recovery site. This topic describes how to add instances to be protected.
Prerequisites
A protection group is created so that you can use a plan to perform centralized operations on multiple ECS instances. For more information, see Step 4: Create a protection group.
Usage notes
ECS disaster recovery (EBS async replication) has limits on regions, zones, disk types, networks, and configuration quotas. For more information, see Limits.
Procedure
Log on to the Cloud Backup console.
In the left-side navigation pane, choose .
If you are not using EBS Async Replication, click Switch to EBS Async Replication.

On the Site Pairs tab, click the site pair, and then click the Protection Group tab.
On the Protection Group tab, find the protection group and click Manage Protected Instance in the Actions column.
On the Protected Instances page, click Add Protected Instance.
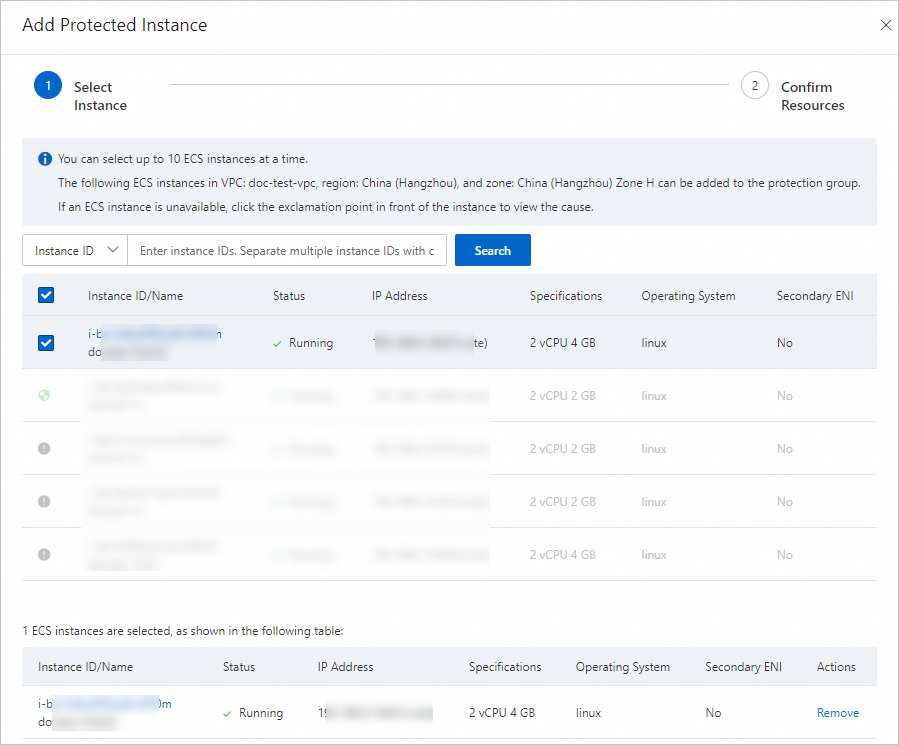
In the Add Protected Instance panel, select the ECS instances to be protected and click Next Step.
ImportantAfter an ECS instance is bound to a secondary elastic network interface (ENI), some images cannot automatically identify the IP address of the secondary ENI or add a route. As a result, the secondary ENI cannot work properly.
If an ECS instance is configured with a secondary ENI (the value of the Secondary ENI field is Yes), check the IP address of the secondary ENI after a failover. This ensures that the secondary ENI works as expected. For more information, see Configure a secondary ENI.

In the Confirm Resources step, confirm the basic information and resource information of the instances, and then click Confirm.
After the instances are added, you can find the instances in the protection group. The instances are in the Initialized state.

What to do next
After an instance is added to a protection group, you can perform the following operations.
Operation | Description |
Details | Click Details to view the computing, network, and storage information of the protected instance. |
Modify Disaster Recovery IP | On the Network Information tab, manually specify an IP address for the disaster recovery site. |
Remove Protected Instance | Remove the instance from the protection group. After the instance is removed, the instance is no longer protected by Cloud Backup. |
Enable Instance Release Protection or Disable Instance Release Protection | If you turn on Enable Instance Release Protection, the protected instance cannot be manually released in the console or by calling the related API operation. To release the protected instance, you must disable the protection and then delete the instance. Important Subscription ECS instances do not support instance release protection. |
Change Instance Type at DR Site | Change the ECS instance type for the disaster recovery site. Important Select the instance type based on your business requirements. The changed ECS instance type will be applied the next time you create an ECS instance. Existing ECS instances are not affected. |
Modify User Data | Click Details. On the Computing Information tab of the Protected Instance Details page, configure ECS user data. The user data of ECS instances can be used to manage startups of the instances or pass data into the instances. For more information, see Instance user data. Important
|