By default, a flow is triggered by an incoming message. This topic explains how to configure the trigger to initiate a flow by a message from WhatsApp, Viber, Instagram, or Messenger.
If the trigger type is WhatsApp, Viber, Instagram, or Messenger, you must bind the flow to a specific business account. For more information, see Message-based triggers.
If the trigger type is Manual, the flow can be initiated via an API call or a marketing campaign. You can choose whether to accept system variables from the marketing campaign. When a flow is triggered by a marketing campaign, an active conversation must already exist between the end user and the sending account.
Procedure
Manual trigger
This section explains how to configure a flow that is triggered by an API call or a marketing campaign.
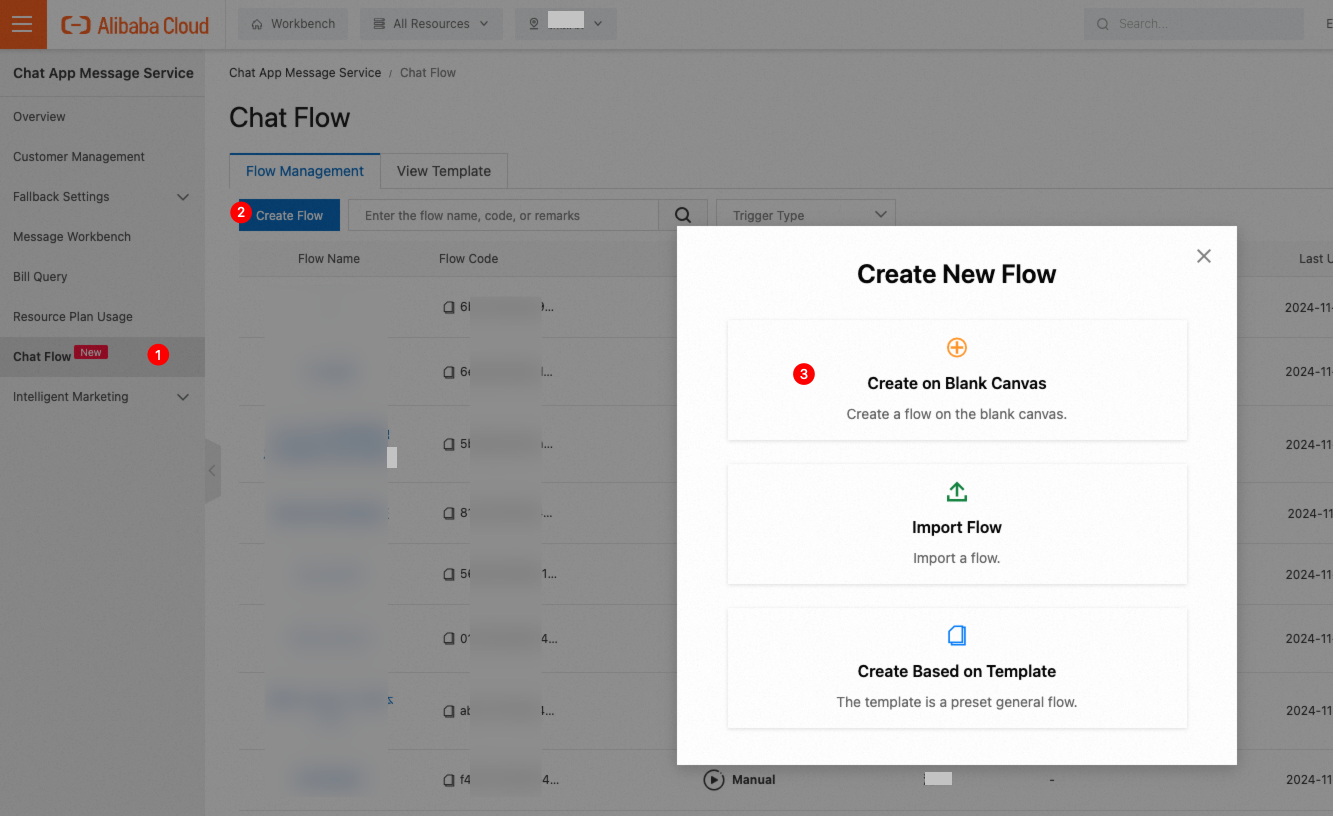
Create a flow: In the Chat App Message Service console, choose Chat Flow > Flow Management. Click Create Flow, and select Create on Blank Canvas.
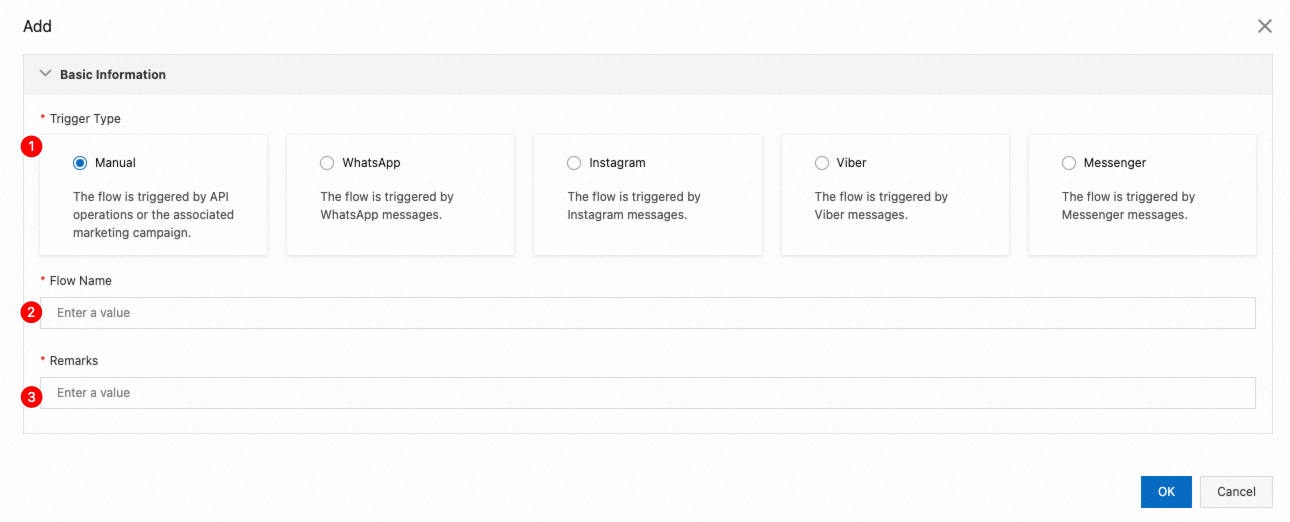
Set Trigger Type to Manual and configure the flow information.
In Basic Settings of the start node, configure the initial variables for the flow.
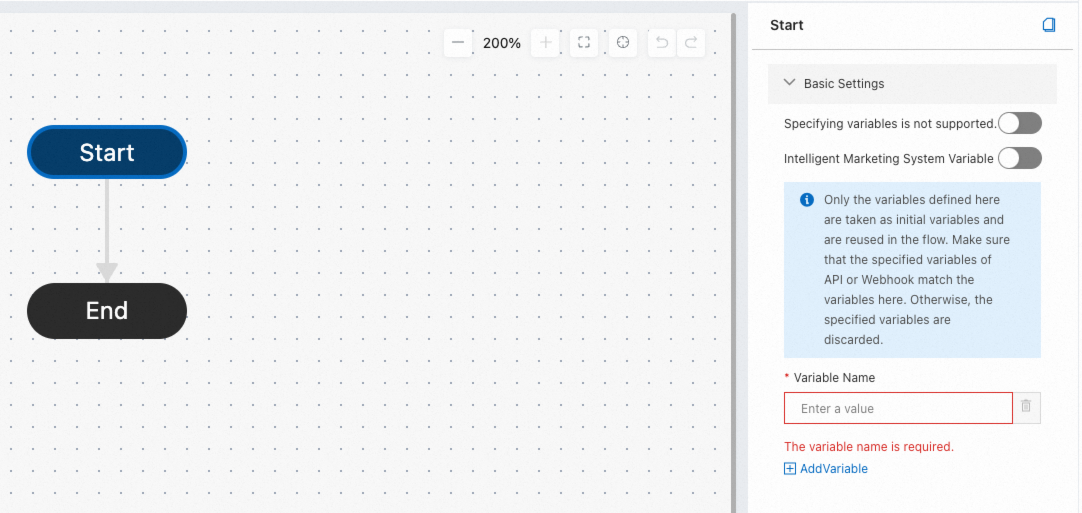
If you enable Do not accept incoming variables, the flow does not accept external variables and uses only the custom variables defined.
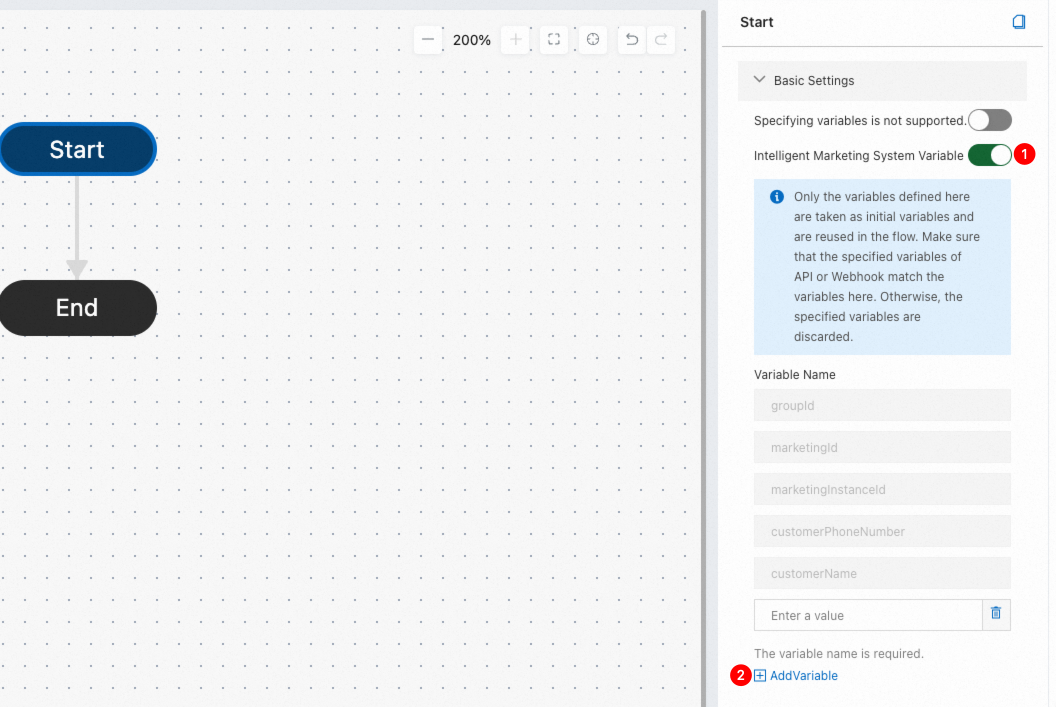
If you enable Intelligent Marketing System Variable, the flow can automatically accept system variables from marketing campaigns. You can also define additional custom system variables.
 Note
NoteWhen using a manually triggered flow in a marketing campaign, the flow must be published, and an active conversation (within the 24-hour window) must exist between the user and the sending account.
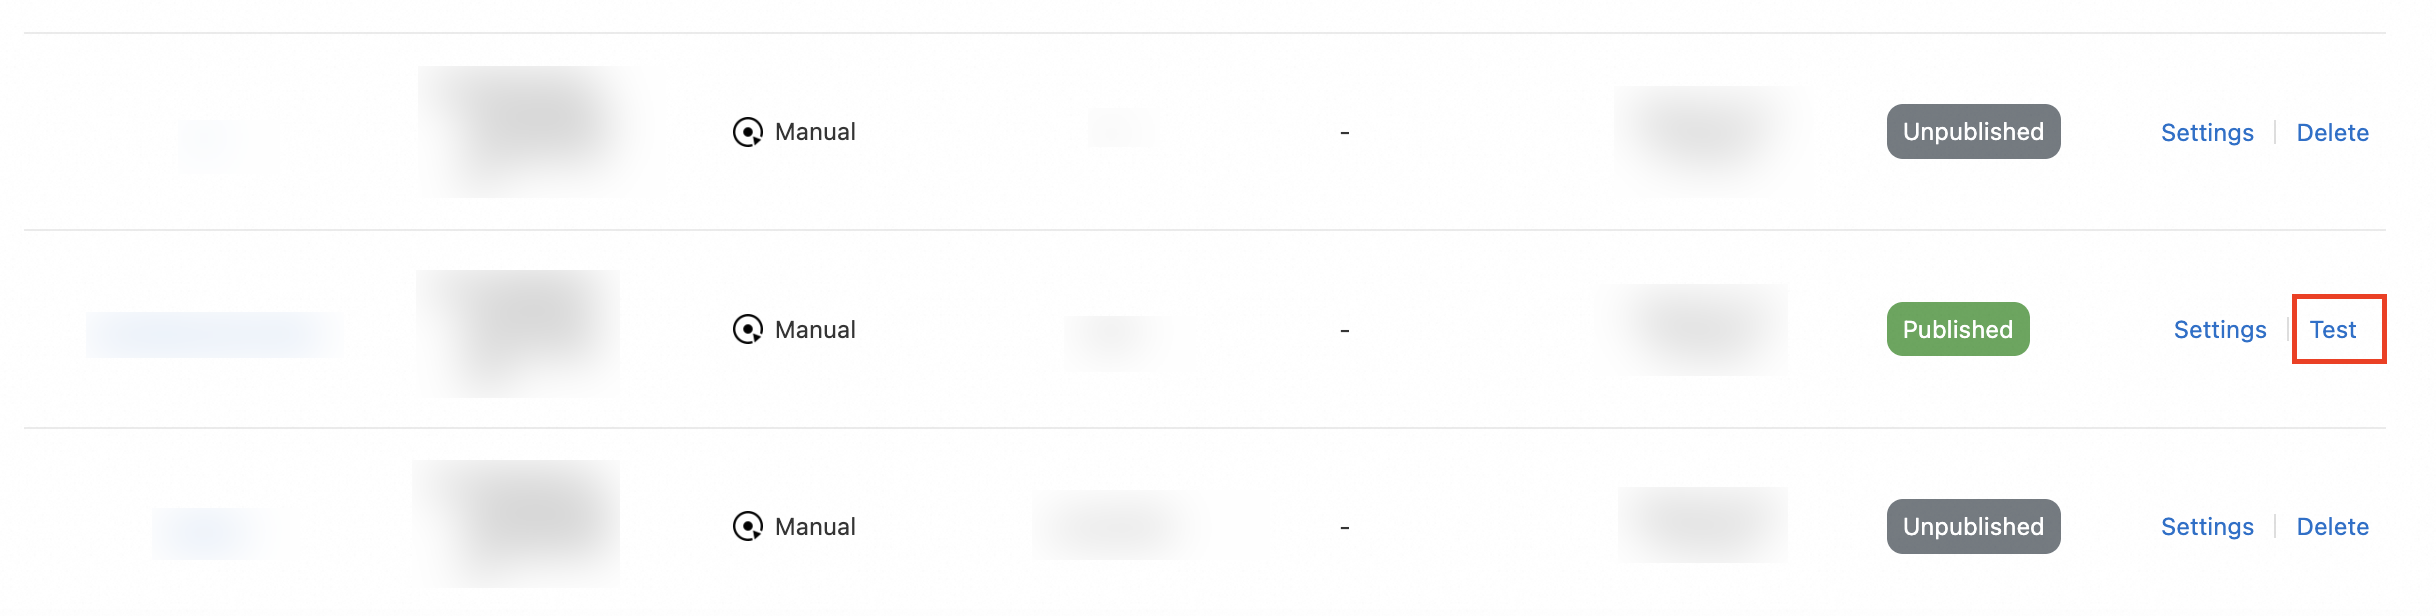
After the manually triggered flow is published, click Test in the Actions column. This will open the OpenAPI Explorer, where you can test the flow and ensure it works as expected.
Message-based triggers
This section explains how to configure a flow that is triggered by a Mobile Originated (MO) message. You can bind the business account when you create the flow or modify the binding information later. To learn how to create a flow and configure its trigger, see Create a flow.
Bind the account when creating the flow
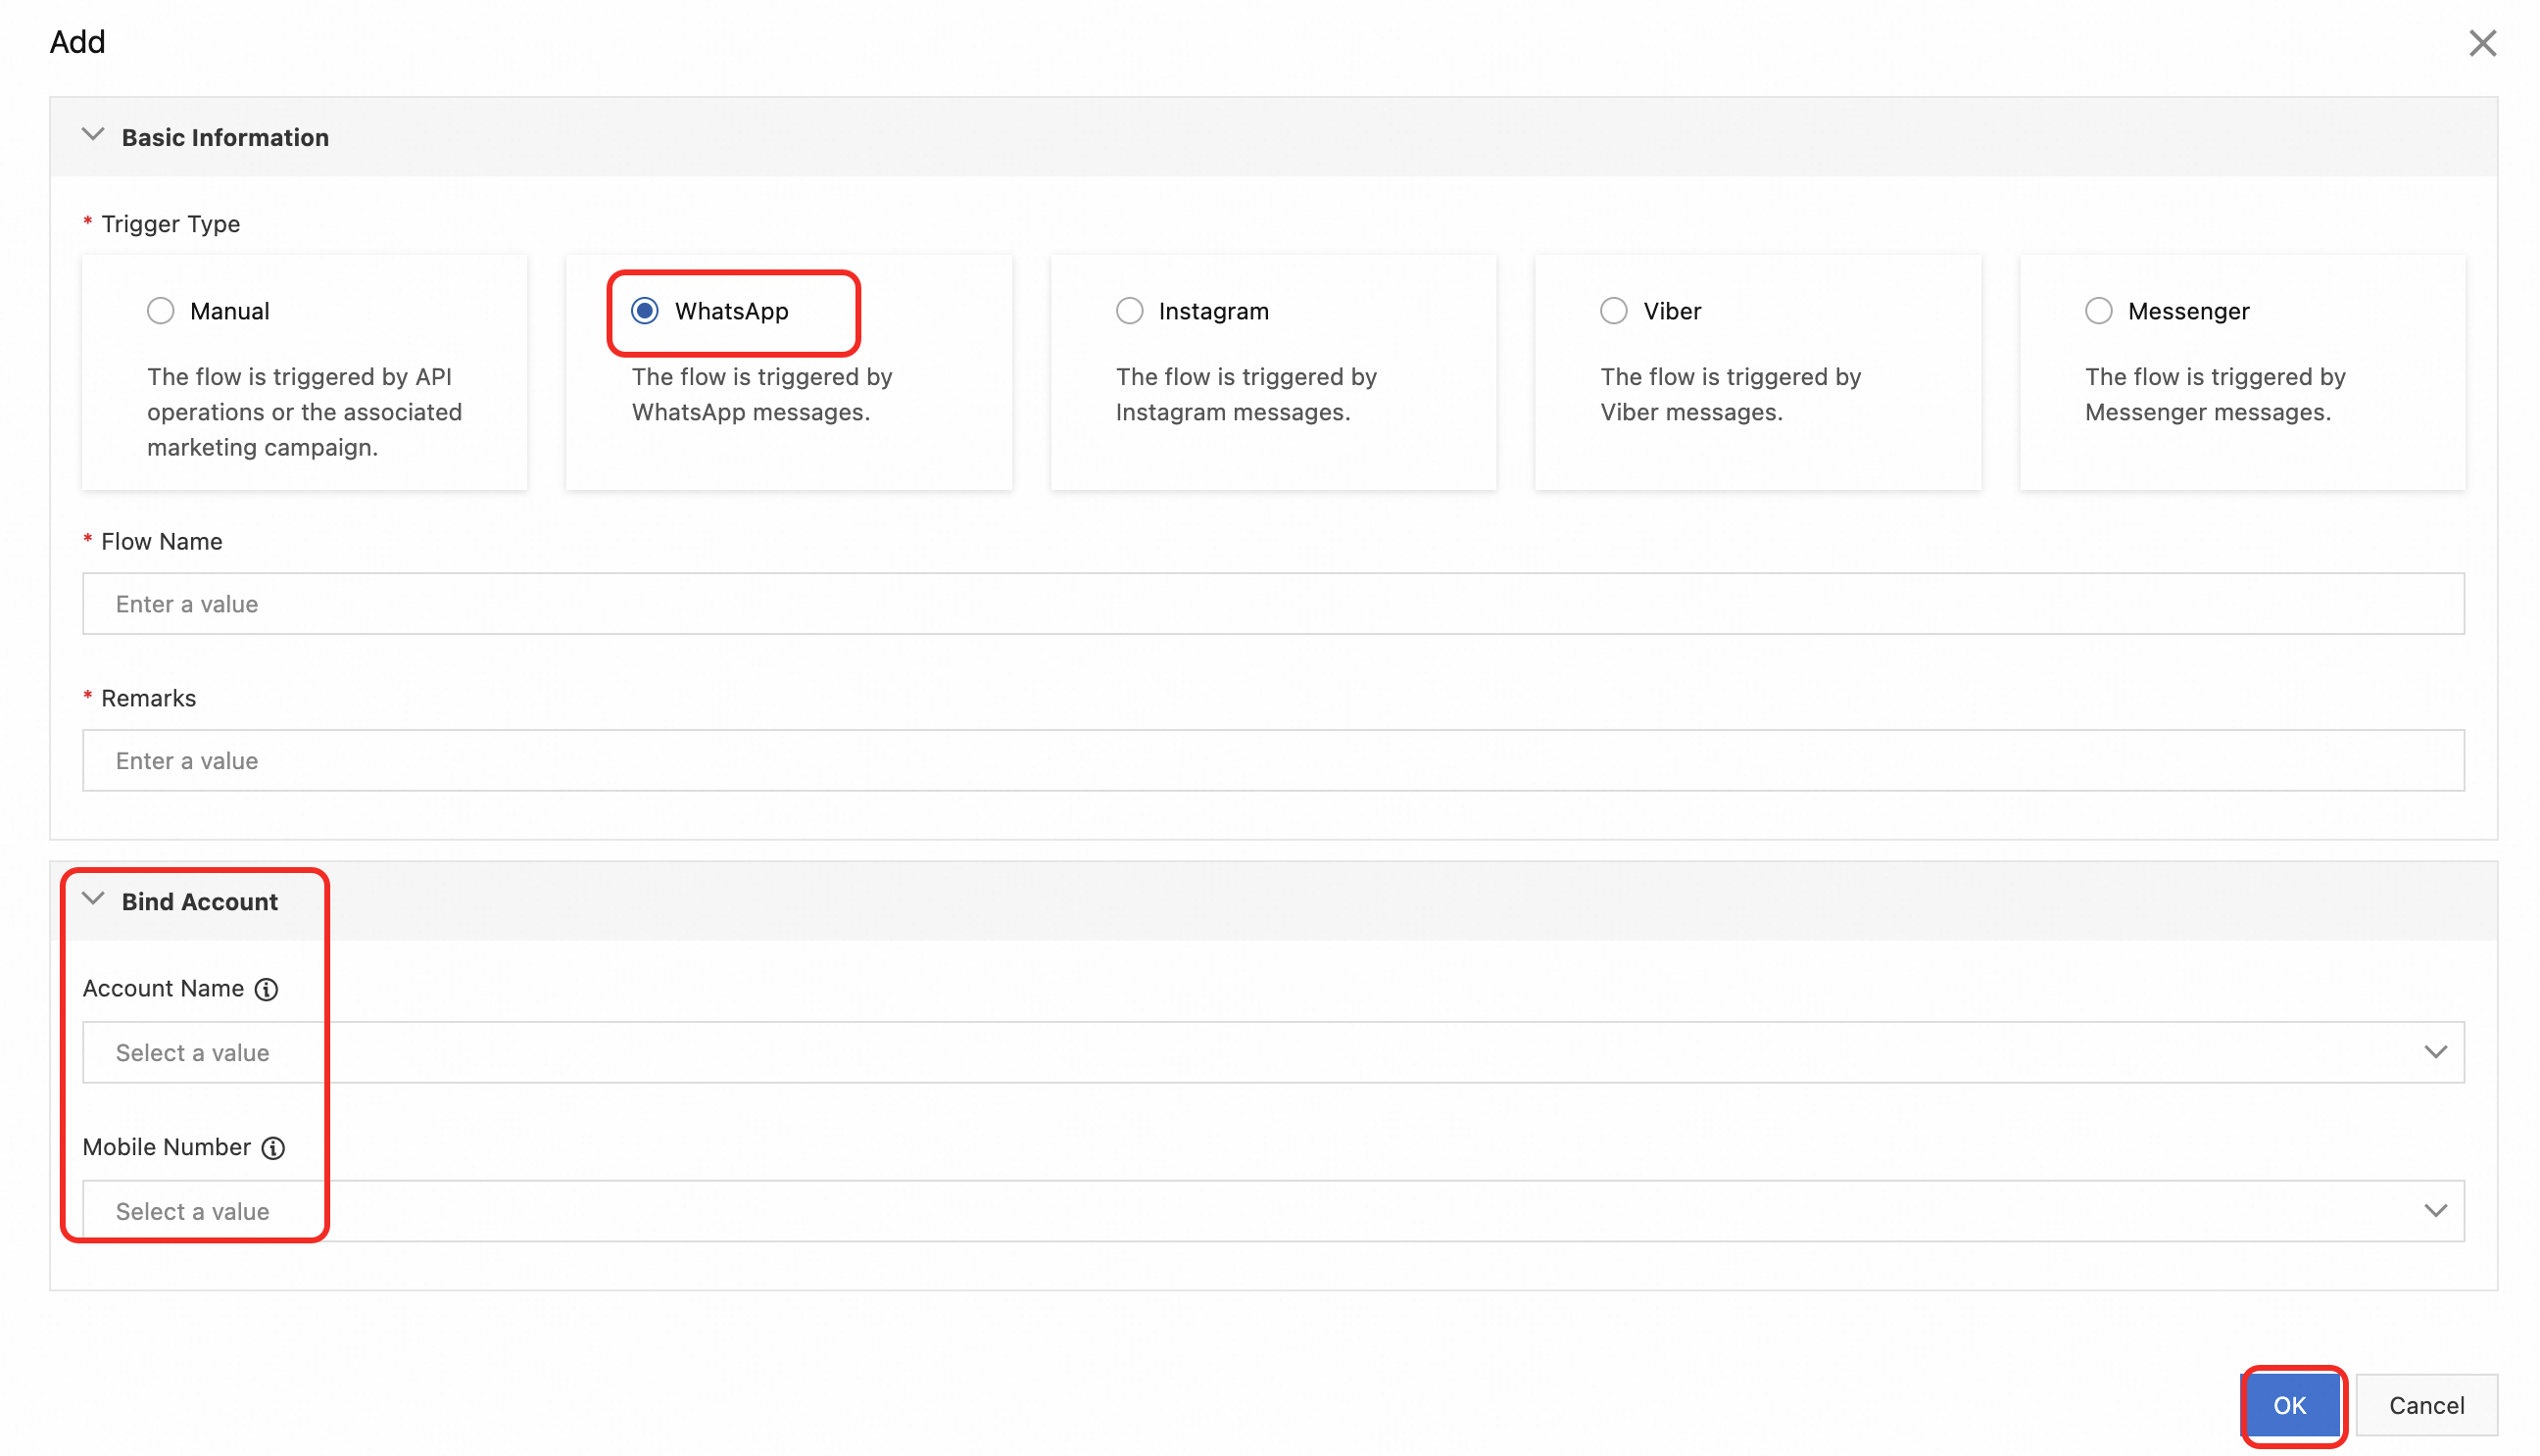
This example uses WhatsApp as the trigger type to demonstrate how to bind a WABA when creating a new flow.
Create a flow: In the Chat App Message Service console, choose Chat Flow > Flow Management. Click Create Flow, and select Create on Blank Canvas.
Set Trigger Type to WhatsApp, configure the flow information, and set the account name and number in the Bind Account section. Click OK to create the flow and bind the WABA.
 Note
NoteWhatsApp: Bind a WABA and phone number.
Viber: Bind a Service ID.
Instagram: Bind a Professional Account ID.
Messenger: Bind a Page ID.
Modify the trigger of an existing flow
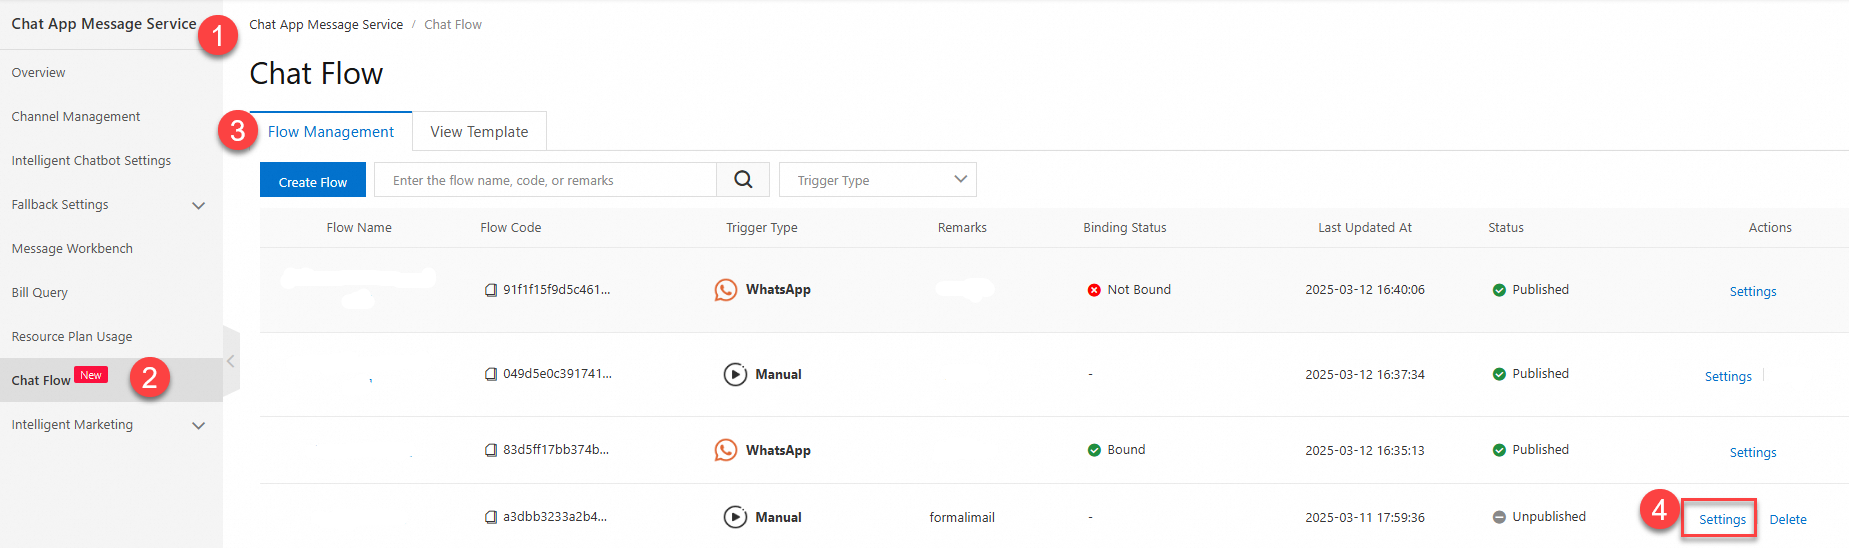
This example shows how to modify the trigger node configuration for an existing WhatsApp flow.
In the Chat App Message Service console, choose Chat Flow > Flow Management. Find the target flow and click Settings.
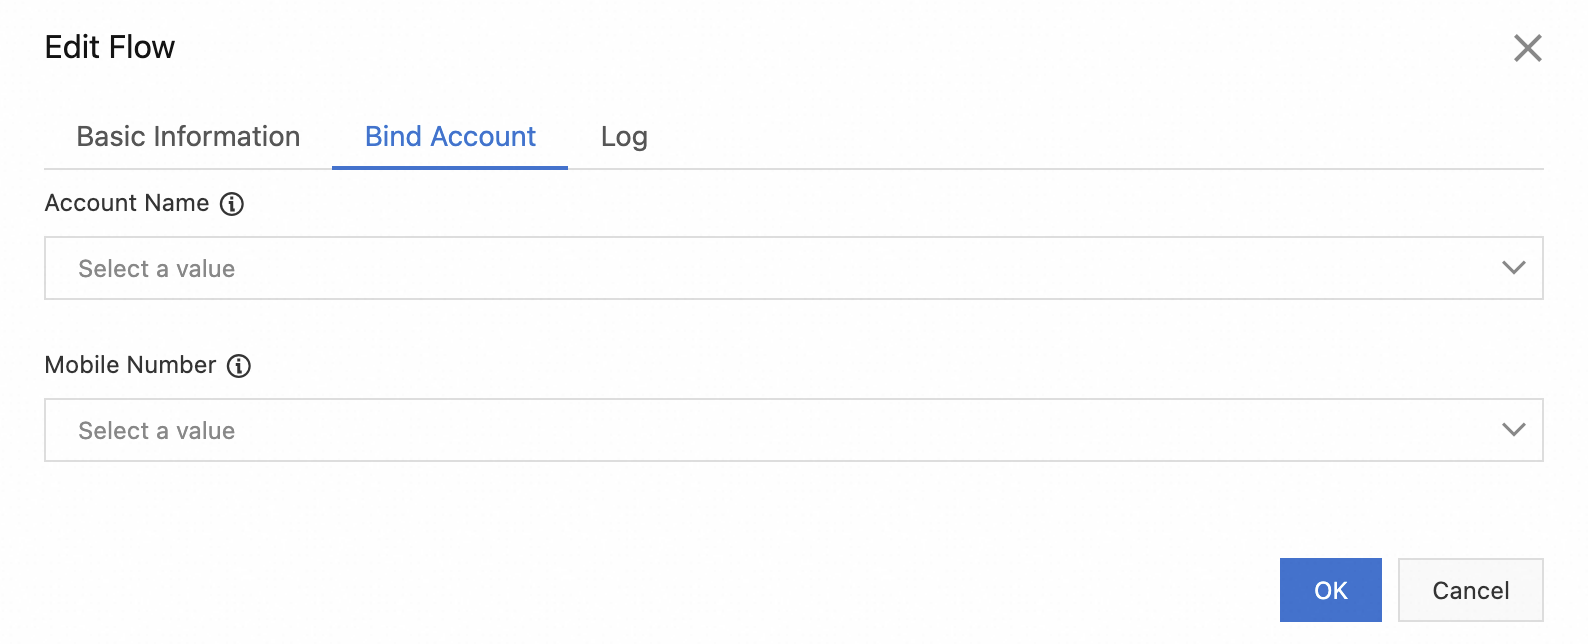
In the dialog box that appears, modify the Bind Account information and click OK to save the changes.
 Note
NoteThe configuration of a published flow cannot be changed. To modify it, you must either temporarily unpublish it or create a copy and edit the new version.