This topic provides an example to describe how to use Cloud Architect Design Tools (CADT) to create a custom application architecture from scratch and the related precautions.
Sample application architecture
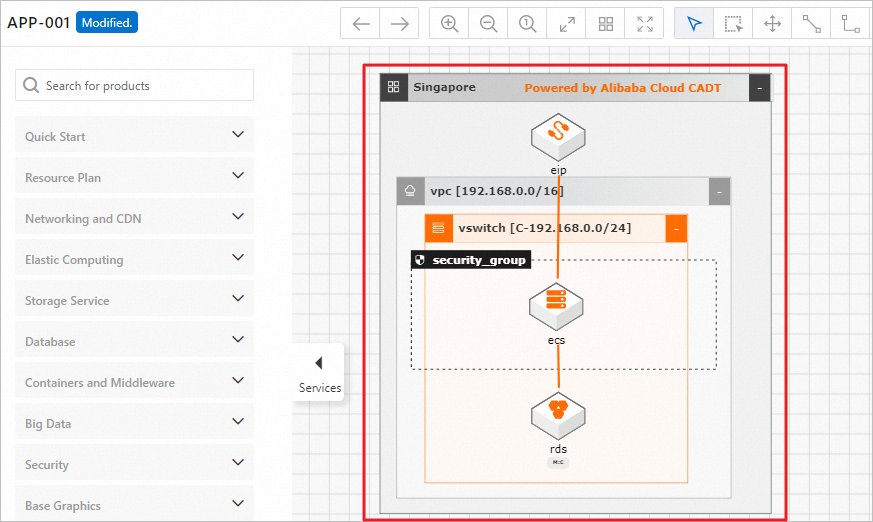
The following figure shows the application architecture that is built in this topic. In this architecture, an Elastic Compute Service (ECS) instance, an elastic IP address (EIP), and an ApsaraDB RDS instance are created in the Singapore region. The EIP is associated with the ECS instance, and the private IP address of the ECS instance is automatically added to the whitelist of the ApsaraDB RDS instance.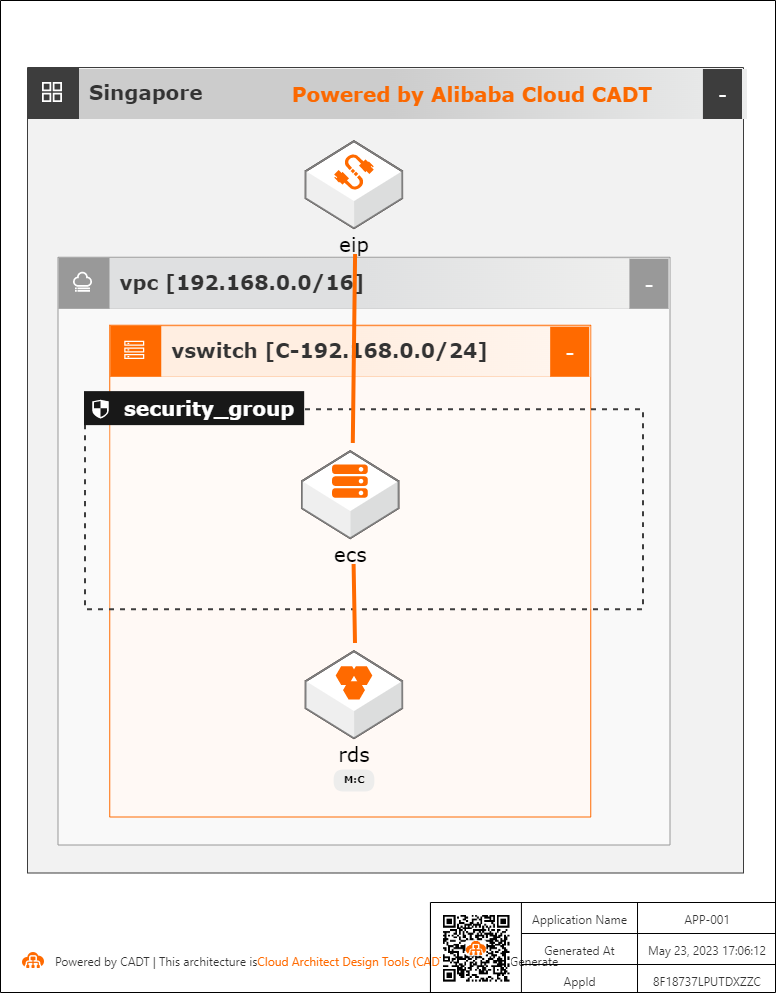
Create a custom application in CADT
Log on to the CADT console.

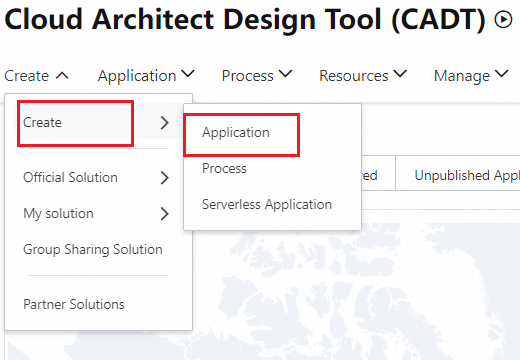
In the top navigation bar, choose Create > Create > Application.
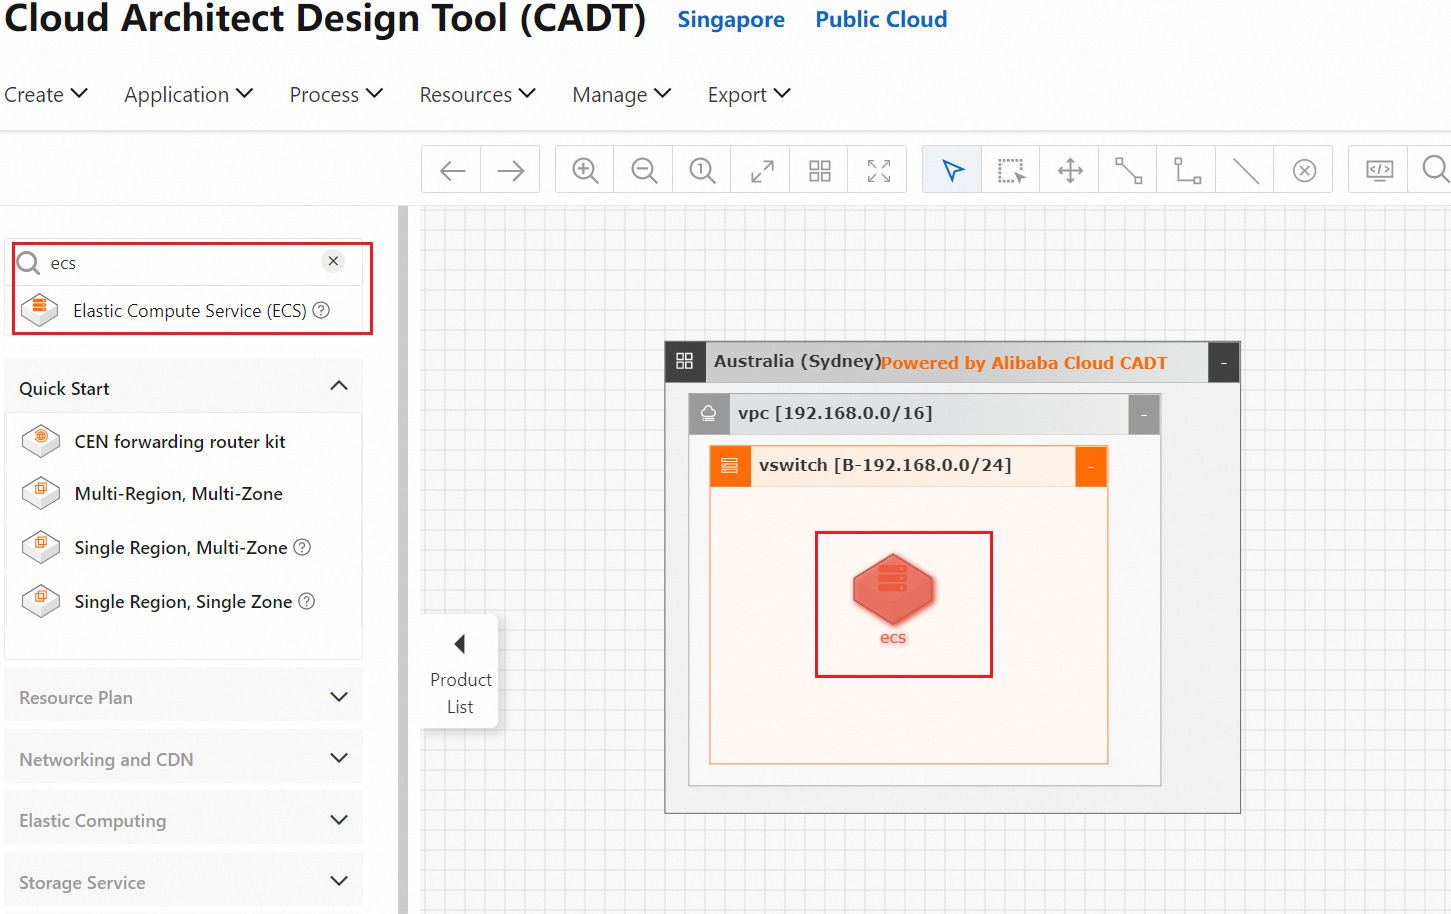
Build a network environment. CADT provides various network topology suites that you can directly drag and use. In this example, the network topology of the application architecture is Single Region, Single Zone. In the left-side navigation pane, click Quick Start and drag Single Region, Single Zone to the canvas on the right, as shown in the following figure.

In the left-side navigation pane, search for the ECS, security group, ApsaraDB RDS, and EIP services from the service list by keyword, and drag them to the corresponding locations in the architecture diagram. The architecture design diagram in the Sample application architecture section of this topic is for your reference.
NoteEach type of Alibaba Cloud resource has a resource level. When you drag a resource in CADT, you are prompted where the resource should be placed based on the changes in the background colors of the region, virtual private cloud (VPC), and vSwitch modules.
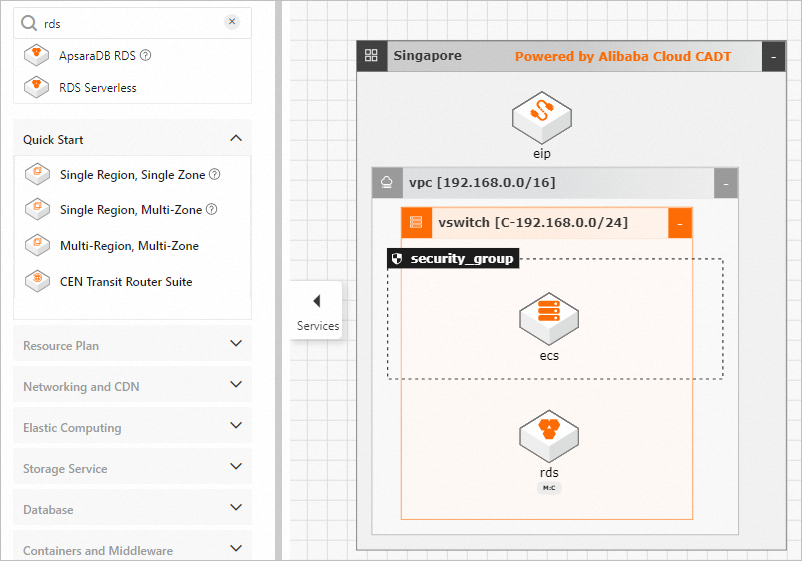
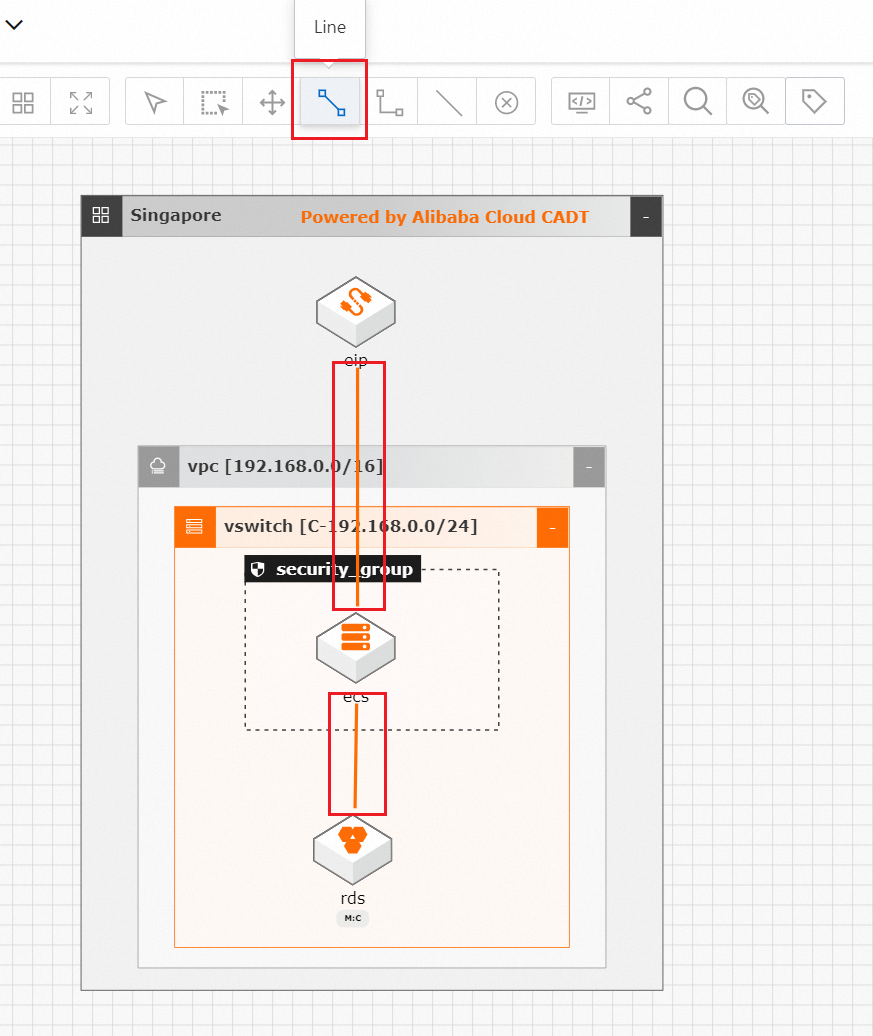
Click the Line icon in the top toolbar to draw a line between the EIP and ECS instance and between the ECS instance and ApsaraDB RDS instance.
NoteThis operation automatically associates the resources. After the resources are deployed, CADT automatically associates the EIP with the ECS instance and adds the private IP address of the ECS instance to the whitelist of the ApsaraDB RDS instance.
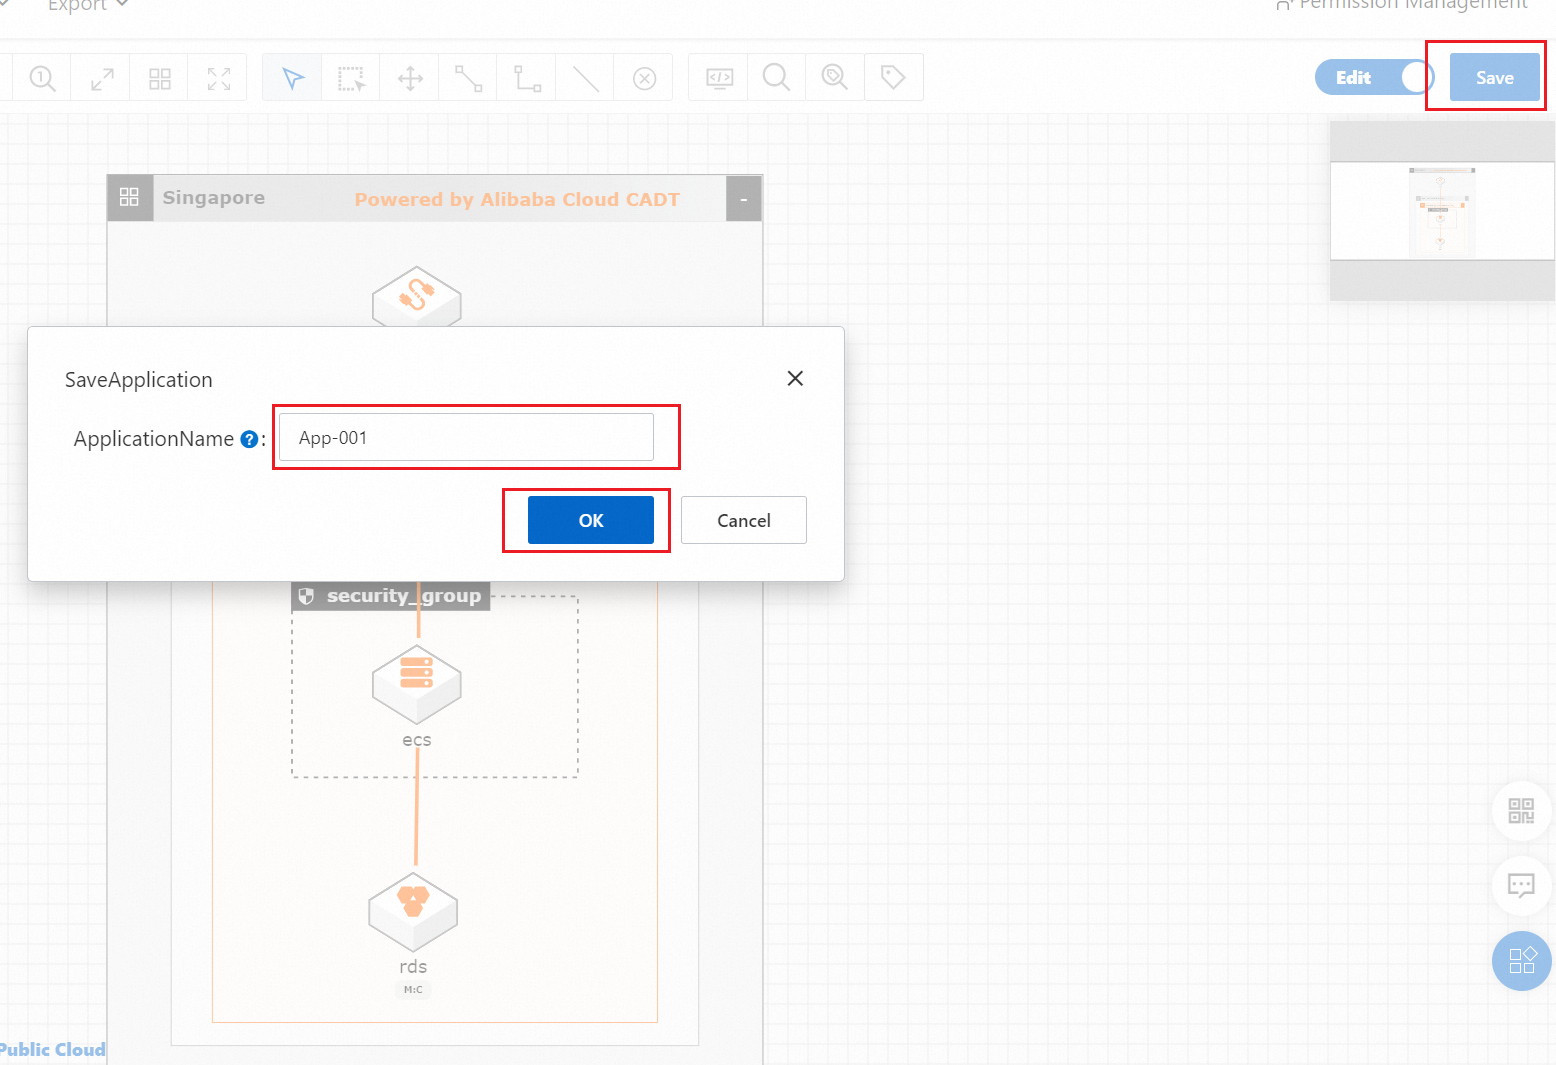
After the application architecture is designed, click Save in the upper-right corner. In the dialog box that appears, configure the ApplicationName parameter and click OK.
NoteThe application name must be unique within the current account.
The application name must be 2 to 128 characters in length. It must start with a letter but cannot start with http:// or https://. It can contain letters, digits, underscores (_), and hyphens (-).
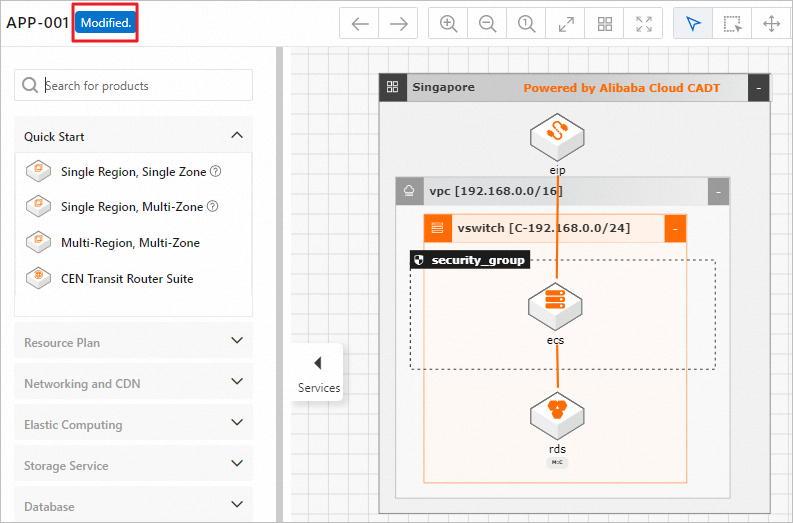
In the upper-left corner of the page, you can find that the status of the application changes to Modified.
A custom application is created.
NoteAt this point, an architecture topology is created and saved as an application, but no resources are actually deployed.
In the top navigation bar, choose Application > My Applications. On the page that appears, you can find the created application.

Move your pointer over the application and click View Architecture. Then, you can open the application on the canvas again.

After the application is opened on the canvas, the View mode is enabled by default to prevent unexpected modifications. If you want to modify the application architecture, click View in the top toolbar to switch the mode to Edit.

