This topic describes how to configure resource parameters for an application in the Cloud Architect Design Tools (CADT) console.
Usage notes
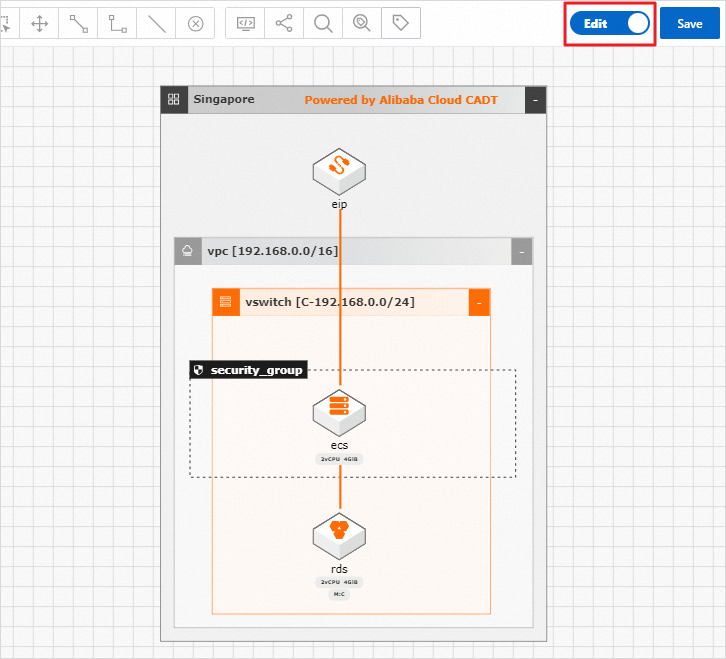
To configure resource parameters on the canvas, make sure that the Edit mode is turned on.
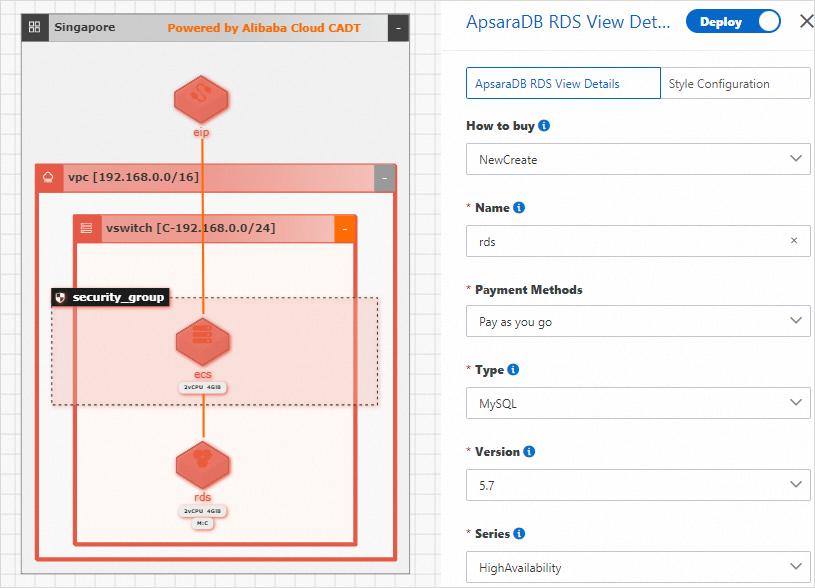
To configure parameters for a service or connection line, double-click the service or connection line. In the panel that appears, configure the resource parameters.
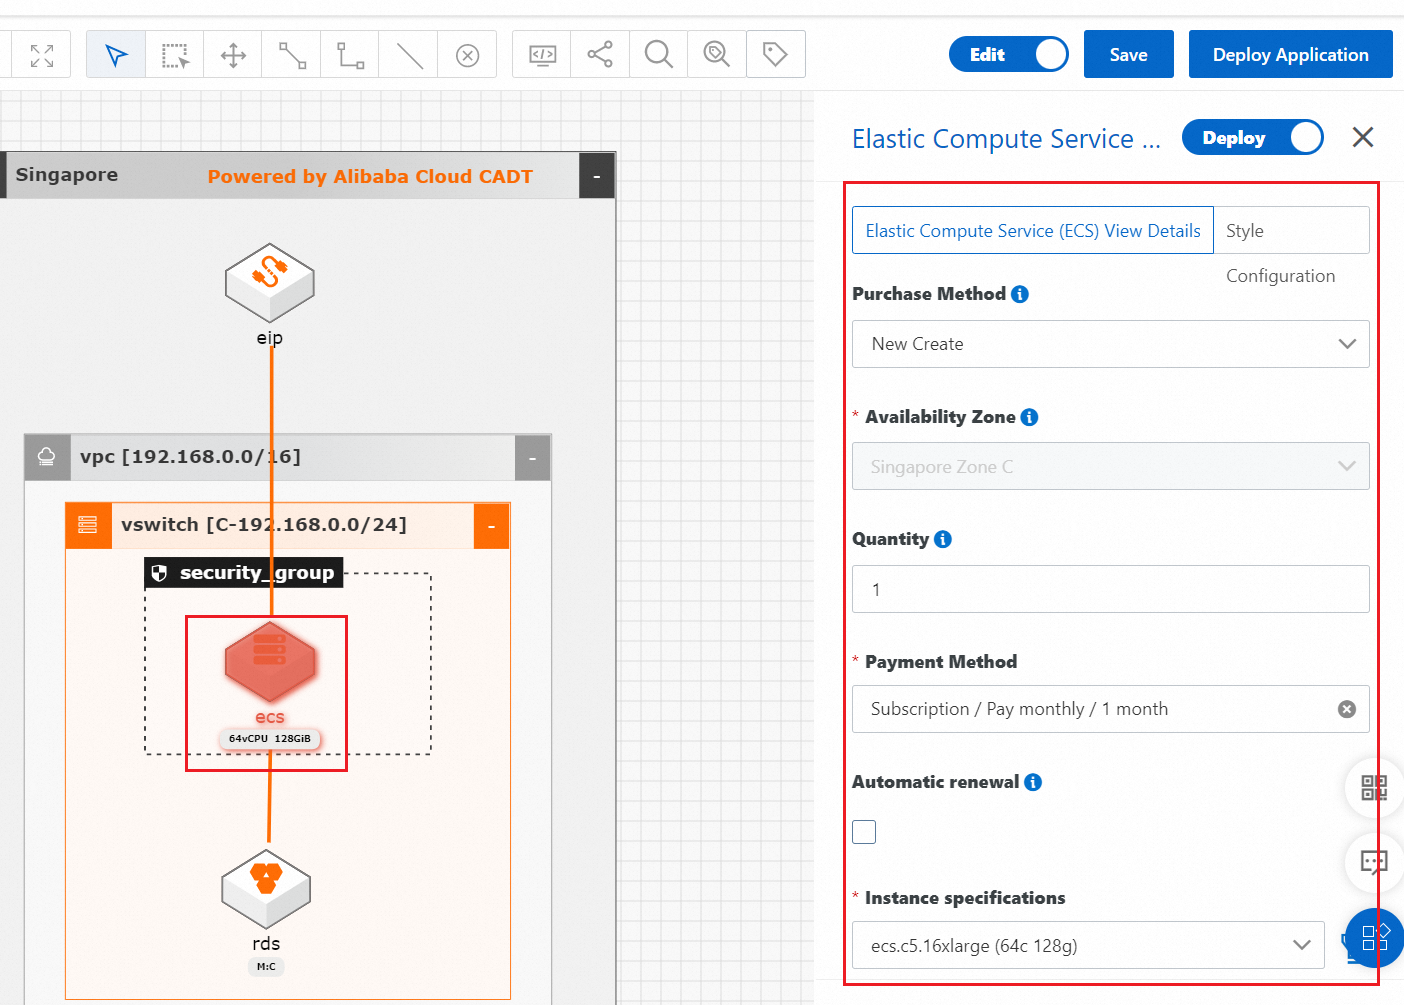
You must configure parameters for services in sequence from the outside to the inside of the application architecture. This is because the parameters of inner services depend on the parameters of outer services. After the parameters of all services are configured, if you modify the parameters of an outer service, you must double-click inner services to verify their parameter settings in the parameter configuration panel.
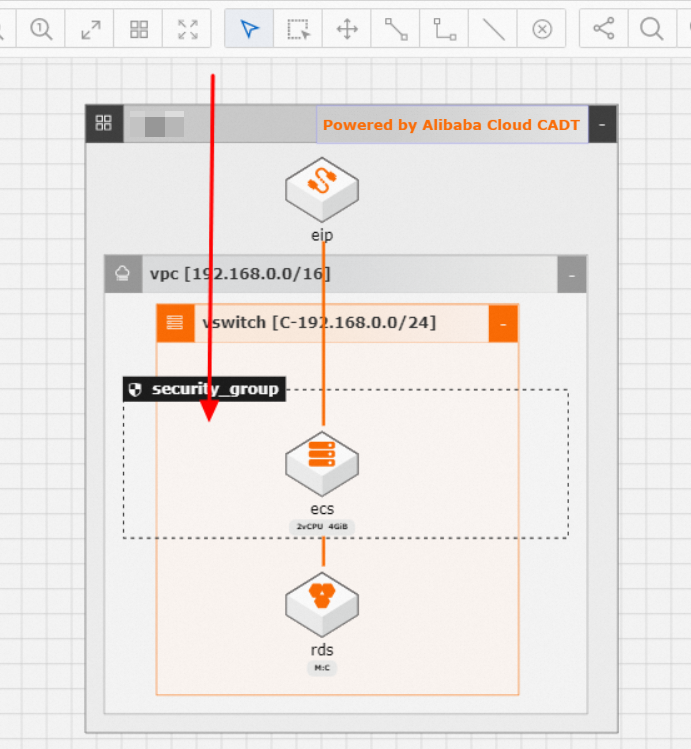
Some connection lines between resources are purely indicative, whereas others indicate association relationships or carry communication parameters, which must be configured.

Procedure
Log on to the CADT console.
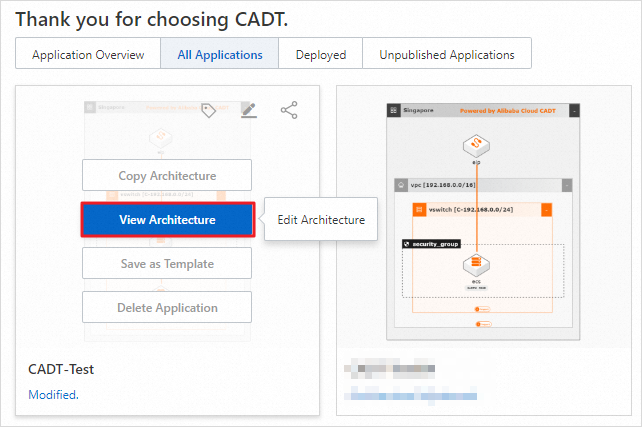
In the navigation bar, choose Applications > My Applications. On the page that appears, find the application for which you want to configure parameters, move the pointer over the application, and then click View Architecture. In this example, a custom application architecture is used. For more information about how to create a custom application, see Create an application architecture.
NoteIf you have opened the application architecture on the canvas, skip this step.
Turn on the Edit mode so that you can edit the application architecture.
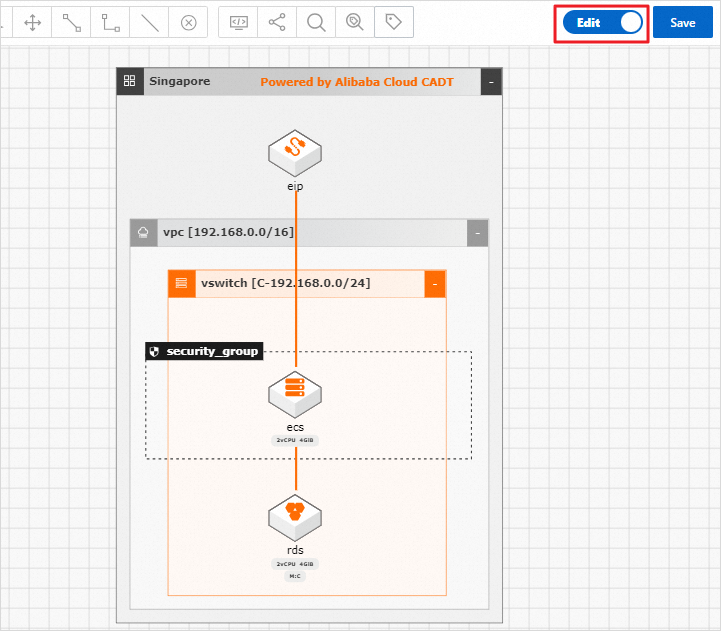
Configure resource parameters based on the order of the application architecture from the outside to the inside.
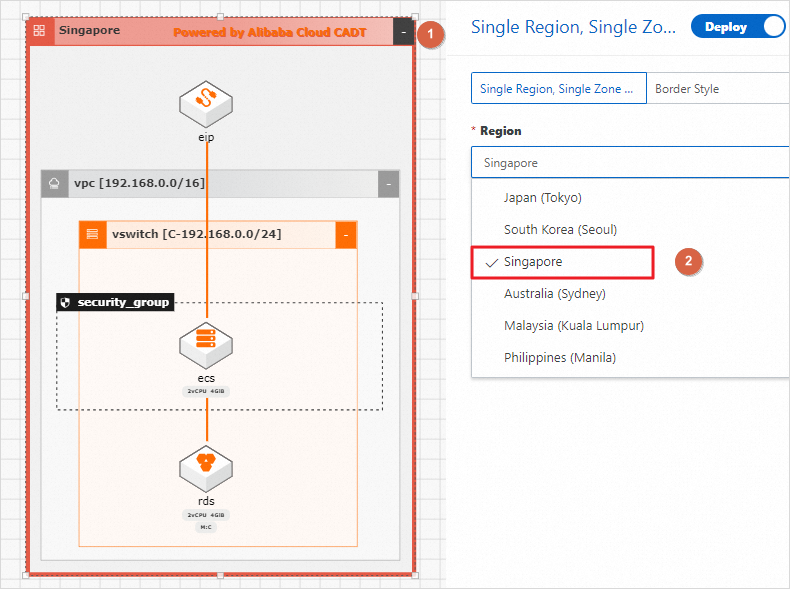
Double-click the region box and select the region in which you want to deploy resources.
NoteIf the application is deployed in a single region and a single zone, the region, virtual private cloud (VPC), and vSwitch are configured by default. You can modify the configurations or use the default configurations.
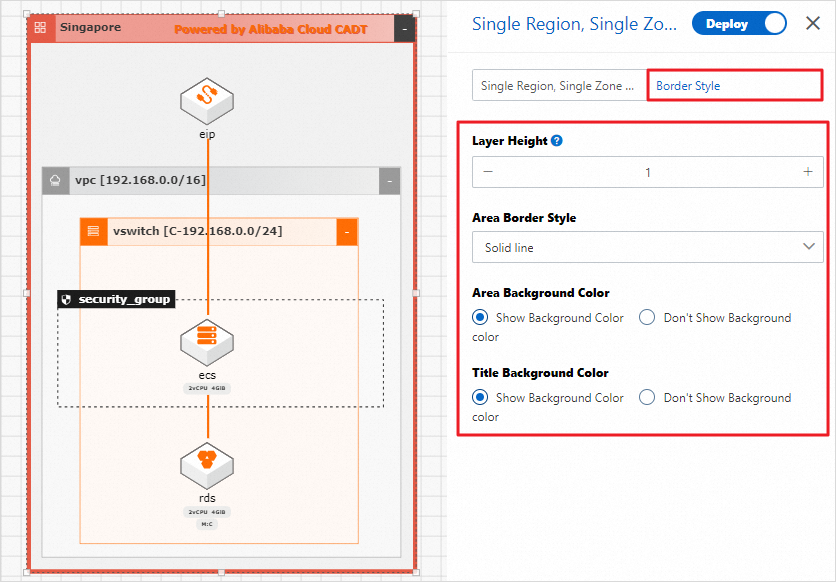
 You can also configure the border style based on your personal preference.
Configure the parameters for the VPC, the vSwitch, the Elastic Compute Service (ECS) instance, the security group, the ApsaraDB RDS instance, and the elastic IP address (EIP) in sequence.
If you change the region or zone after the parameters of all services are configured, you must double-click each service to verify its parameter settings.
For example, you can change the zone in which the vSwitch resides to ap southeast 1b.

A message appears, indicating that CADT will check the number of available resources again. Click Modify.
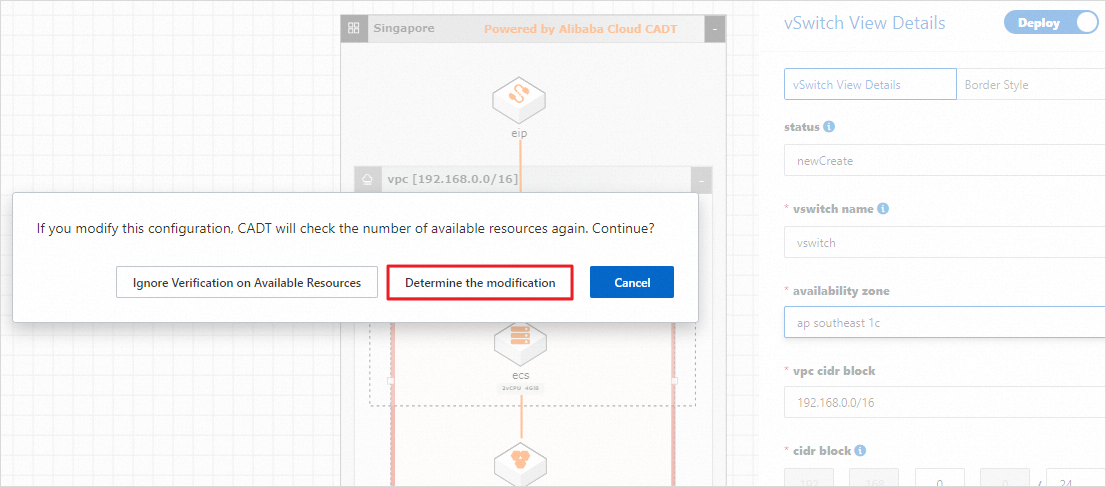
After the zone is changed, double-click the ECS instance and the ApsaraDB RDS instance to verify their parameter settings.
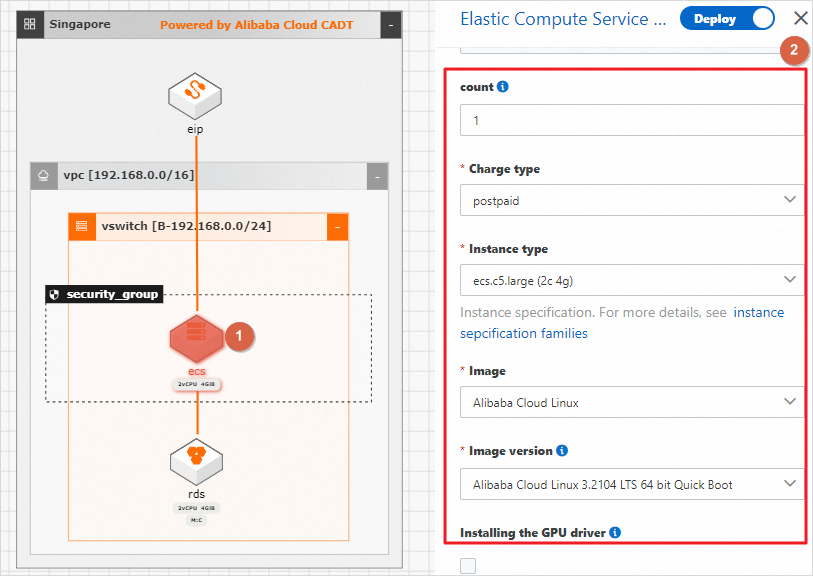
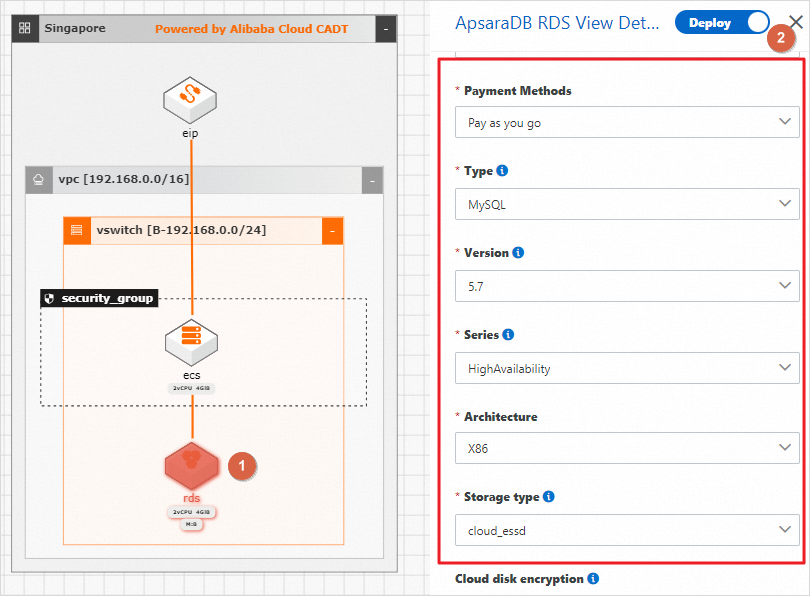
After the parameters of all services are configured, configure parameters for the connection lines between resources.
NoteSome connection lines between resources are purely indicative and no parameters need to be configured. Other connection lines, such as the connection lines between the ECS instance and the ApsaraDB RDS instance and between the Classic Load Balancer (CLB) instance and the ECS instance, indicate association relationships or carry communication parameters, which must be configured.
The connection line between the EIP and the ECS instance indicates that CADT automatically associates the EIP with the ECS instance after the resources are created. You do not need to configure parameters for this connection line.
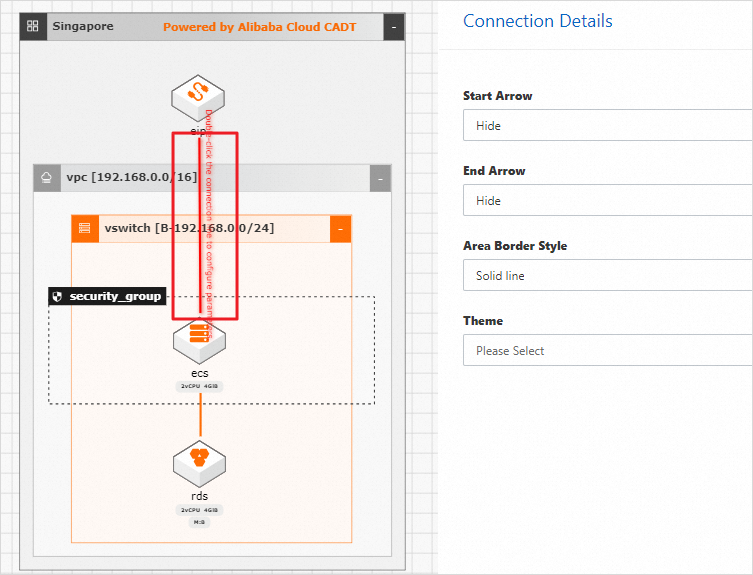
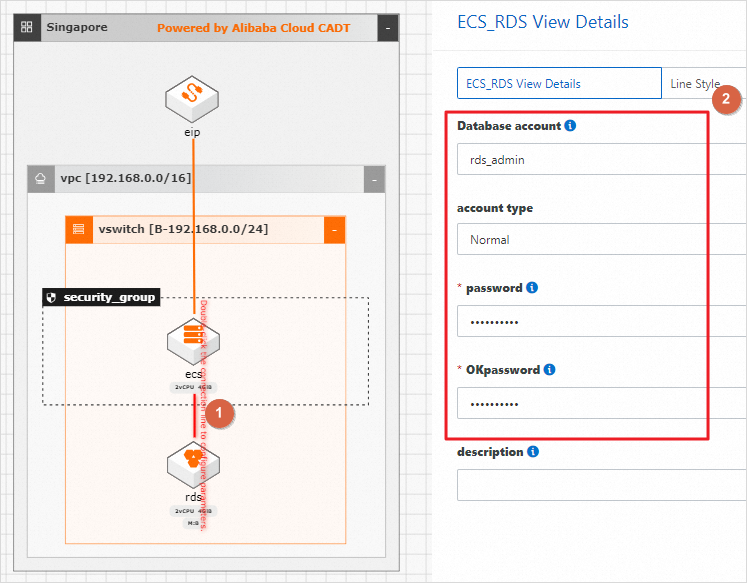
Double-click the connection line between the ECS instance and the ApsaraDB RDS instance. In the panel that appears, configure the database account and password.
NoteThis step is optional. You can create a database account after the ApsaraDB RDS instance is created.
After the parameters of all resources are configured, click Save in the upper-right corner to save the configurations.
NoteAny time you modify the application architecture or parameters, remember to save the configurations.
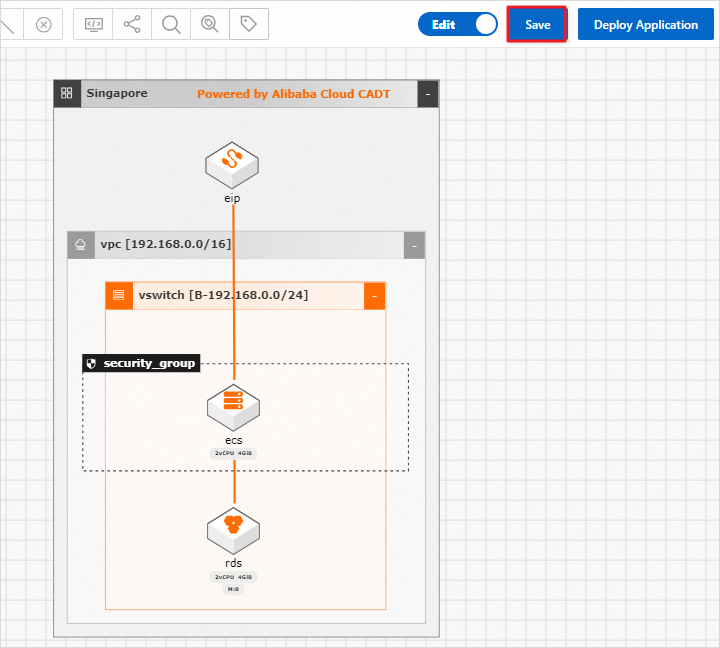
The parameters are configured and saved for all resources in the application.
