Alibaba Cloud Container Service for Kubernetes (ACK) provides GPU sharing capabilities for model inference scenarios using a single, shared GPU. It also supports GPU memory isolation at the NVIDIA driver kernel level. To ensure compatibility, you must upgrade the GPU sharing component if it is incompatible with the node's GPU driver or operating system. This topic describes how to manage the GPU sharing component on GPU nodes to enable GPU scheduling and isolation.
Prerequisites
Before you can use GPU sharing, you must activate the Cloud-native AI suite. For billing information, see Billing of Cloud-native AI Suite.
You have created an ACK Managed Cluster, and selected GPU-accelerated instance as the instance type.
Limitations
Do not set the CPU Policy to
staticfor nodes that use GPU sharing.If you need to customize the KubeConfig file path, use
export KUBECONFIG=<kubeconfig>to specify the path, because thekubectl inspect cgpucommand does not support the--kubeconfigparameter.The isolation feature of the cGPU service does not support GPU memory allocation using Unified Virtual Memory (UVM), which involves calling the cudaMallocManaged() CUDA API. Allocate GPU memory using other methods, such as calling cudaMalloc(). For more information, see the official NVIDIA documentation.
The GPU sharing DaemonSet Pod does not have the highest priority on a node. This means its resources can be preempted by other high-priority Pods, leading to eviction. To prevent this, modify the DaemonSet you are using (for example,
gpushare-device-plugin-dsfor shared GPU memory) by addingpriorityClassName: system-node-criticalto grant it the highest priority.For performance considerations, create a maximum of 20 Pods on a single physical GPU card when using cGPU. If you exceed this limit, subsequent Pods scheduled to the card will fail to run and generate the error
Error occurs when creating cGPU instance: unknown.You can install the GPU sharing component in any region. However, only the following regions support GPU memory isolation. Ensure your cluster is in one of these regions.
Version requirements.
Configuration
Supported version
Kubernetes version
If the ack-ai-installer component version is earlier than 1.12.0, clusters of version 1.18.8 or later are supported.
If the ack-ai-installer component version is 1.12.0 or later, only clusters of version 1.20 or later are supported.
NVIDIA driver version
418.87.01 or later
Container Runtime version
Docker: 19.03.5 or later
containerd: 1.4.3 or later
Operating System
Alibaba Cloud Linux 3.x (container-optimized versions require ack-ai-installer version 1.12.6 or later), Alibaba Cloud Linux 2.x, CentOS 7.6, CentOS 7.7, CentOS 7.9, Ubuntu 22.04
Supported GPU cards
P-series, T-series, V-series, A-series, H-series
Install the GPU sharing component
Step 1: Install the GPU sharing component
Cloud-native AI suite not deployed
Log on to the ACK console. In the left navigation pane, click Clusters.
On the Clusters page, find the cluster you want and click its name. In the left-side navigation pane, choose .
On the Cloud-native AI Suite page, click Deploy.
On the Deploy Cloud-native AI Suite page, select Scheduling Policy Extension (Batch Task Scheduling, GPU Sharing, Topology-aware GPU Scheduling).
(Optional) Click Advanced to the right of Scheduling Policy Extension (Batch Task Scheduling, GPU Sharing, Topology-aware GPU Scheduling). In the Parameters dialog box that appears, modify the
policyparameter for cGPU. After making changes, click OK.If you do not have special requirements for cGPU compute sharing, we recommend using the default
policy: 5, which is native scheduling. For supported cGPU policies, see Install and use the cGPU component.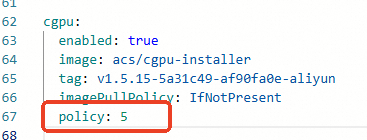
At the bottom of the Cloud-native AI Suite page, click Deploy Cloud-native AI Suite.
After the installation succeeds, the ack-ai-installer component appears in the component list on the Cloud-native AI Suite page.
Cloud-native AI suite deployed
Log on to the ACK console. In the left navigation pane, click Clusters.
On the Clusters page, find the cluster you want and click its name. In the left-side navigation pane, choose .
In the row for the scheduling component ack-ai-installer, click Deploy in the Actions column.
(Optional) In the Parameters dialog box that appears, modify the
policyfield for cGPU.If you do not have special requirements for cGPU compute sharing, we recommend using the default
policy: 5, which is native scheduling. For supported cGPU policies, see Install and use the cGPU component.After making changes, click OK.
After installation, the Status of ack-ai-installer changes to Deployed.
Step 2: Enable GPU sharing and memory isolation
On the Clusters page, find the cluster to manage and click its name. In the left navigation pane, choose .
On the Node Pools page, click Create Node Pool and complete the configurations as described in Create and manage node pools.
On the Create Node Pool page, configure the settings for the node pool, then click Confirm. Key configurations are described below:
Parameter
Description
Expected Nodes
The initial number of nodes for the node pool. To create a node pool without nodes, enter 0.
Node Labels
Add label values based on your business requirements. For details about node labels, see Enable scheduling features.
The following example uses the label value
cgpu, which enables GPU sharing on the node. Each Pod only needs to request GPU memory resources, and Pods on a single card will have memory isolation and share compute power.Click the
 icon next to Node Labels, and set the Key to
 ack.node.gpu.scheduleand the Value tocgpu.ImportantFor notes on cGPU isolation, see cGPU FAQ.
After adding the GPU sharing label, do not use the
kubectl label nodescommand or the label management on the Node page in the console to change the GPU scheduling attribute label. Doing so may cause potential issues. To avoid potential issues, Enable scheduling features.
Step 3: Add GPU nodes
If you created GPU nodes when you added the node pool, you can skip this step.
After creating a node pool, you can add GPU nodes to it. When adding GPU nodes, you must specify GPU-accelerated instance as the architecture for the instance type. For specific operations, see Add existing nodes or Create and manage node pools.
Step 4: Install and use the GPU resource query tool
You must download the executable file to a directory included in your PATH environment variable. This example uses
/usr/local/bin/.If you are using a Linux system, download
kubectl-inspect-cgpu:wget http://aliacs-k8s-cn-beijing.oss-cn-beijing.aliyuncs.com/gpushare/kubectl-inspect-cgpu-linux -O /usr/local/bin/kubectl-inspect-cgpuOn macOS:
wget http://aliacs-k8s-cn-beijing.oss-cn-beijing.aliyuncs.com/gpushare/kubectl-inspect-cgpu-darwin -O /usr/local/bin/kubectl-inspect-cgpu
Add executable permissions to
kubectl-inspect-cgpu.chmod +x /usr/local/bin/kubectl-inspect-cgpuView the GPU usage in your cluster.
kubectl inspect cgpuExpected output:
NAME                       IPADDRESS      GPU0(Allocated/Total)  GPU Memory(GiB)
cn-shanghai.192.168.6.104  192.168.6.104  0/15                   0/15
----------------------------------------------------------------------
Allocated/Total GPU Memory In Cluster:
0/15 (0%)
Update the GPU sharing component
Step 1: Determine the upgrade method for the component
The upgrade method depends on how the ack-ai-installer component was originally installed. There are two installation methods.
Via Cloud-native AI Suite (Recommended): Install the ack-ai-installer component from the Cloud-native AI Suite page.
Via App Catalog (Deprecated): Install the ack-ai-installer component from the App Catalog page in the App Marketplace. This installation method is now deprecated. However, for existing components installed this way, you can still upgrade them using this method.
ImportantIf you uninstall a component that you installed this way, you will need to activate the Cloud-native AI Suite to reinstall it.
Step 2: Upgrade the component
Cloud-native AI suite
Log on to the ACK console. In the left navigation pane, click Clusters.
On the Clusters page, find the cluster you want and click its name. In the left-side navigation pane, choose .
In the Components area, locate the ack-ai-installer component and click Upgrade in the Actions column.
App Catalog
Log on to the ACK console. In the left navigation pane, click Clusters.
On the Clusters page, find the cluster you want and click its name. In the left-side navigation pane, choose .
In the Helm release list, locate the ack-ai-installer component, click Update in the Actions column, and follow the on-screen instructions to select the latest Chart version and complete the update.
ImportantIf you need to customize the Chart configuration, confirm the component update after modifying the configuration.
After the update, verify that the ack-ai-installer component shows the latest Chart version in the Helm release list.
Step 3: Upgrade existing nodes
Upgrading the ack-ai-installer component does not automatically upgrade the cGPU version on existing nodes. Use the following instructions to determine if cGPU isolation is enabled on your nodes.
If your cluster contains GPU nodes with cGPU isolation enabled, you must also upgrade the cGPU version on the existing nodes. For instructions, see Upgrade the cGPU version of a node.
If your cluster has no nodes with cGPU isolation enabled, you can skip this step.
NoteA node has cGPU isolation enabled if it has the label
ack.node.gpu.schedule=cgpuorack.node.gpu.schedule=core_mem.Upgrading the cGPU version on existing nodes requires stopping all application Pods on them. Perform this operation during off-peak hours to minimize business impact.