A deployment, also known as a stateless workload, is one of the most common workload types in Kubernetes. A deployment ensures that a specified number of pods run in the cluster in the state that you define. This topic describes how to create a stateless application in a Container Service for Kubernetes (ACK) cluster using the console and kubectl.
Before you begin
Before you create a workload, read Workloads to understand the basics of workloads and important considerations. This topic contains the following sections:
Create a deployment: Provides quick-start guides about how to create a deployment using the console and kubectl.
Configuration items: Provides links to the documentation about console configuration items and a sample YAML file for use with kubectl.
The examples in this topic use a public image. To pull a public image, your cluster or nodes must have Internet access:
Enable Internet access for the cluster (Recommended): Create an Internet NAT gateway for the VPC where the cluster resides. This provides Internet access to all resources in the cluster.
Assign a static public IP address to a node: A node with a public IP address can pull public images. However, you must assign a public IP address to every node where you deploy the workload.
Create a deployment
Create a deployment using the console
The following steps describe a simplified workflow for creating a workload. You can follow these steps to quickly deploy and verify the workload. After you are familiar with the basic operations, see Configuration items to customize your workload.
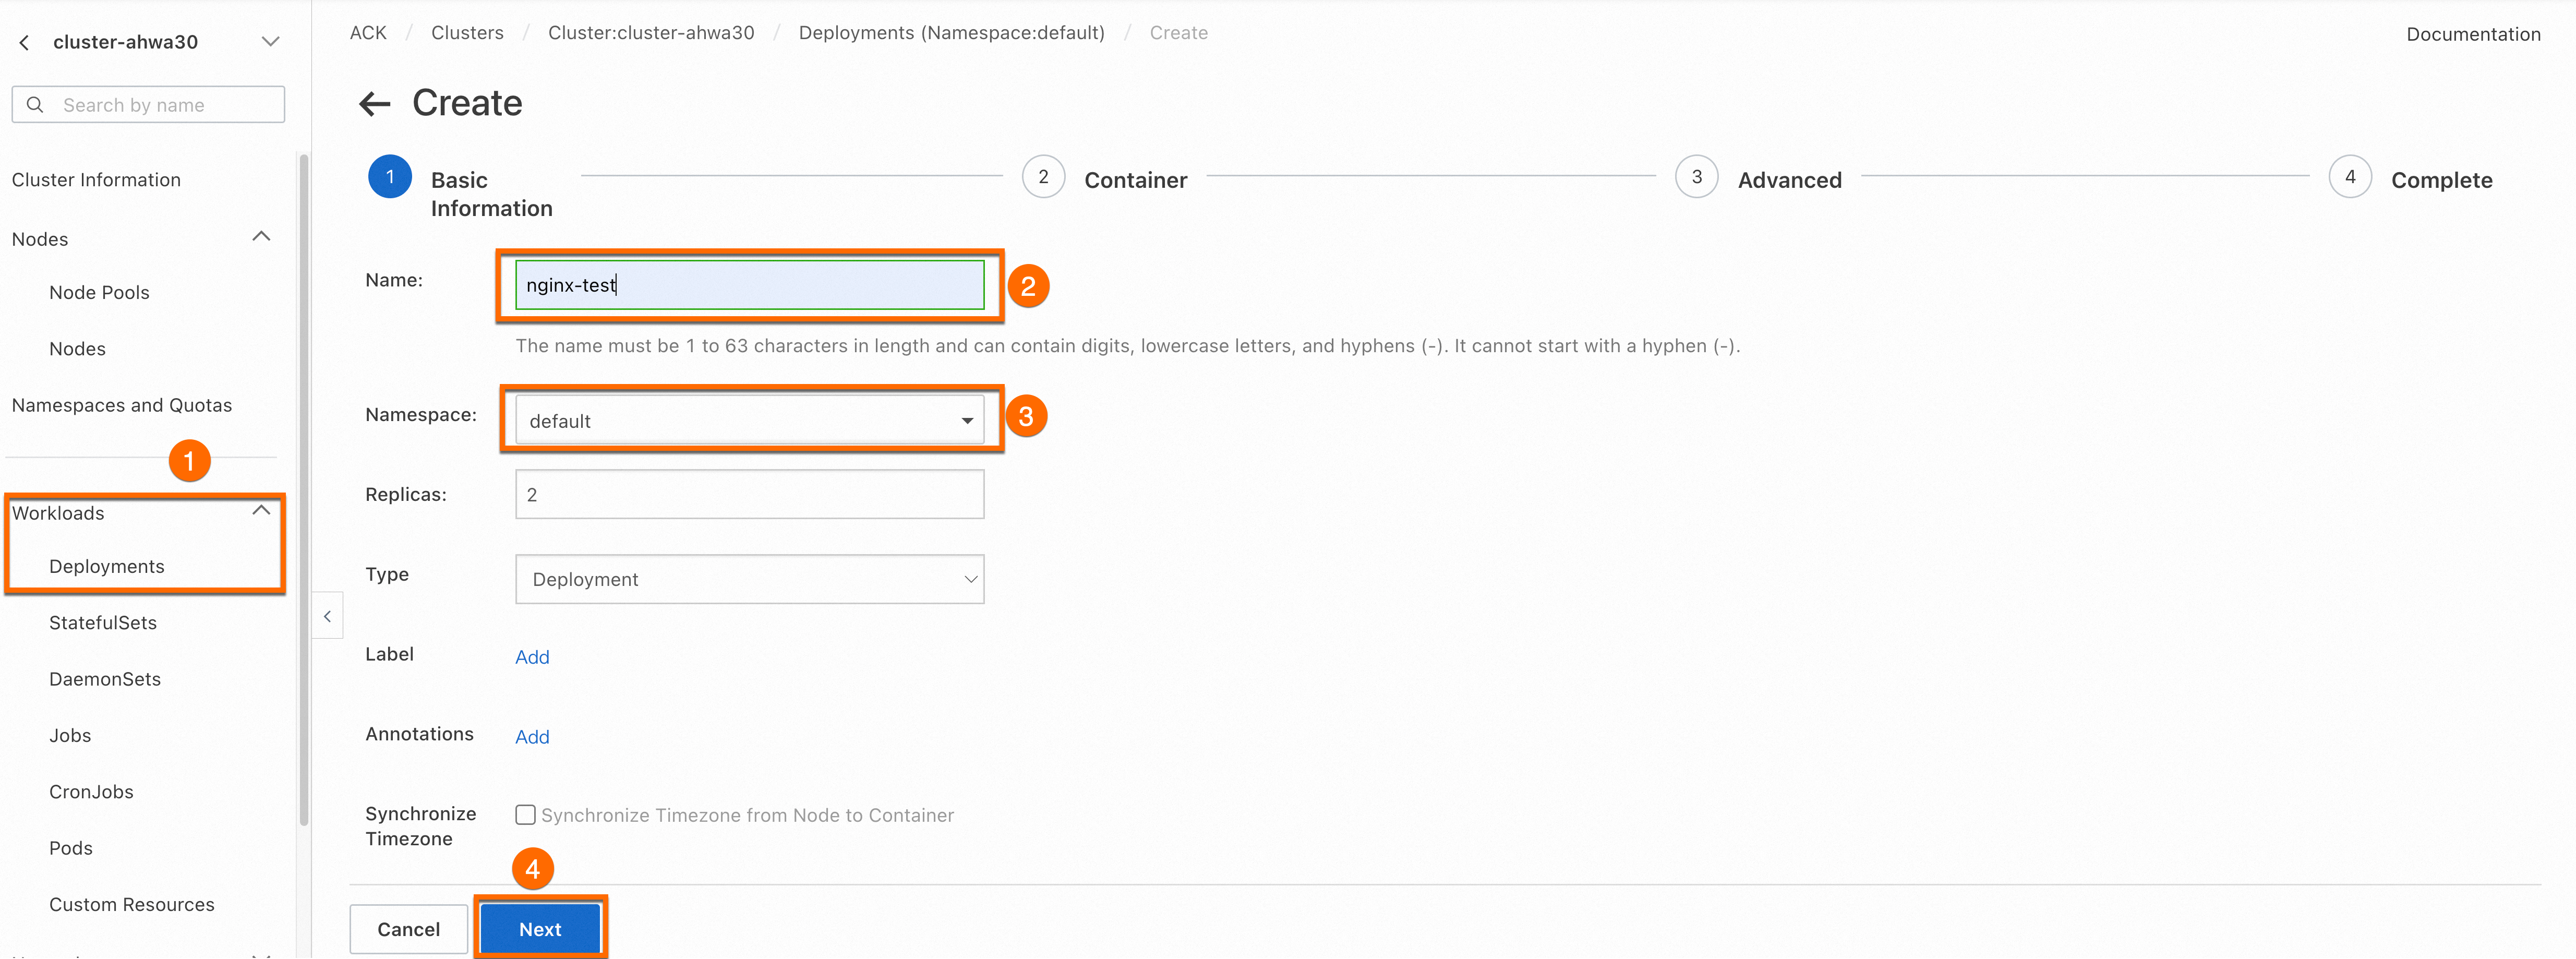
Configure basic information for the application
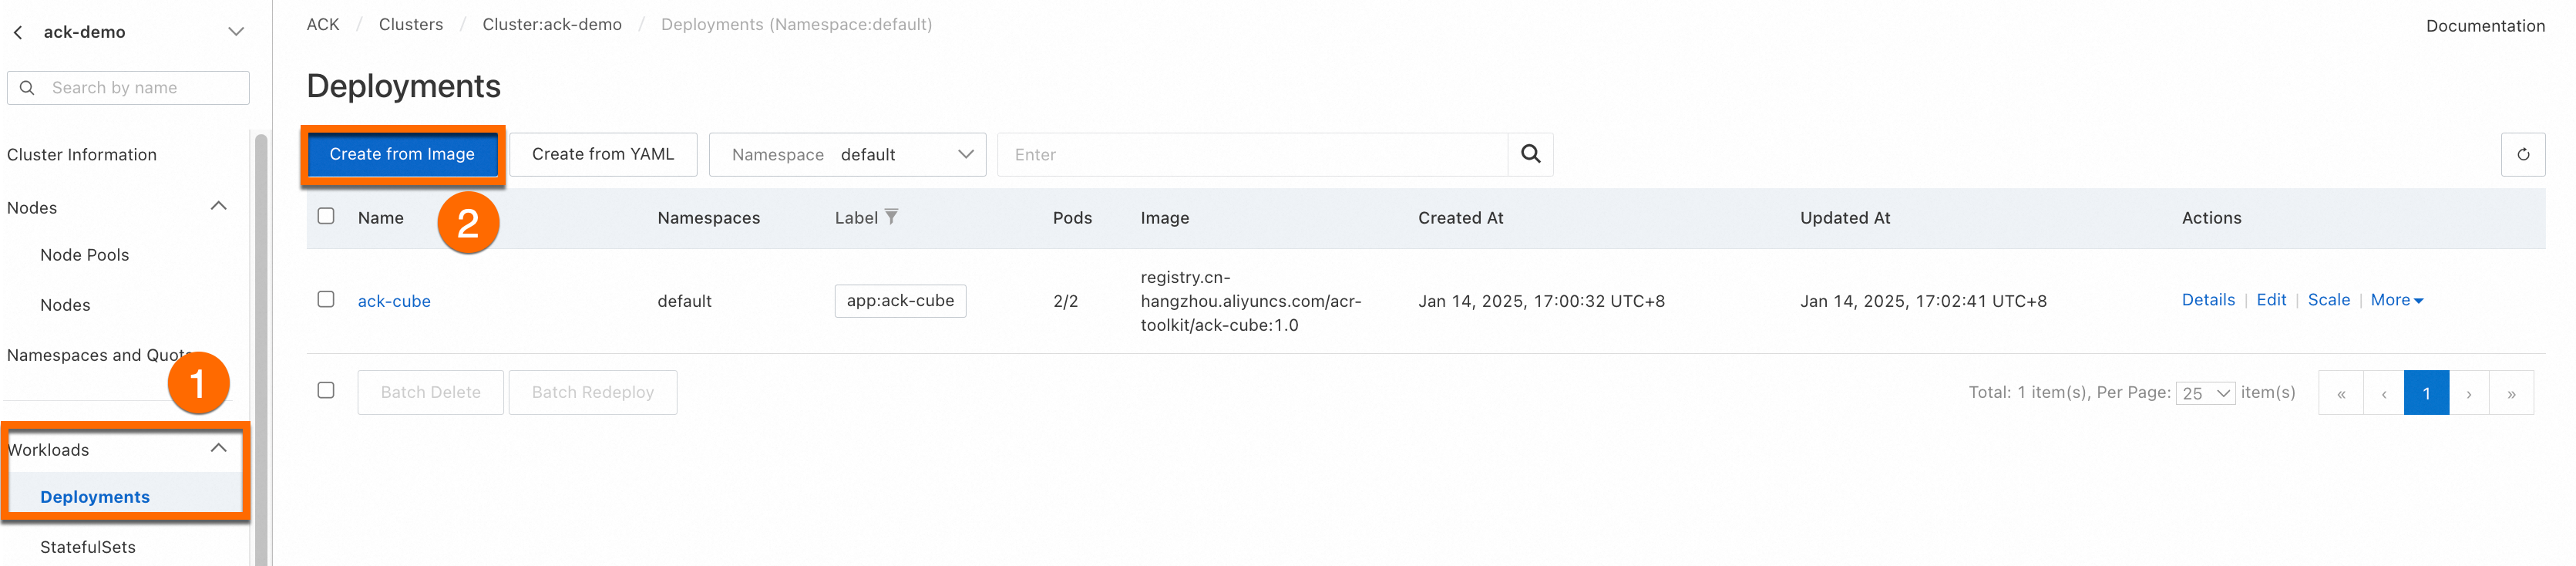
Log on to the Container Service for Kubernetes console. In the navigation pane on the left, click Clusters.On the Clusters page, click the name of the target cluster. In the navigation pane on the left, choose . On the Deployments page, click Create from Image.
On the Basic Information page, set the basic information for the application, and then click Next to proceed to the Container page.
Configure the container
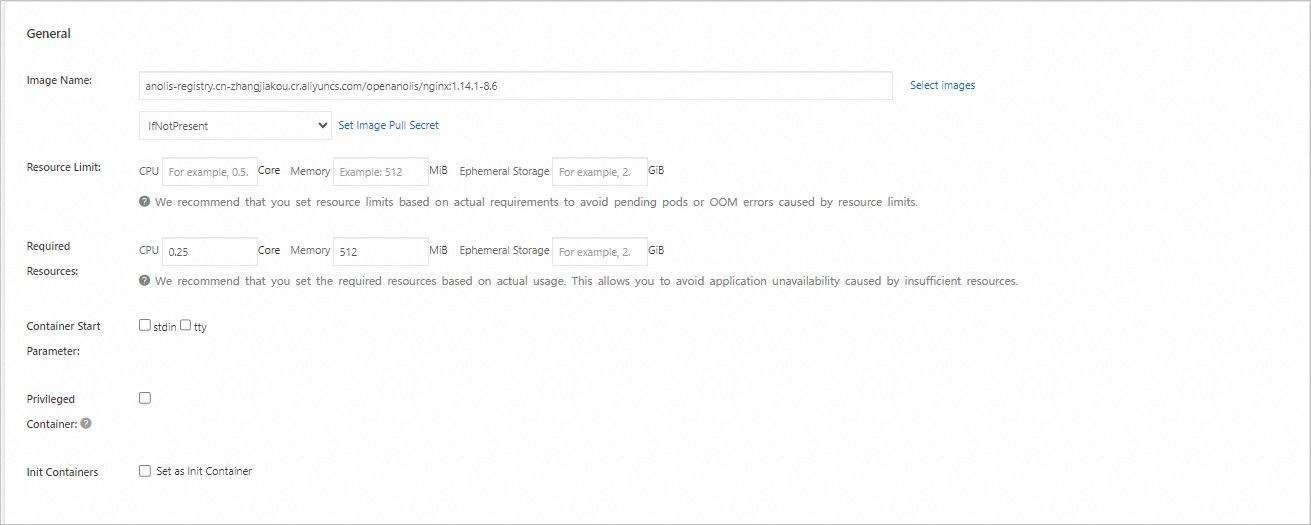
In the Container section, set the Image Name and Port. The other settings are optional. Keep the default values. Then, click Next to go to the Advanced page. The image address is shown below.
ImportantBefore you can pull this image, you must enable Internet access for the cluster. If you kept the default selection for Configure SNAT for VPC when you created the cluster, the cluster already has Internet access. Otherwise, see Enable Internet access for the cluster.
anolis-registry.cn-zhangjiakou.cr.aliyuncs.com/openanolis/nginx:1.14.1-8.6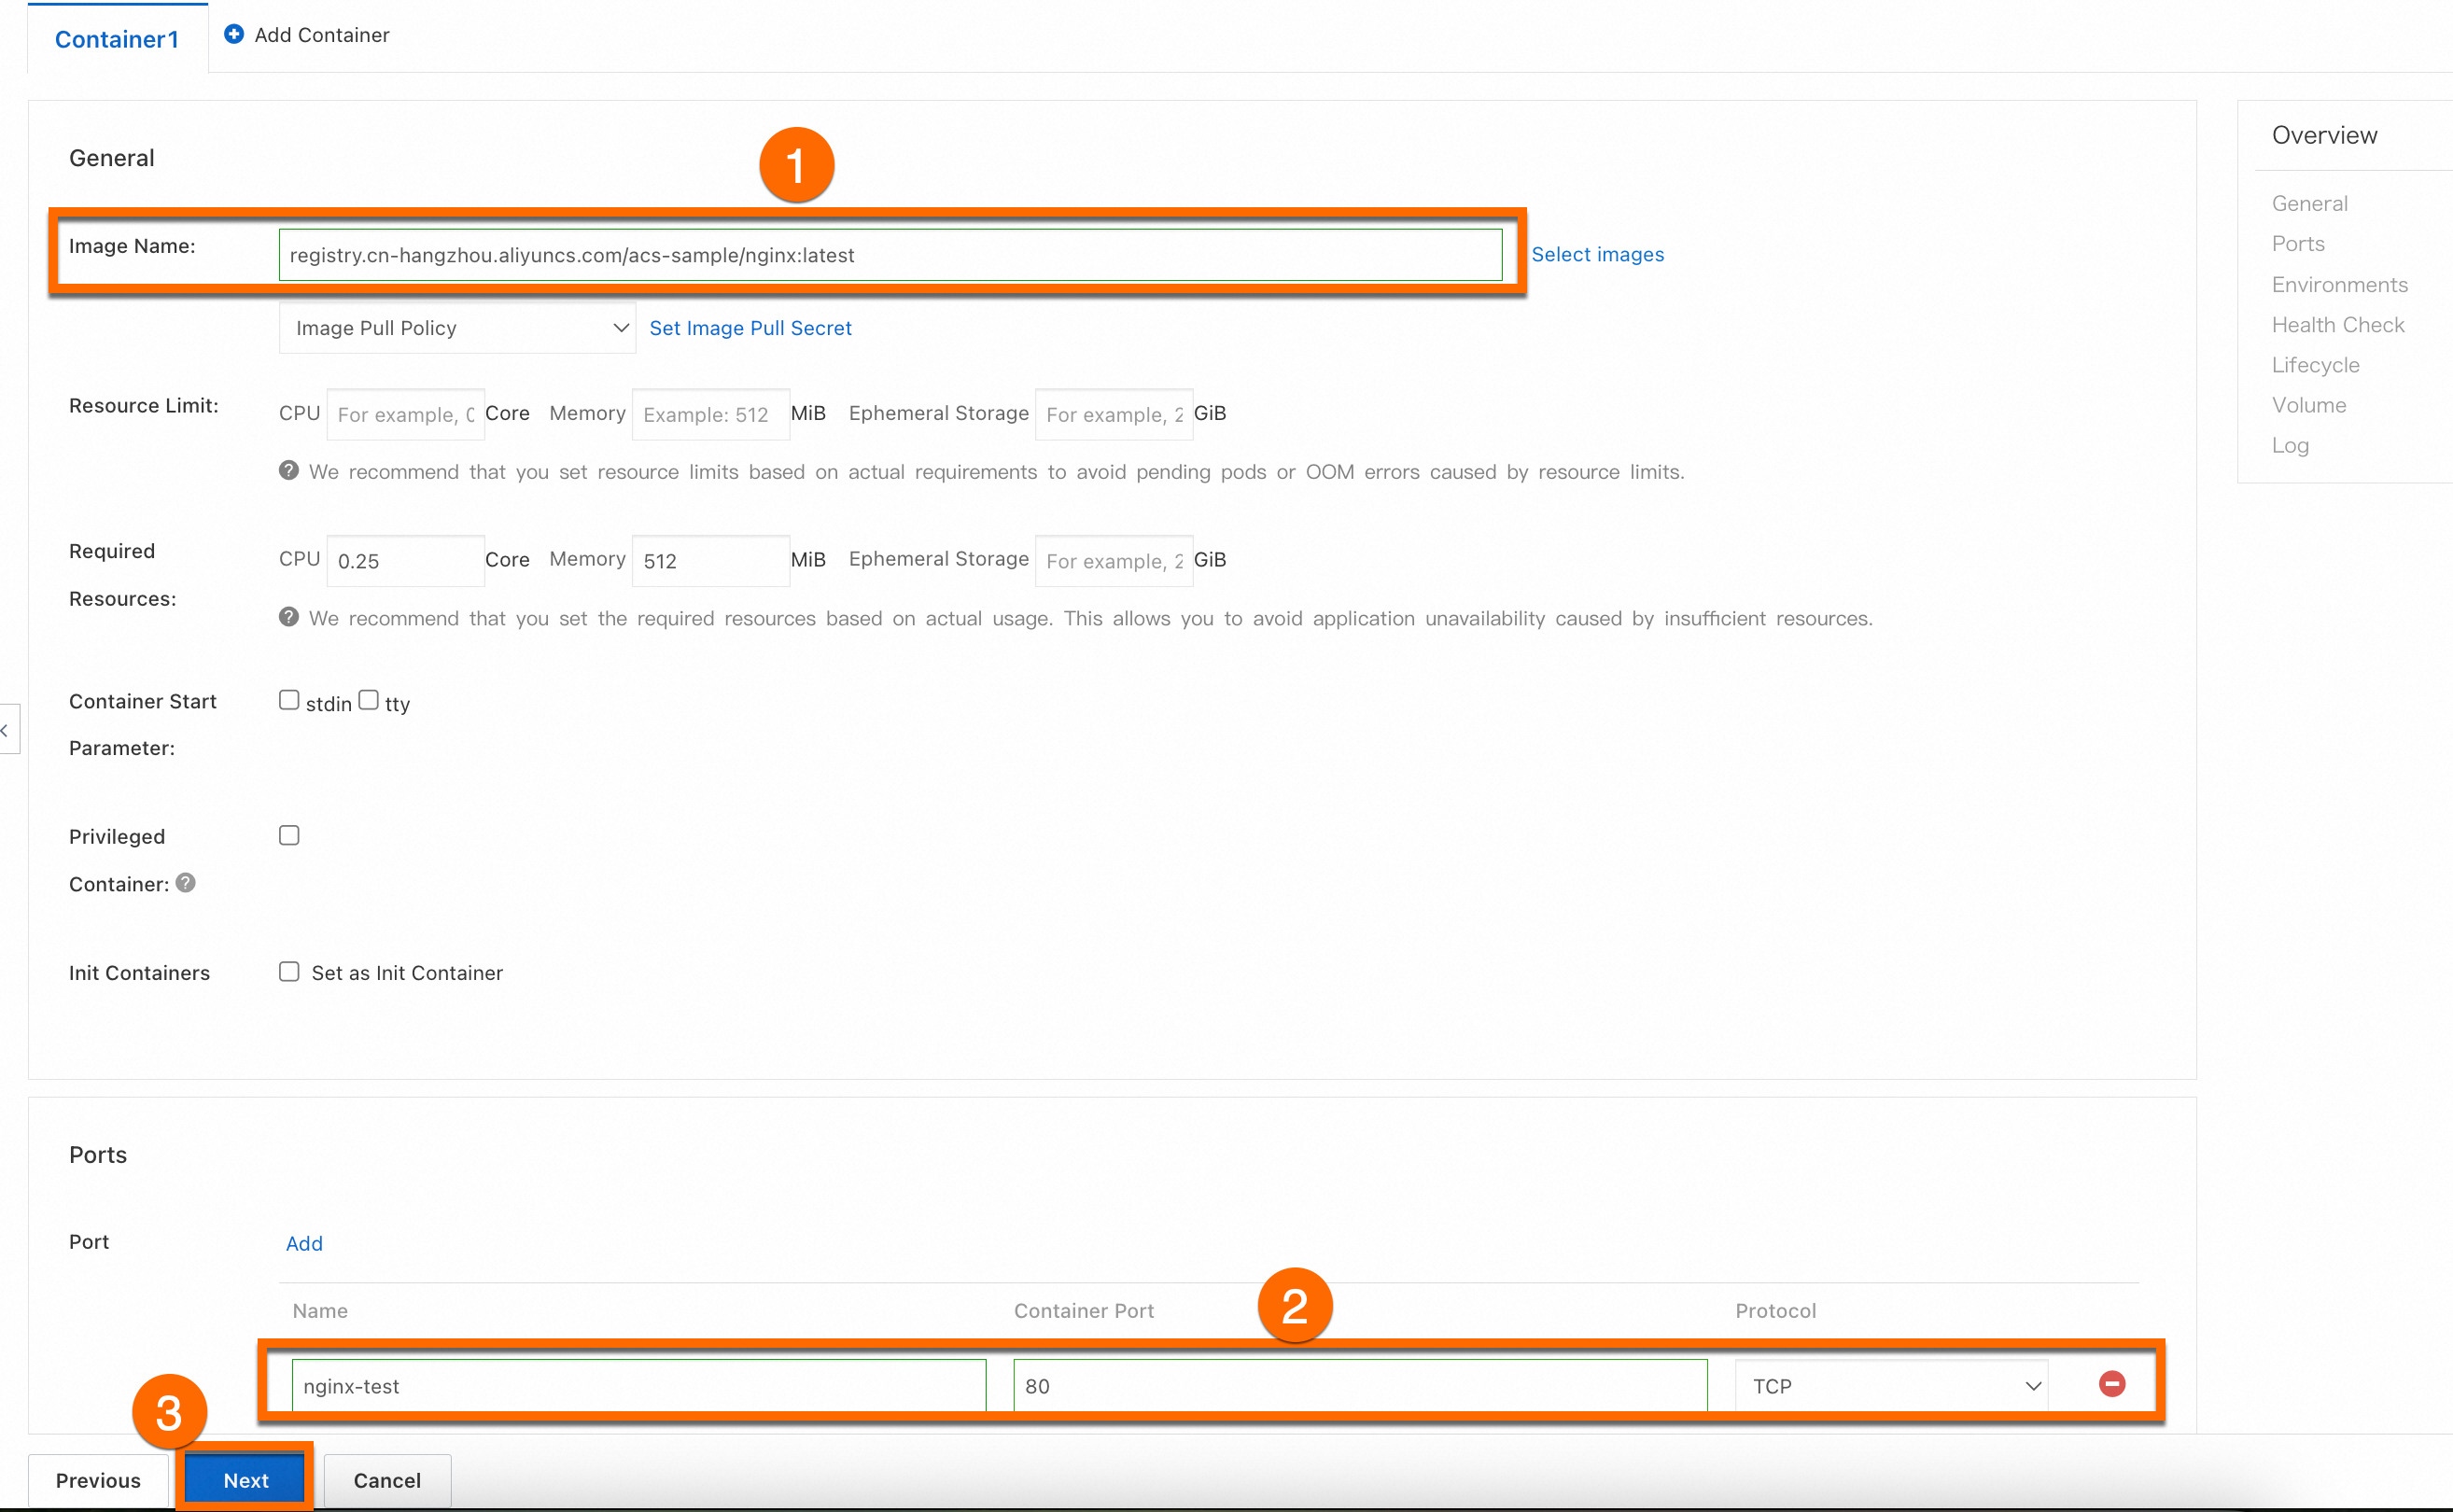
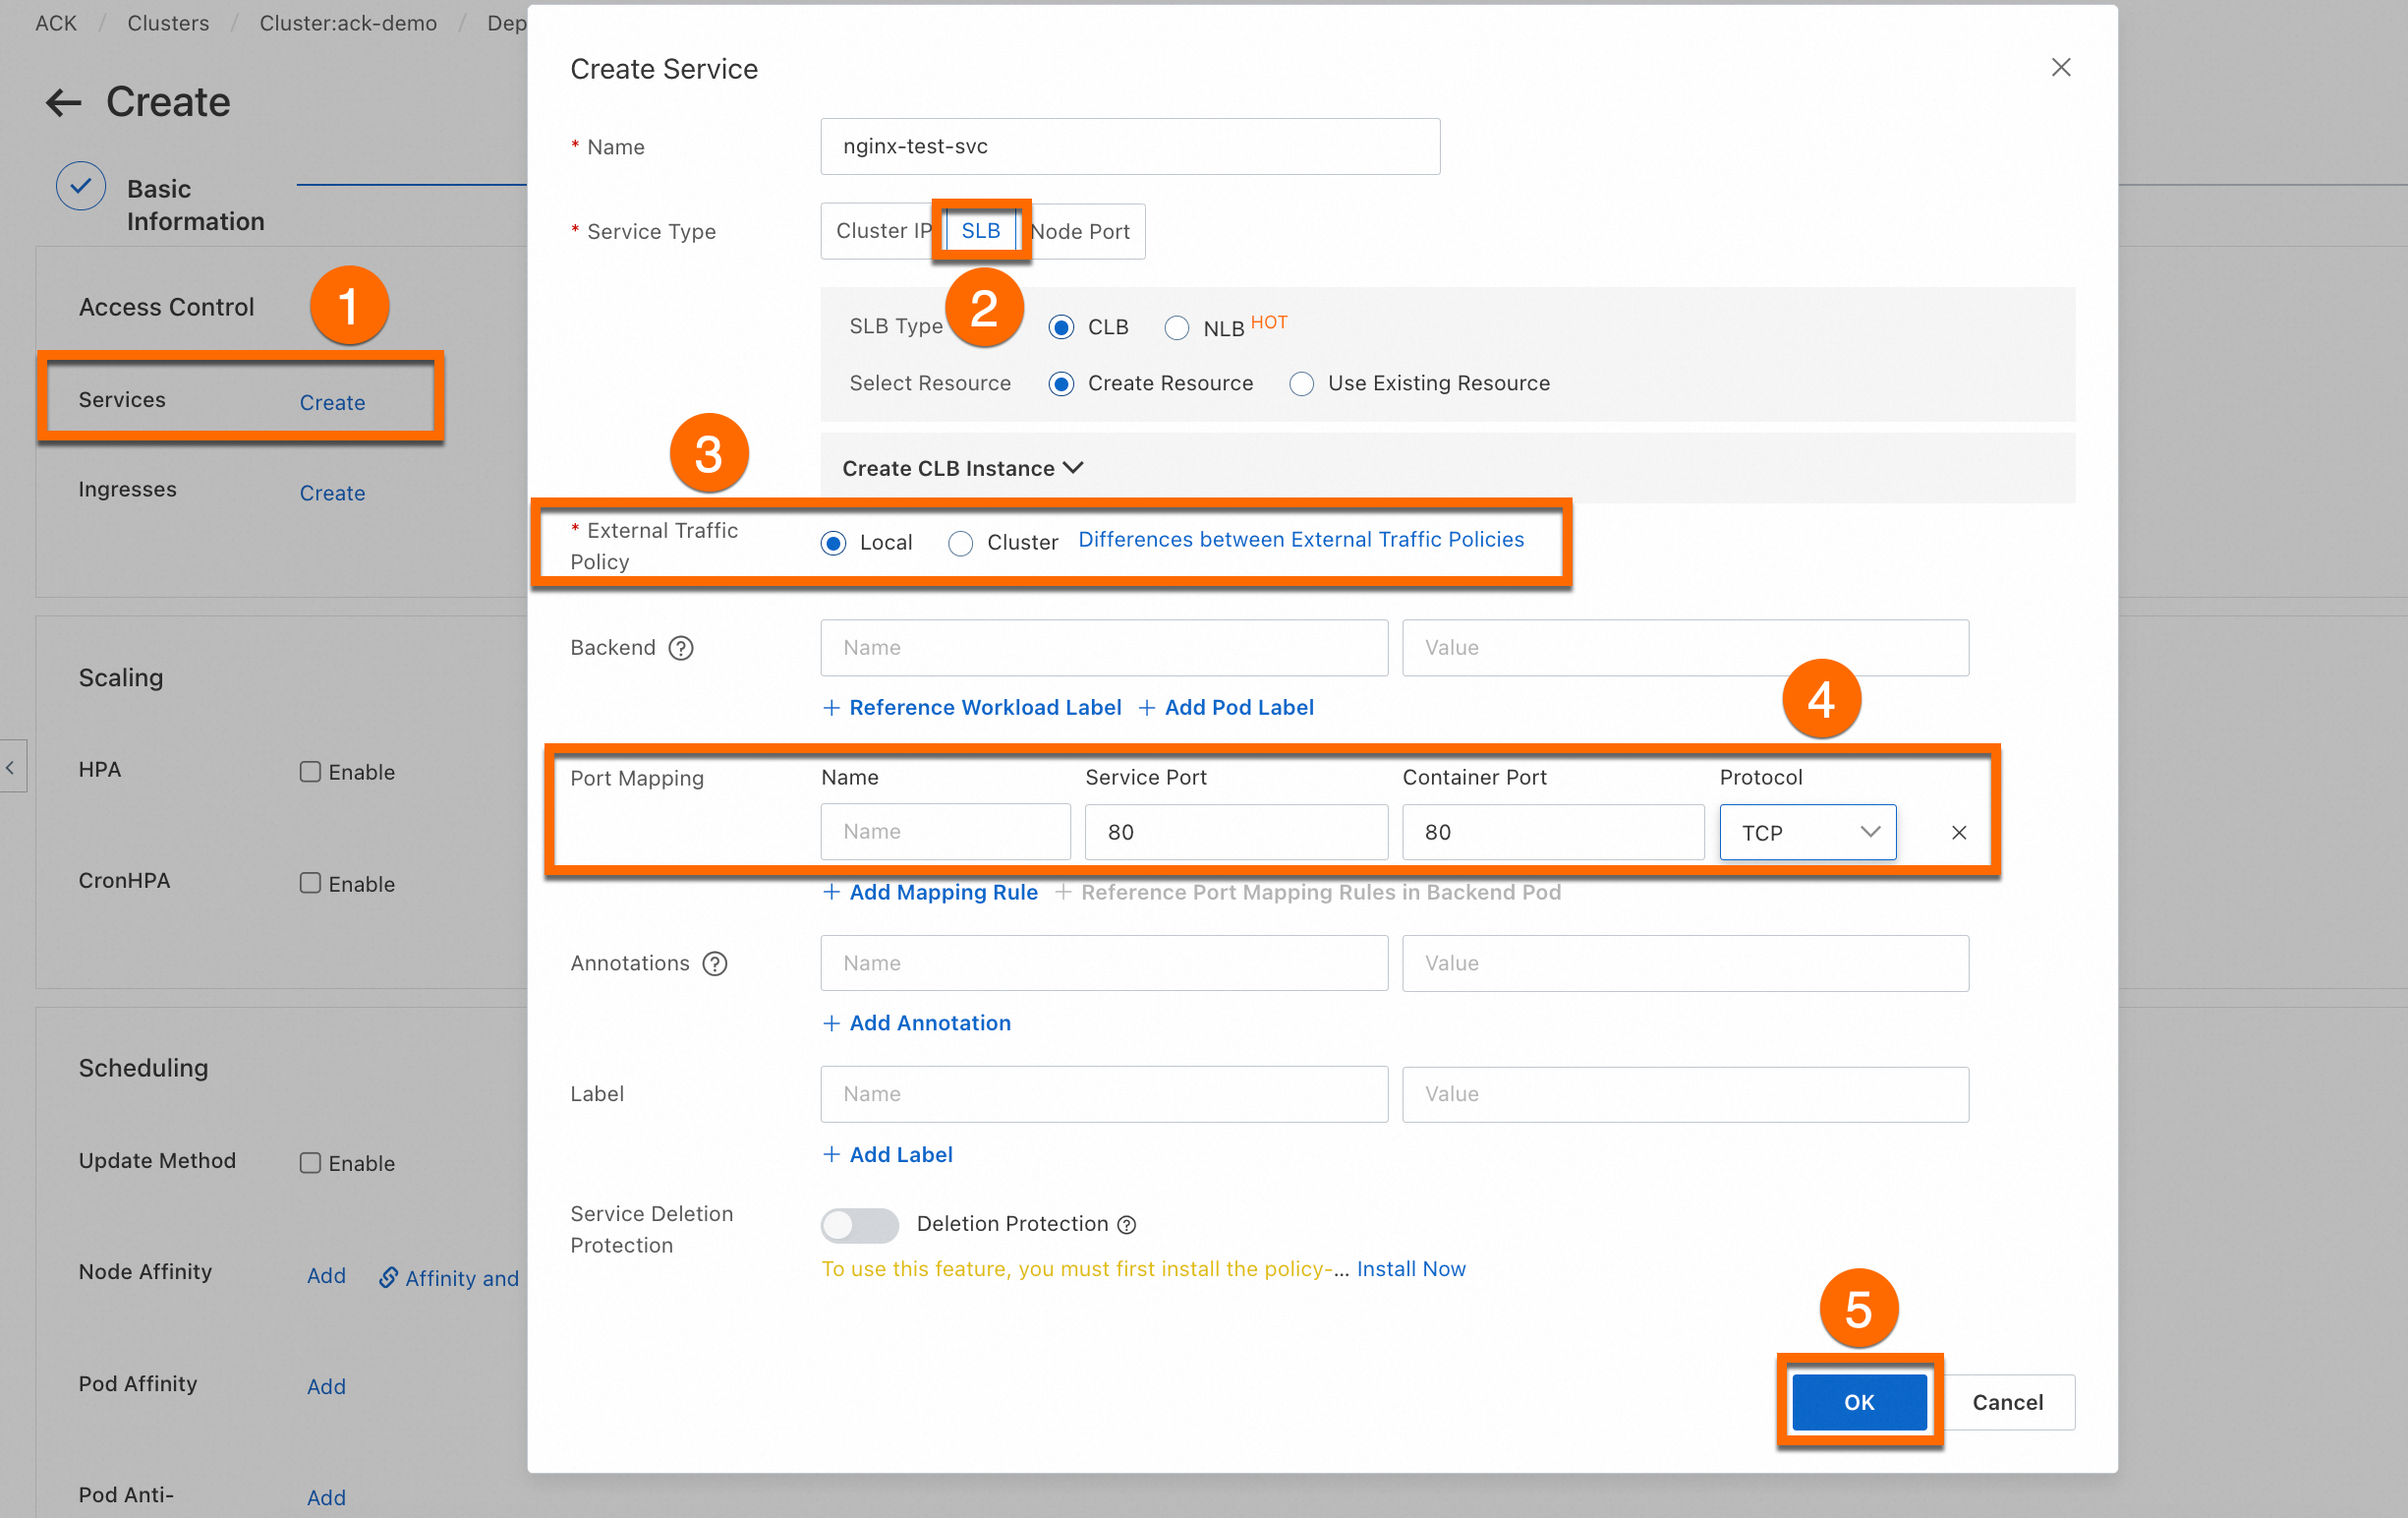
Complete the advanced configuration
On the Advanced page, click Create on the right side of Services to create a SLB type Service. Then, configure Scaling, Scheduling, Labels and Annotations, and click Create at the bottom of the page.
ImportantThis step creates a LoadBalancer service to expose the workload. The SLB instance that is used by this service incurs fees. For more information about billing, see Pay-as-you-go. If you do not plan to use this SLB instance later, release it promptly.
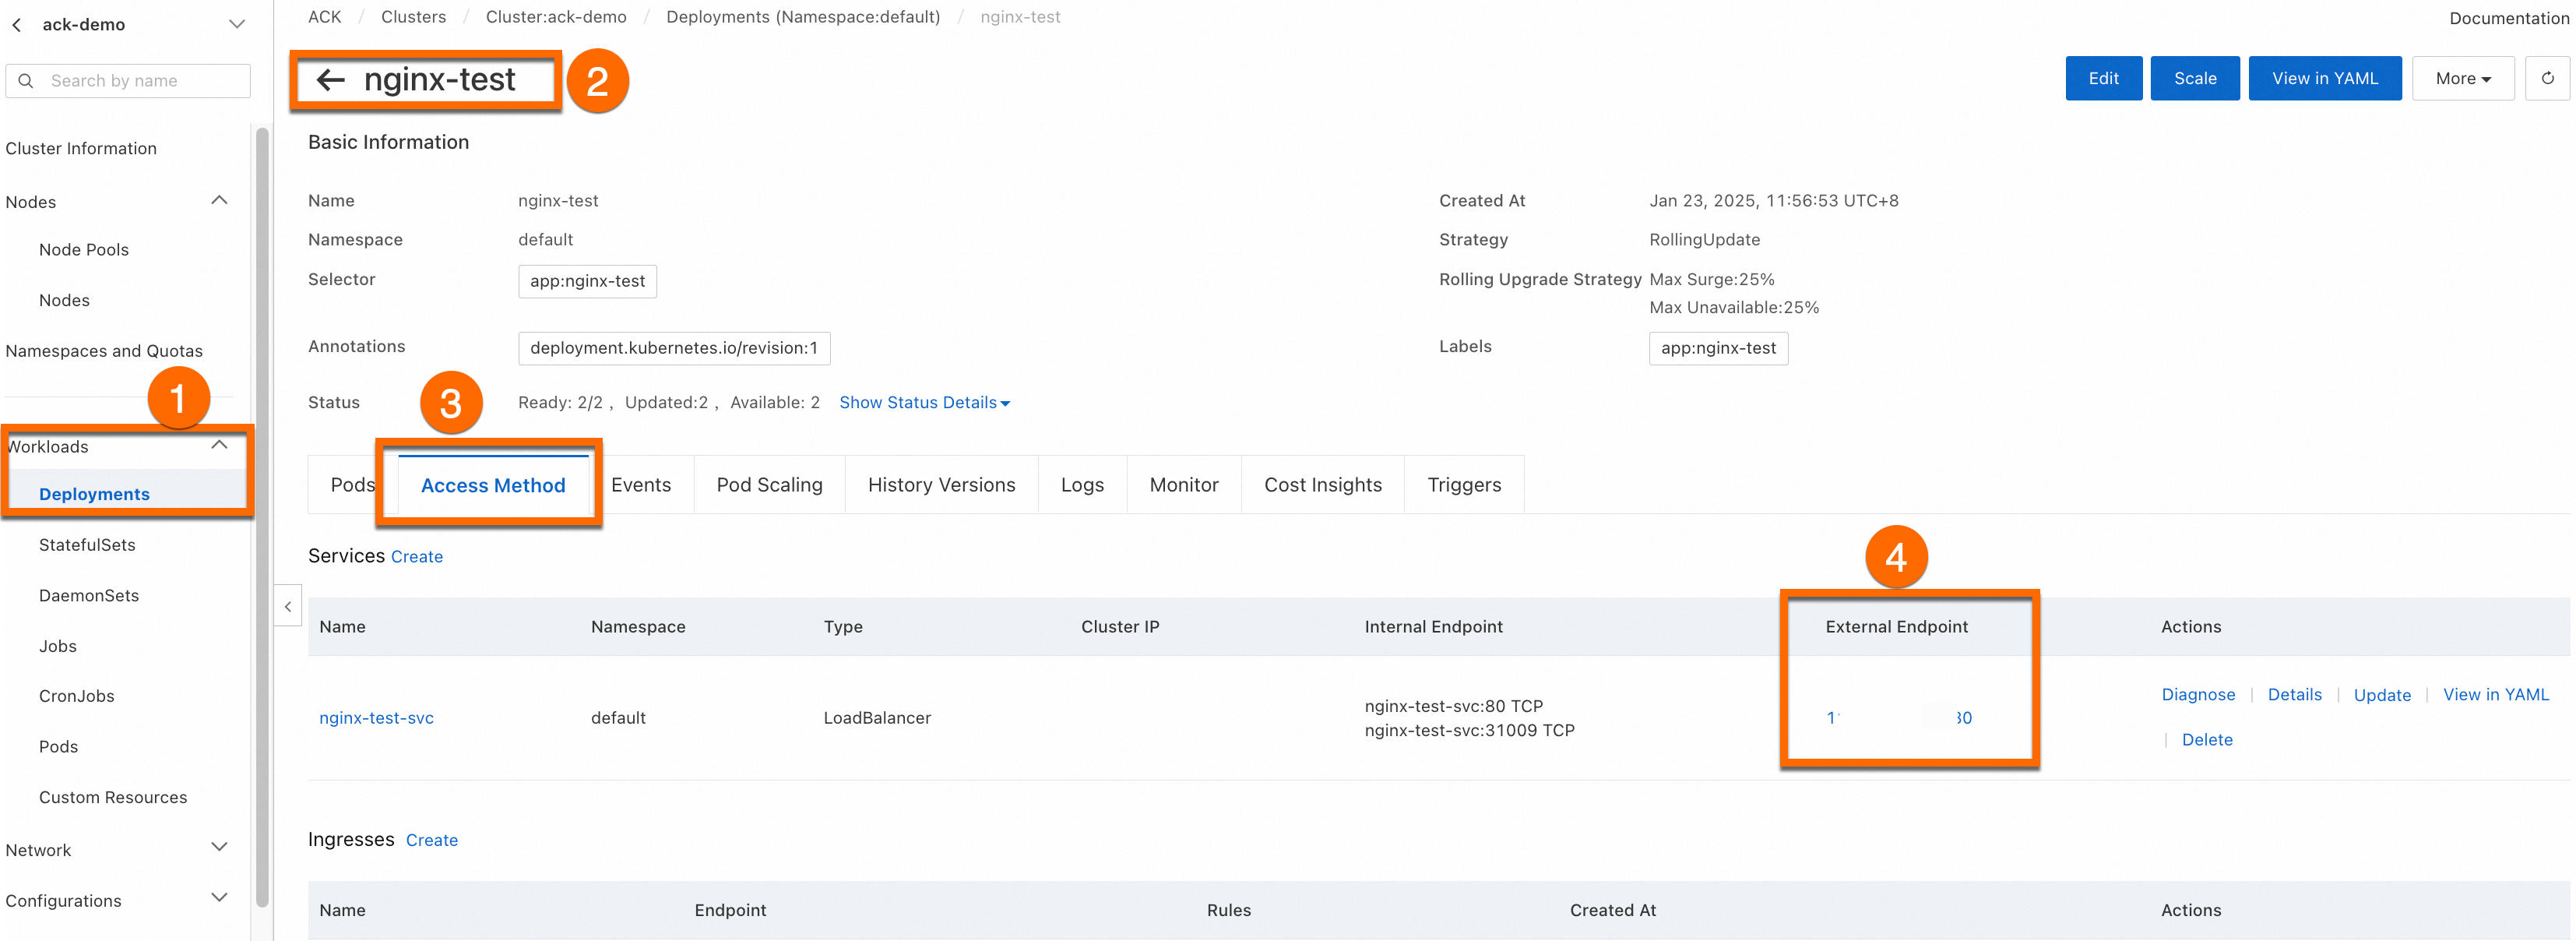
View the application
The Complete page displays the application task. In the Creation Task Submitted panel, click View Details. Click the Access Method tab. Find the newly created service (nginx-test-svc) and click the link in the External Endpoint column to access the service.
You can View, Edit, and Redeploy the created workload in the console.
Create a deployment using kubectl
Before you create a workload, make sure that you have connected to the cluster using kubectl. For more information, see Obtain the kubeconfig file of a cluster and use kubectl to connect to the cluster.
Copy the following YAML content and save it to a file named deployment.yaml. The YAML file defines a deployment and a
LoadBalancerservice to expose it.apiVersion: apps/v1 kind: Deployment # Workload type metadata: name: nginx-test namespace: default # Change the namespace as needed labels: app: nginx spec: replicas: 2 # Specify the number of pods selector: matchLabels: app: nginx template: # Pod configuration metadata: labels: # Pod labels app: nginx spec: containers: - name: nginx # Container name image: anolis-registry.cn-zhangjiakou.cr.aliyuncs.com/openanolis/nginx:1.14.1-8.6 # Use a specific version of the Nginx image ports: - containerPort: 80 # Port exposed by the container protocol: TCP # Specify the protocol as TCP or UDP. The default is TCP. --- # service apiVersion: v1 kind: Service metadata: name: nginx-test-svc namespace: default # Change the namespace as needed labels: app: nginx spec: selector: app: nginx # Match labels to ensure the service points to the correct pods ports: - port: 80 # Port provided by the service within the cluster targetPort: 80 # Points to the port listened to by the application inside the container (containerPort) protocol: TCP # Protocol. The default is TCP. type: LoadBalancer # Service type. The default is ClusterIP for internal access.Run the following command to create the deployment and service:
kubectl apply -f deployment.yamlExpected output:
deployment.apps/nginx-test created
service/nginx-test-svc created
Run the following command to view the public IP address of the service:
kubectl get svcExpected output:
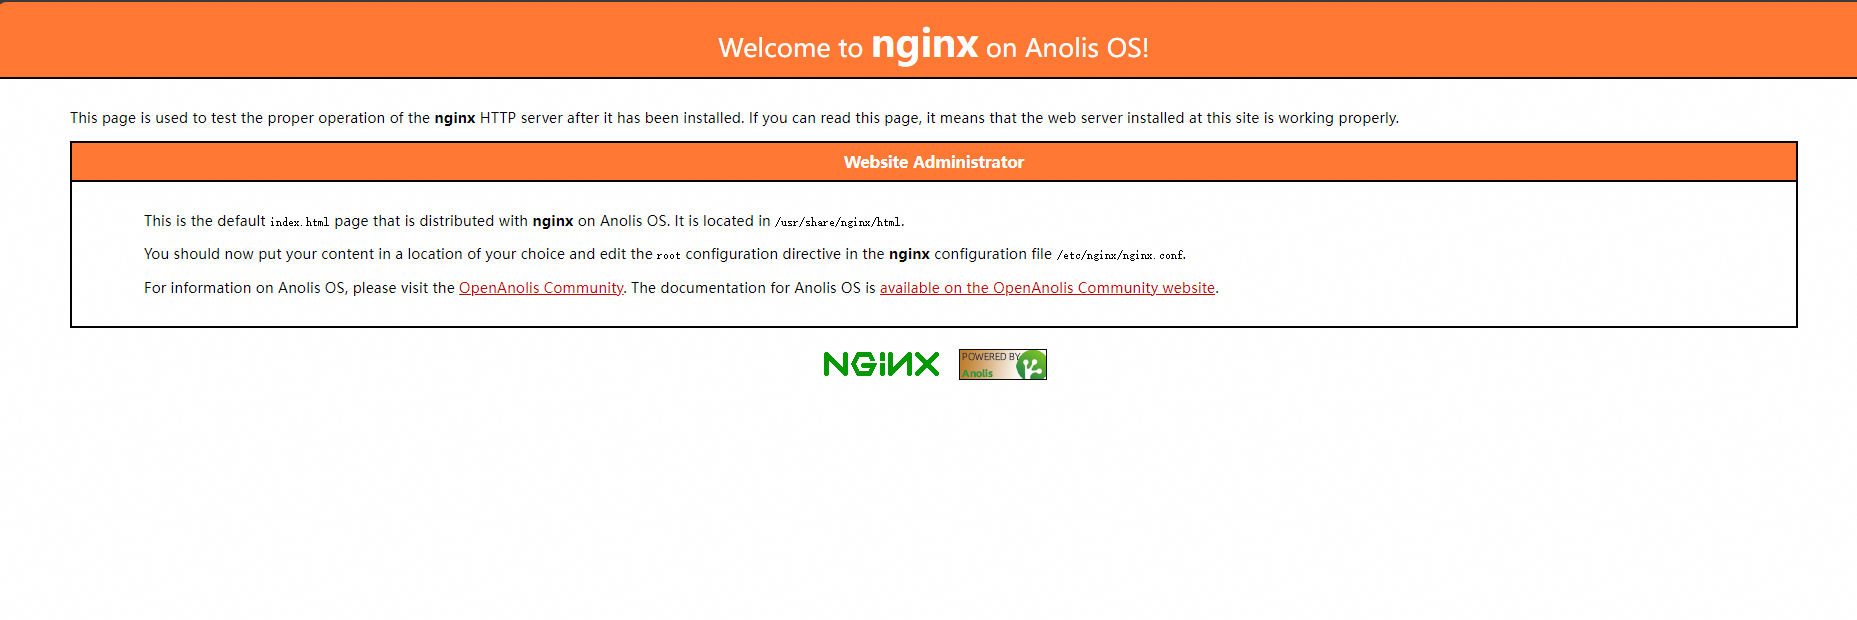
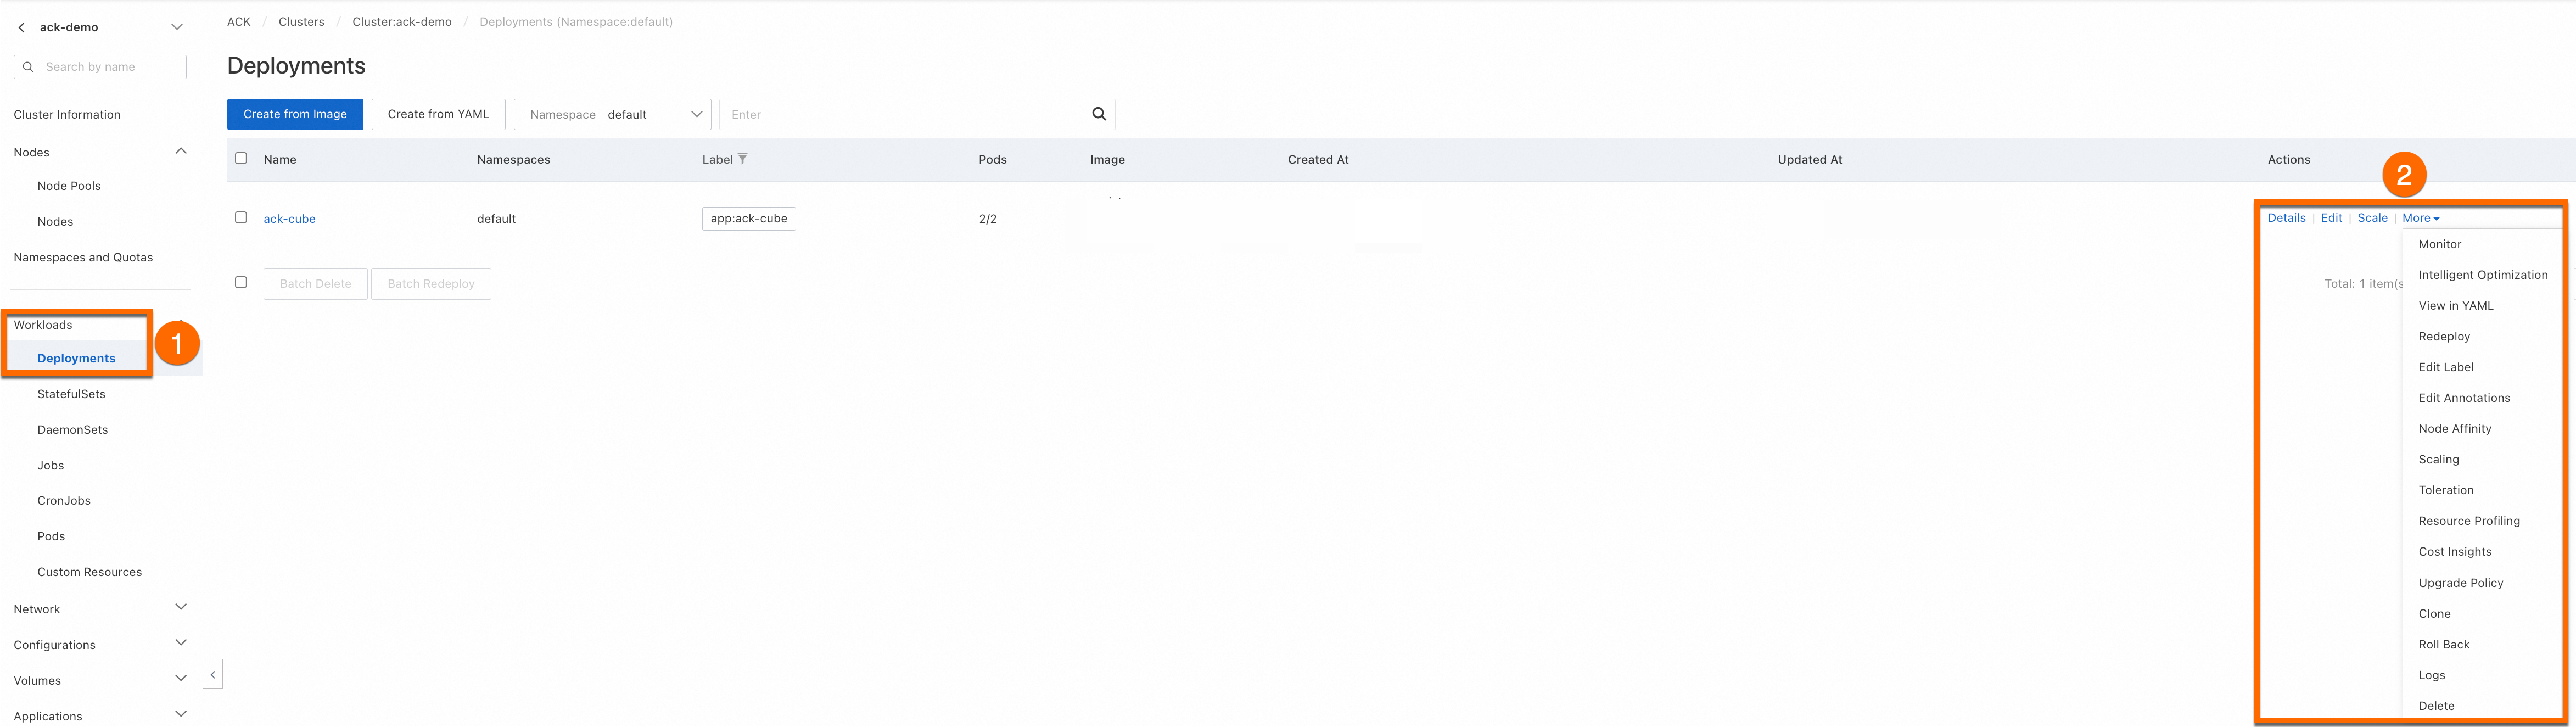
NAME            TYPE           CLUSTER-IP       EXTERNAL-IP     PORT(S)        AGE
kubernetes      ClusterIP      172.16.**.***    <none>          443/TCP        4h47m
nginx-test-svc  LoadBalancer   172.16.**.***    106.14.**.***   80:31130/TCP   1h10m
In a browser, enter the public IP address of Nginx (
106.14.**.***) to access the Nginx container of the workload.
Configuration items
Console configuration items
Basic information

Configuration Item | Description |
Name | The name of the workload. The names of the pods belonging to the workload are generated based on this name. |
Namespace | The namespace to which the workload belongs. |
Replicas | The number of pods in the workload. The default is 2. |
Type | The type of the workload. To choose a workload type, see Create a workload. |
Label | The labels of the workload. |
Annotations | The annotations of the workload. |
Synchronize Timezone | Specifies whether the container uses the same time zone as the node where it resides. |
Container
Configuration Item | Description |
Image Name |
|
Resource Limit | The |
Required Resources | The |
Container Start Parameter |
These two options are usually used together to bind the terminal ( |
Privileged Container |
Privileged mode gives a container permissions similar to the operating system of its host worker node, such as accessing hardware devices and mounting file systems. |
Init Containers | Select this option to create an init container. Init containers provide a mechanism to block or delay the startup of application containers. After the init containers run successfully, other containers in the pod start in parallel. For example, you can check the availability of dependent services. Init containers can include utility tools and installation scripts that are not in the application image to initialize the application container's runtime environment, such as setting kernel parameters or generating configuration files. For more information, see Init Containers. |

Configuration Item | Description |
Name | The name of the container port. It is only used to distinguish ports and has no functional effect. |
Container Port | The port exposed by the container. The value must be between 1 and 65535. A container must expose a port to be accessible from outside the pod and to allow communication between containers within the pod. All containers in a pod share the pod's network protocol stack, so ports cannot be duplicated when configuring multiple containers in a pod. |
Protocol | The Layer 4 (transport-layer) protocol used by the container port. TCP and UDP are supported. |
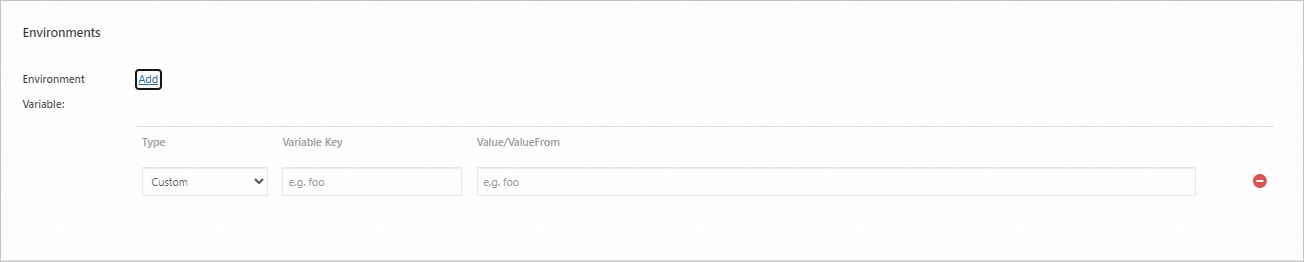
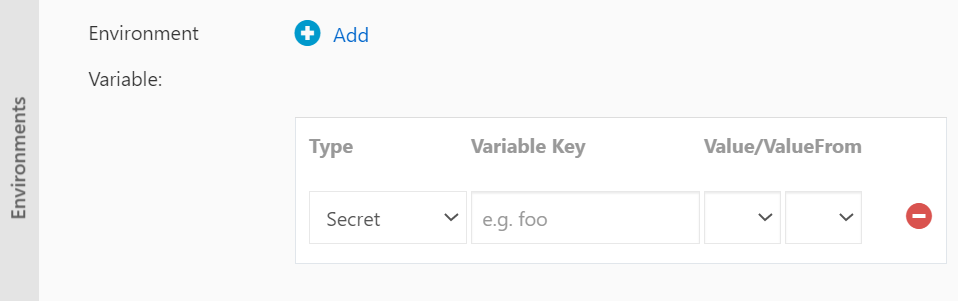
Configuration Item | Description |
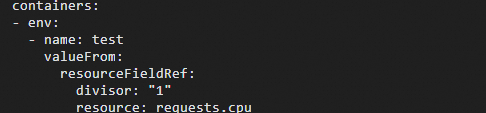
Type | The type of environment variable. The following types are supported:
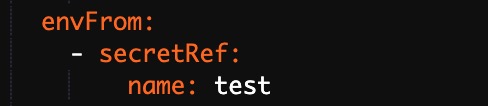
Configuration items and secrets support referencing all files. Take a secret as an example. If you select the Secret type and only select the target secret, all files are referenced by default. The corresponding YAML file also references the entire secret. If you select Resource Reference, the
|
Variable Key | The name of the environment variable in the pod. |
Value/ValueFrom | The value of the environment variable or a value obtained from another source. |

Configuration Item | Description |
Liveness: Used to determine whether a container is running as normal. If a specified number of checks fail, the kubelet restarts the container. Liveness probes can detect issues that cause a container to remain in a running state but fail to respond, such as a deadlock. | |
Readiness: Used to determine whether a container is ready to accept traffic. A pod is attached to a service backend only after its readiness probe succeeds. | |
Startup: Executed only when the container starts to check whether it has started successfully. The Liveness Probe and Readiness Probe are executed only after the startup probe succeeds. Note Startup probes are supported only in Kubernetes clusters that run version 1.18 or later. |
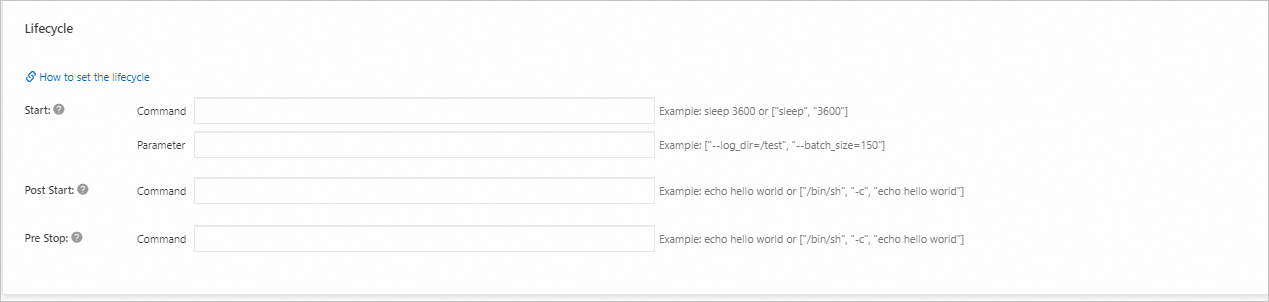
Configuration Item | Description |
Start | Set pre-start commands and parameters for the container. The start command and parameters define the actions to be performed when the container starts, used to initialize the application service. This is suitable for application deployments that require specific environment variables, mount targets, or port mappings. |
Post Start | Set commands to be executed after the container starts. Post-start commands are used to perform specific tasks after the container starts, such as initializing configurations or running scripts. This is suitable for scenarios where preparation work needs to be completed before the main process starts. |
Pre Stop | Set pre-stop commands for the container. Pre-stop commands are used to shut down the application process inside the container, ensuring data consistency and normal service termination. This is suitable for scenarios that require a safe shutdown to avoid data loss or service anomalies. |
You can configure start command, post-start, and pre-stop handlers for the container's lifecycle. For more information, see Configure Lifecycle. | |
Advanced configuration
Configuration Card | Configuration Item | Description |
Access Control | Services | A service provides a fixed, unified Layer 4 (transport-layer) entry point for a group of pods. It is a required resource for exposing a workload. Services support multiple types, including Cluster IP, Node Port, and SLB. Before configuring a service, see Service management to understand the basics of services. |
Ingresses | An Ingress provides a Layer 7 (application layer) entry point for multiple services in a cluster and forwards requests to different services based on domain name matching. Before using an Ingress, you need to install an Ingress controller. ACK provides several options for different scenarios. See Comparison of Nginx Ingress, ALB Ingress, and MSE Ingress to make a selection. | |
Scaling | HPA | Triggers autoscaling by monitoring the performance metrics of containers. Metrics-based scaling helps you automatically adjust the total resources used by a workload when the business load fluctuates, scaling out to handle high loads and scaling in to save resources during low loads. For more information, see Use Horizontal Pod Autoscaling (HPA). |
CronHPA | Triggers workload scaling at scheduled times. This is suitable for scenarios with periodic changes in business load, such as the cyclical traffic peaks on social media after lunch and dinner. For more information, see Use CronHPA for scheduled horizontal pod autoscaling. | |
Scheduling | Upgrade Method | The mechanism by which a workload replaces old pods with new ones when the pod configuration changes.
|
| Affinity, anti-affinity, and toleration configurations are used for scheduling to ensure pods run on specific nodes. Scheduling operations are complex and require advance planning based on your needs. For detailed operations, see Scheduling. | |
Labels and Annotations | Pod Labels | Adds a label to each pod belonging to this workload. Various resources in the cluster, including workloads and services, match with pods through labels. ACK adds a default label to pods in the format |
Pod Annotations | Adds an annotation to each pod belonging to this workload. Some features in ACK use annotations. You can edit them when using these features. |
Sample workload YAML file
apiVersion: apps/v1
kind: Deployment    # Workload type
metadata:
  name: nginx-test
  namespace: default  # Change the namespace as needed
  labels:
    app: nginx
spec:
  replicas: 2  # Specify the number of pods
  selector:
    matchLabels:
      app: nginx
  template: # Pod configuration
    metadata:
      labels: # Pod labels
        app: nginx
      annotations: # Pod annotations
        description: "This is an application deployment"
    spec:
      containers:
      - name: nginx  # Image name
        image: nginx:1.7.9  # Use a specific version of the Nginx image
        ports:
        - name: nginx  # name
          containerPort: 80  # Port exposed by the container
          protocol: TCP  # Specify the protocol as TCP or UDP. The default is TCP.
        command: ["/bin/sh"]  # Container start command
        args: [ "-c", "echo $(SPECIAL_LEVEL_KEY) $(SPECIAL_TYPE_KEY) && exec nginx -g 'daemon off;'"] # Output variables, add command to start nginx
        stdin: true  # Enable standard input
        tty: true    # Allocate a virtual terminal
        env:
          - name: SPECIAL_LEVEL_KEY
            valueFrom:
              configMapKeyRef:
                name: special-config  # Name of the configuration item
                key: SPECIAL_LEVEL    # Key name of the configuration item
        securityContext:
          privileged: true  # true enables privileged mode, false disables it. The default is false.
        resources:
          limits:
            cpu: "500m"               # Maximum CPU usage, 500 millicores
            memory: "256Mi"           # Maximum memory usage, 256 MiB
            ephemeral-storage: "1Gi"  # Maximum ephemeral storage usage, 1 GiB
          requests:
            cpu: "200m"               # Minimum requested CPU usage, 200 millicores
            memory: "128Mi"           # Minimum requested memory usage, 128 MiB
            ephemeral-storage: "500Mi" # Minimum requested ephemeral storage usage, 500 MiB
        livenessProbe:  # Liveness probe configuration
          httpGet:
            path: /
            port: 80
          initialDelaySeconds: 30
          periodSeconds: 10
        readinessProbe:  # Readiness probe configuration
          httpGet:
            path: /
            port: 80
          initialDelaySeconds: 5
          periodSeconds: 10
        volumeMounts:
        - name: tz-config
          mountPath: /etc/localtime
          readOnly: true
      volumes:
      - name: tz-config
        hostPath:
          path: /etc/localtime  # Mount the host's /etc/localtime file to the same path in the container using volumeMounts and volumes fields.
---
# service
apiVersion: v1
kind: Service
metadata:
  name: nginx-test-svc
  namespace: default  # Change the namespace as needed
  labels:
    app: nginx
spec:
  selector:
    app: nginx  # Match labels to ensure the service points to the correct pods
  ports:
    - port: 80           # Port provided by the service within the cluster
      targetPort: 80     # Points to the port listened to by the application inside the container (containerPort)
      protocol: TCP      # Protocol. The default is TCP.
  type: ClusterIP        # Service type. The default is ClusterIP for internal access.
---
# ingress
apiVersion: networking.k8s.io/v1
kind: Ingress
metadata:
  name: nginx-ingress
  namespace: default  # Change the namespace as needed
  annotations:
    kubernetes.io/ingress.class: "nginx"  # Specify the Ingress controller type
    # If using Alibaba Cloud SLB Ingress controller, you can specify the following:
    # service.beta.kubernetes.io/alibaba-cloud-loadbalancer-id: "lb-xxxxxxxxxx"
    # service.beta.kubernetes.io/alibaba-cloud-loadbalancer-spec: "slb.spec.s1.small"
spec:
  rules:
    - host: foo.bar.com  # Replace with your domain name
      http:
        paths:
          - path: /
            pathType: Prefix
            backend:
              service:
                name: nginx-service  # Backend service name
                port:
                  number: 80         # Backend service port
  tls:  # Optional, for enabling HTTPS
    - hosts:
        - foo.bar.com  # Replace with your domain name
      secretName: tls-secret  # TLS certificate Secret name
References
For applications that require stable persistent storage, such as databases, you can use a StatefulSet. For more information, see Create a stateful workload (StatefulSet).
If you encounter issues when you create a workload, see Workload FAQ.
If a pod is abnormal, see Troubleshoot pod exceptions.