By Alberto Roura, Alibaba Cloud Tech Share Author. Tech Share is Alibaba Cloud’s incentive program to encourage the sharing of technical knowledge and best practices within the cloud community.
In this how-to, I want to talk about some best practices when using Alibaba Cloud to deploy a new website/webapp to their infrastructure, including the implementation of maintenance.
Although you might already be familiar with web development on Alibaba Cloud, I will cover this familiar topic from a different approach. The article is going to focus on the deployment from a pure DevOps perspective, as Alibaba Cloud is a platform with all the potential for you to use the best tools in the industry in order to achieve your goals. Here we will use Terraform from Hashicorp, as it is unarguably the industry leader.
In this article, I will use my own website "El Fotómetro Digital" as the example. It is just a blog about photography that I just started, in which I published technical articles about cameras, photography techniques, and all that kind of stuff. It is still in a very early stage of its life, so in the meanwhile, check the Photography section of my blog.
Alibaba Cloud, in my opinion, brings the best of both AWS and DigitalOcean giving you the scalability and services of the first but with the transparency of the second. Although Alibaba Cloud has room for improvement in terms of documentation, it is improving every day and the blog has hundreds of entries every month. Stay tuned to the Alibaba Cloud Blog page, as this company is going to give some big news from time to time. I feel Alibaba Cloud is exploring the cloud industry the right way – building everything from scratch.
This guide will look hard to follow at first, but I’ll try to write it in a very detailed way so anyone can follow it. If you finish this how-to, rest assured that you’ll get to another level in the DevOps industry. You'll also learn about the coolest tools to automate your deployments in Alibaba Cloud/Aliyun.

This must sound obvious, but first you need an account, if you are a new user, there is a $300 free credit waiting for you! So now, create an account and get your profile up and running! It only takes a few minutes for you to register.
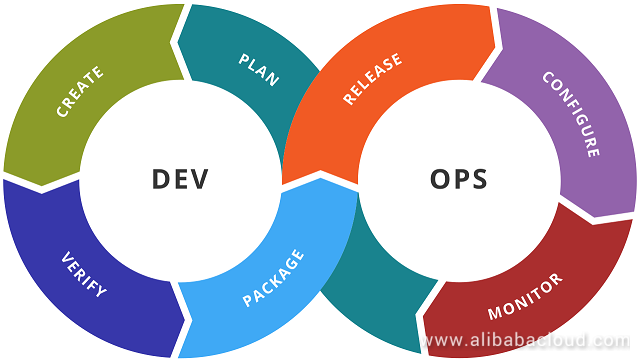
Every good DevOps workflow involves a good pattern, so here we will start applying one of the things in the best-practices-musts-checklist: PLANNING.
Since we are using Terraform for this, is better if you get familiar with using the Official Alibaba Cloud Provider by checking this guide I made, where I explain how to get API keys and run a basic Bolt Application in a Hello World fashion. Here we will use that example as reference to expand it and move it to a real-life scenario.
Design the deploying Infrastructure
Below is a basic diagram made with ASCIIFlow to show how we have an ECS instance of type ecs.xn4, using Ubuntu 16.04 and 2 GIT repositories to setup the project.
+------------------------------------------+
|                                          |
| +--------------------------------------+ |
| |                                      | |
| |                              ecs.xn4 | |
| |                                      | |
| | +--------------+                     | |
| | |              |                     | |
| | | Ubuntu 16.04 |                     | |
| | |              |                     | |
| | +--------------+                ^    | |
| |                                 |    | |
| +-----------^--------------------------+ |
|             |                     |      |
+------------------------------------------+
              |                     |
+-------------+----+ +--------------+------+
| Framework GIT    | | Project GIT         |
|                  | |                     |
+------------------+ +---------------------+
Plan the deploying Resources
As you may know, there is two big stages when using Terraform to deploy resources and infrastructure, terraform plan and terraform apply. In this stage we need to focus in the first command, as is the one that is going to tell us if our plan makes some sense given all the parameters, API tokens and available resources in the regions we use.
Our main.tf file will look like the following:
variable "access_key" {
  type = "string"
  default = "XXXXX"
}
variable "secret_key" {
  type = "string"
  default = "XXXXX"
}
variable "region" {
  type = "string"
  default = "ap-southeast-2"
}
variable "vswitch" {
  type = "string"
  default = "XXX-XXXXX"
}
variable "sgroups" {
  type = "list"
  default = [
    "XX-XXXXX"
  ]
}
variable "name" {
  type = "string"
  default = "bolt-instance"
}
variable "password" {
  type = "string"
  default = "Test1234!"
}

provider "alicloud" {
  access_key = "${var.access_key}"
  secret_key = "${var.secret_key}"
  region = "${var.region}"
}

data "alicloud_images" "search" {
  name_regex = "^ubuntu_16.*_64"
}
data "alicloud_instance_types" "default" {
  instance_type_family = "ecs.xn4"
  cpu_core_count = 1
  memory_size = 1
}
data "template_file" "user_data" {
  template = "${file("user-data.sh")}"
}

resource "alicloud_instance" "web" {
  instance_name = "${var.name}"
  image_id = "${data.alicloud_images.search.images.0.image_id}"
  instance_type = "${data.alicloud_instance_types.default.instance_types.0.id}"

  vswitch_id = "${var.vswitch}"
  security_groups = "${var.sgroups}"
  internet_max_bandwidth_out = 100

  password = "${var.password}"

  user_data = "${data.template_file.user_data.template}"
}

output "ip" {
  value = "${alicloud_instance.web.public_ip}"
}
Get your code ready for deploying
When the instance starts for the first time, we can ask Ubuntu to run a script to set some extra-stuff for us. Is the way to automate the setup of an application after the ECS instance is created, this is called “user data“. In this example I’ll let you use my own repository in GitHub for you to learn. Our user-data.sh file will look like:
#!/bin/bash -v

export REPO=https://github.com/roura356a/bolt-site.git

# Create docker-compose.yml
cat <<- 'EOF' > /opt/docker-compose.yml
version: '3.6'
services:
  web:
    image: roura/bolt
    container_name: bolt
    network_mode: bridge
    restart: on-failure
    ports:
      - "80:80"
    volumes:
      - /opt/repo/theme:/var/www/html/public/theme/bolt-theme
      - /opt/repo/config/config.yml:/var/www/html/app/config/config.yml
      - /opt/repo/config/menu.yml:/var/www/html/app/config/menu.yml
      - /opt/database:/var/www/html/app/database
EOF

# Create re-deploy.sh
cat <<- 'EOF' > /opt/re-deploy.sh
#!/bin/bash
cd /opt/repo && git pull
chown -R www-data:www-data /opt/repo
EOF

apt-get update && apt-get install -y apt-transport-https ca-certificates curl software-properties-common
curl -fsSL https://download.docker.com/linux/ubuntu/gpg | apt-key add -
add-apt-repository "deb [arch=amd64] https://download.docker.com/linux/ubuntu $(lsb_release -cs) stable"
apt-get update && apt-get install -y docker-ce docker-compose
curl -L https://github.com/docker/compose/releases/download/1.21.2/docker-compose-`uname -s`-`uname -m` -o /usr/bin/docker-compose

# Setup cron job for re-deployment
chmod +x /opt/re-deploy.sh
sh /opt/re-deploy.sh
crontab -l > /tmp/newcron
echo "*/5 * * * * /opt/re-deploy.sh" >> /tmp/newcron
crontab /tmp/newcron
rm /tmp/newcron

cd /opt && git clone $REPO repo

mkdir database && chown www-data:www-data database

docker-compose up -d
Please remember to replace URL_TO_YOUR_REPO_HERE with the actual URL where your code lives. To strengthen the security of your project, you can use a private repository instead.
We are half-way through the top, the hardest part is done. Now that is clear what needs to be done, let's go to the next step: DEPLOYING.
Deploy Resources with Code
All the planning is done in the previous step, so now all we need to do is to run terraform apply. Here is where we cross our fingers (if we are superstitious), as is the most delicate part, where all the resources are created and our code ran in order to setup our environment.
Apply complete! Resources: 1 added, 0 changed, 0 destroyed.

Outputs:

ip = XX.XX.XX.XX
Checking that all works
If the deploying went well (if not, just try to tweak and repeat), wait about 5 minutes after Terraform created the instance and we should be able to open the website in our browser, using the IP from the terraform output. If we confirm this step, then we can go get a domain to wrap up!
Registering a domain with Alibaba Cloud
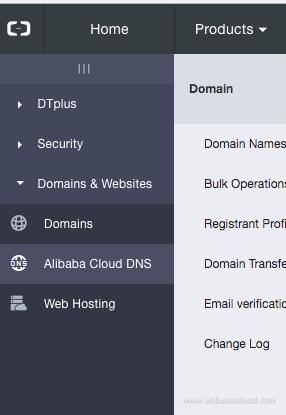
To register a domain, go back to your user console and, after opening the top navigation clicking in “Products”, write “domains” in the search filter like in the following image:

Then click “Domains” and follow the instructions from the following screen to add the domain of your preference.
Hooking up the domain to our application
When your domain is active, and without leaving the “Domains” section, you will need to click, in the side menu, “Alibaba Cloud DNS“. Once in, click on the domain you just created and create an “A” Record with the IP Terraform gave you before in the output.

Hurray! We have an amazing and shiny web application running and getting visits, but it needs maintenance from time to time, as we will need to update the code at some point.
Pushing Code
If we followed the first step properly, we should be able to update our cloud-based application by just pushing code to our GIT repository, as there is a script built in the deployment that keeps the project up to date with the code in your repository. So git commit, git push and see the results LIVE! As you can see in the “user-data.sh” file, we created a cron job to update the project path every 5 minutes.
This how-to covers both a NEW DEPLOYMENT and a potential MIGRATION, as we use Terraform to manage all the steps pulling code from a GIT repository. I hope you enjoyed and got to this point in the article, which means that you finished it and learnt something new!
Remember, if you enjoy DevOps as I do, I recommend you to join Alibaba Cloud regular webinars or get some official Alibaba Cloud certifications. Time are exciting for DevOps engineers and new opportunities unfold every day in this field.
How to Install CouchCMS on Ubuntu 16.04 – Part 2 Installing CouchCMS
Video Analytics Startup SwiMMinD Joins Alibaba Cloud Startup Program

2,593 posts | 793 followers
FollowAlibaba Clouder - June 10, 2020
Alibaba Clouder - September 9, 2020
Alibaba Clouder - July 24, 2018
Alex - June 21, 2019
Alibaba Cloud Community - October 1, 2021
Alibaba Clouder - November 18, 2020

2,593 posts | 793 followers
Follow ECS(Elastic Compute Service)
Elastic and secure virtual cloud servers to cater all your cloud hosting needs.
Learn More Domains
Over 20 million domain, free WHOIS privacy protection.
Learn MoreLearn More
More Posts by Alibaba Clouder